- Professional Development
- Medicine & Nursing
- Arts & Crafts
- Health & Wellbeing
- Personal Development
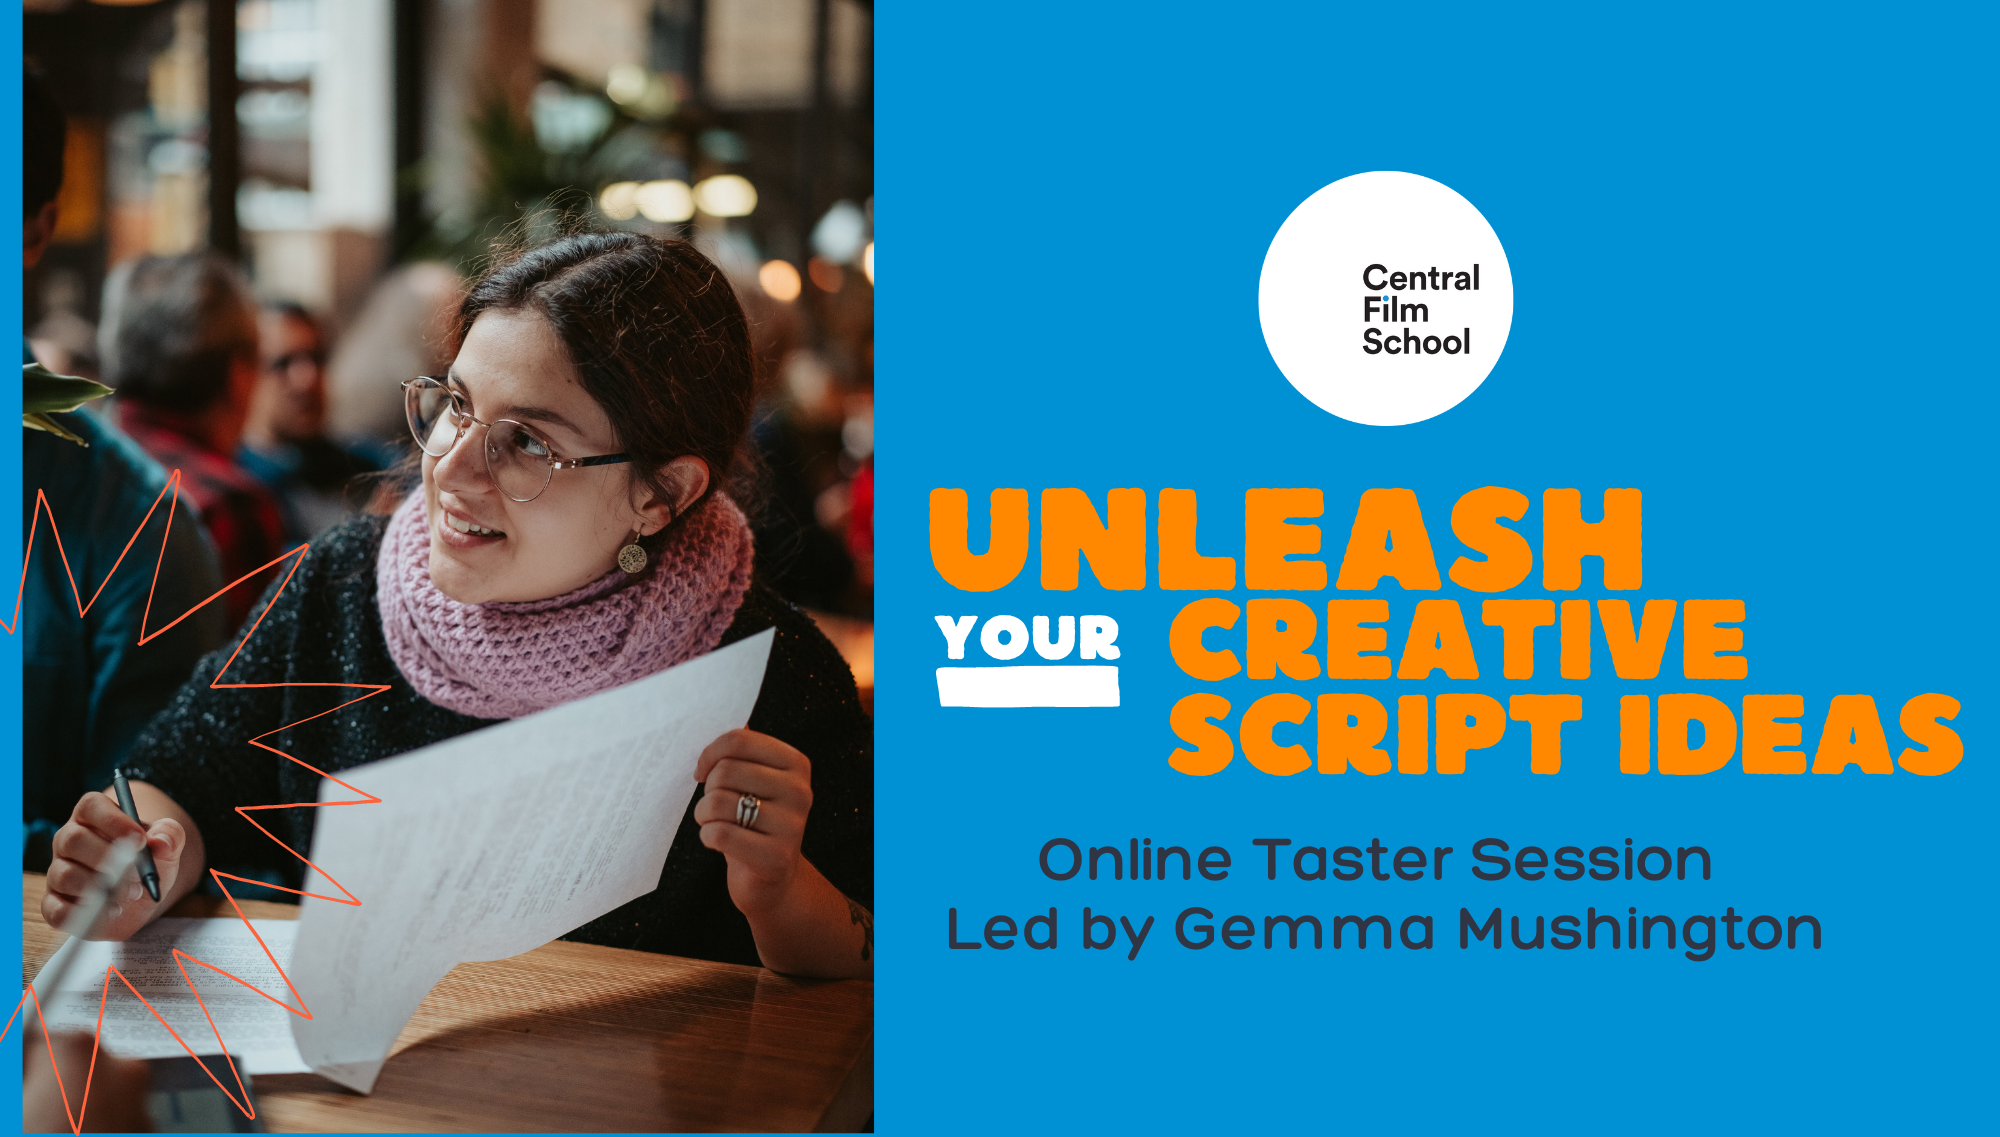
Calling all aspiring screenwriters and creative minds! Join us for an exciting script pitching workshop led by tutor Gemma Mushington. This taster session is designed to unleash your imagination and guide you through the process of coming up with and pitching an original script idea. Gemma Mushington, a talented screenwriter with a BA in Film, Television, and Digital Production, brings her wealth of industry knowledge and experience to this workshop. She is signed with Casarotto Ramsay and was the proud winner of the Neal Street Productions Screenwriting Bursary in 2021. Gemma's impressive credentials also include writing an episode of CBBC's The Dumping Ground, which aired in May 2023. With her current role as our Module Leader for the Major Feature Film module on the BA Screenwriting course, Gemma is the perfect guide to help you develop your script ideas. During this engaging taster session, Gemma will lead you through an exercise focused on generating and refining your own original script idea. Learn the techniques and strategies used by professional screenwriters to create compelling narratives that captivate audiences. Gain valuable insights into the art of pitching as Gemma shares her expertise on how to effectively communicate your ideas and grab the attention of industry professionals. Whether you are a screenwriting student, a budding storyteller, or simply someone with a passion for creative writing, this workshop is a fantastic opportunity to explore the exciting world of script development. No prior experience is necessary, as Gemma will provide guidance and support throughout the session. Don't miss out on this chance to refine your scriptwriting skills and pitch your ideas with confidence. Reserve your spot now and prepare to unleash your creative potential with the guidance of tutor Gemma Mushington!
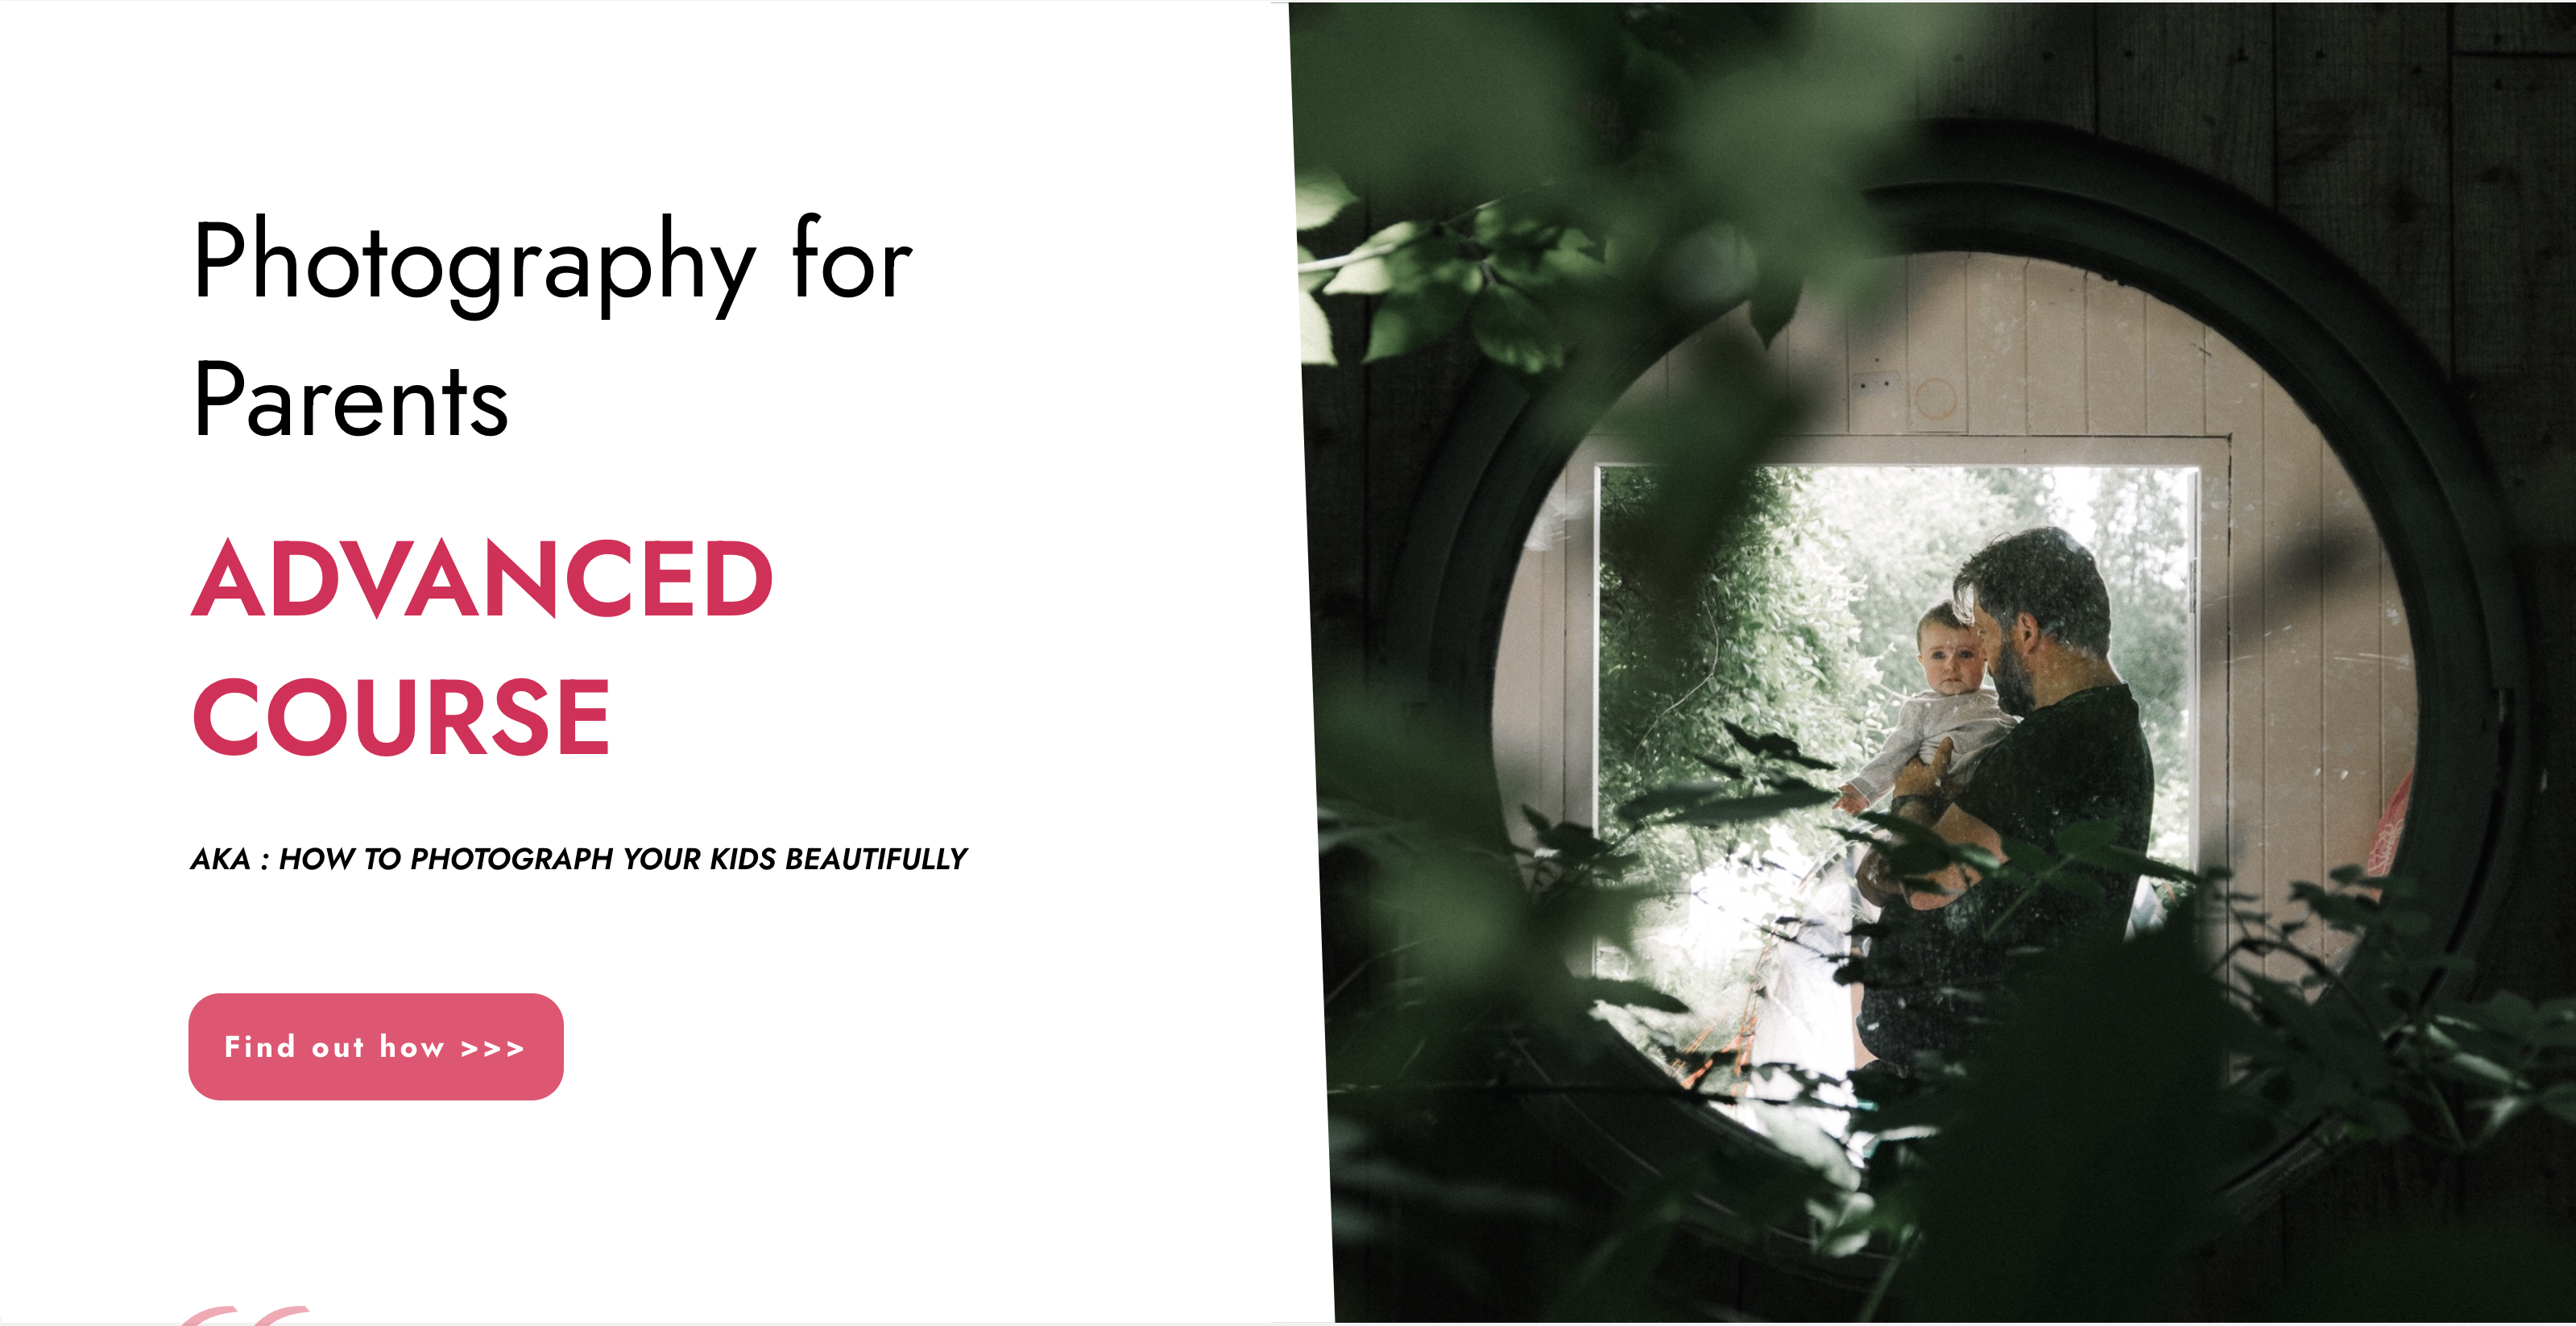
Photography is a way of feeling, of touching, of loving. ... it remembers little things, long after you have forgotten everything. - Aaron Sisking For the kind of photos that are worthy of the memories Because we just don't get do-overs with kids. There is no such thing as second-first steps. Because all their little quirks, all the big and little moments that shape their lives and their childhoods are something that only YOU as parents see and appreciate fully. And they are the thing that make them who they are. There is simply no outside photographer who can come in and capture those unique things because nobody knows your children like you do. Photography For Parents Fundamentals Our flagship 6 week Photography course designed to help you learn all the key photography skills that you will need to drastically improve your children's photos. KEY COURSE INFO: Course type: Instructor-led or self paced Course duration: 6 weeks Course format: Online course with Interactive weekly live classes, personal photo feedback and support group WHAT YOU LEARN: Our hands-on online instructor-led approach helps guarantee that you will quickly learn the key camera and photographic storytelling skills while keeping the focus on photographing children. From camera know-how, light and composition, specific recipes to help you capture typical situations and getting it all right on the fly - yeah, our kids don't sit still either LEARN WHAT'S INCLUDED IN EACH MODULE Key Camera skills Working with natural light Capturing kids on the move Photo composition Portraits and details Photo storytelling HERE IS HOW YOU LEARN WITH US: If you have bought an online course before, then gave up half way through because ... life.. - well, we are a bit different. This is A LOT more than a bunch of random tutorials. This is a proper, well designed, supported and paced course that genuinely delivers. HERE ARE THE INGREDIENTS THAT MAKE OUR COURSE DELIVER The one with all the materials: 5 core course modules, introduced on a weekly basis, plus a bonus wraparound module ( more on that below) - courses accessible online and in pdf version The one with all the people: You're not going through the course on your own - as part of the course you join an online peer support group, moderated daily by the instructor, where you connect, get help and go through this journey together with other parents like you. The one with all the answers: Every week we run an live online class which is where your instructor goes through the key parts of your course, answers live questions and demonstrates techniques and additional illustration photos. The Live classes are run in the evening ( after the kids are in bed) and are always recorded in case you couldn't join in live The one that's all about you: Every week comes with homework to help you practice the elements we introduce in the modules. You submit those images to your instructor on a weekly basis and receive thorough, photo-by-photo, video feedback from your instructor - so it's all about you and your progress, nobody else's The one with the bonuses: A PDF workbook to help you go through the materials and practice the skills, handy cheat sheets formatted for your phone so you can whip them out on the go plus a Bonus wrap-up module with swipe files of photo ideas for children at different ages, handy checklists and more! The one after it's over: We don't just leave you on your lonesome after the course is over - you get access to a=our Alumni group - a Photography for Parents Clique if you will - which is where we continue supporting you, answering your questions, encouraging you to take photos through weekly and monthly challenges and peer support Next Fundamentals course starts on 15th January 2024 5 core course modules Support Facebook group Weekly online Live class Personal Feedback on your images BONUS: extra module with ideas bank for photographing children of all ages BONUS: PDF course workbook BONUS: Printable and mobile friendly Pocket Guides HERE IS WHAT YOU WILL LEARN WITH US: How to finally, actually, properly use your camera - no more cryptic buttons and the 'oh no! what have I pressed now?!' panic. Life's too short to be intimidated by your camerant The precise steps and 'recipes' to help you capture all sorts of different situations - whether your kids are indoors on a dark and dreary day or tearing through the park in the sun How to see the world and your children through a photographers eyes and learn to compose your photographs on the fly so they truly reflect the beauty you see How to get great photos CONSISTENTLY - I mean the spray and pray method is fine, but wouldn't it be nice to have confidence your images will turn out the way you want them? How to learn to notice and capture the little details, the big picture, the whole story of your children growing up. BEAUTIFULLY. "Absolutely, without a doubt, the best money I have ever spent on anything kid related. I so wish i had done these courses 6 years ago, just before my 1st was born. My photography has improved significantly and I'm just sad the course are over, I have loved everything about them!" Hannah Slater "The most enjoyable online course I ever done" I cannot recommend this course highly enough, and I am so grateful for Ania for creating this amazing course and community, teaching busy parents how to document their family storied beautifully! DALIA SEABORNE "I'm amazed at how much my photography has improved " I have learned so much and am amazed at how much my photography has improved - they are brilliant value for money considering the level of personal attention you receive! I've come away with a whole lot more technical knowledge as well as a heap of inspiration and ideas. LUCY GRIFFITH "The most wonderful entry into the incredible photography world" I am seeing things that I have never noticed before, I am using the DSLR to capture precious moments with my family and am signed up to two further courses because the instructors, modules and supportive community are amazing and I think I might be addicted KIRSTY FINNIE Photography for Parents FUNDAMENTALS Next course starts on 15th Jan 2024 All the learning resources, all the community, all the support, all the personal help. Virtually failproof 5 core course modules Bonus Idea Bank module PDF course workbook Pocket reference guide Support group Weekly online live class Personal Feedback on your images Access to Photography For Parents Alumni community But will it work for me? - our guarantee: GUARANTEE We know our course works. We have seen a few thousands of students go through our courses and really improve. BUT, if you find that after the first couple of modules that it just doesn't work for you, you haven't learnt anything new, it's the wrong level for you, you haven't improved, or you simply don't get on or engage with it - we will simply refund you in full. Simple as that! INSIDE THE MODULES - aka WHAT DO YOU LEARN? Module 1: See what your camera sees Our first module is dedicated to breaking you our of the snapping habit and giving you a fresh perspective. We show you how your camera sees the world differently than what you might expect in three major ways - the optics. the focus and the light. Major Takeaways: At the end of the module you will have gained full control of your focus - no more guessing game and kids turning out all blurry, you will also gain an insight of how to use your lens ( there is a skill to it) and how to let the light help make your subjects stand out. What's included: The importance of focus and what it does to our brain Taking control of your focus - the Where and HOW your camera focuses Mastering focus formula - a process to help you determine what settings to use for each occasion To zoom or not to zoom and how it changes what and how your camera sees Learning how your camera sees the light and how to make it better, especially with tricky light Learning how to shoot against the light - like a bright window and NOT end up with the person looking all dark Module 2: On exposure and all things sharp and blurry In our second module we take you off the auto setting and dive deep into learning about exposure - i.e. making sure that your images are not too dark or bright or blurry. But not only that, we pay special attention to how to make some of the things in your image sharp and others blurry through the use of specific combinations of settings Major Takeaways: How to work your camera in priority ( semi-manual) modes, how to capture detail or portraits with a great separation of sharp and blurry to make these elements stand out. What's included: Understanding the mechanics of your camera - how does a photo actually happen inside Taking your camera firmly OFF the Auto settings - learning the key factors ( aperture, shutter speed and ISO) and how they interact with one another How to capture portraits and those precious detail shots beautifully Switching to Aperture priority and controlling your aperture - the how and the why Taking control of what in your image will be sharp and what will be blurry - hello full control over blurry backgrounds, blurry foregrounds and pin sharp subjects in between. Module 3: Capturing movement One of my favourite modules, dedicated to helping you capture your kids in motion - whether they're wriggling babies, speedy crawlers, wobbly toddlers or perpetual-motion-machines that most children are. We learn how to match your focus settings, your shutter settings and your composition to capture great movement photos. Major Takeaways: Learn how to capture your children on the move, SHARP but also how to use blur and speed to really showcase and highlight movement. Big AH-HA moments here! What's included: Switching your camera to shutter priority and mastering MOVEMENT Learning how to capture moving things SHARP - yes, that includes those fast movingbaby arms and legs Learning how to capture moving things BLURRY - and why would you want to do it? Learning how to highlight action and energy and speed in your images and how to help yourself with composition Creative techniques like night time light trails or panning or creative blur How to use your focus settings on top of your shutter settings to help capture things sharp Module 4: See what your camera sees Although we introduce elements of photographic composition throughout the course, this is the module entirely dedicated to it. We look at composition not just as a set of arbitrary rules, but more as something that helps you express what you really see and feel. We look at photographic storytelling and helping your images get look more impactful and stronger Major Takeaways: Good photographic composition principles to help you really show the magic you are seeing. At the end of this module you will say goodbye to boring flat photos and will instead start taking rich images with lots of depth and eye catching composition. What's included: understanding how we 'read' photographs and how to compose so that the magic YOU see translates into what the others see when they pick up that photo fundamental rules of photo composition - we started you off with the rule of thirds but there is MORE Good crops, bad crops, crazy crops and everything in between storytelling through your photographs - how to make your images mean something and show something real, beyond 'my child looks cute here' getting creative and expressing yourself through photographs learning to go beyond your usual compositions and discovering different styles Module 5: Photographic composition and storytelling Although we introduce elements of photographic composition throughout the course, this is the module entirely dedicated to it. We look at composition not just as a set of arbitrary rules, but more as something that helps you express what you really see and feel. We look at photographic storytelling and helping your images get look more impactful and stronger Major Takeaways: Good photographic composition principles to help you really show the magic you are seeing. At the end of this module you will say goodbye to boring flat photos and will instead start taking rich images with lots of depth and eye catching composition. What's included: Understanding how we 'read' photographs and how to compose so that the magic YOU see translates into what the others see when they pick up that photo Fundamental rules of photo composition - we started you off with the rule of thirds but there is MORE Good crops, bad crops, crazy crops and everything in between Storytelling through your photographs - how to make your images mean something and show something real, beyond 'my child looks cute here' Getting creative and expressing yourself through photographs Learning to go beyond your usual compositions and discovering different styles BONUS Module 6: Idea Bank : Photographing children at different ages This last module is a bit different. We us it to give you lots of ideas for photos with children of different ages - from photographing milestones to capturing what's unique about them at a particular stage and really getting into their world to capture where they're at. The module is packed with ready to take ideas and will let you take all that you have learned in the first 5 modules and apply it in real life sitautions. We also help you think ahead to the next steps in your photography education - should you want to continue.
SketchUp Basic Level Training Course
By ATL Autocad Training London
Who is this course for? SketchUp Basic Level Training Course. Click here for more info: Website Ideal for newcomers to 3D modeling, it suits students, hobbyists, and professionals. Gain a strong foundation in SketchUp, perfect for careers in architecture and interior design. Our flexible 1-on-1 sessions let you tailor your learning schedule. Schedule sessions Monday to Saturday, 9 am to 7 pm. The 5-hour course adapts to your timeline, ensuring a personalized, supportive, and adaptable learning experience. Course Title: SketchUp Basic Course. Course Duration: 5 hours Understanding the Basics of SketchUp Introduction to SketchUp Navigating the SketchUp Environment Exploring Zoom, Pan, and Rotate Functions Familiarizing Yourself with the XYZ Axis Mastering SketchUp Tools Efficient Toolbar Selections Utilizing Templates for Projects Drawing with Precision Using the Pencil Tool Working with Fundamental Geometric Shapes Taking Accurate Measurements Advanced SketchUp Techniques Creating Circles and Arcs Harnessing Sticky Geometry Solutions Unveiling the Power of Tags (Formerly Layers) Streamlining Workflow with Keyboard Shortcuts Accurate Object Measurement within SketchUp Information Management and Database Usage Moving and Copying Objects Simple Array Techniques Mastering Rotational Manipulations Effortless Rotational Copying Fractional and Relative Scaling Component and Group Creation Constructing Components for Reusability Creating Efficient Groups Comparing the Advantages of Components and Groups Saving and Reusing Components Importing Components from Digital Repositories Advanced Modeling and Geometry Leveraging Push-Pull Operations Creating Complex Shapes with the Follow Me Tool Exploring Geometry Intersections Duplicating and Offsetting Faces, Edges, and Polygons Incorporating 2D Polygons into Your Drawings Skillful Use of the Paint Bucket Tool Materials and Textures Proficiency with the Materials Editor Applying High-Quality Textures Sourcing and Positioning Textures Graphics and Bitmap Considerations Crafting Scenes and Styles Generating and Customizing Scenes Managing Scenes and Styles Introduction to Animation and Presentation Animation Concepts Adding Dimensions to Your SketchUp Models Annotating Designs for Clarity Preparing Models for Printing Exporting Images and PDFs in 2D Formats This comprehensive SketchUp Fundamentals course will equip you with essential skills to create, modify, and present 3D models effectively. After completing our 5-hour SketchUp training, you'll achieve the following learning outcomes: Basic SketchUp Proficiency: Gain essential skills to navigate the SketchUp interface and utilize its core features effectively. Geometry Creation: Learn to create 2D and 3D geometric shapes, lines, and curves with precision. Rendering Concepts: Understand the fundamentals of rendering and how to apply basic rendering techniques to enhance your designs. Model Organization: Discover techniques for organizing and structuring your SketchUp models efficiently. Visualization Skills: Develop the ability to visualize and plan architectural and interior design concepts in 3D. Efficient Workflows: Acquire time-saving tips and tricks for streamlining your design workflow. Personal Projects: Apply your newfound skills to your personal design projects or professional endeavors. By the end of this short training, you'll have a solid foundation in SketchUp, allowing you to create and present basic 3D models and designs effectively. After SketchUp Training, You'll Acquire: Advanced 3D Modeling: Master the art of creating intricate 3D models, architectural designs, and detailed structures using SketchUp. Texture Mapping and Material Application: Learn to apply realistic textures and materials, enhancing the visual appeal of your 3D creations. Rendering Techniques: Explore rendering plugins like V-Ray or Twilight Render to create lifelike visualizations of your designs. Collaboration and Presentation: Develop skills to effectively collaborate with teams and present your ideas in professional and compelling ways. Project Visualization: Enhance your ability to transform conceptual ideas into visually stunning and detailed 3D representations. Job Opportunities: Architectural Designer: Create detailed architectural models for residential and commercial projects. Interior Designer: Design interior spaces, visualizing furniture placements, colors, and decor elements. Landscape Architect: Develop 3D landscape designs, showcasing outdoor spaces and environmental elements. 3D Modeler: Work in various industries, creating 3D models for animations, games, or simulations. Visualization Specialist: Provide visualization services to real estate agencies, design firms, or marketing companies, transforming ideas into compelling visuals. Why Choose Us? Tailored One-on-One Training: Exclusive coaching from skilled architects and designers, in-person or live online, Monday to Saturday. Customized Tutorials: Enhance your skills with tailored video tutorials to take home. Comprehensive Learning: Receive digital resources for thorough understanding and revision. Free Ongoing Support: Enjoy continuous assistance via phone or email, ensuring your success beyond the course. Flexible Syllabus: Adapted to your needs for focused learning. Official Certificate: Validate your expertise with our prestigious certification.
Enscape Rendering Training
By London Design Training Courses
Why Choose Enscape Rendering Training Course? Course info Best real-time visualization plugin, integrates with design tools like Revit, SketchUp, Rhino, ArchiCAD, and Vectorworks. Experience swift and real-time visualization within your preferred applications, eliminating extra costs and adjustments. Elevate your design projects effortlessly with Enscape. Duration: 5 hrs Method: 1-on-1, Personalized attention Schedule: Tailor your own hours of your choice, available from Mon to Sat between 9 am and 7 pm What does the Enscape Training & Interactive Workshop offer? The Enscape Training & Interactive Workshop is designed to help you get up and running with Virtual Reality (VR) in a cost-effective manner. It covers hardware and software setup, navigation techniques, real-time updates, material settings, and more. The workshop also allows participants to experience VR firsthand. What will I learn in the Enscape (VR) Training and Interactive Workshop? The workshop covers hardware setup, software installation, and configuration. You will learn how to migrate models from Revit and SketchUp into VR, navigate through designs, update objects and materials in real-time, and utilize various visual styles and settings. The course also includes interactive workshops with support from our expert tutors. Course Outline: Enscape Rendering Software Training (5 hours) Course 1: Enscape for Revit Hour 1: 1. Introduction to Enscape: Overview of Enscape rendering software, its features, and benefits. 2. Installing and Setting up Enscape: Step-by-step guidance on installing and configuring Enscape for Revit. 3. Enscape Interface: Familiarizing with the Enscape user interface and navigation controls within Revit. Hour 2: 4. Enscape Materials: Exploring material creation, application, and customization within Enscape for Revit. 5. Lighting in Enscape: Understanding different lighting options, adjusting light settings, and creating realistic lighting effects. Hour 3: 6. Enscape Camera Settings: Manipulating camera angles, perspectives, and settings for optimal visualization. 7. Enscape Rendering Settings: Exploring various rendering settings and techniques to enhance the quality of the final output. Hour 4: 8. Enscape Rendering Workflow: Demonstrating a step-by-step workflow for generating renderings and walkthroughs using Enscape in Revit. 9. Advanced Features: Introduction to advanced features such as creating panoramas, virtual reality (VR) walkthroughs, and creating animations in Enscape. Hour 5: 10. Tips and Tricks: Sharing tips and techniques for maximizing efficiency and achieving high-quality results in Enscape for Revit. 11. Q&A and Troubleshooting: Addressing participant questions, providing troubleshooting guidance, and discussing common challenges and solutions. OR Course Outline: Enscape Rendering Software Training (5 hours) Course 1: Enscape for Sketchup Hour 1: 1. Introduction to Enscape: Overview of Enscape rendering software, its features, and benefits for SketchUp users. 2. Installing and Setting up Enscape: Step-by-step guidance on installing and configuring Enscape for SketchUp. 3. Enscape Interface: Familiarizing with the Enscape user interface and navigation controls within SketchUp. Hour 2: 4. Enscape Materials: Exploring material creation, application, and customization within Enscape for SketchUp. 5. Lighting in Enscape: Understanding different lighting options, adjusting light settings, and creating realistic lighting effects. Hour 3: 6. Enscape Camera Settings: Manipulating camera angles, perspectives, and settings for optimal visualization in SketchUp. 7. Enscape Rendering Settings: Exploring various rendering settings and techniques to enhance the quality of the final output. Hour 4: 8. Enscape Rendering Workflow: Demonstrating a step-by-step workflow for generating renderings and walkthroughs using Enscape in SketchUp. 9. Advanced Features: Introduction to advanced features such as creating panoramas, virtual reality (VR) walkthroughs, and creating animations in Enscape. Hour 5: 10. Tips and Tricks: Sharing tips and techniques for maximizing efficiency and achieving high-quality results in Enscape for SketchUp. 11. Q&A and Troubleshooting: Addressing participant questions, providing troubleshooting guidance, and discussing common challenges and solutions.

Essential Adobe InDesign Training Course
By ATL Autocad Training London
Who is this for? Essential Adobe InDesign Training Course. Acquire Adobe InDesign basics from certified instructors. Master layout design, typography, and core design concepts. Opt for in-person or live online sessions. Receive a Certificate of Completion and lifelong email assistance. Lean desktop publishing skills and quality layouts. Click here for more info: Website Duration: 5 hours Approach: Individualized 1-on-1 training with customized content. Schedule: Flexible sessions, available Monday to Saturday from 9 am to 7 pm. Course Outline: Module 1: Introduction to Adobe InDesign (1 hour) Familiarize with workspace and tools Create new documents with appropriate page size and margins Effectively format text and images Customize the interface for efficient workflow Module 2: Text Formatting and Styles (1 hour) Apply consistent character and paragraph styles Manage text flow using frames Organize lists with bullets and numbering Master special characters for precise typography Module 3: Working with Images (1 hour) Import and position images in documents Adjust image size and alignment within frames Create professional layouts with text wrapping around images Enhance visuals with image frames and effects Module 4: Layout Design (1 hour) Create precise grids and guides for alignment Arrange objects for balanced layouts Streamline work with layers Maintain consistency using master pages and templates Module 5: Printing and Exporting (1 hour) Understand color modes and print principles Export to PDF and other formats for diverse outputs Ensure print readiness through preflighting Efficiently archive and manage InDesign files Through practical exercises, solidify your grasp of each module, enabling you to design visually appealing layouts, craft documents for various purposes, and manage InDesign projects adeptly. Adobe InDesign's potential is vast, and this fundamentals course opens doors for you to explore diverse design projects. Seize this opportunity to unleash your creative prowess with InDesign! Upon completing the Adobe InDesign Fundamentals course, participants will be able to: Master InDesign Tools: Demonstrate proficiency in utilizing InDesign's essential tools, workspace, and interface for effective design workflows. Layout Design Skills: Create visually appealing layouts using grids, guides, and balanced object arrangements, ensuring professional-quality design. Text Formatting Mastery: Apply consistent character and paragraph styles, manage text flow, and enhance typography with special characters. Image Manipulation Expertise: Import, position, and enhance images within frames, integrating them seamlessly into layouts. Printing and Exporting Proficiency: Understand color modes, print principles, and export documents to various formats, ensuring print readiness and diverse output options. Efficient Project Management: Utilize layers, master pages, and templates for streamlined project organization and management in InDesign. Book Recommendations: "InDesign CC Classroom in a Book" by Kelly Kordes Anton and John Cruise: This official Adobe guide provides hands-on lessons and practical techniques for mastering InDesign's core features. "InDesign Type: Professional Typography with Adobe InDesign" by Nigel French: Explore advanced typography techniques, layout principles, and typographic finesse specific to Adobe InDesign. "Real World Adobe InDesign CC" by Olav Martin Kvern, David Blatner, and Bob Bringhurst: A comprehensive guide offering practical insights, tips, and real-world techniques for InDesign users of all levels. "The Adobe InDesign CS6 Book for Digital Photographers" by Scott Kelby: Focused on integrating photography with InDesign, this book provides valuable insights into creating visually stunning layouts with images. "InDesign Secrets" by David Blatner and Anne-Marie Concepción: This book is packed with expert tips, tricks, and techniques that can significantly enhance your efficiency and creativity in InDesign. 1-on-1 InDesign Courses: Personalized Learning: Tailored 1-on-1 courses designed to meet your specific learning needs and goals. Expert Instructors: Learn from industry professionals with extensive experience in animation and design. Flexible Scheduling: Schedule sessions at your convenience, allowing you to balance learning with your busy lifestyle. Comprehensive Curriculum: Dive deep into animation techniques, software mastery, and creative skills through our comprehensive courses. Hands-On Training: Get practical, hands-on experience with real-world animation projects, enhancing your skills effectively. Individual Attention: Benefit from personalized attention and detailed feedback from instructors, ensuring your progress and understanding. Professional Development: Acquire skills relevant to the industry, empowering you for career advancement in animation and related fields. Portfolio Enhancement: Develop a strong portfolio with the guidance of experts, showcasing your newfound skills and creativity. Post-Course Support: Enjoy continued support even after the course completion, ensuring you have resources for ongoing learning and growth. Certification: Receive a certificate upon course completion, validating your expertise and enhancing your professional credentials. Course Highlights: Master Adobe InDesign's key features for layout, text, images, and graphics. Learn design principles and typography techniques for visually appealing documents. Efficiently handle multi-page projects like magazines and brochures. Utilize styles, templates, and libraries for streamlined design and consistency. Explore advanced techniques for interactive PDFs and digital publishing. Earn a Certificate of Completion for your Adobe InDesign proficiency. Flexible learning options: in-person or live online sessions. Lifetime email support for ongoing assistance after the course. Adobe InDesign Learn & Support https://helpx.adobe.com ⺠support ⺠indesign Get started with Adobe InDesign. Find tutorials, the user guide, answers to common questions, and help from the community forum.

ULTIMATE INTRODUCTION TO PHOTOGRAPHY: SOUTH BANK, LONDON
By Matthew Williams-Ellis Photography Workshops
Beginners photography workshop in Central London, helping you learn how to use your digital SLR camera and master interesting compositions in front of exciting subjects!

Adobe InDesign Fundamentals Training
By London Design Training Courses
Why Choose Adobe InDesign Fundamentals Training Course? Course info. Learn Adobe InDesign fundamentals from certified tutors. Master layout creation, typography, layouts and design principles. Choose in-person or live online sessions. Certificate of Completion and lifetime email support provided. Duration: 5 hrs. Method: 1-on-1, Personalized attention. Schedule: Tailor your own hours of your choice, available from Monday to Saturday between 9 am and 7 pm. Adobe Certified Instructors and Expert for InDesign, and a professional graphic designer. In this advanced course, we will delve into InDesign's powerful features, productivity techniques, and workflow speed tricks. 5-hour Adobe InDesign Fundamentals training course, designed to empower you with essential skills for layout and design projects. Suitable for beginners and those with some experience, this course ensures you can confidently create professional-quality documents and publications. Part 1: Introduction to Adobe InDesign (1 hour) Explore the workspace and tools Set up new documents with proper page size and margins Format text and images effectively Customize the interface for efficient workflow Part 2: Text Formatting and Styles (1 hour) Apply character and paragraph styles for consistent formatting Control text flow with text frames Organize lists using bullets and numbering Master special characters for typographic control Part 3: Working with Images (1 hour) Import and position images in the document Adjust image size and alignment within frames Create professional layouts with text wrapping around images Enhance visuals with image frames and effects Part 4: Layout Design (1 hour) Create precise grids and guides for alignment Arrange objects for a balanced layout Streamline design work with layers Maintain consistency with master pages and templates Part 5: Printing and Exporting (1 hour) Understand color modes and printing principles Export to PDF and other formats for various outputs Ensure print readiness through preflighting Efficiently archive and manage InDesign files Through hands-on exercises and practical examples, you'll solidify your understanding of each module. This course equips you to design visually captivating layouts, create documents for diverse purposes, and manage InDesign projects effectively. Adobe InDesign is a powerful desktop publishing tool, and our fundamentals course sets the stage for you to explore and expand your skills in a wide range of design projects. Don't miss this opportunity to unlock your creative potential with InDesign!

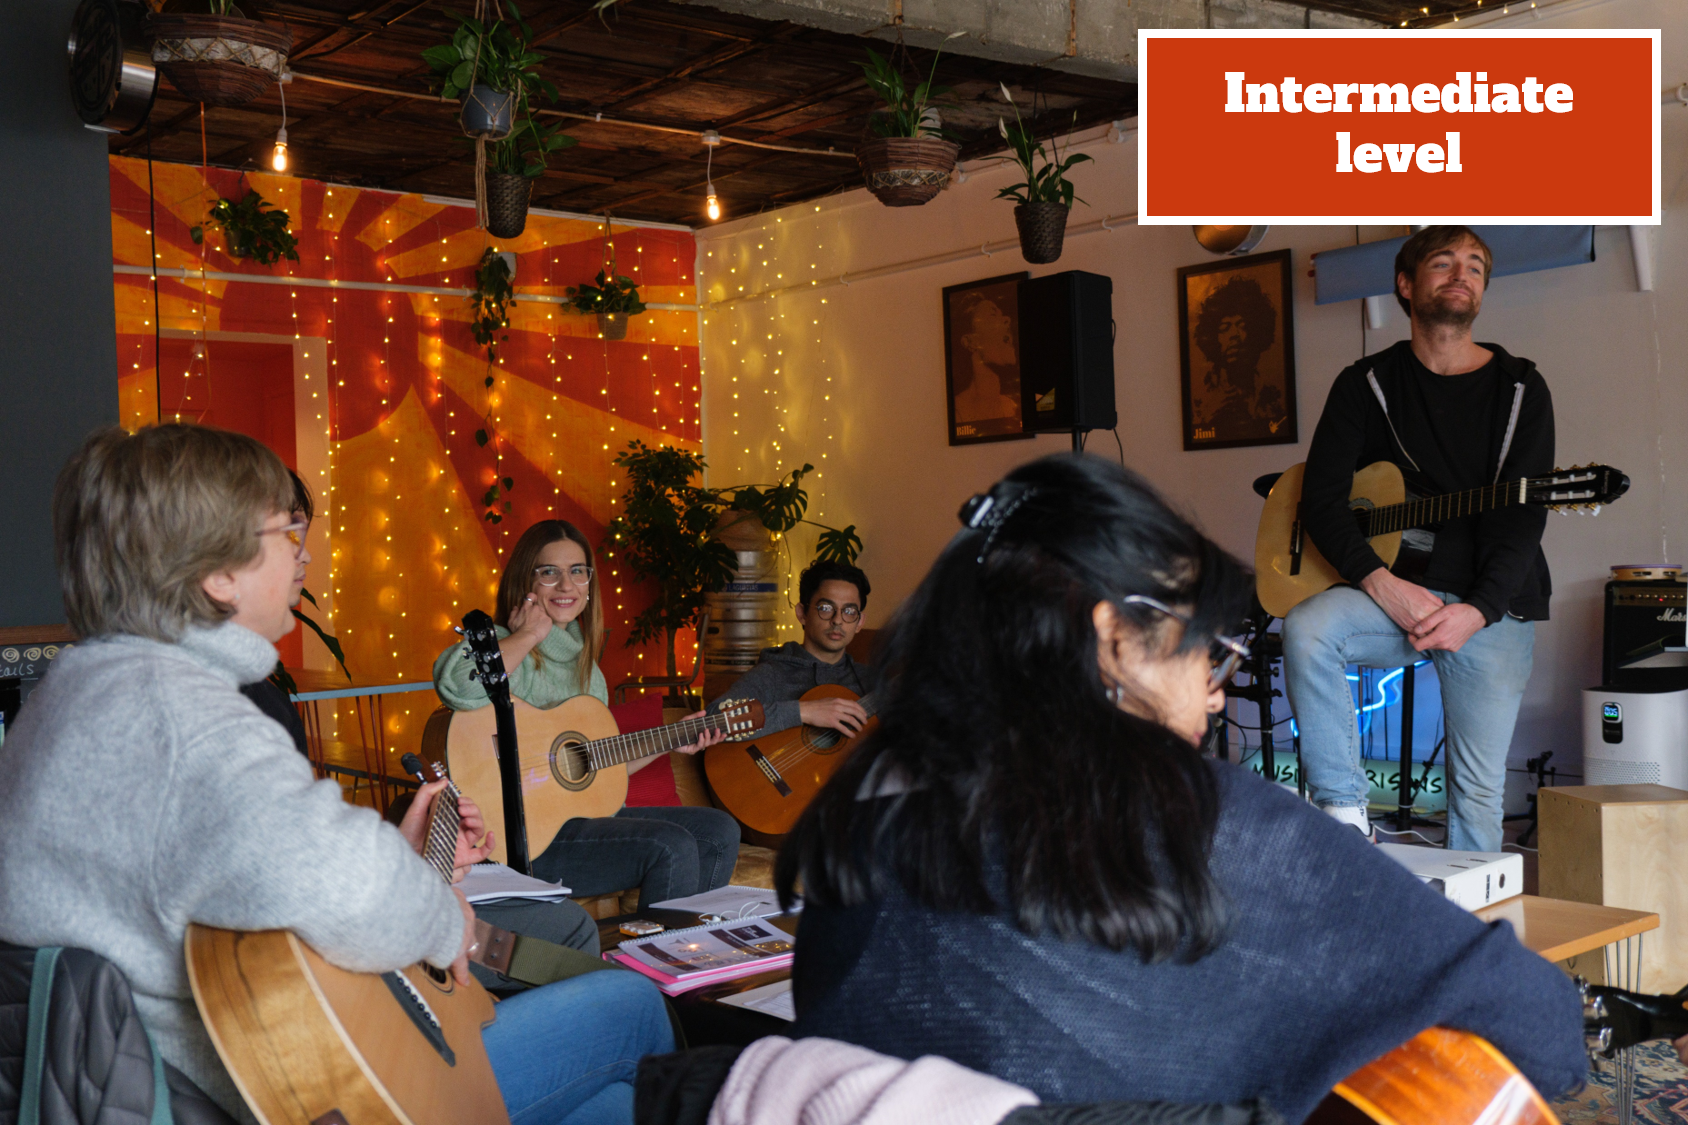
Intermediates: Bedroom player to bar room rockstar - where we jam intermediate level songs with the barre chord, scale, improvisation, theory and chord extension learning snuck into the jamming fun An intermediate player can play E type barre chords and perhaps some/all A type positions. You can play a few scales and have been using them either to improvise or play solos, licks and riffs. Your knowledge of the fretboard is good
In Person Korean Glow Facial
By KBH Training Academy
In Person Korean Glow Facial Course Content: Salon health and safety Anatomy and physiology Contra indications Hygiene Trolley set up Consultation Skin Conditions Extractions What is korean facial Products Step by Step guide Who is this training for? The training is availble to anyone trained in Hydrodermabrasion and facials. Please note, if you are not trained in the above you can sign up for our hydrodermabrasion training alongside the korean facial. Training kit There is no training kit included in this course. Our training manual explains what products you need and where to purchase them from Certificate You will receive an end of course certificate How do Online Courses work? http://www.kbhtrainingacademy.com/online-courses Duration of Course? You will have 3 months to complete the course before it expires Will I require a model? Yes, usually 1 model is required to complete all of the required case studies Are there video tutorials? Yes, you will have a link to YouTube and training videos to watch the treatment being performed

Join lifestyle and streetwear label Stööki as they host their exclusive jewellery workshops at their studio in Greenwich. This ticket is valid for entry for 1 person for the date of the workshop session & includes the Brass 18k Gold-Plated Ring casting and finishing fee. The session will be focused on the creation and personalisation of rings and pendants and led by Stööki's jewellery technologist Nadia Abbas. In this workshop you will: Get an insight in to the jewellery making process Receive a wax ring or pendant template to customise with your own design Get a tutorial covering a range of jewellery making techniques The aim is to have a finished wax master at the end of the workshop that can be taken home, but there is also the option of turning your personalised wax ring or pendant into a finished jewellery piece. Prices to get jewellery made are as follows: Rings: Silver - £70, Brass 18k Gold-Plated - £85, Solid 9k Gold - £ available on request Pendants: Silver - £75, Brass 18k Gold-Plated - £90, Solid 9k Gold - £ available on request *Please note that his ticket option includes the £85 Brass 18k Gold-Plated Ring casting and finishing fee. Add a Stööki sterling silver curb necklace for an additional £15 Stööki will provide all the equipment needed for this session. There is free parking on-site if driving.