- Professional Development
- Medicine & Nursing
- Arts & Crafts
- Health & Wellbeing
- Personal Development
554 Feedback courses in Edinburgh delivered Live Online
SketchUp Evening Training
By London Design Training Courses
Why Learn SketchUp Evening Training Course? You will learn how to create and edit 3D models to a professional standard, ensuring you leave with the skills and confidence to fully take advantage of SketchUp and Layout software. You can book this course after work we are open 9 am to 7 pm. Course info Duration: 10 hrs. Method: 1-on-1, Personalized attention. Schedule: Tailor your own schedule by pre-booking a convenient hour of your choice, available from Mon to Sat between 9 am and 7 pm. SketchUp Evening Training Course Course Duration: 10 hours I. Introduction to SketchUp (1 hour) - Overview of SketchUp for interior design and architecture - Familiarization with the user interface and essential tools - Mastering navigation and viewport controls - Efficiently creating and managing interior design and architectural projects II. Creating Floor Plans (1 hour) - Importing floor plans and site plans for reference - Precision in drawing walls, windows, and doors - Effective management of floor levels - Organizing designs using Layers and Scenes III. Adding Furniture and Fixtures (2 hours) - Accessing and importing furniture and fixtures from the extensive 3D Warehouse - Crafting custom furniture and fixtures to suit specific design needs - Strategically placing and arranging elements within the space - Crafting and customizing materials to achieve the desired visual impact IV. Advanced Modeling Techniques (2 hours) - Employing advanced tools for creating intricate 3D models - Enhancing model organization using groups and components - Adding exquisite details and finishes to elevate design quality V. Layout for Construction Documents (2 hours) - Creating construction documents in Layout for clear communication - Seamlessly importing SketchUp models into Layout - Crafting detailed floor plans, elevations, and sections - Adding annotations and dimensions to facilitate construction VI. Introduction to Vray (1 hour) - Understanding the capabilities of Vray for SketchUp - Familiarization with the basic Vray interface and tools - Exploring Vray materials and textures for enhanced rendering VII. Advanced Rendering Techniques (1 hour) - Applying advanced rendering techniques to elevate SketchUp models - Creating artificial and natural lighting for realistic visualizations - Enhancing designs with entourage and landscaping elements VIII. Importing and Exporting (30 minutes) - Seamlessly importing and exporting files for versatile workflows - Ensuring file format compatibility with other software - Preparing models for 3D printing as required IX. Conclusion and Next Steps (30 minutes) - Comprehensive review of course content and key takeaways - Suggested further learning resources and avenues for improvement - Interactive Q&A session and feedback collection Download SketchUp | Free Trial of 3D Modeling Software SketchUp https://www.sketchup.com SketchUp's Intuitive Interface Helps You Communicate Ideas In 3D Fast. Subscribe Today!
Online Art Course 20th September 2023
By ArtwithTricia
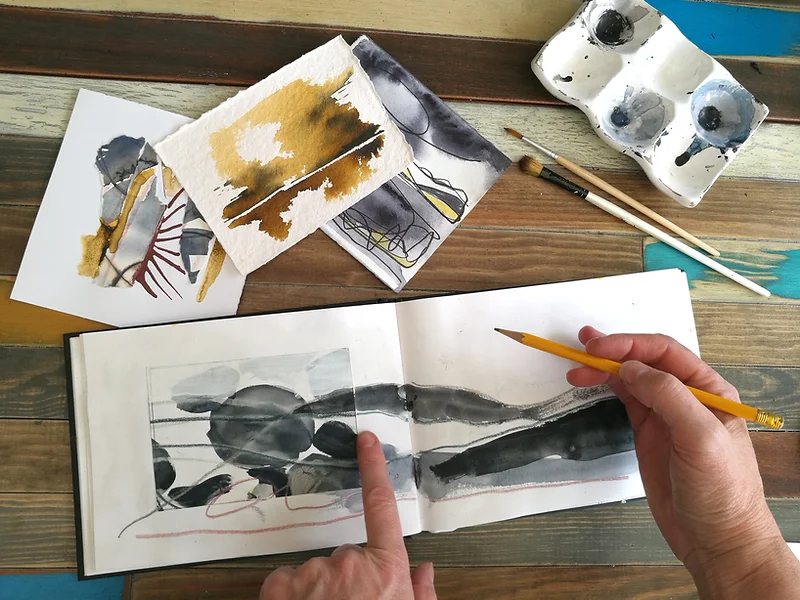
During this 12 week course you will have the opportunity to work on your own project ideas to explore your different media choices.
Autodesk Maya Basic to Fundamentals Training
By London Design Training Courses
Training duration: 10 hrs. Click here for more info Method: 1-2-1, Personalized attention, Tailored content, Flexible pace, Individual support. Schedule: Personalized training experience with our flexible 1-2-1 sessions. Tailor your own schedule by pre-booking a convenient hour of your choice, available from Monday to Saturday between 9 am and 7 pm. Discover the world of 3D computer graphics and animation with our Autodesk Maya Basic to Fundamentals Training Course. Whether you're a beginner or aspiring artist, this comprehensive program equips you with essential skills in modeling, animation, and rendering. Benefit from interactive learning, experienced instructors, and the option to choose in-person or live online sessions. Enroll now to gain industry-standard knowledge and unleash your creativity in the field of animation and visual effects. Maya Basic to Intermediate Course Course Duration: 10 hours Course Outline: I. Introduction to Maya (1 hour) - Gain an insightful overview of Maya and its diverse applications - Familiarize yourself with the Maya interface and essential tools - Master navigation and viewport controls with ease - Learn the art of creating and managing projects proficiently II. Creating 3D Models (2 hours) - Lay a strong foundation in polygon modeling basics - Craft and shape basic objects and shapes adeptly - Refine and modify objects with precision and creativity - Unlock the art of constructing complex objects using extrusions and bevels III. Texturing and Materials (1 hour) - Venture into the realm of texturing and its significance - Create and skillfully apply materials to enhance visual appeal - Master the art of texture mapping and UV unwrapping techniques - Seamlessly import and incorporate textures and images into your projects IV. Lighting and Rendering (1.5 hours) - Illuminate your creations with fundamental lighting techniques - Set up cameras and compose visually captivating scenes - Master the art of rendering still images and dynamic animations - Explore diverse output options and file formats for professional results V. Animation (2.5 hours) - Embark on an enthralling journey into the world of animation - Effectively utilize keyframe animation and animation curves - Create and edit animation clips for seamless and captivating motion - Dive into the intricacies of rigging and animating a simple character VI. Special Effects (1 hour) - Unleash the potential of particle systems and dynamics - Create and manipulate mesmerizing fluid and fire effects - Craft and refine awe-inspiring special effects such as explosions and smoke VII. Intermediate Modeling Techniques (1 hour) - Elevate your skills with NURBS modeling essentials - Create and modify curves and surfaces with finesse - Dive into the world of crafting organic shapes using NURBS techniques - Employ sculpting tools to create high-resolution and detailed models VIII. Conclusion and Next Steps (0.5 hours) - Recap the wealth of knowledge from the course content - Discover valuable tips and resources for further learning and growth - Engage in a dynamic Q&A session and provide valuable feedback

Online Art Course 10th January 2024
By ArtwithTricia
During this 12 week course you will have the opportunity to work on your own project ideas to explore your different media choices.
“Light makes photography. Embrace light. Admire it. Love it. But above all, know light. Know it for all you are worth, and you will know the key to photography.” – George Eastman" - Photography For Parents - Shooting With Flash Next course starts on Monday 12th Feb 2024 Scared of Flash? Never got good results from it? Not sure how it works with your camera? Thinking it’s bound to be complicated and just for studio work? This is the course for you! We show you how to work your flash and your camera – on and off camera! - to get great, natural looking results. In this course you'll discover how to use flash not just to supplement light in dim spaces, but to use it creatively, to help you create images you wouldn't be able to capture with just natural light. KEY COURSE INFO: Course type: Instructor-led Course duration: 4 weeks Course format: Online course with interactive live webinar classes, feedback on your learning and support group WHAT YOU LEARN: You will learn how to make your flash work with your camera and how to control it so that it gives you beautiful, natural looking light You will learn to work with the flash off camera - giving you the freedom to position your light wherever it will most suit your subject rather than relying on what you have with natural or indoor light You will learn to play with flash to capture a variety of creative outcomes and apply it to lots of shooting situations - from learning to fake pretty window light to freezing motion with Flash understanding flash equipment learning to shoot with on-camera flash earning to shoot with off-camera flash learning to bounce the light for natural looking results using flash as a sole or supplementary light source freezing movement with flash where the shutter speed wont allow it THIS IS THE COURSE FOR YOU IF : You find yourself struggling with light especially in the darker autumn / winter months, and there never seems to be enough ISO or aperture to get you what you want You can already use your camera in manual and want to add mastery of detachable flash to your skillset - so you can never worry about insufficient or poor light wherever you are, or whatever unknown space you go into You want to be able to make flash images look natural rather than sporting that famous 'deer in the headlights look. A good flash image never 'looks' like a flash image You want to learn how to capture creative images using a flash - such as freezing motion, creating dramatic shadows, or adding a splash of light to specific areas of the frame. You want to add this versatile skill to your toolbox so you can adapt it to different shooting scenarios. ESPECIALLY if you're considering taking up photography professionally or semi professionally, this is an immensely useful skill to have. Next Shooting with Flash course starts on 12 Feb 2024 4 core course modules Support Facebook group Weekly live webinar Weekly practice assignment Feedback on your images Why shoot with flash in the first place? “Don’t use Flash – it will wash out your child”“Flash will make your photos look horrible”‘You can’t control flash – no control over what your photos will look like” You may have heard those statements, maybe even uttered them yourself. And to a degree – they can be true – but only because, if you don’t know how to control and work any tool, it’s likely to give you terrible outcomes – remember how much poorer your photos were when you first started with your camera on full auto? Here is how I see Flash, and what this course is about: Flash lets me bring light where there would normally be not enough light available to take a well exposed photo – and let me tell you – in glorious British weather, that’s more often that I would like! Flash lets me shape the light to suit my needs – I can make it moody or bright, I can even make it look like natural light ( yes really) Flash lets me neutralise ugly light and make it look good ( anybody else cursed with ugly spotlight lights in their home? no? just me? ) Flash lets me be in control, especially in unknown venues and locations, spaces where I won’t get a chance at that second shot. Flash helps me fill in shadows when shooting in very bright light – the goal is not to stop using natural light, but to help create a balanced image where natual light alone can't cut it COURSE PREREQUISITES YOUR SKILLS: We recommend that you are comfortable in shooting in full manual mode. It's possible to use flash in priority modes of course, but you don't have full control of its strength and level. YOUR EQUIPMENT: You will need to have a detachable flash for your camera make. This could be the same brand as your camera or a compatible third party flash manufacturer. You will also need a way of triggering your flash OFF camera - in some cases, you may be able to do this directly from camera or via an additional remote trigger / controller. Click here to see our Flash buying guide below Shooting with FLASH Book your space now: COURSE STARTS : 12th Feb 2024 ( 4 weeks)COURSE COST : £179 ( payment plans available )What’s included: 4 weekly modules with step by step tutorials weekly live class online class ( also recorded) - on Tuesday evenings feedback and advice on your photos private support group PDF workbook Join our next group to learn how to never have to deal with insufficient light and discover a whole new area of photography! INSIDE THE MODULES - aka WHAT DO YOU LEARN? Module 1: Getting Started with Flash In this module we introduce you to the principles of making your flash work with your camera. We show you how the two work together in layering exposures, how you can control both the flash and natural light side and how to achieve predictable outcomes from your flash. This is the biggest learning curve because the way you work your camera with flash is very different to how you do this with just natural light and understanding the control side of things will let you get creative afterwards. Major Takeaways: At the end of the module you will have gained an understanding of how to work your flash ON your camera. With that, you will have learned how to balance your key light and your fill light, how to combine flash exposure with a natural light exposure, how to supplement or even replace light with flash light. You will also make first steps into bouncing the light to give it a more natural appearance. Module 2: Taking your flash OFF camera In this module we teach you how to make your flash work when detached from your camera. We look at different techniques and methods or shooting off camera as well as any additional equipment you may need for this. We teach you how to use that off camera flash for a number of practical and creative examples Major Takeaways: You will be able to use the flash off camera - whatever your preferred off camera methos. We will explore using off camera flash as the key light - creating low key and high key images, as fill light and as a supplementary light to provide additional dimension to the images. Module 3: Making flash look natural In this module we learn to recognise how you can adjust the very quality of your flash to create natural looking images. We learn how to bend - or bounce the light - on and off camera, to create the kind of images that noone would ever suspect of being taken with flash. We also introduce you to a number of light modifiers and show you what you can expect from them as well as what might work in the way you take the photos. Major Takeaways: Learn how to modify your flash to achieve soft or hard light look. Discover how to bounce your flash and where from and how the angle of those flash bounces will give your subject very different looks. Learn about light fall-off and how to apply this principle to achieve more or less contrast filled images when using flash/ Module 4:Flash and motion In this module we show you how to use flash when trying to freeze your subject - whether it is your child bouncing on the soufe in dim Novemeber light or an inanimate object making a splash. We also introduce you to a few way you can play with flash and your shutter speed to achieve fun and creative outcomes. Major Takeaways: You will learn how to freeze movement with flash - even on very slow shutter speeds or in very poor light. You will learn how shutter and flash work together and how you can achieve great creative outcomes such as high speed photography or freezing rain. Next course starts on 12 Feb 2024

Revit Basic to Advanced Training Course
By ATL Autocad Training London
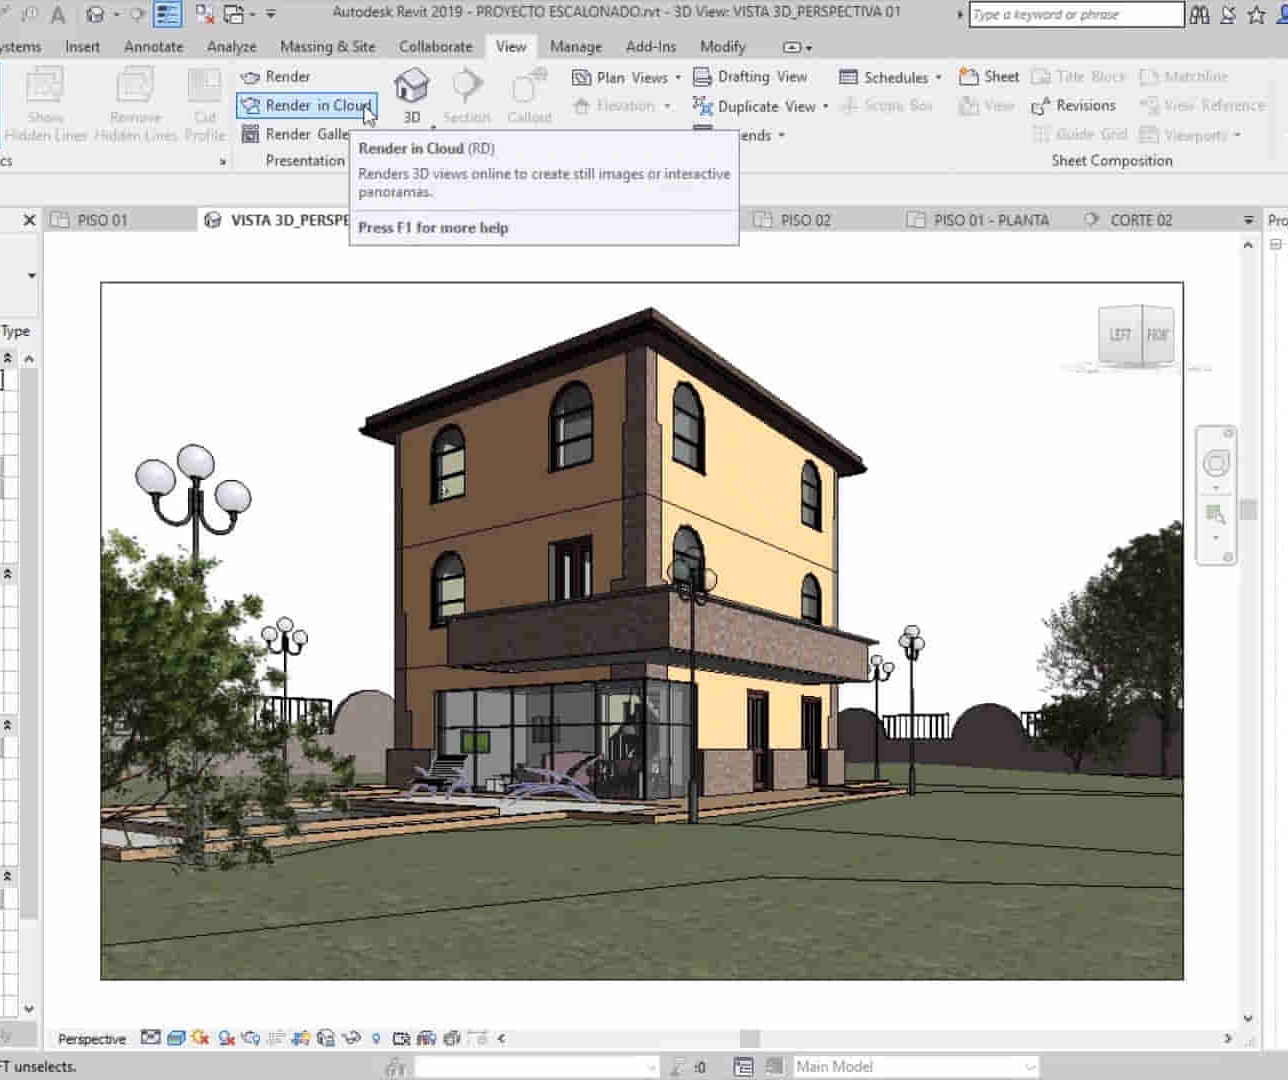
Why Book Revit Basic to Advanced Training Course? Learn BIM and Revit for engineers and architects, supporting 2-D and 3-D design for large-scale projects and combing with AutoCAD. Check our Website How to Book? 1-on-1 training tailored to your schedule. Book your sessions from Monday to Saturday between 9 am and 7 pm or call 02077202581 to book over the phone. Training Details: Duration: 16 hours Flexible scheduling, split across multiple days Method: 1-on-1 (In-person or Live Online) and Personalized attention Course Overview: I. Revit Fundamentals (1 hour) Understanding Revit's Purpose and Applications Navigating the Revit Interface and Essential Tools Mastering Navigation and Viewport Controls Creating and Managing Projects II. Project Setup (1 hour) Initiating a New Project Configuring Project Levels, Grids, and Site Information Defining Project Units for Precision III. Basic Modeling Techniques (2 hours) Building Walls, Doors, and Windows Designing Floors, Ceilings, Roofs, Stairs, and Railings IV. Advanced Modeling Skills (4 hours) Crafting Custom Parametric Families Utilizing Conceptual Modeling Tools Designing Complex Forms and Shapes Enhancing Models with Lighting and Materials Achieving Realism through 3D Rendering V. Views, Sheets, and Annotations (2 hours) Managing Views and Sheets Effectively Incorporating Schedules and Tags Crafting Detail Annotations for Construction Documents VI. Phasing, Worksharing, and Collaboration (2 hours) Understanding Phasing and Design Options Mastering Work Sharing and Collaboration Techniques VII. Project Collaboration and Management (1 hour) Establishing Work Sharing Environments Monitoring Worksets and User Activities Synchronizing Worksets for Seamless Collaboration VIII. Advanced Documentation Skills (2 hours) Creating Advanced Schedules and Legends Developing Construction Documents with Sheets and Title Blocks Customizing Schedules and Keynotes for Precision IX. Course Conclusion and Next Steps (1 hour) Reviewing Course Highlights Exploring Further Learning Resources and Tips Interactive Q&A Session and Feedback Opportunities Download Revit Master Revit Proficiency: Acquire advanced skills in Revit for 3D modeling, parametric design, and efficient project management. Craft Complex Architectural Designs: Create intricate building components, custom families, and detailed construction documents. Seamless Collaboration: Expertise in project collaboration, phasing, and work sharing, ensuring smooth teamwork and synchronization. Enhanced Visualization: Learn advanced rendering techniques for realistic 3D visualizations of architectural concepts. Customize Workflows: Adapt Revit tools, optimize workflows, and enhance efficiency in project execution. Career Opportunities: Architectural Designer: Create architectural plans, 3D models, and construction documents. BIM Specialist: Develop detailed digital models in collaboration with architects and engineers. Construction Documenter: Prepare comprehensive construction documents, including plans and schedules. Project Manager: Oversee projects, ensuring timely completion and adherence to design specifications. Revit Specialist/Trainer: Provide Revit training and support services to individuals, firms, or educational institutions. Elevate Your Revit Skills with Our Advanced Training! Our Revit Basic to Advanced Training Course is tailored to enhance your expertise in Autodesk Revit. Delivered through in-person or live online sessions, this program covers advanced modeling, parametric families, collaboration tools, and project phasing. Course Benefits: Master Advanced Skills: Learn intricate 3D modeling, design complex building components, and implement advanced BIM workflows. Expert Instruction: Industry professionals guide you through advanced concepts via engaging demonstrations and hands-on exercises. Flexible Learning: Choose in-person or live online sessions with interactive instruction and personalized guidance. Lesson Recordings: Access class recordings for convenient review and practice, reinforcing your learning. Lifetime Support: Benefit from lifetime email support for ongoing guidance from our experienced instructors. Enhance your Revit proficiency, streamline design processes, and boost project efficiency. Whether you're an architect, engineer, or design professional, this course unlocks advanced Revit skills. Join our training for comprehensive learning and expert support! Individualized Training: Experience personalized attention and tailored guidance. Flexible Learning Hours: Select your preferred schedule for training sessions. Ongoing Support: Access complimentary online assistance even after course completion. Comprehensive Learning Materials: Receive detailed PDF resources for effective learning. Certificate of Attendance: Earn a certificate acknowledging your course completion. Affordable Pricing: Enjoy budget-friendly training rates. Software Setup Help: Get assistance with software configuration on your device. Referral Benefits: Receive discounts on future courses by referring a friend. Group Discounts: Avail special rates for group training sessions. Extended Availability: Access training sessions every day with extended operating hours. Customized Curriculum: Engage in tailored training designed to meet your specific requirements.
Basics to Essential Photoshop Skills Course
By ATL Autocad Training London
Basics to Essential Photoshop Skills Course, Master retouching, layers, color, correction, shapes, and symbols. Delve into graphic design, photo editing, and digital art. Elevate your skills from beginner to pro, gaining expertise in UX strategies, ensuring your websites are impactful and user-friendly. Click here for more info: Website Duration: 16 hours Method: Personalized 1-on-1 sessions ensure individual attention. Schedule: Customize your learning with pre-booked sessions available Monday to Saturday, from 9 am to 7 pm. Module 1: Introduction to Photoshop (2 hours) Understanding the Photoshop interface and workspace Navigating tools, panels, and menus Essential keyboard shortcuts for efficient workflow Introduction to different file formats and their uses Module 2: Basic Image Editing Techniques (2 hours) Cropping, resizing, and straightening images Color adjustments and corrections using adjustment layers Removing blemishes and distractions with healing tools Introduction to layers and blending modes Module 3: Advanced Image Manipulation (2 hours) Creating composite images with layer masks Utilizing advanced selection tools for precise editing Applying filters and special effects for creative enhancements Mastering text and typography in Photoshop Module 4: Graphic Design and Layout (2 hours) Designing banners, posters, and social media graphics Working with shapes, gradients, and patterns Creating visually appealing typography compositions Introduction to vector graphics and custom shapes Module 5: Web and UI Design (2 hours) Designing user interfaces for websites and applications Creating web-ready graphics and optimizing images Prototyping interactive elements and buttons Designing responsive layouts for various devices Module 6: Introduction to 3D and Animation (2 hours) Creating 3D objects and text Basic 3D manipulation and lighting effects Introduction to animation with the Timeline panel Exporting animations and interactive multimedia Module 7: Project-Based Learning (2 hours) Applying learned techniques to real-world projects Designing a digital artwork, website mockup, or social media campaign Receiving instructor feedback for skill refinement Final presentation of completed projects and portfolio building Upon completing our personalized Photoshop Mastery course, you'll: Master Tools: Excel in Photoshop's essential and advanced tools, including image manipulation and graphic design techniques. Design Expertise: Develop skills in creating compelling graphics, web layouts, and interactive UI designs. 3D & Animation Skills: Understand 3D manipulation, lighting, and basic animation techniques. Career Opportunities: This course prepares you for roles such as Graphic Designer, Web/UI Designer, Digital Artist, Photo Retoucher, 3D Artist, or Entrepreneur in the design industry. Dive deep into the world of Photoshop with our exclusive 1-on-1 training program. Tailored to your pace and skill level, this course offers a comprehensive understanding of Photoshop's essentials and advanced features. From image editing to graphic design and 3D manipulation, master Photoshop with personalized attention and hands-on guidance. Key Details: Personalized Attention: Enjoy dedicated 1-on-1 sessions with an experienced Photoshop instructor, ensuring focused learning and personalized guidance. Tailored Curriculum: The course content is customized based on your goals, allowing you to explore specific areas of interest and address individual challenges. Flexible Scheduling: Schedule sessions at your convenience, accommodating your busy lifestyle. Choose from weekdays or weekends, morning or evening, for a flexible learning experience. Hands-on Learning: Engage in practical, real-time exercises and projects tailored to your interests, reinforcing your skills and boosting confidence. In-depth Exploration: Cover a wide range of topics, including image editing, graphic design, 3D manipulation, web design, and more, delving deep into each area for a thorough understanding. Interactive Q&A: Participate in interactive Q&A sessions during each class, clarifying doubts and gaining valuable insights from your instructor. Lesson Recordings: Access recordings of your sessions for review and reinforcement, ensuring you grasp every concept and technique thoroughly. Ongoing Support: Benefit from continuous email support even after the course completion, receiving guidance on projects and addressing any post-training queries. Solid Foundation: Develop foundational Photoshop skills, mastering essential techniques for image editing and graphic design. Versatile Editing: Learn retouching, color correction, and photo enhancement for professional-quality results. Efficient Workflow: Optimize your work with layer management, non-destructive editing, and time-saving tricks. Creative Mastery: Harness Photoshop's power to create digital art, manipulate images, and design stunning graphics. Real-world Application: Apply skills to diverse projects like photo editing, web design, and social media graphics. Flexible Review: Access recorded lessons for convenient review of specific techniques or workflows. Lifelong Support: Enjoy lifetime email assistance for guidance, questions, and clarifications even after course completion.

Adobe illustrator 1-2-1 Training Course
By Real Animation Works
Illustrator face to face training customised and bespoke Online or Face to Face
Vectorworks Landmark Training
By London Design Training Courses
Why choose Vectorworks Landmark Training Course? Course info Explore the Vectorworks Landmark Training Course! 1-on-1 Live Online sessions led by certified tutors and industry experts. Master Vectorworks Landmark for landscape and site design, creating captivating outdoor spaces. Enroll now to unleash your design skills. Duration: 16 hrs. Method: 1-on-1, Personalized attention. Schedule: Tailor your own schedule by pre-booking a convenient hour of your choice, available from Mon to Sat between 9 am and 7 pm. This course focuses on Vectorworks Landmark fundamentals, providing essential tools and techniques for landscape architecture, design, and related disciplines. Participants should have a basic understanding of Vectorworks software. The course covers 2D and 3D drawing, file organization, landscape plan/model creation, and more. Learning Objectives: Organize drawing files using industry standards and best practices for effective collaboration. Utilize imported files and field-collected data for base plans and site inventories. Integrate 2D and 3D elements for plan documentation and model analysis. Utilize worksheet features for material quantification and project efficiency. Course Prerequisites: Participants should be familiar with basic drafting concepts, computer operations, and keyboard shortcuts. This training demonstrates sustainable design principles and the use of CAD tools for erosion control, runoff calculations, plant tracking, and sun/shade analysis. Participants will learn to create a 3D site digital terrain model and assess proposed plantings' effects on solar heat gain and water usage. Vectorworks Landmark Basic to Intermediate Training Course Duration: 16 hours Join our comprehensive Vectorworks Landmark Basic to Intermediate Training, designed for landscape architects and designers. Master 2D and 3D landscape design with essential techniques, covering site analysis, plans, irrigation, and 3D visualization. Unleash your creativity with custom plant symbols and detailed planting plans using the plant database. Course Outline: I. Introduction to Vectorworks Landmark (1 hour) An overview of Vectorworks Landmark for landscape design Interface orientation and basic tool usage Navigation and viewport controls Landscape design project creation and management II. Site Analysis and Site Plans (3 hours) Collecting site information and producing site analysis drawings Crafting site plans and hardscape design Working with contours, elevations, and terrain models Incorporating site amenities like paths, fences, and walls III. Planting Plans (5 hours) Utilizing the plant database to select suitable plants for specific regions Creating personalized plant symbols Developing comprehensive planting plans and plant lists Understanding plant compatibility and growth patterns IV. Irrigation Design (2 hours) Designing and editing irrigation systems and zones Integrating irrigation components into the site plan Generating irrigation reports for efficient planning V. 3D Visualization (3 hours) Creating captivating 3D models of landscape designs Applying textures and materials to hardscape elements and plants Utilizing the Renderworks engine for high-quality rendering Enhancing designs with lighting and special effects VI. Customization (1 hour) Tailoring the interface for landscape design efficiency Creating custom object styles and resource libraries VII. Collaboration and Sharing (1 hour) Importing and exporting data from other software platforms Sharing landscape design drawings with colleagues and collaborators VIII. Conclusion and Next Steps (1 hour) Comprehensive review of course content Guidance on further learning resources Q&A session and feedback gathering Enroll in our Vectorworks Landmark Basic to Intermediate Training to enhance your landscape design expertise and unleash your creative prowess. Download Vectorworks Landmark https://www.vectorworks.net/en-GB/landmark By the end of the Vectorworks Landmark Training Course, participants will: Understand the key features and functionalities of Vectorworks Landmark for landscape design. Demonstrate proficiency in using essential tools for site analysis, site plans, and hardscape design. Create detailed planting plans, selecting appropriate plants, and understanding their compatibility and growth patterns. Design efficient and effective irrigation systems, including generating irrigation reports. Create 3D visualizations of landscape designs, applying textures, materials, lighting, and special effects. Customize the interface and create personalized object styles and resources. Collaborate and share landscape design drawings with other software users. Have the foundation to pursue further learning and exploration in landscape design using Vectorworks Landmark.
ESOL - Intensive Immersion in English Course (modular) - Online Tuition
(8)By GLA Tutors Home or Online
Course Duration: 8 weeks (40 sessions) Course Objectives: By the end of this course, participants will: 1. Communicate effectively and confidently in English in various contexts. 2. Expand vocabulary and improve grammar usage. 3. Develop listening skills to understand a variety of accents and speech patterns. 4. Enhance reading comprehension skills for different types of texts. 5. Write accurately and coherently for different purposes. Course Outline: Week 1: Introduction and Assessment - Introduction to course objectives, expectations, and immersion techniques - Assessing participants' current English proficiency levels - Establishing individual learning goals and expectations Week 2: Speaking and Listening Skills - Developing conversational skills through role-plays, pair work, and group discussions - Listening activities to improve comprehension of different accents and speech speeds - Pronunciation drills and practice for accurate and fluent speech Week 3: Vocabulary Expansion - Building a wide range of vocabulary through contextualised exercises and activities - Strategies for effective vocabulary acquisition and retention - Vocabulary practice in various themes and topics Week 4: Grammar Review and Practice - Reviewing essential grammar structures and rules - Practice exercises and activities for applying grammar rules in context - Error correction and clarification of common grammar mistakes Week 5: Reading Comprehension - Developing reading skills through authentic texts, articles, and short stories - Strategies for improving reading speed and comprehension - Identifying main ideas, supporting details, and inferred meanings Week 6: Writing Skills - Improving writing skills for different purposes: emails, letters, reports, etc. - Practice exercises for organizing ideas, structuring paragraphs, and coherent writing - Peer editing and feedback for enhancing writing proficiency Week 7: Real-Life Simulations - Simulating real-life situations such as job interviews, meetings, and social interactions - Role-plays and interactive activities for practical application of language skills - Building confidence and fluency in using English in authentic contexts Week 8: Review and Final Evaluation - Reviewing course content and addressing individual needs - Comprehensive review exercises for all language skills - Final evaluation and feedback session Note: This syllabus serves as a guideline and can be customised based on the specific needs, interests, and proficiency levels of the participants. The course may also include cultural immersion activities and field trips to enhance the language learning experience. You can opt in and out of different modules.