- Professional Development
- Medicine & Nursing
- Arts & Crafts
- Health & Wellbeing
- Personal Development
602 Feedback courses in Cardiff delivered Live Online
SketchUp Course for Interior Designers and Architects with Layout and Vray
By London Design Training Courses
Why choose SketchUp Course for Interior Designers and Architects with Layout and Vray? Introducing SketchUp Training Course tailored for Interior Designers and Architects. This comprehensive course is designed for interior designers and architects who want to master SketchUp for 3D modeling, Layout for creating construction documents, and V-Ray for rendering. Course info Duration: 10 hrs Method: 1-2-1, Personalized attention Schedule: Tailor your own hours, available from Mon to Sat between 9 am and 7 pm Explore the world of 3D drawing with Sketchup in this beginner-friendly course. With its user-friendly interface, Sketchup offers a gentle learning curve, allowing you to quickly grasp 3D geometries. As you become acquainted with the basic drawing tools, you'll uncover a plethora of advanced techniques to create intricate and complex 3D objects. Who Should Take This Course? This course is ideal for individuals seeking to utilize a 3D drawing tool to solve three-dimensional problems or engage in more advanced design endeavors. Our experienced tutors communicate in accessible English, avoiding complex jargon and ensuring clarity throughout the course. We offer a wealth of learning resources for you to access beyond live lessons. Stay up-to-date, practice, and review key concepts essential to your growth. Course Title: SketchUp Training for Interior Designers and Architects with Layout and V-Ray Course Course Duration: 10 hours Course Description: This comprehensive course is designed for interior designers and architects who want to master SketchUp for 3D modeling, Layout for creating construction documents, and V-Ray for advanced rendering. Participants will learn how to create stunning 3D models for their projects, produce detailed construction documents, and apply professional-grade rendering techniques to bring their designs to life. Course Outline: Module 1: Introduction to SketchUp (1 hour) - Overview of SketchUp for interior design and architecture - Interface and basic tools - Navigation and viewport controls - Creating and saving interior design and architecture projects Module 2: Creating Floor Plans (1 hour) - Importing floor plans and site plans - Drawing walls, windows, and doors - Creating and editing floor levels - Understanding Layers and Scenes Module 3: Adding Furniture and Fixtures (2 hours) - Importing furniture and fixtures from the 3D Warehouse - Creating custom furniture and fixtures - Placing and arranging furniture and fixtures in the space - Creating and editing custom materials Module 4: Advanced Modeling Techniques (2 hours) - Creating more complex 3D models using advanced tools - Using groups and components for model organization - Adding custom details and finishes Module 5: Layout for Construction Documents (2 hours) - Creating construction documents in Layout - Importing SketchUp models into Layout - Creating floor plans, elevations, and sections - Adding annotations and dimensions to construction documents Module 6: Introduction to V-Ray (1 hour) - Overview of V-Ray for SketchUp - Basic V-Ray interface and tools - Understanding V-Ray materials and textures Module 7: Advanced Rendering Techniques (1 hour) - Applying advanced rendering techniques to SketchUp models - Creating artificial lighting and using natural lighting - Adding entourage and landscaping to designs Module 8: Importing and Exporting (30 minutes) - Importing and exporting files from other software - Understanding file formats and compatibility - Exporting models for 3D printing Module 9: Conclusion and Next Steps (30 minutes) - Review of course content - Tips for further learning and resources - Q&A and feedback

3D Studio Max and CAD Courses 1 on 1
By ATL Autocad Training London
These courses are designed for aspiring 3D artists, students, graduates, creative professionals, CAD designers, and anyone passionate about 3D art. Whether you're looking to launch a career, enhance existing skills, or explore new creative avenues, our courses provide comprehensive training tailored to various skill levels and interests. Check our Website Duration: 16 hours Method: 1-on-1 and Tailored content Dates and Times: Select your preferred hour from Monday to Saturday, available between 9 am and 7 pm. CAD and 3D Studio Max Training Course Duration: 16 hours Course Outline: Introduction to AutoCAD Familiarizing yourself with the AutoCAD interface Navigating the drawing environment Mastering fundamental 2D geometry creation Exploring essential drawing tools and commands Introduction to blocks and symbols for efficient design Advanced AutoCAD Techniques Delving into advanced drawing methods Proficiently manipulating and editing 2D geometry Crafting custom symbols and blocks for enhanced productivity Working with text and annotations for clear communication Utilizing layers and line types for organized design 3D Modeling in AutoCAD Venturing into the world of 3D modeling Precision crafting of 3D solids and surfaces Seamless modification and manipulation of 3D geometry Crafting custom materials and textures for realistic designs Effective utilization of AutoCAD's lighting and camera systems Introduction to 3ds Max Embracing the 3ds Max interface and configuring the workspace Proficiency in navigating within 3ds Max Understanding the viewport for optimized design Exploring basic 3D modeling techniques in 3ds Max Materials and Textures in 3ds Max Application and modification of textures for enhanced designs Mastering the art of UVW mapping for precise texturing Utilizing the material editor for creative freedom Crafting custom materials aligned with your design vision Harnessing the power of Vray materials for lifelike renders Lighting in 3ds Max Introduction to various lighting techniques Grasping light properties for impactful designs Strategic setup of lights to enhance scenes Illuminating scenes with Vray lights Cameras in 3ds Max Mastery of camera systems in 3ds Max Exploring camera properties for cinematic effects Creating animations with cameras for dynamic scenes Utilizing Vray cameras for stunning renders Rendering in 3ds Max Unveiling the art of rendering Utilizing Vray Global Illumination for realistic lighting Leveraging Vray Physical Cameras for precise control Enhancing scenes with Vray HDRI Lighting Following a Vray Rendering Workflow for professional results Advanced Modeling Techniques Proficiency in crafting complex geometry Utilizing modifiers for intricate designs Exploring polygonal modeling for versatile creations Creating both organic and inorganic models with expertise Unleashing the potential of advanced modeling techniques Projects Application of acquired skills to create real-world scenes Designing a detailed interior scene with meticulous attention Crafting a visually impactful exterior scene Creating a complex scene featuring multiple objects and materials Course Requirements: A computer with AutoCAD and 3ds Max installed Basic knowledge of computer operations A keen interest in 2D and 3D modeling and design Course Goals: Upon course completion, you will possess a comprehensive understanding of AutoCAD and 3ds Max, enabling you to craft intricate 3D scenes enriched with advanced materials, textures, lighting, and rendering. These newfound skills empower you to advance your capabilities in both 2D and 3D modeling and rendering. Upon successful completion of this comprehensive AutoCAD and 3ds Max training, participants will attain the following skills: AutoCAD Proficiency: Mastery of 2D geometry, drawing tools, and symbols. Advanced AutoCAD Techniques: Expertise in editing, custom blocks, text, and layers. 3D Modeling in AutoCAD: Competence in crafting 3D solids, textures, and lighting. Introduction to 3ds Max: Proficient navigation of the interface and fundamental 3D modeling. Materials and Textures: Application and customization of textures using Vray. Lighting and Cameras: Mastery of lighting and camera systems within 3ds Max. Rendering: Production of high-quality renders through Vray. Advanced Modeling: Proficiency in handling complex geometry and creating organic models. Real-World Projects: Capability to design interiors, exteriors, and intricate scenes. Skills Acquired: Mastering 3D Modeling Techniques in 3D Studio Max Advanced Texturing and Material Application Skills Proficiency in Lighting and Rendering Techniques Expertise in Animation and Keyframe Techniques Comprehensive Scene Composition and Camera Setup Knowledge Career Opportunities: Senior 3D Modeler Experienced CAD Designer Lighting and Rendering Specialist Animation Director Architectural Visualization Expert Upon completing our 3D Studio Max and CAD Courses, students will acquire advanced 3D modeling, animation, and CAD design skills, paving the way for rewarding careers in roles such as Senior 3D Modeler, CAD Designer, Lighting Specialist, Animation Director, and Architectural Visualization Expert. You will gain access to the following benefits: An Autocad and 3ds Max Certificate of Attendance. A comprehensive PDF training guide for 3ds Max and CAD. Real-time feedback during sessions, with the option to record them as video archives. We offer the following advantages: Price guarantee to ensure the best value for your investment. Personalized one-on-one training for focused learning. Flexible scheduling options available seven days a week, from 9 am to 7 pm. Lifetime email and phone support for ongoing assistance. Assistance with software installation and computer setup. Referral discounts and special offers on group training courses.
Creating brilliant business content
By Fire Plus Algebra
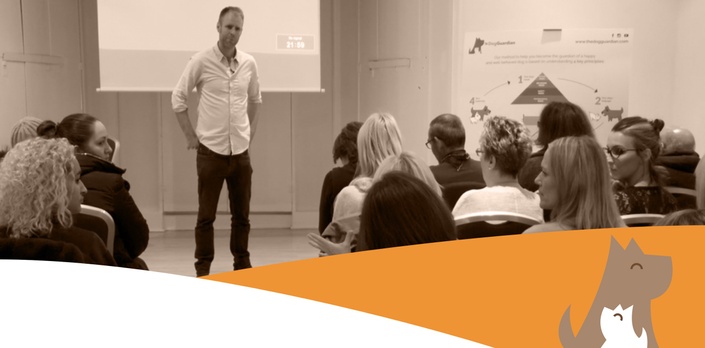
Today, everyone is a publisher. Whether you're filling your company blog with compelling ideas, producing newsletters to engage your customers, packing your social media feeds with engagin content, or crafting insightful posts to push your personal professional profile – you need to use storytelling to engage your audience. In this workshop we'll break down the key ingredients that make content engaging. We'll go through a proven framework for taking ideas from initial spark, through developing a unique angle, to idenitfying the ideal format for execution. We'll discuss the purpose of the content you have in mind, and look at how your can plan a strategy to publish regularly and measure the results. This is a fully interactive online workshop, so be prepared to join discussions and develop your own content ideas. Takeaways Understanding the needs of your target audience. Identifying the Subject, Angle and Format. Cheap (or free!) tools to create professional content. Useful systmes for publishing regularly, and keeping the work manageable. Knowing where to publish on the web, social media and other platforms. Promoting your content, and getting feedback. Delivery We deliver our courses over Zoom, to maximise flexibility. The training can be delivered in a single day, or across multiple sessions. All of our courses are live and interactive – every session includes a mix of formal tuition and hands-on exercises. To ensure this is possible, the number of attendees is capped at 16 people. Tutor Alan Rutter is the founder of Fire Plus Algebra. He is a specialist in communicating complex subjects through data visualisation, writing and design. He teaches for General Assembly and runs in-house training for public sector clients including the Home Office, the Department of Transport, the Biotechnology and Biological Sciences Research Council, the Health Foundation, and numerous local government and emergency services teams. He previously worked with Guardian Masterclasses on curating and delivering new course strands, including developing and teaching their B2B data visualisation courses. He oversaw the iPad edition launches of Wired, GQ, Vanity Fair and Vogue in the UK, and has worked with Condé Nast International as product owner on a bespoke digital asset management system for their 11 global markets. Testimonial “The EMpower Network commissioned the content creation workshop to understand how to communicate effectively with a wide range of stakeholders. In light of covid-19, it’s more important than ever to communicate clearly especially as we’ve moved to remote meetings. The workshop was very insightful and Alan was a very engaging speaker making sure all attendees contributed and worked through real-life examples. Attendees praised the usefulness of the workshop and especially liked the content generation framework with one saying 'It has changed the way I think about communicating and given me a toolkit that I will use in both my work and personal projects'.” Shade Nathaniel-Ayodele | EMpower Network, Southwark Council

Revit Basic to Fundamentals
By London Design Training Courses
Why Choose Revit Basic to Fundamentals Course Course Link In this course you will learn Revit skills for BIM modeling. In-person or live online. Autodesk Revit Architecture training for students to create full 3D architectural project models and set them up in working drawings. Duration: 10hours Method: 1-on-1 method with tailored content and flexible pace, backed by individual support. Schedule: Choose a convenient hour from Mon to Sat between 9 am and 7 pm to create your own schedule. Revit Essentials Training: Learn Revit fundamentals for architecture and structural design, supporting efficient building construction with BIM workflows. Delivery Options: In-class at our center Live online sessions I. Introduction to Revit Overview of Revit and its uses Revit interface and basic tools Navigation and viewport controls Creating and saving projects II. Setting up a Project Creating a new project Setting up project levels and grids Adding site and building information Setting up project units III. Creating Building Elements Creating and modifying walls Adding doors and windows Creating and modifying floors and ceilings Creating roofs and modifying roof shapes Creating stairs and railings IV. Views and Sheets Creating and managing views Creating and managing sheets Adding schedules and tags Creating construction documents V. Annotation and Detailing Adding text and dimensions Creating and modifying detail components Adding symbols and keynote legends Adding annotations to construction documents VI. Conclusion and Next Steps Review of course content Tips for further learning and resources Q&A and feedback Note: The above course outline is just a suggestion, and the course content and duration can be adjusted according to the needs and level of the learners. Detailed Course Outline. 1. Starting a Project Creating a new project and the importance of a template. Understanding project settings and scales Adding levels Adding grids Adding columns 2. Modeling Basics Adding walls Using snaps Wall properties and wall types Using the modified tools Adding doors and windows Using constraints See: Autodesk Seek and Revit City websites 3. Links, Imports, and Groups Working with DWG files Creating topography from a DWG link Understanding CAD inserts Using import tips Creating a group Working with Revit links Managing links 4. Sketch-Based Modeling Components Working with floors Working with roofs Adding openings Working with stairs Working with railings Working with ceilings 5. Complex Walls Creating a custom basic wall type Adding curtain walls Adding curtain grids and mullions 6. Visibility and Graphics Controls Using object styles Working with visibility/graphic overrides Using Hide/Isolate Understanding view range Using the Linework Using cutaway views 7. Rooms Adding rooms Controlling room numbering Understanding room bounding elements 8. Schedules and Tags Understanding tags Adding schedules Modifying schedules Creating a key schedule 9. Annotation and Details Adding text Adding dimensions Adding symbols Adding legend views Creating a detail callout Using detail components Adding filled and masking regions 10. The Basics of Families Understanding familiesUsing reference planes, parameters, and constraints Adding solid geometry Adding void geometry Completing the family 11. Sheets, Plotting, and Publishing Adding sheets Exporting to AutoCAD and JPG

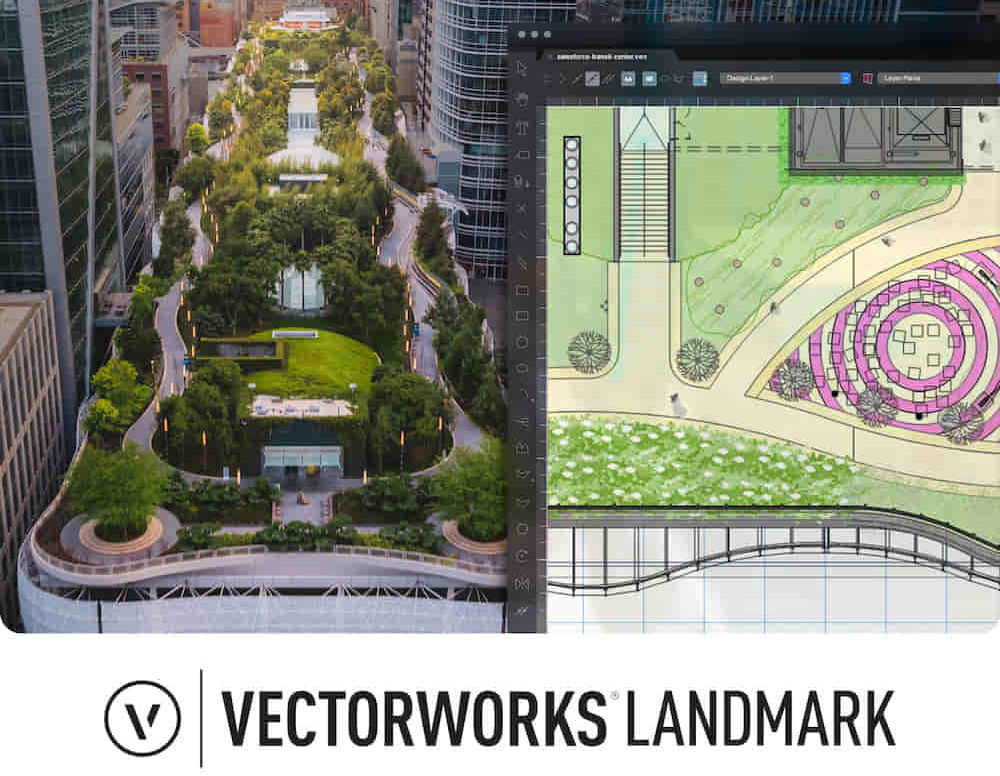
Landmark Training Course With Vectorworks
By ATL Autocad Training London
Who is this course for? Landmark Training Course With Vectorworks. Dive into terrain modeling, planting, irrigation, and site analysis guided by certified tutors. Master these tools for precise landscape designs and effective documentation. Check our Website Enrollment : 1-on-1 Landmark Training. Tailor your schedule. Mon to Sat between 9 am and 7 pm Call 02077202581 to book your slot. Duration: 16 hours. "Split these hours over multiple days as needed for your ideal schedule." Approach: In-person or live online. Landmark Training Course with Vectorworks: Basic to Intermediate Level Course Duration: 16 Hours Embark on a transformative journey with our Landmark Training Course tailored for landscape architects and designers. Over 16 intensive hours, dive deep into Vectorworks Landmark, mastering fundamental and intermediate techniques crucial for comprehensive 2D and 3D landscape design. Craft intricate site analyses, plans, irrigation systems, and elevate your designs with mesmerizing 3D visualizations. Explore custom plant symbols, detailed planting plans, and learn the art of efficient collaboration and customization. Course Highlights: I. Introduction to Vectorworks Landmark (1 hour) Explore Vectorworks Landmark for landscape design Master interface, tool usage, and project management II. Site Analysis and Site Plans (3 hours) Craft detailed site analyses and hardscape designs Work with contours, elevations, and terrain models III. Planting Plans (5 hours) Utilize the plant database for region-specific plant selection Create personalized plant symbols and comprehensive planting plans IV. Irrigation Design (2 hours) Design and edit efficient irrigation systems and zones Integrate irrigation components into site plans V. 3D Visualization (3 hours) Create captivating 3D models with realistic textures and materials Enhance designs with advanced lighting and special effects VI. Customization (1 hour) Tailor the interface for efficient landscape design Create custom object styles and resource libraries VII. Collaboration and Sharing (1 hour) Seamlessly import/export data from other platforms Share designs effectively with colleagues and collaborators VIII. Conclusion and Next Steps (1 hour) Review course content comprehensively Receive guidance on further learning resources Engage in a Q&A session and provide valuable feedback Enhance your landscape design expertise and unleash your creativity. Enroll now in our Vectorworks Landmark Basic to Intermediate Training and transform your designs. Download Vectorworks Landmark By the end of the Vectorworks Landmark Training Course, participants will: Understand the key features and functionalities of Vectorworks Landmark for landscape design. Demonstrate proficiency in using essential tools for site analysis, site plans, and hardscape design. Create detailed planting plans, selecting appropriate plants, and understanding their compatibility and growth patterns. Design efficient and effective irrigation systems, including generating irrigation reports. Create 3D visualizations of landscape designs, applying textures, materials, lighting, and special effects. Customize the interface and create personalized object styles and resources. Collaborate and share landscape design drawings with other software users. Have the foundation to pursue further learning and exploration in landscape design using Vectorworks Landmark. Mastering Foundations Begin your project by organizing your files and importing survey data. Learn to sketch existing buildings using Building Shell tools and model neighboring structures with Massing Model. Explore different methods for laying out survey points and marking existing features with precision. Objectives: Review File Organization Techniques Import Survey Data (DWG Import) Create Building Structures with Building Shell Tools Utilize Triangulation and Arc Tool for Precision Master Various Tape Measurement Techniques Elevating Your Design Enhance your survey with detailed ground, existing trees, and fences. Conduct shadow analysis to optimize planting locations. Dive into the Vectorworks Plant tool, your key design companion. Objectives: Develop Detailed Ground Surfaces Incorporate Existing Trees and Fences Design with Railing Fence Tool Conduct Shadow Analysis using Heliodon Tool Utilize Plant Tool Modes for Plant Placement Access Existing Plant Libraries and Customize Plants in 2D/3D Crafting Landscapes Create vibrant plant mixes using Landscape Area tool and apply them across your site models. Design intricate hardscapes, aligning them effortlessly even in complex paving scenarios. Learn to use components for detailed reporting, cut and fill calculations, and precise detailing. Explore custom object creation and site furniture placement. Objectives: Design Landscape Areas and Define Custom Plant Mixes Create Hardscapes and Define Custom Paving Constructions Generate Reports and Tags for Landscape Areas and Hardscapes Access and Manage Objects in Resource Manager Craft Custom Objects and Site Furniture Polished Presentation Present your designs professionally using Sheet layers and viewports. Create Section viewports to cut through your model and Detail viewports to focus on specific areas. Enhance visual appeal with mood boards and annotations, ensuring a refined, detailed presentation. Objectives: Craft Sheet Layers for Presentation Create Plan, Elevation, and Perspective Viewports Generate Section and Detail Viewports Annotate Viewports for Clear Communication Incorporate Images and Plant Reports for Comprehensive Presentations Master Vectorworks Landmark: Gain expertise in essential and advanced 2D/3D landscape design tools for precision and efficiency. Boost Efficiency: Learn time-saving techniques and workflows tailored to Vectorworks Landmark, enhancing productivity. Versatile Landscape Skills: Develop proficiency in site analysis, planting plans, hardscapes, and irrigation systems for diverse projects. Industry-Ready Expertise: Acquire sought-after skills in landscape architecture, paving the way for career growth. Flexible Learning: Access recorded lessons for convenient review and receive lifetime email support for ongoing guidance.
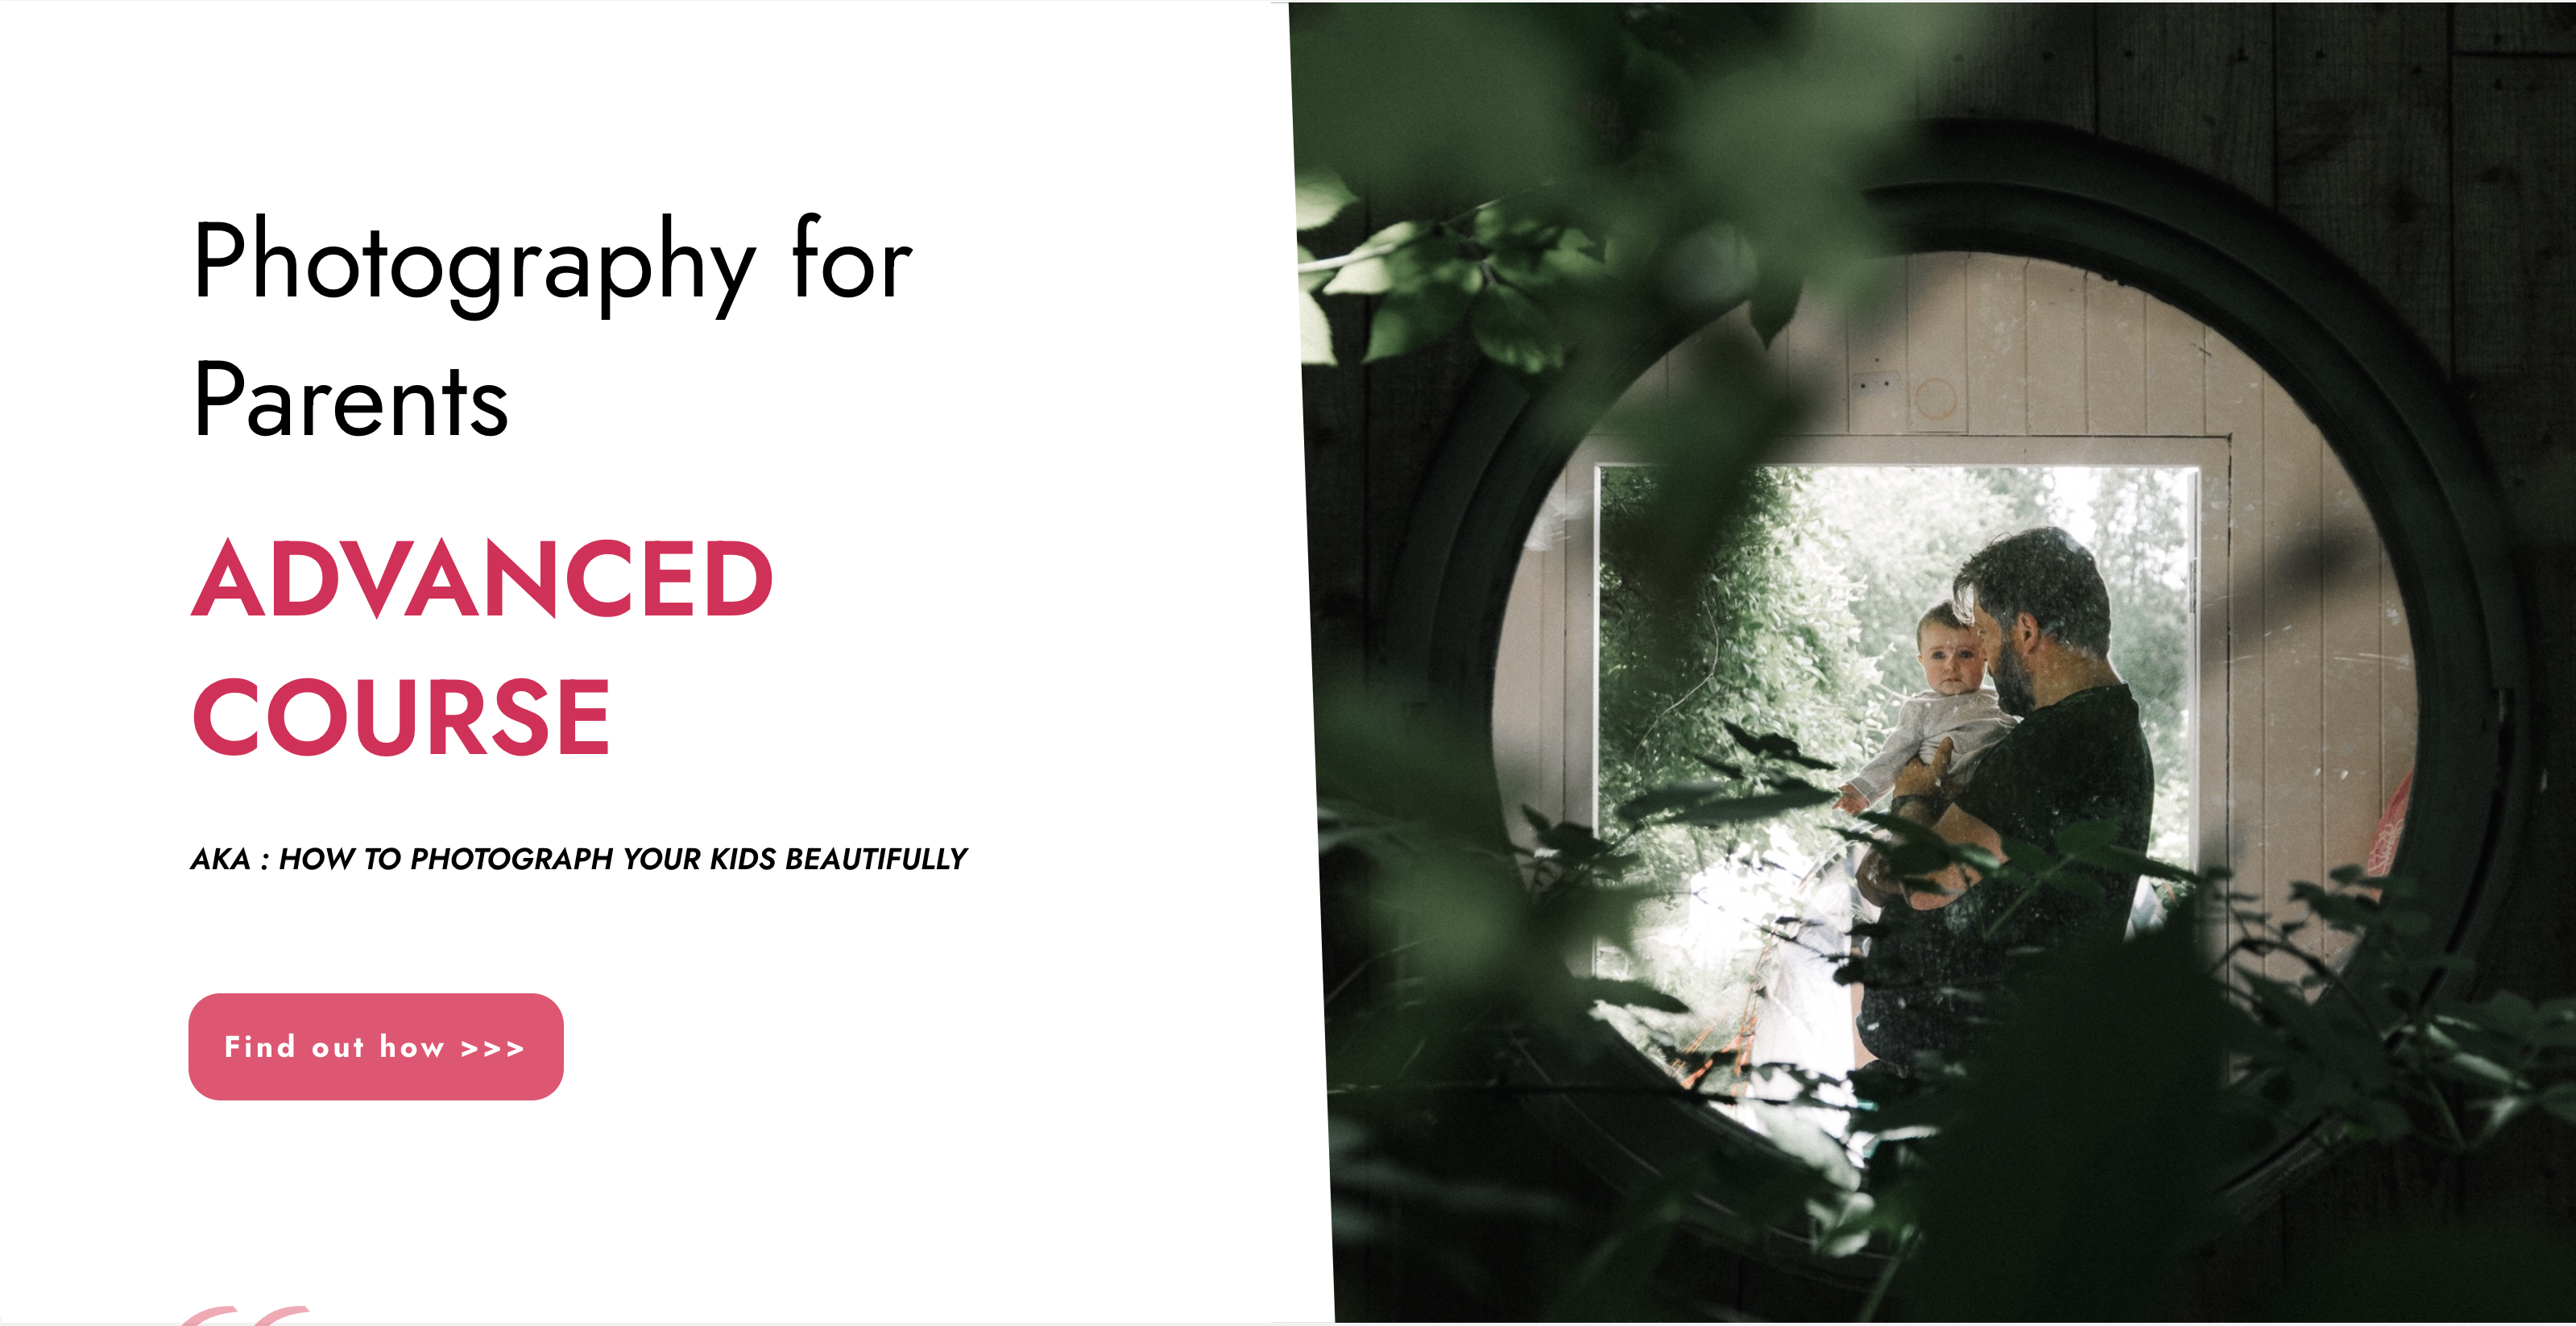
Photography is a way of feeling, of touching, of loving. ... it remembers little things, long after you have forgotten everything. - Aaron Sisking For the kind of photos that are worthy of the memories Because we just don't get do-overs with kids. There is no such thing as second-first steps. Because all their little quirks, all the big and little moments that shape their lives and their childhoods are something that only YOU as parents see and appreciate fully. And they are the thing that make them who they are. There is simply no outside photographer who can come in and capture those unique things because nobody knows your children like you do. Photography For Parents Fundamentals Our flagship 6 week Photography course designed to help you learn all the key photography skills that you will need to drastically improve your children's photos. KEY COURSE INFO: Course type: Instructor-led or self paced Course duration: 6 weeks Course format: Online course with Interactive weekly live classes, personal photo feedback and support group WHAT YOU LEARN: Our hands-on online instructor-led approach helps guarantee that you will quickly learn the key camera and photographic storytelling skills while keeping the focus on photographing children. From camera know-how, light and composition, specific recipes to help you capture typical situations and getting it all right on the fly - yeah, our kids don't sit still either LEARN WHAT'S INCLUDED IN EACH MODULE Key Camera skills Working with natural light Capturing kids on the move Photo composition Portraits and details Photo storytelling HERE IS HOW YOU LEARN WITH US: If you have bought an online course before, then gave up half way through because ... life.. - well, we are a bit different. This is A LOT more than a bunch of random tutorials. This is a proper, well designed, supported and paced course that genuinely delivers. HERE ARE THE INGREDIENTS THAT MAKE OUR COURSE DELIVER The one with all the materials: 5 core course modules, introduced on a weekly basis, plus a bonus wraparound module ( more on that below) - courses accessible online and in pdf version The one with all the people: You're not going through the course on your own - as part of the course you join an online peer support group, moderated daily by the instructor, where you connect, get help and go through this journey together with other parents like you. The one with all the answers: Every week we run an live online class which is where your instructor goes through the key parts of your course, answers live questions and demonstrates techniques and additional illustration photos. The Live classes are run in the evening ( after the kids are in bed) and are always recorded in case you couldn't join in live The one that's all about you: Every week comes with homework to help you practice the elements we introduce in the modules. You submit those images to your instructor on a weekly basis and receive thorough, photo-by-photo, video feedback from your instructor - so it's all about you and your progress, nobody else's The one with the bonuses: A PDF workbook to help you go through the materials and practice the skills, handy cheat sheets formatted for your phone so you can whip them out on the go plus a Bonus wrap-up module with swipe files of photo ideas for children at different ages, handy checklists and more! The one after it's over: We don't just leave you on your lonesome after the course is over - you get access to a=our Alumni group - a Photography for Parents Clique if you will - which is where we continue supporting you, answering your questions, encouraging you to take photos through weekly and monthly challenges and peer support Next Fundamentals course starts on 15th January 2024 5 core course modules Support Facebook group Weekly online Live class Personal Feedback on your images BONUS: extra module with ideas bank for photographing children of all ages BONUS: PDF course workbook BONUS: Printable and mobile friendly Pocket Guides HERE IS WHAT YOU WILL LEARN WITH US: How to finally, actually, properly use your camera - no more cryptic buttons and the 'oh no! what have I pressed now?!' panic. Life's too short to be intimidated by your camerant The precise steps and 'recipes' to help you capture all sorts of different situations - whether your kids are indoors on a dark and dreary day or tearing through the park in the sun How to see the world and your children through a photographers eyes and learn to compose your photographs on the fly so they truly reflect the beauty you see How to get great photos CONSISTENTLY - I mean the spray and pray method is fine, but wouldn't it be nice to have confidence your images will turn out the way you want them? How to learn to notice and capture the little details, the big picture, the whole story of your children growing up. BEAUTIFULLY. "Absolutely, without a doubt, the best money I have ever spent on anything kid related. I so wish i had done these courses 6 years ago, just before my 1st was born. My photography has improved significantly and I'm just sad the course are over, I have loved everything about them!" Hannah Slater "The most enjoyable online course I ever done" I cannot recommend this course highly enough, and I am so grateful for Ania for creating this amazing course and community, teaching busy parents how to document their family storied beautifully! DALIA SEABORNE "I'm amazed at how much my photography has improved " I have learned so much and am amazed at how much my photography has improved - they are brilliant value for money considering the level of personal attention you receive! I've come away with a whole lot more technical knowledge as well as a heap of inspiration and ideas. LUCY GRIFFITH "The most wonderful entry into the incredible photography world" I am seeing things that I have never noticed before, I am using the DSLR to capture precious moments with my family and am signed up to two further courses because the instructors, modules and supportive community are amazing and I think I might be addicted KIRSTY FINNIE Photography for Parents FUNDAMENTALS Next course starts on 15th Jan 2024 All the learning resources, all the community, all the support, all the personal help. Virtually failproof 5 core course modules Bonus Idea Bank module PDF course workbook Pocket reference guide Support group Weekly online live class Personal Feedback on your images Access to Photography For Parents Alumni community But will it work for me? - our guarantee: GUARANTEE We know our course works. We have seen a few thousands of students go through our courses and really improve. BUT, if you find that after the first couple of modules that it just doesn't work for you, you haven't learnt anything new, it's the wrong level for you, you haven't improved, or you simply don't get on or engage with it - we will simply refund you in full. Simple as that! INSIDE THE MODULES - aka WHAT DO YOU LEARN? Module 1: See what your camera sees Our first module is dedicated to breaking you our of the snapping habit and giving you a fresh perspective. We show you how your camera sees the world differently than what you might expect in three major ways - the optics. the focus and the light. Major Takeaways: At the end of the module you will have gained full control of your focus - no more guessing game and kids turning out all blurry, you will also gain an insight of how to use your lens ( there is a skill to it) and how to let the light help make your subjects stand out. What's included: The importance of focus and what it does to our brain Taking control of your focus - the Where and HOW your camera focuses Mastering focus formula - a process to help you determine what settings to use for each occasion To zoom or not to zoom and how it changes what and how your camera sees Learning how your camera sees the light and how to make it better, especially with tricky light Learning how to shoot against the light - like a bright window and NOT end up with the person looking all dark Module 2: On exposure and all things sharp and blurry In our second module we take you off the auto setting and dive deep into learning about exposure - i.e. making sure that your images are not too dark or bright or blurry. But not only that, we pay special attention to how to make some of the things in your image sharp and others blurry through the use of specific combinations of settings Major Takeaways: How to work your camera in priority ( semi-manual) modes, how to capture detail or portraits with a great separation of sharp and blurry to make these elements stand out. What's included: Understanding the mechanics of your camera - how does a photo actually happen inside Taking your camera firmly OFF the Auto settings - learning the key factors ( aperture, shutter speed and ISO) and how they interact with one another How to capture portraits and those precious detail shots beautifully Switching to Aperture priority and controlling your aperture - the how and the why Taking control of what in your image will be sharp and what will be blurry - hello full control over blurry backgrounds, blurry foregrounds and pin sharp subjects in between. Module 3: Capturing movement One of my favourite modules, dedicated to helping you capture your kids in motion - whether they're wriggling babies, speedy crawlers, wobbly toddlers or perpetual-motion-machines that most children are. We learn how to match your focus settings, your shutter settings and your composition to capture great movement photos. Major Takeaways: Learn how to capture your children on the move, SHARP but also how to use blur and speed to really showcase and highlight movement. Big AH-HA moments here! What's included: Switching your camera to shutter priority and mastering MOVEMENT Learning how to capture moving things SHARP - yes, that includes those fast movingbaby arms and legs Learning how to capture moving things BLURRY - and why would you want to do it? Learning how to highlight action and energy and speed in your images and how to help yourself with composition Creative techniques like night time light trails or panning or creative blur How to use your focus settings on top of your shutter settings to help capture things sharp Module 4: See what your camera sees Although we introduce elements of photographic composition throughout the course, this is the module entirely dedicated to it. We look at composition not just as a set of arbitrary rules, but more as something that helps you express what you really see and feel. We look at photographic storytelling and helping your images get look more impactful and stronger Major Takeaways: Good photographic composition principles to help you really show the magic you are seeing. At the end of this module you will say goodbye to boring flat photos and will instead start taking rich images with lots of depth and eye catching composition. What's included: understanding how we 'read' photographs and how to compose so that the magic YOU see translates into what the others see when they pick up that photo fundamental rules of photo composition - we started you off with the rule of thirds but there is MORE Good crops, bad crops, crazy crops and everything in between storytelling through your photographs - how to make your images mean something and show something real, beyond 'my child looks cute here' getting creative and expressing yourself through photographs learning to go beyond your usual compositions and discovering different styles Module 5: Photographic composition and storytelling Although we introduce elements of photographic composition throughout the course, this is the module entirely dedicated to it. We look at composition not just as a set of arbitrary rules, but more as something that helps you express what you really see and feel. We look at photographic storytelling and helping your images get look more impactful and stronger Major Takeaways: Good photographic composition principles to help you really show the magic you are seeing. At the end of this module you will say goodbye to boring flat photos and will instead start taking rich images with lots of depth and eye catching composition. What's included: Understanding how we 'read' photographs and how to compose so that the magic YOU see translates into what the others see when they pick up that photo Fundamental rules of photo composition - we started you off with the rule of thirds but there is MORE Good crops, bad crops, crazy crops and everything in between Storytelling through your photographs - how to make your images mean something and show something real, beyond 'my child looks cute here' Getting creative and expressing yourself through photographs Learning to go beyond your usual compositions and discovering different styles BONUS Module 6: Idea Bank : Photographing children at different ages This last module is a bit different. We us it to give you lots of ideas for photos with children of different ages - from photographing milestones to capturing what's unique about them at a particular stage and really getting into their world to capture where they're at. The module is packed with ready to take ideas and will let you take all that you have learned in the first 5 modules and apply it in real life sitautions. We also help you think ahead to the next steps in your photography education - should you want to continue.
Rhino 3d and V-ray for Rhino Basic to Intermediate Training
By London Design Training Courses
Why Learn Rhino 3d and V-ray for Rhino Basic to Intermediate Training Course? Course Link Learn Rhino 3D and V-Ray for Rhino Basic to Intermediate Training Course. Designed for beginners and experienced users, this course empowers you with essential modeling and rendering techniques. Choose between in-person or live online sessions. Duration: 16 hrs. Method: 1-on-1, Personalized attention. Schedule: Tailor your own schedule by pre-booking hours of your choice, available from Mon to Sat between 9 am and 7 pm. London Design Training Course Certified tutors for Rhino 3D and Vray Training - Online, On-Site, or In-Class one to one. Choose from a diverse range of Rhino courses conducted by expert trainers with extensive production experience. Rhino 3D and V-Ray Comprehensive Training Course Duration: 16 hours Course Overview: Learn Rhino 3D and V-Ray with our Basic to Intermediate Training Course. Perfect for beginners, this course equips you with the skills to navigate Rhino's interface, create captivating 3D models, apply textures, and utilize V-Ray for stunning renders. Course Outline: I. Introduction to Rhino 3D and V-Ray (1 hour) Get familiar with Rhino 3D and V-Ray interfaces and essential tools Master viewport navigation with expert controls Understand units and tolerance for precise designs Customize your workspace for seamless workflow II. Creating Basic 3D Objects (3 hours) Craft captivating 3D shapes and objects Edit objects and work with curves for refined designs Explore surfaces and solids for advanced modeling Utilize transformations and copying techniques for enhancements III. Materials and Textures (2 hours) Unleash the power of materials and textures on your designs Apply stunning materials to bring your creations to life Enhance your designs with custom materials for an aesthetic boost IV. Basic Lighting Techniques in V-Ray (2 hours) Discover the magic of lighting with V-Ray for impactful renders Utilize V-Ray lights and HDRI maps for striking lighting effects Adjust lighting settings for impeccable results V. Enhancing Renders with V-Ray Settings (3 hours) Optimize V-Ray render settings for the best output Adjust global illumination and reflection settings for desired looks Elevate renders with dynamic effects like depth of field and motion blur VI. Advanced Modeling Techniques (2 hours) Master advanced modeling tools for intricate shapes Refine curve and surface creation and editing skills Handle solids with Boolean operations and trimming techniques VII. Advanced Lighting Techniques in V-Ray (2 hours) Create and adjust artificial lights for perfect illumination Utilize V-Ray's Sun and Sky system for realism Craft custom HDR images for enhanced lighting VIII. Exporting and Importing (1 hour) Learn file formats for seamless sharing and collaboration Prepare models for 3D printing with best practices Integrate models from other software for a unified workflow IX. Conclusion and Next Steps (30 minutes) Recap course knowledge and highlights Access valuable tips and resources for continuous learning Engage in interactive Q&A for feedback and support Resources: Explore V-Ray with a free trial at: https://www.chaosgroup.com/vray/sketchup/free-trial Access material library at: https://www.vray-materials.de/ Discover textures at: https://textures.com/ Downloads: Download Rhino 7 for Windows for a full 90-day evaluation at: https://www.rhino3d.com Experience Rhino 7 for Mac Evaluation with a user-friendly interface and seamless performance for 90 days. Upon completing the Rhino 3D and V-Ray Basic to Intermediate Training Course, participants can expect to achieve the following learning outcomes: Proficiency in Rhino 3D and V-Ray: Develop a comprehensive understanding of Rhino 3D and V-Ray interfaces, tools, and functionalities, enabling participants to navigate and utilize the software effectively. 3D Modeling Skills: Master the art of creating captivating 3D objects and shapes using Rhino 3D, including editing, transforming, and refining designs for diverse applications. Material Application: Acquire the ability to apply and customize materials and textures to enhance the visual appeal and realism of 3D models, elevating the quality of designs. Lighting Techniques: Gain expertise in utilizing V-Ray lighting tools, such as V-Ray lights and HDRI maps, to achieve striking lighting effects in rendered scenes. Rendering Excellence: Learn to optimize V-Ray render settings, control global illumination, and apply dynamic effects like depth of field and motion blur for high-quality and impressive renders. Advanced Modeling: Develop skills in advanced modeling techniques, including handling curves, surfaces, and solids, enabling participants to tackle complex design challenges. Lighting Mastery: Acquire the knowledge and expertise to create and adjust artificial lights, utilize the Sun and Sky system, and craft custom HDR images for realistic lighting setups. Seamless File Management: Understand various file formats for exporting and importing 3D models, facilitating efficient collaboration and preparation for 3D printing. Creative Problem-Solving: Enhance creative thinking and problem-solving abilities through hands-on practice and exploration of diverse design scenarios. Professional Presentation: Learn post-production techniques in Photoshop to enhance renders and create visually appealing design presentations for effective communication. Continuous Learning: Access valuable resources and tips to encourage continuous learning and professional growth in Rhino 3D and V-Ray.

Exam Technique Training for OISC Level 1
By Immigration Advice Service
Exam Technique Training for OISC Level 1 The aim of the Exam Technique Training is to provide participants with a strong body of knowledge of the OISC Level 1 exam. Topics on the course include: Navigating the OISC Exam Resource Book Overview of the Syllabus for the Level 1 OISC Exam OISC competency levels What is an ‘open book’ exam? Practice mock exam questions Exam tips Q&A The course also includes the opportunity to practise a typical question under exam conditions. Following this, there will be time for collective discussion and group feedback. There is a limited capacity of 10 participants on this course so book early to avoid disappointment. The size of the course means that all individuals will have time to ask questions and learn as much as possible about how to prepare for the OISC Level 1 exam. Please note that this is an exam preparation course – not the OISC exam. We provide some of the most comprehensive immigration law training courses across the UK. This course is ideal for anyone who is preparing to take the OISC Level 1 exam. Join over 92% of satisfied customers who found their training with IAS useful and beneficial. You will also be provided with training materials to keep after completing the course. Course joining links, materials and instructions are sent out 24hours before the course starts. How can I prepare for the OISC Level 1 exam? You can prepare independently to take the OISC Level 1 exam. If you wish to maximise your chances of a successful result, we recommend taking a training course from experienced immigration lawyers. IAS offers OISC training at Level 1, Level 2, and Level 3 and has a strong track record in assisting candidates to successfully take the exam. The OISC Level 1 exam is divided into two parts. The first part consists of multiple-choice questions, while the second part consists of a number of scenario-based questions. This Exam Technique Training course will help you to prepare to take the exam and give you the knowledge and skills you need to be successful. What is included in the OISC Level 1 Syllabus? This half-day course does not cover the full training involved in the OISC Level 1 syllabus. However, some of the topics covered in the course will be relevant. Based on the latest syllabus, published by the Office of the Immigration Services Commissioner in 2013, the OISC Level 1 Training Course covers the following: Analysis of the structures, terminology, ethical practices and frameworks of immigration law Asylum and protection law European Economic Area (EEA) free movement law British naturalisation and British citizenship registration Immigration law for businesses Immigration appeals process and structures of the Asylum and Immigration Tribunal

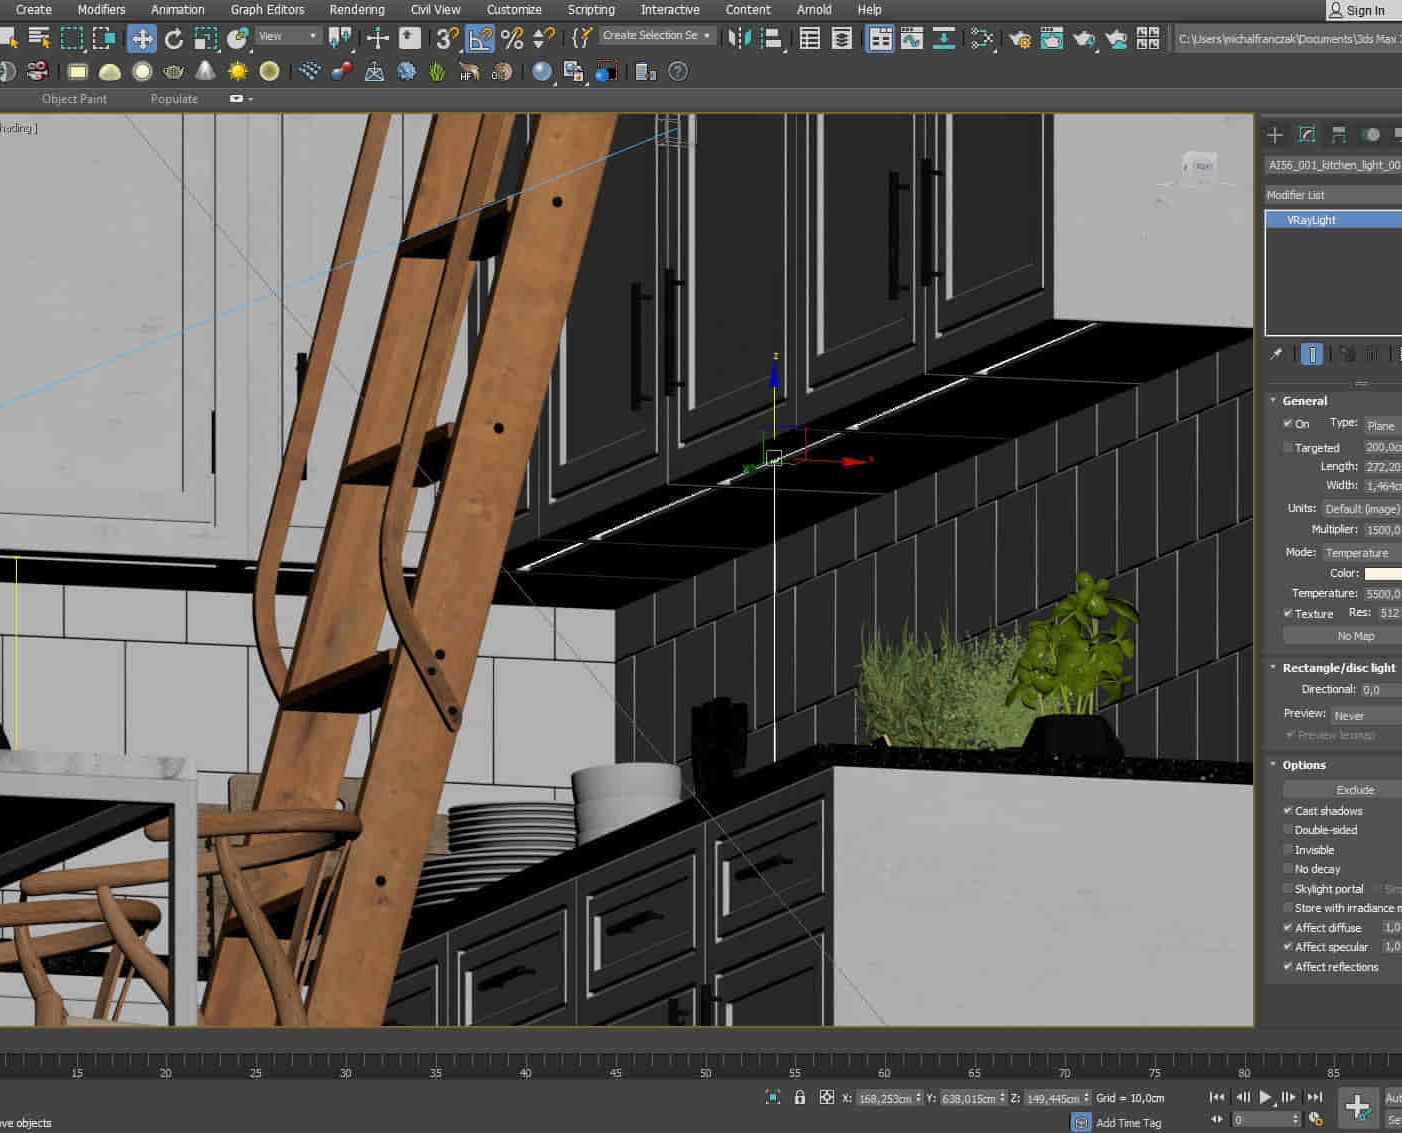
3ds Max and Vray Training 1-2-1 Live Online or Face-to-Face, Evening and Weekend
By Real Animation Works
3ds Max and Vray Training 1-2-1