- Professional Development
- Medicine & Nursing
- Arts & Crafts
- Health & Wellbeing
- Personal Development
1404 ESS courses in Cardiff delivered Live Online
Essential Skills for Practice Managers
By M&K Update Ltd
This workshop is aimed at practice managers who work in GP Practices and Health Centres or their equivalent. The purpose of this workshop is to equip practice managers with the tools and techniques they need to run a busy practice and/or team.

Essential Skills for Ward, Department and Team Managers
By M&K Update Ltd
This is a two-day course designed for ward, department and team managers in healthcare. It is suitable for both aspiring ward, department and team managers and those already in post.
SketchUp - Rendering with V-Ray Course
By ATL Autocad Training London
Who is this course for? SketchUp - Rendering with V-Ray Course This course is tailored for architects, designers, 3D artists, and anyone interested in enhancing their rendering skills using SketchUp and V-Ray. Whether you're a beginner or an experienced user, this course provides in-depth training to create stunning visualizations and realistic renders in SketchUp using V-Ray. Check our Website Course Duration: 6 hours Training Method: 1-on-1, (Face to Face) or Live Online session. Personalized to your needs. Course Content Overview: SketchUp and V-Ray: Exploring Intermediate Modeling Techniques Mastering V-Ray Materials: Textures, Sources, and Editing Managing and Optimizing Textures for Graphics and Bitmaps Illuminate Your Designs: Delving into Lighting: Types, Placement, and Scene Enhancement Understanding V-Ray Camera: Exposure, White Point, and Efficient Setup Achieve Stunning Renderings: Rendering Scenes: Digital Output, File Formats, and Best Practices Optimizing Quality Settings for Efficient Scene Creation Transitioning from 2D to 3D: Modeling Essentials for Visualization Utilizing Follow-Me and Push-Pull Techniques Enhancing Designs with Components: Choosing Between Groups and Components Mastering V-Ray Frame Buffer: Automatic 2D Graphic Saving File Types, Properties, and Effective Usage Perfecting V-Ray Materials: Materials Editor: Layering, Previews, and Shiny Surfaces Incorporating Bumps and Bitmaps for Realism Exploring Advanced Techniques: Unveiling Ambient Occlusion Effects Advanced Modeling, including Magic Box and Polygon Techniques Optimizing Texturing: Projected UVW Mapping Fine-Tuning Mapping Size and Position Locking Mapping for Consistency Alpha Channels: Preparing Graphics with Alpha Channels Integrating Rendered Output with Photoshop Hands-On Learning: Practical Exercises: From Concept to Stunning Renderings Vray for SketchUp Trial. https://www.chaosgroup.com/vray/sketchup/free-trial. Texture resources https://www.vray-materials.de/ and https://textures.com After completing the SketchUp and Vray course, participants will: Gain expertise in creating realistic 3D architectural and interior design scenes using Vray for SketchUp. Master lighting, camera settings, and composition for visually striking renders. Excel in applying Vray materials and textures for enhanced design quality. Produce high-quality renderings and refine them with post-production techniques. Receive a certification of attendance and 30 days of post-course email support. Job opportunities include roles in architectural visualization, interior design, real estate marketing, product design, and more. Skills Acquired: Advanced SketchUp Proficiency: Master advanced techniques for modeling and designing in SketchUp. V-Ray Rendering Skills: Learn how to use V-Ray to create realistic, high-quality renders in SketchUp. Texture Mapping and Material Application: Understand the art of texturing and applying materials for lifelike renders. Lighting Techniques: Explore various lighting setups to enhance the realism of your renders. Post-Processing: Gain skills in enhancing renders further through post-processing techniques. Job Opportunities: Architectural Visualizer: Create detailed and realistic architectural visualizations for projects. Interior Designer: Develop compelling interior visualizations for residential or commercial spaces. 3D Artist: Work in the gaming or animation industry, creating 3D models and environments. Visualization Specialist: Provide visualization services for real estate, marketing, or design agencies. Freelance Renderer: Offer your rendering services on a freelance basis to various clients. Why Choose Our Training? Personalized Coaching: Benefit from one-on-one training sessions conducted either Face to Face (SW96DE) or Live online, ensuring a tailored experience with practicing architects and designers. Flexible Hours: Our training is available Monday to Saturday from 9 am to 7 pm, accommodating your schedule for a seamless learning experience. Tailored Tutorials: Take advantage of custom video tutorials designed specifically for you, providing additional resources to enhance your learning journey. Comprehensive Reference: Receive a digital reference book to support thorough revision, ensuring a comprehensive understanding of each concept covered. Ongoing Support: Enjoy free and continuous support via phone or email even after the course concludes, ensuring your success beyond the classroom. Adaptable Syllabus: We customize the syllabus and projects to meet your specific needs, ensuring a focused learning experience on what matters most to you. Official Certification: Receive a certificate upon completing your course, recognizing your achievement in mastering the content. Why Us? Individualized Learning Support: Our courses, ranging from 10 hours to 120 hours Diploma training Courses, provide consistent support. With personalized assignments and post-course assistance, we guide you towards mastering software with dedicated help. Personal Attention, No Crowds: Say goodbye to crowded classrooms. Experience the intimacy of one-on-one learning, ensuring you receive the focused attention necessary for a confident and comfortable learning environment. Financial Flexibility: We understand the financial aspects of education. We offer various payment plans tailored to your needs, making your learning journey accessible and affordable. Expert Instructors, Real-world Knowledge: Our instructors are industry experts chosen for their extensive knowledge and teaching passion. Dedicated to imparting invaluable skills, they provide real-world insights to anyone eager to learn.

“You don't take a photograph. You make it" - Ansel Adams Photography For Parents - Editing In Lightroom Next course starts 11 March 2024 Editing is an essential skill for anyone with even just a passing interest in photography. Much as we try, we can't always get everything right in camera and editing tools help us bring our vision to life, help correct problems and allow our images to look beautifully polished. We teach how to do all these things in Adobe Lightroom because it's a powerful, intuitive and affordable tool used by Pros around the world for that very reason. KEY COURSE INFO: Course type: Instructor-led Course duration: 4 weeks + prep module Course format: Online course with interactive edit-along live classes, feedback on your learning and support group WHAT YOU LEARN: From being able to correct issues such as over/under exposure, issues with colour or graininess to bringing your vision to life, creating mood and tone to your images, knowing how to use editing software is a must. But good and purposeful editing goes way beyond just slapping on a preset or a filter - in our course we teach you all about the tools - not just what all of them do but how, and we teach you how to know what to use and when to achieve certain effects.everything you need to allow you to style your photos, confidently use the software and fix common problems. editing to correct common photo problems creating good editing workflow using powerful precision tools editing to achieve beautiful skin tones using light and colour creatively editing to bring out a mood of a feel THIS IS THE COURSE FOR YOU IF : Love taking photos but want them to look more polished - with colours that pop and light that's perfectly balanced You want to be able to fix common issues such as under- or overexposure, white balance or colour casts so that you never need to bin an image just because it wasn't right straight out of camera You want to get more creative with light and colour to make the images look just like the moment felt. Bring on the moody edits or sun soaked edits or light kissed skin tones or creative black and white conversions You want to confidently use the editing techniques so you can bring your vision to life every time, without guesswork You want to be able to prepare your images for print so that your walls can beam with pride at the beauty that you captured Next Editing in Lightroom course starts 11 March 2024 4 core course modules plus prep module Support Facebook group Weekly edit-along live webinar Practice files to learn on Feedback on your images HERE IS WHAT YOU WILL LEARN in this course : Our Photo Editing in Lightroom course guides you through the photo editing process in Adobe Lightroom from start to finish – from setting it up correctly, organising your collections and creating a workflow that works for you, through learning the capabilities of all the editing tools - such as adjusting exposure, colours, light or sharpening the images; all the way to printing and creating photo books. We’ll show you how to create specific artistic effects ( high impact Black and white, vintage, light and airy, dark and moody etc ), and how to fix common photography problems ( grainy images, underexposed images, wrong colours etc). At the end of the course you will be able to confidently manage your photo collection with Lightroom, achieve desired artistic effects and make your photos truly stand out. Getting around in Lightroom and Lightroom Classic - shooting in full manual - but with clarity and purpose Correcting common problems - whether your photo started too dark or too bright, your child's face was in a shade, the white balance and colours were off, the grain was heavy, the light looked dull - you can fix it all within a couple of clicks in Lightroom Using Lightroom's super powerful intelligent masking tools to quickly and efficiently edit specific parts of your image - from brightening up the eyes to rescuing overblown skies Enhancing and adding beautiful light - light makes images stand out, but it can be hard capturing the atmosphere it creates in camera at times. Lightroom is where you can bring light to life and make your images feel how what you saw in real life Knowing how to shoot in camera so you can get the most in editing - photographers will often purposefully under or overexpose images in camera so that they have more chance of balancing the image just they way they want in Lightroom. INSIDE THE MODULES - aka WHAT DO YOU LEARN? Module 0: Getting set up in Lightroom This module is released a week before the course starts to give you a chance to fully familiarise yourself with the layout, structure and the best way of working in Lightroom Classic, including guidance of creating a smooth selection and culling process that helps you see and keep the best of your images, without getting bogged down with 100s near duplicates. Module 1: Getting Started In Lightroom - Global Edits In this module we introduce you to Lightroom's most powerful tools - the global edits. We help you understand how to tweak your images to achieve the effects you're after quickly - from adjusting over and under exposure, to correcting white balance in a few different ways, to having a play with my favourite Lightroom tool - the tone curve. Major Takeaways: At the end of the module you will have gained full control of lightroom key global tools and will be able to use them to correct any global - as in affecting the whole image - issues with your images. This includes perfecting your exposure, balancing your colour and white balance, sharpening and creating clarity and more. Module 2: Targeted Edits - Masks! Lightroom allows us to apply edits to selected parts of the image through a range of its very powerful, intelligent and manual masks. This means you can now effortlessly select your subject from the photo to adjust them separately with just one click, you can pick only the sky, the subject's eyes or only colour green or any other element and treat them differently to the rest. Major Takeaways: You will be able to use the full range of masks in lightroom and apply your edits exactly where they are needed, and nowhere else. This includes working with with the new AI powered masks which can detect a person's individual features and allow you to selectively edit them in a few simple steps, as well as those more manual tools, that allow you to literally paint with light and colour on your photographs. Module 3: Creative Editing in Lightroom This is a brand new module in our course where we take all the tools introduced in Modules 1 and 2 and actually use them to achieve different effects on our photos. Wer show you how to be guided by light when editing, how to achieve a light and airy or a moody edit on your images, how to add light and how to convert to black and white, as well as how to edit skin in Lightroom! This module is all play! Major Takeaways: You will learn how to create yoru own editing process - from knowing where to start and to understanding what elements of your photograph may need or benefit from adjusting and knowing how you can do so to achieve different outcomes. You will also learn how to edit your skin tones so they look delightful - no matter what your subject's complexion. Module 4: After the edits We close the course with a module centered around all the things you might want to do after the edits - from preparation for print, creating photo books, but also sharing your images online and syncing them between different machines and adobe workplaces. PLUS there is a little Photoshop intro so you get a glimpse at how it's different and what it can do. Major Takeaways: You will learn how to connect all of your Adobe ecosystem and sync and share your images across multiple devices. You will learn how to prepare your images for print so they look their very best and how to create photobooks. Next course starts 11 March 2024 Absolutely, without a doubt book Editing. I was very unsure at first. My interest in photography is to capture those memories so it felt like it was 'cheating' to edit. I can honestly say it's like magic.To finish off the pictures you love and just give you complete control over the exposure, colours to make them perfect, to rescue the disasters etc. I learnt so much in those few weeks and it made the biggest difference to my photos. Kerry White Editing in LIGHTROOM Book your space now: COURSE STARTS : 11 March 2024 ( 4 weeks + 1 prep week)COURSE COST : £179 ( payment plans available ) What’s included: 4 weekly modules with step by step illustrated tutorials and videos + prep module weekly edit along class online class ( also recorded) - on Wednesday evenings feedback and advice on your edits private support group PDF workbook and downloadable videos Practice images to learn on Join our next group to really bring life to your images and make them look sleep, polished and full of light COURSE PREREQUISITES: Lightroom or Lightroom Classic CC software installed on your computer or tablet. RECOMENDED : Lightroom Photography Plan 25GB – a monthly subscription at approx £9pm – including Lightroom CC, Lightroom Classic CC and Photoshop. This plan can also be occasionally purchased at a lower price via Amazon or Groupon if you purchase a year’s worth of subscription in one go ( average savings – around 2-4 months worth depending on the deal) Please note that Adobe also has a Lightroom Plan with 1TB of storage – we do not recommend this plan as it restricts you to one version of software only. The increased Cloud storage can always be purchased as an add on or your plan can be switched from Photographer plan to CC only at a later stage if you prefer.

Course summary This Python Programming course has become essential to all professional who would like to do code using Python. Learn evenings, work while studying. Work and study Python Part Time. It is a Python beginners course and teaches Python coding from scratch to intermediate. Hands-on, practical. We code some real life examples in this course.

EUSR SHEA Core Qualification – Safety, Health & Environmental Awareness The EUSR SHEA Core Qualification (Safety, Health and Environmental Awareness) is a foundational training programme that provides essential health, safety, and environmental understanding for individuals working across a wide range of industries, including utilities, construction, and engineering. Developed by Energy & Utility Skills, the SHEA Core qualification is recognised nationally and forms the basis of all SHEA schemes. It delivers a strong grounding in workplace safety principles and prepares learners for more specialised SHEA sector schemes such as SHEA Water, SHEA Gas, SHEA Power, and SHEA Waste & Resource Management.

Analysing and Managing Key Data
By Centre for Competitiveness
Data Data Everywhere – For what purpose? Which data is crucial to driving your organisation? How do we Analyse data to drive improvements? Course Overview Organisations generally collect enormous amounts of data. However, what data or information is really needed? How do we present the data that we have collected so that it is openly available and can be understood and used to drive the business? Is the data collected driving change? Structure of the Course This one-day workshop will enable participants to gain the necessary skills to collect, analyse and present data in an understanding and meaningful way and assist the decision-making process. It looks at how to translate data into useful and meaningful information that can contribute towards real problem solving, effective performance indicators, leading to the development of effective KPI’s, among others. Alternatively, if an organisation is in the process of selecting data collection methods and appropriate analysis, then this workshop will also help. Data analysis skills are essential to providing honest and accurate analysis, determining statistical significance, reliability, and validity on which to base their decisions, whether it is to improve quality, profitability, efficiency, or competitiveness. Improper statistical analyses distort findings and can mislead or negatively influence decision-making and the perception of the data collected. The correct analysis of data is a process of systematically applying statistical and / or logical techniques to describe and illustrate, condense, and recap, and evaluate data so that it can be used effectively. This workshop provides essential learning for staff at all levels of the organisation. Course content: 1. Data Types Discrete data Continuous data 2. Data Collection Sheet design Testing, prior to full-scale data collection 3. Data Input into Spreadsheet 4. Determination of Basic Descriptive Statistics Mean Median Mode Minimum and maximum values Range Standard deviation 5. Graphical Analysis Bar charts Line graphs Pie charts Scatter diagrams 6. Determination of Relationships between Factors Relationship between discrete factors Relationship between continuous factors 7. Use of Data in Decision Making 8. Establishment of Key Performance Indicators 9. Determination of Data Reliability 10. Summary Who would benefit from this Approach? Anyone who collects, manages, analyses and uses data to drive business performance. Delivery The course is delivered through virtual, tutor-led classes as structured above. The platform used is Adobe Connect which utilizes e-work rooms, video and streamed trainers. Cost £200 + VAT If you are not yet a member but are already thinking about joining CforC, you can find more information on how to become a member and the benefits by clicking here.

Adobe After Effects Fast-Track Course (Live Online)
By ATL Autocad Training London
Adobe After Effects Fast-Track Course (Live Online) through our comprehensive course, beginners, intermediate, and advanced learners. Perfect your skills at the top Training Centre in the UK. Dive into motion graphics and animation with hands-on training led by expert tutors ensuring a practical and interactive learning experience. Click here for more info: Website Duration: 5 hours Approach: Personalized 1-on-1sessions and Customized content. Schedule: Select your preferred hour from Monday to Saturday between 9 am and 7 pm. Adobe After Effects Essentials (5-hour course) Session 1: Introduction to After Effects (1 hour) Overview of After Effects and its applications in motion graphics and visual effects. Understanding the workspace and interface. Importing and organizing assets for seamless workflow. Creating projects and compositions. Session 2: Animation Basics (1.5 hours) Working with layers: Adding, editing, and arranging layers in the timeline. Keyframe animation: Introduction to keyframes and creating simple animations. Motion paths: Manipulating motion paths for dynamic animations. Easing motion: Applying ease in and ease out to smoothen animations. Animation presets: Utilizing built-in presets for efficient animation. Session 3: Effects and Compositing (1.5 hours) Applying effects: Adding visual effects to layers and compositions. Compositing techniques: Understanding blending modes and layer styles. Masking and track mattes: Using masks to control the visibility of layers and apply effects. Motion tracking: Applying tracking data to objects in a scene. Session 4: Text and Shape Animation (1 hour) Text animation: Creating and animating text layers with different styles. Shape layers: Introduction to shape layers and their applications. Animating shapes: Using shape layers to create dynamic animations. Session 5: Final Project and Exporting (1 hour) Applying all the learned techniques to create a final motion graphics project. Refining the project and adding finishing touches. Understanding export settings and rendering the final output. Read the usefull Blogs https://realanimationworks.com/government-funded-interior-design-courses-in-london-your-path-to-creative-excellence/ Upon completing the Adobe After Effects Essentials course, participants will: Master the Interface: Understand After Effects' layout, tools, and key functionalities, gaining confidence in navigating the software. Animation Proficiency: Gain expertise in animating images, videos, and text layers using keyframes, easing techniques, and smooth transitions. Effects Application: Learn to apply, customize, and animate various visual effects, enhancing the overall visual appeal of multimedia projects. Masking and Precision Editing: Master the art of creating and animating masks for detailed and accurate editing, enabling seamless integration of visual elements. Advanced Compositing Skills: Explore advanced compositing techniques for combining multiple elements seamlessly, achieving professional-level visual integration. Export and Rendering Mastery: Understand export settings, ensuring optimal video quality for diverse output formats. Learn the art of efficient rendering for polished final products. Certificate of Completion: Receive a certificate validating the successful completion of the course, showcasing newfound skills to potential employers or clients. Practical Knowledge: Acquire practical insights and techniques applicable to real-world projects, ensuring the ability to create visually captivating multimedia content independently. Lifetime Learning Support: Benefit from lifetime email support, enabling continuous learning and assistance with any post-course queries or challenges. After Effects CC Training: From Novices to Experts Immerse yourself in the world of motion graphics and VFX with our Adobe Certified After Effects Courses, suitable for total novices and experts alike. Learn to create captivating motion graphics, smooth animations, and stunning special effects in a professional environment. Choose from four learning options: London Classroom: Attend in-person sessions 1-2-1 in our dynamic studio. Live Online Classes: Join interactive classes from the comfort of your home or office. Bespoke Training: Tailor the course to your specific needs and preferences. Whichever path you select, all options cover the same lesson plan delivered by our Certified Professional Trainers. Rest assured, your learning experience is fully supported by our 100% Satisfaction Guarantee. Personalized After Effects Training: Tailored for You! Custom one-on-one sessions, in-person or online. Work with your files, learn at your pace. Expert trainers in London. Team training available. Benefits: Unlimited post-course support via phone/email. Access to training materials and a handbook. Free pre-course consultation. Achieve impressive results: create captivating videos, animated logos, and more. Master cinematic effects and enhance your visual storytelling skills.
Goldwork embroidery, Incognito: Live Zoom class
By Ecole Saint Clare
Improve your knowledge of goldwork with this intricate design

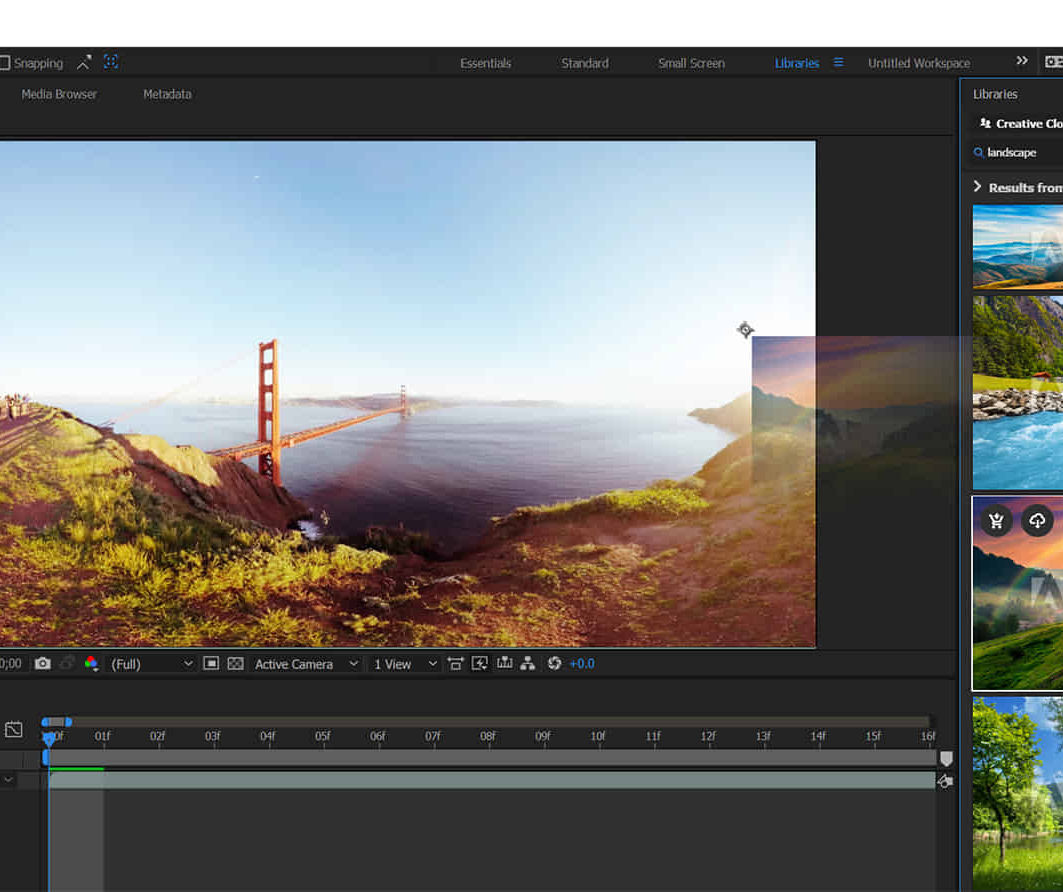
Introduction to Adobe After Effects Online
By Platform Training
Live online course with study materials and certificate of completion included Adobe After Effects is recognised as an essential tool for motion graphics and visual effects. Our introductory Adobe After Effects course is designed for those new to post-production techniques, and would like to get the most from this immensely powerful application. Whether you are a motion graphics designer, a web designer, rich media artist or broadcast video editor, this course covers all the techniques you need to successfully start using, or significantly improve your command over, Adobe After Effects. Description Completing this course will enable you to do the following and more: Become familiar with the After Effects workspace Create animations using keyframes Understand keyframe interpolation and velocity Work with the graph editor to fine tune animations Work with Solid, Text and Null layers Work with masks, mattes and track mattes Create Compositions Incorporate video with Photoshop and Illustrator. Use video layering with transfer and blending modes Use Motion Tracker and 3D Camera Tracker Apply and animate Effects Use Colour Correction / Glows + Curves Use filters for special effects Render your final project For the full course content please download the course information pdf listed above. Who is this course for? This workshop is suitable for anyone who wishes to learn Adobe Afer Effects from scratch or wants to improve their existing knowledge of the program. Requirements Attendees should have basic PC or Mac skills. You will need a broadband internet connection to participate in this live online course. Certificates Certificate of completion Digital certificate - Included