- Professional Development
- Medicine & Nursing
- Arts & Crafts
- Health & Wellbeing
- Personal Development
1097 Engineer courses delivered Live Online
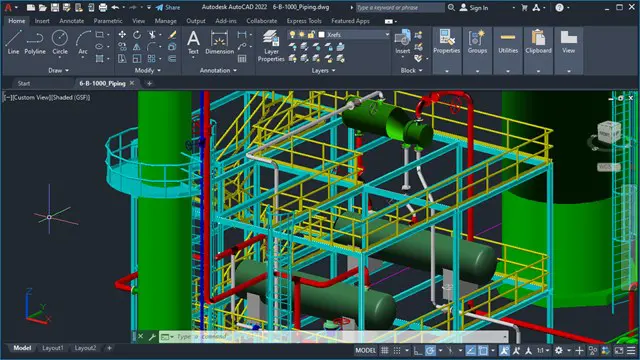
AutoCAD 3D modeling course
By Real Animation Works
Autocad face to face training customised and bespoke.
AI-900T00 Microsoft Azure AI Fundamentals
By Nexus Human
Duration 1 Days 6 CPD hours This course is intended for The Azure AI Fundamentals course is designed for anyone interested in learning about the types of solution artificial intelligence (AI) makes possible, and the services on Microsoft Azure that you can use to create them. You don?t need to have any experience of using Microsoft Azure before taking this course, but a basic level of familiarity with computer technology and the Internet is assumed. Some of the concepts covered in the course require a basic understanding of mathematics, such as the ability to interpret charts. The course includes hands-on activities that involve working with data and running code, so a knowledge of fundamental programming principles will be helpful. This course introduces fundamentals concepts related to artificial intelligence (AI), and the services in Microsoft Azure that can be used to create AI solutions. The course is not designed to teach students to become professional data scientists or software developers, but rather to build awareness of common AI workloads and the ability to identify Azure services to support them. Prerequisites Prerequisite certification is not required before taking this course. Successful Azure AI Fundamental students start with some basic awareness of computing and internet concepts, and an interest in using Azure AI services. Specifically: Experience using computers and the internet. Interest in use cases for AI applications and machine learning models. A willingness to learn through hands-on exp... 1 - Fundamental AI Concepts Understand machine learning Understand computer vision Understand natural language processing Understand document intelligence and knowledge mining Understand generative AI Challenges and risks with AI Understand Responsible AI 2 - Fundamentals of machine learning What is machine learning? Types of machine learning Regression Binary classification Multiclass classification Clustering Deep learning Azure Machine Learning 3 - Fundamentals of Azure AI services AI services on the Azure platform Create Azure AI service resources Use Azure AI services Understand authentication for Azure AI services 4 - Fundamentals of Computer Vision Images and image processing Machine learning for computer vision Azure AI Vision 5 - Fundamentals of Facial Recognition Understand Face analysis Get started with Face analysis on Azure 6 - Fundamentals of optical character recognition Get started with Vision Studio on Azure 7 - Fundamentals of Text Analysis with the Language Service Understand Text Analytics Get started with text analysis 8 - Fundamentals of question answering with the Language Service Understand question answering Get started with the Language service and Azure Bot Service 9 - Fundamentals of conversational language understanding Describe conversational language understanding Get started with conversational language understanding in Azure 10 - Fundamentals of Azure AI Speech Understand speech recognition and synthesis Get started with speech on Azure 11 - Fundamentals of Azure AI Document Intelligence Explore capabilities of document intelligence Get started with receipt analysis on Azure 12 - Fundamentals of Knowledge Mining with Azure Cognitive Search What is Azure Cognitive Search? Identify elements of a search solution Use a skillset to define an enrichment pipeline Understand indexes Use an indexer to build an index Persist enriched data in a knowledge store Create an index in the Azure portal Query data in an Azure Cognitive Search index 13 - Fundamentals of Generative AI What is generative AI? Large language models What is Azure OpenAI? What are copilots? Improve generative AI responses with prompt engineering 14 - Fundamentals of Azure OpenAI Service What is generative AI Describe Azure OpenAI How to use Azure OpenAI Understand OpenAI's natural language capabilities Understand OpenAI code generation capabilities Understand OpenAI's image generation capabilities Describe Azure OpenAI's access and responsible AI policies 15 - Fundamentals of Responsible Generative AI Plan a responsible generative AI solution Identify potential harms Measure potential harms Mitigate potential harms Operate a responsible generative AI solution Additional course details: Nexus Humans AI-900T00 - Microsoft Azure AI Fundamentals training program is a workshop that presents an invigorating mix of sessions, lessons, and masterclasses meticulously crafted to propel your learning expedition forward. This immersive bootcamp-style experience boasts interactive lectures, hands-on labs, and collaborative hackathons, all strategically designed to fortify fundamental concepts. Guided by seasoned coaches, each session offers priceless insights and practical skills crucial for honing your expertise. Whether you're stepping into the realm of professional skills or a seasoned professional, this comprehensive course ensures you're equipped with the knowledge and prowess necessary for success. While we feel this is the best course for the AI-900T00 - Microsoft Azure AI Fundamentals course and one of our Top 10 we encourage you to read the course outline to make sure it is the right content for you. Additionally, private sessions, closed classes or dedicated events are available both live online and at our training centres in Dublin and London, as well as at your offices anywhere in the UK, Ireland or across EMEA.

Level 1 Diploma in Motor Vehicle Studies - OFQUAL Accredited (RQF)
By Evo Education and Training Centre
The Level 1 Diploma in Motor Vehicle Studies is designed to encourage and enable learners who have an interest in this area of study to acquire knowledge and skills to aid progression to further study or employment.

Python Programming: Beginner To Expert
By NextGen Learning
Python Programming: Beginner To Expert Course Overview The "Python Programming: Beginner to Expert" course provides a comprehensive learning journey from the basics of Python to advanced programming techniques. Designed to equip learners with the skills necessary to become proficient Python developers, this course covers a broad range of essential topics, including data types, operators, functions, error handling, and object-oriented programming (OOP). By the end of the course, learners will gain the expertise needed to develop complex applications and tackle real-world problems using Python. The course is ideal for those looking to deepen their understanding of programming and advance their careers in software development, data science, or automation. Course Description This course delves deeply into Python programming, beginning with the fundamentals and progressing to advanced concepts. Learners will explore core programming techniques, including control flow, functions, and error handling, as well as specialized topics such as object-oriented programming (OOP) and libraries like NumPy and Pandas. The course also covers career development topics, such as how to start a career in Python programming. Students will gain a solid understanding of Python’s capabilities and how to apply them across a variety of programming contexts, from scripting to data analysis and more. With its structured modules and clear guidance, learners will finish the course ready to take on more advanced programming projects and pursue roles in the field. Python Programming: Beginner To Expert Curriculum Module 01: Introduction to Python Programming from A-Z Module 02: Getting Familiar with Python Module 03: Basic Data Types Module 04: Python Operators Module 05: Advanced Data Types Module 06: Control Flow Part 1 Module 07: Control Flow Part 2 Module 08: Python Functions Module 09: User Input and Error Handling Module 10: Python Advanced Functions Module 11: Python Scripting and Libraries Module 12: NumPy Module 13: Pandas Module 14: Introduction to OOP Module 15: Advanced OOP Module 16: Starting a Career in Python (See full curriculum) Who is this course for? Individuals seeking to start a career in Python programming. Professionals aiming to enhance their programming skills for career development. Beginners with an interest in software development, data science, or automation. Those looking to expand their programming knowledge in a structured and progressive way. Career Path Python Developer Software Engineer Data Analyst Data Scientist Automation Specialist Web Developer Backend Developer

PHP for Beginners 2023 Guide: Develop a ECommerce Store
By NextGen Learning
PHP for Beginners 2023 Guide: Develop a ECommerce Store Course Overview This course provides a comprehensive introduction to PHP programming through the development of a fully functional eCommerce store. Learners will explore core PHP concepts while building practical features such as product management, user authentication, shopping cart functionality, and payment integration using Stripe. Designed for beginners, the course emphasises clear, step-by-step instruction to equip learners with the skills needed to create dynamic, database-driven web applications. By the end of the course, participants will be confident in setting up a PHP environment, developing user and admin interfaces, and managing eCommerce workflows effectively. This guide is ideal for anyone looking to launch their journey into web development or expand their programming toolkit with essential PHP knowledge relevant to modern online retail solutions. Course Description Delving deeper into PHP fundamentals, this course guides learners through the full lifecycle of building an eCommerce website. It covers everything from installing the necessary tools to implementing secure authentication systems and managing product categories. Participants will learn how to structure their code efficiently, interact with databases, and integrate payment gateways like Stripe to process transactions securely. The curriculum balances foundational theory with project-based learning, ensuring students acquire not only programming syntax but also an understanding of real-world web application workflows. By mastering user-facing and admin panel functionalities, learners develop versatile skills applicable across various web development projects. Throughout the course, the focus remains on building scalable, maintainable code following best practices in PHP development. PHP for Beginners 2023 Guide: Develop a ECommerce Store Curriculum Module 01: Introduction Module 02: Installation Module 03: Getting Started with the Project and Authentication System Module 04: Preparing Products Module 05: Developing Cart and Payment with Stripe Module 06: Categories and Finishing Users Side Module 07: Getting Started with Admin Panel Module 08: Finishing Categories (Admin Side) Module 09: Finishing Products (Admin Side) Module 10: Update: Extra Lectures Module 11: Update - Creating a Wishlist System (See full curriculum) Who Is This Course For? Individuals seeking to learn web development with PHP. Professionals aiming to enhance their programming skills for career growth. Beginners interested in creating eCommerce websites. Anyone wanting to understand backend development and payment integration. Career Path Junior PHP Developer Web Developer (Front and Back End) ECommerce Developer Full Stack Developer Software Engineer in Web Technologies

Revit One to One Basic to Advance Weekends Online or Face to Face
By Real Animation Works
Revit face to face training customised and bespoke. Online or Face to Face

This ACS renewal reassessment gas safe course is for existing gas engineers who have previously passed the ACS assessment and need to renew their qualifications and certification. This qualification needs renewing every five years for gas engineers to continue working safely, legally, and to remain on the gas safe register. To be eligible for this course, candidates must ACS qualifications must have expired within the last 12 months or be due to expire in the next 6 months – if it has been over 12 months, the new entrant’s assessment must be taken. This ACS renewal reassessment course is ideal for category 1 gas engineers who predominately work with boilers & appliance’s including CCN1, CPA1, CENWAT, HTR1, and CKR1. Your training & assessment will be easier to determine if you have been regularly undertaking the areas of gas work covered by your existing certification. Reassessment ACS is a mixture of assessing both your practical skills and theory knowledge and covers all updates since you last took the qualification. What does this cover? The core domestic gas safety course (CCN1) plus appliances, includes training and re-assessment on CCN1 CENWAT (Central Heating Boilers and Water Heaters) CKR1 (Cookers) HTR1 (Space heaters, including gas fires and wall heaters.) MET1: Meters There’s also the opportunity to cover the below for an extra fee if required: Water Regulations Advisory Scheme (WRAS) Unvented Hot Water Heating The assessment is a mixture of practical and theory, testing candidates skills and knowledge. Our aim is to make your ACS reassessment informative to make the most of your time off the “tools”. Our facilities have a superb range of boilers & appliances along with staff with both years of both practical & training knowledge enabling you to take real value from your training & assessment.
