- Professional Development
- Medicine & Nursing
- Arts & Crafts
- Health & Wellbeing
- Personal Development
4415 EDI courses
Lumion 3d Realtime Rendering Training
By London Design Training Courses
Why Choose Lumion 3d Realtime Rendering Training Course? Course Link Our Lumion Course is best for materials, lighting, and animation skills. Learn high-quality rendering using Lumion's asset library. In-person or live online sessions with lifetime access to recordings and email support. Unleash Lumion's potential for immersive architectural visualizations. Duration: 10 hrs Method: 1-on-1, Personalized attention Schedule: Tailor your own hours of your choice, available from Mon to Sat between 9 am and 7 pm What is Lumion? Lumion is specialized 3D rendering software designed for architects and designers. With Lumion, you can quickly bring your 3D design models to life, add materials, furnish interiors and exteriors, and showcase the impact of lighting and shadows without the need for specialized training. Objectives of the Course The course aims to teach you how to start Lumion projects, add environments, cameras, illuminations, populate scenes with various elements, create terrains, and produce animations. Lumion 3D Course Outline Module 1: Introduction to Lumion 3D Discovering Lumion 3D's capabilities and interface navigation. Learning shortcut keys for efficient workflow. Customizing settings for optimal performance. Module 2: 3D Models and Materials Importing 3D models in various formats. Applying and tweaking materials. Creating procedural materials and glass effects. Troubleshooting common issues. Module 3: Creating a Project in Lumion Building scenes and sculpting terrain. Enhancing realism with alpha and height maps. Module 4: 3D World Managing multiple 3D objects and their properties. Implementing grass and scattering elements. Module 5: Lighting in Lumion 3D Utilizing weather settings for dynamic scenes. Understanding Lumion lights and interior/exterior illumination. Creating 3D reflections and spotlights. Module 6: Realistic Visualizations Incorporating special effects like fire, smoke, and fog. Achieving realism with camera effects and shadows. Rendering still images and animations. Module 7: NPR Visualizations Creating non-photorealistic visualizations with artistic effects. Implementing unique styles for enhanced visuals. Module 8: Artistic Effects in Lumion 3D Exploring conceptual visualizations with painting and sketch effects. Creating cartoon effects and understanding perspectives. Module 9: Animation in Lumion 3D Timing and working with cameras for dynamic shots. Composing animation clips and adding effects. Utilizing layers and control objects for precise control. Module 10: Advanced Features Import and output formats in Lumion. Expanding assets with the 3D model library. Adding animated characters and sound effects. Utilizing the advanced material library. Controlling environment and weather for dynamic scenes. Scene management and movie editing within Lumion 3D. Lumion for Students | Unleash Your Creativity https://lumion.com› product › students Unlock the full potential of your designs with Lumion for students. Request your free 1-year Student license now and bring your visions to life!
Podcasting and Video Editing - Double Endorsed Certificate
By Imperial Academy
2 QLS Endorsed Course | CPD Certified | Free PDF + Hardcopy Certificates | 80 CPD Points | Lifetime Access
Refresher training IV sedation for Dentists and Nurses
By UKSedation
Work in Dentistry and provide sedation for your patients? This one day face to face course gives 7 hour vCPD and will refresh you on techniques and scenarios. Includes Practical training with blood pressure, pulse oximetry, cannulation and monitoring, along with emergency scenarios. THIS ONE DAY FACE TO FACE COURSE IS DESIGNED FOR DENTISTS AND NURSES ALREADY IN THE FIELD OF DENTAL SEDATION, WITH UPDATES ON REGULATIONS ALONG WITH PRACTICAL STATIONS ON CANNULATION, PROBLEM SOLVING, ASSESSMENTS AND MONITORING. PART OF THE DAY WILL INVOLVE SOME AIRWAY MANAGEMENT TRAINING AS WELL. Course Includes 24 Lessons 14 Quizzes Course Certificate About Instructor Rob Endicott Roy Bennett Dr Roy Bennett is the director of Mellow Dental Training, IACSD accredited trainer and mentor and former director of Portmans Dental Care. Dr Rob Endicott is an IACSD accredited trainer and mentor and is the ViceChair of the ADAS (Association of Dental Anaesthetists and Sedationists)

3ds Max and Vray Training
By London Design Training Courses
Why Choose 3ds Max and Vray Training Course? Click here for more info 3ds Max a valuable tool for architectural modeling, product design, and manufacturing across numerous industries. While widely utilized, mastering the software requires effort. Engaging in 3ds Max tutorials proves particularly advantageous for game designers, aiding in their career advancement. Duration: 10 hrs Method: 1-on-1, Personalized attention Schedule: Tailor your own hours, available from Mon to Sat between 9 am and 7 pm Our 3ds Max course consists of two main sections, covering architectural visualizations for both interior and exterior scenes. By the end of the training, you'll have the expertise to create professional projects independently. We begin with fundamental and advanced 3D modeling, starting from simple objects and progressing to complex buildings, interiors, and products. 3ds Max and Vray Comprehensive Course Course Duration: 10 hours Course Overview: This course is designed to offer a comprehensive introduction to 3ds Max and Vray. Throughout this program, you will acquire the knowledge necessary to proficiently create 3D models, apply materials and textures, configure lighting and camera systems, and produce high-quality Vray renders. This course is suitable for individuals with various levels of experience, from beginners to those with some prior exposure to 3D modeling and rendering. Course Outline: Module 1: Introduction to 3ds Max and Vray Familiarization with the 3ds Max interface Configuring the workspace Navigating within 3ds Max Introduction to Vray and its user interface Module 2: 3D Modeling Creating fundamental shapes Employing modifiers Crafting intricate shapes through advanced 3D modeling techniques Grasping the fundamentals of polygonal modeling Crafting both organic and inorganic models Module 3: Materials and Textures Application and modification of textures Understanding UVW mapping Utilizing the material editor Developing custom materials Leveraging Vray materials Module 4: Lighting Introduction to various lighting techniques Exploring different types of lights Comprehending light properties Configuring lights for a scene Employing Vray lights Module 5: Cameras Familiarization with camera systems Understanding camera properties Setting up camera views Creating animations using cameras Utilizing Vray cameras Module 6: Rendering Introduction to rendering Exploring Vray Global Illumination Utilizing Vray Physical Cameras Harnessing Vray HDRI Lighting Implementing the Vray Rendering Workflow Module 7: Projects Integrating all acquired knowledge Crafting a simple interior scene Constructing a basic exterior scene Developing a complex scene featuring multiple objects and materials Course Requirements: To participate in this course, you will need: A computer with 3ds Max and Vray installed (trial versions can be obtained from Autodesk and Chaos Group websites) Basic computer operation skills An interest in 3D modeling and animation Course Goals: Upon completing this course, you will have gained a comprehensive understanding of 3ds Max and Vray. You will possess the skills required to create realistic and visually captivating 3D scenes using Vray. Furthermore, you will be well-equipped to continue honing your 3D modeling and rendering abilities. Resources: Vray Trial Download: https://www.chaosgroup.com/vray/sketchup/free-trial Materials:https://www.vray-materials.de/ Textures: https://textures.com/ By completing the 3ds Max and Vray Training Course, participants will acquire proficiency in 3D modeling and rendering using 3ds Max. They will establish a solid foundation and essential skills, enabling them to create captivating visualizations. This expertise opens doors to various job opportunities in fields such as architectural visualization, game design, film production, and product modeling.

Video Editing and Adobe After Effects - Double Endorsed Certificate
By Imperial Academy
2 QLS Endorsed Course | CPD Certified | Free PDF + Hardcopy Certificates | 80 CPD Points | Lifetime Access
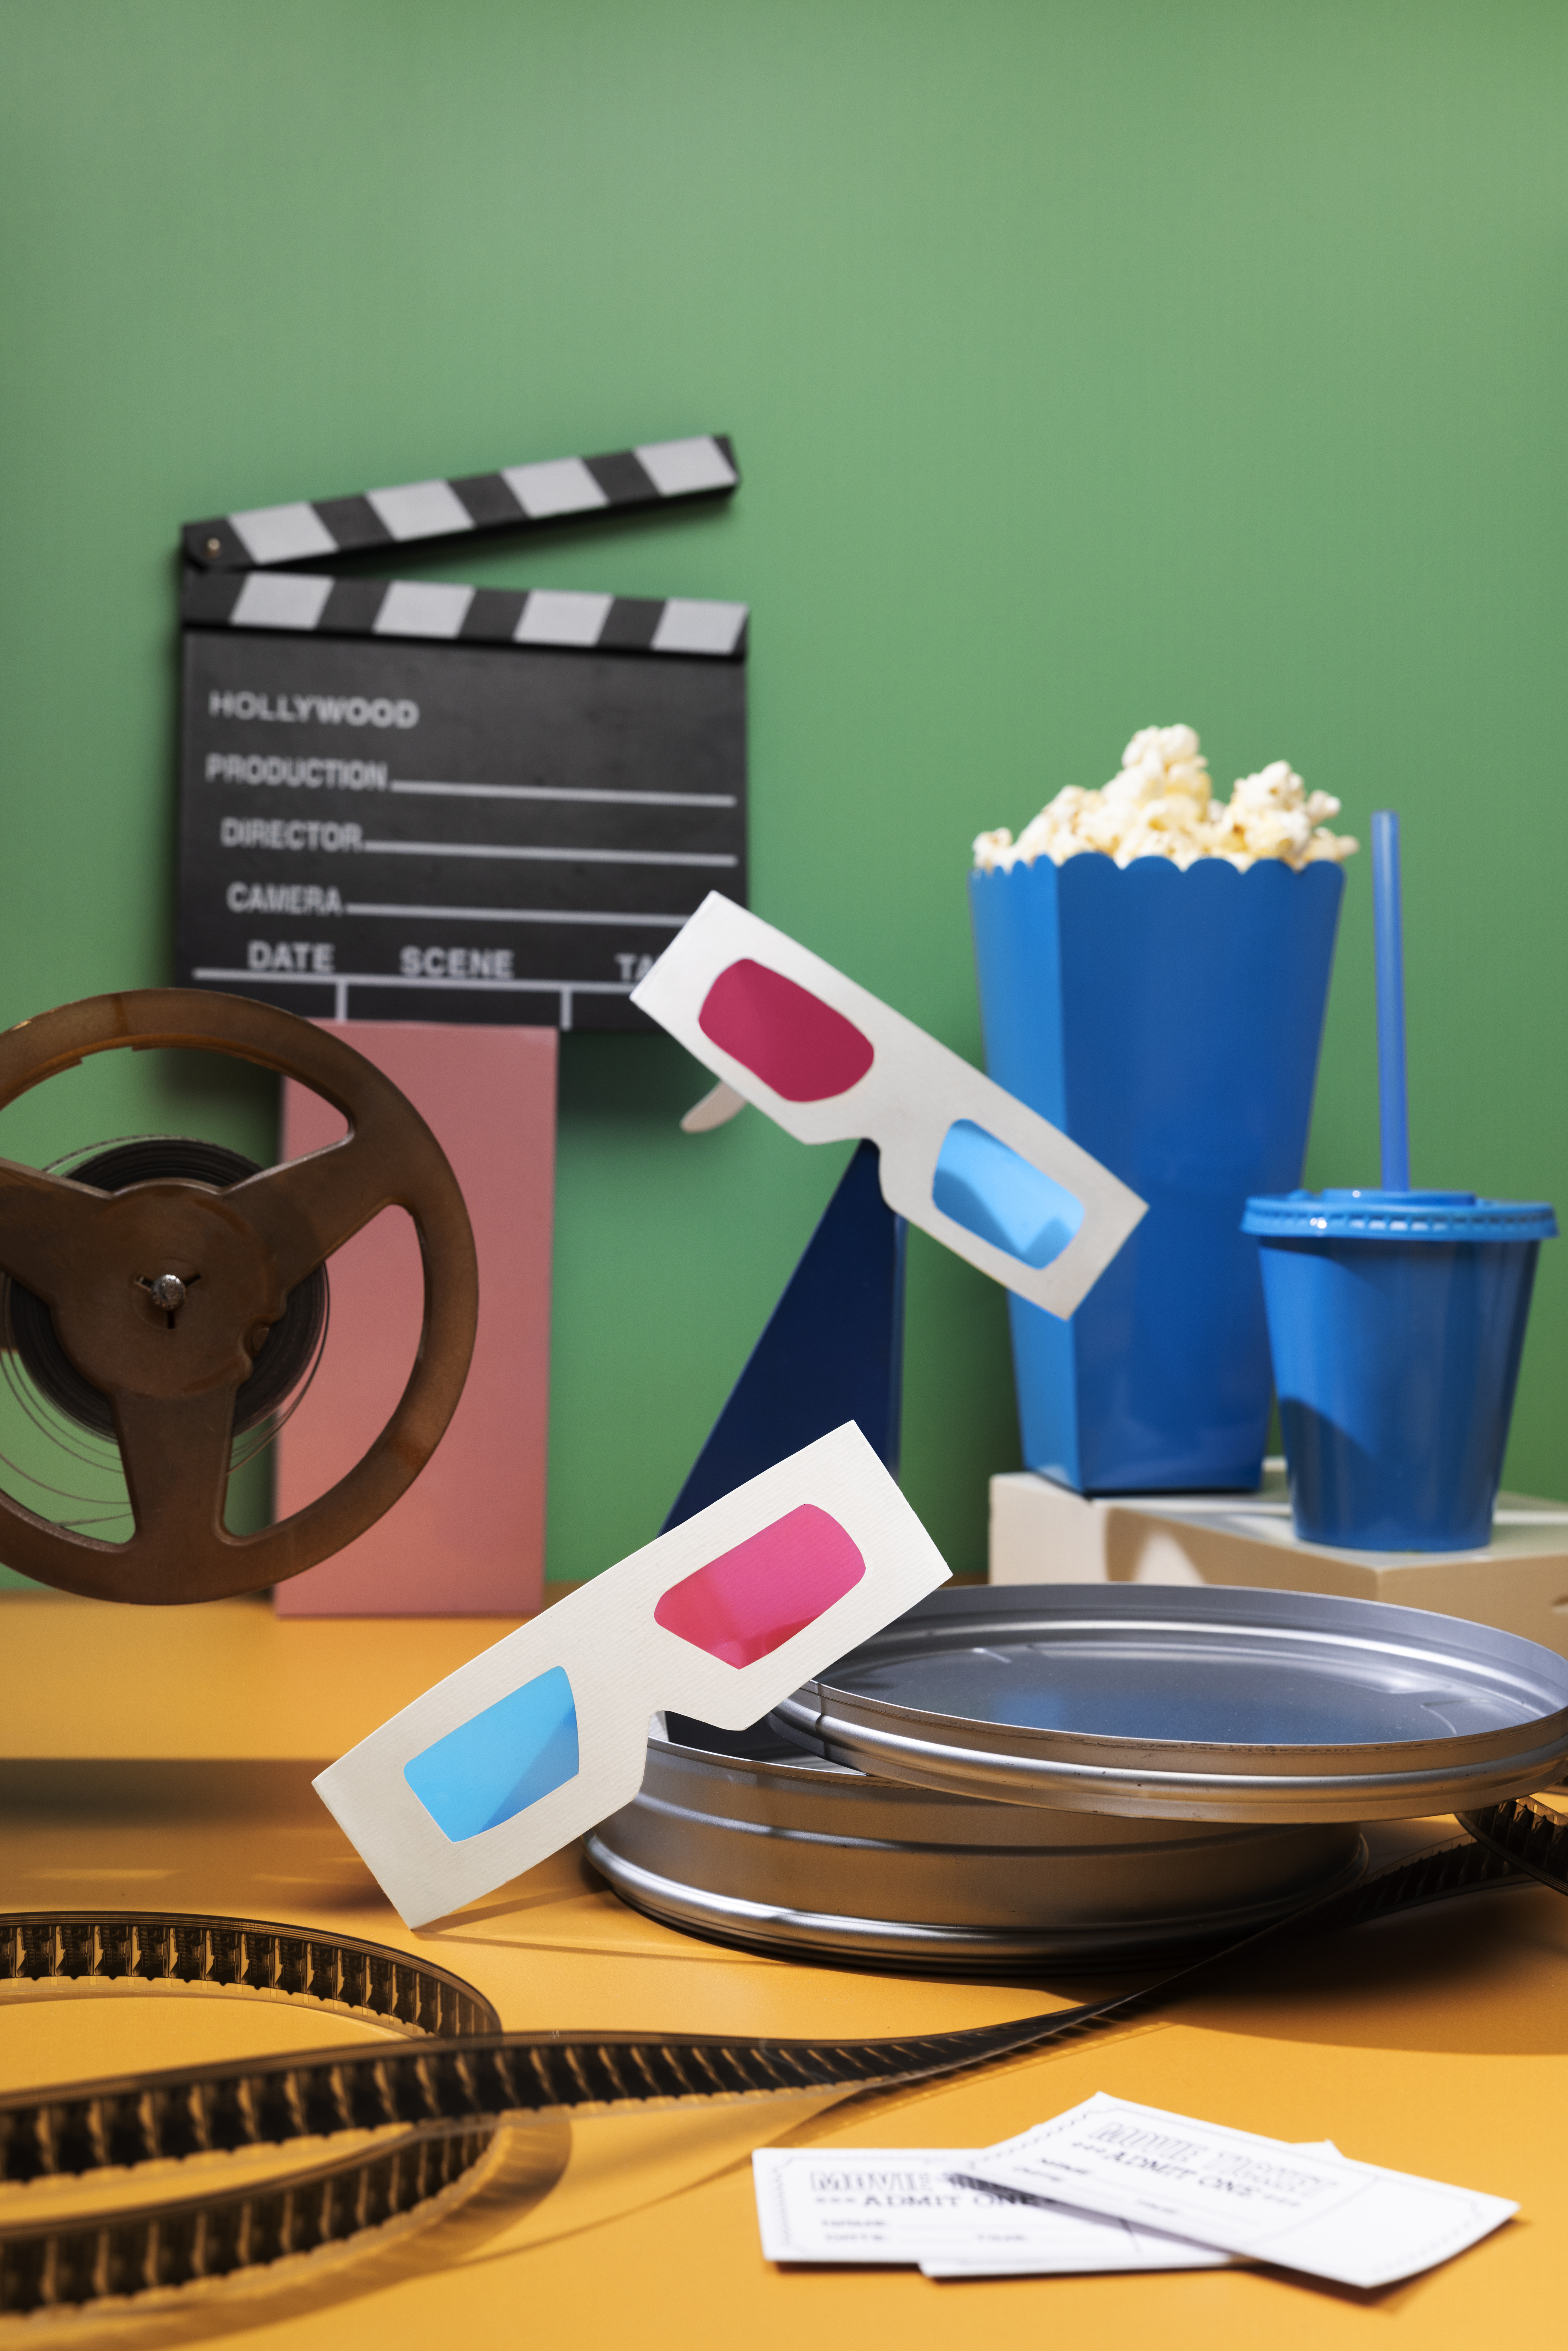
Unlock Your Filmmaking Potential with Taraq Qureshi** Discover the art of filmmaking with Taraq Qureshi, an acclaimed British producer, director, and actor. With over 20 years of experience in the film industry and a unique perspective as a disabled filmmaker, Taraq brings a wealth of knowledge and passion to his teaching. **About Taraq Qureshi:** - **Seasoned Filmmaker**: With over two decades of experience, Taraq has produced and directed numerous feature films and short films. His journey began in community theatre with a year-long course accredited by Middlesex University London in 1999. - **Industry Leader**: Founder and artistic director of the "Golden Nugget International Film Festival," which has been running for six years. In 2023, Taraq also founded the "Global Film Producers Alliance" (www.gfa.com), a platform dedicated to connecting and supporting film producers worldwide. - **Innovative Storyteller**: Taraq's notable projects include "Strictly Salsa - The Beginning," "The Chosen Ones," and "Do Not Enter." His work is marked by a deep passion for storytelling and a commitment to creating both commercially successful and niche market films. - **Mentor and Educator**: As an acting teacher, creative executive, and development coordinator, Taraq has inspired countless aspiring filmmakers to pursue their dreams and achieve success in the industry. **Why Learn from Taraq?** - **Expert Guidance**: Gain insights from a seasoned professional with a proven track record in the film industry. - **Unique Perspective**: Learn from Taraq's experiences as a disabled filmmaker, providing a fresh and inclusive approach to storytelling. - **Hands-On Learning**: Benefit from practical, real-world advice and techniques that you can apply to your own filmmaking projects. - **Community and Support**: Join a network of passionate filmmakers and industry professionals through Taraq's initiatives, including the "Golden Nugget International Film Festival" and the "Global Film Producers Alliance." **Enroll Now and Transform Your Filmmaking Journey!** Don't miss this opportunity to learn from one of the industry's most respected and innovative filmmakers. Enroll in Taraq Qureshi's online teaching course today and take the first step towards realizing your filmmaking dreams. A comprehensive 10-lesson course on film producing, designed to cover all the essentials within 90-minute sessions each day: --- ### **Day 1: Introduction to Film Producing** - **Welcome and Course Overview:** - Introduction to the role of a film producer. - Course objectives and expectations. - **Types of Producers:** - Understanding the different types of producers (Executive Producer, Line Producer, etc.). - Responsibilities and key tasks for each role. --- ### **Day 2: Development and Pre-Production** - **Project Development:** - Finding and developing a project. - Acquiring rights and working with screenwriters. - **Pre-Production Planning:** - Creating a production schedule and budget. - Assembling the production team. --- ### **Day 3: Financing and Budgeting** - **Film Financing:** - Understanding different sources of film financing. - Pitching to investors and securing funds. - **Budgeting Basics:** - Creating a detailed film budget. - Managing finances and controlling costs. --- ### **Day 4: Legal and Contracts** - **Legal Considerations:** - Overview of legal aspects in film production. - Understanding contracts and agreements. - **Rights and Clearances:** - Securing rights for music, footage, and locations. - Clearing copyright and intellectual property. --- ### **Day 5: Production Management** - **Managing the Shoot:** - Overseeing the production process. - Handling logistics, scheduling, and on-set challenges. - **Communication and Problem-Solving:** - Effective communication with the cast and crew. - Resolving conflicts and troubleshooting issues. --- ### **Day 6: Post-Production** - **Post-Production Workflow:** - Overview of post-production stages. - Working with editors, sound designers, and visual effects artists. - **Quality Control:** - Ensuring the final product meets the desired standards. - Conducting test screenings and making adjustments. --- ### **Day 7: Marketing and Distribution** - **Marketing Strategies:** - Creating a marketing plan for the film. - Utilizing social media and other promotional tools. - **Distribution Channels:** - Understanding traditional and digital distribution. - Strategies for film festivals, theaters, and online platforms. --- ### **Day 8: Film Festivals and Awards** - **Navigating Film Festivals:** - Selecting the right festivals for your film. - Submitting and promoting your film at festivals. - **Awards and Recognition:** - Understanding the importance of awards. - Strategies for winning awards and gaining recognition. --- ### **Day 9: Case Studies and Guest Speakers** - **Case Studies:** - Analyzing successful film productions. - Learning from real-world examples and experiences. - **Guest Speakers:** - Inviting industry professionals to share insights and advice. - Q&A sessions with experienced producers. --- ### **Day 10: Final Project and Presentation** - **Project Work:** - Finalizing a production plan for a hypothetical film. - Preparing for the presentation. - **Presentations:** - Presenting the production plan to the Tutor - Feedback and discussion. - **Course Wrap-Up:** - Reflecting on the course experience. - Final thoughts and future steps. --- This 10-lesson course aims to equip aspiring film producers with the essential knowledge and skills to successfully manage film productions from development to distribution.!
Photoshop Basics to Fundamentals Training
By London Design Training Courses
Why Choose Photoshop Basics to Fundamentals Training Course? Our Photoshop Basics to Fundamentals Training Course offers a strong skills in Adobe Photoshop, equipping with essential skills. Learn to use layers, selection tools, layer effects, layers, masking, photos, typography, filters, and color theory. Learn features for confident Photoshop usage. Course Link Duration: 10 hrs Method: 1-on-1, Personalized attention Schedule: Tailor your own hours of your choice, available from Mon to Sat between 9 am and 7 pm Course Highlights: Master Advanced Photoshop Skills: Develop expertise in professional image editing, retouching, and manipulation techniques. Hands-on Creative Projects: Engage in practical exercises to enhance real-world design skills. Explore Special Effects: Dive into advanced topics like layer effects, filters, and blending modes for stunning visual creations. Typography and Design Mastery: Learn typography styles, layout design, and color theory for compelling compositions. Build a Professional Portfolio: Receive guidance on crafting a portfolio showcasing your Photoshop expertise. Job Opportunities: Graphic Designer: Create captivating visuals for print and digital media. Digital Artist: Craft digital artwork for various applications, from illustrations to ads. UI/UX Designer: Design user interfaces and experiences for websites and apps. Web Designer: Develop visually engaging websites with expertise in Photoshop. Marketing Content Creator: Produce marketing materials, including banners and social media visuals. Freelance Designer: Offer design services independently to diverse clients. Advertising Creative: Design impactful ad visuals for creative campaigns. Print Production Specialist: Prepare print-ready materials, ensuring high-quality results. Photography Post-Processing Specialist: Enhance and retouch photographs for professional use. Module 1: Interface and Preferences Familiarize with the Photoshop Interface Customize Panels and Toolbars to suit your workflow Explore Photoshop Preferences for optimal settings Discover different Photoshop CC Workspaces for various tasks Get started with essential Keyboard Shortcuts Module 2: Image File Formats Understand various image file formats, including PSD, JPEG, PNG, and PDF Explore File Compression and its impact on image quality Module 3: Creating a New Document Set dimensions and size for new documents Understand media units for precise design specifications Explore Color Profiles and their importance Save presets for quick document setups Module 4: Placing Images Learn about Embedded vs. Linked images Introduction to Smart Objects for non-destructive editing Master the Selection tool for precise image placement Module 5: Image Size and Resolution Save images in different formats and compression settings Learn about Image Size and Resolution for various output requirements Module 6: Layers Introduction Organize your work using Layer management Master layer tasks such as reordering, renaming, grouping, locking, and hiding Module 7: Selection Tools Explore various Selection Tools like Marquee, Magic Wand, Quick Selection, and Lasso Understand Inverse Selection and Deselect for efficient editing Module 8: Layer Effects Apply captivating Layer Effects like Drop Shadow, Stroke, and Outer Glow Save and clone Effects Styles for quick application Combine multiple effects for creative designs Module 9: Introduction to Shapes Utilize the Shapes tool for basic design elements Create Custom Shapes for unique designs Understand Color principles and use the Properties Panel for adjustments Master the Direct Selection tool for precise shape editing Create a basic poster using provided examples Module 10: Type and Typography Work with Type and explore the Character and Paragraph Panel Utilize Styles Panel for consistent text formatting Save favorite fonts for easy access Apply Effects and Layer Styles on Type for impactful typography Learn about Leading, Tracking, and Kerning for optimal text spacing Module 11: Colors Understand RGB vs. CMYK color modes Select colors using the Eyedropper tool Save colors as Swatches for reuse Create gradients using the Gradient Tool Module 12: Creating a Clipping Mask Master the concept of Clipping Masks and its usage Apply Clipping Masks to Type, Images, and Shapes Combine Layer Effects with Clipping Masks for creative designs Module 13: Introduction to Masking Understand Masking and its importance in image editing Utilize the Brush tool for creating masks Learn Masking shortcuts and use Gradient Mask for smooth transitions Module 14: Adjustment Layers Explore Color and Gradient Adjustment Layers for image enhancements Master Curves, Levels, and Hue/Saturation Adjustment Layers for precise color control Convert images to Black and White using Adjustment Layers Combine Adjustment Layer Masks for targeted edits Module 15: Image Touch Up Master various touch-up techniques, including Red Eye Removal, Spot Healing Brush, and Patch Tool Utilize Content Aware Removal for seamless object removal Restore an old photo using Clone Stamp and Dodge/Burn tools Improve portraits by removing blemishes and whitening teeth Module 16: Filters Introduction Understand Smart Objects and Filter usage for non-destructive editing Explore the Filters Gallery and experiment with Blur and Vantage filters Module 17: Blending Modes Introduction Master the concept of Blending Modes and their impact on layer overlays Understand different types of Blending Modes, including Darken, Lighten, and Overlay Master the art of working with layers in Adobe Photoshop. Skillfully utilize various selection tools for precise editing and manipulation. Apply captivating Layer Effects to enhance your designs and visuals. Understand the functionality of Adjustment Layers, Masking, and Clipping Masks for advanced editing and compositing. Acquire the techniques to touch up and restore photographs effectively. Explore typography techniques to create visually appealing text designs. Gain an introductory understanding of Filters and their creative applications. Grasp the principles of Color Theory and its practical application in design.

Rhino 2D | 3D Training Course for Jewellery Design
By London Design Training Courses
Why Opt for the Rhino 3D Training Course in Jewelry Design? Click here for more info Within a span of 10 hours, you'll master the interface and gain insights into how Rhino leverages points, lines, surfaces, and solids to fashion printable 3D objects. Moreover, you'll explore the art of crafting repetitive and intricate geometric shapes, perfect for creating minimalist and elegant jewelry. Flexible Scheduling: 1-on-1 training sessions tailored to your schedule. Pick any hour between 9 am and 7 pm from Mon to Sat. Course Duration: 10 hours. Training Methods: Choose between in-person sessions or live online training. Why Choose Our Rhino 3D Training Course for Jewelry Design? Rhino, also known as Rhinoceros, stands as a robust 3D computer graphics and computer-aided design software extensively utilized in various industries, including architecture, industrial design, and multimedia. LDTC offers meticulously crafted Rhino courses to empower you in mastering this software. Led by experienced instructors, our courses ensure a comprehensive understanding of Rhino, equipping you to create exceptional designs, specifically tailored for jewelry creation. Rhino 3D Training for Jewelry Design: Our Rhino 3D training caters to both beginners and those aspiring to acquire advanced techniques, emphasizing its application in jewelry design. Course Highlights: Precise 3D Modeling: Master the art of crafting free-form 3D NURBS models with utmost precision. Advanced Functionality: Explore Rhino's advanced surfacing commands and features tailored for jewelry design. User Interface Mastery: Navigate Rhino's interface seamlessly and refine your skills in curves, surfaces, and solids. Expert Guidance: Acquire expertise in Rhino's modeling environment under the guidance of seasoned professionals. Modeling Why Choose Our Rhino 3D Training Course for Jewelry Design? Rhino, also known as Rhinoceros, stands as a robust 3D computer graphics and computer-aided design software extensively utilized in various industries, including architecture, industrial design, and multimedia. LDTC offers meticulously crafted Rhino courses to empower you in mastering this software. Led by experienced instructors, our courses ensure a comprehensive understanding of Rhino, equipping you to create exceptional designs, specifically tailored for jewelry creation. Rhino for Jewelry Design - 16-Hour Course Module 1: Introduction and Navigation Get acquainted with Rhino's interface, menus, and screen layout. Navigate Rhino models with precision in 2D lines, polylines, and NURBS curves. Use modeling setup features like snap, ortho, and planar constraints for accuracy. Leverage object snaps and Smart Track functionality for enhanced precision. Module 2: Solid and Surface Modeling Fundamentals Rapidly develop 3D solids and surfaces using Rhino's organized layering system. Utilize coordinates and constraints for meticulous modeling in 3D space. Create diverse shapes, including rectangles, circles, arcs, ellipses, and polygon curves. Enhance models with Rhino render, render color, and free-form curves. Efficiently handle model views with pan, zoom, and view management tools. Implement various editing commands for curve manipulation and transforming curves into surfaces and solids. Utilize history tracking for advanced editing and execute general editing actions. Module 3: Intermediate Edit and Surfacing Techniques Introduce essential NURBS modeling concepts and terminologies. Edit curves and surfaces through control point manipulation and rebuilding for optimal refinement. Use the nudge modeling aid for precise adjustments and generate deformable shapes. Create curves through projection techniques and split surfaces using curves and surfaces. Blend surfaces seamlessly, utilizing symmetry tools, lighting, and rendering effects. Convert intricate 3D objects into detailed 2D drawings and craft page layouts. Module 4: Advanced Surfacing and Solid Modeling Techniques Construct model primitives and solid text using techniques such as pipe and extrusion. Efficiently modify solids using Boolean tools, expanding surface modeling capabilities. Utilize techniques like extrusion, lofting, and revolving for intricate surfaces. Create sweeps using 1 and 2 rail curves and master surface network techniques for complex shapes. Downlaod Rhino. Upon completion of the Rhino 3D Training Course for Jewelry Design, participants can expect the following learning outcomes: Mastering Rhino Interface: Gain a comprehensive understanding of Rhino's interface, menus, and screen layout. Precision in Modeling: Navigate Rhino models with precision using 2D lines, polylines, and NURBS curves. Modeling Setup Proficiency: Utilize modeling setup features such as snap, ortho, and planar constraints for accurate designs. Enhanced Navigation Techniques: Leverage object snaps and Smart Track functionality for enhanced precision during navigation. Solid and Surface Modeling Skills: Rapidly develop 3D solids and surfaces with Rhino's organized layering system. Coordination and Constraint Application: Utilize coordinates and constraints for meticulous modeling in 3D space. Diverse Shape Creation: Create diverse shapes, including rectangles, circles, arcs, ellipses, and polygon curves. Rendering and Enhancement Techniques: Enhance models with Rhino render, render color, and free-form curves. Efficient Model View Handling: Efficiently handle model views with pan, zoom, and view management tools. Intermediate Edit and Surfacing Techniques: Edit curves and surfaces through control point manipulation and rebuilding for optimal refinement. NURBS Modeling Mastery: Introduce essential NURBS modeling concepts and terminologies. Advanced Editing and Modeling Skills: Use the nudge modeling aid for precise adjustments and generate deformable shapes. Complex Shape Creation: Create sweeps using 1 and 2 rail curves and master surface network techniques for intricate shapes. Solid Modeling Proficiency: Construct model primitives and solid text using techniques such as pipe and extrusion. Application of Boolean Tools: Efficiently modify solids using Boolean tools, expanding surface modeling capabilities. Advanced Surfacing Techniques: Utilize techniques like extrusion, lofting, and revolving for intricate surfaces. Conversion and Crafting of 2D Drawings: Convert intricate 3D objects into detailed 2D drawings and craft page layouts. Hands-On Project Experience: Engage in practical exercises and hands-on projects tailored for jewelry design applications. Upon mastering these skills, participants will be well-equipped to create sophisticated jewelry designs using Rhino 3D modeling software.

Private View & Winners Awards 12th Edition ArtGeminiPrize 2025
By ArtGeminiPrize2025
#ArtGeminiPrize2024 #ArtGeminiPrize

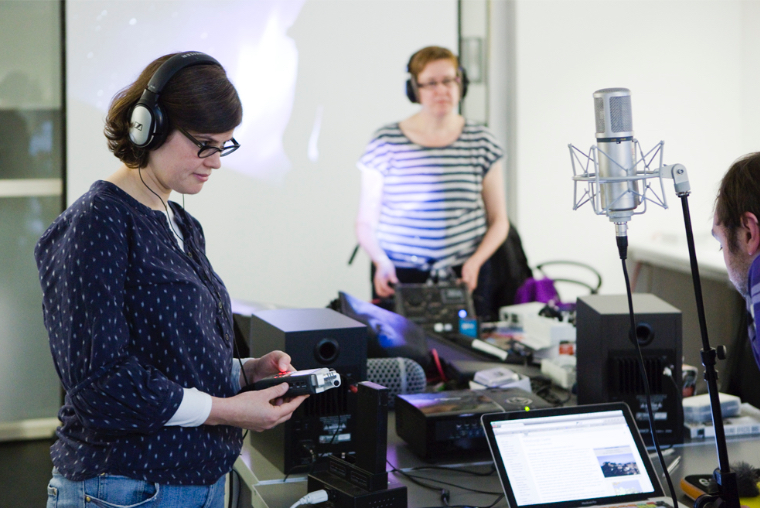
Employing a mix of practical exercises and critical reflection, this introductory day course provides an overview of fundamental techniques for recording and editing voice, ambiences and sound effects for podcasts, video/film and art installations or just for fun. The course uses industry standard software and introduces a range of popular, high quality microphones and portable recording devices. The course has enough flexibility to be steered by the individual interests of the participants, but you will generally cover; the properties of sound, microphone selection and placement, gain structure, effective planning, noise limiting and reduction, sound editing, dynamics, sound processing and spatial effects. If desired, we can look at a variety of techniques for improving sound quality and recording audio from video conferencing, as we all find ourselves working and interacting in this manner every day. Computer experience is required. Morning Microphone Selection – why and when to use Applications, characteristics, limitations Microphone type – Dynamic, Condenser, Lavalier, Shotgun, Boundary, Stereo, Binaural Polar Patterns – Omni, Cardoid, Attenuated and others Practical microphone placement and technique Critical distance, proximity effect, shielding, simple acoustic treatments, filtering Lavalier microphone – positioning, preventing distortion & rustles Booming – positioning, preventing microphone bumps Stereo Mics – phase issues Afternoon Editing techniques (fades, looping) Building a mix Basic sound processing, noise reduction and dynamics (channel strips, EQ and compression) Insert effects (modulation, filtering, distortion) Send effects (delay, reverb) Automation (of volume, panning etc) Bussing (sending signals to multiple fx) Mastering effects (limiting) Exporting and file types Courses are subject to minimum enrolment. Please register early, within five days of the start date, to reduce the likelihood of course cancellation. Please read our cancellation policy before booking. Students, anyone over the age of 65, and those in receipt of any form of benefits can claim the concessionary price, offering a 10% discount on the full course price. Valid proof of eligibility must be produced on the first day of the course. Please use the code CONCESSION when prompted at checkout.