- Professional Development
- Medicine & Nursing
- Arts & Crafts
- Health & Wellbeing
- Personal Development
Microsoft Project White Belt 2016: In-House Training
By IIL Europe Ltd
Microsoft® Project White Belt® 2016: In-House Training This workshop serves as an introduction to the interface and features of Microsoft® Project. This workshop serves as an introduction to the interface and features of Microsoft® Project. It is kept up to date with the framework outlined by Project Management Institute's A Guide to the Project Management Body of Knowledge (PMBOK® Guide). This course will be led by an IIL-certified instructor who will outline the benefits of Microsoft Project, provide tips on using various features and common shortcuts, recommend guidelines, and discuss the application of scheduling concepts to manage project work. What you Will Learn You'll learn how to: Define key scheduling concepts and terms Effectively navigate the user interface and interpret common views Configure essential elements of a new schedule Enter and modify a task list Set dependencies between tasks Create a basic resource list and generate assignments Format targeted areas of the Gantt Chart view Prepare the schedule for printing Getting Started Introductions Course objectives Course outline Navigating the User Interface and Views The ribbon The Quick Access Toolbar General and display options Major elements on the Project screen The Gantt chart, calendar, and network diagram views The help Setting up a New Schedule New schedules from blank, templates or other files The project starting date and forward scheduling The project standard calendar and exception days Entering, Modifying, and Outlining Task Data Task entering options and edition Unscheduled tasks Duration estimates for a single task or multiple tasks Tasks organization Multi-level outline Notes to detail tasks Creating Dependencies by Setting Links The critical path Critical path calculation in Project Dynamic schedules and dependencies Link tasks in Project Displaying the critical path Entering and Assigning Resources Resource planning Resource list Resource assignments Formatting Gantt Chart View Format options for text and Gantt charts Print options

Microsoft Project White Belt 2013: In-House Training
By IIL Europe Ltd
Microsoft Project White Belt® 2013: In-House Training This workshop serves as an introduction to the interface and features of Microsoft® Project 2013. This course will be led by an IIL-certified instructor who will outline the benefits of Microsoft Project, provide tips on using various features and common shortcuts, recommend guidelines, and discuss the application of scheduling concepts to manage project work This workshop serves as an introduction to the interface and features of Microsoft® Project 2013. This course will be led by an IIL-certified instructor who will outline the benefits of Microsoft Project, provide tips on using various features and common shortcuts, recommend guidelines, and discuss the application of scheduling concepts to manage project work. What you Will Learn You'll learn how to: Define key scheduling concepts and terms Effectively navigate the user interface and interpret common views Configure essential elements of a new schedule Enter and modify a task list Set dependencies between tasks Create a basic resource list and generate assignments Format targeted areas of the Gantt Chart view Prepare the schedule for printing Getting Started Introductions Course objectives Course outline Navigating the User Interface and Views Navigate and use the Ribbon Use and customize the Quick Access Toolbar Modify general and display options Become familiar with major elements on the Project screen Navigate Gantt Chart, calendar, and network diagram views Search for a help topic Setting up a New Schedule Create new schedules Create a new schedule using existing information Enter and modify the schedule start date Enter and modify exception days in the calendar Entering, Modifying, and Outlining Task Data Enter, edit, correct, and clear information Enter unscheduled tasks Enter duration estimates for a single task or multiple tasks Organize tasks Set up a multi-level outline Add notes to tasks Creating Dependencies by Setting Links Identify a critical path in a simple schedule Understand how scheduling software calculates a critical path Describe dynamic schedules and dependencies Create links using various methods Display the critical path Entering and Assigning Resources Plan for resources Create a list of available resources Assign resources Formatting Gantt Chart View Format text and Gantt Chart bars Format a collection of items Configure print options
Microsoft Project White Belt 2013
By IIL Europe Ltd
Microsoft Project White Belt® 2013 This workshop serves as an introduction to the interface and features of Microsoft® Project 2013. This course will be led by an IIL-certified instructor who will outline the benefits of Microsoft Project, provide tips on using various features and common shortcuts, recommend guidelines, and discuss the application of scheduling concepts to manage project work This workshop serves as an introduction to the interface and features of Microsoft® Project 2013. This course will be led by an IIL-certified instructor who will outline the benefits of Microsoft Project, provide tips on using various features and common shortcuts, recommend guidelines, and discuss the application of scheduling concepts to manage project work. What you Will Learn You'll learn how to: Define key scheduling concepts and terms Effectively navigate the user interface and interpret common views Configure essential elements of a new schedule Enter and modify a task list Set dependencies between tasks Create a basic resource list and generate assignments Format targeted areas of the Gantt Chart view Prepare the schedule for printing Getting Started Introductions Course objectives Course outline Navigating the User Interface and Views Navigate and use the Ribbon Use and customize the Quick Access Toolbar Modify general and display options Become familiar with major elements on the Project screen Navigate Gantt Chart, calendar, and network diagram views Search for a help topic Setting up a New Schedule Create new schedules Create a new schedule using existing information Enter and modify the schedule start date Enter and modify exception days in the calendar Entering, Modifying, and Outlining Task Data Enter, edit, correct, and clear information Enter unscheduled tasks Enter duration estimates for a single task or multiple tasks Organize tasks Set up a multi-level outline Add notes to tasks Creating Dependencies by Setting Links Identify a critical path in a simple schedule Understand how scheduling software calculates a critical path Describe dynamic schedules and dependencies Create links using various methods Display the critical path Entering and Assigning Resources Plan for resources Create a list of available resources Assign resources Formatting Gantt Chart View Format text and Gantt Chart bars Format a collection of items Configure print options
Adobe Photoshop Training course One to One Weekends
By Real Animation Works
Photoshop pay per hr training flexible time weekend evening

Autodesk 3ds Max Training One-to-One, Online or Face-to-Face Options
By Real Animation Works
Customized and Bespoke 3ds Max Training: Face-to-Face and Online Options

Unreal Engine Courses London
By Real Animation Works
Face to Face training customised and bespoke. One to One Online or Face to Face
Rhino 3d training course 1-2-1
By Real Animation Works
Rhino 3d face to face training customised and bespoke Online or Face to Face

Sketchup Basic to Advance Training
By London Design Training Courses
Why Learn Sketchup Basic to Advance Training Course? Course info SketchUp mastery with our hands-on course go from basics to advanced 3D modeling, advanced rendering, and expert lighting techniques. Immerse yourself in transformative learning tailored for SketchUp excellence. Duration: 16 hrs. Method: 1-on-1 Online Over Zoom is also available. Schedule: Tailor your own schedule by pre-booking a convenient hour of your choice, available from Mon to Sat between 9 am and 7 pm. Course Benefits: Comprehensive Skills Development: Master SketchUp from basics to advanced, gaining a comprehensive skill set. Efficient 3D Modeling: Learn to navigate and create intricate designs effortlessly with AI-driven 3D modeling techniques. Stunning Visual Realism: Explore advanced rendering methods to bring your designs to life with stunning visual realism. Professional Lighting Mastery: Harness the power of lighting to add depth and dimension, achieving a polished and professional finish. Flexible Learning: Tailor your own schedule with the convenience of pre-booking hours between 9 am and 7 pm, Monday to Saturday. Personalized 1-on-1 Training: Receive personalized attention and guidance with our 1-on-1 training approach. Course Title: "Sketchup Basic to Advance Training Course" Module 1: SketchUp Fundamentals (4 hours) Explore the SketchUp Interface Learn Basic Drawing Tools and Techniques Create and Edit Components Utilize Groups and Layers for Organization Introduction to Scenes and Animation Module 2: Advanced SketchUp Techniques (4 hours) Precision Modeling with Measurements Dynamic Components and Interactivity Advanced 3D Modeling Techniques Importing and Managing 3D Assets Enhance Functionality with SketchUp Extensions Module 3: V-Ray Rendering Basics (4 hours) Navigate the V-Ray Interface Set up V-Ray Materials Master Basic Lighting Techniques Understand Camera Settings and Composition Optimize Rendering Settings and Output Module 4: Advanced V-Ray Rendering (4 hours) Global Illumination and Image-based Lighting Realistic Material Creation Post-Processing using V-Ray Frame Buffer Efficient Scene Management with V-Ray Proxy Rendering Animation Sequences Course Project (2 hours) Integrate SketchUp and V-Ray for a Final Project Receive Guidance on Creating Photorealistic Renderings Participate in a Review and Feedback Session Upon completing the SketchUp Basic to Advance Training Course, participants will: Master SketchUp Basics: Navigate the interface, use drawing tools, and manage components effectively. Advance 3D Modeling: Apply precision modeling, dynamic components, and advanced techniques. Explore Extensions: Enhance functionality with SketchUp extensions. V-Ray Rendering Introduction: Learn V-Ray basics, including materials, lighting, and rendering settings. Advanced V-Ray Techniques: Implement global illumination, realistic materials, post-processing, and animation. Course Project Proficiency: Integrate SketchUp and V-Ray for a final project with photorealistic renderings.

3ds Max Basic to Fundamentals Training
By London Design Training Courses
Why Learn 3ds Max Basic to Fundamentals Training Course? Course Info Unlock your 3D potential with our transformative 3ds Max Basic to Intermediate Training Course. Whether you're a beginner or aiming to enhance your skills, certified tutors and industry experts will guide you through mastering 3D modeling and animation. Duration: 16 hrs Method: 1-on-1, Personalized attention. Schedule: Tailor your own schedule by pre-booking a convenient hour of your choice, available from Mon to Sat between 9 am and 7 pm. 3ds Max Training Course Explore the core skills of 3ds Max, empowering you to create 3D models, rendered images, animations, and games. Used across various industries, 3ds Max is a valuable tool for architects, interior designers, engineers, and professionals in gaming, film, and television. Our 3ds Max Essentials course covers key functionality, principles, and techniques to effectively utilize the application. Set up projects efficiently Create 3ds Max models Apply materials and use maps Utilize lighting and materials for realism Work with cameras Produce rendered images and desktop animations Course Title: 3ds Max Fundamentals - Mastering 3D Modeling and Animation Course Length: 16 hours Course Outline: Part 1: Introduction to 3ds Max - Familiarizing with the 3ds Max Interface - Setting up the workspace for optimal workflow - Mastering navigation within 3ds Max's environment Part 2: 3D Modeling - Creating simple shapes as a foundation - Employing modifiers for advanced designs - Unleashing creativity with complex 3D modeling techniques - Understanding the art of polygonal modeling - Crafting organic and inorganic models with finesse Part 3: Texturing Techniques - Applying and refining textures to enhance visual appeal - Grasping the concept of UVW mapping for precise texture application - Utilizing the material editor for versatile material creation - Crafting custom materials to bring uniqueness to your designs Part 4: Illuminating Your Scenes - Embracing the art of lighting to set the mood - Exploring various light types for different effects - Mastering light properties for the perfect ambiance - Setting up lights to complement the scene's narrative Part 5: Animation Essentials - Delving into the captivating world of animation - Setting keyframes to breathe life into objects - Understanding animation curves for seamless motion - Animating objects in 3D space with creativity and finesse Part 6: Rendering Magic - Unveiling the power of rendering for visual perfection - Configuring rendering parameters for breathtaking results - Exploring render elements to refine post-processing effects - Rendering final images and animations to showcase your creations Part 7: Real-World Projects - Synthesizing all skills to create captivating projects - Designing a simple and stunning interior scene - Crafting a character model and animating its journey Course Requirements: - A computer with 3ds Max installed (a trial version is available on the Autodesk website) - Basic knowledge of computer operations - A passion for 3D modeling and animation Course Goals: By the course's conclusion, you will have gained a solid grasp of 3ds Max, capable of crafting your own 3D models, textures, and animations. You will possess the skills needed to continue your learning journey, refining and elevating your 3D modeling and animation prowess. https://www.autodesk.co.uk › products › free-trialDownload a free 30 day trial of 3ds Max, 3D modelling and rendering software for design visualisation, games and animation to create with full artistic renders.

Vectorworks Landmark Training
By London Design Training Courses
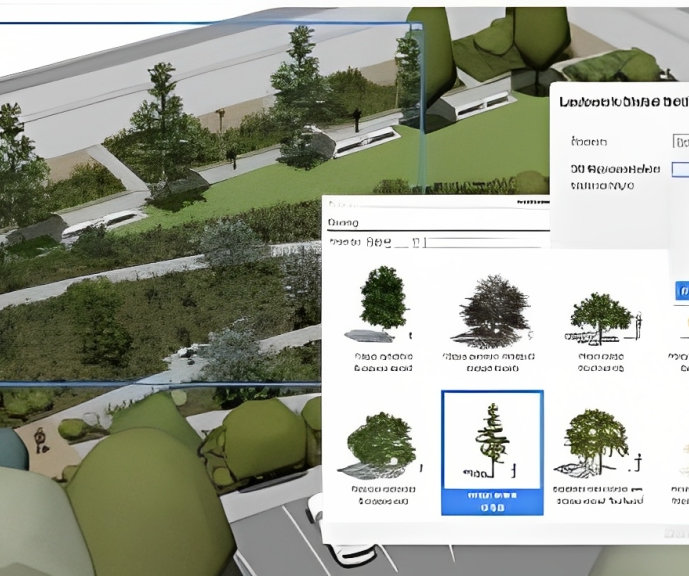
Why choose Vectorworks Landmark Training Course? Course info Explore the Vectorworks Landmark Training Course! 1-on-1 Live Online sessions led by certified tutors and industry experts. Master Vectorworks Landmark for landscape and site design, creating captivating outdoor spaces. Enroll now to unleash your design skills. Duration: 16 hrs. Method: 1-on-1, Personalized attention. Schedule: Tailor your own schedule by pre-booking a convenient hour of your choice, available from Mon to Sat between 9 am and 7 pm. This course focuses on Vectorworks Landmark fundamentals, providing essential tools and techniques for landscape architecture, design, and related disciplines. Participants should have a basic understanding of Vectorworks software. The course covers 2D and 3D drawing, file organization, landscape plan/model creation, and more. Learning Objectives: Organize drawing files using industry standards and best practices for effective collaboration. Utilize imported files and field-collected data for base plans and site inventories. Integrate 2D and 3D elements for plan documentation and model analysis. Utilize worksheet features for material quantification and project efficiency. Course Prerequisites: Participants should be familiar with basic drafting concepts, computer operations, and keyboard shortcuts. This training demonstrates sustainable design principles and the use of CAD tools for erosion control, runoff calculations, plant tracking, and sun/shade analysis. Participants will learn to create a 3D site digital terrain model and assess proposed plantings' effects on solar heat gain and water usage. Vectorworks Landmark Basic to Intermediate Training Course Duration: 16 hours Join our comprehensive Vectorworks Landmark Basic to Intermediate Training, designed for landscape architects and designers. Master 2D and 3D landscape design with essential techniques, covering site analysis, plans, irrigation, and 3D visualization. Unleash your creativity with custom plant symbols and detailed planting plans using the plant database. Course Outline: I. Introduction to Vectorworks Landmark (1 hour) An overview of Vectorworks Landmark for landscape design Interface orientation and basic tool usage Navigation and viewport controls Landscape design project creation and management II. Site Analysis and Site Plans (3 hours) Collecting site information and producing site analysis drawings Crafting site plans and hardscape design Working with contours, elevations, and terrain models Incorporating site amenities like paths, fences, and walls III. Planting Plans (5 hours) Utilizing the plant database to select suitable plants for specific regions Creating personalized plant symbols Developing comprehensive planting plans and plant lists Understanding plant compatibility and growth patterns IV. Irrigation Design (2 hours) Designing and editing irrigation systems and zones Integrating irrigation components into the site plan Generating irrigation reports for efficient planning V. 3D Visualization (3 hours) Creating captivating 3D models of landscape designs Applying textures and materials to hardscape elements and plants Utilizing the Renderworks engine for high-quality rendering Enhancing designs with lighting and special effects VI. Customization (1 hour) Tailoring the interface for landscape design efficiency Creating custom object styles and resource libraries VII. Collaboration and Sharing (1 hour) Importing and exporting data from other software platforms Sharing landscape design drawings with colleagues and collaborators VIII. Conclusion and Next Steps (1 hour) Comprehensive review of course content Guidance on further learning resources Q&A session and feedback gathering Enroll in our Vectorworks Landmark Basic to Intermediate Training to enhance your landscape design expertise and unleash your creative prowess. Download Vectorworks Landmark https://www.vectorworks.net/en-GB/landmark By the end of the Vectorworks Landmark Training Course, participants will: Understand the key features and functionalities of Vectorworks Landmark for landscape design. Demonstrate proficiency in using essential tools for site analysis, site plans, and hardscape design. Create detailed planting plans, selecting appropriate plants, and understanding their compatibility and growth patterns. Design efficient and effective irrigation systems, including generating irrigation reports. Create 3D visualizations of landscape designs, applying textures, materials, lighting, and special effects. Customize the interface and create personalized object styles and resources. Collaborate and share landscape design drawings with other software users. Have the foundation to pursue further learning and exploration in landscape design using Vectorworks Landmark.