- Professional Development
- Medicine & Nursing
- Arts & Crafts
- Health & Wellbeing
- Personal Development
Revit and 3dsMax V-Ray Visualization Basic to Advance Training
By London Design Training Courses
Why Learn Revit and 3dsMax V-Ray Visualization Basic to Advance Training Course? Course info Master architectural visualization and photorealistic renderings. In-person or live online options available. Learn Revit and 3dsMax, V-Ray rendering, and advanced techniques. Hands-on projects for real-world experience. Duration: 40 hrs Method: 1-on-1 - Individual support. Schedule: Tailor your own schedule by pre-booking a convenient hour of your choice, available from Mon to Sat between 9 am and 7 pm. Comprehensive Training: Master Revit, 3dsMax, and advanced visualization techniques for exceptional results. V-Ray Rendering: Explore realistic rendering with V-Ray, including advanced techniques and materials. Real-World Projects: Work on industry-relevant projects for a professional portfolio. Flexible Learning: Choose in-person or live online sessions for an engaging experience. Lesson Recordings: Access recorded classes to reinforce your understanding. Lifetime Email Support: Get guidance and assistance from experienced instructors beyond the course duration. Autodesk Certified Instructors. Comprehensive Training: Master Revit, 3dsMax, and advanced visualization techniques for exceptional results. V-Ray Rendering: Explore realistic rendering with V-Ray, including advanced techniques and materials. Real-World Projects: Work on industry-relevant projects for a professional portfolio. Flexible Learning: Choose in-person or live online sessions for an engaging experience. Lesson Recordings: Access recorded classes to reinforce your understanding. Lifetime Email Support: Get guidance and assistance from experienced instructors beyond the course duration. Autodesk Certified Instructors. Part 1: Revit (16 hours) Module 1: Introduction to Revit Familiarizing with the Revit interface and workspace Embracing the Building Information Modeling (BIM) workflow Creating a fundamental building model as a starting point Module 2: Basic Modeling in Revit Working with essential elements such as walls, doors, and windows Constructing floors and roofs to complete the building structure Crafting functional and visually appealing stairs and railings Module 3: Advanced Modeling in Revit Delving into the creation and manipulation of families Utilizing parameters and constraints to enhance modeling efficiency Exploring intricate geometries for complex designs Module 4: Annotation and Documentation in Revit Enhancing project documentation by adding text and dimensions Generating informative schedules for better project management Mastering the printing and exporting processes for professional output Part 2: 3ds Max (16 hours) Module 1: Introduction to 3ds Max Navigating the 3ds Max interface and workspace Understanding the 3D modeling workflow for design visualization Initiating the creation of basic 3D models Module 2: Basic Modeling in 3ds Max Working with primitive shapes to build foundational models Creating and refining splines to form versatile shapes Advancing to complex 3D model development for intricate designs Module 3: Materials and Textures in 3ds Max Exploring the material editor and its functionalities Skillfully applying and adjusting materials for realistic renders Incorporating textures to add depth and detail to the models Module 4: Lighting and Cameras in 3ds Max Mastering the art of lighting creation and manipulation Utilizing the daylight system for enhanced realism Understanding cameras and perspectives for compelling visual storytelling Part 3: V-Ray (8 hours) Module 1: Introduction to V-Ray Getting acquainted with the V-Ray interface and workflow Exploring V-Ray materials and textures for high-quality renders Module 2: Lighting and Rendering in V-Ray Creating and refining lighting setups for stunning renders Utilizing global illumination to enhance the realism of scenes Implementing advanced rendering techniques for professional output Module 3: Materials and Textures in V-Ray Crafting and modifying V-Ray materials for realistic surfaces Applying V-Ray textures to add depth and realism to objects Utilizing V-Ray displacement maps for intricate details For 3ds Max free trial, visit: https://www.autodesk.co.uk/products/free-trial. To access the V-Ray free trial, visit: https://www.chaosgroup.com/. Start your journey to becoming a proficient designer and renderer in the world of 3D modeling and visualization. Download Revit Revit and 3dsMax V-Ray Visualization Basic to Advance Training Course: Proficient Software Skills: Acquire a strong command of Revit and 3dsMax, along with advanced techniques in V-Ray rendering. High-Quality Visualizations: Create realistic and visually stunning architectural visualizations using V-Ray. Architectural Modeling: Master the process of modeling architectural elements with precision and efficiency. Materials and Textures: Understand how to apply realistic materials and textures to enhance visualizations. Lighting Setup: Set up lighting environments to achieve optimal illumination and ambiance in renderings. Rendering Techniques: Explore advanced rendering techniques, including global illumination, caustics, and ambient occlusion. Real-World Projects: Complete industry-relevant projects to build a professional-grade portfolio. Problem-Solving Skills: Develop the ability to troubleshoot and resolve rendering challenges effectively. Efficient Workflows: Learn time-saving workflows and best practices for efficient visualization production. Portfolio Showcase: Showcase your newly acquired skills through a diverse range of visualizations.

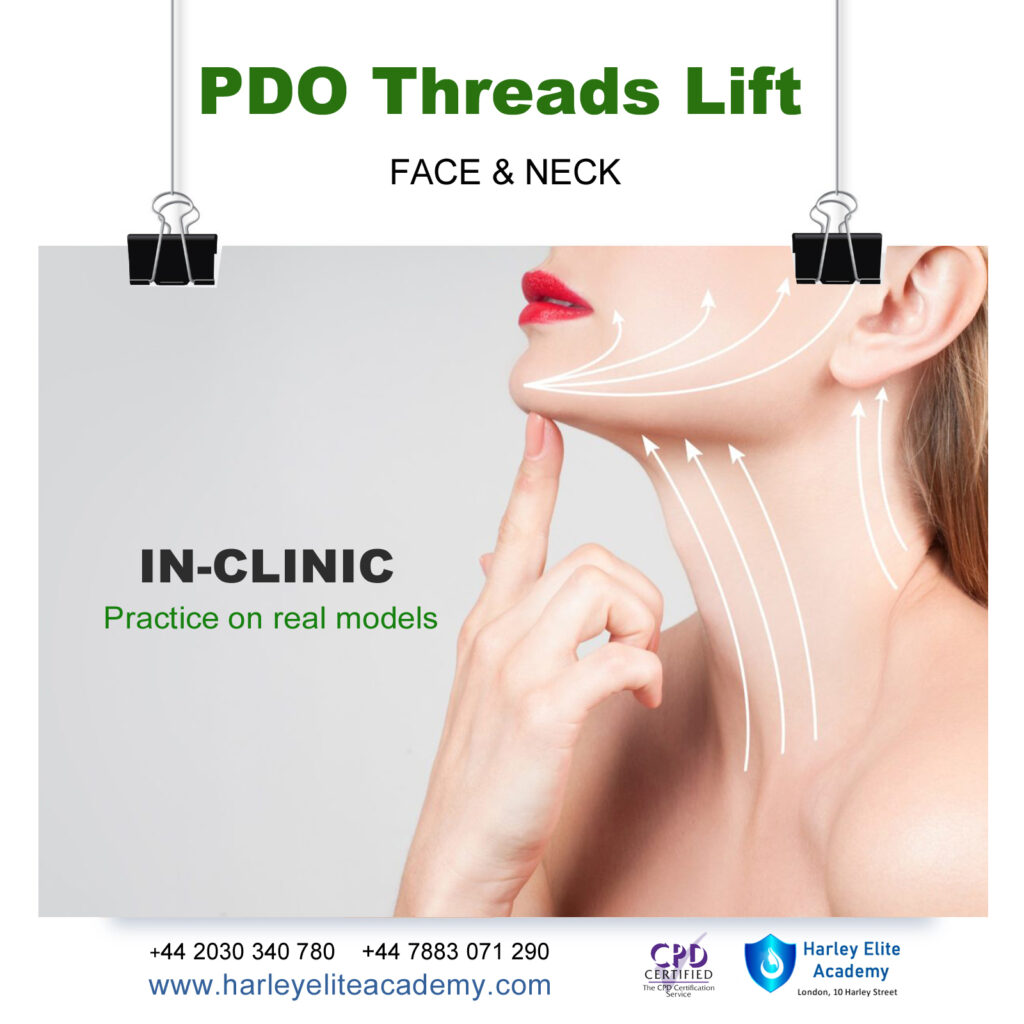
PDO Threads Lift Course
By Harley Elite Academy (HeLa)
MASTERCLASS ONE-2-ONE 8 CPD POINTS 1 DAY INTENSIVE COURSE ONLINE or IN-CLINIC NOTE! After booking we will contact you for scheduling the exact course date! Courses dates are subject to change due to mentors availability. We will inform you via email if a date becomes available! PDO Threads course Our one-day Harley Elite Academy PDO cog thread lift ( Elite Mini Face Lift )training course is providing for Doctors ,Nurses , Dentist looking to further to present non-surgical facelift. It s the newest trend made popular by some of celebrities recently and it is an amazing and effective latest technique to mehanical lift and tighten skin. We provide second option using mono and screw it has the potential to redefine facial contours and induces collagen production. This type threads support structure for the tissue of the face by encouraging natural collagen synthesis with 30 % immediately results that peak at 6 months and more. During the training learn how to safely achieve mid and lower face lift and tight , we aim to help you master class techniquesre-volumisation and lifting using one of the highest quality products on the market PCL Threads. Thread Lift Masterclass Course You will perform this procedure on live models under the supervision You will practice using This master training will teach you how to introduce threads in Body areas including: Inner Thigh | Inner Arm | Knee | Tummy | Buttock Using threads: screw, mono and cogs. During Dermal Filler Masterclass, you will learn the full Anatomy of the face and gain practice.Anatomy, Vascular Supply of the face, Nerves Contraindications Complications Management Post treatment advice Additional information ATTENDANCE ONLINE (theory), IN-CLINIC (Practice) PDO THREADS LIFT AREA BEGINNER Face and Neck Threads Lift, ADVANCED Body Threads Lift, MASTERCLASS Face, Neck, Body Threads Lift, MASTERCLASS Foxy Eyes | Cat Eyes
3ds Max Basic to Advanced Training
By London Design Training Courses
Why Learn 3ds Max Basic to Advanced Training Course? Learn 3ds max design and animation with our comprehensive 3ds Max Basic to Advanced Training Course. Whether you're a beginner or an experienced user, this course is thoughtfully designed to elevate your skills. Course Link Duration: 40 hrs Method: 1-on-1, Personalized attention & Tailored content. Schedule: 1-on-1 training with flexible scheduling. Book a convenient hour, Mon to Sat, from 9 am to 7 pm. Course Details: Course Duration: 40 hours Course Syllabus: Part 1: Introduction to 3ds Max and Vray Familiarization with the 3ds Max Interface Configuring an efficient workspace in 3ds Max Seamless navigation within 3ds Max and Vray Understanding the power of Vray and its interface Part 2: 3D Modeling Precision crafting of fundamental shapes Mastering modifiers for advanced modeling Creating intricate 3D models using diverse techniques Learning the art of polygonal modeling Shaping both organic and inorganic models flawlessly Part 3: Texturing Applying and refining textures with expertise Grasping the essentials of UVW mapping Harnessing material editor to perfection Customizing materials with Vray materials Part 4: Lighting Discovering the magic of illumination Differentiating various light types Comprehending the subtleties of light properties Setting up captivating scenes with Vray lights Part 5: Animation Embarking on an animation adventure Expertly setting up keyframes and animation curves Infusing life into objects in a mesmerizing 3D space Elevating animations with Vray's prowess Part 6: Advanced Rendering with Vray Entering the realm of rendering excellence Mastering Vray Global Illumination for realism Optimizing visuals with Vray Physical Cameras Illuminating scenes with Vray HDRI Lighting Employing Vray Proxies and Render Elements for finesse Streamlining rendering workflow with Vray's techniques Part 7: Projects Showcasing skills through hands-on projects Crafting a captivating yet simple interior scene Designing an alluring exterior scene Taking on the challenge of a complex scene with multiple elements Course Requirements: A computer with 3ds Max and Vray installed (trial versions are available on Autodesk and Chaos Group websites) Basic knowledge of computer operations Enthusiasm for 3D modeling and animation Course Objectives: Upon completing the course, you will have mastered 3ds Max and Vray, enabling you to create photorealistic 3D scenes. The skills acquired will open doors to opportunities in the 3D modeling and animation industry, while also serving as a foundation for further honing your expertise. Course Overview: Photoshop Post-Production Delve into the world of Photoshop post-production through our comprehensive course. Learn essential photo editing techniques, including color correction, retouching, and compositing. Unleash your artistic potential by creating mesmerizing visual effects and stylizing your photos. Course Syllabus: Part 1: Introduction to Photoshop Post-Production Navigating the Photoshop Interface with ease Mastering the art of Layers and Layer Masks Embracing the power of Selections Understanding the basics of Color Correction Part 2: Retouching Techniques Unraveling common Retouching Tools and Techniques Removing blemishes, wrinkles, and unwanted elements Achieving remarkable results with Dodging and Burning Part 3: Compositing Embracing the art of Compositing Working seamlessly with Multiple Images Blending images flawlessly using Layer Masks Part 4: Visual Effects and Stylizing Techniques Crafting Special Effects with Layer Styles and Blending Modes Enhancing images with Filters Achieving mesmerizing effects with Color Grading and Adjustment Layers Part 5: Projects Applying your knowledge to hands-on projects Perfectly Retouching a portrait Creating an alluring composite image Fashioning a stylized masterpiece Course Requirements: A computer with Photoshop installed (trial version available on Adobe website) Basic knowledge of computer operations Passion for photo editing and manipulation

Effective Presentation Skills: In-House Training
By IIL Europe Ltd
Effective Presentation Skills: In-House Training In today's results-oriented, global working environment, the ability to create and deliver presentations effectively is a necessary skill set for people at all levels of an organization. Regardless of your role, it's important to know how to synthesize your ideas into a coherent and focused narrative, add visuals that support and reinforce your message, and deliver it in a way that resonates with your audience. In this highly interactive course, we will unpack and practice some of the tools and techniques used by top speakers and influencers all over the world. In this engaging two-day course, you will plan, write, refine, practice, and deliver a presentation to the class. Your presentation will be filmed on both days, and you will leave the course with a flash-drive copy of your videos; participants of the virtual classroom workshop should be prepared to present via webcam. In addition to discovering and enhancing your own personal delivery style, you will learn how to create an overarching goal for your presentation and then organize and structure it for maximum impact. You'll gain insight into how to anticipate your audience's needs and tailor the content and delivery in a way that connects with them and sustains their attention and engagement. You will also learn skills that will help you control nervous energy, remain focused on and attuned to your audience, improvise under pressure, deal effectively with questions, and build a compelling call to action. What you will Learn At the end of this program, you will be able to: Construct an effective presentation goal statement, opening, body, and closing that connect with an audience Analyze an audience's needs and style preferences, including relevant DiSC®-related elements Deliver a complete criteria-based presentation that will persuade others Align usage of visuals as well as verbal and non-verbal techniques to maximize the impact of your presentation Getting Started Introductions and social agreements Course structure Course goals and objectives Opening activities Planning and Organizing Video: 'The Art of Misdirection' Setting your presentation goal Writing a goal statement Analyzing your audience Applying the 'reality' test Creating and strengthening supports Structuring your presentation 5 components of an effective opening Presentation body Presentation closing Write your presentation opening Audience Analysis Video: 'How to Tie Your Shoes' Everything DiSC® introduction Audience DiSC® Styles Analyzing your audience Further audience analysis Effective Delivery Delivery challenges: virtual and in-person Keeping your audience engaged Your body as your instrument Verbal / paraverbal elements Body stance and nonverbal communication What are your 'tells?' Controlling nervousness Staying attuned to your audience Responding to questions Review and edit your opening Deliver your opening Visuals and Enriching Elements Using images in your presentation Guidelines for visual composition Using questions to engage your audience The power of the pause Practicing and Applying What You've Learned Preparation Delivery Feedback Opportunity to put into practice the program content and receive a video copy Summary and Next Steps What did we learn and how can we implement this in our work environment? Your personal action plan

Regular expressions training course description Regular expressions are an extremely powerful tool for manipulating text and data. They are now standard features in a wide range of languages and popular tools, including Python and MySQL. Regular expressions allow you to code complex and subtle text processing that you never imagined could be automated. Once you've mastered regular expressions, they'll become an invaluable part of your toolkit. You will wonder how you ever got by without them. What will you learn Use Regular Expressions. Troubleshoot Regular Expressions. Compare RE features among different versions. Explain how the regular expression engine works. Optimize REs. Match what you want, not what you don't want. Regular expressions training course details Who will benefit: Anyone looking to use regular expressions. Prerequisites: None. Duration 1 day Regular expressions training course contents Introduction to Regular Expressions Solving real problems, REs as a language, the filename analogy, language analogy, RE frame of mind, searching text files: egrep, egrep metacharacters, start and end of the line, character classes, matching any character with dot, alternation, ignoring differences in capitalization, word boundaries, optional items, other quantifiers: repetition, parentheses and backreferences, the great escape, expanding the foundation, linguistic diversification, the goal of a RE, more examples, RE nomenclature, Improving on the status quo. Extended introductory examples A short introduction to Perl, matching text with regular expressions, toward a more real-world example, side effects of a successful match, Intertwined regular expression, intermission, modifying text with regular expressions, example: form letter, example: prettifying a stock price, automated editing, a small mail utility, adding commas to a number with lookaround, text-to-HTML conversion, that doubled-word thing. Regular expression features and flavours The regex landscape, origins of REs, care and handling of REs, Integrated handling, procedural and object-oriented handling, search-and-replace example. strings character encodings and modes, strings as REs, character-encoding issues, unicode, regex modes and match modes, common metacharacters and features, character representations, character classes and class-like constructs, anchors and other 'zero-width assertions', comments and mode modifiers, grouping capturing conditionals and control. The mechanics of expression processing Two kinds of engines, new standards, regex engine types, from the department of redundancy department, testing the engine type, match basics, about the examples, rule 1: the match that begins earliest wins, engine pieces and parts, rule 2: the standard quantifiers are greedy, regex-directed versus text-directed, NFA engine: regex-directed, DFA engine: text-directed, first thoughts: NFA and DFA in comparison, backtracking, two important points on backtracking, saved states, backtracking and greediness, more about greediness and backtracking, problems of greediness, multi-character 'quotes', lazy quantifiers, greediness and laziness, laziness and backtracking, possessive quantifiers and atomic grouping, possessive quantifiers ?, +, *+, ++ and {m,n}+, the backtracking of lookaround, is alternation greedy? taking advantage of ordered alternation, NFA DFA and posix, the longest-leftmost', posix and the longest-leftmost rule, speed and efficiency. Practical regex techniques Continuation lines, matching an IP address, working with filenames, matching balanced sets of parentheses, watching out for unwanted matches, matching delimited text, knowing your data and making assumptions, stripping leading and trailing whitespace, matching and HTML tag, matching an HTML link, examining an HTTP URL, validating a hostname, plucking a hostname, plucking a URL, parsing CSV files. Crafting an efficient expression Efficiency vs. correctness, localizing greediness, global view of backtracking, more work for POSIX NFA, work required during a non-match, being more specific, alternation can be expensive, benchmarking, know what you re measuring, benchmarking with Python, common optimisations, the mechanics of regex application, pre-application optimizations, optimizations with the transmission, optimization of the regex itself, techniques for faster expressions, common sense techniques, expose literal text, expose anchors, lazy versus greedy: be specific, split into multiple REs, mimic initial-character discrimination, use atomic grouping and possessive quantifiers, lead the engine to a match, unrolling the loop, observations, using atomic grouping and possessive quantifiers, short unrolling examples, unrolling C comments, the free flowing regex, a helping hand to guide the match, a well-guided regex is a fast regex.

Course Outline A key advancement with the Level 4 Certificate in Sports Massage Therapy is the expanded scope of practice it provides. Unlike Level 3, which focuses on maintenance and recovery, Level 4 delves into the understanding of injuries, thereby enabling practitioners to confidently and effectively treat actual Musculoskeletal (MSK) conditions. This qualification marks a significant step towards becoming a therapist capable of addressing a wider range of client needs. For more course information click here Level 4 Sports Massage Courses The Level 4 Certificate in Sports Massage Therapy builds on your existing knowledge and skills gained from the level 3 Sports Massage course. This qualification will provide learners with a deeper knowledge and further skills to be able treat clients and correct common patterns of dysfunction. Course Focus: Assessment skills Learning of a range of injuries and dysfunctions Introduction and learning of some special tests. Development of massage techniques & skills Patient aftercare advice along with corrective exercise prescription knowledge This Qualification Enables You To: Progression on to a Level 5 Sports Therapy Course Progression onto an Osteopathy or Physiotherapy course Venue BTST Academy & Clinic, Holly Farm, Clipstone Road, Edwinstowe, Nottingham, NG21 9JD Course delivery Online and Weekends Practical Course Dates 2025 Day 1; Saturday 31st May 2025 – Leg Anatomy and Palpation Day 2; Sunday 1st June 2025 – Torso and Arm Palpation Day 3; Saturday 12th July 2025 – Special Tests Day 4; Sunday 13th July 2025 – Advanced Massage Techniques Day 5; Saturday 16th August 2025 – Treatment planning and Case Studies Part 1 Day 6; Sunday 17th August 2025 – Treatment planning and Case Studies Part 2 Practical Assessments Book at Your Own Pace: Assessments are booked individually, allowing you to schedule them when you feel ready* Course days will run from 9:30am – 4:30pm Price £ 1400.00 Course Content For the course content and syllabus please click HERE Tutor Becky Tyler Assessor’s Becky Tyler, Laura Simmons & Clare Sargent Internal Verifier: Sarah Lane External Verifier: Will Mansford – Active IQ Awarding Body: Active IQ Payment on Booking: You can either select to pay:- The non refundable deposit of £400 or the Full Amount at time of booking. Paying a Deposit: If you select to pay the deposit you will receive communication via email to discuss & confirm a payment plan, all monies owed must be paid in full 1 week before the course start date ELCAS Funding: ELCAS Funding is available for this course Course Attendance: *We ask that all dates are attended but appreciate this is not always possible and therefore any missed days will need to be completed via home study. However if there are more than 2x days you are unable to attend, please contact us at btstacademy@outlook.com to discuss before booking. Refunds: Please note that your deposit is non-refundable. If you start your practical training and then withdraw from the course you will still be liable for the full course fee. Course Terms & Conditions: Click here
Let us demystify photo editing & show you how to reveal all the detail and drama in your images! Processing an image should be fun, quick and easy. Join us for 3-days and we'll show you how to professionally organise, edit and process your shots to help you create images that have real 'WOW"! This ticket includes: > Photographic and Editing 3-day Weekend Workshop. > Side-by-side tuition in the field > short 1-2-1 session with students during the weekend. > Post processing tuition in-between shoots and evenings at the lodge > Three nights luxury accommodation. (Options for both shared and single occupancy) > Camera Craft sessions and tutorials for explaining best in-camera practices and camera functions and features > Breakfast on Days 2, 3 and 4 > 3-course gourmet evening

This 6 week course will support you to make the most of the range of applications Adobe Premiere Pro offers in the production of video. Sample footage will be provided for you throughout the course, but you can also bring along your own video files to work on. The course is quite technical so some computer experience is required. We use Macs on the course – the Premiere interface is the same across operating systems but some shortcuts and menu items are different. Week 1- The basics This week we’ll start with some of the basics, introducing you to editing and Premiere Pro through: A short history of editing; from analogue to digital Getting to know the layout of Premiere Pro Working with ‘bins’ (folders) and creating edit Sequences Making selects from the rushes and sound files by creating in and out points Introducing clips to the timeline and making a simple edit with music Understanding rendering for smooth, full quality playback Week 2- Editing narrative sequences This week we’ll get further stuck into editing by building narrative, focus on offline editing‚ better organisation of your projects and breaking down footage through: Re-linking lost or moved footage Video ingest – importing and organising clips Organising and breaking down rushes using annotated markers and sub-clips Basics of the effects and motion settings Using our skills to create a simple narrative sequence Editing a dialogue sequence Considering the best ways of exporting your film for online Learn Adobe Media Encoder for more efficient exporting Week 3- Video settings, effects & titles This week we will focus in on what makes up video from a technical standpoint. We will then look at how we can work with and alter these parameters for different uses in our films through: Transcoding – converting the footage into an editable file and understanding codecs and meta data Adjusting scale and positioning and using motion keyframes to create movement over time Adding titles and animating them Applying transitions and various stock video effects Layering tracks and using opacity and different layer blending effects Creating masks and using motion tracking Working with green-screen footage, creating mattes, mask filters and working with multiple layers Week 4- Audio & sound This week we’ll consider the importance of sound design and music for narrative and atmosphere in film and experimental video through: Learning how to enhance your film with sound and music Introducing audio and music to the timeline, cutting and leveling Laying down music and cutting the footage to fit Building sound design around an existing edit with sync-sound and SFX Common practice and different approaches for syncing external microphone audio and video Mastering the audio and making sure that it is all levelled Learning how to create subtitles for our films and different methods to export/embed them Week 5- Colour This week we’ll start looking at colour in our videos and what role that plays. We will look at the process of colour grading and changing the mood in our films through: Using Lumetri Colour, the colour-correcting function within Premiere Pro CC Matching the colour of different cameras to create a similar look Creating different “colour grades” to create different atmospheres Stylising our footage Understand the colour limitations of video files and the importance of exposure when filming Working with tracked masks to isolate certain areas within your image to colour correct Week 6- Putting it all together In our final week we will get the opportunity to experiment with all the skills we’ve learned to create an opening sequence for a tv series. This is also a great opportunity to revisit any topics from previous weeks. Courses are subject to minimum enrolment. Please register early, within five days of the start date, to reduce the likelihood of course cancellation. Please read our cancellation policy before booking. Students, anyone over the age of 65, and those in receipt of any form of benefits can claim the concessionary price, offering a 10% discount on the full course price. Valid proof of eligibility must be produced on the first day of the course. Please use the code CONCESSION when prompted at checkout.

PRINCE2® Foundation and Practitioner
By London School of Science and Technology
PRINCE2® Foundation and Practitioner are process-based project management approaches that can be easily customised and scaled. PRINCE2® Foundation and Practitioner course aim to provide delegates with a comprehensive knowledge of project management methodologies. Course Overview PRINCE2 Foundation and Practitioner are process-based project management approaches that can be easily customised and scaled. PRINCE2® Foundation and Practitioner course aim to provide delegates with a comprehensive knowledge of project management methodologies. At the end of this PRINCE2® Foundation and Practitioner course, delegates will be able to delegate tolerances and report actual and forecast progress effectively. They will also be able to quickly prepare the risk management, change control, quality management, and communication management approaches. Attaining this PRINCE2® certification enables candidates to demonstrate and enhance their project management proficiency – contributing to elevated business acumen and career prospects. Concepts covered: • Project management • Levels of management • Authorise initiation • Tailoring the IP process • Project and stage plans • Analysing risks to a plan • Escalate issues and risks PRINCE2® Foundation Training: This introductory PRINCE2® certification will help candidates understand the fundamentals of the PRINCE2® project management methodology and develop an appreciation of the constituents that contribute to a project’s success – underpinned by the PRINCE2® principles, processes, and themes. The foundation element of the combined course lasts for 3 days. During the course, candidates will gain a basic understanding of how to work in part of a PRINCE2® team. PRINCE2® Practitioner Training: The PRINCE2® Practitioner element of the combined course forms the final part of the training where the candidate learns to apply their acquired knowledge. Candidates will be educated on how to apply the methodology to a set of scenarios and how to efficaciously lead a project. What’s Included in this PRINCE2® Course? The following is included in this PRINCE2® Course: • The PRINCE2® Foundation Examination • The PRINCE2® Practitioner Examination • Pre-course material • PRINCE2® Workbook • PDUs • Experienced PRINCE2® Instructor • Certificate • Refreshments • PRINCE2 Homework – Set by your PRINCE2 Instructor at the end of each day. Prerequisites for PRINCE2® Course: In this PRINCE2® Foundation and Practitioner course, there are no formal prerequisites. This PRINCE2® Course is designed for anyone who wants to gain in-depth knowledge about project management methodologies. This Course is more beneficial for: • Project Managers • Aspiring Project Managers • Team Leaders • Directors • Senior Responsible Owners PRINCE2® Foundation and Practitioner 6th Edition Training Course Outline: Module 1: Introduction to Projects and the PRINCE2® Methodology: • PRINCE2® “Project” Definition • Project Characteristics • Project Management • What is PRINCE2®? • Four Integrated Elements • What PRINCE2® Does Not Provide • What Makes a Project a PRINCE2® Project? Module 2: Project Manager Activities: • Customer/Supplier Environment • Projects in Context • Commercial Environment • Applying PRINCE2® • Delivery Approaches • Measuring Success • Organisational Capability • Seven Processes Module 3: Seven Themes: • Business Case • Organisation • Quality • Plans • Risk • Change • Progress Module 4: Seven Principles: • Continued Business Justification • Learn from Experience • Defined Roles and Responsibilities • Manage by Stages • Manage by Exception • Focus on Products • Tailor to Suit the Project Module 5: Organisation Theme: • Four Levels of Management • PRINCE2® Organisation Requirements • Project Management Team • Project Management Team Roles • Project Board • Project Assurance • Change Authority • Project Support • Communication Management Approach Module 6: Starting Up a Project (SU): • Process Overview • Feasibility Study and Mandate • Appoint the Executive and the Project Manager • Capture Previous Lessons • Design and Appoint the Project Management Team • Prepare the Outline Business Case • Project Product Description • Select the Project Approach and Assemble the Project Brief • Plan the Initiation Stage • Tailoring the SU Process Module 7: Directing a Project (DP): • Authorise Initiation • Authorise the Project • Authorise a Stage or Exception Plan • Authorise Project Closure • Give Ad Hoc Direction • Tailoring the DP Process • Theme Overview • Balance of Justification • Continued Business Justification • PRINCE2® Requirements • Contents of a Business Case • Business Case Development • Benefits Management Approach • Key Responsibilities Module 8: Initiating a Project (IP): • Agree to the Tailoring Requirements • Prepare the Risk Management Approach • Prepare the Change Control Approach • Prepare the Quality Management Approach • Prepare the Communication Management Approach • Set up the Project Controls • Create the Project Plan • Prepare the Benefits Management Approach • Assemble the Project Initiation Documentation • Tailoring the IP Process Module 9: Risk Theme: • Risk Definition • Effective Risk Management • PRINCE2® Risk Requirements • Risk Management Approach • Probability/Impact Grid • Risk Register • Risk Management Procedure • Identify Step • Risk Budget • Key Responsibilities Module 10: Quality Theme: • Quality Definitions • Quality Management • Quality Planning and Control • What is Quality Assurance? • PRINCE2® Quality Requirements • PRINCE2® Quality Documentation Requirements • Quality Management Approach • Quality Audit Trail • Project Product Description • Product Description • Quality Review Technique • Quality Review Roles/Responsibilities • Quality Review Meeting • Off-Specifications and Concessions • Review Follow-Up • Quality Review Benefits • Key Responsibilities • Communication Management Approach Module 11: Plans Theme: • Dealing with the Planning Horizon • PRINCE2® Planning Requirements • Documentation Requirements • Project and Stage Plans • Team Plans and Work Packages • Plans Relationship • What is in a Plan? • PRINCE2® Approach to Plans • Designing a Plan • Delivery Approaches • Defining and Analysing the Products • Product Breakdown Structures • Product Description • Product Flow Diagram • Identify the Activities and Dependencies • Preparing Estimates • Preparing a Schedule • Documenting the Plan • Analysing Risks to a Plan • Gantt Chart and Tailoring • Key Responsibilities Module 12: Progress Theme: • Progress Definition • PRINCE2® Requirements • Progress Control • Management by Exception • Delegating Tolerances and Reporting Actual and Forecast Progress • Types of Control • Management Products and Progress Control Module 13: Change Theme: • Issue Definition • PRINCE2® Approach to Change • PRINCE2® Change Documentation • Issue Register • Change Control Approach • Change Budget • Issue and Change Control Procedure • Issue Report • Exception Report Module 14: Controlling a Stage (CS): • Activity Breakdown • Authorise a Work Package • Work Package • Review Work Package Status • Receive Completed Work Packages • Review the Management Stage Status • Report Highlights • Highlight Report • Capture and Assess Issues and Risks • Escalate Issues and Risks • Take Corrective Action • Tailoring CS Module 15: Managing Product Delivery (MP): • Accept a Work Package • Execute a Work Package • Checkpoint Report • Deliver a Work Package • Tailoring MP Module 16: Managing a Stage Boundary (SB): • Plan the Next Management Stage • What is in a Plan? • Update the Project Plan • Update the Business Case • Report the Management Stage End • End-Stage Report • Produce an Exception Plan • Tailoring SB Module 17: Closing a Project (CP): • Prepare Planned Closure • Hand Over Products • Evaluate the Project • End Project Report • Recommend Project Closure • Tailoring CP Module 18: Considerations for Organisational Adoption: • Creating a PRINCE2® Based Project Management Method • Creating Tailoring Rules and Guidelines • Rating the Complexity of Projects • Embedding PRINCE2® • Tailoring • What Should Be Tailored? • Tailoring Constraints and Influences • Creating an Organisation’s Method DURATION 6 days WHATS INCLUDED Course Material Case Study Experienced Lecturer Refreshments Certificate