- Professional Development
- Medicine & Nursing
- Arts & Crafts
- Health & Wellbeing
- Personal Development
Individual Eyelash Extension Course 1:1
By Penelope Academy
This one day course will teach students how to extend the natural lash whilst adding volume, using synthetic lashes. Students will learn the technique for applying individual eyelashes and how to use products and tools used during the service.

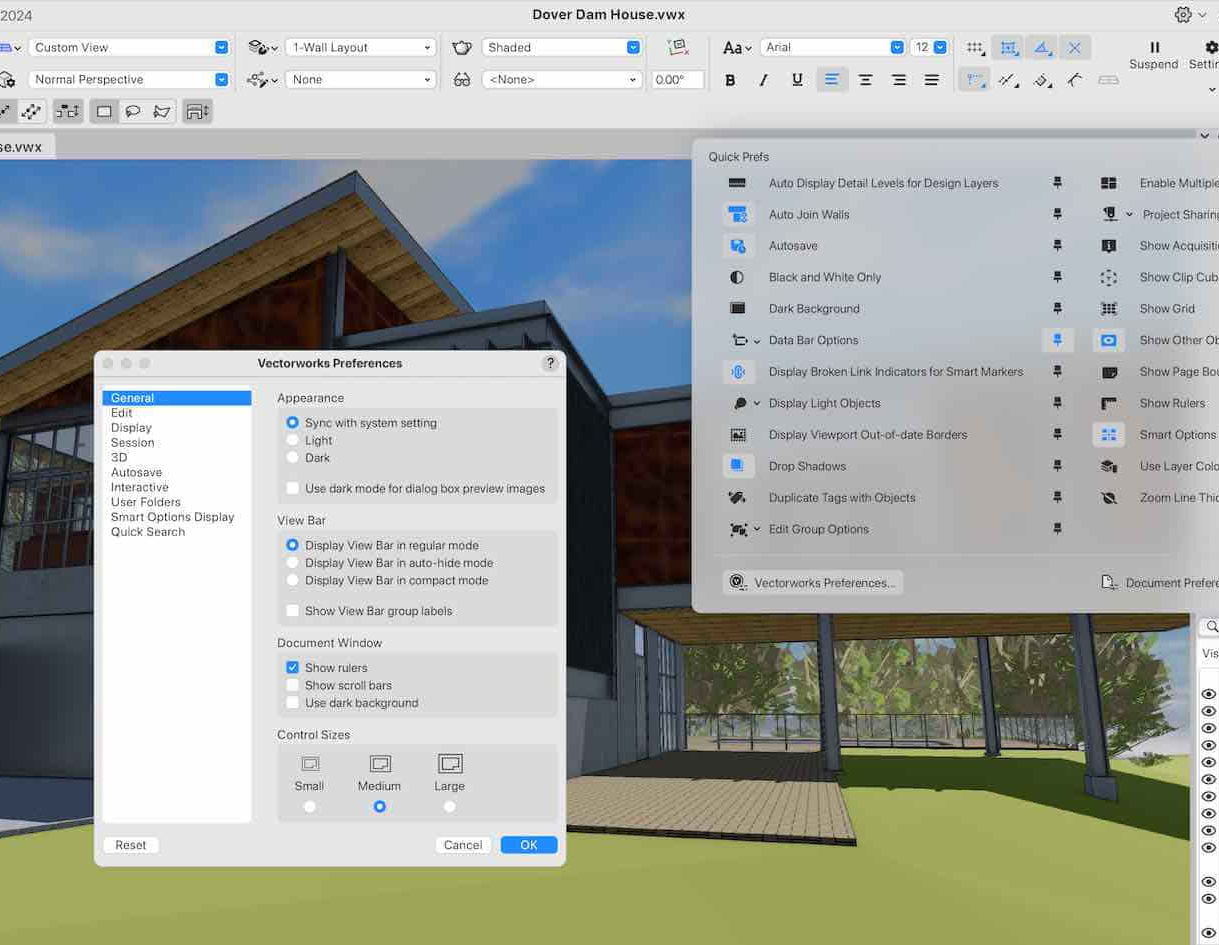
Vectorworks Night Training Courses
By ATL Autocad Training London
Why Choose Vectorworks Night Training Courses? Flexibility: Learn around your work schedule. Personalized Attention: Small classes for focused guidance. Practical Learning: Hands-on training for immediate application. Convenience: Balance work and learning seamlessly. Check our Website Training Duration: 10 hours. Approach: Personalized 1-on-1 Training and customized training. Timings: Schedule a convenient hour, Mon to Sat, between 9 am and 7 pm. Course Outline: Mastering Vectorworks Basics I. Introduction to CAD and Vectorworks Software Understanding the role of Computer-Aided Design (CAD) in modern workflows. Comprehensive introduction to Vectorworks software. II. Workspace Setup and Fundamental Options Configuring the workspace for efficient navigation and operation. Exploring basic options to enhance user experience. III. Basic Skills in Drawing and Object Selection Mastering fundamental drawing techniques. Expertise in selecting and manipulating objects. IV. Advanced Editing Techniques Combining shapes, mirroring, rotating, and grouping objects effectively. Working with precise scaling, preferences, and templates. V. Detailed Object Manipulation and Attributes Drawing and moving objects accurately within the design space. Utilizing advanced editing tools like fillet and offset. Introduction to basic attributes and group editing. VI. Advanced Drawing Techniques and Graphics Creating room plans with walls, windows, and doors. Implementing graphic elements such as hatching, gradients, and image fills. Drawing elevations using various methods and techniques. VII. Resource Management and Design Layers Importing images for graphic illustration. Creating symbols and navigating the Resource Browser. Organizing the drawing effectively using design layers. VIII. Labels, Annotations, and User Interface Mastery Labeling drawings and incorporating simple title block text. Navigating the user interface, understanding key terminologies. Plotting, printing, creating sheets (A1, A2, A3), and working with viewports. IX. Advanced Object Manipulation and Customization Converting drawings into PDF files. Efficiently working with files, objects, and data. Utilizing object snaps, quick selection, division, and measurement. X. Dimensioning, Text, and Tool Palettes Implementing dimensioning and annotations effectively. Working with text, custom tool palettes, and organizing these palettes. Creating standard views and additional drawing objects (Arc, Donut, Ellipse). XI. 3D Modeling Introduction and Real-World Units Introduction to 3D modeling, focusing on creating extrudes. Working with real-world units for accurate representation. XII. Advanced Object Manipulation and Exporting Manipulating objects, changing object angles, creating mirror images. Dealing with architectural elements like walls, doors, windows, and floors. By the end of the Vectorworks Evening Training Course, participants will: Demonstrate proficiency in using the Vectorworks interface, tools, and navigation. Create and edit 2D drawings, including walls, doors, windows, floors, ceilings, stairs, and railings. Effectively manage layers, classes, and views for organized and controlled object placement. Create and edit dimensions and annotations for accurate measurements and documentation. Develop skills in creating, modifying, and utilizing symbols for increased efficiency. Generate and edit 3D geometry, apply textures, and create sections and elevations from 3D models. Create polished presentation drawings using viewports, annotations, and text for clarity. Summarize course content and confidently apply learned skills in Vectorworks projects. Utilize available resources for further learning and professional development. Who Should Attend? Perfect for those aiming to master Advanced 2D Plans, Sections, Elevations and Construction detailing, lighting, and rendering in Vectorworks. Schedule Flexibility: Book personalized 1-on-1 sessions, Monday to Saturday, 9 a.m. to 7 p.m. Split 10 hours to fit your schedule. Method: Choose in-person or Live Online 1-on-1 sessions with tailored content and individual support, including Zoom options. Why Vectorworks? A pioneering CAD software, Vectorworks seamlessly integrates 2D and 3D capabilities, making it ideal for architects and designers. Free Educational Access: Students and professors can access a complimentary Vectorworks Designer license via the Academic Portal. Explore Vectorworks: Transform your designs with Vectorworks, the leading 2D, 3D, CAD, BIM software. Download or try now: https://www.vectorworks.net Tailored Training Solutions: We offer customized and project-focused training programs, designed to meet your specific needs and goals. Individualized Coaching: Receive personalized one-on-one guidance tailored exclusively for you. Adaptable Timings: Choose training slots that align with your schedule, ensuring flexibility in your learning journey. Ongoing Assistance: Access continuous post-course support to enhance your understanding and resolve queries. Comprehensive Learning Resources: Receive detailed materials providing in-depth insights for effective learning and reference. Recognition of Participation: Earn a Certificate of Attendance upon completion of your personalized training. Affordable Learning: Benefit from cost-effective rates, making quality education accessible to all. Software Setup Guidance: Get expert assistance in setting up your software on your devices for seamless learning experiences. Rewards for Referrals: Recommend our courses to others and enjoy special rewards for each successful referral. Group Learning Benefits: Enjoy exclusive discounts when you opt for group training, making it an ideal choice for teams. Convenient Hours of Operation: Access our training services at your convenience, with operating hours extending to accommodate your busy schedule. Tailored Learning Paths: Experience courses curated specifically for your needs, ensuring targeted and effective learning outcomes.
Vectorworks 2D Basics Level Training Course
By ATL Autocad Training London
Why Vectorworks 2D Basics Level Training Course? Vectorworks excels in 2D design, delivering exceptional results and serving as a robust 2D design tool. The Fundamentals course provides customizable tools for precise 2D drawings, while VectorWorks Architect streamlines the process with user-friendly, easy-to-learn tools. Click here for more info: Website Course Details: 10 hrs, Flexible 1-on-1 sessions, in-person or online. 9 am and 7 pm (Mon-Sat).10 hours, split as needed for your schedule. Module 1: Understanding CAD and Vectorworks The Role of CAD in Design Introduction to Vectorworks Software Module 2: Setting Up Your Workspace Workspace Configuration Basic Options and Preferences Module 3: Foundational Drawing Skills Drawing Techniques Selecting Objects Module 4: Advanced Object Editing Combining Shapes Mirroring Objects Rotating Objects Grouping Objects Module 5: Precision Drawing and Scaling Working with Scale Setting Preferences Saving Templates Module 6: Accurate Object Placement Drawing Precision Moving Objects Precisely Module 7: Advanced Editing Techniques Using Fillet Employing Offset Module 8: Introduction to Object Attributes and Groups Basic Attributes Editing Object Groups Module 9: Duplicating Objects Linear Duplicates Rectangular Duplicates Circular Duplicates Module 10: Creating Room Plans Designing Walls Incorporating Windows and Doors Module 11: Room Plan Development Room Plan Drawing Methods Module 12: Utilizing Additional Attributes Hatch Patterns Gradients Image Fills Module 13: Drawing Elevations Elevation Techniques Effective Methods Module 14: Importing Images for Graphics Graphic Illustration Image Integration Module 15: Symbols and Resource Management Creating Symbols Introduction to Resource Browser Module 16: Organizing Drawings with Design Layers Design Layer Usage Module 17: Labeling Drawings and Title Blocks Drawing Labels Title Block Text Module 18: Plotting and Printing User Interface and Terminology Printing Techniques Module 19: Creating Drawing Sheets A1, A2, and A3 Sheets Module 20: Utilizing Viewports Multiple Views Module 21: Professional Model Presentation Paper Space Presentation Converting to PDFs Module 22: Managing Files and Projects Module 23: Displaying Objects and Terminology Module 24: Objects and Data Management Module 25: Precise Object Placement Object Snaps Quick Select Module 26: Dividing and Measuring Objects Module 27: Dimensioning and Annotation Module 28: Working with Text Module 29: Custom Tool Palettes Module 30: Organizing Tool Palettes Module 31: Effective Tool Palette Usage Module 32: Standard Views and Drawing Techniques Module 33: Drawing Curves Arcs, Donuts, and Ellipses Module 34: Real-World Units and Measurements Module 35: Object Manipulation Changing Object Angles Module 36: File Management Saving, Exiting, and Opening Projects Module 37: Creating Mirror Images Module 38: Introduction to 3D Modeling Creating Extrusions Basic 3D Concepts Outcomes and Vectorworks Jobs: Vectorworks Proficiency: Gain expertise in using Vectorworks software for design tasks. 2D Design Skills: Create accurate 2D drawings and architectural plans. Advanced Editing: Efficiently manipulate and edit objects in your designs. Precision Drawing: Develop skills for precise scaling and drawing. These skills open doors to careers in design, architecture, engineering, entertainment, and more. Potential Jobs: Architectural Drafter Interior Designer Landscape Designer AD Technician Graphic Designer Construction Estimator Product Designer Set Designer Event Planner Urban Planner Vectorworks 2D Training Course Our Vectorworks training is thoughtfully designed to educate and inspire designers at every skill level. Whether you're just starting or a seasoned pro, our courses will furnish you with fresh skills, streamline your workflows, and unleash the full potential of your Vectorworks software. Online Training Choices Tailored Online Sessions: Customized training sessions tailored to your specific requirements and skill level. Virtual Classroom: Participate in interactive virtual classes from the convenience of your workspace. Getting Started Guides: Comprehensive guides to assist you in navigating the fundamentals of Vectorworks. In-Person Training Opportunities Customized On-Site Sessions: Hands-on training delivered directly to your office or at regional events. One-to-One: Engage in interactive learning at our training locations. Download Vectorworks https://www.vectorworks.net Personalized One-on-One Training: Get individualized attention and customized instruction. Flexible Scheduling: Choose your preferred training time and day to suit your schedule. Post-Course Assistance: Access free online support after course completion. Comprehensive Learning Materials: Receive PDF notes and handouts to enhance your learning. Certificate of Completion: Earn a recognition certificate upon successfully finishing the course. Affordable Rates: Enjoy cost-effective training rates. Software Setup Assistance: Receive help setting up the software on your computer. Referral Benefits: Recommend a friend and receive discounts on future courses. Group Training Discounts: Special discounts available for group training sessions. Convenient Availability: Access training sessions from Monday to Sunday, with extended hours. Tailored Training: Receive customized, bespoke training tailored to your specific requirements.
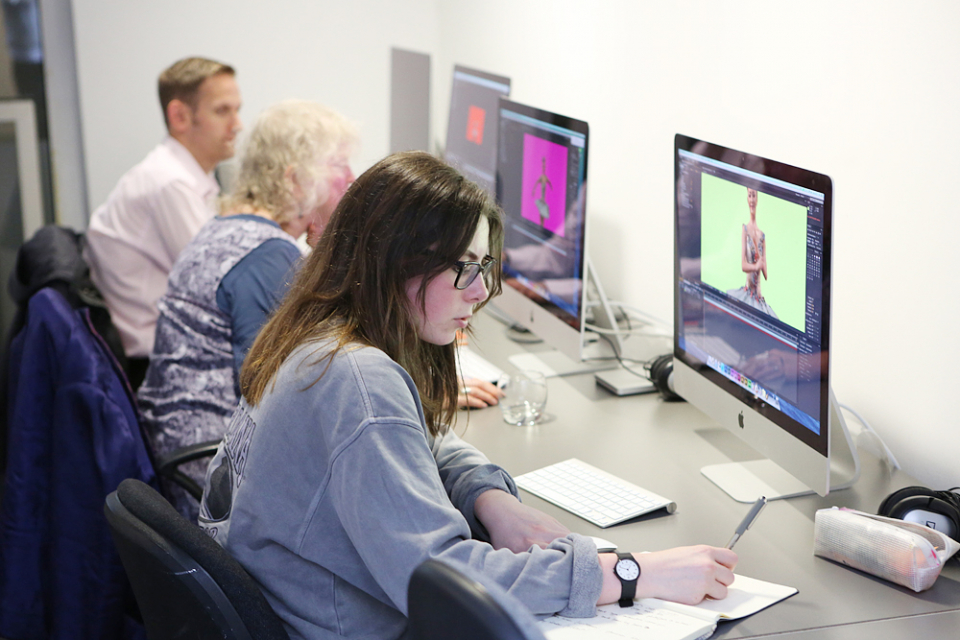
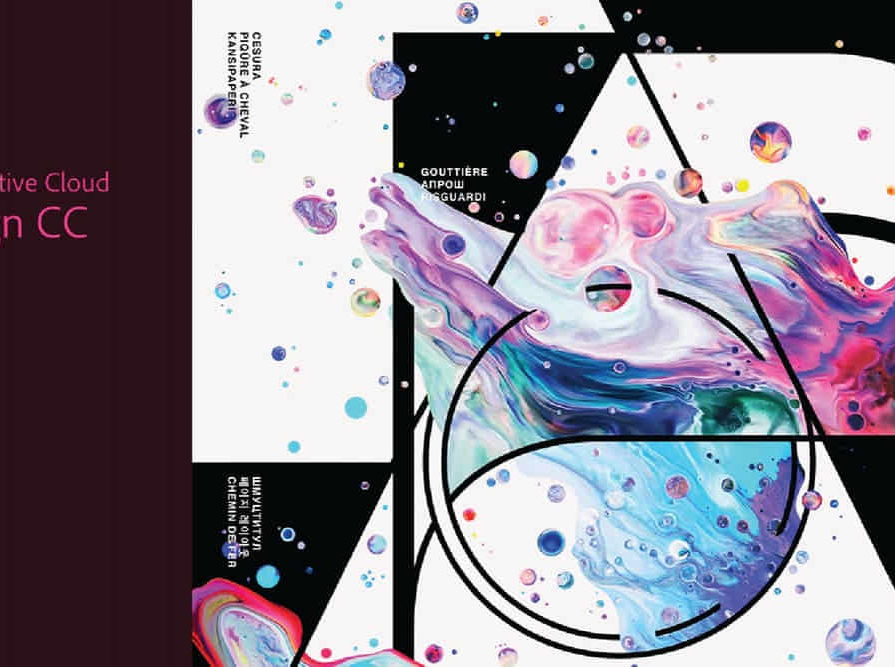
Adobe After Effects CC is the industry leader in video compositing software, offering an exciting and versatile array of applications for the creation of professional moving image work. On this course you will learn a range of visual effects and animation techniques, working between Photoshop and After Effects to create videos which explore text based motion graphics, character animation, green-screen compositing, 3D landscapes, motion tracking and lots more in-between. Alongside technical exercises the tutor will screen and discuss relevant artists, designers and filmmakers, providing both the technical skills and inspiration to create your own professional motion graphics work, filmic special effects or experimental artists video. Computer experience is required. Week 1 This week we will create a short video that combines text, still image and video layers. Through this exercise you will learn how to: Navigate the workspace on After Effects Set up a project and select a video format Introduce video to the timeline and split layers Change the position and scale of layers Introduce basic text Use selections in Photoshop to create a still image composition Import this composition into After Effects to create a composite video. Week 2 This week we will look at basic animation techniques. Through a series of exercises, you will learn how to: Use Photoshop to great multi-layered elements for animation Import these Photoshop elements into After Effects Work with key-frames and interpolation Add motion blur Duplicate and pre-compose animated elements Create a parallax effect to give the illusion of depth Apply blending modes Work with the puppet tool to create moving joints for an animated character Week 3 This week we will look at converting 2D photographs into a 3D virtual space to provide depth and movement. Through a series of exercises, you will learn how to: Convert a 2D image into a 3D space Set up a multi-layered diorama in Photoshop Import this into After Effects and position the layers within 3D space Create an animated camera move through 3D space Apply depth of field Week 4 This week we will look at working with green-screen compositing to place a live action figure within an animated backdrop. Through a series of exercises, you will learn how to: Work with the Keylight filter Adjust colour balance and tone Composite the figure against an animated background Introduce shadows and highlights Use the green-screen figure to create a silhouette Week 5 This week we will look at applying masks to footage to create cutouts, as well as exploring different applications for effects. Through a series of exercises, you will learn how to: Work with masks Use the Roto-mask tool Apply time re-mapping Work with ‘Particle Playground’ and similar effects Week 6 This week we will look at working with the paint panel to create animated drawings, as well as using motion tracking to attach a text element to a moving point within a video clip. Finally, we will cover how to output your final project, adding sound effects and applying a basic edit. Through a series of exercises, you will learn how to: Create text based motion graphics (kinetic typography) Apply motion tracking to live action footage Render your project Add sound to your video Courses are subject to minimum enrolment. Please register early, within five days of the start date, to reduce the likelihood of course cancellation. Please read our cancellation policy before booking. Students, anyone over the age of 65, and those in receipt of any form of benefits can claim the concessionary price, offering a 10% discount on the full course price. Valid proof of eligibility must be produced on the first day of the course. Please use the code CONCESSION when prompted at checkout.
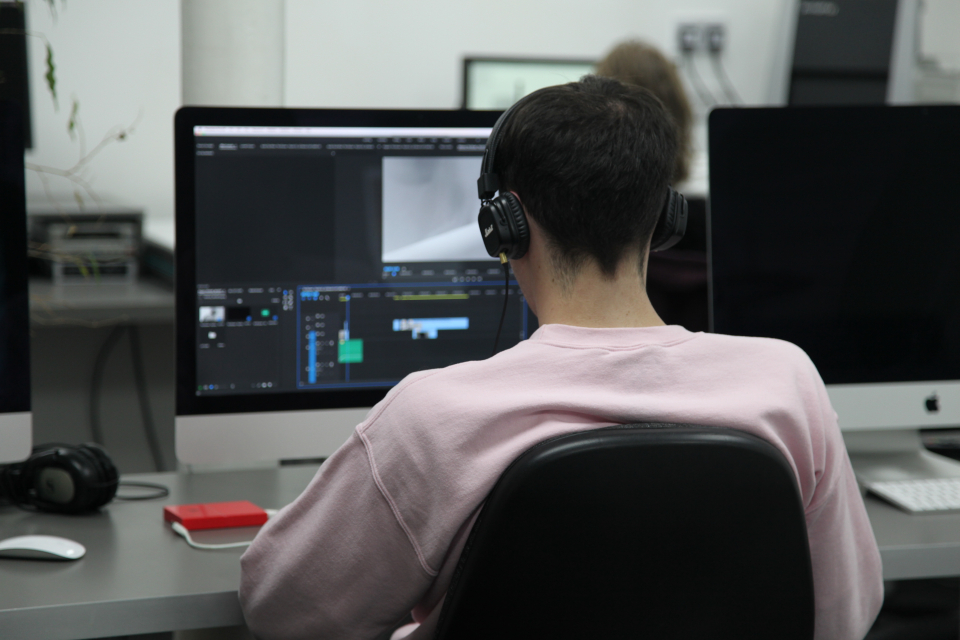
This 6 week course will support you to make the most of the range of applications Adobe Premiere Pro offers in the production of video. Sample footage will be provided for you throughout the course, but you can also bring along your own video files to work on. The course is quite technical so some computer experience is required. We use Macs on the course – the Premiere interface is the same across operating systems but some shortcuts and menu items are different. Week 1- The basics This week we’ll start with some of the basics, introducing you to editing and Premiere Pro through: A short history of editing; from analogue to digital Getting to know the layout of Premiere Pro Working with ‘bins’ (folders) and creating edit Sequences Making selects from the rushes and sound files by creating in and out points Introducing clips to the timeline and making a simple edit with music Understanding rendering for smooth, full quality playback Week 2- Editing narrative sequences This week we’ll get further stuck into editing by building narrative, focus on offline editing‚ better organisation of your projects and breaking down footage through: Re-linking lost or moved footage Video ingest – importing and organising clips Organising and breaking down rushes using annotated markers and sub-clips Basics of the effects and motion settings Using our skills to create a simple narrative sequence Editing a dialogue sequence Considering the best ways of exporting your film for online Learn Adobe Media Encoder for more efficient exporting Week 3- Video settings, effects & titles This week we will focus in on what makes up video from a technical standpoint. We will then look at how we can work with and alter these parameters for different uses in our films through: Transcoding – converting the footage into an editable file and understanding codecs and meta data Adjusting scale and positioning and using motion keyframes to create movement over time Adding titles and animating them Applying transitions and various stock video effects Layering tracks and using opacity and different layer blending effects Creating masks and using motion tracking Working with green-screen footage, creating mattes, mask filters and working with multiple layers Week 4- Audio & sound This week we’ll consider the importance of sound design and music for narrative and atmosphere in film and experimental video through: Learning how to enhance your film with sound and music Introducing audio and music to the timeline, cutting and leveling Laying down music and cutting the footage to fit Building sound design around an existing edit with sync-sound and SFX Common practice and different approaches for syncing external microphone audio and video Mastering the audio and making sure that it is all levelled Learning how to create subtitles for our films and different methods to export/embed them Week 5- Colour This week we’ll start looking at colour in our videos and what role that plays. We will look at the process of colour grading and changing the mood in our films through: Using Lumetri Colour, the colour-correcting function within Premiere Pro CC Matching the colour of different cameras to create a similar look Creating different “colour grades” to create different atmospheres Stylising our footage Understand the colour limitations of video files and the importance of exposure when filming Working with tracked masks to isolate certain areas within your image to colour correct Week 6- Putting it all together In our final week we will get the opportunity to experiment with all the skills we’ve learned to create an opening sequence for a tv series. This is also a great opportunity to revisit any topics from previous weeks. Courses are subject to minimum enrolment. Please register early, within five days of the start date, to reduce the likelihood of course cancellation. Please read our cancellation policy before booking. Students, anyone over the age of 65, and those in receipt of any form of benefits can claim the concessionary price, offering a 10% discount on the full course price. Valid proof of eligibility must be produced on the first day of the course. Please use the code CONCESSION when prompted at checkout.
Rhino Introduction to Intermediate Training Course
By ATL Autocad Training London
Why Choose Rhino Introduction to Intermediate Training Course? Learn: 3D NURBS models. Master: Surfacing modeling. Interface: Rhino's navigation. Rendering Skills: Enhance presentations with Rhino renderings. Check our Website Flexible Scheduling: 1-on-1 training sessions according to your convenience. Choose any hour between 9 a.m. and 7 p.m., Mon to Sat. You can call us at 02077202581 to book over the phone. Duration: 10 hours. Methods: Personalized training either in-person, or live online. Introduction and Navigation Become acquainted with Rhino's interface, menus, and screen layout. Efficiently traverse through Rhino models, ensuring precision in 2D lines, polylines, and NURBS curves. Utilize modeling setup features, incorporating constraints like snap, ortho, and planar for accuracy. Leverage object snaps and Smart Track functionality to enhance precision. Solid and Surface Modeling Develop rapid 3D solids and surfaces, employing Rhino's organized layering system. Utilize coordinates and constraints for meticulous modeling, exploring 3D space and elevations. Create diverse shapes, such as rectangles, circles, arcs, ellipses, and polygon curves. Elevate models with Rhino render and render color, incorporating free-form curves, helix, and spiral curves. Efficiently handle model views with pan, zoom, and view management tools. Implement various editing commands for curve manipulation and transform curves into surfaces and solids. Utilize history tracking for advanced editing and execute general editing actions: move, copy, rotate, mirror, and scale. Create arrays with both polar and rectangular arrangements and employ boolean operations like union, difference, and intersection. Offset curves and surfaces effectively, ensuring meticulous detailing. Intermediate Edit and Surfacing Introduce key NURBS modeling concepts and terminologies. Edit curves and surfaces via control point manipulation and rebuild them for optimal refinement. Employ the nudge modeling aid for precise adjustments and generate deformable shapes. Create curves through projection techniques and split surfaces using curves and surfaces. Blend surfaces seamlessly, utilizing symmetry tools, lighting, and rendering effects. Convert intricate 3D objects into detailed 2D drawings, expertly crafting page layouts. Advanced Surfacing and Solid Modeling Construct model primitives and solid text, employing techniques such as pipe and extrusion. Modify solids efficiently using Boolean tools, expanding your surface modeling capabilities. Employ techniques like extrusion, lofting, and revolving for intricate surfaces. Create sweeps using 1 and 2 rail curves, mastering surface network techniques for complex shapes. Upon completion, you will: Master Rhino Tools: Navigate interfaces, utilize advanced tools for precise modeling, and employ features like object snaps and Smart Track. Expert Solid and Surface Modeling: Develop intricate 3D solids and surfaces, create diverse shapes, and use Rhino render effectively. Advanced Editing Skills: Apply intermediate and advanced editing techniques, including symmetry tools and realistic rendering. Precision Modeling: Utilize coordinates, constraints, and advanced aids for accurate detailing and problem-solving. Professional Project Execution: Create high-quality renderings, 2D drawings, and polished 3D models for real-world design scenarios. Upon completion, you'll be adept at 3D modeling, product design, and architecture, positioning you as a valuable asset in the design industry. Why Choose Our Rhino Courses? Rhino, also known as Rhinoceros, stands as a robust 3D computer graphics and computer-aided design software, utilized extensively in domains like architecture, industrial design, and multimedia. Our Rhino courses are meticulously crafted to empower you in mastering this software. Led by seasoned instructors, our courses provide a comprehensive understanding of Rhino, enabling you to create exceptional designs. Rhino 3D Training: Our Rhino 3D training caters to beginners and those seeking advanced techniques. Course Highlights: Precise 3D Modeling: Master free-form 3D NURBS models with precision. Advanced Functionality: Explore Rhino's features, including advanced surfacing commands. User Interface Mastery: Navigate Rhino's interface and hone skills in curves, surfaces, and solids. Expert Guidance: Acquire expertise in Rhino's modeling environment under expert guidance. Modeling Techniques: Learn free-form and precision modeling techniques. Modeling Aids: Utilize tools for accurate modeling and create basic Rhino renderings. Benefits of our Courses: Expert Guidance: Receive instruction from experienced architects and designers, providing practical, real-world insights for comprehensive learning. Comprehensive Resources: Access bespoke video tutorials for additional learning and reference, enhancing your understanding of the course materials. Digital Reference Material: Receive a digital reference book to support your revision efforts, providing a comprehensive resource for your studies. Ongoing Support: Enjoy free after-support through phone or email even after course completion, ensuring continuous assistance and guidance. Tailored Learning Experience: Customize your learning journey by adapting the syllabus and projects to align with your specific needs and interests, fostering a personalized educational experience. Certificate: Upon completion, earn a certificate from us, validating your achievement and recognizing your expertise in the field.

InDesign Evening Classes
By ATL Autocad Training London
Who is this for? InDesign Evening Classes. Refine your Adobe InDesign skills with expert tutors. Master layout creation, typography, and image manipulation. Design captivating brochures, magazines, and more. Choose between in-person or live online sessions. Earn a Certificate of Completion and enjoy lifetime email support. Explore our complimentary trial session. Check our Website Duration: 10 hours Approach: 1-on-1 sessions with tailored content. Schedule: 1-on-1 sessions, available Mon to Sat from 9 am to 7 pm. Course Title: Mastering Adobe InDesign Course Duration: 10 Hours Session 1: Introduction to Adobe InDesign (1 hour) Overview of Adobe InDesign interface Understanding tools and panels Setting up new documents and document properties Basic navigation and shortcuts Session 2: Mastering Page Layouts (1.5 hours) Working with master pages Creating and managing text frames and image placeholders Managing multiple pages and spreads Using grids and guides for precise layouts Session 3: Typography and Text Formatting (1.5 hours) Working with fonts, styles, and text formatting options Understanding text threading and linking Advanced text composition techniques Utilizing paragraph and character styles for consistency Session 4: Advanced Image Manipulation (1.5 hours) Importing and manipulating images and graphics Understanding image resolution and color modes Working with clipping paths and transparency Applying image effects and filters Session 5: Interactive Documents and Digital Publishing (2 hours) Creating hyperlinks and interactive buttons Embedding multimedia elements (audio, video) in documents Exporting documents for digital platforms (eBooks, PDF forms) Introduction to responsive design for various devices Session 6: Advanced Techniques and Special Effects (1 hour) Utilizing advanced drawing tools and shapes Applying special effects like drop shadows, transparency, and blending modes Working with tables and charts Introduction to data merge for personalized content Session 7: Printing and Prepress (1 hour) Understanding print terminology and specifications Preflighting documents for print readiness Color management and preparing files for different printing processes Exporting files for professional printing Session 8: Project Work and Review (0.5 hour) Participants work on a practical project applying learned skills Instructor-guided project review and feedback Session 9: Tips, Tricks, and Best Practices (0.5 hour) Time-saving shortcuts and productivity hacks Best practices for efficient workflow and file management Troubleshooting common issues and errors Session 10: Q&A and Certification (0.5 hour) Addressing participant queries and concerns Certificate distribution and course completion celebration This comprehensive 10-hour course aims to equip participants with advanced skills in Adobe InDesign, covering essential aspects of design, typography, interactivity, and print preparation. Participants will engage in hands-on activities, projects, and discussions to reinforce their learning throughout the course. By the end of this 10-hour advanced InDesign course, you will: Gain a comprehensive understanding of InDesign's most powerful features and advanced techniques. Create sophisticated page layouts with eye-catching special effects for professional-level designs. Efficiently manage fonts, colors, and shapes to enhance the visual appeal of your documents. Develop interactive PDFs with navigation, page transitions, and embedded video for engaging presentations. Master the use of character styles, paragraph styles, and word styles to streamline text formatting. Utilize advanced object styles and anchored objects for efficient layout design. Work effectively with Adobe Stock, Photoshop, Illustrator, and other Creative Cloud applications for seamless integration. Create PDF forms and implement interactive button-triggered animations for interactive documents. Optimize workflow with keyboard shortcuts, scripts, and advanced preferences for a smoother design process. Learn valuable tips and best practices from industry experts to boost your productivity and efficiency. Enhance your mastery of InDesign through our advanced program, meticulously designed to hone your skills. Explore intricate page layouts and seamlessly integrate captivating special effects into your projects. Our seasoned Adobe trainers, renowned for their approachable teaching style, will guide you through InDesign's powerful features, sharing invaluable insights derived from years of practical experience. This interactive course provides ample opportunities for hands-on practice, ensuring your confidence in harnessing InDesign's diverse technical capabilities. Key Course Highlights: In-depth exploration of InDesign's advanced functionalities. Individualized attention, fostering open discussions and encouraging questions. Expert trainers, small class sizes, and a supportive and collaborative learning environment. Comprehensive learning materials and resources, all inclusive. Continuous support for any post-course inquiries or concerns, ensuring your ongoing success. Enhance your InDesign proficiency, crafting polished designs effortlessly. Elevate your skills with our advanced course, ensuring: Thorough coverage of InDesign's technical capabilities. Personalized attention and ample opportunity for questions. Supportive, knowledgeable trainers in a comfortable learning environment. Comprehensive materials and resources for your learning journey. Continued assistance for post-course queries and concerns. Download InDesign
SketchUp Night Training Courses
By ATL Autocad Training London
Who is this course for? SketchUp Night Training Courses. This course is designed for professionals and students interested in enhancing their SketchUp skills through evening sessions. Whether you're a beginner looking to learn the basics or an experienced user seeking advanced techniques, this course offers tailored instruction to suit various skill levels during evening hours. Click here for more info: Website 1-on-1 sessions. Mon to Sat between 9 am and 7 pm Course Duration: 10 hours Method: 1-on-1 (In-person or Live Online) Design Your Own Template Craft custom templates 2D Geometry Essentials Construct fundamental 2D shapes (lines, arcs, circles, rectangles) Grasp the concept of geometric stickiness Exploring 3D Geometry Develop basic 3D shapes Master 3D geometric stickiness Visualize your model in 3D Effective Model Organization Organize your model effectively using layers Geometry Shaping Tools Shape geometry with the Push/Pull tool Manipulate geometry by moving entities Maintain coplanar geometry integrity Connect and generate complex forms Lock inferences for precision Expedite form generation Restore and refine surfaces Create and apply surfaces to your model Employ mirroring and array techniques Enhancing Visuals Apply materials for enhanced visuals Craft 3D text elements Utilize essential tools for creating and manipulating 3D structures Integration and Expansion Integrate component models from the 3D Warehouse Explore display options and styles Position and export models to Google Earth Model Efficiency Techniques Overcome stickiness challenges in your model Optimize modeling efficiency with component nesting Understand the impact of scaling on similar components Leverage groups and components for isolating geometry Efficiently manage components using the Component Browser 3D Warehouse Collaboration Access and share components via the 3D Warehouse Harness the power of dynamic components Master component inferencing and editing Combine and integrate components seamlessly Integration and Multimedia Import external sites into SketchUp Incorporate photographs into your projects Employ the Follow Me tool effectively Enhance your designs with the Materials Browser Collaborate with the 3D Warehouse community Fine-tune your model's style Interactive Presentations Create immersive scene-based walk-throughs Generate sections and animated scenes for compelling presentations Export and Integration Seamlessly export your work to AutoCAD and LayOut Learning Outcomes for Designers after this course: SketchUp Proficiency: Acquire mastery of essential 3D modeling and design tools. Advanced Modeling Skills: Apply intricate modeling techniques for architectural and interior components. Effective Space Planning: Organize interior spaces efficiently with space planning expertise. Architectural Precision: Create detailed architectural models and facades with precision. Custom Furniture Design: Craft bespoke furniture designs that enhance interior spaces. Texture Realism: Apply textures skillfully to achieve lifelike visualizations. Compelling Visual Presentations: Present design concepts with captivating visualizations. Effective Presentation Skills: Showcase ideas convincingly to clients and stakeholders. Professional Collaboration: Communicate seamlessly with industry professionals using SketchUp. Workflow Streamlining: Enhance project efficiency by streamlining design workflows for rapid iterations. Additional Benefits: Complimentary Portfolio Review Mock Interviews for Skill Enhancement Skills Acquired: Proficient SketchUp Mastery: Gain expertise in using SketchUp for 3D modeling, design, and visualization. Advanced Rendering Techniques: Learn to create realistic renders using plugins like V-Ray or Twilight Render. Efficient Workflow: Develop skills to streamline your design process and enhance productivity. Collaboration and Presentation: Explore techniques for collaborative work and compelling project presentations. Job Opportunities: Architectural Designer: Create detailed 3D models and visualizations for architectural projects. Interior Designer: Design and visualize interior spaces for residential and commercial clients. Landscape Architect: Develop 3D landscape designs and presentations for outdoor spaces. Freelance 3D Artist: Offer your services for various projects, from architectural visualization to product modeling. Visualization Specialist: Provide visualization services to real estate agencies, design firms, or marketing companies. Why Us? Personalized Training: Dive into SketchUp with exclusive coaching from experienced architects and designers. Enjoy 1-on-1, in-person sessions at (SW96DE) or participate in live online classes. Flexible Schedule: We're available Monday to Saturday from 9 am to 7 pm, ensuring learning fits into your busy life. Tailored Tutorials: Take home custom video tutorials crafted to enhance your SketchUp skills. Comprehensive Learning: Access a digital reference book for thorough revision, ensuring a deep understanding of every SketchUp concept. Continuous Support: Enjoy ongoing assistance via phone or email, even after the course ends, ensuring your continued success. Adaptable Syllabus: We customize the syllabus and projects to meet your specific needs, ensuring focused learning on what matters most to you. Official Certification: Certificate upon course completion, validating your SketchUp expertise. Why Choose Us? Individualized Support: Our courses, ranging from 10 to 120 hours, provide unwavering assistance at every stage. Personalized homework assignments and post-course support pave the way for mastering SketchUp with expert guidance. Personal Attention, No Crowded Classes: Experience the intimacy of one-on-one learning. Say goodbye to overcrowded classrooms, ensuring you receive the focused attention you deserve in a confident and comfortable environment. Financial Flexibility: Your educational journey shouldn't strain your finances. We offer a range of payment plans tailored to your needs. Explore the available options and embark on your SketchUp learning adventure today. Expert Instructors, Real-world Expertise: Our instructors, meticulously chosen for their industry expertise and passion for teaching, are dedicated to imparting invaluable SketchUp skills to eager learners.

Mental Health First Aid
By Bright White Life - Coaching and Training
Become a Mental Health First Aider (MHFAider®) and receive 3 years of certification and ongoing benefits. This 2-day course will teach you how to identify signs of poor mental health and confidently provide support. Delivered via Zoom or in person. Includes workbook/manual, e-certificate, and 3yr access to MHFAider® Support App and learning opportunities. Enquire for more details

Are you interested in learning how to make polymer clay jewellery? Join us for a fun and informative workshop that will teach you everything you need to know about conditioning the clay, texturing, cutting, shaping the clay, forming and moulding. You'll create a range of finished jewellery pieces that you can take home with you afterwards. This is a great way to learn some new skills and explore a wide variety of style and techniques that are easy enough for beginners but also have room for more advanced learners!
