- Professional Development
- Medicine & Nursing
- Arts & Crafts
- Health & Wellbeing
- Personal Development
Training Course for Architects & Interior Exterior Designers
By Real Animation Works
1-2-1 face to face training customised and bespoke.

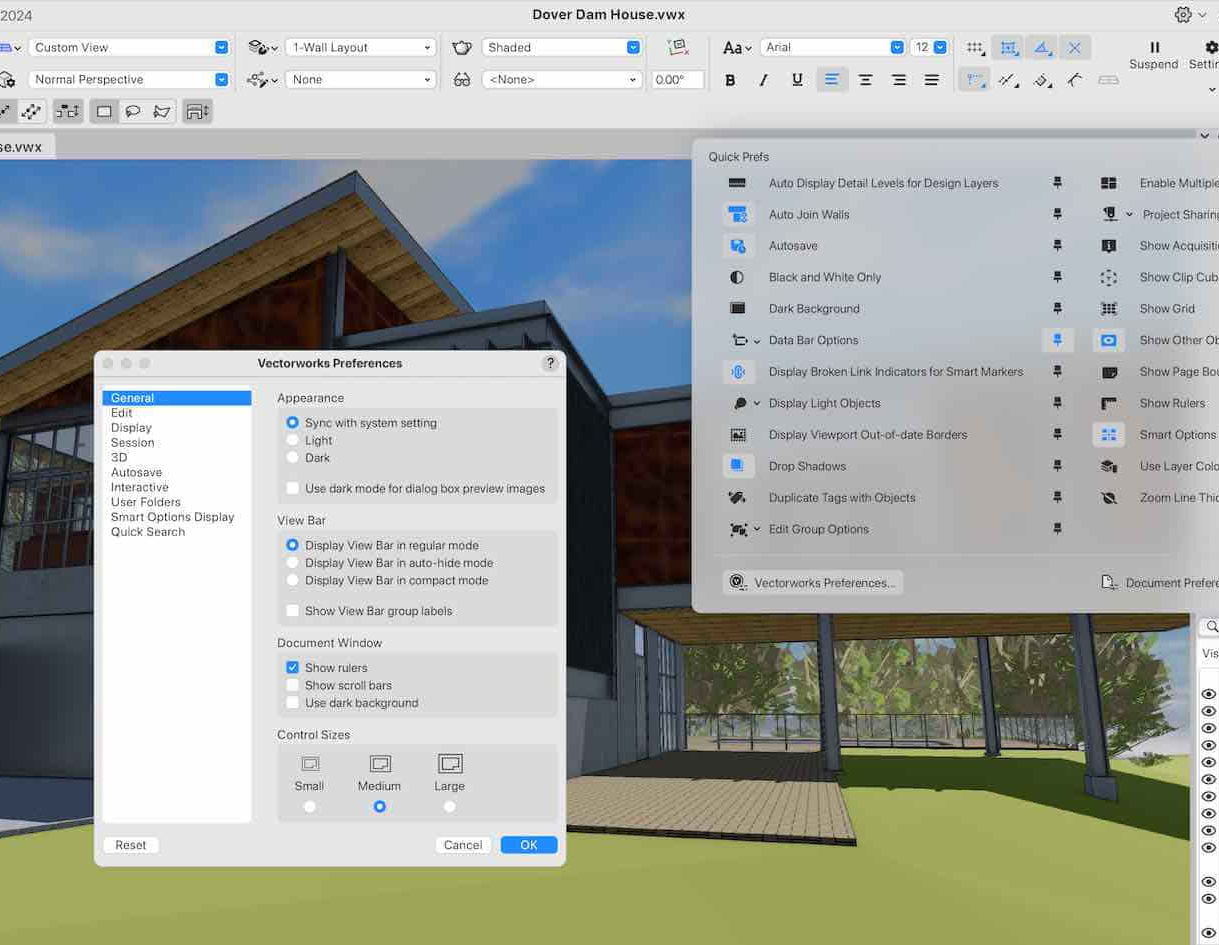
Vectorworks Evening Introduction Training Course
By Real Animation Works
Vectorworks Evening Course face to face One to one
AutoCAD Basics-Advanced Training Classes
By London Design Training Courses
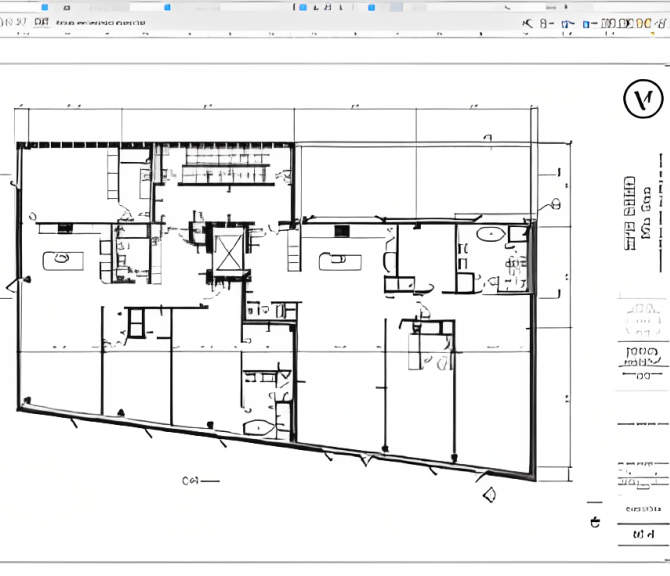
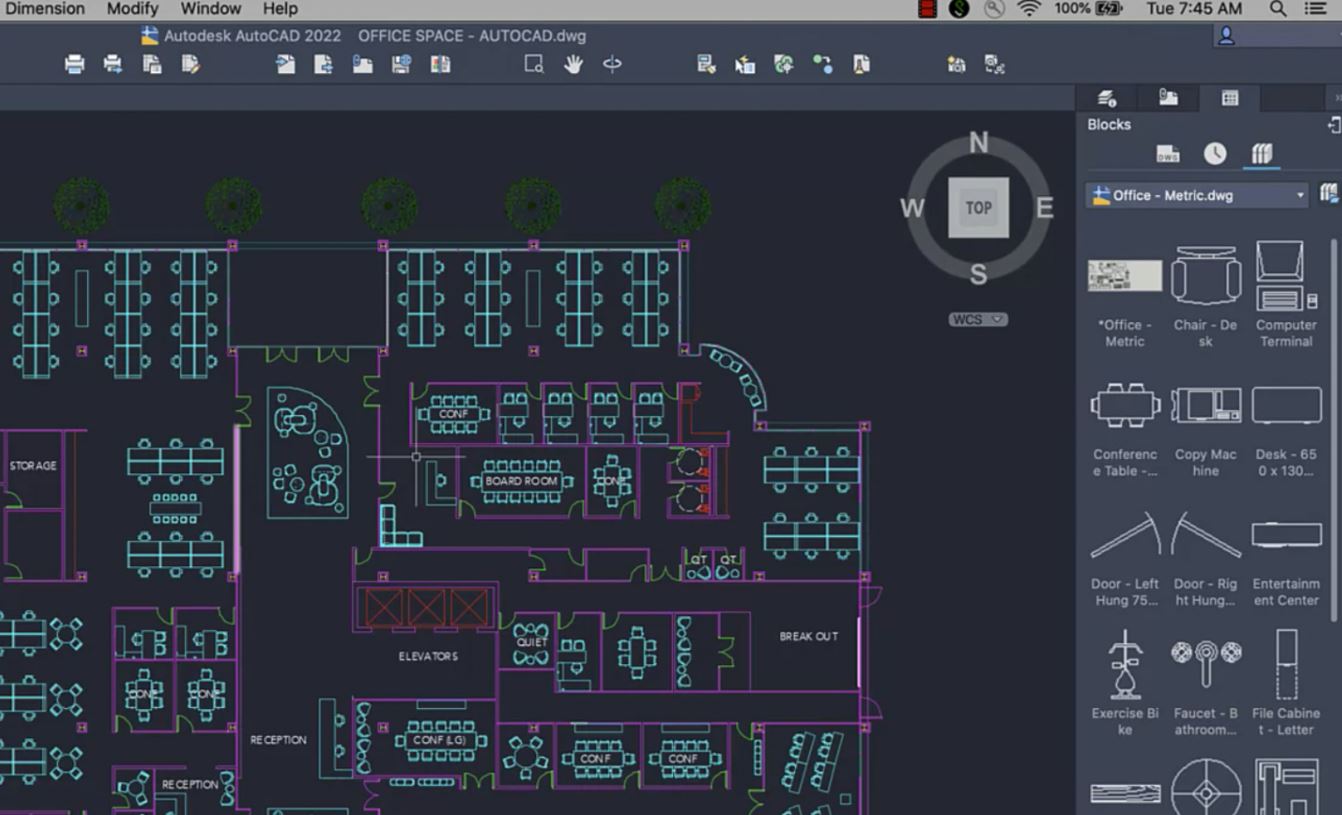
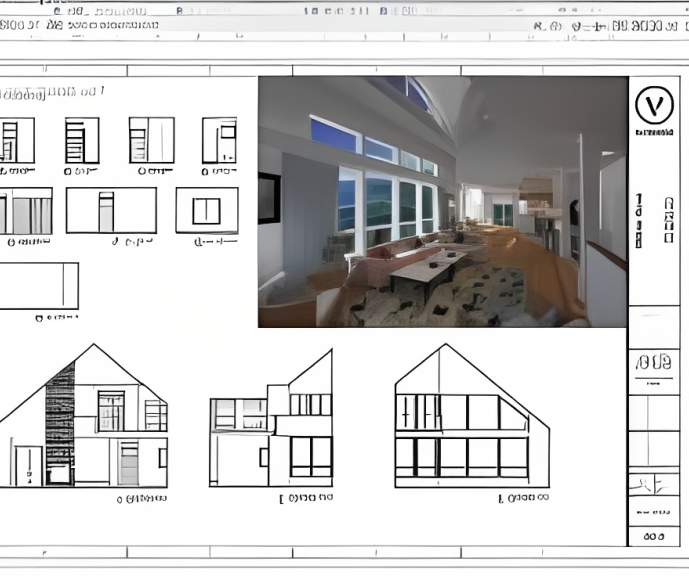
Why AutoCAD Basics-Advanced Training Classes? Click here for more info AutoCAD Basics to Advanced Level Training Master drawing, editing, and advanced techniques. Optimize productivity and customize workspace. Create precise 2D drawings for various industries. Access recorded lessons and lifetime email support. Duration: 16 hrs Method: 1-on-1, Personalized attention. Schedule: Tailor your own schedule by pre-booking a convenient hour of your choice, available from Mon to Sat between 9 am and 7 pm. The AutoCAD from Basics leading to Advanced Training Course offers a comprehensive learning experience for participants to become proficient in AutoCAD. Whether you're a beginner or an experienced user, this progressive program covers the full spectrum of AutoCAD functionality. Participants will learn core features like drawing, editing, annotations, and dimensioning, progressing to advanced topics such as object manipulation, workspace customization, and workflow optimization. Upon completion, participants will create precise 2D drawings and designs. Interactive learning experiences with experienced instructors are available in-person or through live online sessions. AutoCAD 2D Course Outline: Session 1: Introduction to AutoCAD interface, commands, and tools Managing drawings and drawing basic shapes Basic modification techniques (erase, move, rotate, scale) Session 2: Working with layers and properties Creating and modifying text and dimensions Introduction to blocks and attributes Session 3: Advanced object modification techniques (fillet, chamfer, trim, extend) Using grips to modify objects Creating and modifying polylines and splines Session 4: Creating and editing tables Working with layouts and viewports Printing and exporting drawings Construction detailing and Detailed sections Course Highlights: Engaging exercises and projects to reinforce skills. Q&A and troubleshooting support. Solid understanding of AutoCAD 2D for basic to intermediate drawings. List of Topics Covered: Drawing: Line, Polyline, Circle, Arc, Rectangle, Ellipse, Spline, Polygon, Ray, Hatching, Gradient. Inquiry: Measure and Select All. Modify: Move, Copy, Rotate, Mirror, Fillet, Trim, Extend, Erase, Offset, Explode, Array, Stretch, Break, Polyline Edit, Hatch Edit, Scale. Layers: Creating, Managing, Changing, Line Type, Line Weights. Annotation: Dimensions, Text, Dimension Style, Text Style, Leaders. Properties: Colors, Line weights, Line Types, Line Type Scaling. Blocks: Create, Insert, Edit, Explode, Export. Insert: Insert, Attach. View: Navigate, View, Windows. Plot/Print: Model Space, Layouts/Workspaces, Viewports, Layout Scaling, Paper Setup, What To Plot, Plot Scale, Plot Offset, Plot Options. Final Project: Create a Plan, Section, and Elevation drawing. Option for a personal project. Free Trial - Download AutoCAD Software & Toolsets: Participants can download a free trial of AutoCAD and industry-specific toolsets from Autodesk's official website: (https://www.autodesk.co.uk). Master AutoCAD Basics: Understand the interface, commands, and drawing tools. Create and Modify Drawings: Proficiently manage drawings and apply various modification techniques. Work with Layers and Annotations: Effectively use layers, text, and dimensions. Utilize Advanced Drawing Techniques: Apply advanced object modifications and work with polylines. Navigate Layouts and Viewports: Manage layouts, viewports, and printing/exporting. Hands-On Project Experience: Practice skills through exercises and a final project. Personalized Learning: Receive focused one-to-one attention. Convenient Options: Choose in-person or live online sessions. Lesson Recordings and Support: Access recorded lessons and receive ongoing email assistance. Enhance Career Opportunities: Develop valuable 2D drawing skills for career advancement.
Garden Design Training Course Beginner to Advanced
By ATL Autocad Training London
Who is this course for? The Garden Design Training Courses are suitable for individuals interested in learning how to plan, design, and manage outdoor spaces, including public parks, gardens, parks, and commercial landscapes. Jobs: Landscape Designer, Consultant, Garden Planner, Green Space Developer, Urban Garden Designer. Click here for more info: Website Personalized 1-on-1 sessions. Book between 9 a.m. and 7 p.m., Mon to Sat. (Book anytime and day). The 40-hour program includes AutoCAD, Sketchup, Vray, IndDesign and Photoshop. Garden Design Software Training Course Options Option A: AutoCAD, Sketchup Pro, Vray, Photoshop (Total: 40 hours) AutoCAD (10 hours): Module 1: AutoCAD Fundamentals (2 hours) - Explore the AutoCAD interface and its toolset - Master drawing creation, management, and storage - Utilize essential drawing and editing commands Module 2: Drawing and Editing Mastery (3 hours) - Achieve precision drawing with lines, circles, and arcs - Create complex shapes with polylines and polygons - Proficiently use object modification tools: Move, Copy, Rotate, and Scale Module 3: Precision and Detail (3 hours) - Implement coordinate systems for accuracy - Learn dimensioning techniques and text incorporation - Elevate designs with hatching and gradients Module 4: Advanced Design Tools (2 hours) - Harness the power of blocks and attributes - Manage layers and object properties efficiently - Craft layouts and prepare for plotting Sketchup Pro (16 hours): Specializing in Garden Planning (Planting Plans, Vegetation Layouts, and Maps) Module 1: Introduction to Sketchup Pro (2 hours) - Navigate the Sketchup Pro interface - Understand essential 2D and 3D modeling concepts - Create and manipulate garden design objects Module 2: Advanced Garden Modeling (6 hours) - Sculpt intricate garden elements with curves and surfaces - Expertly edit and transform garden geometry - Focus on Planting Plans, Vegetation Layouts, and Maps Module 3: Visualization Excellence with Vray (4 hours) - Master the Vray rendering engine for lifelike garden visuals - Apply materials and textures for realism - Set up optimal lighting and camera angles for compelling garden renders Module 4: Image Enhancement through Photoshop (10 hours) - Use Photoshop for garden design refinement - Elevate garden images from Sketchup and Vray outputs - Create visually stunning presentations for garden projects Additional Resources: Gain access to invaluable resources, including free online portfolio design assistance, career growth guidance, and mock interviews, ensuring your readiness for the competitive garden design job market. Option B: AutoCAD, Rhino, Vray, Photoshop (Total: 40 hours) AutoCAD (12 hours): Module 1: AutoCAD Introduction (2 hours) - Unveil the AutoCAD interface and its feature set - Master drawing creation, management, and storage - Proficiency in fundamental drawing and editing commands Module 2: Drawing and Editing Proficiency (3 hours) - Apply precision drawing techniques, including lines, circles, and arcs - Construct complex shapes with polylines and polygons - Skillfully use object modification commands: Move, Copy, Rotate, and Scale Module 3: Precision and Detail Mastery (3 hours) - Implement coordinate systems for precision - Explore comprehensive dimensioning methods and text integration - Enhance designs with hatching and gradients Module 4: Advanced Design Tools (4 hours) - Gain expertise in blocks and attributes for efficient design - Efficiently manage layers and object properties - Craft layouts and prepare for plotting Rhino (14 hours): Module 1: Rhino Introduction (2 hours) - Navigate within the Rhino interface - Understand essential 2D and 3D modeling concepts for garden design - Create and manipulate garden design objects Module 2: Advanced Garden Modeling (6 hours) - Craft intricate garden structures using curves and surfaces - Proficiently edit and transform garden geometry - Build complex 3D garden structures Module 3: Visualization Mastery with Vray (6 hours) - Set up optimal lighting and camera angles for garden renders - Explore rendering settings and options for high-quality outputs - Learn post-production techniques and compositing for exceptional garden visuals Module 4: Image Enhancement with Photoshop (8 hours) - Utilize Photoshop for refining garden design concepts - Enhance garden images from Rhino and Vray outputs - Create visually striking garden presentations for projects Garden Design Training Course Information When Can I Book This Training Course? - Immerse yourself in a personalized training experience with our flexible 1-on-1 training sessions. - Tailor your schedule by pre-booking a convenient hour of your choice. - Available for booking from Monday to Saturday between 9 a.m. and 7 p.m. - Alternatively, you can call 02077202581 to book over the phone. Training Duration - This comprehensive course spans 40 hours, which you can split over as many days as needed to create your ideal learning schedule. Training Method - We offer 1-on-1 training, which can be conducted either in-person Face to Face or Live Online. - Expect personalized attention, customized content, a flexible learning pace, and individualized support throughout your training. - We also provide the option of Live Online 1-on-1 sessions over Zoom for added convenience. Enroll Today - If you're ready to embark on this enriching journey, click the link below to enroll in our 1-on-1 Course. Garden Design Software Training Overview In our comprehensive garden design training program, you'll cultivate your expertise using a thoughtfully selected array of industry-leading software tools, ensuring you're well-prepared to bring your garden designs to vibrant life. Option A: - AutoCAD (10 hours): Craft precise garden layouts and plans. - SketchUp (16 hours): Specialize in garden planting plans, vegetation layouts, and maps. - Vray (4 hours): Create lifelike 3D renderings of your garden designs. - Photoshop (10 hours): Enhance garden images effectively. Option B: - AutoCAD (12 hours): Develop garden blueprints with precision. - Rhino (14 hours): Master 3D modeling for intricate garden designs. - Vray (6 hours): Craft stunning 3D visualizations of your gardens. - Photoshop (8 hours): Perfect your garden design concepts. Both options accommodate Mac and Windows operating systems, ensuring accessibility for all learners. Key Benefits Price Assurance: We are committed to delivering exceptional value for your investment in a flourishing garden design career. One-on-One Training Sessions: Tailored learning experiences designed to adapt to your unique learning style. Flexible Scheduling: Choose your preferred training time and day, with availability from Monday to Sunday, spanning from 9 am to 8 pm. Lifetime Email and Phone Support: Ongoing support continues beyond your training period, facilitating your career growth. Computer Configuration Assistance: We provide guidance to ensure a seamless software installation on your computer. Referral Benefits: Enjoy special discounts when referring a friend and substantial savings on group training courses.

Vectorworks Evening Training
By London Design Training Courses
Why choose Vectorworks Evening Training Course? Course Link. This course led by certified expert, this course offers flexibility for evening learning. Choose in-person or live online sessions to master Vectorworks in architecture, interior design, and landscaping. Enroll now even after business hours! Duration: 10 hrs. Method: 1-on-1, Personalized attention. Schedule: Tailor your own schedule by pre-booking a convenient hour of your choice, available from Mon to Sat between 9 am and 7 pm. The Vectorworks course provides comprehensive training in computer-aided design (CAD) and Building Information Modeling (BIM) using the powerful Vectorworks software. This hands-on, instructor-led course covers 2D drafting, technical drawing, and 3D modeling, enabling participants to apply Vectorworks effectively in real-world projects. Key Features: Hands-on, instructor-led classroom training. Practical Vectorworks CAD projects for real-world application. Part-time evening or weekend options available. 1-2-1 Private learning experience. Module 1: Grasping CAD and Vectorworks Understanding the Role of CAD in Design Getting Acquainted with Vectorworks Software Module 2: Configuring Your Workspace Customizing Your Workspace Essential Options and Preferences Module 3: Mastering Foundational Drawing Skills Techniques for Drawing Object Selection Methods Module 4: Advanced Object Manipulation Merging Shapes Reflecting Objects Rotating Objects Grouping Elements Module 5: Precision Drawing and Scaling Techniques Working with Scale Setting Preferences for Accuracy Creating and Saving Templates Module 6: Achieving Accurate Object Placement Ensuring Drawing Precision Precise Object Movement Module 7: Advanced Editing Methods Utilizing Fillet Tool Applying Offset Function Module 8: Understanding Object Attributes and Groups Basic Attribute Management Editing Object Groups Module 9: Object Duplication Techniques Linear Duplicates Rectangular Duplicates Circular Duplicates Module 10: Crafting Room Plans Designing Walls Incorporating Windows and Doors Module 11: Development of Room Plans Methods for Room Plan Drawing Module 12: Exploring Additional Attributes Hatch Patterns Gradients Image Fills Module 13: Creating Elevation Drawings Elevation Drawing Techniques Effective Approaches Module 14: Importing Images for Graphic Use Graphic Illustration Integrating Images Module 15: Symbols and Resource Handling Symbol Creation Introduction to Resource Browser Module 16: Organizing Drawings Using Design Layers Optimizing Design Layer Utilization Module 17: Labeling Drawings and Title Blocks Drawing Labels Title Block Text Placement Module 18: Plotting and Printing Methods User Interface Navigation and Terminology Printing Approaches Module 19: Generating Drawing Sheets A1, A2, and A3 Sheet Formats Module 20: Utilizing Viewports Effectively Managing Multiple Views Module 21: Professional Model Presentation Techniques Paper Space Presentation Conversion to PDF Formats Module 22: File and Project Management Module 23: Object Display and Terminology Module 24: Objects and Data Management Module 25: Precise Object Placement Object Snapping Quick Selection Module 26: Dividing and Measuring Objects Module 27: Dimensioning and Annotations Module 28: Working with Text Elements Module 29: Customizing Tool Palettes Module 30: Organizing Tool Palettes Module 31: Efficient Tool Palette Usage Module 32: Standard Views and Drawing Techniques Module 33: Drawing Curved Shapes Arcs, Donuts, and Ellipses Drawing Module 34: Real-World Units and Measurements Module 35: Object Manipulation Adjusting Object Angles Module 36: File Handling and Management Saving, Exiting, and Opening Projects Module 37: Creating Mirrored Images Module 38: Introduction to 3D Modeling By the end of the Vectorworks Evening Training Course, participants will: Demonstrate proficiency in using the Vectorworks interface, tools, and navigation. Create and edit 2D drawings, including walls, doors, windows, floors, ceilings, stairs, and railings. Effectively manage layers, classes, and views for organized and controlled object placement. Create and edit dimensions and annotations for accurate measurements and documentation. Develop skills in creating, modifying, and utilizing symbols for increased efficiency. Generate and edit 3D geometry, apply textures, and create sections and elevations from 3D models. Create polished presentation drawings using viewports, annotations, and text for clarity. Summarize course content and confidently apply learned skills in Vectorworks projects. Utilize available resources for further learning and professional development.
GARDEN DESIGN TRAINING (BEGINNER TO ADVANCE LEVEL)
By Real Animation Works
Garden design face to face training customised and bespoke.

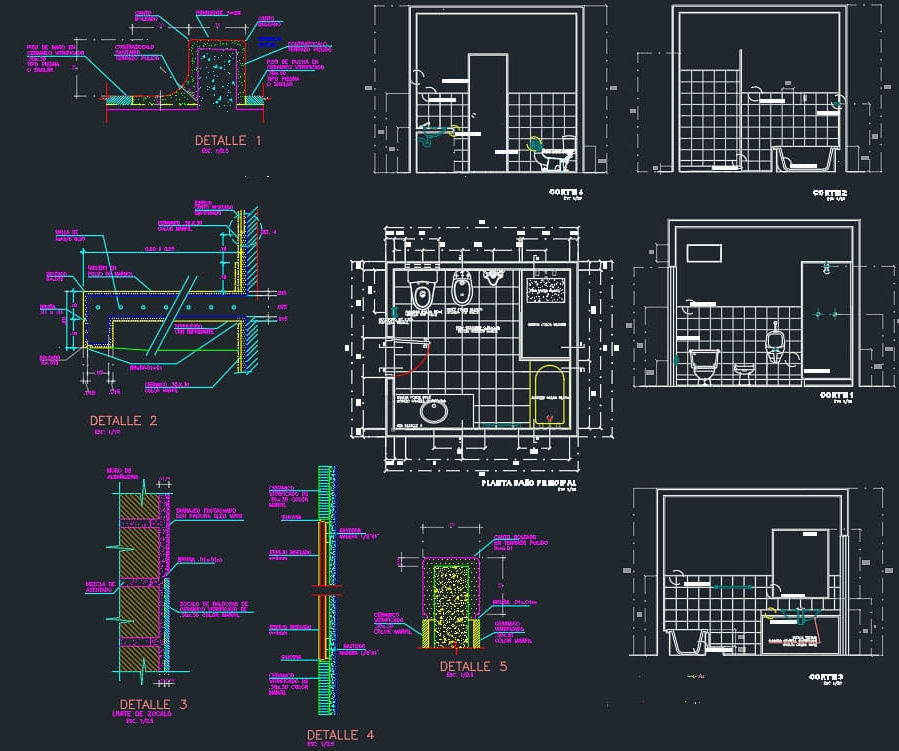
AutoCAD Mac Basics-Advanced Training
By London Design Training Courses
Why AutoCAD Mac Basics-Advanced Training Course? Click here for more info Learn 2D drawing, Plans, Sections, Elevations and advanced features. Choose in-person or live online sessions. Certified tutors, practical exercises, and career advice. Access recorded lessons and lifetime email support. Duration: 16 hrs. Method: 1-on-1, Personalized attention. Schedule: Tailor your own schedule by pre-booking a convenient hour of your choice, available from Mon to Sat between 9 am and 7 pm. AutoCAD for Mac Essentials to Advanced Training Course: Learn AutoCAD for Mac and master its popular functionalities, tailored for Mac users. Course Highlights: Thorough grounding for beginners in using AutoCAD for Mac. Develop the skills to create precise and high-quality 2D layouts and designs. Generic drawing techniques applicable to all industries. In-class or live online options available. Ideal for newcomers to AutoCAD for Mac, self-taught users, and those transitioning from other CAD tools. Autodesk Certified Tutors: Autocad Mac 1-2-1 training courses. Expert trainers with extensive experience in AutoCAD and various CAD applications. Hands-On Learning: Practical and hands-on training with demonstrations and step-by-step techniques. Support and Prerequisites: Lifetime post-course email support. Good working knowledge of the Mac OS required, no prior CAD experience needed. AutoCAD Mac Course Content: Fundamental Drawing:Creating Basic ObjectsWorking with LinesWorking with ArcsHandling Polylines Object Manipulation Techniques:Utilizing GripsMastering Object SnapsTracking Object Snap PointsEmploying Polar Tracking File Management:Saving Your WorkAuto-backupsUnderstanding Different File Formats (DXF, etc.)Disaster Recovery Accurate Object Creation:Working with UnitsUtilizing Dynamic InputUsing Inquiry Commands for Measurements Object Viewing and Navigation:Zooming TechniquesPanning Techniques Object Manipulation:Selecting Objects in the DrawingNoun/Verb SelectionQuick SelectMoving, Copying, Rotating, Mirroring, and Arraying ObjectsScaling, Trimming, and Extending Objects Organizing Drawings:Managing LayersChanging Object PropertiesExploring the Properties PaletteUsing Different Linetypes Layouts and Annotations:Working with Layouts and Page SetupsScaling Drawing ViewsAnnotating the Drawing with Text and DimensionsCreating MultileadersApplying Hatching to Objects Reusable Content:Creating and Inserting Blocks and SymbolsUsing Tool PalettesWorking with Groups Paper Space and Model Space: Understanding Model Space and Paper Space Creating Layouts and Managing Viewports Setting Viewport Scales Plotting and Output: Plotting Drawings Generating PDF Output Handling Multiple Sheet Drawings Using Plotstyles Drawing Templates and AutoCAD Tools: Creating Drawing Templates Exploring AutoCAD Toolsets Advance Plans, Sections, Elevations and Construction detailing. This course provides comprehensive instruction in AutoCAD, equipping participants with essential skills to create and manage drawings effectively for various design projects.
Vectorworks Basics to Essentials Training
By London Design Training Courses
Why Learn Vectorworks Basics to Essentials Training Course? Our Vectorworks training is meticulously crafted to educate and inspire designers of all levels. Whether you're a beginner or an experienced designer, our courses will equip you with new skills, refine your workflows, and teach Plans, sections and elevations. Course Link Duration: 10 hrs. Method: 1-on-1, Personalized attention. Schedule: Tailor your own schedule by pre-booking hours of your choice, available from Mon to Sat between 9 am and 7 pm. Vectorworks Basics to Essentials Training Course Discover and Enhance Your Design Skills Our Vectorworks training is meticulously crafted to educate and inspire designers of all levels. Whether you're a beginner or an experienced designer, our courses will equip you with new skills, refine your workflows, and unlock the full potential of your Vectorworks software. Online Training Options Customized Online Sessions: Tailored training sessions for your specific needs and expertise level. Virtual Classroom: Join interactive virtual classes from the comfort of your office. Getting Started Guides: Comprehensive guides to help you navigate the fundamentals of Vectorworks. In-Person Training Opportunities Customized On-Site Sessions: Hands-on training delivered directly to your office or regional event. One to One: Engage in interactive learning at our training locations. Get Vectorworks https://www.vectorworks.net ⺠downloads ⺠ServicePack Vectorworks, Inc. 2D 3D CAD BIM software for Mac or Windows allows designers to transform the world. Project sharing makes it easy. Download or try today. Module 1: Grasping CAD and Vectorworks Understanding the Role of CAD in Design Getting Acquainted with Vectorworks Software Module 2: Configuring Your Workspace Customizing Your Workspace Essential Options and Preferences Module 3: Mastering Foundational Drawing Skills Techniques for Drawing Object Selection Methods Module 4: Advanced Object Manipulation Merging Shapes Reflecting Objects Rotating Objects Grouping Elements Module 5: Precision Drawing and Scaling Techniques Working with Scale Setting Preferences for Accuracy Creating and Saving Templates Module 6: Achieving Accurate Object Placement Ensuring Drawing Precision Precise Object Movement Module 7: Advanced Editing Methods Utilizing Fillet Tool Applying Offset Function Module 8: Understanding Object Attributes and Groups Basic Attribute Management Editing Object Groups Module 9: Object Duplication Techniques Linear Duplicates Rectangular Duplicates Circular Duplicates Module 10: Crafting Room Plans Designing Walls Incorporating Windows and Doors Module 11: Development of Room Plans Methods for Room Plan Drawing Module 12: Exploring Additional Attributes Hatch Patterns Gradients Image Fills Module 13: Creating Elevation Drawings Elevation Drawing Techniques Effective Approaches Module 14: Importing Images for Graphic Use Graphic Illustration Integrating Images Module 15: Symbols and Resource Handling Symbol Creation Introduction to Resource Browser Module 16: Organizing Drawings Using Design Layers Optimizing Design Layer Utilization Module 17: Labeling Drawings and Title Blocks Drawing Labels Title Block Text Placement Module 18: Plotting and Printing Methods User Interface Navigation and Terminology Printing Approaches Module 19: Generating Drawing Sheets A1, A2, and A3 Sheet Formats Module 20: Utilizing Viewports Effectively Managing Multiple Views Module 21: Professional Model Presentation Techniques Paper Space Presentation Conversion to PDF Formats Module 22: File and Project Management Module 23: Object Display and Terminology Module 24: Objects and Data Management Module 25: Precise Object Placement Object Snapping Quick Selection Module 26: Dividing and Measuring Objects Module 27: Dimensioning and Annotations Module 28: Working with Text Elements Module 29: Customizing Tool Palettes Module 30: Organizing Tool Palettes Module 31: Efficient Tool Palette Usage Module 32: Standard Views and Drawing Techniques Module 33: Drawing Curved Shapes Arcs, Donuts, and Ellipses Drawing Module 34: Real-World Units and Measurements Module 35: Object Manipulation Adjusting Object Angles Module 36: File Handling and Management Saving, Exiting, and Opening Projects Module 37: Creating Mirrored Images Module 38: Introduction to 3D Modeling Creating Extrusions Basic 3D Concepts Understanding For a free 30-day trial of Vectorworks, request an evaluation serial number at the provided link. https://www.vectorworks.net/trial Learning Outcomes of the Vectorworks Basics to Essentials Training Course: Proficiency in Vectorworks software, mastering its basic and essential features. Enhanced design skills and efficient workflows for architectural, landscape, and entertainment projects. Customized training based on individual needs and expertise levels. Flexibility with online and on-site options for convenient learning. Access to Vectorworks University with a wealth of resources for continuous learning. Interactive virtual classrooms and immersive hands-on training for practical experience.
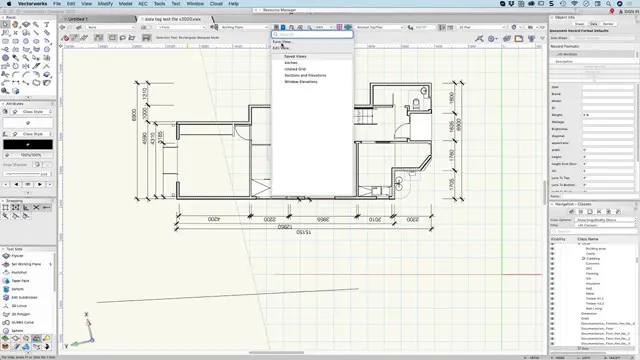
Vectorworks 2D Basics Level Training Course
By ATL Autocad Training London
Why Vectorworks 2D Basics Level Training Course? Vectorworks excels in 2D design, delivering exceptional results and serving as a robust 2D design tool. The Fundamentals course provides customizable tools for precise 2D drawings, while VectorWorks Architect streamlines the process with user-friendly, easy-to-learn tools. Click here for more info: Website Course Details: 10 hrs, Flexible 1-on-1 sessions, in-person or online. 9 am and 7 pm (Mon-Sat).10 hours, split as needed for your schedule. Module 1: Understanding CAD and Vectorworks The Role of CAD in Design Introduction to Vectorworks Software Module 2: Setting Up Your Workspace Workspace Configuration Basic Options and Preferences Module 3: Foundational Drawing Skills Drawing Techniques Selecting Objects Module 4: Advanced Object Editing Combining Shapes Mirroring Objects Rotating Objects Grouping Objects Module 5: Precision Drawing and Scaling Working with Scale Setting Preferences Saving Templates Module 6: Accurate Object Placement Drawing Precision Moving Objects Precisely Module 7: Advanced Editing Techniques Using Fillet Employing Offset Module 8: Introduction to Object Attributes and Groups Basic Attributes Editing Object Groups Module 9: Duplicating Objects Linear Duplicates Rectangular Duplicates Circular Duplicates Module 10: Creating Room Plans Designing Walls Incorporating Windows and Doors Module 11: Room Plan Development Room Plan Drawing Methods Module 12: Utilizing Additional Attributes Hatch Patterns Gradients Image Fills Module 13: Drawing Elevations Elevation Techniques Effective Methods Module 14: Importing Images for Graphics Graphic Illustration Image Integration Module 15: Symbols and Resource Management Creating Symbols Introduction to Resource Browser Module 16: Organizing Drawings with Design Layers Design Layer Usage Module 17: Labeling Drawings and Title Blocks Drawing Labels Title Block Text Module 18: Plotting and Printing User Interface and Terminology Printing Techniques Module 19: Creating Drawing Sheets A1, A2, and A3 Sheets Module 20: Utilizing Viewports Multiple Views Module 21: Professional Model Presentation Paper Space Presentation Converting to PDFs Module 22: Managing Files and Projects Module 23: Displaying Objects and Terminology Module 24: Objects and Data Management Module 25: Precise Object Placement Object Snaps Quick Select Module 26: Dividing and Measuring Objects Module 27: Dimensioning and Annotation Module 28: Working with Text Module 29: Custom Tool Palettes Module 30: Organizing Tool Palettes Module 31: Effective Tool Palette Usage Module 32: Standard Views and Drawing Techniques Module 33: Drawing Curves Arcs, Donuts, and Ellipses Module 34: Real-World Units and Measurements Module 35: Object Manipulation Changing Object Angles Module 36: File Management Saving, Exiting, and Opening Projects Module 37: Creating Mirror Images Module 38: Introduction to 3D Modeling Creating Extrusions Basic 3D Concepts Outcomes and Vectorworks Jobs: Vectorworks Proficiency: Gain expertise in using Vectorworks software for design tasks. 2D Design Skills: Create accurate 2D drawings and architectural plans. Advanced Editing: Efficiently manipulate and edit objects in your designs. Precision Drawing: Develop skills for precise scaling and drawing. These skills open doors to careers in design, architecture, engineering, entertainment, and more. Potential Jobs: Architectural Drafter Interior Designer Landscape Designer AD Technician Graphic Designer Construction Estimator Product Designer Set Designer Event Planner Urban Planner Vectorworks 2D Training Course Our Vectorworks training is thoughtfully designed to educate and inspire designers at every skill level. Whether you're just starting or a seasoned pro, our courses will furnish you with fresh skills, streamline your workflows, and unleash the full potential of your Vectorworks software. Online Training Choices Tailored Online Sessions: Customized training sessions tailored to your specific requirements and skill level. Virtual Classroom: Participate in interactive virtual classes from the convenience of your workspace. Getting Started Guides: Comprehensive guides to assist you in navigating the fundamentals of Vectorworks. In-Person Training Opportunities Customized On-Site Sessions: Hands-on training delivered directly to your office or at regional events. One-to-One: Engage in interactive learning at our training locations. Download Vectorworks https://www.vectorworks.net Personalized One-on-One Training: Get individualized attention and customized instruction. Flexible Scheduling: Choose your preferred training time and day to suit your schedule. Post-Course Assistance: Access free online support after course completion. Comprehensive Learning Materials: Receive PDF notes and handouts to enhance your learning. Certificate of Completion: Earn a recognition certificate upon successfully finishing the course. Affordable Rates: Enjoy cost-effective training rates. Software Setup Assistance: Receive help setting up the software on your computer. Referral Benefits: Recommend a friend and receive discounts on future courses. Group Training Discounts: Special discounts available for group training sessions. Convenient Availability: Access training sessions from Monday to Sunday, with extended hours. Tailored Training: Receive customized, bespoke training tailored to your specific requirements.