- Professional Development
- Medicine & Nursing
- Arts & Crafts
- Health & Wellbeing
- Personal Development
2999 Design courses in North Hykeham delivered Live Online
Vectorworks 2d | 3d and Spotlight training
By London Design Training Courses
Why Learn Vectorworks 2d | 3d and Spotlight training Course? Course info Led by experts, this comprehensive program equips you with skills in 2D drafting, immersive 3D modeling, and dynamic lighting design. Master Vectorworks' powerful features, including the Spotlight module tailored for entertainment and events. Duration: 16 hrs Method: 1-on-1, Personalized attention. Schedule: Tailor your own hours, available from Mon to Sat between 9 am and 7 pm. Or Call 02077202581 or WhatsApp 07970325184. Course Details: Format: 1-on-1 Training Schedule: Flexible, Any Day, Anytime (Monday to Saturday), 9 AM to 7 PM Duration: Customizable to Individual Learning Pace Content: Comprehensive training in Vectorworks, focusing on 2D Drafting, Immersive 3D Modeling, and Dynamic Lighting Design. Specialization: Spotlight Module for Entertainment and Events Instructors: Expert-led sessions ensuring personalized attention and effective learning. Outcome: Mastery of Vectorworks' Powerful Features, Proficiency in 2D and 3D Design, and Expertise in Dynamic Lighting Design for Entertainment Purposes. Note: Schedule and course duration are flexible to accommodate individual preferences and learning needs. Course Details: Format: 1-on-1 Training Schedule: Flexible, Any Day, Anytime (Monday to Saturday), 9 AM to 7 PM Duration: Customizable to Individual Learning Pace Content: Comprehensive training in Vectorworks, focusing on 2D Drafting, Immersive 3D Modeling, and Dynamic Lighting Design. Specialization: Spotlight Module for Entertainment and Events Instructors: Expert-led sessions ensuring personalized attention and effective learning. Outcome: Mastery of Vectorworks' Powerful Features, Proficiency in 2D and 3D Design, and Expertise in Dynamic Lighting Design for Entertainment Purposes. Note: Schedule and course duration are flexible to accommodate individual preferences and learning needs. Vectorworks 2D | 3D and Spotlight Training Course Course Duration: 16 hours Course Description: I. Introduction to Vectorworks (1 hour) Overview of Vectorworks software and its applications Familiarization with the user interface and navigation Customizing preferences and settings for optimal workflow II. 2D Drawing Tools (2 hours) Using basic drawing tools for creating lines, rectangles, circles, and polygons Utilizing text and dimension tools for annotations Applying modify tools for editing and transforming objects Organizing elements with layers and classes III. 3D Modeling Tools (3 hours) Introduction to extrude, revolve, sweep, and loft tools for 3D modeling Creating 3D objects from 2D shapes for spatial representation Modifying and refining 3D models Exploring the 3D modeling environment IV. Advanced 3D Modeling Tools (2 hours) Utilizing solid modeling tools for complex geometry creation Performing Boolean operations to combine or subtract shapes Creating and utilizing symbols for efficient workflow V. Introduction to Spotlight (1 hour) Overview of the Spotlight workspace and its features Adding and configuring lighting devices for stage and event design Creating and modifying lighting positions for accurate placement VI. Spotlight Tools and Techniques (3 hours) Creating and editing lighting instruments for customized setups Using visualization tools for lighting simulations Creating and applying labels and legends for documentation Generating worksheets and reports for lighting analysis VII. Advanced Spotlight Techniques (2 hours) Utilizing video and projection tools for multimedia presentations Incorporating audio and sound systems for immersive experiences Understanding rigging and hoisting for stage setup Managing paperwork and documentation for effective planning VIII. Integration with Other Software (1 hour) Importing and exporting files to collaborate with other software Utilizing Vectorworks in CAD and BIM workflows for interoperability Exploring plugins and add-ons for expanded functionality IX. Project-based Exercises (1 hour) Applying learned techniques to real-world scenarios Creating a lighting plan for a concert or theater production Designing a 3D model of a building or interior space Free 30-day, BIM & CAD Software Trial Request | Vectorworks https://www.vectorworks.net/trial Vectorworks Trial Version Request. Please fill out the following form. We will provide you with an evaluation serial number to activate your trial copy. Learning Outcomes of Vectorworks 2D | 3D and Spotlight Training Course: Master Vectorworks with 2D and 3D design skills. Create precise 2D drawings and detailed 3D models. Learn specialized tools for lighting and event planning in Spotlight. Optimize workflows and improve project coordination. Produce realistic renderings and visualizations. Apply skills to real-world projects in architecture and events.

TRAINING FOR FILM & GAME DESIGNERS One to One Online or Face to Face
By Real Animation Works
Film and VFX face to face training customised and bespoke. One to One Online or Face to Face

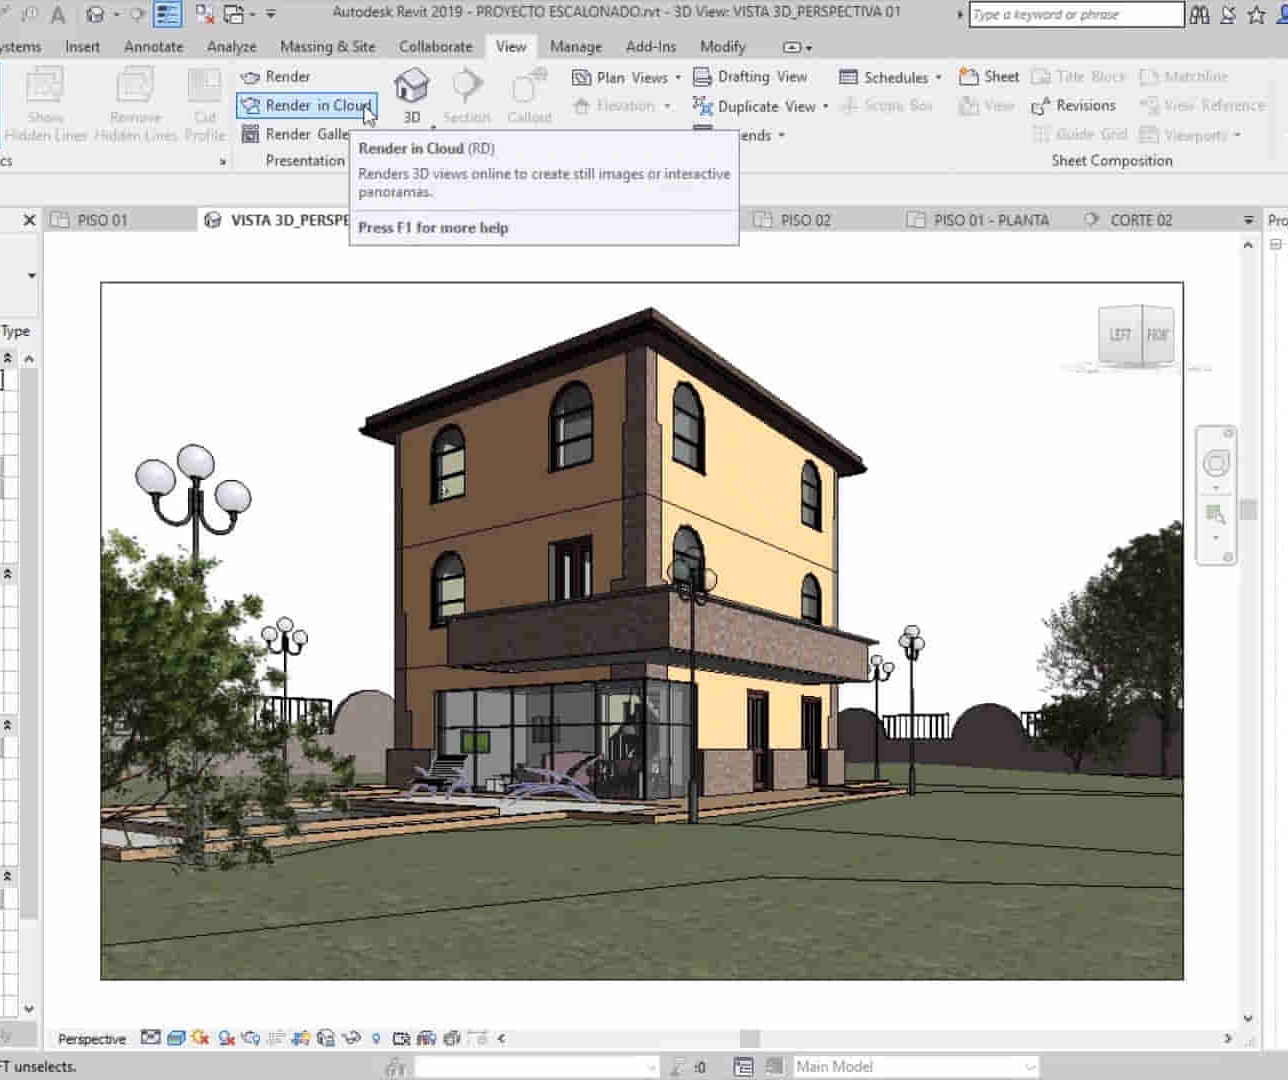
Revit Basic to Advanced Training Course
By ATL Autocad Training London
Why Book Revit Basic to Advanced Training Course? Learn BIM and Revit for engineers and architects, supporting 2-D and 3-D design for large-scale projects and combing with AutoCAD. Check our Website How to Book? 1-on-1 training tailored to your schedule. Book your sessions from Monday to Saturday between 9 am and 7 pm or call 02077202581 to book over the phone. Training Details: Duration: 16 hours Flexible scheduling, split across multiple days Method: 1-on-1 (In-person or Live Online) and Personalized attention Course Overview: I. Revit Fundamentals (1 hour) Understanding Revit's Purpose and Applications Navigating the Revit Interface and Essential Tools Mastering Navigation and Viewport Controls Creating and Managing Projects II. Project Setup (1 hour) Initiating a New Project Configuring Project Levels, Grids, and Site Information Defining Project Units for Precision III. Basic Modeling Techniques (2 hours) Building Walls, Doors, and Windows Designing Floors, Ceilings, Roofs, Stairs, and Railings IV. Advanced Modeling Skills (4 hours) Crafting Custom Parametric Families Utilizing Conceptual Modeling Tools Designing Complex Forms and Shapes Enhancing Models with Lighting and Materials Achieving Realism through 3D Rendering V. Views, Sheets, and Annotations (2 hours) Managing Views and Sheets Effectively Incorporating Schedules and Tags Crafting Detail Annotations for Construction Documents VI. Phasing, Worksharing, and Collaboration (2 hours) Understanding Phasing and Design Options Mastering Work Sharing and Collaboration Techniques VII. Project Collaboration and Management (1 hour) Establishing Work Sharing Environments Monitoring Worksets and User Activities Synchronizing Worksets for Seamless Collaboration VIII. Advanced Documentation Skills (2 hours) Creating Advanced Schedules and Legends Developing Construction Documents with Sheets and Title Blocks Customizing Schedules and Keynotes for Precision IX. Course Conclusion and Next Steps (1 hour) Reviewing Course Highlights Exploring Further Learning Resources and Tips Interactive Q&A Session and Feedback Opportunities Download Revit Master Revit Proficiency: Acquire advanced skills in Revit for 3D modeling, parametric design, and efficient project management. Craft Complex Architectural Designs: Create intricate building components, custom families, and detailed construction documents. Seamless Collaboration: Expertise in project collaboration, phasing, and work sharing, ensuring smooth teamwork and synchronization. Enhanced Visualization: Learn advanced rendering techniques for realistic 3D visualizations of architectural concepts. Customize Workflows: Adapt Revit tools, optimize workflows, and enhance efficiency in project execution. Career Opportunities: Architectural Designer: Create architectural plans, 3D models, and construction documents. BIM Specialist: Develop detailed digital models in collaboration with architects and engineers. Construction Documenter: Prepare comprehensive construction documents, including plans and schedules. Project Manager: Oversee projects, ensuring timely completion and adherence to design specifications. Revit Specialist/Trainer: Provide Revit training and support services to individuals, firms, or educational institutions. Elevate Your Revit Skills with Our Advanced Training! Our Revit Basic to Advanced Training Course is tailored to enhance your expertise in Autodesk Revit. Delivered through in-person or live online sessions, this program covers advanced modeling, parametric families, collaboration tools, and project phasing. Course Benefits: Master Advanced Skills: Learn intricate 3D modeling, design complex building components, and implement advanced BIM workflows. Expert Instruction: Industry professionals guide you through advanced concepts via engaging demonstrations and hands-on exercises. Flexible Learning: Choose in-person or live online sessions with interactive instruction and personalized guidance. Lesson Recordings: Access class recordings for convenient review and practice, reinforcing your learning. Lifetime Support: Benefit from lifetime email support for ongoing guidance from our experienced instructors. Enhance your Revit proficiency, streamline design processes, and boost project efficiency. Whether you're an architect, engineer, or design professional, this course unlocks advanced Revit skills. Join our training for comprehensive learning and expert support! Individualized Training: Experience personalized attention and tailored guidance. Flexible Learning Hours: Select your preferred schedule for training sessions. Ongoing Support: Access complimentary online assistance even after course completion. Comprehensive Learning Materials: Receive detailed PDF resources for effective learning. Certificate of Attendance: Earn a certificate acknowledging your course completion. Affordable Pricing: Enjoy budget-friendly training rates. Software Setup Help: Get assistance with software configuration on your device. Referral Benefits: Receive discounts on future courses by referring a friend. Group Discounts: Avail special rates for group training sessions. Extended Availability: Access training sessions every day with extended operating hours. Customized Curriculum: Engage in tailored training designed to meet your specific requirements.
2year Masters program with Experience certificate and Chartered Engineering status
By JP Jacobs International University
Mep Design Engineering
AutoCAD Architecture Training Classes
By London Design Training Courses
Why Choose AutoCAD Architecture Training Classes? Course info Master architectural design tools and workflows. Create precise floor plans, elevations, and sections. Utilize BIM for intelligent 3D modeling. Access recorded lessons and lifetime email support. Enroll for in-person or online sessions. Duration: 16 hrs. Method: 1-on-1, Personalized attention. Schedule: Tailor your own schedule by pre-booking a convenient hour of your choice, available from Mon to Sat between 9 am and 7 pm. AutoCAD Architecture 3D Course Outline: Introduction to AutoCAD Architecture Understanding the difference between AutoCAD Architecture and AutoCAD LT Familiarization with the user interface and 3D viewing Wall Construction and Modification Adding walls to the model Creating curtain walls for specialized designs Modifying walls to fit specific requirements Joining walls together to form complex structures Adding and modifying wall openings for doors and windows Ceiling Plans (Reflected) Creating ceiling grids and construction detailing Modifying ceiling grids to match design needs Inserting ceiling fixtures and construction detailing Structural Design and Analysis Working with structural members and online resources Creating column grids and detailing columns Modifying column grids and annotations Annotating column grids and detailing for clarity Stairs Creating stairs in the model Modifying stairs to suit design specifications Adding railings to stairs and construction detailing Modifying railings and construction detailing Floors and Slabs Creating floor slabs and construction detailing Modifying floor slabs to align with the design Editing slabs using Slab Tools and construction detailing Roofs and Construction Detailing of Roofs Creating roofs for the building Designing roof slabs for specific areas Modifying roofs and roof slabs as needed Using Roof Slab Tools for precise detailing Annotation Detail drawing for scale and annotation Adding text, leaders, and comments to the model Dimensioning in AutoCAD Architecture for accurate measurements Utilizing other annotation tools for clarity Equipment and Furnishings Adding interior and exterior furnishings to the design Incorporating blocks and online 3D models for realistic representations Utilizing Tool Palettes and Autodesk Seek resources Model Views Ready for Print PDF Creating callouts for specific views Designing elevations, sections, and construction detailing Modifying callout objects for better visualization Implementing live sections and elevations Generating reports and managing project resources Schedules Adding door and window labels to the model Editing label data for accuracy Creating schedules for better project management Modifying schedules to suit specific requirements This AutoCAD Architecture 3D course covers a comprehensive range of topics, providing participants with the skills to create detailed 3D architectural models, implement construction detailing, and manage project resources efficiently. The course enables participants to produce professional-grade architectural designs using AutoCAD Architecture software.


Overview In this competitive era no matter how much hard work and solid efforts are contributed still, too many projects end up creating unneeded and unsellable products. There is a significant risk that the outcome of the project may not be relevant to the client/user requirements or become outdated when needs change. Here is where Design Thinking and Agile Management play their role. The combination of Agile and Design Thinking should be used in order to achieve impactful outcomes. Agile and design thinking together works well and gives an effective approach to product development, one that results in efficient resolutions to significant problems. In this course, you'll learn how to define and determine what's important to a user primary in the process, to frontload value, by directing your team on testable narratives about the user and generating an effectively shared perspective. For more dates and Venue, Please email sales@gbacorporate.co.uk

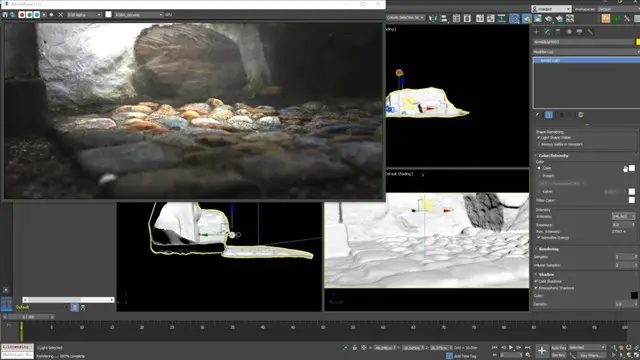
Vray Training for 3ds Max - 10 Hours, One-to-One Instruction
By Real Animation Works
face to face training customised and bespoke. Online or Face to Face
Photoshop Basics to Fundamentals Training
By London Design Training Courses
Why Choose Photoshop Basics to Fundamentals Training Course? Our Photoshop Basics to Fundamentals Training Course offers a strong skills in Adobe Photoshop, equipping with essential skills. Learn to use layers, selection tools, layer effects, layers, masking, photos, typography, filters, and color theory. Learn features for confident Photoshop usage. Course Link Duration: 10 hrs Method: 1-on-1, Personalized attention Schedule: Tailor your own hours of your choice, available from Mon to Sat between 9 am and 7 pm Course Highlights: Master Advanced Photoshop Skills: Develop expertise in professional image editing, retouching, and manipulation techniques. Hands-on Creative Projects: Engage in practical exercises to enhance real-world design skills. Explore Special Effects: Dive into advanced topics like layer effects, filters, and blending modes for stunning visual creations. Typography and Design Mastery: Learn typography styles, layout design, and color theory for compelling compositions. Build a Professional Portfolio: Receive guidance on crafting a portfolio showcasing your Photoshop expertise. Job Opportunities: Graphic Designer: Create captivating visuals for print and digital media. Digital Artist: Craft digital artwork for various applications, from illustrations to ads. UI/UX Designer: Design user interfaces and experiences for websites and apps. Web Designer: Develop visually engaging websites with expertise in Photoshop. Marketing Content Creator: Produce marketing materials, including banners and social media visuals. Freelance Designer: Offer design services independently to diverse clients. Advertising Creative: Design impactful ad visuals for creative campaigns. Print Production Specialist: Prepare print-ready materials, ensuring high-quality results. Photography Post-Processing Specialist: Enhance and retouch photographs for professional use. Module 1: Interface and Preferences Familiarize with the Photoshop Interface Customize Panels and Toolbars to suit your workflow Explore Photoshop Preferences for optimal settings Discover different Photoshop CC Workspaces for various tasks Get started with essential Keyboard Shortcuts Module 2: Image File Formats Understand various image file formats, including PSD, JPEG, PNG, and PDF Explore File Compression and its impact on image quality Module 3: Creating a New Document Set dimensions and size for new documents Understand media units for precise design specifications Explore Color Profiles and their importance Save presets for quick document setups Module 4: Placing Images Learn about Embedded vs. Linked images Introduction to Smart Objects for non-destructive editing Master the Selection tool for precise image placement Module 5: Image Size and Resolution Save images in different formats and compression settings Learn about Image Size and Resolution for various output requirements Module 6: Layers Introduction Organize your work using Layer management Master layer tasks such as reordering, renaming, grouping, locking, and hiding Module 7: Selection Tools Explore various Selection Tools like Marquee, Magic Wand, Quick Selection, and Lasso Understand Inverse Selection and Deselect for efficient editing Module 8: Layer Effects Apply captivating Layer Effects like Drop Shadow, Stroke, and Outer Glow Save and clone Effects Styles for quick application Combine multiple effects for creative designs Module 9: Introduction to Shapes Utilize the Shapes tool for basic design elements Create Custom Shapes for unique designs Understand Color principles and use the Properties Panel for adjustments Master the Direct Selection tool for precise shape editing Create a basic poster using provided examples Module 10: Type and Typography Work with Type and explore the Character and Paragraph Panel Utilize Styles Panel for consistent text formatting Save favorite fonts for easy access Apply Effects and Layer Styles on Type for impactful typography Learn about Leading, Tracking, and Kerning for optimal text spacing Module 11: Colors Understand RGB vs. CMYK color modes Select colors using the Eyedropper tool Save colors as Swatches for reuse Create gradients using the Gradient Tool Module 12: Creating a Clipping Mask Master the concept of Clipping Masks and its usage Apply Clipping Masks to Type, Images, and Shapes Combine Layer Effects with Clipping Masks for creative designs Module 13: Introduction to Masking Understand Masking and its importance in image editing Utilize the Brush tool for creating masks Learn Masking shortcuts and use Gradient Mask for smooth transitions Module 14: Adjustment Layers Explore Color and Gradient Adjustment Layers for image enhancements Master Curves, Levels, and Hue/Saturation Adjustment Layers for precise color control Convert images to Black and White using Adjustment Layers Combine Adjustment Layer Masks for targeted edits Module 15: Image Touch Up Master various touch-up techniques, including Red Eye Removal, Spot Healing Brush, and Patch Tool Utilize Content Aware Removal for seamless object removal Restore an old photo using Clone Stamp and Dodge/Burn tools Improve portraits by removing blemishes and whitening teeth Module 16: Filters Introduction Understand Smart Objects and Filter usage for non-destructive editing Explore the Filters Gallery and experiment with Blur and Vantage filters Module 17: Blending Modes Introduction Master the concept of Blending Modes and their impact on layer overlays Understand different types of Blending Modes, including Darken, Lighten, and Overlay Master the art of working with layers in Adobe Photoshop. Skillfully utilize various selection tools for precise editing and manipulation. Apply captivating Layer Effects to enhance your designs and visuals. Understand the functionality of Adjustment Layers, Masking, and Clipping Masks for advanced editing and compositing. Acquire the techniques to touch up and restore photographs effectively. Explore typography techniques to create visually appealing text designs. Gain an introductory understanding of Filters and their creative applications. Grasp the principles of Color Theory and its practical application in design.

What does this course cover? This is an online course for developing history leadership in primary teaching. This term, we will be piloting the course as an immersive programme covering the key elements of primary history subject leadership, enabling all involved in history leadership at primary to carry out their role effectively. How is this course structured and delivered? The course will take place in ten online sessions from January–May 2025. Sessions 1, 8 and 10 are compulsory to attend live. Participants will be required to complete a gap task after each session and contribute to an online reflection diary. The other sessions will be recorded for participants to work through at their convenience, though participants are encouraged to attend the recording sessions live in order to make the most of the programme. All recordings will be made available on the course Moodle page within two working days of the live recording session. Who is this course for? This programme is designed for anyone who is a subject coordinator or subject leader for history in their primary school. You may have just been appointed as a subject leader, or be more experienced but looking for formal training or fresh inspiration and direction. What are the outcome? This course will: equip you fully for the demands of history leadership in primary schools increase your confidence to develop an innovative, inclusive and effective history curriculum in your school develop your understanding of efficient action planning and how to make a wider impact help you to make the case for history with senior leaders enable you to enthuse others and lead staff meetings about history develop your understanding of current issues in primary history education The course will include a chance to share resources and assessment approaches, plus much more What will each session cover? Session 1: Introductory meeting (Live attendance) Wednesday 22 January 2025, 4pm–5.30pm Introduction and aims Reflection activity on the current state of history in your school Key responsibilities of the history subject leader Current Ofsted implications for the subject and what to expect in an inspection How the HA and latest Ofsted material can support you Session 2: What makes an effective history subject leader? (Live and recorded) Monday 27 January 2025, 4pm–5.30pm How to effectively support teachers and learners as a history leader How to create a vision, lead change, and manage time Effective action planning and improvement Auditing your history provision and building your evidence trail Developing an innovative, inclusive and effective history curriculum in your school Disciplinary knowledge: What is history? What do historians do? Suggested gap task: Conducting teacher and/or pupil voice questionnaires. Compulsory gap task: Add to your reflection diary for the programme. If relevant, reflect on how you will use the teacher questionnaire or pupil voice. Session 3: What makes effective teaching of history? (Live and recorded) Wednesday 19 February 2025, 4–5.30pm The role of the teacher Supporting SEND pupils Securing substantive knowledge and concepts across the curriculum How to support colleagues by identifying core knowledge How to involve the whole staff in mapping out and embedding the progression of concepts across the curriculum Suggested gap task: Consider SEND in your curriculum. Compulsory gap task: Add to your reflection diary for the programme reflecting on SEND. Session 4: Curriculum and practice at EYFS (Live and recorded) Tuesday 25 February 2025, 4–5.30pm Unpicking and supporting the requirements of the EYFS curriculum and Development Matters Developing historical and chronological understanding in EYFS as part of Understanding the world Progression and transition from EYFS to Key Stage 1 Ensuring coherence: how to start developing concepts Making use of the local history on your doorstep for EYFS and KS1 Accessing resources and support for EYFS Suggested gap task: Fact finding and liaison. Compulsory gap task: Add to your reflection diary for the programme reflecting on current EYFS practice. Session 5: Curriculum and practice at Key Stage 1 (Live and recorded) Monday 3 March 2025, 4pm–5.30pm Unpicking and supporting the requirements of the National Curriculum for KS1 Progression: building upon transition from EYFS What do KS1 require before KS2? Ensuring coherence: further developing the school’s chosen substantive concepts How to develop disciplinary concepts Developing appropriate chronological understanding in KS1 Enhancing and engaging children’s knowledge and retention through enquiry The use of working walls in KS1 to support learning Accessing resources and support for KS1 Suggested gap task: Check your KS1 curriculum for coverage and progression, building upon what they have learnt in EYFS. Compulsory gap task: Add to your reflection diary for the programme reflecting on KS1 practice in your setting. Session 6: Curriculum and practice at Key Stage 2 (Live and recorded) Tuesday 11 March 2025, 4pm–5.30pm Unpicking and supporting the requirements of the National Curriculum for KS2 How to incorporate local history with progression in KS2 What do we want the children in Year 6 to leave with? Developing appropriate chronological understanding in KS2 Preparing for transition to Key Stage 3 Ensuring coherence: building upon the school’s chosen concepts for progression What the HA can do to support the teaching of KS2 units? Resources and support for KS2 Suggested gap task: Check your KS2 curriculum for coverage and progression, building upon what they have learnt in EYFS and KS1. Compulsory gap task: Add to your reflection diary for the programme reflecting on KS2 practice in your setting. Session 7: Approaching sensitive issues in history (Live and recorded) Tuesday 18 March 2025, 4pm–5.30pm What do we mean by diversity in history and why is it important? How to ensure a wider diversity in your history teaching Barriers to making the curriculum more diverse and how to overcome them Approaches to sensitive issues in history lessons, including: - Refugees and migration history - War - Climate change Suggested gap task: Consider opportunities for increasing diverse voices and raising climate issues in your curriculum. Compulsory gap task: Add to your reflection diary for the programme considering how you might address the sensitive or current issues raised in this session. Session 8: Interim review meeting (Live attendance) Tuesday 25 March 2025, 4pm–5.30pm A review session allowing subject leaders to reflect upon their progress so far Opportunity to respond to suggestions, clarify information, or raise issues from the previous sessions Time to ask questions, share good practice or recommended resources with the rest of the cohort Suggested gap task: Time to follow up on anything raised in this session or to complete any previous tasks, following clarification and inspiration from this session. Compulsory gap task: Add to your reflection diary for the programme, reflecting on your priorities and actions using suggestions from the presenter or other delegates. Session 9: Assessment and evidence (Live and recorded) Wednesday 30 April 2025, 4pm–5.30pm Assessment and expectations A word about writing Triangulating the evidence What to look for in a work scrutiny Suggested gap task: Conduct a work scrutiny on one aspect to check across the school, in conjunction with a focused pupil voice on the same aspect. Compulsory gap task: Add to your reflection diary considering how you will conduct a work scrutiny and what you will focus on – or, if relevant, reflect on what you discovered and how you will address any issues. Session 10: Final meeting (Live attendance) Wednesday 14 May 2025, 4pm–5.30pm Following up any requests arising from the interim meeting (Session 8) Discussion or clarification of any issues arising from previous sessions Discussion of priorities, next steps and any issues Sharing ideas for enthusing others and leading staff meetings: “What worked for me?” Communicating with headteachers, governors, colleagues and parents Are you ready for the HA Quality Mark? Suggested gap task: Identifying your school’s next steps Compulsory gap task: Complete your final piece in your reflection diary.