- Professional Development
- Medicine & Nursing
- Arts & Crafts
- Health & Wellbeing
- Personal Development
3441 Design courses in Bradford delivered Live Online
Game Designing Training Course 3ds Max and Unity 3D (Live Online Only)
By London Design Training Courses
Why Learn Game Designing Training Course 3ds Max and Unity 3D? Click for more info Learn Game Designing with 3ds Max and Unity 3D for industry demand, 3d and 2d skills, game design, AR/VR projects, game programming, and 3d visualization. Enhance your career in the thriving gaming and interactive media industry. Duration: 40 hrs. Method: 1-on-1 & Tailored content. Schedule: Tailor your own schedule by pre-booking a convenient hour of your choice, available from Mon to Sat 9 am and 7 pm. Explore the World of Unity 3D with Our Training Courses Unity is a robust cross-platform game development engine, responsible for creating a significant portion of the world's games. Learn ultimate game development platform to build top-notch 3D & 2D games, deployable on mobile, desktop, VR/AR, consoles, or the Web. The opportunities are limitless. Led by certified and experienced Unity instructors, our training courses are filled with practical, real-world exercises. 40-hour Game Designing Training Course with 3ds Max and Unity 3D: Course Overview: Module 1: Introduction to 3ds Max and Unity 3D (4 hours) Get acquainted with 3ds Max and Unity 3D interfaces and workflows Efficiently set up and manage projects Master importing and handling assets Module 2: 3D Modeling with 3ds Max (8 hours) Dive into 3D modeling techniques Create stunning 3D models using 3ds Max Explore polygonal, spline, and NURBS modeling Enhance models with textures and materials Module 3: Animation and Rigging with 3ds Max (8 hours) Understand animation techniques in 3ds Max Rig 3D models for smooth animations Bring creations to life with keyframe animation Employ procedural animation methods Export animations for Unity 3D integration Module 4: Game Design with Unity 3D (8 hours) Learn the Unity 3D game engine Grasp essential game mechanics and concepts Create and manage game scenes and levels Master control of game objects and components Utilize physics and collision detection for immersive experiences Module 5: Scripting and Programming with Unity 3D (8 hours) Introduce Unity 3D scripting with C# Understand variables, data types, and functions in C# Control game objects and components using C# Explore game loops and events for interactive gameplay Module 6: User Interfaces and Audio with Unity 3D (4 hours) Design captivating user interfaces within Unity 3D Implement interactive buttons, sliders, and input fields Elevate games with audio import and editing Control sound effects and background music Module 7: Optimization and Deployment (4 hours) Master game optimization in Unity 3D Enhance game performance through scripting techniques Build and test games for various platforms Publish games on the web or app stores Game Designing Training Course 3ds Max and Unity 3D (Live Online Only): Explore advanced 3ds Max techniques for modeling, lighting, and cameras Dive into character animation for lifelike characters Enhance Unity 3D skills with real-time development and game authoring settings Unity - Real-time 3D Development Platform: Unlock Your Creativity https://www.unity.com/ Create 3D, 2D, VR & AR Experiences For Any Industry: Games, Auto, AEC, Film, And More. Complete Solution To Develop Better, Iterate Faster, And Grow Your Business. Amazing Games. Immersive Experiences. Multi-Platform Support. 3ds Max Free Trial | Autodesk Download a free 30-day trial of 3ds Max, 3D modeling, and rendering software for design visualization, games, and animation.

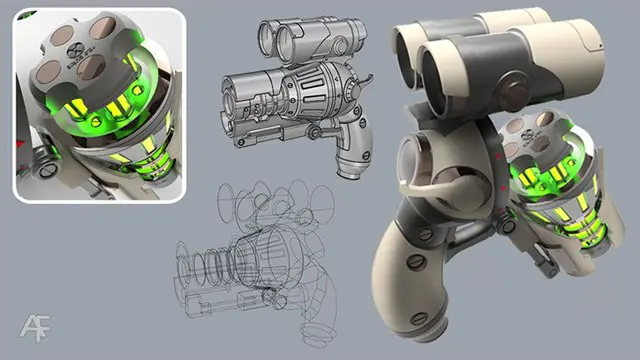
Product Design Training Courses 1-2-1
By Real Animation Works
PRODUCT DESIGN face to face training customised and bespoke.
Dreamweaver training course description Dreamweaver is a web authoring program that allows you to build professional quality websites. This course starts with a tour of Dreamweaver and customising your workspaces, moving onto HTML and CSS basics. Page layouts, templates and interactive pages are also covered. The final session covers how to use Dreamweaver as a HTML editor. Hands on session follow all the major theory chapters. What will you learn Use Dreamweaver to create websites. Customise Dreamweaver. Use templates. Add interactivity to web pages. Use Dreamweaver to edit HTML code. Dreamweaver training course details Who will benefit: Anyone wishing to create or edit websites. Prerequisites: None. Duration 3 days Dreamweaver training course contents Getting started Installing the programme, Updating to the latest version,, Online content, On first launch, Choosing the program colour theme, Setting up the workspace, Defining a Dreamweaver site, Checking for updates, Additional resources. Customizing your workspace Touring the workspace, Using the start screen, Exploring new feature guides, Setting interface preferences, Switching and splitting views, Selecting a workspace layout, Personalising Dreamweaver, Working with extract, Creating custom keyboard shortcuts, Using the Property inspector, Using the Related Files interface, Using tag selectors, Using the CSS Designer, Using the Visual Media Query (VMQ) interface, Using the DOM viewer, Using Element dialogs, displays and inspectors, Setting up version control in Dreamweaver, Exploring experimenting and learning. HTML Basics What is HTML? Where did HTML begin? Frequently used HTML elements, What's new in HTML5. CSS Basics What is CSS? HTML vs. CSS formatting, HTML defaults, CSS box model, Applying CSS styling, Multiples, classes and ids. Web design basics Developing a new website, Scenario, Working with thumbnails and wireframes, Creating a page layout Evaluating page design options, Working with predefined layouts, Styling an existing layout, Styling elements using the Extract panel, Extracting text from a Photoshop mockup, Troubleshooting CSS styling, Extracting text styling from a Photoshop mockup, Creating a gradient background using Extract, Extracting image assets from a mockup, Adding CSS background effects in code, Finishing up the layout. Working with templates Creating a template from an existing layout, Inserting editable regions, Inserting editable regions, Inserting HTML entities, Inserting metadata, Validating HTML code, Producing child pages, Moving CSS styles to linked file, Updating a template. Working with text, lists and tables Previewing the completed file, Creating and styling text, Creating lists, Creating and styling tables, Spell-checking webpages, Finding and replacing text. Working with images Web image basics, Previewing completed files, Inserting an image, Controlling image positions with CSS classes, Working with the Insert panel, Using the Insert menu, Inserting non-web file types, Working with Photoshop Smart Objects, Copying and pasting images from Photoshop, Inserting images by drag and drop, Optimizing images with the Property inspector. Working with navigation Hyperlinks, previewing the completed file, creating internal and external hyperlinks, setting up email links, Creating image-based links, Targeting page elements, Locking an element on the screen, Styling a navigation menu, Checking your page, Adding destination links. Adding interactivity Dreamweaver behaviours, Previewing the completed file, Working with Dreamweaver behaviours, Working with jQuery Accordion widgets, Inserting a jQuery Accordion widget, Styling a jQuery Accordion. Publishing to the web Defining a remote site, Cloaking folders and files, Wrapping things up, Putting your site online, Synchronizing local and remote sites. Working with code Creating HTML code, multicursor support, commenting your code, Working with CSS preprocessors, Selecting code, Collapsing code, Expanding code, Accessing Split code view, Previewing assets in Code View.

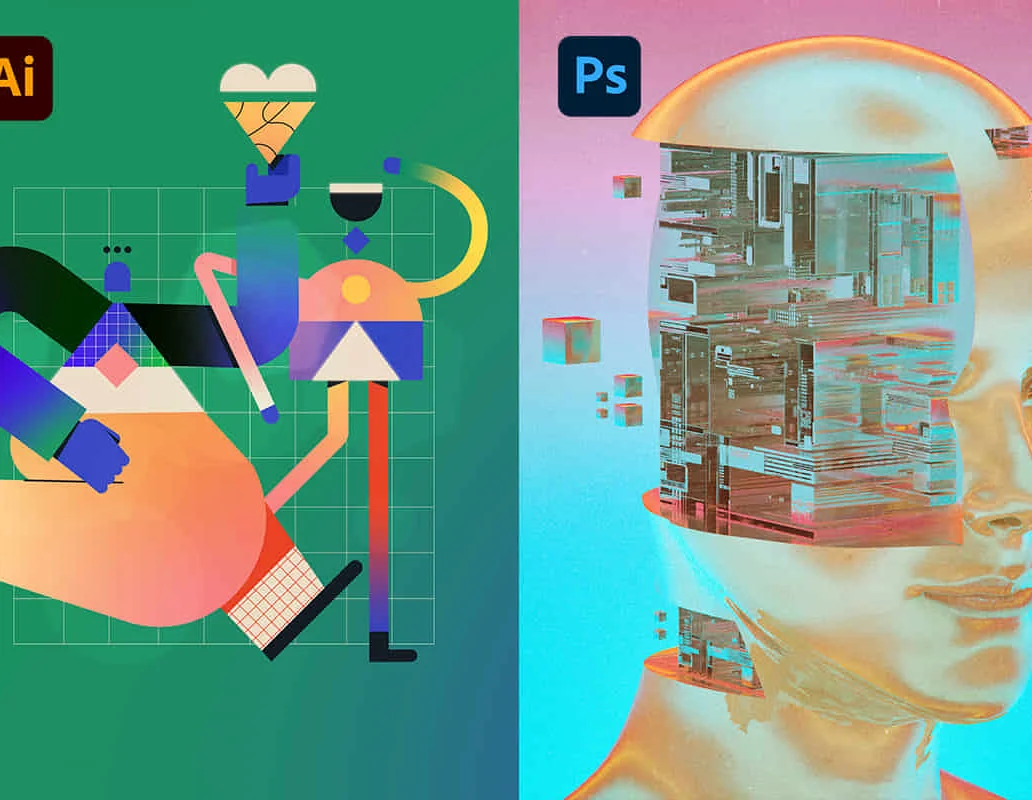
Adobe Illustrator and Photoshop Masterclass Training
By ATL Autocad Training London
Adobe Illustrator and Photoshop Masterclass Training, your gateway to Photoshop and Illustrator. Learn with the best software for publishing and marketing materials. This comprehensive training covers Photoshop, Illustrator, and InDesign, offering step-by-step tutorials tailored for creative professionals. Click here for more info: Website Duration: 10 hours Approach: Individualized, Tailored Content, Flexible Pace, Personal Support Scheduling Flexibility: 1-on-1 sessions from Mon to Sat, 9 am to 7 pm, based on your availability. Course Title: Adobe Photoshop and Illustrator Mastery Workshop Duration: 10 Hours (Divided into 10 Modules) Module 1: Introduction to Adobe Photoshop (1 hour) Familiarization with Photoshop interface and tools Understanding bitmap graphics and resolution Basic image editing techniques (cropping, resizing, color adjustments) Significance of layers in design Module 2: Essential Photoshop Tools (1 hour) Mastery of selection tools (Marquee, Lasso, Magic Wand) Understanding brushes and their settings Introduction to the Pen tool for precise selections Working adeptly with layers and layer styles Module 3: Advanced Image Editing (1 hour) Proficiency in advanced color adjustments (Curves, Levels, Hue/Saturation) Techniques for photo retouching and manipulation Creating composite images using blending modes Application of filters and special effects for creative designs Module 4: Introduction to Adobe Illustrator (1 hour) Exploration of Illustrator interface and tools Working with vector graphics and paths Basic shapes and drawing tools Understanding anchor points and handles Module 5: Creating Vector Artwork (1 hour) Expert use of the Pen tool for precise vector illustration Creating and editing shapes and objects Mastery in handling gradients and patterns Understanding the Appearance panel Module 6: Illustrator Typography (1 hour) Text tools and advanced formatting options Crafting text effects and artistic typography Integration of text with shapes and images Working adeptly with text on a path Module 7: Combining Photoshop and Illustrator (1 hour) Importing Illustrator files into Photoshop and vice versa Efficient use of smart objects and vector shapes in Photoshop Creation of custom brushes and patterns in Illustrator for seamless use in Photoshop Designing posters and flyers by combining elements from both software Module 8: Integration with InDesign (1 hour) Exporting assets from Photoshop and Illustrator for InDesign Crafting layouts in InDesign using assets from both programs Understanding print and digital design nuances Preparing files for printing and online use Module 9: Advanced Techniques and Tips (1 hour) Creating custom actions and automation in Photoshop Mastery in advanced selection techniques Utilizing Illustrator's advanced tools (Pathfinder, Shape Builder, etc.) Exploration of creative design styles and trends Module 10: Final Projects and Portfolio (1 hour) Individual or group projects incorporating Photoshop and Illustrator skills Detailed review and feedback on the projects Preparation of a portfolio showcasing the work Upon completion of the Adobe Photoshop and Illustrator Mastery Workshop, participants will: Master Advanced Design Techniques: Acquire expert skills in both Adobe Photoshop and Illustrator, delving into advanced tools, filters, and effects for intricate design work. Seamlessly Integrate Software: Learn to seamlessly integrate Photoshop and Illustrator, enabling the creation of dynamic and visually appealing designs by leveraging the unique strengths of both programs. Develop Creative Problem-Solving: Cultivate creative problem-solving abilities by exploring diverse design styles and industry-relevant trends, empowering the creation of innovative and captivating visuals. Construct Professional Portfolios: Gain the expertise to construct professional portfolios, showcasing a diverse range of projects incorporating advanced Photoshop and Illustrator techniques. Collaborate on Real-World Projects: Collaborate effectively on real-world design projects, combining Photoshop and Illustrator skills to produce high-quality marketing materials, promotional content, and digital artwork. Career Opportunities: Upon mastering Photoshop and Illustrator, participants can pursue a range of creative careers, including: Graphic Designer: Craft visually appealing designs for print and digital media, ranging from marketing materials to social media graphics. Digital Illustrator: Create intricate digital illustrations and artworks for various applications, including book covers, digital publications, and games. Web Designer: Develop engaging and user-friendly website layouts and elements, optimizing user experience through appealing visuals. Advertising Artist: Design compelling advertisements for print and online platforms, captivating audiences and promoting brands effectively. Freelance Designer: Work as a freelance designer, taking on diverse projects from clients and agencies, showcasing versatility in both Photoshop and Illustrator skills. By mastering these Adobe tools, participants open doors to a multitude of creative opportunities in the ever-expanding digital design industry. Skills Acquired: Participants in the Adobe Illustrator and Photoshop Masterclass Training will develop advanced skills in vector graphics, digital illustration, and photo manipulation using Adobe Illustrator and Photoshop. Key skills include: Precision Vector Graphic Design in Illustrator Creative Digital Illustration Techniques Advanced Photo Editing and Manipulation in Photoshop Job Opportunities: Upon completion, individuals can pursue roles such as: Graphic Designer Digital Illustrator Advertising Creative Branding Specialist Elevate Your Design Skills: Master Adobe Illustrator and Photoshop, crafting stunning graphics, logos, and digital illustrations. Understand design principles, tools, and workflows. Receive a recognized Certificate of Completion and access recorded lessons for future reference. Expert Guidance, Your Schedule: Learn from certified experts, tailored to your timetable-flexible online or in-person sessions, Monday to Sunday, 9 am to 8 pm. Enjoy lifetime email support for seamless learning. Unleash Your Creativity Today: Enroll now to ignite your creative potential in Adobe Illustrator and Photoshop. Elevate your designs effortlessly.
UX Research
By Experience Thinkers
Arm yourself with a robust research toolkit that will help you uncover deep behavioural insights on user needs and motivations so you can design better experiences.

This is a full 4 day course covering the requirements of commercial fire alarm systems to BS 5839 Part 1 2017 Code of Practice for Design, Installation, Commissioning and Maintenance of Systems in Non-Domestic Premises. This is one of the few externally examined Level 3 courses available and is supported by the Fire Industry Association (FIA) and Independent Fire Engineering & Distributors Association (IFEDA). All successful delegates will receive a EAL Level 3 Award in the Requirements of Fire Detection and Fire Alarm Systems for Buildings BS 5839-1:2017

Adobe InDesign and Photoshop Training Courses 1-2-1
By Real Animation Works
Face to Face training customised and bespoke. One to One Online or Face to Face
Mastering User Experience (UX) Design for Experienced Web Developers (TT4213)
By Nexus Human
Duration 3 Days 18 CPD hours This course is intended for The intended audience for this course is experienced web developers who are new to User Experience (UX) and Responsive Design principles. These professionals typically have a solid understanding of front-end development technologies such as HTML, CSS, and JavaScript but seek to expand their skillset to create more user-centric, adaptable, and accessible web experiences. Roles that would benefit from this course include: Front-end Web Developers Full-stack Developers Web Designers Team Leads and Project Managers Freelance Web Developers Overview Working in a hands-on learning environment led by our expert UX coach, you'll learn to: Understand and apply UX principles and user-centered design processes: Participants will learn to identify the needs and preferences of users, create user personas, and apply UX best practices to develop intuitive, user-friendly web experiences. Design and implement responsive web layouts: Participants will gain the skills to create fluid grid layouts, use flexible images, and apply media queries to design web pages that adapt seamlessly across various devices and screen sizes. Optimize web performance for responsive designs: Participants will learn techniques to improve website performance, including image optimization, responsive images, and minification and concatenation of assets, ensuring a fast and smooth user experience across devices. Implement accessible web designs: Participants will understand the importance of accessibility in web design and learn to apply WCAG principles and accessible design patterns to create websites that are usable by a wide range of users, including those with disabilities. Collaborate effectively with designers, developers, and stakeholders: Participants will gain insights into design collaboration and handoff processes, enhancing their ability to communicate design decisions, provide and receive feedback, and work efficiently with team members and clients. In today's fast-paced digital world, user-centric and adaptable websites are no longer a luxury ? they're a necessity. By embracing UX and responsive design, you'll unlock the potential to elevate your websites, boosting user satisfaction and engagement. This, in turn, leads to higher conversion rates and a stronger online presence for your clients or organization, as well as better collaboration within your team, bridging the gap between designers, developers, and stakeholders.UX Design & Responsive Design for Experienced Web Developers is a three day, engaging hands-on workshop designed to equip you with the latest skills and best practices in User Experience (UX) and Responsive Web Design required to create seamless, user-friendly websites that adapt effortlessly across devices. This course will immerse you in the latest skills, best practices, and hands-on activities, empowering you to create exceptional, accessible websites that excel across devices and captivate users. Throughout the program you?ll explore the fundamentals of UX and responsive design, including user-centered design processes, mobile-first and desktop-first approaches, and design techniques for various devices and screen sizes. You'll gain practical experience creating responsive layouts, optimizing performance, and implementing accessible web designs, all while leveraging popular frameworks and design tools. You'll also gain valuable insights into performance optimization, accessibility, and collaboration strategies, ensuring you have the complete toolkit to excel in your field.By the end of this workshop, you?ll have gained a solid understanding of UX and responsive design principles, as well as hands-on experience in applying these concepts to real-world projects. You?ll be able to create more user-friendly, responsive, and accessible websites, and collaborate more effectively with your design and development teams. Introduction to UX and Responsive Design: Understanding User Experience What is UX? Importance of UX in web development UX principles and best practices User-centered design process Responsive Web Design Basics What is Responsive Web Design? Importance of Responsive Design in modern web development Fluid grid layout, flexible images, and media queries Hands-on Activity: Creating a Responsive Layout Designing a simple responsive layout using HTML, CSS, and media queries Breakdown and explanation of the code Testing responsiveness across different devices Mobile-first vs. Desktop-first Approaches Pros and cons of each approach Deciding which approach to use Designing for Different Devices and Screen Sizes Common breakpoints and device considerations Accessibility and usability across devices Typography, color, and other design elements in responsive design Hands-on Activity: Designing for Different Devices Modifying the previously created responsive layout to optimize for various devices Discussion and feedback on designs Advanced UX and Responsive Design Techniques: UX Research and Testing Importance of UX research Usability testing and user feedback A/B testing and heatmaps Navigation and Information Architecture Designing effective and user-friendly navigation Organizing content and information Common navigation patterns in responsive design Hands-on Activity: Designing Navigation for Responsive Websites Adding navigation elements to the previously created responsive layout Testing navigation on different devices and screen sizes Discussion and feedback on navigation designs Responsive Web Design Frameworks and Tools Overview of popular frameworks (Bootstrap, Foundation, etc.) Pros and cons of using frameworks Introduction to design tools (Sketch, Figma, Adobe XD) Hands-on Activity: Exploring Frameworks and Tools Experimenting with a chosen framework or design tool Redesigning the responsive layout using the selected framework/tool Sharing experiences and discussing the benefits and drawbacks UX and Responsive Design Best Practices: Design Patterns and UI Components Common design patterns in responsive web design Designing reusable UI components Consistency and usability in UI components Performance Optimization Importance of performance in responsive design Image optimization and responsive images Minification and concatenation of assets Hands-on Activity: Optimizing Performance (1.5 hours) Applying performance optimization techniques to the responsive layout Testing the improvements in performance Sharing results and discussing best practices Accessibility in UX and Responsive Design Importance of accessibility in web design Accessibility principles (WCAG) Accessible design patterns and techniques Hands-on Activity: Evaluating and Improving Accessibility Assessing the accessibility of the responsive layout Implementing accessibility improvements Testing and discussing the results Design Collaboration and Handoff Collaborating with designers, developers, and stakeholders Effective communication and documentation Design handoff tools and techniques Hands-on Activity: Simulating Design Handoff Participants will work in pairs to simulate a design handoff Reviewing, discussing, and providing feedback on each other's responsive layouts Sharing experiences and lessons learned

Driver CPC - 1 Day Periodic 7 Hour Course - The Compliant Driver / Trailer Checks and 3rd Party Trailers - ONLINE - August 2025
By Total Compliance
Driver CPC - 1 Day Periodic 7 Hour Course The Compliant Driver / Trailer Checks and 3rd Party Trailers Join our online course from Total Compliance, designed to build your expertise in being a compliant driver and conducting essential trailer check. Driver Compliance: Understanding the responsibilities and legal requirements for maintaining compliance on the road. Trailer Checks: Conducting thorough pre-use and post-use trailer inspections to ensure safety and efficiency. 3rd Party Trailers: Best practices for managing and operating third-party trailers, including checks, handling procedures, and risk mitigation. Don't miss out on this opportunity to improve your driving practices! Please review our Terms and Conditions for more information.

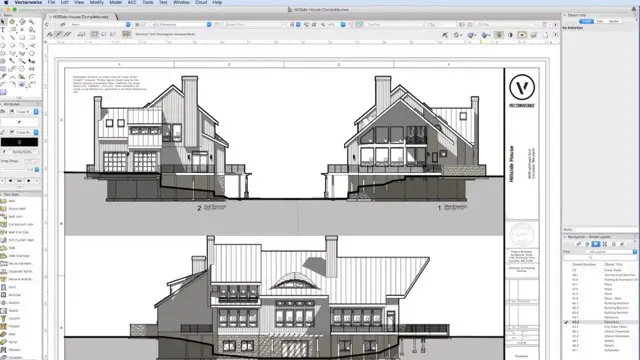
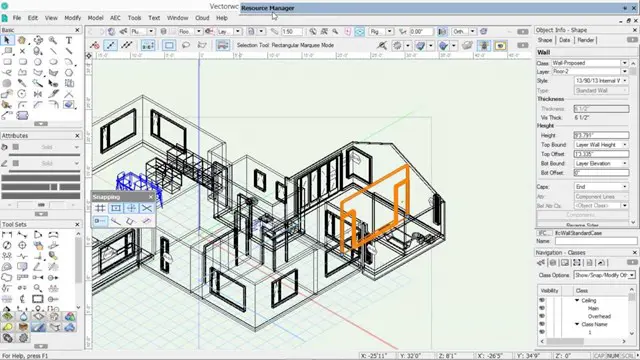
Vectorworks One to One training course for interior designers
By Real Animation Works
Vectorworks Evening Course face to face One to one