- Professional Development
- Medicine & Nursing
- Arts & Crafts
- Health & Wellbeing
- Personal Development
7058 Courses in Rosyth delivered Live Online
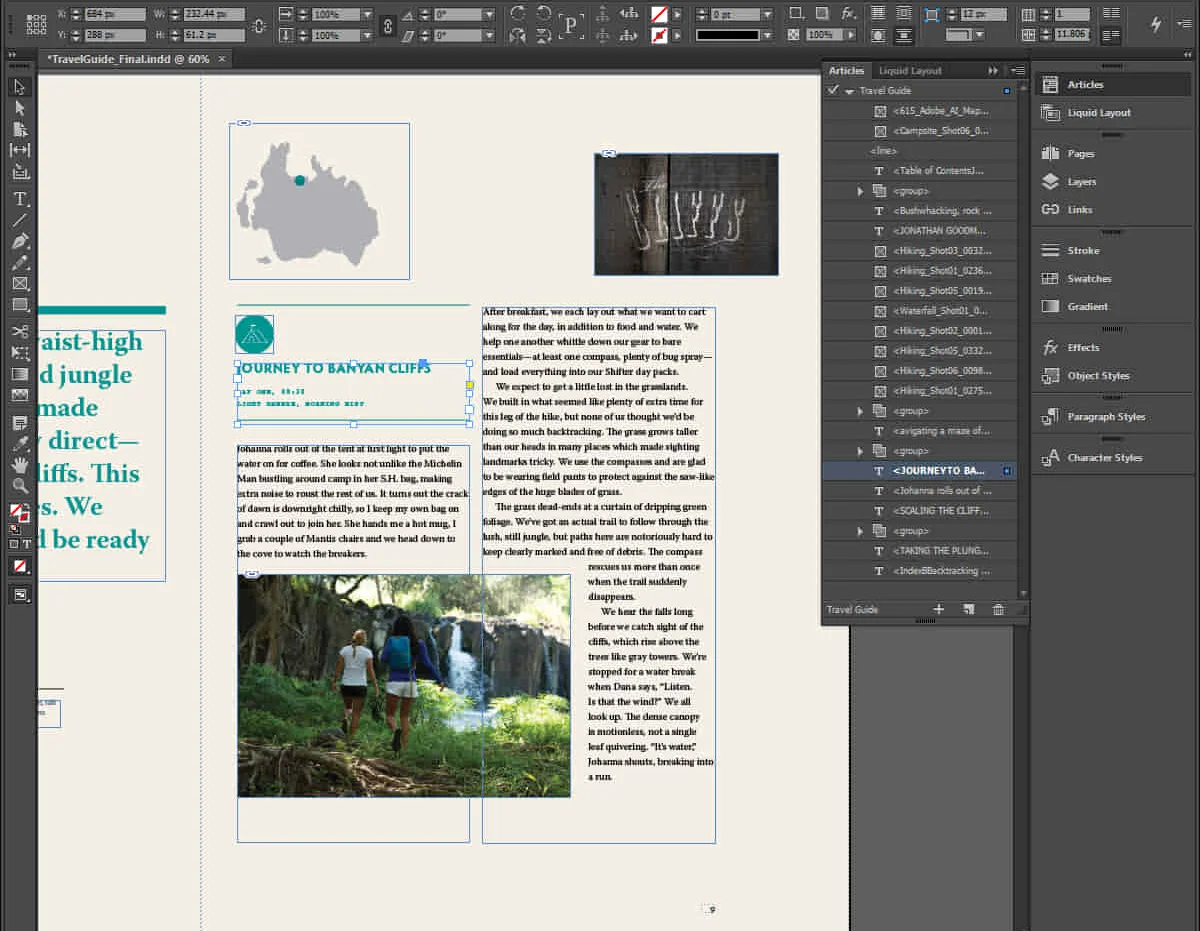
InDesign Evening Classes
By ATL Autocad Training London
Who is this for? InDesign Evening Classes. Refine your Adobe InDesign skills with expert tutors. Master layout creation, typography, and image manipulation. Design captivating brochures, magazines, and more. Choose between in-person or live online sessions. Earn a Certificate of Completion and enjoy lifetime email support. Explore our complimentary trial session. Check our Website Duration: 10 hours Approach: 1-on-1 sessions with tailored content. Schedule: 1-on-1 sessions, available Mon to Sat from 9 am to 7 pm. Course Title: Mastering Adobe InDesign Course Duration: 10 Hours Session 1: Introduction to Adobe InDesign (1 hour) Overview of Adobe InDesign interface Understanding tools and panels Setting up new documents and document properties Basic navigation and shortcuts Session 2: Mastering Page Layouts (1.5 hours) Working with master pages Creating and managing text frames and image placeholders Managing multiple pages and spreads Using grids and guides for precise layouts Session 3: Typography and Text Formatting (1.5 hours) Working with fonts, styles, and text formatting options Understanding text threading and linking Advanced text composition techniques Utilizing paragraph and character styles for consistency Session 4: Advanced Image Manipulation (1.5 hours) Importing and manipulating images and graphics Understanding image resolution and color modes Working with clipping paths and transparency Applying image effects and filters Session 5: Interactive Documents and Digital Publishing (2 hours) Creating hyperlinks and interactive buttons Embedding multimedia elements (audio, video) in documents Exporting documents for digital platforms (eBooks, PDF forms) Introduction to responsive design for various devices Session 6: Advanced Techniques and Special Effects (1 hour) Utilizing advanced drawing tools and shapes Applying special effects like drop shadows, transparency, and blending modes Working with tables and charts Introduction to data merge for personalized content Session 7: Printing and Prepress (1 hour) Understanding print terminology and specifications Preflighting documents for print readiness Color management and preparing files for different printing processes Exporting files for professional printing Session 8: Project Work and Review (0.5 hour) Participants work on a practical project applying learned skills Instructor-guided project review and feedback Session 9: Tips, Tricks, and Best Practices (0.5 hour) Time-saving shortcuts and productivity hacks Best practices for efficient workflow and file management Troubleshooting common issues and errors Session 10: Q&A and Certification (0.5 hour) Addressing participant queries and concerns Certificate distribution and course completion celebration This comprehensive 10-hour course aims to equip participants with advanced skills in Adobe InDesign, covering essential aspects of design, typography, interactivity, and print preparation. Participants will engage in hands-on activities, projects, and discussions to reinforce their learning throughout the course. By the end of this 10-hour advanced InDesign course, you will: Gain a comprehensive understanding of InDesign's most powerful features and advanced techniques. Create sophisticated page layouts with eye-catching special effects for professional-level designs. Efficiently manage fonts, colors, and shapes to enhance the visual appeal of your documents. Develop interactive PDFs with navigation, page transitions, and embedded video for engaging presentations. Master the use of character styles, paragraph styles, and word styles to streamline text formatting. Utilize advanced object styles and anchored objects for efficient layout design. Work effectively with Adobe Stock, Photoshop, Illustrator, and other Creative Cloud applications for seamless integration. Create PDF forms and implement interactive button-triggered animations for interactive documents. Optimize workflow with keyboard shortcuts, scripts, and advanced preferences for a smoother design process. Learn valuable tips and best practices from industry experts to boost your productivity and efficiency. Enhance your mastery of InDesign through our advanced program, meticulously designed to hone your skills. Explore intricate page layouts and seamlessly integrate captivating special effects into your projects. Our seasoned Adobe trainers, renowned for their approachable teaching style, will guide you through InDesign's powerful features, sharing invaluable insights derived from years of practical experience. This interactive course provides ample opportunities for hands-on practice, ensuring your confidence in harnessing InDesign's diverse technical capabilities. Key Course Highlights: In-depth exploration of InDesign's advanced functionalities. Individualized attention, fostering open discussions and encouraging questions. Expert trainers, small class sizes, and a supportive and collaborative learning environment. Comprehensive learning materials and resources, all inclusive. Continuous support for any post-course inquiries or concerns, ensuring your ongoing success. Enhance your InDesign proficiency, crafting polished designs effortlessly. Elevate your skills with our advanced course, ensuring: Thorough coverage of InDesign's technical capabilities. Personalized attention and ample opportunity for questions. Supportive, knowledgeable trainers in a comfortable learning environment. Comprehensive materials and resources for your learning journey. Continued assistance for post-course queries and concerns. Download InDesign
Advanced Adobe InDesign Training Program
By ATL Autocad Training London
Advanced Adobe InDesign Training Program Learn InDesign with a course at Real Animation Works. Choose from Weekend, Weekday or Evening Courses and learn from expert tutors. Benefit from professional InDesign training conducted by Adobe Certified Instructors with extensive graphic design expertise. Check our Website Duration: 10 hours. Approach: 1-on-1 and personalized attention. Schedule: 1-on-1 sessions, available Monday to Saturday from 9 am to 7 pm. Course Title: Comprehensive Adobe InDesign Training Duration: 10 Hours Session 1: Introduction to Adobe InDesign (1 hour) Overview of InDesign interface and tools Document setup: page size, margins, and columns Basic text formatting and paragraph styles Introduction to working with images and graphics Session 2: Advanced Text Formatting and Styles (1 hour) In-depth exploration of character and paragraph styles Advanced text composition techniques Managing text flow with threaded frames Incorporating special characters for typographic control Session 3: Mastering Images and Graphics (1 hour) Advanced image manipulation: resizing, cropping, and effects Text wrap options and integrating text with images Creating image frames and working with transparency Interactive elements: buttons and hyperlinks Session 4: Layout Design Techniques (1.5 hours) Grids and guides: precise alignment and spacing Working with layers for efficient design management Advanced object arrangement and distribution Utilizing master pages for consistent layout elements Session 5: Advanced Document Features (1.5 hours) Tables and data merge: organizing and automating data Interactive PDFs: forms, multimedia, and navigation Advanced print preparation: color management and preflighting Exporting for various digital and print outputs Session 6: Advanced Special Effects (1 hour) Creating drop shadows, gradients, and blending modes Working with typography on a path Advanced text and image effects Integrating Adobe Illustrator and Photoshop files Session 7: Project-Based Learning (1 hour) Participants work on a comprehensive project applying learned skills Instructor-guided project review and feedback Session 8: Tips, Tricks, and Time-Saving Techniques (1 hour) Productivity hacks and shortcuts Troubleshooting common issues and errors Best practices for efficient workflow and collaboration Session 9: Portfolio Building and Career Guidance (0.5 hour) Creating a professional portfolio showcasing InDesign projects Career advice and industry insights from the instructor Session 10: Q&A, Certification, and Course Completion (0.5 hour) Addressing participant questions and concerns Certificate of Completion distribution and course review Celebrating the completion of the Adobe InDesign training journey Upon completion of the Comprehensive Adobe InDesign Training course, participants will: Master Core Skills: Develop proficiency in essential InDesign tools, functions, and techniques for effective layout design. Advanced Text and Typography: Understand advanced text formatting, paragraph styles, and typographic controls for professional typography. Image Manipulation Expertise: Acquire skills in advanced image manipulation, text wrapping, transparency, and integration of multimedia elements. Advanced Layout Design: Learn precise layout techniques using grids, guides, layers, and master pages for consistency and visual appeal. Interactive Document Creation: Create interactive PDFs, forms, multimedia-rich content, and navigation elements for digital publications. Data Management and Automation: Master tables, data merge, and automation features for organized data presentation and streamlined workflow. Print and Export Proficiency: Understand color management, preflighting, and export settings for high-quality print and digital output. Special Effects and Integration: Apply advanced effects, gradients, blending modes, and integrate InDesign with Illustrator and Photoshop files seamlessly. Project-Based Expertise: Develop a comprehensive portfolio-worthy project, showcasing a range of InDesign skills and creativity. Efficient Workflow and Troubleshooting: Implement time-saving techniques, shortcuts, and troubleshoot common design challenges effectively. Career Readiness: Gain valuable insights into industry practices, portfolio building, and career guidance for pursuing opportunities in graphic design and desktop publishing. Versatile Learning Choices: Opt for either in-person sessions at our London center or engage in interactive online learning. Both options offer hands-on experience, detailed demonstrations, and ample chances for inquiries. Compatibility and Assistance: InDesign operates smoothly on Windows and Mac systems. Participants receive a comprehensive InDesign training manual for reference and an electronic certificate upon course completion. Additionally, enjoy lifelong email assistance from your InDesign instructor. Entry Requirements: No prior InDesign expertise is necessary. The training concentrates on InDesign 2023, relevant to recent software updates. Guarantees: We ensure exceptional value for your investment, guaranteeing your acquisition of essential skills and concepts during the training. Course Highlights: Master advanced typography techniques, including paragraph styles, character styles, and nested styles. Explore multi-page layout design, long document management, and advanced table formatting. Acquire skills to create and manipulate complex shapes, vector graphics, and custom illustrations. Learn efficient workflows for data merging, interactive documents, and digital/print output. Collaborate seamlessly with other Adobe Creative Cloud applications. Upon completion, receive a Certificate of Completion and access recorded lessons for self-paced learning. Expert Instruction: Learn from certified tutors and industry experts, gaining valuable insights, tips, and best practices for professional-level designs. Flexible Learning Options: Choose between in-person or live online sessions based on your schedule. Sessions are available Monday to Sunday, from 9 am to 8 pm, accommodating your convenience. Lifetime Support: Benefit from lifetime email support for continuous assistance. Our dedicated team is available to address your queries and challenges. Explore Adobe InDesign - Free Trial: https://www.adobe.com/uk/products/indesign/free-trial-download.html
Rhino Introduction to Intermediate Training Course
By ATL Autocad Training London
Why Choose Rhino Introduction to Intermediate Training Course? Learn: 3D NURBS models. Master: Surfacing modeling. Interface: Rhino's navigation. Rendering Skills: Enhance presentations with Rhino renderings. Check our Website Flexible Scheduling: 1-on-1 training sessions according to your convenience. Choose any hour between 9 a.m. and 7 p.m., Mon to Sat. You can call us at 02077202581 to book over the phone. Duration: 10 hours. Methods: Personalized training either in-person, or live online. Introduction and Navigation Become acquainted with Rhino's interface, menus, and screen layout. Efficiently traverse through Rhino models, ensuring precision in 2D lines, polylines, and NURBS curves. Utilize modeling setup features, incorporating constraints like snap, ortho, and planar for accuracy. Leverage object snaps and Smart Track functionality to enhance precision. Solid and Surface Modeling Develop rapid 3D solids and surfaces, employing Rhino's organized layering system. Utilize coordinates and constraints for meticulous modeling, exploring 3D space and elevations. Create diverse shapes, such as rectangles, circles, arcs, ellipses, and polygon curves. Elevate models with Rhino render and render color, incorporating free-form curves, helix, and spiral curves. Efficiently handle model views with pan, zoom, and view management tools. Implement various editing commands for curve manipulation and transform curves into surfaces and solids. Utilize history tracking for advanced editing and execute general editing actions: move, copy, rotate, mirror, and scale. Create arrays with both polar and rectangular arrangements and employ boolean operations like union, difference, and intersection. Offset curves and surfaces effectively, ensuring meticulous detailing. Intermediate Edit and Surfacing Introduce key NURBS modeling concepts and terminologies. Edit curves and surfaces via control point manipulation and rebuild them for optimal refinement. Employ the nudge modeling aid for precise adjustments and generate deformable shapes. Create curves through projection techniques and split surfaces using curves and surfaces. Blend surfaces seamlessly, utilizing symmetry tools, lighting, and rendering effects. Convert intricate 3D objects into detailed 2D drawings, expertly crafting page layouts. Advanced Surfacing and Solid Modeling Construct model primitives and solid text, employing techniques such as pipe and extrusion. Modify solids efficiently using Boolean tools, expanding your surface modeling capabilities. Employ techniques like extrusion, lofting, and revolving for intricate surfaces. Create sweeps using 1 and 2 rail curves, mastering surface network techniques for complex shapes. Upon completion, you will: Master Rhino Tools: Navigate interfaces, utilize advanced tools for precise modeling, and employ features like object snaps and Smart Track. Expert Solid and Surface Modeling: Develop intricate 3D solids and surfaces, create diverse shapes, and use Rhino render effectively. Advanced Editing Skills: Apply intermediate and advanced editing techniques, including symmetry tools and realistic rendering. Precision Modeling: Utilize coordinates, constraints, and advanced aids for accurate detailing and problem-solving. Professional Project Execution: Create high-quality renderings, 2D drawings, and polished 3D models for real-world design scenarios. Upon completion, you'll be adept at 3D modeling, product design, and architecture, positioning you as a valuable asset in the design industry. Why Choose Our Rhino Courses? Rhino, also known as Rhinoceros, stands as a robust 3D computer graphics and computer-aided design software, utilized extensively in domains like architecture, industrial design, and multimedia. Our Rhino courses are meticulously crafted to empower you in mastering this software. Led by seasoned instructors, our courses provide a comprehensive understanding of Rhino, enabling you to create exceptional designs. Rhino 3D Training: Our Rhino 3D training caters to beginners and those seeking advanced techniques. Course Highlights: Precise 3D Modeling: Master free-form 3D NURBS models with precision. Advanced Functionality: Explore Rhino's features, including advanced surfacing commands. User Interface Mastery: Navigate Rhino's interface and hone skills in curves, surfaces, and solids. Expert Guidance: Acquire expertise in Rhino's modeling environment under expert guidance. Modeling Techniques: Learn free-form and precision modeling techniques. Modeling Aids: Utilize tools for accurate modeling and create basic Rhino renderings. Benefits of our Courses: Expert Guidance: Receive instruction from experienced architects and designers, providing practical, real-world insights for comprehensive learning. Comprehensive Resources: Access bespoke video tutorials for additional learning and reference, enhancing your understanding of the course materials. Digital Reference Material: Receive a digital reference book to support your revision efforts, providing a comprehensive resource for your studies. Ongoing Support: Enjoy free after-support through phone or email even after course completion, ensuring continuous assistance and guidance. Tailored Learning Experience: Customize your learning journey by adapting the syllabus and projects to align with your specific needs and interests, fostering a personalized educational experience. Certificate: Upon completion, earn a certificate from us, validating your achievement and recognizing your expertise in the field.

Bespoke AutoCAD Mac Basic-Intermediate Course
By ATL Autocad Training London
Why Learn Bespoke AutoCAD Mac Basic-Intermediate Course? Learn AutoCAD using your projects and learn how to use powerful tools and techniques for drawing, dimensioning, and printing 2D drawings with our Intermediate AutoCAD course. Check our Website How long is the training? 10 hours, Choose and split 10 hrs Mon to Sat 9 am to 7 pm. Book online or call 02077202581 or 07970325184. Method? 1-on-1, available in both in-person and Live Online. Course Topics Include: Building Fundamental Shapes Working with Lines, Arcs, and Polylines Utilizing Grip Tools Precision Object Alignment Data Management and Backups Exploring File Formats Ensuring Disaster Recovery Mastering Object Creation Handling Measurement Units Dynamic Input Techniques Inquiring Commands and Measurement Tools Effective Object Viewing Navigating Zoom and Pan Object Manipulation Strategies Object Selection Methods Swift Object Management Object Transformation Techniques Scaling and Altering Objects Trim, Extend, and Offset Functions Creating Geometric Variations Object Joining and Editing Corner Filleting and Chamfering Stretching Objects Organizing Your Drawings Layer Management Customizing Object Properties Applying Linetypes Layout Design and Setup Efficient Page Configurations Scaling Drawing Views Adding Annotations Multiline and Single-Line Text Creation Text Styling and Editing Dimensioning Concepts Customizing Dimension Styles Dimension Editing Implementing Multileaders Object Hatching Hatching Editing Reusable Content Management Blocks and Symbols Tool Palette Usage Working with Groups Model Space and Paper Space Understanding Layout Creation and Viewports Viewport Scaling Plotting and PDF Output Managing Multiple Sheet Drawings Utilizing Plotstyles Crafting Custom Drawing Templates Download AutoCAD Mac https://www.autodesk.co.uk After completing the AutoCAD for Mac course, learners can expect the following learning outcomes: Proficiency in AutoCAD: Participants will acquire the skills and knowledge needed to confidently use AutoCAD for Mac, including creating and editing drawings, managing objects, and applying precision techniques. Effective Design Skills: They will gain the ability to produce accurate 2D drawings, making them valuable assets in design-related professions. Jobs that individuals can pursue after completing this course include: Draftsperson: Working in architectural, engineering, or construction firms to create technical drawings and plans. CAD Technician: Assisting in the development of designs for various projects, such as product design or urban planning. Interior Designer: Using AutoCAD for space planning and layout design in the interior design industry. Architectural Designer: Collaborating on architectural projects, including creating floor plans and elevations. Mechanical Designer: Participating in the design and development of mechanical components and systems. Civil Engineering Technician: Supporting civil engineers in designing infrastructure projects, such as roads and bridges. Electrical or Electronics Designer: Assisting in the creation of electrical schematics and electronic circuit diagrams. Landscape Designer: Planning and visualizing outdoor spaces, gardens, and landscapes. Completing this AutoCAD course opens doors to various industries where precise and detailed 2D drawing skills are highly valued. The AutoCAD Mac Bespoke 1 on 1 Basics to Intermediate Level Training Course provides participants with a comprehensive skill set, enabling them to attain proficiency in using AutoCAD Mac. This course covers a wide range of functionalities and caters to individuals at all skill levels, whether they are beginners or experienced users. Participants will begin by learning fundamental features such as drawing, editing, annotations, and dimensioning. As they progress, they will delve into more advanced topics like object manipulation, customizing workspaces, and streamlining workflows. Key Benefits of the Course: Mastery of Mac-AutoCAD: Acquire expertise in both essential and advanced techniques for creating precise 2D drawings. Enhanced Productivity: Increase efficiency by implementing time-saving tips and optimizing your work processes. Versatile Design Abilities: Develop the skills to undertake diverse projects in fields such as architecture, engineering, and more. Industry-Relevant Competencies: Elevate your career prospects across various industries by gaining in-demand AutoCAD skills. Access to Recorded Lessons: Review and reinforce your learning at your convenience with access to recorded lesson sessions. Ongoing Email Support: Receive continuous assistance and guidance via email even after completing the course. Enroll today to benefit from interactive learning experiences guided by experienced instructors. Choose between flexible in-person or online sessions, gain access to lesson recordings, and enjoy a lifetime of email support. Tailored Guidance: Get personalized coaching and instruction tailored to your unique learning needs and objectives. Convenient Scheduling: Choose from flexible training slots available Monday to Saturday from 9 am to 7 pm, accommodating your busy schedule. Versatile Learning Options: Select between in-person training at our location, conveniently situated just 5 minutes away from Oval Tube Station, or participate in live online sessions from anywhere. Engaging Interactions: Participate in interactive sessions designed for questions, discussions, and problem-solving, creating an immersive learning experience. Effective Progression: Accelerate your learning with focused guidance, allowing you to advance at your own pace while mastering the material. Tailored Curriculum: Customize the course content to align with your prior knowledge and specific areas of interest, ensuring a relevant and engaging learning experience. Real-Time Guidance: Receive immediate feedback from the instructor, enhancing your comprehension and skill development. Comprehensive Support: Enjoy ongoing assistance and clarification opportunities through email or additional sessions beyond the course for an in-depth learning experience.

3ds Max Night Training Courses
By ATL Autocad Training London
Course Title: 3ds Max Night Training Program. Join our 3ds Max Evening Course for after-work convenience and guidance in 3D modeling. Personalized attention, and build an impressive portfolio. 3ds Max Courses & Classes Online and in-person in London. Click here for more info: Website Training Duration: 10 hours Learning Approach: 1-on-1 sessions and Customized content. Course Schedule: Reserve a convenient hour from 9 am to 7 pm, Monday to Saturday, to suit your schedule. I. Introduction to 3ds Max Course Overview Familiarization with the User Interface Basic Navigation and Settings II. Creating 3D Objects Formation of Primitive Objects Crafting Complex Shapes using Editable Poly Application of Modifiers to Objects Implementing Materials and Textures III. Lighting Introducing Light Sources in a Scene Different Types of Lighting Adjustment of Light Properties Creating Shadows IV. Camera Establishing Cameras and Camera Views Fine-Tuning Camera Settings Camera Animation Techniques V. Animation Fundamentals Keyframe Animation Techniques Utilizing the Time Slider and Track View Animation of Object Transformations Animated Materials and Textures VI. Rendering Configuration of Render Settings Selection of Output Format Batch Rendering Procedures Post-Processing Effects VII. Project-Based Learning Application of Learned Techniques in a Final Project Creative Problem-Solving for Project Completion In-Depth Course Outline: Modeling Techniques Edit Poly Modeling Extrusion, Chamfer, Cut, and Slicing Techniques Symmetry Mirror Modeling Designing Furniture (Tables and Chairs) Basic House Model Design Creating Lines and Shapes Importing Plans from AutoCAD/Vectorworks Interior Space Design Doors, Windows, Railings, Trees, and Stairs Modifiers Compound Objects (Connect, Scatter, Pro Boolean, Loft, Terrain) Bend, Taper, Twist, Stretch, Skew, FFD, Wave, and Ripple Lattice and Lathe Techniques 3ds Max Basic Lighting Omni Light Spot Light Direct Light 3ds Max Camera Techniques Free Camera Target Camera Texturing and Rendering Diffuse and Bump Mapping Incorporating Environment and Background Images Rendering Images with Advanced Lighting in 3ds Max For a hands-on experience, access a free 30-day trial of 3ds Max, a robust 3D modeling and rendering software for design visualization, games, and animation, via Autodesk's official website. Download 3ds max. Autodesk Download a free 30 day trial of 3ds Max, 3D modelling and rendering software. Learning Outcomes after 3ds Max: Advanced 3D Skills: Master intricate 3D modeling, animation, and rendering techniques. Project Experience: Apply skills to real-world projects, building a professional portfolio. Problem-Solving: Develop critical thinking for complex design challenges. Potential Jobs: 3D Modeler: Create detailed 3D models for various industries. Character Animator: Animate lifelike characters for entertainment media. Architectural Visualizer: Produce realistic architectural renders. Interior Designer: Visualize and present interior designs. Game Environment Artist: Design immersive game environments. Product Visualization Specialist: Render detailed product visuals. Visual Effects Artist: Create stunning visual effects for film/TV. Freelance 3D Artist: Take on diverse projects as an independent professional. Details: Duration: 10 Hours of Comprehensive Training Focus: Advanced 3D Modeling, Animation, and Rendering Techniques Learning Format: Personalized One-on-One Sessions for Maximum Attention Availability: Flexible Scheduling, Monday to Saturday, 9 am to 7 pm Instructors: Certified Experts and Industry Professionals Materials: Certificate of Completion and Extensive Training Guides Interactive Learning: Live Feedback Sessions and Access to Recorded Classes Support: Lifetime Email and Phone Assistance for Continued Learning Special Benefits: Competitive Rates, Referral Discounts, and Assistance with Software Installation This intensive 3ds Max Masterclass provides advanced training in 3D design and animation, ensuring personalized attention, interactive learning, and lifelong support for your creative journey. Personalized Instruction: Skilled trainers provide tailored one-on-one coaching, meeting your unique learning requirements. Practical Learning: Participate in hands-on demonstrations, strengthening skills applicable in design, gaming, and film industries. Comprehensive Materials: Obtain a Certificate of Attendance and detailed guides for continuous reference. Interactive Engagement: Engage in live sessions with tutors, gaining valuable feedback and access to session recordings. Flexible Learning: Choose between online or in-person sessions, aligning with your schedule and preferences. Value and Support: Benefit from competitive rates, referral discounts, and lifelong assistance via email and phone. Seamless Start: Get help with software installation, ensuring a smooth and hassle-free learning experience.

Basic Photoshop Training Course
By ATL Autocad Training London
Learn the Basic PhotoshopTraining Course Learn retouching, layers, color, correction, shapes, and symbols. Delve into graphic design, photo editing, and digital art. From beginner to pro, gaining expertise in UX strategies, ensuring your websites are impactful and user-friendly. Click here for more info: Website Duration: 10 hours Approach: 1-on1 sessions and Personalized guidance. Schedule: Customize your schedule by booking a convenient hour, available from Monday to Saturday between 9 am and 7 pm. Module 1: Interface and Preferences Familiarize yourself with the Photoshop Interface Customize Panels and Toolbars to match your workflow Explore Photoshop Preferences to optimize settings Discover various Photoshop CC Workspaces tailored for different tasks Begin with essential Keyboard Shortcuts Module 2: Image File Formats Understand diverse image file formats such as PSD, JPEG, PNG, and PDF Delve into File Compression and its influence on image quality Module 3: Creating a New Document Set dimensions and size for new documents Grasp media units for accurate design specifications Explore Color Profiles and their significance Save presets for swift document setups Module 4: Placing Images Differentiate Embedded vs. Linked images Introduction to Smart Objects for non-destructive editing Master the Selection tool for precise image placement Module 5: Image Size and Resolution Save images using various formats and compression settings Understand Image Size and Resolution for diverse output needs Module 6: Layers Introduction Organize your work with Layer management Master layer tasks such as reordering, renaming, grouping, locking, and hiding Module 7: Selection Tools Explore Selection Tools like Marquee, Magic Wand, Quick Selection, and Lasso Grasp Inverse Selection and Deselect for efficient editing Module 8: Layer Effects Apply captivating Layer Effects such as Drop Shadow, Stroke, and Outer Glow Save and replicate Effects Styles for quick application Combine multiple effects for creative designs Module 9: Introduction to Shapes Utilize the Shapes tool for fundamental design elements Create Custom Shapes for unique designs Understand Color principles and use the Properties Panel for adjustments Master the Direct Selection tool for precise shape editing Create a basic poster using provided examples Module 10: Type and Typography Work with Type and explore the Character and Paragraph Panel Utilize Styles Panel for consistent text formatting Save favorite fonts for easy access Apply Effects and Layer Styles on Type for impactful typography Learn about Leading, Tracking, and Kerning for optimal text spacing Module 11: Colors Understand RGB vs. CMYK color modes Select colors using the Eyedropper tool Save colors as Swatches for reuse Create gradients using the Gradient Tool Module 12: Creating a Clipping Mask Master the concept of Clipping Masks and their application Apply Clipping Masks to Type, Images, and Shapes Combine Layer Effects with Clipping Masks for creative designs Module 13: Introduction to Masking Understand Masking and its importance in image editing Utilize the Brush tool for mask creation Learn Masking shortcuts and use Gradient Mask for smooth transitions Module 14: Adjustment Layers Explore Color and Gradient Adjustment Layers for image enhancements Master Curves, Levels, and Hue/Saturation Adjustment Layers for precise color control Convert images to Black and White using Adjustment Layers Combine Adjustment Layer Masks for targeted edits Module 15: Image Touch Up Master various touch-up techniques, including Red Eye Removal, Spot Healing Brush, and Patch Tool Utilize Content Aware Removal for seamless object removal Restore old photos using Clone Stamp and Dodge/Burn tools Enhance portraits by removing blemishes and whitening teeth Module 16: Filters Introduction Understand Smart Objects and Filter usage for non-destructive editing Explore the Filters Gallery and experiment with Blur and Vantage filters Module 17: Blending Modes Introduction Master the concept of Blending Modes and their effects on layer overlays Understand different Blending Modes like Darken, Lighten, and Overlay Layer Mastery: Develop expertise in working with layers, mastering advanced techniques for seamless editing and design organization in Adobe Photoshop. Precision Editing: Skillfully employ a variety of selection tools, ensuring precise and meticulous editing, manipulation, and composition of images and elements. Creative Layer Effects: Apply captivating Layer Effects with finesse, enhancing your designs and visuals to achieve professional-grade aesthetics. Advanced Editing Techniques: Understand the functionalities of Adjustment Layers, Masking, and Clipping Masks, enabling you to perform advanced editing and compositing tasks with confidence and precision. Effective Photo Restoration: Acquire techniques to touch up and restore photographs effectively, ensuring professional-quality results in photo editing and retouching. Typography Expertise: Explore advanced typography techniques, enabling you to create visually appealing text designs that complement your overall compositions. Filter Applications: Gain an introductory understanding of Filters and their creative applications, enhancing your ability to add artistic effects and refine visuals. Practical Color Theory: Grasp the fundamental principles of Color Theory and apply them practically in your designs, ensuring harmonious and visually pleasing color schemes in your work. Course Highlights: Advanced Photoshop Skills: Learn intricate techniques for professional image editing, retouching, and manipulation. Creative Design Projects: Engage in hands-on projects to enhance your practical skills in real-world scenarios. Mastering Special Effects: Dive into advanced topics like layer effects, filters, and blending modes to create stunning visual effects. Typography and Design Principles: Explore typography styles, layout design, and color theory for compelling compositions. Professional Portfolio Development: Receive guidance on creating a professional portfolio showcasing your Photoshop expertise. Potential Job Roles: Graphic Designer: Craft visually appealing graphics for print and digital media. Digital Artist: Create digital artwork for various applications, from illustrations to advertisements. Photo Retoucher: Enhance and manipulate photos for professional use, including portrait retouching. UI/UX Designer: Design user interfaces and experiences for websites and applications. Web Designer: Develop visually engaging websites with expertise in Photoshop for web design. Marketing Content Creator: Produce marketing materials such as banners, brochures, and social media visuals. Freelance Designer: Work independently, offering design services to clients across different industries. Advertising Creative: Contribute to creative campaigns by designing impactful ad visuals. Print Production Specialist: Prepare print-ready materials, ensuring quality in printed products. Photography Post-Processing Specialist: Enhance and retouch photographs, optimizing them for professional use. Comprehensive Photoshop Proficiency: Develop a solid foundation in Photoshop, mastering essential tools and techniques vital for image editing and manipulation. Creative Editing Expertise: Learn advanced retouching, image enhancement, digital artwork creation, and graphic design using Photoshop's powerful features. Professional-Grade Results: Acquire skills for achieving professional-level outcomes in image editing, ensuring precise color correction, seamless retouching, and visually appealing compositions. Optimized Workflow: Discover time-saving tips, shortcuts, and efficient techniques to enhance your Photoshop workflow. Learn layer management, non-destructive editing, and automation for streamlined processes. Versatile Design Skills: Unlock creative possibilities by mastering text effects, digital collages, filters, and graphic design for diverse mediums. Access to Recorded Lessons: Revisit course material and reinforce learning through recorded lessons. Review specific techniques at your own pace, deepening your understanding of Photoshop. Lifetime Email Assistance: Benefit from continuous support with lifetime email assistance. Seek guidance, get answers to questions, and seek clarification even after completing the course.
Rhinoceros 3D Night Training Course
By ATL Autocad Training London
Why Choose Rhinoceros 3D Night Training Course? Learning Rhino 3D opens doors to advanced 3D modeling, making it essential for architects, designers, and engineers. Its versatility, ease of use, and powerful features make it an industry favorite for creating intricate designs, from architecture to product design. Click here for more info: Website Personalized Learning: 1-on-1 sessions tailored to your needs Flexible Timing: Convenient evening classes (5 pm - 7 pm) Mon to Sat Duration: 10 hours. Choose your own day and time Rhino 3D Training Overview Our Rhino 3D Training offers in-person or live sessions suitable for beginners and those aiming to optimize their workflow in Rhinoceros 3D. Course Highlights: Master precise free-form 3D NURBS modeling. Explore advanced surfacing commands and the Rhino interface. Develop skills in curve, surface, and solid modeling. Learn effective modeling practices for various industries, from industrial design to jewelry and graphic design. Who Should Attend? This course is perfect for individuals starting their Rhino journey or aiming to refine their modeling skills. If jewelry modeling is your focus, check out our specialized Rhino Training for Jewelry Design Course. Why Choose Us? Hands-on, instructor-led sessions with flexible scheduling (weekdays, evenings, or weekends from 9 am to 7 pm). Expert instruction from Rhino professionals. Real-time practice with industry-aligned projects. Comprehensive electronic notes and course completion certificate. Ongoing support and career advice from experienced trainers. Benefits of Rhino Training Ideal for enthusiasts in animation, modeling, NURBS curves, surfaces, or solids, Rhino Training empowers you with industry-standard skills. No prerequisites are required, ensuring accessibility for all learners. Upon completing this course, you will: Master Rhino's Interface: Gain proficiency in Rhino's commands, toolbars, and menus, enabling efficient 3D modeling. Create Complex 3D Models: Develop the skills to create intricate 3D objects using curves, surfaces, and solids with various techniques like lofts, sweeps, and revolves. Refine Modeling Techniques: Learn advanced editing methods, such as filleting, chamfering, and curve Booleans, to refine and modify objects. Navigate the 3D Space: Understand 3D navigation, viewports, and construction planes, enabling precise modeling in a virtual space. Prepare Models for Production: Master techniques for analyzing and preparing 3D models for manufacturing, prototyping, and 3D printing. Enhance Rendering and Visualization: Learn rendering techniques to create realistic visuals of your models for presentations and proofs. Job Opportunities: After completing this course, you can pursue a variety of careers, including: 3D Modeler: Create detailed 3D models for industries like gaming, animation, or virtual reality. Product Designer: Design and visualize products for manufacturing using 3D modeling software. Architectural Visualization Specialist: Develop detailed architectural models for presentations and client approvals. Industrial Designer: Design consumer products, furniture, or appliances for manufacturing companies. Jewelry Designer: Craft intricate jewelry designs with precise detailing using 3D modeling techniques. Prototyping Specialist: Work in industries like aerospace or automotive, creating prototypes for testing and development. Freelance 3D Artist: Offer your skills on platforms like Upwork or Fiverr, creating custom 3D models for clients worldwide. Rhino 3D Training Overview Our Rhino 3D Training offers in-person or live sessions suitable for beginners and those aiming to optimize their workflow in Rhinoceros 3D. Course Highlights: Master precise free-form 3D NURBS modeling. Explore advanced surfacing commands and the Rhino interface. Develop skills in curve, surface, and solid modeling. Learn effective modeling practices for various industries, from industrial design to jewelry and graphic design. Who Should Attend? This course is perfect for individuals starting their Rhino journey or aiming to refine their modeling skills. If jewelry modeling is your focus, check out our specialized Rhino Training for Jewelry Design Course. Why Choose Us? Hands-on, instructor-led sessions with flexible scheduling (weekdays, evenings, or weekends from 9 am to 7 pm). Expert instruction from Rhino professionals. Real-time practice with industry-aligned projects. Comprehensive electronic notes and course completion certificate. Ongoing support and career advice from experienced trainers. Benefits of Rhino Training Ideal for enthusiasts in animation, modeling, NURBS curves, surfaces, or solids, Rhino Training empowers you with industry-standard skills. No prerequisites are required, ensuring accessibility for all learners. Advantages: Personalized Rhino 3D Evening Training with individual attention. Flexibility to select your preferred time and day for the training. Access to free online support even after completing the course. Comprehensive PDF notes and handouts provided for effective learning. Receive a certificate upon completing the Rhino 3D Evening Training Course. Affordable pricing options tailored to your budget. Assistance in computer configuration for seamless software installation. Referral benefits: Recommend a friend and enjoy exclusive discounts. Special discounts available for group training sessions. Operating hours from Monday to Saturday, extending into the evening for convenience. Tailored training programs designed to meet your specific needs and requirements.
Adobe After Effects Basic to Fundamentals Training Course (Live Online Only)
By London Design Training Courses
Training duration: 10 hrs Course info Method: 1-2-1, Personalized attention, Tailored content, Flexible pace, Individual support. Schedule: Personalized training experience with our flexible 1-2-1 sessions. Tailor your own schedule by pre-booking a convenient hour of your choice, available from Monday to Saturday between 9 am and 7 pm. Unlock visual effects and motion graphics skills with our 3ds Max and After Effects Course. Certified tutors guide you through seamless integration of 3D models and animations. Live online format, recorded lessons, and lifetime email support provided. Enroll now and explore exciting career opportunities in visual effects, animation, and motion graphics. Course Outline: Adobe After Effects Fundamentals. Getting Started Overview of the workspace and interface. Importing and organizing assets for seamless workflow. Understanding projects and compositions for effective project management. Working with layers to create complex compositions. Applying Effects (FX) Introduction to applying effects in After Effects. Fixed and applied FX for enhancing visual appeal. Understanding animation principles for smooth motion. Modifying motion paths to control animation trajectories. Mastering keyframes for precise animation control. Exploring the basics of the graph editor for advanced animation adjustments. Text Animation Creating and animating text in After Effects. Enhancing text with layer styles for engaging visuals. Utilizing animation options for dynamic text effects. Implementing motion blur for realistic motion. Shape Layers Introduction to shape layers and their versatility. Creating shapes from Illustrator files for flexible designs. Working with paths and their applications in animations. Utilizing animation options to breathe life into shapes. Exporting and Finalizing Projects Effective project management and organization techniques. Understanding export options for optimal rendering. Exporting projects through Media Encoder for various platforms. Utilizing dynamic link to Premiere Pro for seamless integration. Masks and Chroma-keying Creating and animating masks for selective visual effects. Utilizing tracking masks for precise adjustments. Limiting effects to specific areas using track mattes and property links. Mastering green-screen chroma-keying with Keylight 1.2. Additional Effects Exploring additional effects such as Warp Stabilizer, Camera Tracker, Motion Tracker, and Puppet Pin tool. Implementing these effects to enhance motion graphics and visual effects. Creative applications and hands-on practice with each effect. By the end of this fast-paced and practical Adobe After Effects training course, participants will achieve the following learning outcomes: Key Skills in After Effects: Gain proficiency in essential After Effects skills to transform video projects effectively. Professional Techniques: Master a range of professional techniques and processes invaluable for film makers, motion designers, and animators. Project Planning: Learn how to plan projects, prepare assets, and set compositions for seamless video production. Animation and Effects: Acquire the ability to apply and animate various transformations and effects on images, videos, and text elements. Masking and Compositing: Develop skills in masking and compositing to create visually stunning and cohesive compositions. Rendering Videos: Understand the video rendering process to produce high-quality final outputs.

Unity 3D Game Design Training Course (Live Online Only)
By London Design Training Courses
Why Choose Unity 3D Game Design Training Course? Course Link Unity transforms ideas into reality, offering limitless possibilities for 2D and 3D games, VR, AR, and AI experiences. From films to architecture, training videos, and interactive tutorials, Unity revolutionizes industries with its interactive engagement, making it the top choice for solutions. Duration: 10 hrs Method: 1-on-1, Personalized attention Schedule: Tailor your own hours of your choice, available from Mon to Sat between 9 am and 7 pm Is Unity Good for Beginners? Definitely! Unity is an ideal starting point for beginners in game development. It offers an accessible platform to learn state logic and C# programming, making it popular among new programmers. Whether you choose self-guided or structured learning, Unity provides a strong foundation for 3D game development. Coding in Unity? Coding is optional in Unity, thanks to the visual scripting tool, Bolt. Users can implement ideas without coding using flow graphs and state graphs for low-level and high-level logic. Paid tools like PlayMaker and Adventure Creator offer more advanced gameplay and AI behaviors. How Does Unity's Game Engine Work? Unity operates as a versatile scene player, initializing settings for graphics, audio, and input devices at game start. It loads scenes with assets and game objects, executing a cycle that renders scenes, runs physics simulations, and handles events, providing a seamless and dynamic game experience. Is Unity Good for Beginners? Definitely! Unity is an ideal starting point for beginners in game development. It offers an accessible platform to learn state logic and C# programming, making it popular among new programmers. Whether you choose self-guided or structured learning, Unity provides a strong foundation for 3D game development. 10-hour Unity 3D Game Design Training Course: Module 1: Introduction to Unity 3D (2 hours) - What is Unity 3D and why use it for game design? - Understanding the Unity 3D interface - Creating and managing projects in Unity 3D - Importing and managing assets in Unity 3D - Understanding game objects and components in Unity 3D Module 2: Game Mechanics (2 hours) - Basic game mechanics and concepts - Player movement and camera control - Creating and controlling game objects - Working with physics and collision detection - Creating interactive environments Module 3: Scripting with C# (2 hours) - Introduction to C# scripting language - Understanding variables and data types in C# - Creating and using functions in C# - Controlling game objects with C# - Understanding game loops and events Module 4: User Interfaces and Audio (2 hours) - Designing user interfaces in Unity 3D - Creating and using buttons, sliders, and input fields - Audio import and editing in Unity 3D - Creating and controlling game sound effects and background music Module 5: Optimization and Deployment (2 hours) - Understanding game optimization in Unity 3D - Optimizing game performance with scripting - Building and testing games for desktop and mobile platforms - Publishing games on the web or app stores Introduction to Unity: - Introduction to gaming and the game development process - Unity Basics - Interface - Inspector - Project and Hierarchy Starting Making a Game: - Working with Projects - Creating Projects - Importing Geometry - Importing Textures - Using the terrain generator to make the terrain - Creating basic primitives in Unity Materials: - Working with materials 1 - Working with materials 2 - Finishing materials on all objects Lighting: - Creating lights - Adjusting Lights - Creating Sunlight Animation: - Animating objects - Animating lights - Adjusting Animations Audio: - Adding Sound - Interacting with sound - Modifying sound Programming Tools: - JavaScript - Editor for JavaScript - Variables and functions - Simple programming Testing: - Testing the game - Fixing bugs - Making changes in games Building the Game: - Game authoring Settings - Building the game for windows - Playing the game Utilize Unity Pro, the ultimate real-time development platform, to craft 3D, 2D, VR, and AR experiences across diverse industries. From games to auto, AEC, and film, Unity Pro empowers you to create immersive content with multi-platform support. Visit https://www.unity.com/ to kickstart your journey today, enabling faster iterations and business growth through unparalleled development capabilities.

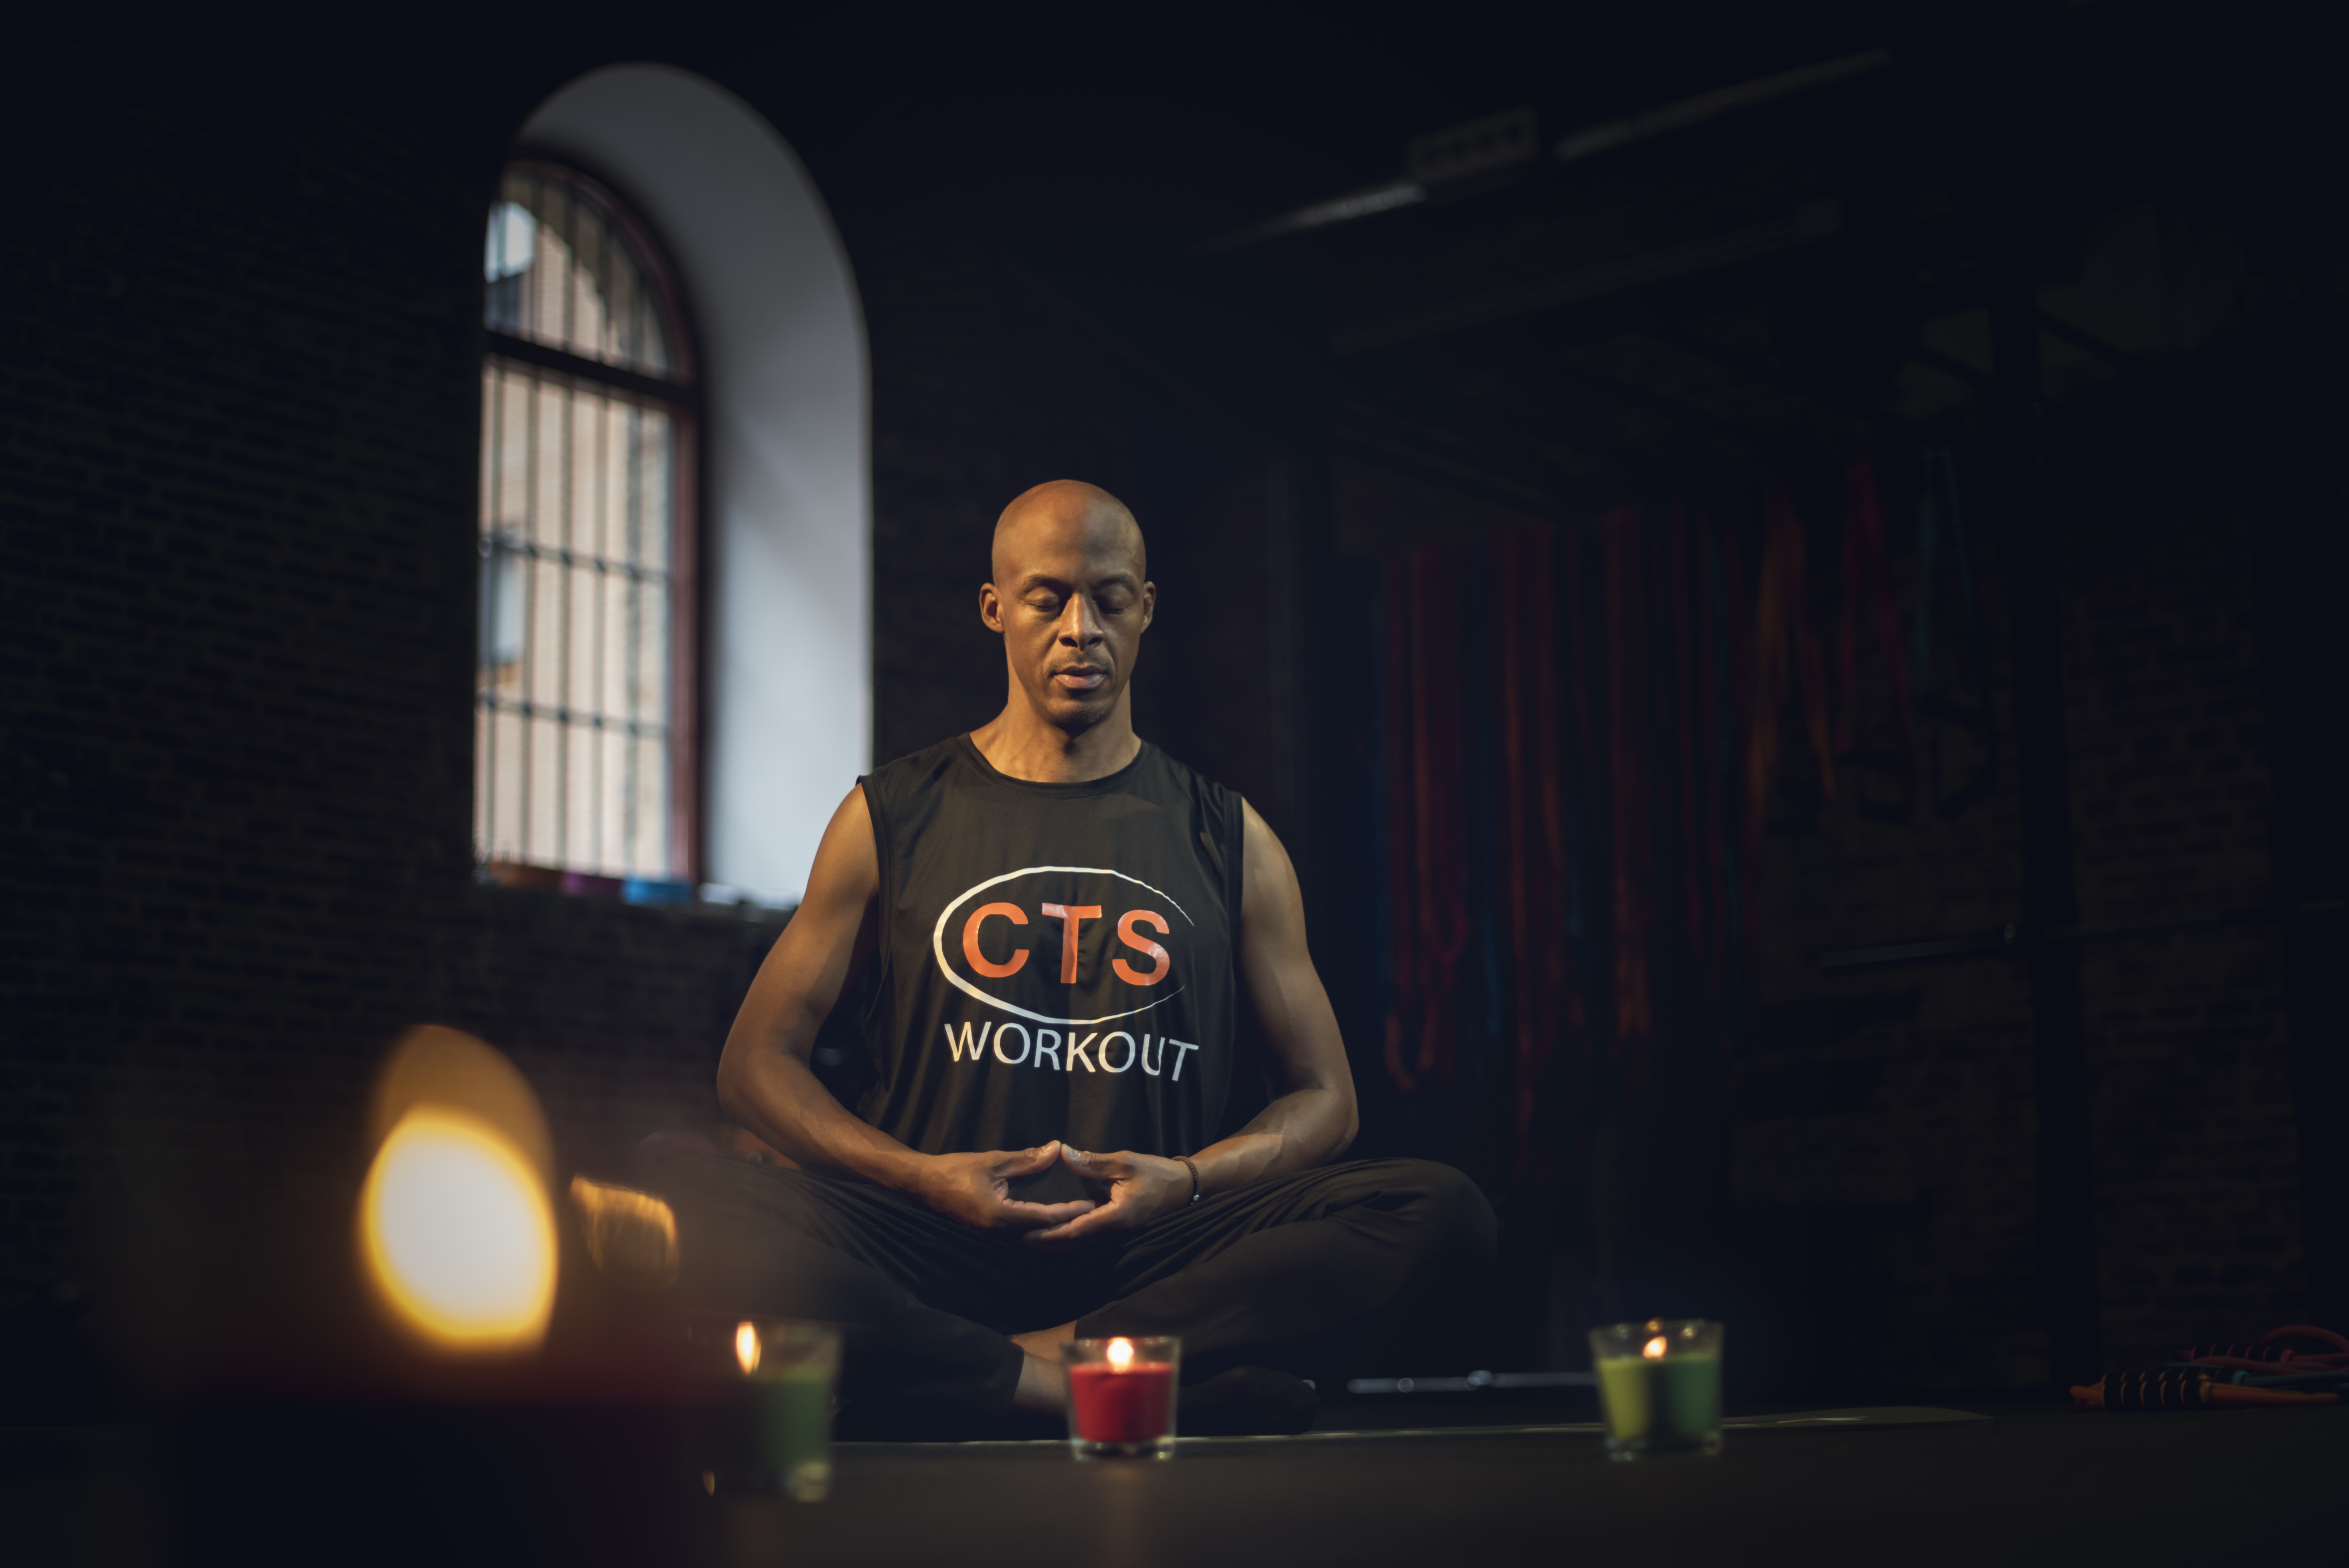
Training One to One "CTS FLEX" (online)
By Cts Workout, Sl
training at home, fitness, personal trainer, workout, health