- Professional Development
- Medicine & Nursing
- Arts & Crafts
- Health & Wellbeing
- Personal Development
2655 Courses in Manchester delivered Live Online
The Real Estate Analyst course has been taught non-stop to global real estate firms over the last 25 years, and is without doubt the core financial modelling training in your career portfolio. Whether you have an upcoming financial modelling test for a new job or an APC exam, the Real Estate Analyst course is the choice for you.

Figma Basics
By Bunnyfoot
Course description Figma is an industry leading web-based design tool that allows you to create user interfaces for any screen type or size, collaborate on those designs in real-time and build interactive prototypes suitable for user testing. Figma is a visual design tool so there’s no coding involved. Design is achieved by adding, combining and styling shapes, text and images on a canvas or ‘Frame’. We run 2 consecutive Figma training days, the second day building on the practical activities from the first. You can attend just the first day. Attending just the second day is only recommended if you’re already very comfortable with the Figma interface. Day 1: Basic Figma design and collaboration For beginners with no prior experience with Figma who want to understand the basics, be able to create their own designs, share, collaborate and even iterate on the designs of others. You will learn: How to navigate the Figma interface. How to create your own designs by: Setting up a design file. Setting up the screen type you want to design and add grids and guides. Adding and modifying basic shapes and text to create user interface elements. How to save text and colour styles for reuse. How to create reusable components. How to use the ‘auto layout’ feature to promote tidy, consistent and usable design. How to collaborate on designs by sharing screens and commenting on designs. A brief introduction to prototyping: What’s possible. What’s not. Day 2: Component variants, design systems and prototyping This session will cover the more sophisticated aspects of Figma use such as: How to use component variants to create: Interaction styles such as hover and mouse down states ‘Flavours’ of a widget such as primary and secondary button styles. Toggleable elements within a widget such as buttons or bullets within a product card. How to turn a collection of components into a basic design system. Prototyping fundamentals: How to make journeys clickable. How to introduce animations. Tips and tricks for effective user testing. The limitations of Figma prototyping Is it for you? With no experience of Figma necessary, this course is suitable if: If you’re involved with creating or curating digital experiences. if you want to turn your design ideas into something tangible. If you work with Figma designers and want to understand the ‘art of the possible’. If you want to collaborate with your team on Figma projects. Learning objectives After completing day 1 you will be able to: Understand the Figma user interface. Create mobile and desktop interface designs. Effectively collaborate remotely. Share designs and gather feedback. Use auto layout to promote consistent and usable designs. Understand Figma’s role in user experience design, and its limitations. After day 2 you will be able to: Understand how design systems are set up and used. Create component variants for use in your own design system. Use that design system to efficiently create a user journey. Create a prototype suitable for user testing.

Adobe InDesign Advanced Training
By London Design Training Courses
Why Learn Adobe InDesign Advanced Training Course? Master Adobe InDesign for efficient page layouts with our advanced course. Learn document setup, text formatting, and special effects. Suitable for beginners and advanced users. London Design Training Course provides top InDesign course with Adobe Certified Instructors. Course Link Duration: 10 hrs Method: 1-on-1, Personalized attention Schedule: Tailor your own schedule by pre-booking hours of your choice, available from Mon to Sat between 9 am and 7 pm Flexible Learning Options: Choose between in-class training at our London center or participate online. Both options provide hands-on, practical learning with step-by-step demonstrations and ample opportunities for questions. Introduction to InDesign: Exploring InDesign Basics Customizing Preferences and Workspace Navigating Panels and Windows Setting Up Toolbar and Properties Panel Document Management: New Document, Pages, and Order Quick Navigation Techniques with Shortcuts Smart Layout: Organizing Layouts with Guides and Grids Understanding Bleed, Slug, and Margins Utilizing Smart Guides for Precision Typography: Mastering the Type Tool Adding Text to Pages and Using Placeholder Text Text Formatting with Character and Paragraph Controls Editing Text Frames and Justifying Text Multi-column Setup and Styling with Character/Paragraph Styles Working with Bullet Points and Numbering Working with Images: Creating Frames and Placing Images Content Fitting Options: Proportional Fit, Content-Aware Fit, Auto-Fit Manipulating Frame Properties: Fill, Stroke, Effects Utilizing Object Styles for Consistent Frames Advanced Techniques: Image Frame Grids, Merging Frames, Text Wrap Options Understanding Image Formats and Resolution Tabs and Alignment: Mastering Tab Palette and Alignment Options Adding Leaders for Enhanced Formatting Color Theory and Editing: Basics of Color Theory and Color Modes Creating Color Themes with the Color Theme Tool Swatches, Color Libraries, and Gradients Editing Gradient Fills and Colors Advanced Interactive Actions: Adding Animation Effects with Animation Panel Fine-tuning Animations with Timing Panel Creating Complex Object States and Action Buttons Adding and Testing Hyperlinks, Page Transitions Parent Page Basics: Understanding Parent Pages Page Numbering, Order, Headers, and Footers Inserting Text Variables for Dynamic Content Advanced Object Styles and Effects: Opacity Control and Blending Modes Black and White Conversion, Color Blending Modes Adding Dimension with Bevel and Emboss Effects Advanced Text Frame Options: Auto-sizing Text Frames and Balancing Column Height Inset Spacing and Fill Colors for Text Boxes Hot Corner Resizing Shortcuts and Anchor Objects Footnotes: Purpose and Usage of Footnotes Adding, Editing Footnotes with Footnote Options By the end of this Adobe InDesign training, participants will: Understand InDesign basics and its interface. Create effective page layouts with text formatting and image placement. Work with layers, apply special effects, and manage tables. Ensure error-free and print-ready documents through preflighting. Receive a practical training guide and an e-certificate upon completion.
Photoshop Basics to Essentials Training
By London Design Training Courses
Why Choose Photoshop Basics to Essentials Training Course? Course Link Mastering Photoshop is crucial for securing positions in creative fields such as graphic design, digital design, and user interface (UI) design. Acquiring this skill serves as a foundation to excel in various design programs essential for creative professionals. Duration: 16 hrs. Method: 1-on-1, Personalized attention. Schedule: Tailor your own hours of your choice, available from Monday to Saturday between 9 am and 7 pm. Photoshop Course: Total 16 hrs Module 1: Keyboard and Toolbar Shortcuts Customize toolbars and keyboard shortcuts for efficient workflow Learn essential keyboard shortcuts for faster navigation Module 2: Advanced Layer Management Filter, search, and color code layers for better organization Group and merge layers to streamline your design process Explore Blending Modes for creative effects Module 3: Blending Modes Understand Blending Modes and their usage within layers and effects Apply Blending Modes to enhance your designs Module 4: Layer Comps Discover Layer Comps and their benefits in managing complex designs Create, edit, and update Layer Comps for different design versions Export Layer Comps to PSD, PDF, and JPEG formats Module 5: Drawing Vectors Work with Vector images using shapes and the Pen Tool Use the Direct Selection Tool for precise editing Apply colors and create Clipping Masks with vectors Module 6: Advanced Type Techniques Convert text into Shapes and utilize font style changes with the Pen Tool Use text as a Clipping Mask and create text Outlines Design 3D text for impactful typography Module 7: Advanced Adjustment Layers Master advanced adjustments like Curves, Levels, and Black and White Utilize Selective Color and Gradient Maps for creative color control Module 8: Advanced Selection Techniques Use Smart Radius and Select and Mask for precise selections Learn to select complex objects like hair using Color Range and the Pen Tool Save and manage selections using the Path Panel Module 9: Colorizing Black and White Images Module 10: Displacement Maps Module 11: Advanced Filters Create Trees, Frames, Clouds, and Fire with filters Use Polarized, Wave, and Extrusion for artistic effects like "Japanese Sun" Explore Vanishing Point Filter, Camera RAW, Blur for depth of field, and Filter Gallery Combine 3D text with Vanishing Point for stunning designs Use Liquify for image manipulation Module 12: Introduction to Actions Automate tasks using Photoshop's preset Actions Create your own Actions to save time and effort Module 13: Creating an Animated GIF Learn frame by frame animation Utilize the Timeline to create engaging animated GIFs Learning Outcomes: Master advanced selection techniques, including the Path and Pen Tool, for precise editing. Gain proficiency in advanced layer management and utilize Layer Comps for efficient design organization. Enhance your designs with a deeper understanding and application of Blending Modes. Create visually appealing 3D text and text outlines to add depth and impact to your artwork. Explore advanced Filters like Displacement Maps, Blurs, and Distortion for creative effects. Automate tasks with actions and batch processing, streamlining your workflow. Craft engaging animated GIFs to add dynamic elements to your designs. Skillfully set project requirements by identifying the purpose, target audience, copyright considerations, and project management tasks for successful project execution.

Photoshop Training Course Basics to Advanced
By ATL Autocad Training London
Photoshop Training Course Basics to Advanced designed for individuals of every skill level, ranging from beginners to advanced image editing professionals. Immerse yourself in the realm of potent image manipulation tools at our school in London. Personalized Photoshop courses either at our facility or directly at your location. Click here for more info: Website Duration: 20 hours. Method: Personalized 1-on-1. Schedule: Customize your learning with pre-booked sessions available Monday to Saturday, from 9 am to 7 pm. Course Title: Mastering Photoshop: From Basics to Advanced Proficiency Course Duration: 20 hours Module 1: Introduction to Photoshop (2 hours) Understanding the Photoshop interface Navigating tools and panels Basic keyboard shortcuts for efficient workflow Introduction to different file formats and their uses Module 2: Essential Tools and Techniques (3 hours) Selection tools and techniques for precise editing Working with layers: management and blending modes Understanding brushes, gradients, and patterns Introduction to basic filters and their applications Module 3: Image Editing and Retouching (4 hours) Color correction and adjustment layers Advanced retouching techniques: Healing Brush, Clone Stamp, and Content-Aware tools Removing backgrounds and unwanted elements Restoring old or damaged photographs Module 4: Advanced Photo Manipulation (3 hours) Compositing multiple images seamlessly Advanced blending modes and layer effects Creative use of masks and clipping paths Special effects: lighting, shadows, and reflections Module 5: Text and Typography (2 hours) Working with text layers and formatting options Creating custom typography and text effects Utilizing layer styles for creative text designs Text manipulation along paths and shapes Module 6: Web and UI Design (3 hours) Designing web banners, buttons, and interfaces Slicing and optimizing images for the web Creating interactive prototypes and mockups Exporting assets for web and app development Module 7: Print Design and Prepress (2 hours) Understanding color modes: CMYK vs. RGB Setting up documents for print: bleed, margins, and resolution Designing print materials: brochures, business cards, and posters Preparing files for professional printing Module 8: Project-Based Learning (1 hour) Applying learned techniques to real-world projects Instructor-led project: creating a digital artwork or advertisement Feedback and critique session for skill refinement Final presentation of completed projects Upon completion, you will: Master Photoshop Skills: Gain proficiency in fundamental and advanced Photoshop techniques, enabling professional-level image editing and creative design. Enhance Creativity: Develop creative problem-solving abilities, enabling innovative and visually appealing design solutions. Job Opportunities: Graphic Designer: Craft compelling visual content for ads, websites, and marketing materials. Photo Retoucher: Edit and enhance photographs to meet professional standards. Digital Artist: Create digital artwork and illustrations for various purposes. Web/UI/UX Designer: Design user-friendly interfaces and engaging online experiences. Marketing Content Creator: Generate eye-catching promotional visuals and social media content. Video Editor: Enhance video footage and create engaging video content for online platforms. Professional Adobe Photoshop Training in London - On-Site & Live Virtual Classes Being the industry-leading image editing software, Photoshop empowers users to manipulate images, enhance colors, and create visually striking designs. Its extensive toolkit allows for intricate adjustments, retouching, and even editing videos, graphic design, and 3D imagery. Enroll in our Photoshop course to establish a strong foundation in creative visuals, focusing on essential skills like image adjustment, composition, and common troubleshooting. For a more in-depth understanding, our Advanced course delves into advanced techniques such as color fills, text and layer styling, and creating web-ready artwork. Explore our masterclass options for advanced training and deeper insights. Both beginner courses are available in physical classrooms and online, providing flexible learning opportunities. Holistic Design Education: Comprehensive training across diverse design fields. Industry-Experienced Instructors: Learn from seasoned professionals in the field. Flexible Learning: Accommodating schedules for busy professionals and students. Practical Projects: Hands-on projects for real-world design experience. Career-Focused Skills: Acquire industry-relevant skills for professional growth. Cutting-Edge Facilities: Access state-of-the-art technology and facilities. Personalized Training: Tailored programs to suit individual learning needs. Networking Opportunities: Connect with design professionals for valuable connections. Innovation Exploration: Explore creative trends and emerging technologies. Ongoing Support: Continuous assistance and post-course guidance.

Microsoft Powerpoint Introduction - In-company (now with live online classes)
By Microsoft Office Training
Course Objectives At the end of this course you will be able to: Identify the components of the PowerPoint interface Create slides Format text on slides Add and modify graphical objects to a presentation Work with tables in a presentation Add charts to a presentation Prepare the SlideShow '1 year email support service Take a look at the consistent excellent feedback from our corporate clients visiting our site ms-officetraining co uk Customer Feedback Very patient Trainer. Happy to adapt course + help with problems on existing presentations. Andrea Lethbridge - CNN ' With more than 20 years experience, we deliver courses on all levels of the Desktop version of Microsoft Office and Office 365; ranging from Beginner, Intermediate, Advanced to the VBA level. Our trainers are Microsoft certified professionals with a proven track record with several years experience in delivering public, one to one, tailored and bespoke courses. Our competitive rates start from £550.00 per day of training Tailored training courses: You can choose to run the course exactly as they are outlined by us or we can customise it so that it meets your specific needs. A tailored or bespoke course will follow the standard outline but may be adapted to your specific organisational needs. Getting Started with PowerPoint Identify the Components of the PowerPoint Interface Create a PowerPoint Presentation Accessing Help Choose the right view for the task in PowerPoint Normal view Slide Sorter view Notes Page view Outline view Add, rearrange, and delete slides in PowerPoint Working with Themes Add colour and design to my slides with themes Remove the current slide design (theme) Slide Layout What is a slide layout? Apply or change a slide layout Working with text Add text to a slide Create a new text box Format text Tables Add a table to a slide Format a Table Copy and paste a table from Word Insert an Excel spreadsheet within PowerPoint Edit Cells, Rows and Columns Delete a table Graphics Working with Clipart, and Shapes Selecting objects, shapes, pictures or text boxes Arrange a picture, shape or other object Adding Charts to Your Presentation Create a Chart Format a Chart Insert a Chart from Microsoft Excel Inserting date and slide numbers Add slide numbers to your presentation Hide slide numbers on the title slide Change where the page numbers appear on your slides Start your slide numbering with a specific number Print slides, notes, or handouts Create the Slide Show Record your slide show Preview the recorded slide show Turn slide timings off Set the slide timings manually Add or remove transitions between slides Add Animations to Text and Objects Deliver the Presentation Speakers notes Add speaker notes to your slides View your speaker notes as you deliver your slide show Who is this course for? Who is this course for? This course is designed for end users who are interested in learning the fundamentals needed to create and modify engaging presentations. Requirements Requirements General knowledge of the Windows OS Career path Career path Microsoft Office know-how can instantly increase your job prospects as well as your salary. 80 percent of job openings require spreadsheet and word-processing software skills Certificates Certificates Certificate of completion Digital certificate - Included

Adobe After Effects Basic to Advanced Training Course (Live Online Only)
By London Design Training Courses
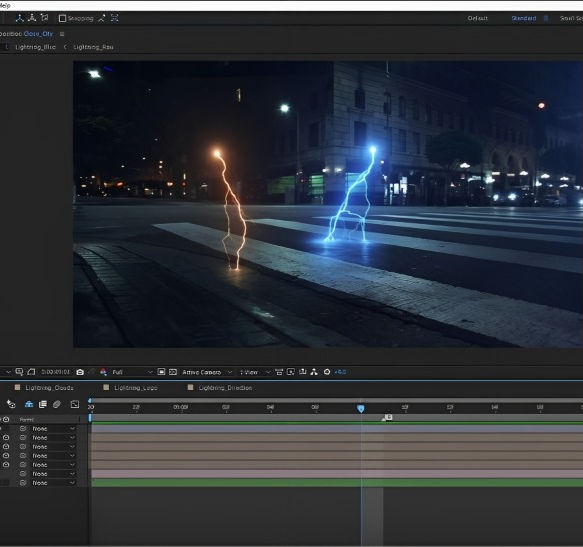
Why Learn Adobe After Effects Basic to Advanced Training Course? Click here for the course info This course offers basic to advanced training in After Effects, focusing on best techniques for motion graphics and visual effects for films and TV. After Effects is the leading software for motion graphics and VFX, widely used in video and screen-based media, to achieve stunning visual outcomes. Duration: 40 hrs Method: 1-on-1 Schedule: Tailor your own schedule by pre-booking. Available from Mon to Sat 9 am and 7 pm. The introductory training covers fundamental tools and features, including animation techniques, layer control, effects, track mattes, and masks. To gain insight into the effects you'll learn to create, you can explore examples on our blogs. Comprehensive After Effects Training: From Basic to Advanced Course Duration: 40 hours Course Overview: This 40-hour training course is designed to take you from a beginner's level to an advanced understanding of Adobe After Effects. Throughout the course, you will explore various tools, techniques, and features that will enable you to create impressive motion graphics, visual effects, and animations. By the end of the training, you will have gained the expertise to handle After Effects with confidence and efficiency. Course Outline: Module 1: Getting Started with After Effects What is Adobe After Effects? Tour of the interface Setting preferences Setting Auto-Save Module 2: Getting Started with Projects and Compositions Creating a new project/composition Creating a new composition from footage Importing assets Organizing assets Working with layers Module 3: Animation Techniques Keyframing Temporal and spatial keyframes Motion paths Modifying motion paths Orientation Anchor point essentials Rove across time Toggle hold Exponential scale The Graph Editor Motion sketch Module 4: Layer Control Arrange, organize, and navigate layers Lock, hide, and solo layers Understand Switches and Modes view Module 5: Working with Shapes Understanding how shape layers work in After Effects Creating shape layers Multiple shapes on the same layer? Shapes and their anchor points Moving anchor points Animating shapes Module 6: Effects Examples of effects Applying effects Customizing effects properties Module 7: Track Mattes and Masks Creating Masks Creating Track Mattes Differences between masks and track mattes Animating masks and track mattes Module 8: Type and Type Animation Working with type Basic text animation Text animation presets Layer styles Module 9: Exporting Your Compositions Export options in After Effects Exporting directly from After Effects Exporting through Media Encoder After Effects Free Download & Free Trial https://www.adobe.com ⺠products ⺠free-trial-download Download the full official version of Adobe After Effects for free. Create incredible motion graphics and the best visual effects with a free trial today! Learning Outcomes: Master the Adobe After Effects interface and preferences. Efficiently manage projects and compositions, importing and organizing assets. Create captivating animations using keyframing, motion paths, and anchor points. Utilize the Graph Editor for precise motion control. Organize and control layers effectively with Switches and Modes view. Create and animate shape layers for dynamic visual effects. Apply and customize effects to enhance visual impact. Implement masks and track mattes for creative effects. Create text animations and utilize animation presets. Export compositions using various options in After Effects.
LOOKING FOR: ADULT FICTION, NON-FICTION Publisher / editor Scott Pack is now in his third decade working in the world of books. During that time he has been Head of Buying for Waterstones, worked for publishers big and small - including a lengthy spell at HarperCollins - and taught numerous workshops and classes on all aspects of writing. These days he splits his time between writing his own books, editing other people's, teaching the editors of tomorrow as part of the Oxford Brookes University MA in Publishing, and he is one of the question setters for BBC's Mastermind. His latest book, Tips From A Publisher, is out now. As a publisher, Scott has published across most genres in fiction and a wide range of non-fiction and is happy to read any style of writing. He will assess your sample and provide feedback on any issues he identifies, the manuscript's commercial potential and what steps he would advise before you submit to agents or publishers. Scott is very direct with his feedback, so expect robust, but always constructive, comments! Scott would like you to submit your fiction as a covering letter, 1-2 page synopsis and the first 5,000 words of your manuscript in a single word document. For non-fiction, he would like to see:- 1-page synopsis – to give an overview of what the book will offer the reader and how it's different from other books out there on this topic A detailed proposed contents list, including proposed sub-section headings as well as chapter headings – to give a sense of the overall reader journey 1000-1500 words of intro text - to showcase context, tone etc 1000-1500 words from later in the book - to showcase the progression of the book (In addition to the paid sessions, Scott is kindly offering one free session for low income/underrepresented writers. Please email agent121@iaminprint.co.uk to apply, outlining your case for this option which is offered at the discretion of I Am In Print). By booking you understand you need to conduct an internet connection test with I Am In Print prior to the event. You also agree to email your material in one document to reach I Am In Print by the stated submission deadline and note that I Am In Print take no responsibility for the advice received during your agent meeting. The submission deadline is: Monday 12th May 2025

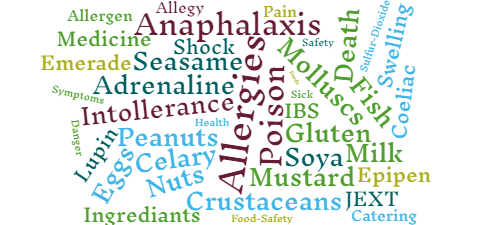
Food Safety, Social Care and Education Training Courses Introduction to Food Intolerances CPD Accredited, Interactive Short Course 2 hr session Do you serve food, or have people with known food intolerances in your school or on your team? In this interactive course we will explain what food intolerances are, and why it is vital for you to understand how food intolerances affect people Course Contents: What is a food intolerance Different types of food intolerances The Digestive System Consequences of Food Intolerances The importance of good food hygiene Benefits of this Short Course: More than 20% of the population in industrialized countries suffer from food intolerance or food allergy About two million people live with a diagnosed food allergy in the UK, and 32 million in the US This course will teach you the importance of ensuring food is safe to eat for all, without causing significant pain or even death 600,000 people in the UK have coeliac disease
InDesign Basic to Advance training One to One
By Real Animation Works
InDesign face to face training customised and bespoke.
