- Professional Development
- Medicine & Nursing
- Arts & Crafts
- Health & Wellbeing
- Personal Development
3735 Courses in Liverpool delivered Live Online
Total FabricPath training course description A comprehensive look at Cisco's FabricPath. This course starts with the problems in traditional switched networks then moves onto to how FabricPath solves these problems. As IS-IS is key to loop free topologies in FabricPath networks, this protocol is also studied. What will you learn Explain the benefits of FabricPath. Explain how FabricPath works Explain the role of IS-IS in FabricPath. Integrate FabricPath into existing networks. Total FabricPath training course details Who will benefit: Technical staff working with FabricPath. Prerequisites: Definitive Ethernet switching for engineers Duration 1 day Total FabricPath training course contents What is FabricPath? Layer 2 versus Layer 3, STP problems: One path, convergence, MAC explosion. Frame routing. Shortest path. Comparison with TRILL. FabricPath architecture Core and edge, VLANs, vPC+. IS-IS Link layer IS-IS, SPF trees, traffic management. IS -IS extensions for FabricPath. ISIS TLV. FabricPath forwarding Routing table, Switch IDs, multi destination trees, IGMP snooping. Roots. MAC versus switch tables. FabricPath Dynamic Resource Allocation Protocol (DRAP). FabricPath frames Encapsulation, frame format, Switch ID, Forwarding tag. Miscellaneous Basic configuration, interoperation with STP, TCN forwarding

Rhino Introduction to Intermediate Training Course
By ATL Autocad Training London
Why Choose Rhino Introduction to Intermediate Training Course? Learn: 3D NURBS models. Master: Surfacing modeling. Interface: Rhino's navigation. Rendering Skills: Enhance presentations with Rhino renderings. Check our Website Flexible Scheduling: 1-on-1 training sessions according to your convenience. Choose any hour between 9 a.m. and 7 p.m., Mon to Sat. You can call us at 02077202581 to book over the phone. Duration: 10 hours. Methods: Personalized training either in-person, or live online. Introduction and Navigation Become acquainted with Rhino's interface, menus, and screen layout. Efficiently traverse through Rhino models, ensuring precision in 2D lines, polylines, and NURBS curves. Utilize modeling setup features, incorporating constraints like snap, ortho, and planar for accuracy. Leverage object snaps and Smart Track functionality to enhance precision. Solid and Surface Modeling Develop rapid 3D solids and surfaces, employing Rhino's organized layering system. Utilize coordinates and constraints for meticulous modeling, exploring 3D space and elevations. Create diverse shapes, such as rectangles, circles, arcs, ellipses, and polygon curves. Elevate models with Rhino render and render color, incorporating free-form curves, helix, and spiral curves. Efficiently handle model views with pan, zoom, and view management tools. Implement various editing commands for curve manipulation and transform curves into surfaces and solids. Utilize history tracking for advanced editing and execute general editing actions: move, copy, rotate, mirror, and scale. Create arrays with both polar and rectangular arrangements and employ boolean operations like union, difference, and intersection. Offset curves and surfaces effectively, ensuring meticulous detailing. Intermediate Edit and Surfacing Introduce key NURBS modeling concepts and terminologies. Edit curves and surfaces via control point manipulation and rebuild them for optimal refinement. Employ the nudge modeling aid for precise adjustments and generate deformable shapes. Create curves through projection techniques and split surfaces using curves and surfaces. Blend surfaces seamlessly, utilizing symmetry tools, lighting, and rendering effects. Convert intricate 3D objects into detailed 2D drawings, expertly crafting page layouts. Advanced Surfacing and Solid Modeling Construct model primitives and solid text, employing techniques such as pipe and extrusion. Modify solids efficiently using Boolean tools, expanding your surface modeling capabilities. Employ techniques like extrusion, lofting, and revolving for intricate surfaces. Create sweeps using 1 and 2 rail curves, mastering surface network techniques for complex shapes. Upon completion, you will: Master Rhino Tools: Navigate interfaces, utilize advanced tools for precise modeling, and employ features like object snaps and Smart Track. Expert Solid and Surface Modeling: Develop intricate 3D solids and surfaces, create diverse shapes, and use Rhino render effectively. Advanced Editing Skills: Apply intermediate and advanced editing techniques, including symmetry tools and realistic rendering. Precision Modeling: Utilize coordinates, constraints, and advanced aids for accurate detailing and problem-solving. Professional Project Execution: Create high-quality renderings, 2D drawings, and polished 3D models for real-world design scenarios. Upon completion, you'll be adept at 3D modeling, product design, and architecture, positioning you as a valuable asset in the design industry. Why Choose Our Rhino Courses? Rhino, also known as Rhinoceros, stands as a robust 3D computer graphics and computer-aided design software, utilized extensively in domains like architecture, industrial design, and multimedia. Our Rhino courses are meticulously crafted to empower you in mastering this software. Led by seasoned instructors, our courses provide a comprehensive understanding of Rhino, enabling you to create exceptional designs. Rhino 3D Training: Our Rhino 3D training caters to beginners and those seeking advanced techniques. Course Highlights: Precise 3D Modeling: Master free-form 3D NURBS models with precision. Advanced Functionality: Explore Rhino's features, including advanced surfacing commands. User Interface Mastery: Navigate Rhino's interface and hone skills in curves, surfaces, and solids. Expert Guidance: Acquire expertise in Rhino's modeling environment under expert guidance. Modeling Techniques: Learn free-form and precision modeling techniques. Modeling Aids: Utilize tools for accurate modeling and create basic Rhino renderings. Benefits of our Courses: Expert Guidance: Receive instruction from experienced architects and designers, providing practical, real-world insights for comprehensive learning. Comprehensive Resources: Access bespoke video tutorials for additional learning and reference, enhancing your understanding of the course materials. Digital Reference Material: Receive a digital reference book to support your revision efforts, providing a comprehensive resource for your studies. Ongoing Support: Enjoy free after-support through phone or email even after course completion, ensuring continuous assistance and guidance. Tailored Learning Experience: Customize your learning journey by adapting the syllabus and projects to align with your specific needs and interests, fostering a personalized educational experience. Certificate: Upon completion, earn a certificate from us, validating your achievement and recognizing your expertise in the field.

Essential OTN training course description An In-depth introduction to the terminology and technology that will comprise tomorrow's Optical Transport Networks. What will you learn Describe the problems with old technologies. Identify the purpose of new technologies. Describe the functionality of the various transmission mediums available Identify OTN features and functionality. Define the issues involved in equipment and application rollout. Essential OTN training course details Who will benefit: Anyone wishing to learn OTN. Prerequisites: SDH foundation or Essential DWDM Duration 2 days Essential OTN training course contents Scope, References Terms and definitions, Abbreviations and Conventions Optical transport network interface structure Multiplexing/mapping principles and bit rates Optical transport module (OTM-n.m, OTM-nr.m, OTM-0.m and OTN 0.mvn) Physical specification of the ONNI Optical channel (OCh) Optical channel transport unit (OTU) Optical channel data unit (ODU) Optical channel payload unit (OPU) OTM overhead signal (OOS) Overhead description and maintenance signals Mapping of client signals and concatenation Mapping ODUk signals into the ODTUjk signal Forward error correction using 16-byte interleaved RS (255,239) codecs ODUk tandem connection monitoring (TCM) overhead OPUk Multiplex Overhead Amendment 2 including: OTN Multiplexing and Mapping, Basic signal structure, ODTU12, ODTU13, ODTU23, OPUk Multiplex Overhead, OPUk Multiplex Structure Identifier (MSI). OPU2 Multiplex Structure Identifier (MSI), OPU3 Multiplex Structure Identifier (MSI), OPUk Payload Structure Identifier Reserved overhead (RES), ODU1 into ODU2 multiplexing, ODU2 into ODU3 multiplexing, ODU1 into ODU3 multiplexing Amendment 3 including: 40 Gbit/s ODU3/OTU3 and 100 Gbit/s ODU4/OTU4, Support of gigabit Ethernet services via ODU0, ODU2e, ODU3 and ODU4, ODU0 and ODUFlex, Multi-lane OTU3 and OTU4 interfaces, Support for InfiniBand Amendment 4 including: OTSn OTN synchronization messaging channel (OSMC) overhead, FC-1600 Amendment 5 Including: ODUk.ts, OTU0LL (OTU0 low latency), OTSiA (optical tributary signal assembly). OTSiG (optical tributary signal group), OTSiG-O (optical tributary signal overhead), CMEP (connection monitoring end- point), CMOH (connection monitoring overhead), MOTU (Multi-OUT), MOTUm (Multi-OTU with management), OTUCn-M (Optical Transport Unit-Cn, with n OxUC overhead instances and 5G tributary slots). SOTU (Single-OUT). SOTUm (Single-OTU with management). Modified bit rates and capacity for OTU1/2/3/4 OTM.nr.m, OTM.n.m, OTM.0.3v4, OTM 0.4v4 Mapping of CBR2G5, CBR10G, CBR10G3 and CBR40G signals into OPUk 64B/66B and 513B block code format PCS lane alignment marker for 40GBASE-R and 100GBASE-R PT=20/PT=21 and AMP/GMP options OTL 4.10 to OTL 4.4 gearbox ODU switching and Line protection Schemes 10 x 10 MSA Overview of current and future coherent and noncoherent technologies 40Gbit and 100Gbit compliant ROADM's Implementers Guide including replacement terms. Differing vendor's equipment and their implementations Individual and group planning exercises: Upgrade a customer STM-64/10G network to a 40G/ OTN network. Upgrade a customer old 16 Wavelength WDM network to be OTN compliant. Implement a new customer 40 wavelength OTU3 OTN compliant MSPP (DWDM) network. Design a cost-effective solution where we can hand over circuits using 'Optical Transport Lanes'.
Rhino 3D Evening Training
By London Design Training Courses
Who Should Attend Rhino 3D Evening Training Course? Click here for info. This Evening Course is for individuals seeking to learn 2D and 3D modeling skills in a supportive and creative learning environment. Whether you are new to Rhino or want to expand your existing knowledge, this course is for product, furniture, architectural, and jewelry design industries. Duration: 10 hrs Method: 1-on-1, Personalized attention Schedule: Tailor your own schedule hours of your choice, available from Mon to Sat between 9 am and 7 pm Course Inclusions: Free Lifetime email support: Enjoy the flexibility of a free lifetime email support. Expert Instruction: Learn from experienced architects, designers, and software professionals, ensuring top-notch teaching. Hands-On Learning: Engage in practical, hands-on lessons with personalized project work to apply your skills effectively. Digital Reference: Access valuable video tutorials and a digital reference book for convenient revision and continuous development. London Design Training Course Certificate of Completion: Receive a certificate upon course completion, enhancing your CV and LinkedIn profile. Free Career Guidance: Benefit from career guidance, including tips on job applications and setting up a creative business, to stand out in the competitive design industry. Rhino 3D Basic to Intermediate Training Course Course Duration: 10 hours Introduction to Rhino and Interface: Familiarizing with Rhino's command system and toolbar usage. Navigating the geometry menus, command line, and status bar efficiently. Understanding the Properties window and its functionalities. Managing file operations, including opening and saving files. Grasping the three entity types: curves, surfaces, and solids. Exploring various geometric elements, such as Bezier curves, B-splines, NURBS objects, isocurve surfaces, and mesh surfaces. Setting measurement units for accurate modeling. Navigation: Introducing the viewport and its features. Using construction planes to aid in modeling. Utilizing shading modes for better visualization. Learning essential viewport controls: pan, zoom, rotate, and reset. Workflow Basics: Creating basic objects like curves, surfaces, and solids. Performing fundamental transformations to manipulate objects. Organizing projects efficiently using layers. Drawing: 2D Geometry: Understanding the creation of lines, polylines, rectangles, polygons, arcs, circles, and ellipses. Drawing freeform curves for more creative designs. Modeling: 3D Surfaces: Comparing various 3D surface types. Utilizing extrusion to add features to models. Creating surfaces with loft, revolve, rail revolve, sweep rail, and network surface commands. Constructing complex surfaces with the Network Surface tool. Modeling: 3D Solids: Introducing solid modeling techniques. Creating solids with primitives and curves. Applying Boolean operators to create unique shapes. Editing solids using the solid edit tool. Transforming solids and incorporating modeling aids like Grid Snap, Ortho, and Planar. Editing and Transforming Objects: Using Fillet and Chamfer to edit corners. Employing curve Booleans for trimming and splitting. Mastering the Drag and Nudge tools for object movement and rotation. Copying, pasting, and grouping objects effectively. Scaling and duplicating objects with the Mirror command. Analysis and Degrees: Understanding degrees of curves and surfaces. Creating screen captures for quick proofs. Generating 2D views and rendering projects. Preparation for 3D Printing and Manufacturing: Preparing models for prototyping by ensuring closed gaps. Using the shell technique to create wall thickness suitable for 3D printing.

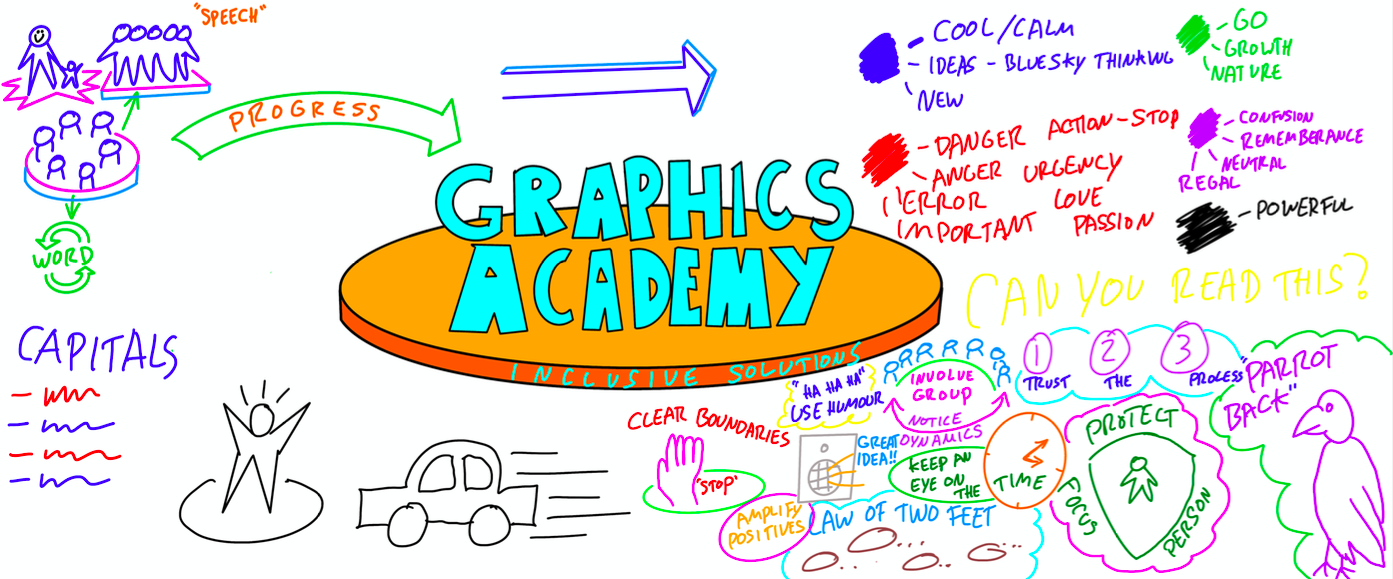
GRAPHIC FACILITATION – AN INTRODUCTION
By Inclusive Solutions
This day will introduce you to the basic techniques and skills involved in doing graphic facilitation. Learn how to use a BIG piece of paper and a handful of pens to create a memorable summary of your training day, team meeting or your work with young people and families. Learn how to harvest the essence of an event in a visual representation. This is a ‘hands on’ interactive day built around demonstrations of graphic facilitation, coaching and the chance to try things out. Ideal for teams who can then go on together to practice, practice, practice. Learning Objectives To introduce you to the basic skills of graphic facilitation – no previous experience is needed To develop your capacity to ‘listen under the words’ and draw out the deeper messages To help you suspend your self-doubt – “I can’t draw!” and rediscover your capacity to create an effective visual representation of a meeting/training day/conversation etc Course Content The day will introduce you to the fundamentals of graphic facilitation and will include the following topics: Pens, Pastels and Paper – what you will need to get started The basic ‘grammar’ of graphic facilitation; the essential shapes, using colour, images, lettering, words, creating connection How to listen for the essence of what is being said and translate this into visual language A chance to do it live – with coaching
Technical Report Writing and Presentation Skills for Oil & Gas Engineers and Technical Professionals
By EnergyEdge - Training for a Sustainable Energy Future
Develop your technical report writing and presentation skills with EnergyEdge's course designed for oil & gas professionals. Sign up now!

INSIGHTS AND SOLUTIONS CIRCLE
By Inclusive Solutions
This can be introduced in one day but is better offered over a series of twilight or half day workshops with individualised coaching. We will provide background context for this approach and will directly model the process with real live issues facing participants. So bring your most challenging concerns to this training. Course Category Behaviour and Relationships Visioning and Problem Solving Team Building and Leadership Description ‘Insights and Solutions Circle’ a new expanded version of Solution Circle that uses some of the best of the Circle of Adults process. Its a 50 minute process and works really well with families and professionals! Contact us today for a live demo or training… Steps Problem presented Questions asked Theories Shared Strategies listed Dialogue regarding selected strategies Next steps Testimonials Excellent! It was great how we all cam up with ideas and theories including us parents I wish all meeting about my child’s behaviour were like this The whole world is going to be interested in this… The empowerment is great The buzz after the meeting says it all. Learning Objectives Deeper understanding of what is actually happening underneath the presenting behaviour Increased confidence in managing and building relationships with challenging pupils in mainstream schools Learn process for locating richer and wider range of practical strategies to impact on behaviour problems Deeper understanding of yourself and the psychodynamic processes happening between pupils, staff and pupils and families Opportunity to reflect on professional practice Mutual support established with other front line practitioners Who Is It For ? Team Around the Child agencies Parents and Professional working together Families Multi Agency Teams Social workers CAMHS teams Year Managers Primary and secondary staff teams Early Years and School based Practitioners Heads and Deputies SENCOs Advanced Skills Teachers Primary and secondary teachers Local Authority Support Services Course Content This can be introduced in one day but is better offered over a series of twilight or half day workshops with individualised coaching. We will provide background context for this approach and will directly model the process with real live issues facing participants. So bring your most challenging concerns to this training. The course answers the questions: Can we find an alternative to permanent exclusion or special unit or school placement? Cannot understand why a child is behaving as they do? Struggling with a child for whom praise is ineffective? Feeling isolated in your responses to a child’s needs? Worried about where your instinctive reactions are leading you? Cannot seem to get any consensus view of a young person’s behaviour/needs amongst all the family and professionals involved – is everyone pulling in different directions? We will cover: Setting the tone Background and detailed teaching of process Inclusion values underpinning this work Graphic and process facilitation skills Processes modelled and opportunities to try process out with coaching Practical setting up of insights and solutions circles Lessons learned If you liked this you may like: CIRCLES OF ADULTS…

Total sFlow training course description A comprehensive hands on course covering sFlow. The course starts with the basics of flows moving swiftly onto configuring sFlow and studying the information it provides. What will you learn Describe sFlow. Use Nmap. Recognise how sFlow can be used. Describe the issues in using sFlow. Compare SFlow with SNMP and NetFlow. Total sFlow training course details Who will benefit: Technical staff working with sFlow. Prerequisites: TCP/IP foundation for engineers. Duration 1 day Total sFlow training course content What is SFlow? Where to monitor traffic. Packet based sampling, Time based sampling. Adaptive sampling. Flow samples, Counter samples. Hands on Wireshark flow analysis. Getting started with sFlow sFlow configuration. Enabling sFlow. Per interface. Hands on Accessing sFlow data using the CLI. sFlow architecture SFlow agents and collectors. When flows are exported. Distributed sFlow architecture, subagents. sFlow reporting products. SolarWinds. Hands on Collector software. sFlow features and benefits Troubleshooting with sFlow, controlling congestion, security and audit trail analysis. Hands on Using sFlow. sFlow versus other technologies Flows. sFlow impact and scalability. sFlow versus SNMP and RMON, SFlow versus NetFlow/IPFIX. Hands on Advanced sFlow configuration.
We have been supporting executives, leaders, entrepreneurs and professionals across corporate and public sector industries, nationally and internationally. Our unique methodology focuses on effective and efficient, life-long learning with rapid, tangible and guaranteed results. In addition to our bespoke coaching workshops, our 1-to-1 online coaching sessions have proven to be an effective and flexible means of delivering speech and communication coaching. Our experience enables us to provide cost-effective, professional support. We offer flexible long-term, short-term, and intensive courses that cater to your schedule and level. Through personalised instruction, we focus on key aspects such as intonation, rhythm, and stress patterns. Start with a free consultation with one of our accent coaches, and we’ll assess your needs and goals. Transform your spoken English and communicate more effectively with our specialised accent training.

AutoCAD Training Courses Evening
By London Design Training Courses
Learn AutoCAD Evening Training Course. Clickhere for info This Autodesk AutoCAD 2D Introduction Evening Course is ideal for students who are completely new to the software and for those looking to produce advanced 2D plans, elevations and sections, as well as understanding all key tools in AutoCAD 2D. Call 02077202581 or WhatsApp 07970325184. Duration: 10 hrs. Method: 1-on-1, Personalized attention Schedule: Tailor your own slots, available from Mon to Sat between 9 am and 7 pm. Flexible Evening Sessions: Learn at your pace with evening classes. Comprehensive Skill Development: Master 2D Plans, Sections and Elevations. Industry-Standard Knowledge: Gain proficiency sought by employers. Practical Application: Apply skills to real-world design scenarios. Recorded Lessons for Review: Revisit course material anytime. Lifetime Email Support: Get ongoing assistance even after course completion. Course Duration: 10 hours Course Overview: AutoCAD 2D Training Course Designed for beginners, this course teaches the fundamentals of AutoCAD 2D software. Participants will learn essential tools and features to create, edit, and annotate 2D drawings. By course completion, students will confidently produce their own 2D drawings using AutoCAD. Introduction to AutoCAD 2D Overview of AutoCAD 2D software Understanding the user interface Navigating the drawing area Setting up drawing units and limits Creating basic shapes and lines Drawing Tools Utilizing Line, Circle, and Arc tools Implementing Polyline and Spline tools Adding dimensions and annotations Understanding layers and object properties Creating and inserting blocks into drawings Editing Tools Using Erase, Move, and Copy tools Implementing Rotate and Scale tools Understanding grips and grip editing Utilizing Trim and Extend tools Exploring fillets and chamfers Advanced Drawing Tools Utilizing Offset and Mirror tools Implementing Array and Divide tools Understanding hatching and gradient fills Adding text and multiline text Incorporating tables and fields into drawings Final Project Completing a final project using all learned tools and features Instructor-guided process to create a personal 2D drawing with AutoCAD Q&A and review of course material Assessment: Submission of the final project Active participation in class exercises and discussions Requirements: AutoCAD 2D software installed on the student's computer Basic computer skills and familiarity with the Windows operating system A laptop or desktop computer with a minimum of 4GB RAM and a 64-bit operating system.