- Professional Development
- Medicine & Nursing
- Arts & Crafts
- Health & Wellbeing
- Personal Development
716 Courses in Cardiff delivered Live Online
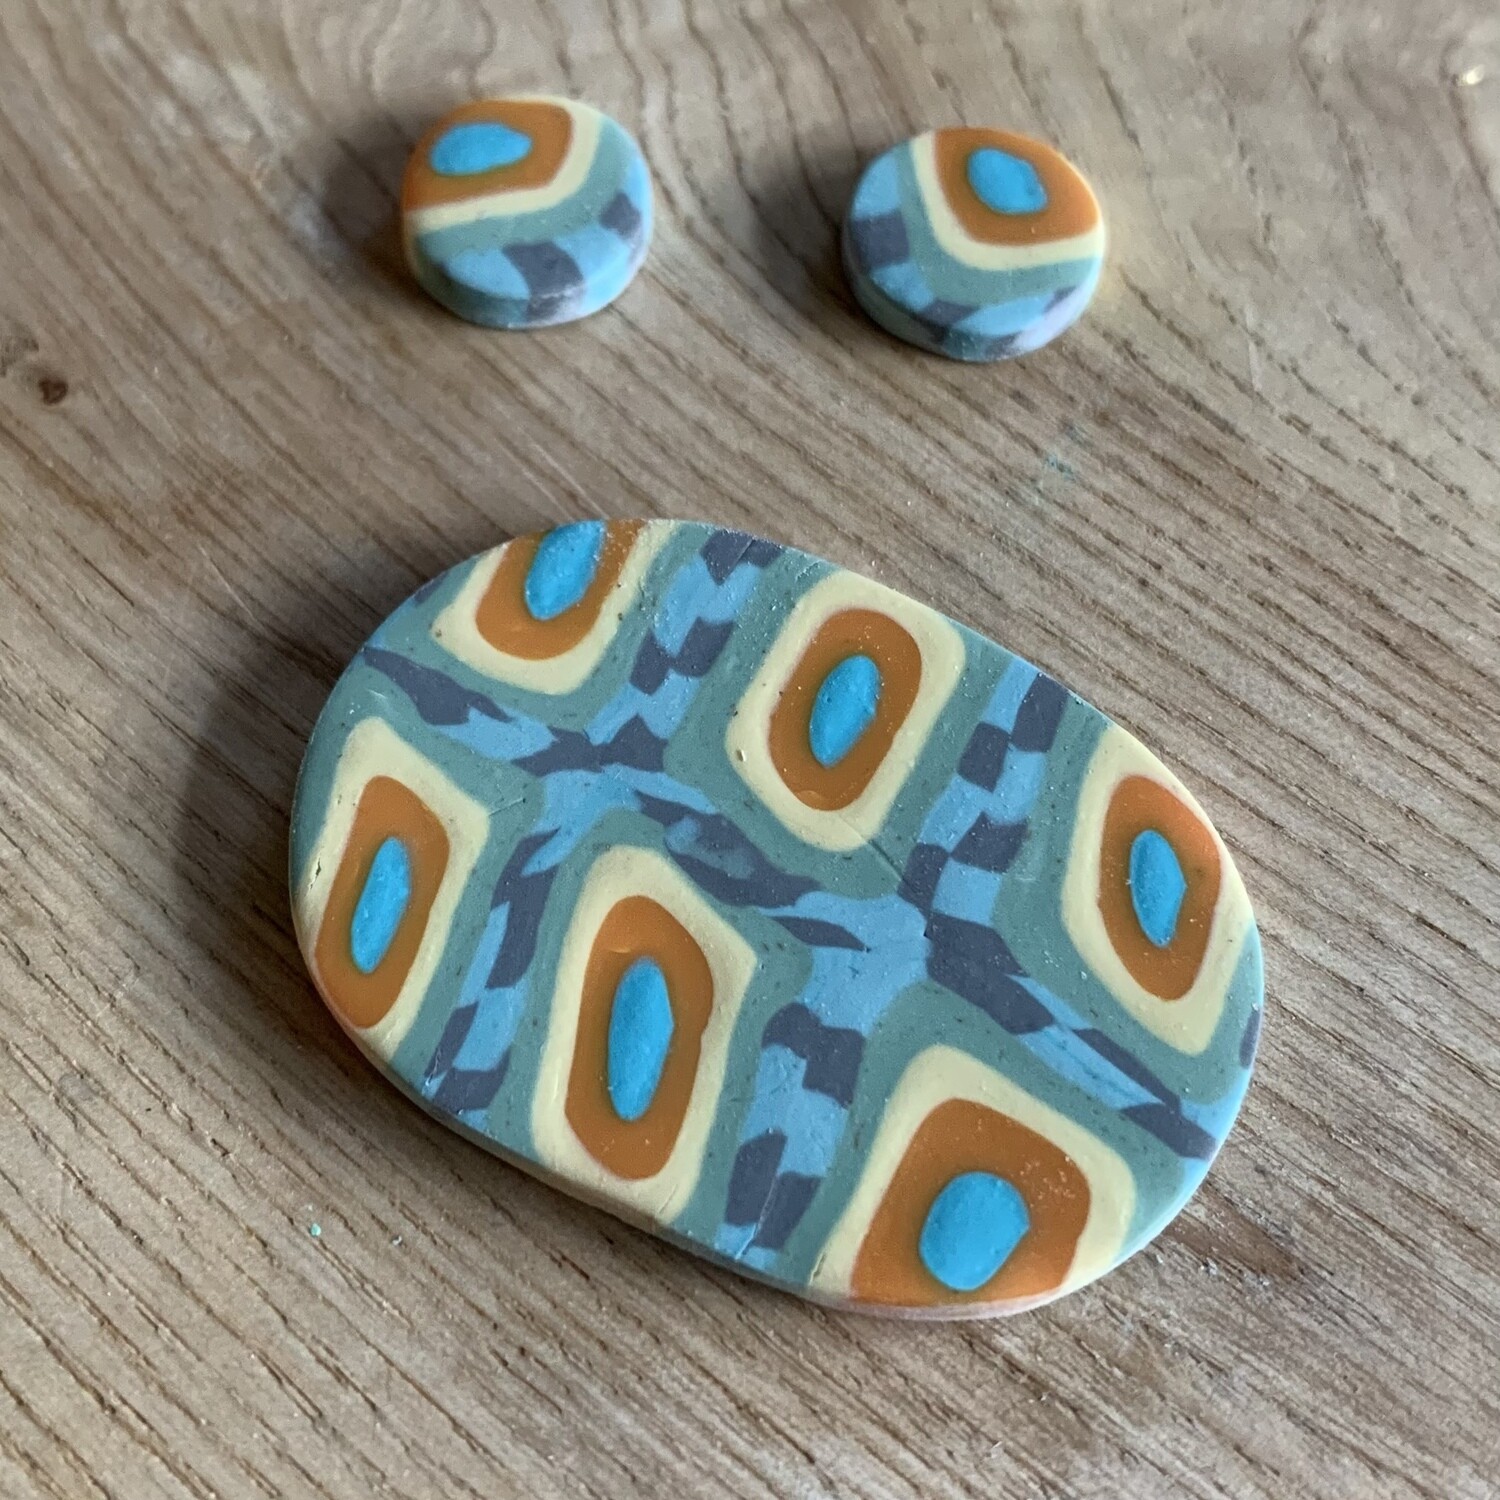
Are you interested in learning how to make polymer clay jewellery? Join us for a fun and informative workshop that will teach you everything you need to know about conditioning the clay, texturing, cutting, shaping the clay, forming and moulding. You'll create a range of finished jewellery pieces that you can take home with you afterwards. This is a great way to learn some new skills and explore a wide variety of style and techniques that are easy enough for beginners but also have room for more advanced learners!
Basic Photoshop Training Course
By ATL Autocad Training London
Learn the Basic PhotoshopTraining Course Learn retouching, layers, color, correction, shapes, and symbols. Delve into graphic design, photo editing, and digital art. From beginner to pro, gaining expertise in UX strategies, ensuring your websites are impactful and user-friendly. Click here for more info: Website Duration: 10 hours Approach: 1-on1 sessions and Personalized guidance. Schedule: Customize your schedule by booking a convenient hour, available from Monday to Saturday between 9 am and 7 pm. Module 1: Interface and Preferences Familiarize yourself with the Photoshop Interface Customize Panels and Toolbars to match your workflow Explore Photoshop Preferences to optimize settings Discover various Photoshop CC Workspaces tailored for different tasks Begin with essential Keyboard Shortcuts Module 2: Image File Formats Understand diverse image file formats such as PSD, JPEG, PNG, and PDF Delve into File Compression and its influence on image quality Module 3: Creating a New Document Set dimensions and size for new documents Grasp media units for accurate design specifications Explore Color Profiles and their significance Save presets for swift document setups Module 4: Placing Images Differentiate Embedded vs. Linked images Introduction to Smart Objects for non-destructive editing Master the Selection tool for precise image placement Module 5: Image Size and Resolution Save images using various formats and compression settings Understand Image Size and Resolution for diverse output needs Module 6: Layers Introduction Organize your work with Layer management Master layer tasks such as reordering, renaming, grouping, locking, and hiding Module 7: Selection Tools Explore Selection Tools like Marquee, Magic Wand, Quick Selection, and Lasso Grasp Inverse Selection and Deselect for efficient editing Module 8: Layer Effects Apply captivating Layer Effects such as Drop Shadow, Stroke, and Outer Glow Save and replicate Effects Styles for quick application Combine multiple effects for creative designs Module 9: Introduction to Shapes Utilize the Shapes tool for fundamental design elements Create Custom Shapes for unique designs Understand Color principles and use the Properties Panel for adjustments Master the Direct Selection tool for precise shape editing Create a basic poster using provided examples Module 10: Type and Typography Work with Type and explore the Character and Paragraph Panel Utilize Styles Panel for consistent text formatting Save favorite fonts for easy access Apply Effects and Layer Styles on Type for impactful typography Learn about Leading, Tracking, and Kerning for optimal text spacing Module 11: Colors Understand RGB vs. CMYK color modes Select colors using the Eyedropper tool Save colors as Swatches for reuse Create gradients using the Gradient Tool Module 12: Creating a Clipping Mask Master the concept of Clipping Masks and their application Apply Clipping Masks to Type, Images, and Shapes Combine Layer Effects with Clipping Masks for creative designs Module 13: Introduction to Masking Understand Masking and its importance in image editing Utilize the Brush tool for mask creation Learn Masking shortcuts and use Gradient Mask for smooth transitions Module 14: Adjustment Layers Explore Color and Gradient Adjustment Layers for image enhancements Master Curves, Levels, and Hue/Saturation Adjustment Layers for precise color control Convert images to Black and White using Adjustment Layers Combine Adjustment Layer Masks for targeted edits Module 15: Image Touch Up Master various touch-up techniques, including Red Eye Removal, Spot Healing Brush, and Patch Tool Utilize Content Aware Removal for seamless object removal Restore old photos using Clone Stamp and Dodge/Burn tools Enhance portraits by removing blemishes and whitening teeth Module 16: Filters Introduction Understand Smart Objects and Filter usage for non-destructive editing Explore the Filters Gallery and experiment with Blur and Vantage filters Module 17: Blending Modes Introduction Master the concept of Blending Modes and their effects on layer overlays Understand different Blending Modes like Darken, Lighten, and Overlay Layer Mastery: Develop expertise in working with layers, mastering advanced techniques for seamless editing and design organization in Adobe Photoshop. Precision Editing: Skillfully employ a variety of selection tools, ensuring precise and meticulous editing, manipulation, and composition of images and elements. Creative Layer Effects: Apply captivating Layer Effects with finesse, enhancing your designs and visuals to achieve professional-grade aesthetics. Advanced Editing Techniques: Understand the functionalities of Adjustment Layers, Masking, and Clipping Masks, enabling you to perform advanced editing and compositing tasks with confidence and precision. Effective Photo Restoration: Acquire techniques to touch up and restore photographs effectively, ensuring professional-quality results in photo editing and retouching. Typography Expertise: Explore advanced typography techniques, enabling you to create visually appealing text designs that complement your overall compositions. Filter Applications: Gain an introductory understanding of Filters and their creative applications, enhancing your ability to add artistic effects and refine visuals. Practical Color Theory: Grasp the fundamental principles of Color Theory and apply them practically in your designs, ensuring harmonious and visually pleasing color schemes in your work. Course Highlights: Advanced Photoshop Skills: Learn intricate techniques for professional image editing, retouching, and manipulation. Creative Design Projects: Engage in hands-on projects to enhance your practical skills in real-world scenarios. Mastering Special Effects: Dive into advanced topics like layer effects, filters, and blending modes to create stunning visual effects. Typography and Design Principles: Explore typography styles, layout design, and color theory for compelling compositions. Professional Portfolio Development: Receive guidance on creating a professional portfolio showcasing your Photoshop expertise. Potential Job Roles: Graphic Designer: Craft visually appealing graphics for print and digital media. Digital Artist: Create digital artwork for various applications, from illustrations to advertisements. Photo Retoucher: Enhance and manipulate photos for professional use, including portrait retouching. UI/UX Designer: Design user interfaces and experiences for websites and applications. Web Designer: Develop visually engaging websites with expertise in Photoshop for web design. Marketing Content Creator: Produce marketing materials such as banners, brochures, and social media visuals. Freelance Designer: Work independently, offering design services to clients across different industries. Advertising Creative: Contribute to creative campaigns by designing impactful ad visuals. Print Production Specialist: Prepare print-ready materials, ensuring quality in printed products. Photography Post-Processing Specialist: Enhance and retouch photographs, optimizing them for professional use. Comprehensive Photoshop Proficiency: Develop a solid foundation in Photoshop, mastering essential tools and techniques vital for image editing and manipulation. Creative Editing Expertise: Learn advanced retouching, image enhancement, digital artwork creation, and graphic design using Photoshop's powerful features. Professional-Grade Results: Acquire skills for achieving professional-level outcomes in image editing, ensuring precise color correction, seamless retouching, and visually appealing compositions. Optimized Workflow: Discover time-saving tips, shortcuts, and efficient techniques to enhance your Photoshop workflow. Learn layer management, non-destructive editing, and automation for streamlined processes. Versatile Design Skills: Unlock creative possibilities by mastering text effects, digital collages, filters, and graphic design for diverse mediums. Access to Recorded Lessons: Revisit course material and reinforce learning through recorded lessons. Review specific techniques at your own pace, deepening your understanding of Photoshop. Lifetime Email Assistance: Benefit from continuous support with lifetime email assistance. Seek guidance, get answers to questions, and seek clarification even after completing the course.
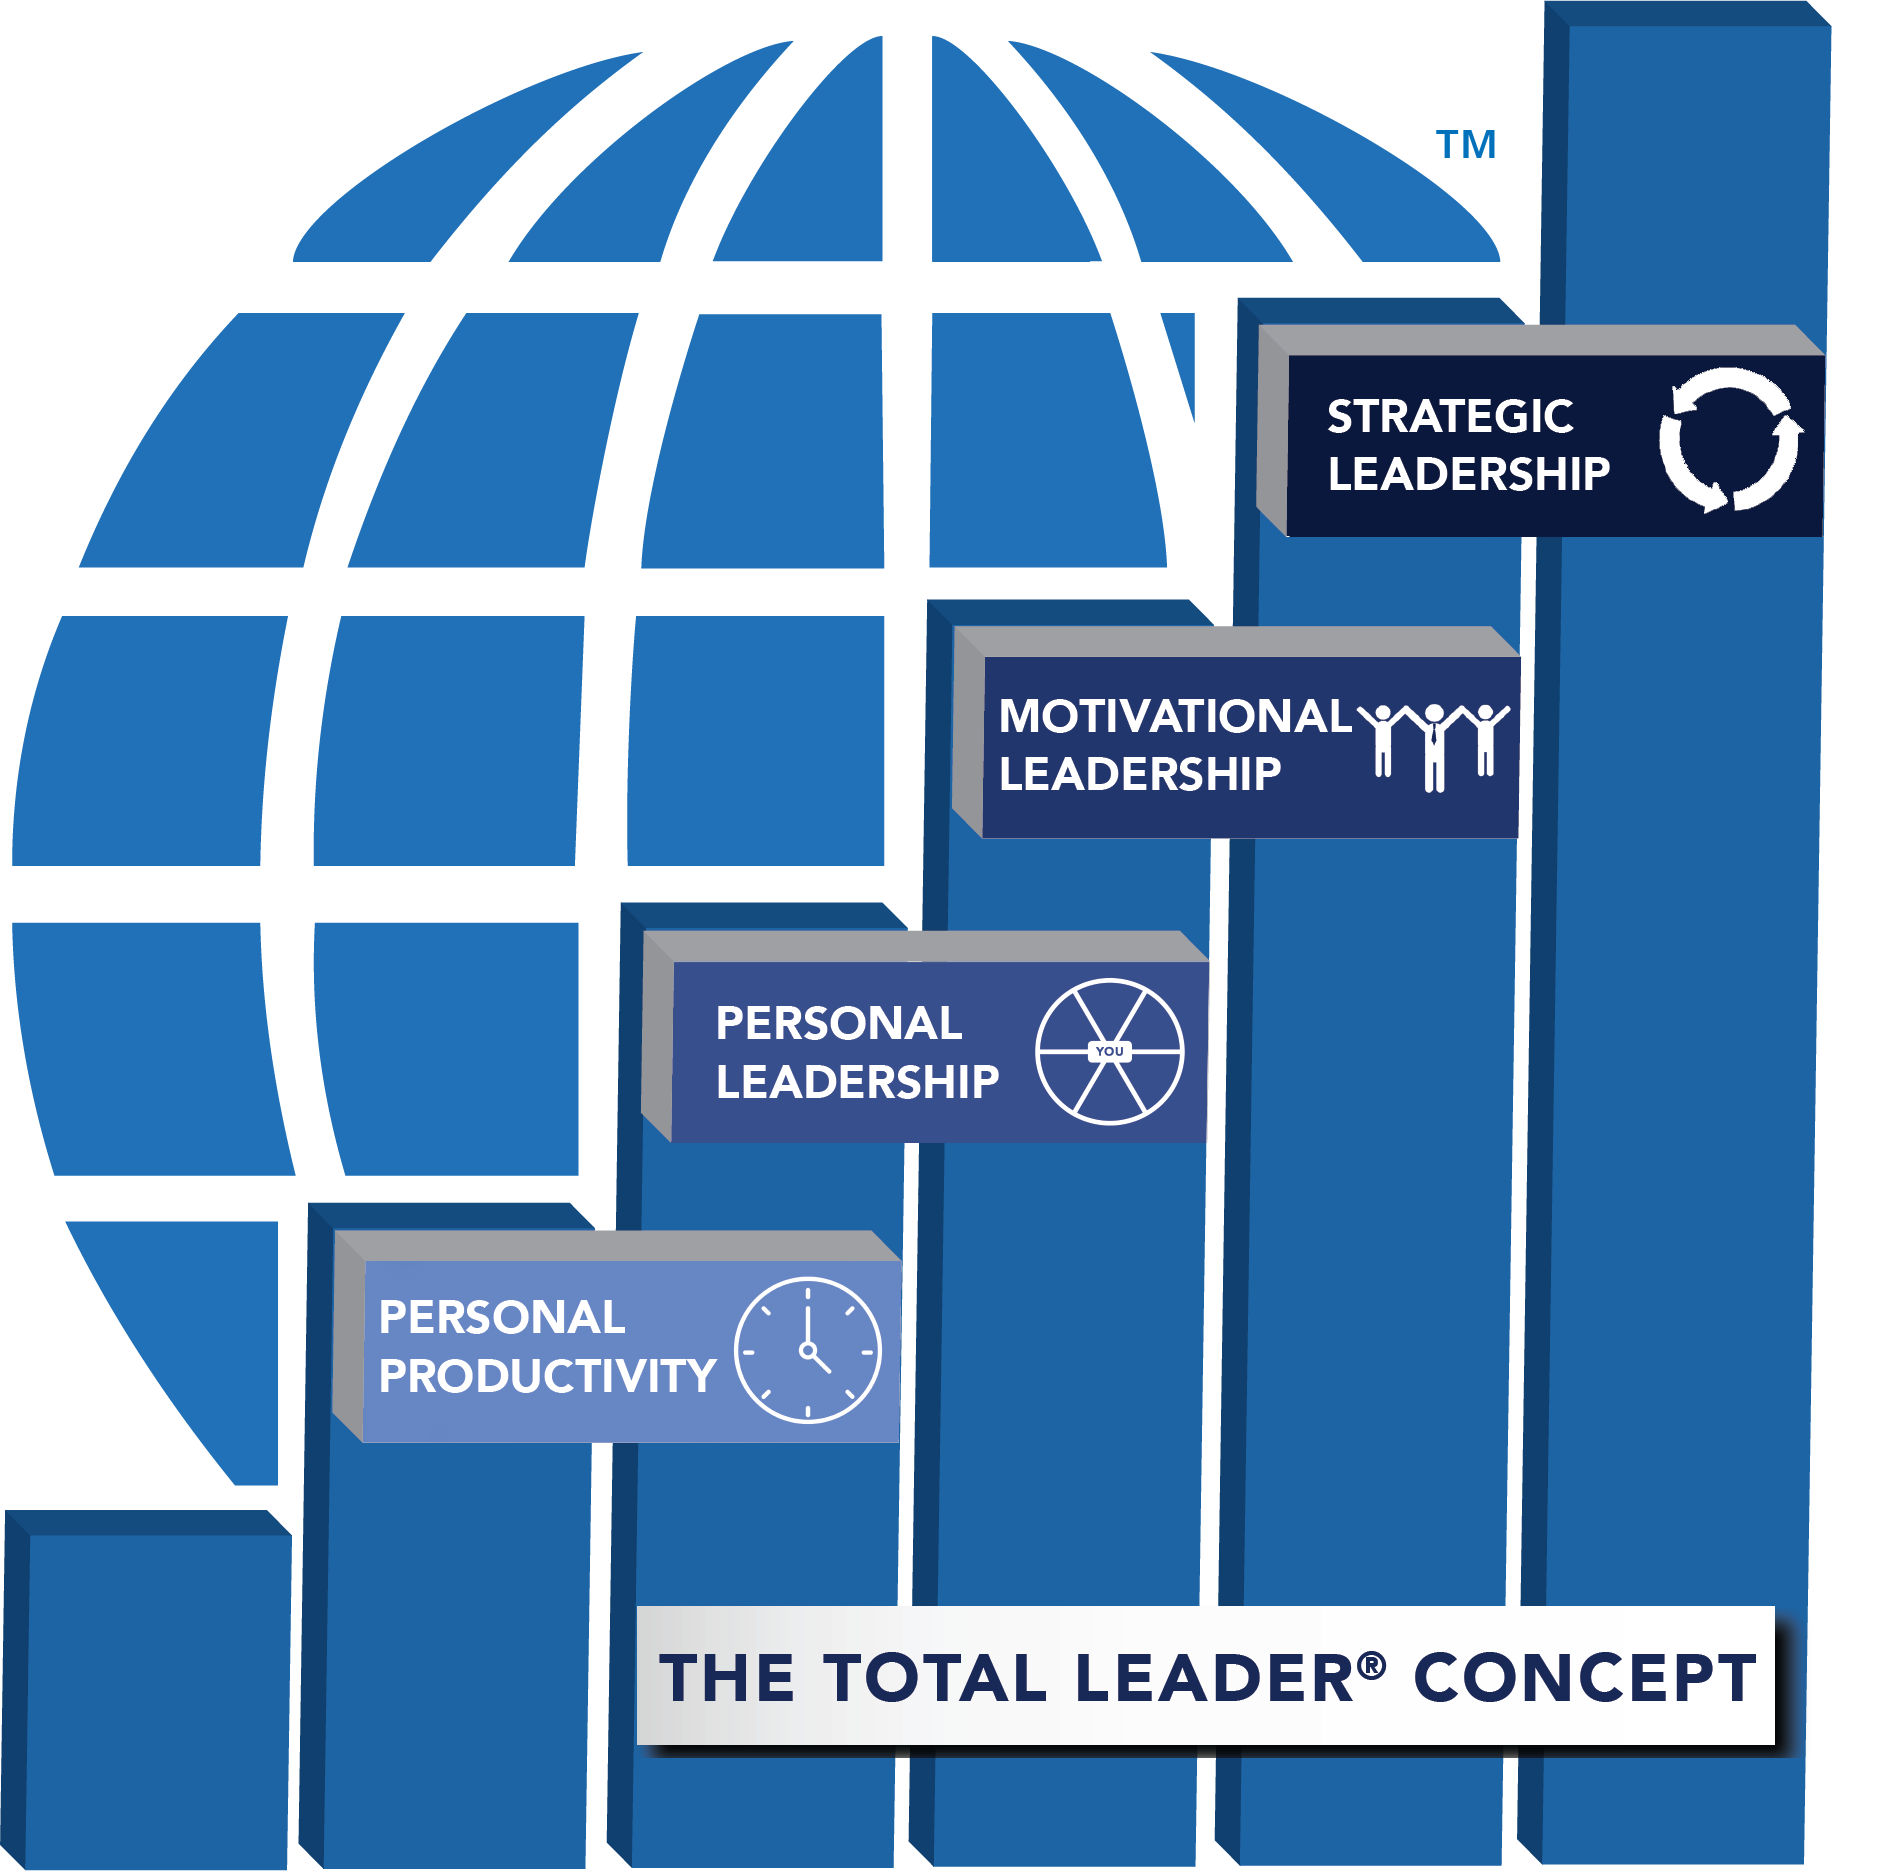
Foundations of Success
By Leadership Management International (LMI) UK
The LMI Foundations of Success workshop introduces the concepts and practical tools used to help countless individuals within thousands of organisations, of all sizes and complexity in both the public and private sector, realise more of their true potential.
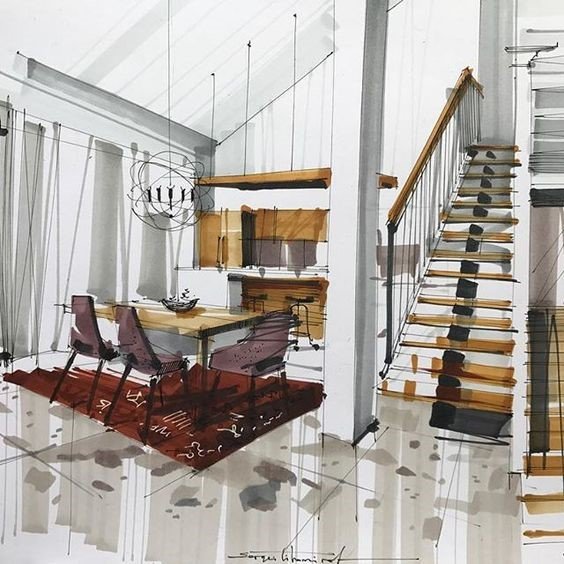
Twinmotion Realtime Rendering Training
By London Design Training Courses
Why Choose Twinmotion Realtime Rendering Training Course? Click here for info Empower architects, designers, and visualization experts with our Twinmotion training. Learn tools, materials, lighting, animation, and rendering. Explore advanced techniques for lifelike landscape and special effects using Twinmotion's asset library. Opt for in-person or live online sessions. Duration: 10 hrs Method: 1-on-1, Personalized attention Schedule: Tailor your own hours of your choice, available from Mon to Sat between 9 am and 7 pm Twinmotion Real-time 3D Architecture Visualization Course Outline: Module 1: Introduction to Twinmotion Explore Twinmotion's real-time 3D visualization capabilities Master the Twinmotion interface for efficient scene manipulation Prepare 3D files for import and manage the workflow Module 2: Materials and Realism Enhance scenes with realistic materials and visual quality Utilize videos as materials and apply glow effects Create grunge materials for added texture and realism Employ the X-ray material for specific visualization needs Module 3: Landscape and Vegetation Integrate vegetation using Twinmotion's scatter, HQ trees, and growth features Customize grass and utilize HQ vegetation assets for realism Create time-lapse effects for vegetation growth Module 4: Library and Object Import Access the Twinmotion library for furniture and objects Seamlessly import external 3D objects Obtain high-quality 3D assets from the internet and add to the user library Utilize BIM-objects for additional assets Module 5: Lighting and Animation Work with various lighting options, including area light and volumetric light Add animated characters and vehicles for dynamism Incorporate construction vehicles and aircraft for realism Module 6: Volumes and Interactivity Utilize volumes and the animator feature for dynamic scenes Implement urban elements and measurement tools for accuracy Module 7: Nature and Weather Effects Utilize Twinmotion's nature features, including physical sky and weather effects Create realistic lighting for outdoor scenes Add ocean effects for water elements Module 8: Rendering Techniques Master rendering processes, from creating images to exporting panoramas and animations Implement depth of field improvements for captivating visuals Create BIM motion virtual reality phases for immersive experiences Utilize the Twinmotion presenter feature for streamlined presentations Module 9: Final Project Apply knowledge and skills to complete a final render project in Twinmotion Download Twinmotion https://www.twinmotion.com › download Learn how to download and install Twinmotion, the fast, easy real-time archvis tool.

Lumion 3d Realtime Rendering Training
By London Design Training Courses
Why Choose Lumion 3d Realtime Rendering Training Course? Course Link Our Lumion Course is best for materials, lighting, and animation skills. Learn high-quality rendering using Lumion's asset library. In-person or live online sessions with lifetime access to recordings and email support. Unleash Lumion's potential for immersive architectural visualizations. Duration: 10 hrs Method: 1-on-1, Personalized attention Schedule: Tailor your own hours of your choice, available from Mon to Sat between 9 am and 7 pm What is Lumion? Lumion is specialized 3D rendering software designed for architects and designers. With Lumion, you can quickly bring your 3D design models to life, add materials, furnish interiors and exteriors, and showcase the impact of lighting and shadows without the need for specialized training. Objectives of the Course The course aims to teach you how to start Lumion projects, add environments, cameras, illuminations, populate scenes with various elements, create terrains, and produce animations. Lumion 3D Course Outline Module 1: Introduction to Lumion 3D Discovering Lumion 3D's capabilities and interface navigation. Learning shortcut keys for efficient workflow. Customizing settings for optimal performance. Module 2: 3D Models and Materials Importing 3D models in various formats. Applying and tweaking materials. Creating procedural materials and glass effects. Troubleshooting common issues. Module 3: Creating a Project in Lumion Building scenes and sculpting terrain. Enhancing realism with alpha and height maps. Module 4: 3D World Managing multiple 3D objects and their properties. Implementing grass and scattering elements. Module 5: Lighting in Lumion 3D Utilizing weather settings for dynamic scenes. Understanding Lumion lights and interior/exterior illumination. Creating 3D reflections and spotlights. Module 6: Realistic Visualizations Incorporating special effects like fire, smoke, and fog. Achieving realism with camera effects and shadows. Rendering still images and animations. Module 7: NPR Visualizations Creating non-photorealistic visualizations with artistic effects. Implementing unique styles for enhanced visuals. Module 8: Artistic Effects in Lumion 3D Exploring conceptual visualizations with painting and sketch effects. Creating cartoon effects and understanding perspectives. Module 9: Animation in Lumion 3D Timing and working with cameras for dynamic shots. Composing animation clips and adding effects. Utilizing layers and control objects for precise control. Module 10: Advanced Features Import and output formats in Lumion. Expanding assets with the 3D model library. Adding animated characters and sound effects. Utilizing the advanced material library. Controlling environment and weather for dynamic scenes. Scene management and movie editing within Lumion 3D. Lumion for Students | Unleash Your Creativity https://lumion.com› product › students Unlock the full potential of your designs with Lumion for students. Request your free 1-year Student license now and bring your visions to life!
3ds Max and Vray Training
By London Design Training Courses
Why Choose 3ds Max and Vray Training Course? Click here for more info 3ds Max a valuable tool for architectural modeling, product design, and manufacturing across numerous industries. While widely utilized, mastering the software requires effort. Engaging in 3ds Max tutorials proves particularly advantageous for game designers, aiding in their career advancement. Duration: 10 hrs Method: 1-on-1, Personalized attention Schedule: Tailor your own hours, available from Mon to Sat between 9 am and 7 pm Our 3ds Max course consists of two main sections, covering architectural visualizations for both interior and exterior scenes. By the end of the training, you'll have the expertise to create professional projects independently. We begin with fundamental and advanced 3D modeling, starting from simple objects and progressing to complex buildings, interiors, and products. 3ds Max and Vray Comprehensive Course Course Duration: 10 hours Course Overview: This course is designed to offer a comprehensive introduction to 3ds Max and Vray. Throughout this program, you will acquire the knowledge necessary to proficiently create 3D models, apply materials and textures, configure lighting and camera systems, and produce high-quality Vray renders. This course is suitable for individuals with various levels of experience, from beginners to those with some prior exposure to 3D modeling and rendering. Course Outline: Module 1: Introduction to 3ds Max and Vray Familiarization with the 3ds Max interface Configuring the workspace Navigating within 3ds Max Introduction to Vray and its user interface Module 2: 3D Modeling Creating fundamental shapes Employing modifiers Crafting intricate shapes through advanced 3D modeling techniques Grasping the fundamentals of polygonal modeling Crafting both organic and inorganic models Module 3: Materials and Textures Application and modification of textures Understanding UVW mapping Utilizing the material editor Developing custom materials Leveraging Vray materials Module 4: Lighting Introduction to various lighting techniques Exploring different types of lights Comprehending light properties Configuring lights for a scene Employing Vray lights Module 5: Cameras Familiarization with camera systems Understanding camera properties Setting up camera views Creating animations using cameras Utilizing Vray cameras Module 6: Rendering Introduction to rendering Exploring Vray Global Illumination Utilizing Vray Physical Cameras Harnessing Vray HDRI Lighting Implementing the Vray Rendering Workflow Module 7: Projects Integrating all acquired knowledge Crafting a simple interior scene Constructing a basic exterior scene Developing a complex scene featuring multiple objects and materials Course Requirements: To participate in this course, you will need: A computer with 3ds Max and Vray installed (trial versions can be obtained from Autodesk and Chaos Group websites) Basic computer operation skills An interest in 3D modeling and animation Course Goals: Upon completing this course, you will have gained a comprehensive understanding of 3ds Max and Vray. You will possess the skills required to create realistic and visually captivating 3D scenes using Vray. Furthermore, you will be well-equipped to continue honing your 3D modeling and rendering abilities. Resources: Vray Trial Download: https://www.chaosgroup.com/vray/sketchup/free-trial Materials:https://www.vray-materials.de/ Textures: https://textures.com/ By completing the 3ds Max and Vray Training Course, participants will acquire proficiency in 3D modeling and rendering using 3ds Max. They will establish a solid foundation and essential skills, enabling them to create captivating visualizations. This expertise opens doors to various job opportunities in fields such as architectural visualization, game design, film production, and product modeling.

Online gluten free sourdough class for beginners
By edita_kt
Online gluten-free sourdough class for complete beginners.

What to expect during standard Ofsted inspections of Independent Schools (for upto 20 people)
By Marell Consulting Limited
Gain the clarity and confidence to take on inspections successfully with this actionable workshop.

Vray for Rhino Training
By London Design Training Courses
Why Choose Vray for Rhino Training Course? Click for more info. Become skilled in photorealistic rendering with V-Ray for Rhino through our course. Led by certified tutors, you'll learn lighting, materials, and rendering, as well as advanced techniques like textures and global illumination. In-person or live online sessions and receive a Certificate of Completion. Duration: 10 hrs Method: 1-on-1, Personalized attention Schedule: Tailor your own hours of your choice, available from Mon to Sat between 9 am and 7 pm. Why Enroll in Our Vray for Rhino Training Course? Elevate your skills in the art of photorealistic rendering with our comprehensive V-Ray for Rhino training program. Led by certified experts, this course delves into the nuances of lighting, materials, rendering, and advanced techniques such as textures and global illumination. Whether you're a beginner or looking to enhance your proficiency, our course caters to all skill levels. What Sets Our Course Apart? Expert Guidance: Learn from our certified tutors who provide personalized attention in 1-on-1 sessions, ensuring you grasp every concept thoroughly. Flexible Learning: Tailor your own learning schedule at your convenience. Our in-person and live online sessions are available from Monday to Saturday, between 9 am and 7 pm, accommodating various time zones and commitments. Comprehensive Curriculum: Master the intricacies of Rhino and V-Ray rendering, progressing seamlessly from beginner to advanced levels. Dive into the exclusive realm of architectural exterior rendering with V-Ray 6 for Rhino and Rhino 7 in our specialized London Design Training Course. Course Highlights: Duration: 10 hours of intensive training to hone your skills and gain expertise in V-Ray for Rhino. Method: Personalized 1-on-1 attention ensures focused and effective learning, allowing you to ask questions and receive immediate feedback. Certification: Upon completion, receive a prestigious Certificate of Completion, validating your mastery of V-Ray for Rhino. Why Enroll in Our Vray for Rhino Training Course? Elevate your skills in the art of photorealistic rendering with our comprehensive V-Ray for Rhino training program. Led by certified experts, this course delves into the nuances of lighting, materials, rendering, and advanced techniques such as textures and global illumination. Whether you're a beginner or looking to enhance your proficiency, our course caters to all skill levels. What Sets Our Course Apart? Expert Guidance: Learn from our certified tutors who provide personalized attention in 1-on-1 sessions, ensuring you grasp every concept thoroughly. Flexible Learning: Tailor your own learning schedule at your convenience. Our in-person and live online sessions are available from Monday to Saturday, between 9 am and 7 pm, accommodating various time zones and commitments. Comprehensive Curriculum: Master the intricacies of Rhino and V-Ray rendering, progressing seamlessly from beginner to advanced levels. Dive into the exclusive realm of architectural exterior rendering with V-Ray 6 for Rhino and Rhino 7 in our specialized London Design Training Course. Course Highlights: Duration: 10 hours of intensive training to hone your skills and gain expertise in V-Ray for Rhino. Method: Personalized 1-on-1 attention ensures focused and effective learning, allowing you to ask questions and receive immediate feedback. Certification: Upon completion, receive a prestigious Certificate of Completion, validating your mastery of V-Ray for Rhino. Join our 10-hour Vray for Rhino 3D training course for a comprehensive understanding of Vray's integration with Rhino 3D. Learn lighting, camera settings, materials, rendering, and post-production techniques. Master the skills to create realistic and high-quality renders with Vray for Rhino 3D. Module 1: Introduction to Vray for Rhino 3D (2 hours) Discover the purpose and advantages of Vray for Rhino 3D. Successfully install and set up Vray for Rhino 3D. Navigate the Vray interface and explore its workflow. Gain insights into Vray materials and their effective application. Module 2: Lighting with Vray (2 hours) Master techniques for achieving compelling lighting with Vray in Rhino 3D. Familiarize yourself with various types of Vray lights and their settings. Create and control Vray sun and sky for outdoor scenes. Utilize Vray dome lighting for captivating interior renderings. Employ IES lights to achieve lifelike lighting effects. Understand the lighting workflow with Vray in Rhino 3D. Module 3: Vray Camera (2 hours) Gain proficiency in Vray camera settings and their impact on the final render. Control exposure using Vray camera settings. Explore Vray depth of field for captivating focusing effects. Create dynamic visual presentations with Vray camera animations. Harness the features and functionalities of Vray frame buffer. Module 4: Vray Materials (2 hours) Unveil the intricacies of Vray materials and their properties. Create visually stunning and realistic materials using Vray. Organize and save custom Vray material libraries for efficient workflow. Optimize productivity with Vray material overrides for quick material changes. Module 5: Vray Rendering and Post Production (2 hours) Delve into Vray rendering settings for optimal results. Master the art of rendering high-quality images and animations using Vray. Enhance Vray renders through post-production techniques in Photoshop. Fine-tune the output using Vray frame buffer. Gain control by compositing Vray render elements in Photoshop. Utilize Vray denoiser for noise reduction in renders. Chaos Group https://www.chaos.com ⺠vray ⺠rhino ⺠free-trial V-Ray for Rhino. Powerful rendering for product design and architecture. Try free for 30 days. Download trial. Overview; What's new; Download trial. Why Learn V-Ray for Rhino? V-Ray is a widely acclaimed photorealistic renderer, renowned for its precision and fast raytracing capabilities. While some may find V-Ray to be complex, our course simplifies the process, allowing you to create, adjust, and render architectural scenes with ease. V-Ray for Rhino Basics Acquire essential V-Ray knowledge, including default engine render, V-Ray camera usage, VRay editor, progressive rendering, V-Ray sun and camera settings, lighting techniques with V-Ray lights and IES lights, color mapping, and working with V-Ray materials and HDRI. Join us for this comprehensive London Design Training Course on V-Ray for Rhino and elevate your architectural rendering skills to the next level.

COURSE INTRODUCTION The purpose of this course is to introduce / refresh participants’ knowledge and skills in the essential aspects of diabetes management in their practice setting. AIMS AND OBJECTIVES Identify their current knowledge of diabetes care and how confident they feel about offering advice to a patient with diabetes and or their family. Purpose and outcomes of the main treatment options for people with diabetes . Discuss the importance of addressing the person’s needs and how regular clinic visits impact on the management of diabetes All course materials and certificate of attendance Accreditation 6 CPD points awarded completion. Accredited by One Awards (*Certificate £30) and CPD Standards (*Certificate free) Discuss how to build relationships and establish an environment that enables the person with diabetes to take an active role in their diabetes management COURSE CONTENTS OVERVIEW Aetiology and diagnosis of type 1 and type 2. Difference between type 1 and type 2 diabetes Implications for practice Management goals TYPE 1 Treatment and management options Carbohydrate awareness Challenges in self-management Hypoglycaemia and hyperglycaemia Screening and the annual review TYPE 2 First line treatment and step-wise options Food choices and relation to risk Activity and type 2 diabetes Cardiovascular disease and type 2 diabetes Screening and annual review SUPPORTING PEOPLE WITH DIABETES AND THEIR FAMILY Seeing the person not the disease Consultation skills Ongoing support needs . Food and lifestyle messages for diabetes Annual review and screening including foot care advice Blood glucose monitoring Consultation skills and relationship building Complications and treatment options WHO SHOULD ATTEND? Nurses HCAs