- Professional Development
- Medicine & Nursing
- Arts & Crafts
- Health & Wellbeing
- Personal Development
5229 Courses in Cardiff delivered Live Online
VMware vSphere: Install, Configure, Manage v8.0
By Nexus Human
Duration 5 Days 30 CPD hours This course is intended for System administrators System engineers Overview By the end of the course, you should be able to meet the following objectives: Install and configure ESXi hosts Deploy and configure vCenter Use the vSphere Client to create the vCenter inventory and assign roles to vCenter users Create virtual networks using vSphere standard switches and distributed switches Create and configure datastores using storage technologies supported by vSphere Use the vSphere Client to create virtual machines, templates, clones, and snapshots Create content libraries for managing templates and deploying virtual machines Manage virtual machine resource allocation Migrate virtual machines with vSphere vMotion and vSphere Storage vMotion Create and configure a vSphere cluster that is enabled with vSphere High Availability (HA) and vSphere Distributed Resource Scheduler Manage the life cycle of vSphere to keep vCenter, ESXi hosts, and virtual machines up to date This five-day course features intensive hands-on training that focuses on installing, configuring, and managing VMware vSphere 8, which includes VMware ESXi 8 and VMware vCenter 8. This course prepares you to administer a vSphere infrastructure for an organization of any size. This course is the foundation for most VMware technologies in the software-defined data center. Course Introduction Introductions and course logistics Course objectives vSphere and Virtualization Overview Explain basic virtualization concepts Describe how vSphere fits in the software-defined data center and the cloud infrastructure Recognize the user interfaces for accessing vSphere Explain how vSphere interacts with CPUs, memory, networks, storage, and GPUs Installing and Configuring ESXi Install an ESXi host Recognize ESXi user account best practices Configure the ESXi host settings using the DCUI and VMware Host Client Deploying and Configuring vCenter Recognize ESXi hosts communication with vCenter Deploy vCenter Server Appliance Configure vCenter settings Use the vSphere Client to add and manage license keys Create and organize vCenter inventory objects Recognize the rules for applying vCenter permissions View vCenter logs and events Configuring vSphere Networking Configure and view standard switch configurations Configure and view distributed switch configurations Recognize the difference between standard switches and distributed switches Explain how to set networking policies on standard and distributed switches Configuring vSphere Storage Recognize vSphere storage technologies Identify types of vSphere datastores Describe Fibre Channel components and addressing Describe iSCSI components and addressing Configure iSCSI storage on ESXi Create and manage VMFS datastores Configure and manage NFS datastores Deploying Virtual Machines Create and provision VMs Explain the importance of VMware Tools Identify the files that make up a VM Recognize the components of a VM Navigate the vSphere Client and examine VM settings and options Modify VMs by dynamically increasing resources Create VM templates and deploy VMs from them Clone VMs Create customization specifications for guest operating systems Create local, published, and subscribed content libraries Deploy VMs from content libraries Manage multiple versions of VM templates in content libraries Managing Virtual Machines Recognize the types of VM migrations that you can perform within a vCenter instance and across vCenter instances Migrate VMs using vSphere vMotion Describe the role of Enhanced vMotion Compatibility in migrations Migrate VMs using vSphere Storage vMotion Take a snapshot of a VM Manage, consolidate, and delete snapshots Describe CPU and memory concepts in relation to a virtualized environment Describe how VMs compete for resources Define CPU and memory shares, reservations, and limits Deploying and Configuring vSphere Clusters Create a vSphere cluster enabled for vSphere DRS and vSphere HA View information about a vSphere cluster Explain how vSphere DRS determines VM placement on hosts in the cluster Recognize use cases for vSphere DRS settings Monitor a vSphere DRS cluster Describe how vSphere HA responds to various types of failures Identify options for configuring network redundancy in a vSphere HA cluster Recognize vSphere HA design considerations Recognize the use cases for various vSphere HA settings Configure a vSphere HA cluster Recognize when to use vSphere Fault Tolerance Managing the vSphere Lifecycle Enable vSphere Lifecycle Manager in a vSphere cluster Describe features of the vCenter Update Planner Run vCenter upgrade prechecks and interoperability reports Recognize features of vSphere Lifecycle Manager Distinguish between managing hosts using baselines and managing hosts using images Describe how to update hosts using baselines Describe ESXi images Validate ESXi host compliance against a cluster image and update ESXi hosts Update ESXi hosts using vSphere Lifecycle Manager Describe vSphere Lifecycle Manager automatic recommendations Use vSphere Lifecycle Manager to upgrade VMware Tools and VM hardware

PL-100T00 Microsoft Power Platform App Maker
By Nexus Human
Duration 4 Days 24 CPD hours This course is intended for The App Maker builds solutions to simplify, automate, and transform tasks and processes for themselves and their team where they have deep expertise in the solution business domain. They have basic data modeling, user experience design, requirements analysis, and process analysis skills. The App Maker creates and enforces business processes, structures digital collection of information, improves efficiency of repeatable tasks, and automates business processes. The App Maker uses the Maker tools of Power Platform to solve business problems. They may use advanced features of Microsoft apps and third-party productivity tools. The App Maker is aware of the capabilities and limitations of available tools and understands how to apply them. The App Maker is self-directed, and solution focused. They may not have formal IT training but are comfortable using technology to solve business problems with a personal growth mindset. They understand the operational need and have a vision of the desired outcome. They approach problems with phased and iterative strategies. This course will teach you how to build apps with low-code techniques to simplify, automate, and transform business tasks and processes using Microsoft Power Platform. This course contains a 1-day Applied Workshop. This workshop will allow you to practice your App Maker skills by creating an end-to-end solution to solve a problem for a fictitious company. The solution will include a Microsoft Dataverse database, Power Apps canvas app, and Power Automate flows. 1 - Get started with Microsoft Power Platform for app makers Identify components Create apps Get started with Microsoft Dataverse Work with Copilot in Microsoft Power Platform 2 - Create tables in Dataverse Table characteristics Table relationships Dataverse logic and security Dataverse auditing Dual-write vs. virtual tables 3 - Create and manage columns within a table in Dataverse Define columns in Microsoft Dataverse Column types in Microsoft Dataverse Add a column to a table Primary name column Restrictions that apply to columns in a table Create an auto numbering column Create an alternate key 4 - Load/export data and create data views in Dataverse View data in a table Create or edit views of data in a table Dataverse data import options Load data into a table Dataverse data export options Export Add, update, or delete data in a table by using Excel Import data using Power Query 5 - Export data from Dataverse and use Microsoft Excel to edit records Export data to Excel Edit and update data in Excel 6 - Get started with Microsoft Dataverse for Teams Dataverse for Teams vs Dataverse Provision your first Dataverse environment Create your first table to store data 7 - Build your first app with Power Apps and Dataverse for Teams Create your first app with the hero template Customize your app with Power Apps Studio Publish your app Install template apps 8 - Build your first workflow with Power Automate and Dataverse for Teams Types of workflows that Power Automate can build in Dataverse Schedule a flow 9 - Create reports with Power BI and Dataverse for Teams Connect to and transform Dataverse for Teams data from Power BI Create a Power BI report Publish the report Share the data 10 - Get started building with Power BI Use Power BI Building blocks of Power BI Tour and use the Power BI service 11 - Explore what Power BI can do for you What can I do with the Power BI service as a consumer? View content in the Power BI service Collaborate and share in Power BI Find and view dashboards and reports 12 - Create and manage workspaces in Power BI Distribute a report or dashboard Monitor usage and performance Recommend a development life cycle strategy Troubleshoot data by viewing its lineage Configure data protection 13 - Manage semantic models in Power BI Use a Power BI gateway to connect to on-premises data sources Configure a semantic model scheduled refresh Configure incremental refresh settings Manage and promote semantic models Troubleshoot service connectivity Boost performance with query caching (Premium) 14 - Create dashboards in Power BI Configure data alerts Explore data by asking questions Review Quick insights Add a dashboard theme Pin a live report page to a dashboard Configure a real-time dashboard Set mobile view 15 - Implement row-level security Configure row-level security with the static method Configure row-level security with the dynamic method 16 - Create dashboards in Power BI Configure data alerts Explore data by asking questions Review Quick insights Add a dashboard theme Pin a live report page to a dashboard Configure a real-time dashboard Set mobile view 17 - Secure, publish, and share data in Power BI Share and use reports in Power BI Row-level security Publish a report to a Power BI workspace Share reports and user experience Protect data in Power BI Data refresh and alerts 18 - Embed Power BI content Embed Power BI reports Embed other Power BI content types Optimize the embedding experience 19 - How to build your first model-driven app with Dataverse Model-driven apps, powered by Microsoft Dataverse Explore sample apps 20 - Get started with model-driven apps in Power Apps Introducing model-driven apps Components of model-driven apps Design model-driven apps Incorporate business process flows 21 - Configure forms, charts, and dashboards in model-driven apps Forms overview Form elements Configure multiple forms Use specialized form components Configure views overview Configure grids Create and edit views Configure charts overview Dashboards overview Use interactive streams and tiles 22 - Manage Dynamics 365 model-driven app settings and security Configure role-based security Manage teams and business units Explore settings and customizations 23 - Use specialized components in a model-driven form Create business process flows Embed a canvas app in a model-driven form Add a timeline in a model-driven form Create a report in a model-driven form 24 - Get started with Power Apps canvas apps Start Power Apps Power Apps data sources Use Power Apps with Power Automate and Power BI Designing a Power Apps app 25 - Customize a canvas app in Power Apps Improve your app by making basic customizations Explore controls and screens in canvas apps 26 - How to build the User Interface in a canvas app in Power Apps Use themes to quickly change the appearance of your app Brand a control Icons Images Personalization Build for phones or tablets 27 - Navigation in a canvas app in Power Apps Understanding navigation The Navigate and Back functions More ways to use the Navigate function 28 - Manage apps in Power Apps Power Apps review 29 - Build a mobile-optimized app from Power Apps Learn about mobile-optimized apps Identify components to make a canvas app mobile-optimized Create a mobile-optimized app that uses responsive designs Identify performance considerations for a mobile-optimized canvas app 30 - Use and understand Controls in a canvas app in Power Apps Core properties of controls Entering and displaying data with text controls Additional controls for enhancing your app's usability Media Modern controls Work with component libraries 31 - Create formulas to change properties in a Power Apps canvas app Formulas overview Use a formula to modify the format of controls Use formulas to perform calculations Use a control to modify the property of other controls Conditional formatting Functions for validating data 32 - Use imperative development techniques for canvas apps in Power Apps Imperative versus declarative development The three types of variables in Power Apps Global variables Contextual variables Collections Additional variable concepts 33 - Manage apps in Power Apps Power Apps review 34 - Create formulas to change properties in a Power Apps canvas app Formulas overview Use a formula to modify the format of controls Use formulas to perform calculations Use a control to modify the property of other controls Conditional formatting Functions for validating data 35 - Create formulas to change behaviors in a Power Apps canvas app Formulas and functionality Understanding true and false Understanding control behaviors and actions Performing multiple actions in a formula Control the display mode through a formula Use controls and functions to create a dynamic formula 36 - Author a basic formula that uses tables and records in a Power Apps canvas app Records and tables Using the Table function Store a table Filter your table Use the lookup function to return a record Additional table functions 37 - Build a canvas app for a real estate solution with Copilot in Power Apps 38 - Get started with Power Automate Introducing Power Automate Create your first flow Troubleshoot flows 39 - Build approval flows with Power Automate Provide solutions to real-world scenarios. 40 - Build flows to manage user information 41 - Power Automate's deep integration across multiple data sources 42 - Use the Admin center to manage environments and data policies in Power Automate Administer flows Export and import flows Learn how to distribute button flows 43 - Use AI Builder in Power Automate AI Builder in Power Automate saves time Advanced usage of AI Builder in Power Automate 44 - Optimize your business process with process advisor Get familiar with process advisor Create your first recording Edit recordings and group actions Analyze recordings and interpret results Automation recommendations 45 - Optimize your business process with process advisor Get familiar with process advisor Create your first recording Edit recordings and group actions Analyze recordings and interpret results Automation recommendations 46 - Build flows for a real estate solution using Copilot in Power Automate When to use Copilot in Power Automate 47 - Use Dataverse triggers and actions in Power Automate Dataverse triggers Query data Create, update, delete, and relate actions 48 - Create tables in Dataverse Table characteristics Table relationships Dataverse logic and security Dataverse auditing Dual-write vs. virtual tables 49 - Create and manage columns within a table in Dataverse Define columns in Microsoft Dataverse Column types in Microsoft Dataverse Add a column to a table Primary name column Restrictions that apply to columns in a table Create an auto numbering column Create an alternate key 50 - Get started with Power Apps canvas apps Start Power Apps Power Apps data sources Use Power Apps with Power Automate and Power BI Designing a Power Apps app 51 - How to build the User Interface in a canvas app in Power Apps Use themes to quickly change the appearance of your app Brand a control Icons Images Personalization Build for phones or tablets 52 - Get started with Power Automate Introducing Power Automate Create your first flow Troubleshoot flows 53 - Challenge Project - Build a booking requests app with Power Apps and Power Automate Prepare
Portfolio, Programs, and Project Offices Foundation: Virtual In-House Training
By IIL Europe Ltd
Portfolio, Programs, and Project Offices Foundation: Virtual In-House Training P3O® is the AXELOS standard for the design of decision-making processes regarding changes in organizations. P3O provides a guideline for the design of portfolio, programme, and project offices in organizations. The P3O Foundation course is an interactive learning experience. The P3O Foundation-level content provides you with sufficient knowledge and understanding of the P3O guidance to interact effectively with, or act as an informed member of, an office within a P3O model. It enables you to successfully complete the associated P30 Foundation exam and achieve the qualification. In this course, you will be prepared to successfully attempt the P3O Foundation exam and learn how to implement or re-energize a P3O model in their own organization. What you will Learn Individuals certified at the P3O Foundation level will be able to: Define a high-level P3O model and its component offices List the component offices in a P3O model Differentiate between Portfolio, Programme, and Project Management List the key functions and services of a P3O List the reasons for establishing a P3O model Compare different types of P3O models List the factors that influence selection of the most appropriate P3O model for an organization Define the processes to implement or re-energize a P3O Benefits: Fast-track programme for those who want to achieve P3O Foundation qualification Practical case study and scenarios Attractive slides and course book Introduction to P3O What is the purpose of P3O? Definitions What are P3Os? Portfolio, programme, and project lifecycles Governance and the P3O Designing a P3O Model Factors that affect the design Design considerations What functions and services should the P3O offer? Roles and responsibilities Sizing and tailoring of the P3O model Introduction to P3O What is the purpose of P3O? Definitions What are P3Os? Portfolio, programme, and project lifecycles Governance and the P3O Designing a P3O Model Factors that affect the design Design considerations What functions and services should the P3O offer? Roles and responsibilities Sizing and tailoring of the P3O model Why Have a P3O? How a P3O adds value Maximizing that value Getting investment for the P3O Overcoming common barriers Timescales How to Implement or Re-Energize a P3O Implementation lifecycle for a permanent P3O Identify Define Deliver Close Implementation lifecycle for a temporary programme or project office Organizational context Definition and implementation Running Closing Recycling How to Operate a P3O Overview of tools and techniques Benefits of using standard tools and techniques Critical success factors P3O tools P3O techniques

Figma Basics
By Bunnyfoot
Course description Figma is an industry leading web-based design tool that allows you to create user interfaces for any screen type or size, collaborate on those designs in real-time and build interactive prototypes suitable for user testing. Figma is a visual design tool so there’s no coding involved. Design is achieved by adding, combining and styling shapes, text and images on a canvas or ‘Frame’. We run 2 consecutive Figma training days, the second day building on the practical activities from the first. You can attend just the first day. Attending just the second day is only recommended if you’re already very comfortable with the Figma interface. Day 1: Basic Figma design and collaboration For beginners with no prior experience with Figma who want to understand the basics, be able to create their own designs, share, collaborate and even iterate on the designs of others. You will learn: How to navigate the Figma interface. How to create your own designs by: Setting up a design file. Setting up the screen type you want to design and add grids and guides. Adding and modifying basic shapes and text to create user interface elements. How to save text and colour styles for reuse. How to create reusable components. How to use the ‘auto layout’ feature to promote tidy, consistent and usable design. How to collaborate on designs by sharing screens and commenting on designs. A brief introduction to prototyping: What’s possible. What’s not. Day 2: Component variants, design systems and prototyping This session will cover the more sophisticated aspects of Figma use such as: How to use component variants to create: Interaction styles such as hover and mouse down states ‘Flavours’ of a widget such as primary and secondary button styles. Toggleable elements within a widget such as buttons or bullets within a product card. How to turn a collection of components into a basic design system. Prototyping fundamentals: How to make journeys clickable. How to introduce animations. Tips and tricks for effective user testing. The limitations of Figma prototyping Is it for you? With no experience of Figma necessary, this course is suitable if: If you’re involved with creating or curating digital experiences. if you want to turn your design ideas into something tangible. If you work with Figma designers and want to understand the ‘art of the possible’. If you want to collaborate with your team on Figma projects. Learning objectives After completing day 1 you will be able to: Understand the Figma user interface. Create mobile and desktop interface designs. Effectively collaborate remotely. Share designs and gather feedback. Use auto layout to promote consistent and usable designs. Understand Figma’s role in user experience design, and its limitations. After day 2 you will be able to: Understand how design systems are set up and used. Create component variants for use in your own design system. Use that design system to efficiently create a user journey. Create a prototype suitable for user testing.

School Improvement Planning
By Inclusive Solutions
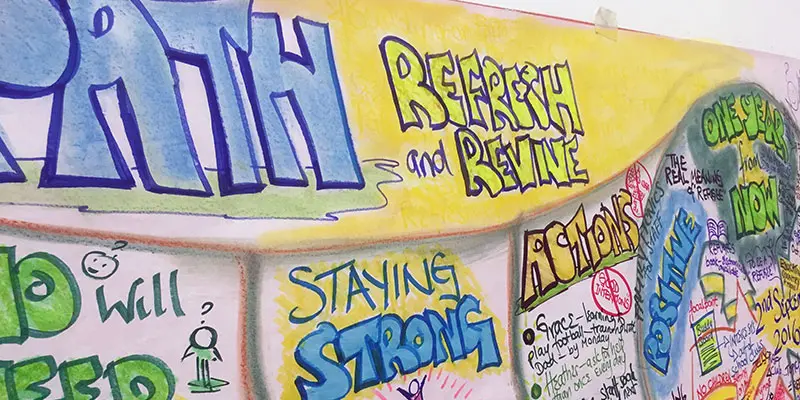
Give your team the opportunity to pause and reflect on what matters most to them about the work they do. The act of listening to each other creates relationship and strengthens trust and inclusion within the team – in creating a shared vision, groups of people build a sense of commitment together. Using the PATH or MAP processes of group facilitation and the creating of a large wall sized graphic we will provide a School Improvement Plan to be proud of! Course Category Visioning and Problem Solving Person Centred Planning Strategic Work Team Building and Leadership Description There is an old Japanese proverb, “Vision without action is a daydream. Action without vision is a nightmare” “There is no power for change greater than a community discovering what it cares about” MARGARET WHEATLEY – ‘TURNING TO ONE ANOTHER’ (2002) Give your team the opportunity to pause and reflect on what matters most to them about the work they do. The act of listening to each other creates relationship and strengthens trust and inclusion within the team – in creating a shared vision, groups of people build a sense of commitment together. They develop images of ‘the future we want to create together’, along with the values that will be important in getting there and the goals they want to see achieved along the way. Unfortunately, many people still think ’vision’ is the top leader’s job. In schools, the ‘vision task’ usually falls to the Headteacher and/or the governors or it comes in a glossy document from the local authority or the DfES. But visions based on authority are not sustainable. Drawing on the planning tools MAPS and PATH (Pearpoint, Forest and O’Brien 1997) and other facilitation sources we use both process and graphic facilitation to enable the group to build their picture of what they would love to see happening within their organisation/community in the future and we encourage this to be a positive naming, not just a list of the things they want to avoid. ??Let us join you to explore your vision and the ‘roadblocks’ to your vision. Testimonials “Thank you so much for the work you did with us yesterday – I have since been in 2 schools today and have spoken to an number of other colleagues who were present – all were totally overwhelmed by the session – they loved it.” “I was totally blown away, so nice to reflect and realise what a long way we have come” “That was so powerful and motivational” “Our Primary is now an OFSTED rated ‘Outstanding School’ – we were in Special Measures – the Visioning and Planning using the PATH process for 3 years has seriously contributed to this”. Learning Objectives To create a far reaching and shared vision of the future for the school team/group you are working with and ensure that each person present contributes to this To create a visual representation (a graphic) of the vision and use this to plan future actions and to inform school improvement and development plans To facilitate the group in thinking through what some of the barriers to achieving their vision are and to begin work on how these can be removed To build a sense of commitment, common purpose and trust within the team/group Who Is It For ? Headteachers School managers EIP Managers Whole staff – including everyone Course Content The facilitation of a shared vision can be delivered as a full or a half day but, unlike our other training days this day depends on your and your team’s needs and the time you have available The course will cover: Creating the vision The Story So Far Headline Themes Naming the Nightmare A Year from Now Naming Roadblocks and Barriers Building strength Who will we need to take with us on the journey towards the vision Who are we? – Gifts, Strengths and Talents Charting Specific Actions
Scrum Master Exam Prep: In-House Training
By IIL Europe Ltd
Scrum Master Exam Prep This workshop prepares you for the Scrum.org Professional Scrum Master (PSM)™ I certification. A voucher for the exam and the access information you will need to take the exam will be provided to you via email after you have completed the course. NOTE: If you have participated in any of IIL's other Scrum workshops, you can bypass this program and focus on reading/studying the Scrum Guide and taking practice exams from Scrum.org. A Scrum Master helps project teams properly use the Scrum framework, increasing the likelihood of the project's overall success. Scrum Masters understand Scrum values, practices, and applications and provide a level of knowledge and expertise above and beyond that of typical project managers. Scrum Masters act as 'servant leaders', helping the rest of the Scrum Team work together and learn the Scrum framework. Scrum Masters also protect the team from both internal and external distractions. The Professional Scrum Master™ I (PSM I) certificate is a Scrum.org credential that enables successful candidates to demonstrate a fundamental level of Scrum mastery. PSM I credential holders will grasp Scrum as described in The Scrum Guide™1 and recognize how those concepts can be applied. They will also share a consistent terminology and approach to Scrum with other certified professionals. Scrum.org does not require that you take their own sponsored or any preparatory training. However, training can facilitate your preparation for this credential. And this course is based on IIL's Scrum Master Workshop, which is aligned with The Scrum Guide™ and was built based on PSM I credentialed expertise. It will provide you with the information you need to pass the exam and IIL will make the arrangements for your online exam. You will be provided with an exam code and instructions, so that you can take the exam at your convenience, any time you are ready after the course. Passwords have no expiration date, but they are valid for one attempt only. What you will Learn You'll learn how to: Successfully prepare for the Scrum.org PSM I exam Comprehend the Agile Manifesto and mindset Explain the fundamental principles of Scrum, including events, artifacts, and roles Guide the Scrum team in their responsibilities Define Ready and Done Write requirements in the form of user stories Estimate using planning poker and prioritize using MoSCoW Facilitate the team through the 5 Sprint events Fulfill the role of Scrum Master in a Scrum project Create Information Radiators to enable transparency Define the structure of the retrospective Getting Started Introductions Workshop orientation Exam prep preview Foundation Concepts Agile History, Values, and Mindset Introduction to Scrum Scrum events Scrum artifacts Scrum Roles and Responsibilities Product Owner responsibilities Scrum Master responsibilities The Team responsibilities Cross-functional teams Building effective teams The Product Backlog and User Stories The Product Backlog User Stories Definition of Done Backlog grooming Estimating User Stories Story points, planning poker Prioritizing User Stories The Sprint Team capacity and velocity The Sprint Planning Meeting The Sprint Backlog The Sprint Learning to self-manage, self-organize, self-improve Sprint Review and Retrospective Project Progress and Completion The Daily Scrum The Task Board and The Burndown Chart Information Radiators Closing a Scrum Project Summary and Next Steps Review of course goals, objectives, and content Exam prep next steps
Overview Having a detailed understanding of financial statements is critical to assessing financial risk, and the rate of change in financial statement standards makes this a continuing challenge for users. This course brings together the key elements of financial statement analysis to help participants develop their skills in this area and enable them to ask the right questions to really get under the skin and see the real risks facing businesses and investors in these challenging times. The reference reporting framework used will be IFS.

Overview The course begins by introducing credit risk, its components and its drivers. The course then dives into business risk assessment and group structure risks. After examining financial statements, including accounting concepts and principles, the course concludes with a review of financial analysis and its four main risk areas.

Overview The training objective is to build on existing knowledge of Strategic Public Relations, Apply the tactical skills required for working in Strategic Public Relations, Capitalise on developments in technology, Manage the key aspects of protocol, Learn tips, tools and techniques to arrange business travel, Meet the expectation of those involved in protocol and travel arrangements.