- Professional Development
- Medicine & Nursing
- Arts & Crafts
- Health & Wellbeing
- Personal Development
641 Courses
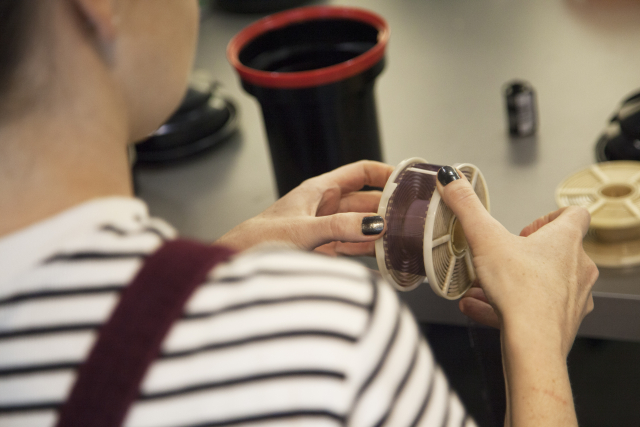
“Any good photography is a successful synthesis of technique and art.” – Andreas Feininger Discover the magic of Black & White Photography and learn some of the secrets the masters use to make stunning photographs. Explore the fundamentals of light and time and no longer be a slave to the Auto setting. Master the manual functions of your 35mm SLR film camera and unlock its true potential. Get to grips with the complete darkroom workflow from processing film to printing your own black & white photographs. Perfect for those with no experience or those looking for a full refresher. If you don’t have a 35mm SLR camera we have a limited number available for use during the course – please make your selection from the dropdown at time of booking. Week 1 Capture, technical notes, discussions, art context Understand the fundamentals of light and time in balancing an accurate exposure; No longer be a slave to the Auto setting! Learn how to utilise the Manual functions of your 35mm SLR camera including aperture, shutter speed, film speed and metering. Understand depth of field, composition and creative photo-making techniques; Appreciate photography within an art context – Begin to look at the work of other photographers Assignment: You will be given one roll of B&W film to be shot for the second week Week 2 Film processing Learn how to process B&W film by hand in Stills’ darkrooms. We will discuss different film types and chemistry, as well as best practice procedures for film handling. Appreciating photography within an art context-Sally Mann. Week 3 Contact Printing Gain an appreciation of general darkroom procedures;understand how to set up your enlarger and make a contact print using the traditional analogue method; learn how to make 8×10″ work prints using the single filter printing method. All paper and chemistry will be provided. Week 4 Darkroom printing This last session will allow participants to keep on printing with some one to one attention. We will also explore some basic dodging and burning and other printing techniques to get the most from your negatives and make a series of final prints. Courses are subject to minimum enrolment. Please register early, within five days of the start date, to reduce the likelihood of course cancellation. Please read our cancellation policy before booking. Students, anyone over the age of 65, and those in receipt of any form of benefits can claim the concessionary price, offering a 10% discount on the full course price. Valid proof of eligibility must be produced on the first day of the course. Please use the code CONCESSION when prompted at checkout. Stills uses ILFORD PHOTO chemicals on this course that can potentially pose a risk to pregnant and breast feeding women and asthmatics. We take every care to ensure good working practices and adequate ventilation in our darkrooms. If you feel you may be adversely affected, please visit the Health and Safety section of Ilford’s website for further information. General Guidance Notes for Pregnant and Breast Feeding Women and Asthmatics: From a risk assessment standpoint, provided all necessary control measures (such as good working practices, adequate ventilation, and the use of appropriate PPE) are in place then pregnant and breastfeeding women should be able to continue to work safely with photochemical products.Inhalation is the main route by which fumes and gases enter the body, making good ventilation a high priority. Exposure to irritant chemicals that would not affect most people may provoke an asthma attack in a person who already has asthma. For example, low levels of the gas sulphur dioxide can be produced by some ILFORD PHOTO processes. Most individuals would be unaffected but asthmatics may suffer adverse affects. ILFORD PHOTO products include no known human carcinogens, and no substances to which phrase R46 (May cause heritable genetic damage) or R64 (May cause harm to breastfed babies) applies. Most ILFORD PHOTO developers use hydroquinone, and their classification therefore includes R40 (Limited evidence of a carcinogenic effect) and R68 (Possible risk of irreversible effects). Some ILFORD PHOTO chemicals use boric acid or borates. These substances are classified as toxic for reproduction. As a result, the classification of some of the powder developers includes R60 (May impair fertility) and R61 (May cause harm to the unborn child).

CRYSTAL GRID FREQUENCY ACTIVATION
By Mystic Sisters
Barbra May (Mystic Sisters) elevates your energetic frequency by anchoring you into a crystal grid and by crystalline vibrations.

Holistic Massage Practitioner Course
By lindsay wild
You will gain an accredited certificate for Holistic Massage Practitioner with BH Holistics an approved executive training provider with International Practitioners of Holistic Medicine.

Advanced Course
By The Dog Guardian
On this course we go into far greater detail on understanding the dog’s needs, behaviour, state of mind, language, and improving your leadership skills.

3ds Max Character Animation Training Course
By ATL Autocad Training London
Who is this course for? 3ds Max Character Animation Training Course. Master character animation in our 3ds Max course. All levels welcome. Learn from certified tutors in flexible in-person or online sessions. Create unique 3D characters from scratch, gaining personalized techniques to fuel your creativity. Click here for more info: Website Duration: 20 hours Method: 1-on-1 personalized attention Schedule: Flexible 1-on-1 sessions. Schedule your sessions at your convenience, choosing any hour between 9 am and 7 pm from Mon to Sat. Course Title: 3ds Max Character Animation Workshop Duration: 20 Hours Course Overview: This workshop is meticulously crafted to instill the foundational principles of character animation utilizing 3ds Max. Whether you're a novice or possess some background in 3D modeling and animation, this course caters to your learning needs. You'll delve into the art of character rigging, grasp animation essentials, and employ advanced methods to breathe life into your characters. Course Outline: Module 1: Introduction to Character Animation Grasping animation principles Exploring 3ds Max animation tools Mastering character rig creation Understanding the intricacies of the timeline Module 2: Basic Animation Principles Embracing keyframe dynamics Crafting fundamental animation cycles Applying the 12 principles of animation Navigating the graph editor Utilizing ease-in and ease-out techniques Module 3: Advanced Animation Techniques Harnessing the power of the reaction manager Crafting non-linear animations Implementing inverse kinematics for dynamic movements Designing custom controllers Exploring expressions and scripts Module 4: Character Creation Sculpting a character model from scratch Grasping the nuances of topology Perfecting UV maps and texturing techniques Preparing characters for seamless rigging Module 5: Facial Animation Mastering facial animation principles Creating expressive blend shapes Utilizing morph targets for nuanced expressions Achieving flawless lip syncing Module 6: Body Animation Crafting seamless walk cycles Animating characters in motion Creating authentic and believable poses Employing character physics for lifelike movements Module 7: Advanced Character Animation Implementing motion capture data for realistic animations Leveraging CAT and Biped for intricate movements Understanding motion blur nuances Adding special effects for enhanced realism Fine-tuning rendering and outputting animations Module 8: Character Animation Projects Synthesizing knowledge into practical applications Creating a fundamental character animation Crafting a nuanced walk cycle Executing complex character animations Course Requirements: Access to a computer with 3ds Max installed Basic proficiency in computer operations Enthusiasm for delving into the world of character animation Course Goals: Upon completion, you will possess a profound understanding of character animation in 3ds Max. You'll be equipped with the expertise to create intricate, lifelike character animations using advanced techniques. Moreover, you'll gain the skills necessary to continue honing your craft, ensuring a solid foundation for your future endeavors in the realm of character animation. Upon successful completion of the 3ds Max Character Animation Workshop, participants will: Master Fundamental Principles: Understand the core principles of character animation, including keyframe dynamics, timing, and the 12 principles of animation, laying a strong foundation for advanced techniques. Proficient Software Usage: Navigate 3ds Max confidently, utilizing animation tools, character rigging techniques, and specialized editors for precise control over character movements. Advanced Animation Techniques: Apply advanced techniques such as non-linear animations, inverse kinematics, and custom controller design to create dynamic and realistic character movements. Facial Animation Mastery: Demonstrate expertise in facial animation by creating expressive blend shapes, morph targets, and achieving seamless lip syncing for realistic character emotions. Body Language Proficiency: Create fluid and natural body movements, including walk cycles, dynamic poses, and character motions, capturing the essence of lifelike animations. Special Effects Integration: Integrate special effects seamlessly into character animations, enhancing visual appeal and realism in the final output. Project Implementation: Apply acquired knowledge and skills in practical projects, including basic character animations, walk cycles, and complex character animations, demonstrating proficiency in real-world scenarios. Problem-Solving Skills: Develop problem-solving abilities related to character animation challenges, employing creative solutions to achieve desired results. Collaborative Skills: Engage in collaborative projects, demonstrating effective communication and teamwork while integrating animations into broader creative contexts. Portfolio Enhancement: Build a robust portfolio showcasing diverse character animations, reflecting both technical prowess and creative expression, essential for career advancement in the animation industry. Continued Learning: Acquire the skills and confidence necessary to pursue further learning and self-improvement in the field of character animation, enabling a continuous growth trajectory in the industry. Course Title: 3ds Max Character Animation Workshop Duration: 20 Hours Key Details: Course Focus: Comprehensive training in character animation using 3ds Max, covering fundamental principles, advanced techniques, facial animation, body language, special effects integration, and project-based learning. Audience: Ideal for beginners and individuals with some background in 3D modeling and animation, aiming to enhance their skills in character animation for industries such as animation studios, gaming, and film production. Instruction Method: Interactive, instructor-led sessions combining theoretical knowledge with hands-on practical exercises, fostering a dynamic learning environment. Flexible Learning Options: Participants can choose between in-person and live online sessions, accommodating diverse schedules and geographical locations. Certified Instructors: Experienced tutors and industry professionals with certification in 3ds Max and character animation, ensuring high-quality instruction and personalized guidance. Project-Based Learning: Engage in real-world projects, applying learned skills to create character animations, walk cycles, and intricate character movements, fostering practical expertise. Software Proficiency: Gain proficiency in 3ds Max, including animation tools, character rigging, and specialized editors, enabling participants to confidently navigate the software. Collaborative Learning: Opportunities for teamwork and collaborative projects, encouraging effective communication and networking within the class. Career Development: Build a diverse and impressive portfolio, receive guidance on industry best practices, and develop problem-solving skills crucial for a successful career in character animation. Post-Course Support: Access to resources, tutorials, and community forums, allowing participants to continue learning and stay updated with industry trends even after the course completion. Certification: Participants receive a certificate of completion, recognizing their proficiency in 3ds Max character animation, enhancing their professional credibility in the job market. By enrolling in this course, you'll enjoy the following advantages: Comprehensive Learning: Master the art of character animation in 3ds Max, covering fundamental concepts and advanced techniques. Certified Tutors and Industry Experts: Learn from experienced professionals with extensive knowledge of character animation, providing valuable insights. Personalized Instruction: Receive one-to-one training tailored to your specific learning needs, ensuring individual attention and effective progress. Flexible Learning Options: Choose between in-person or live online training, offering convenience and accessibility to suit your schedule. Recorded Lessons: Access recorded sessions to review content and reinforce your learning at your own pace and convenience. Lifetime Email Support: Benefit from ongoing assistance and guidance through email, even after completing the course. Free Career Advice: Tap into our industry expertise and receive valuable career guidance to excel in the field of character animation.

Vray for Sketchup Training
By London Design Training Courses
Why choose Vray for Sketchup Training Course? Course info Our in-person or live online sessions led by certified tutors. Learn advanced rendering techniques, practical hands-on experience, recorded lessons, lifetime email support, and an industry-recognized certification. Enroll now to elevate your Sketchup renderings. Duration: 6 hrs Method: 1-on-1, Personalized attention Schedule: Tailor your own schedule by pre-booking a convenient hour of your choice, available from Monday to Saturday between 9 am and 7 pm Experience V-Ray training, where you'll master the art of creating stunningly realistic 3D architectural and interior design scenes from your SketchUp models. V-Ray for SketchUp is a user-friendly rendering solution, offering faster rendering, enhanced lighting tools, and the ability to visualize intricate scenes effortlessly. Our SketchUp - Rendering with V-Ray course empowers you to seamlessly integrate SketchUp with V-Ray, allowing you to craft scenes with captivating features, including: Various lighting techniques (daylight, sunlight, and skylight). Reflective surfaces for added depth. Dynamic moving cameras for captivating visualizations. This hands-on course is highly practical, ensuring you gain real-world skills and expertise. You have the flexibility to arrange this course on-request, either as one-to-one training or as a 'closed course' for your group. The training can be tailored to accommodate your existing knowledge and specific project requirements. Choose from in-class sessions available at six centers or participate in live online classes. V-Ray works seamlessly on both Windows and Mac platforms, and our centers provide computers for delegates to use, ensuring a familiar environment for all. Upon successful completion, you'll receive an e-certificate to validate your V-Ray training. Following the training, you'll enjoy lifetime email support from your trainer to address any post-course queries or concerns. Prerequisites for this course include familiarity with the fundamentals of SketchUp, such as attending our Introduction to SketchUp course or possessing equivalent knowledge. Our training can accommodate any recent version of SketchUp Pro and V-Ray, ensuring compatibility with your preferred Windows or Mac platform. Experience the transformative power of V-Ray and elevate your SketchUp projects to new heights. Experience V-Ray training, where you'll master the art of creating stunningly realistic 3D architectural and interior design scenes from your SketchUp models. V-Ray for SketchUp is a user-friendly rendering solution, offering faster rendering, enhanced lighting tools, and the ability to visualize intricate scenes effortlessly. Module 1: Introduction to Vray for SketchUp Gain insights into Vray's benefits for SketchUp Install and set up Vray for SketchUp Familiarize with the Vray interface and workflow Explore Vray materials and their properties Module 2: Lighting and Environment Master effective lighting techniques in Vray Understand different Vray light types and settings Create realistic outdoor lighting with Vray sun and sky Utilize Vray dome lighting for interior scenes Introduce IES lights and their usage in Vray Module 3: Camera and Composition Learn Vray camera settings and their impact on the final image Control exposure and adjust camera settings in Vray Create depth of field effects with Vray camera Animate the Vray camera for dynamic shots Explore the Vray frame buffer and its functionalities Module 4: Vray Materials and Textures Gain an in-depth understanding of Vray materials and their properties Create realistic materials using Vray's material editor Save and organize custom Vray material libraries Apply Vray material overrides for quick changes Module 5: Rendering and Post-Production Explore Vray rendering settings and optimization techniques Render high-quality images and animations with Vray Enhance Vray renders using post-production techniques in Photoshop Fine-tune the final output with the Vray frame buffer Compose Vray render elements in Photoshop for added control For those interested in trying Vray for SketchUp, a free trial can be accessed through the following link: https://www.chaosgroup.com/vray/sketchup/free-trial. Additionally, provided material and texture resources (https://www.vray-materials.de/ and https://textures.com/) can enhance the quality of renders by providing access to a variety of materials and textures for use in Vray.

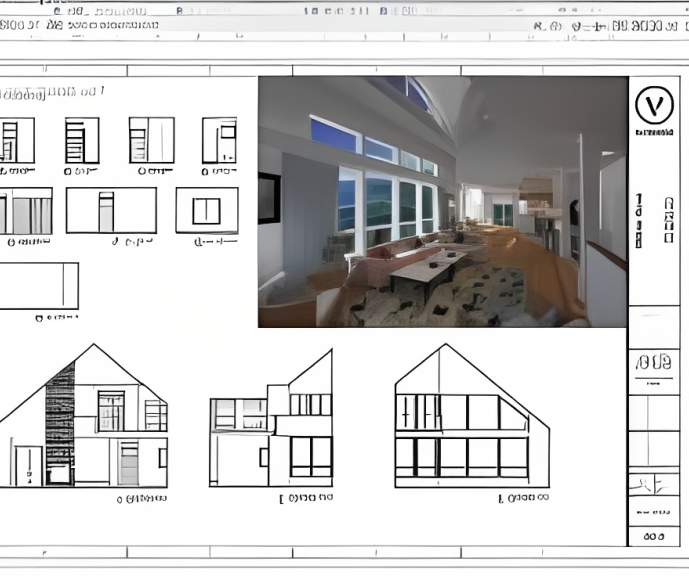
Vectorworks Basics to Essentials Training
By London Design Training Courses
Why Learn Vectorworks Basics to Essentials Training Course? Our Vectorworks training is meticulously crafted to educate and inspire designers of all levels. Whether you're a beginner or an experienced designer, our courses will equip you with new skills, refine your workflows, and teach Plans, sections and elevations. Course Link Duration: 10 hrs. Method: 1-on-1, Personalized attention. Schedule: Tailor your own schedule by pre-booking hours of your choice, available from Mon to Sat between 9 am and 7 pm. Vectorworks Basics to Essentials Training Course Discover and Enhance Your Design Skills Our Vectorworks training is meticulously crafted to educate and inspire designers of all levels. Whether you're a beginner or an experienced designer, our courses will equip you with new skills, refine your workflows, and unlock the full potential of your Vectorworks software. Online Training Options Customized Online Sessions: Tailored training sessions for your specific needs and expertise level. Virtual Classroom: Join interactive virtual classes from the comfort of your office. Getting Started Guides: Comprehensive guides to help you navigate the fundamentals of Vectorworks. In-Person Training Opportunities Customized On-Site Sessions: Hands-on training delivered directly to your office or regional event. One to One: Engage in interactive learning at our training locations. Get Vectorworks https://www.vectorworks.net ⺠downloads ⺠ServicePack Vectorworks, Inc. 2D 3D CAD BIM software for Mac or Windows allows designers to transform the world. Project sharing makes it easy. Download or try today. Module 1: Grasping CAD and Vectorworks Understanding the Role of CAD in Design Getting Acquainted with Vectorworks Software Module 2: Configuring Your Workspace Customizing Your Workspace Essential Options and Preferences Module 3: Mastering Foundational Drawing Skills Techniques for Drawing Object Selection Methods Module 4: Advanced Object Manipulation Merging Shapes Reflecting Objects Rotating Objects Grouping Elements Module 5: Precision Drawing and Scaling Techniques Working with Scale Setting Preferences for Accuracy Creating and Saving Templates Module 6: Achieving Accurate Object Placement Ensuring Drawing Precision Precise Object Movement Module 7: Advanced Editing Methods Utilizing Fillet Tool Applying Offset Function Module 8: Understanding Object Attributes and Groups Basic Attribute Management Editing Object Groups Module 9: Object Duplication Techniques Linear Duplicates Rectangular Duplicates Circular Duplicates Module 10: Crafting Room Plans Designing Walls Incorporating Windows and Doors Module 11: Development of Room Plans Methods for Room Plan Drawing Module 12: Exploring Additional Attributes Hatch Patterns Gradients Image Fills Module 13: Creating Elevation Drawings Elevation Drawing Techniques Effective Approaches Module 14: Importing Images for Graphic Use Graphic Illustration Integrating Images Module 15: Symbols and Resource Handling Symbol Creation Introduction to Resource Browser Module 16: Organizing Drawings Using Design Layers Optimizing Design Layer Utilization Module 17: Labeling Drawings and Title Blocks Drawing Labels Title Block Text Placement Module 18: Plotting and Printing Methods User Interface Navigation and Terminology Printing Approaches Module 19: Generating Drawing Sheets A1, A2, and A3 Sheet Formats Module 20: Utilizing Viewports Effectively Managing Multiple Views Module 21: Professional Model Presentation Techniques Paper Space Presentation Conversion to PDF Formats Module 22: File and Project Management Module 23: Object Display and Terminology Module 24: Objects and Data Management Module 25: Precise Object Placement Object Snapping Quick Selection Module 26: Dividing and Measuring Objects Module 27: Dimensioning and Annotations Module 28: Working with Text Elements Module 29: Customizing Tool Palettes Module 30: Organizing Tool Palettes Module 31: Efficient Tool Palette Usage Module 32: Standard Views and Drawing Techniques Module 33: Drawing Curved Shapes Arcs, Donuts, and Ellipses Drawing Module 34: Real-World Units and Measurements Module 35: Object Manipulation Adjusting Object Angles Module 36: File Handling and Management Saving, Exiting, and Opening Projects Module 37: Creating Mirrored Images Module 38: Introduction to 3D Modeling Creating Extrusions Basic 3D Concepts Understanding For a free 30-day trial of Vectorworks, request an evaluation serial number at the provided link. https://www.vectorworks.net/trial Learning Outcomes of the Vectorworks Basics to Essentials Training Course: Proficiency in Vectorworks software, mastering its basic and essential features. Enhanced design skills and efficient workflows for architectural, landscape, and entertainment projects. Customized training based on individual needs and expertise levels. Flexibility with online and on-site options for convenient learning. Access to Vectorworks University with a wealth of resources for continuous learning. Interactive virtual classrooms and immersive hands-on training for practical experience.
British Sign Language Level 1 Examination
By ArtwithTricia
I am currently offering the Level 1 exam as add-on to my one to one lessons. This is only for the exam. Please see my 'BSL lessons' for information about training either online or in person. This exam qualification is divided into three units, each of which can be achieved separately. Learners should sit the BSL101 exam first, then sit the exams BSL102 and BSL103. Exams 102 and 103 can be taken in any order.

SUMMER TERM: Tuesday Evening Silver Jewellery Class 23rd July – 27th August (6 weeks) 7-9pm with Krista Thomson
(21)By Workshop 925
6 week summer term, please see full details below… Time: Tuesday Evening 7-9pm Dates: 23rd July – 27th August (6 weeks) Length: 2 hours each week, each term runs for 6 weeks Tutor: Krista Thomson Where: Workshop 925 Unit F9 The Mayford Centre, Mayford Green Woking, Surrey GU22 0PP What does the term time course involve? Our term time classes allow students of all abilities the opportunity to design and create their own jewellery while learning new skills along the way. During the first session your tutor will settle you all in and get to grips with what each student is aiming to complete or learn during the term. Your tutor will discuss your different aims and goals, whether that’s really focusing upon learning and practicing a certain skill, or if it is to finish a specific project. Any new starters will be given a tour of the workshop and you will be introduced to some basic techniques during the first session, so you feel comfortable within the workshop. You can then discuss your ideas for the term and your tutor will help you with how and where to order materials from for your project, we have a substantial list of good suppliers and discount codes to get you started. Soon enough you will have a good understanding of the essential jewellery making skills which you can then go on to develop further, there are many areas of jewellery making to explore. Throughout your time with us, your tutor and peers will help you develop the skills and knowledge required to bring your designs to life. Each student will be working on their own projects, everybody has different directions and design ideas and techniques they want to work on. However during our terms we run demonstrations which are relevant to student projects to help them complete aspects of their project- other students are welcome to watch these too, we also run demonstrations requested by students, this might be a repeat of something a student would like a refresher on, or maybe a technique they would like to learn for their next project and we will also provide demonstrations to strive to introduce you to new skills. We also like to keep you up to date with industry news, show you designer inspiration to help you learn methods to process new ideas and gain an understanding of design processes behind jewellery making. We are very much here to support your development. The more terms you complete with us, the more time you have to develop a wide range of skills and a good understanding of the industry as a whole. Jewellery making skills take time to practice and learn. Here is a Pinterest board to inspire new starters. Summer Terms: Summer terms differ from our regular terms. Regular term time students are not given first refusal of spaces to allow a break in the year, and our schedule changes as summer holidays and children being off school affect tutor availability. Summer term allows others the opportunity to secure a place. Should a space be available on the regular term time classes they will be offered to those on our waiting list, please email us at hello@workshop925.com if you would like to be on our waiting list for September – The regular term timers enrolled in July will have first refusal of their space for September any spaces will then be offered to the waiting list. Experience required: This class is suitable for those with any level of experience. Some students on our termly courses, have been with us for many years, others are beginners. We run a very welcoming and supportive environment, so whatever level your skills are at, you will always feel encouraged and supported by all to develop your ability further. Class size: We have 9 jeweller’s wooden workbenches in our workshop, however our term time classes always run with 6 students to allow each student plenty of opportunity to gain one to one tutor attention and it eliminates any queues for equipment in our very well-equipped workshop. Occasionally there may be a 7th student who is catching up a missed class – one catch up session is permitted per term per student. What is included? All tools and consumables are supplied Light refreshments are provided The cost of this course does not include materials. What to bring: For safety reasons, during each class, you are required to wear appropriate footwear, we request that no open toed shoes are worn within Workshop 925. Long hair should also be tied back when working with the equipment. You may also wish to bring a notebook. We have handouts for many demonstrations, but there are always many tips and tricks given verbally by the tutor, which some might like to keep note of. Please bring any, snacks and drinks to each session if you require refreshments.