- Professional Development
- Medicine & Nursing
- Arts & Crafts
- Health & Wellbeing
- Personal Development
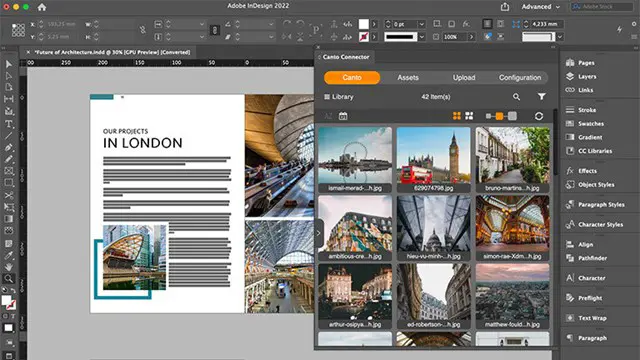
Lumion 3d Realtime Rendering Training
By London Design Training Courses
Why Choose Lumion 3d Realtime Rendering Training Course? Course Link Our Lumion Course is best for materials, lighting, and animation skills. Learn high-quality rendering using Lumion's asset library. In-person or live online sessions with lifetime access to recordings and email support. Unleash Lumion's potential for immersive architectural visualizations. Duration: 10 hrs Method: 1-on-1, Personalized attention Schedule: Tailor your own hours of your choice, available from Mon to Sat between 9 am and 7 pm What is Lumion? Lumion is specialized 3D rendering software designed for architects and designers. With Lumion, you can quickly bring your 3D design models to life, add materials, furnish interiors and exteriors, and showcase the impact of lighting and shadows without the need for specialized training. Objectives of the Course The course aims to teach you how to start Lumion projects, add environments, cameras, illuminations, populate scenes with various elements, create terrains, and produce animations. Lumion 3D Course Outline Module 1: Introduction to Lumion 3D Discovering Lumion 3D's capabilities and interface navigation. Learning shortcut keys for efficient workflow. Customizing settings for optimal performance. Module 2: 3D Models and Materials Importing 3D models in various formats. Applying and tweaking materials. Creating procedural materials and glass effects. Troubleshooting common issues. Module 3: Creating a Project in Lumion Building scenes and sculpting terrain. Enhancing realism with alpha and height maps. Module 4: 3D World Managing multiple 3D objects and their properties. Implementing grass and scattering elements. Module 5: Lighting in Lumion 3D Utilizing weather settings for dynamic scenes. Understanding Lumion lights and interior/exterior illumination. Creating 3D reflections and spotlights. Module 6: Realistic Visualizations Incorporating special effects like fire, smoke, and fog. Achieving realism with camera effects and shadows. Rendering still images and animations. Module 7: NPR Visualizations Creating non-photorealistic visualizations with artistic effects. Implementing unique styles for enhanced visuals. Module 8: Artistic Effects in Lumion 3D Exploring conceptual visualizations with painting and sketch effects. Creating cartoon effects and understanding perspectives. Module 9: Animation in Lumion 3D Timing and working with cameras for dynamic shots. Composing animation clips and adding effects. Utilizing layers and control objects for precise control. Module 10: Advanced Features Import and output formats in Lumion. Expanding assets with the 3D model library. Adding animated characters and sound effects. Utilizing the advanced material library. Controlling environment and weather for dynamic scenes. Scene management and movie editing within Lumion 3D. Lumion for Students | Unleash Your Creativity https://lumion.com› product › students Unlock the full potential of your designs with Lumion for students. Request your free 1-year Student license now and bring your visions to life!
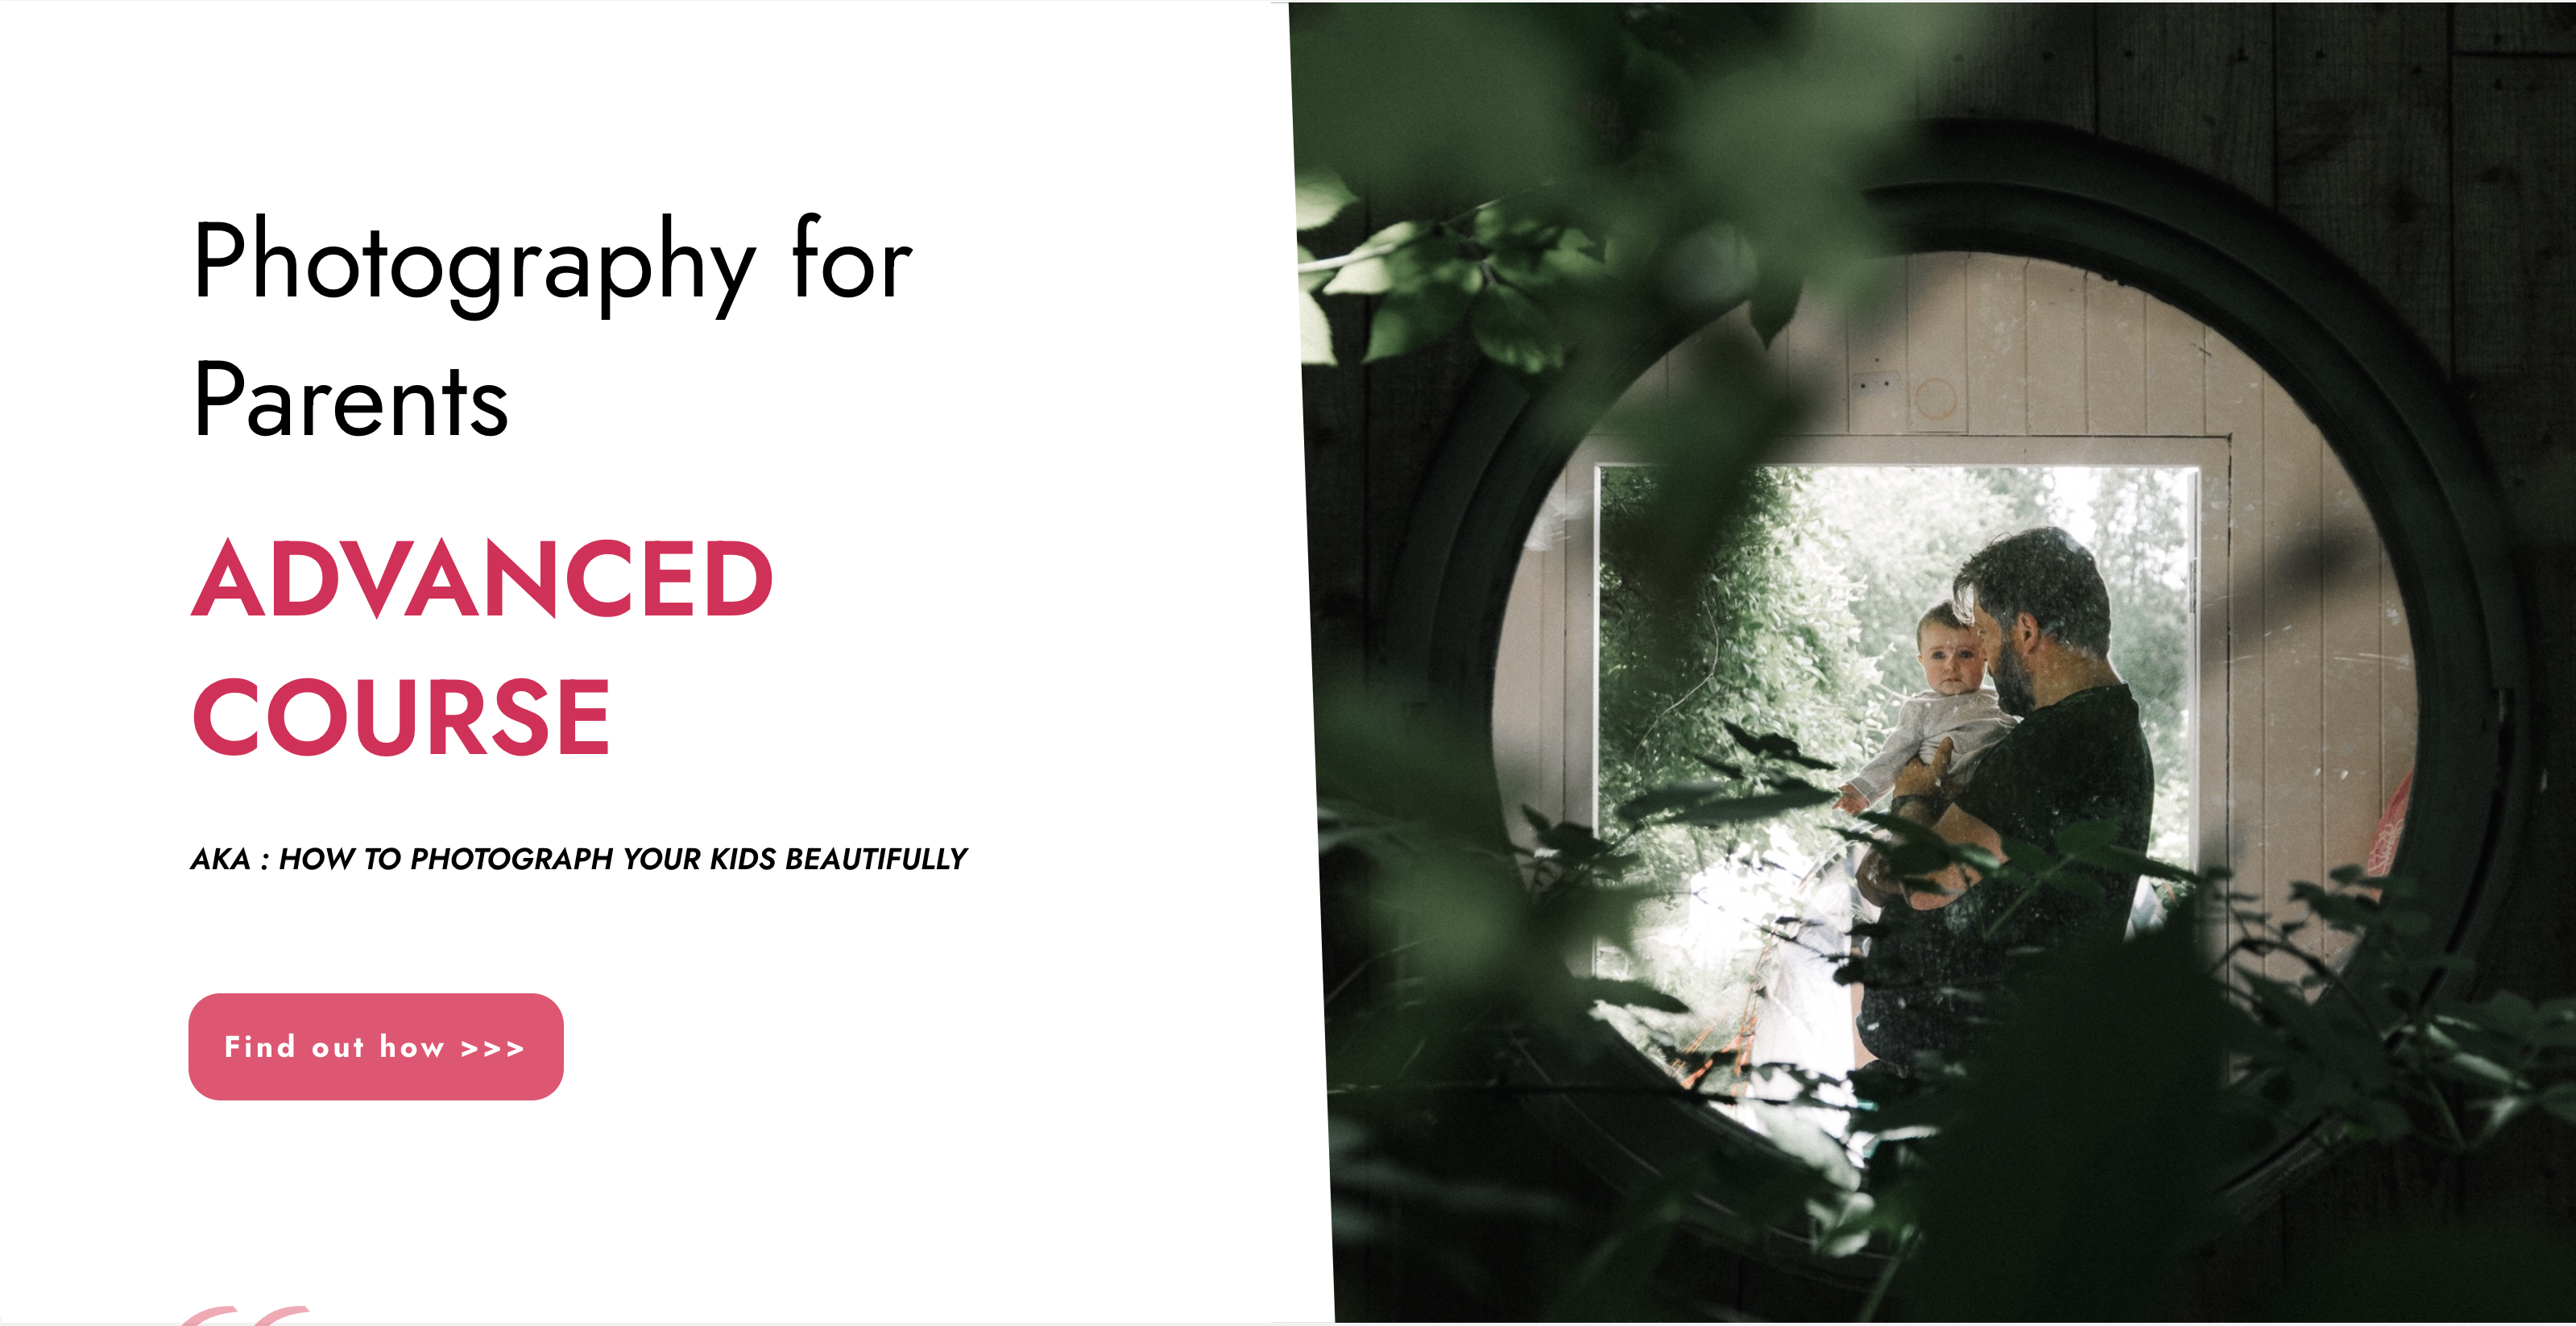
“Photography is my way of bearing witness to the joy I find in seeing the extraordinary in ordinary.” -Harold Feinstein Photography For Parents - Advanced Course Next course starts on 15th April 2024 6 week Photography course designed to help further advance your photography skill and move beyond simply capturing what's in front of you. Choose this course if you are already friends with your camera but want to learn how to shoot creatively in full manual, how to go beyond the basic composition rules and start expressing yourself through photography KEY COURSE INFO: Course type: Instructor-led or self paced Course duration: 6 weeks Course format: Online course with Interactive weekly live classes, personal photo feedback and support group WHAT YOU LEARN: In this course we build on the key photo skills we introduce in the Fundamentals Course and learn some new ones ( although completing the Fundamentals course is not a pre-requisite) You will love this course if you want to keep growing your photographic eye, truly control your camera and start making your photos reflect who you are and who your family are. This is the course where your photography really picks up the pace. We will support and challenge you to help you find your own voice in photography. creative use of manual mode creating strong compositions low light shooting capturing emotions introduction to flash using colour in photography THIS IS THE COURSE FOR YOU IF : Are already familiar with your camera - but want to get better at using it in full manual - with no overwhelm or frantic guesswork You want to take photographs that look more polished and that truly show you what you pictured in your head - still true to your kids and who they are You want to be able to capture true emotions and express yourself through photography You want to get more creative with light and colour to elevate your images and make them shine Next course starts on 15th April 2024 The bookings for this course are not open yet - request to be added to the waiting list to be offered priority booking and Early Bird prices when the course registration opens 5 core course modules Support Facebook group Weekly online Live class Personal Feedback on your images BONUS: extra module with ideas to keep your creativity flowing BONUS: PDF course workbook HERE IS WHAT YOU WILL LEARN in this course : This course was designed to help you grow your photography skills beyond just being able to take "nice looking photos". You will love this course if you want to keep growing your photographic eye, truly control your camera and start making your photos reflect who you are and who your family are. This is the course where your photography really picks up the pace. We will support and challenge you to help you find your own voice in photography. How do I get FULL control of my camera? - shooting in full manual - but with clarity and purpose When is the ‘correct’ exposure not the RIGHT one and why is my camera confused? And more importantly, how to fix it in camera? How do you capture genuine emotion and NOT just fake smiles? No more 'smile for Mummy' How to make your light AND SHADOWS work for you? and capture stunning images even if you think you have barely any light What makes a ‘strong image’ and how do I begin to get them more consistently? INSIDE THE MODULES - aka WHAT DO YOU LEARN? Module 1: Getting started in Manual mode First steps into shooting in full manual – understanding your exposure and metering, finding correct exposure for your subject, handling over and under exposure and adjusting your settings without even taking your camera away from your eyes. Major Takeaways: At the end of the module you will have gained full control of your camera - no more guessing game and unpredictable results with all the control going firmly to you. You will be able to understand your jump off points for different situations and how to adjust them to the changing light or environment Module 2: More on manual exposure and why your camera is often wrong Learning when the ‘correct’ exposure is not the “right exposure”, understanding and interpreting your histograms, learning how your environment can help you get the right exposure even in tricky light, dealing with challenging light situations. Major Takeaways: Knowing when to trust and not trust your camera's exposure assessment. Knowing exactly how to adjust things when the images don't turn out looking right out of the camera. Having a method to help you capture different colour accurately - especially when it comes to skin tones, or elements that are bright or dark Module 3: Powerful composition Learning what makes a strong image and learning to create your own, consistently, with the help of our advanced composition techniques – beyond the rule of thirds. Visual storytelling and creating connection to create images which go beyond just pretty. Major Takeaways: Learning new concepts in composition - things that will help you create exiting visual flow, help with impactful storytelling and draw the viewer's eye into the image rather than away from it. Next course starts on 15th April 2024Get your space now Module 4: No such thing as bad light There is no such thing as bad light - even with just a sliver of it you can make a statement in your images. In this module we teach you how to work with low light - through low key photography - playing with light and shadows. And we give you an introduction to Flash - for when you want to boost your existing natural light that little bit more. Major Takeaways: You will learn how to use light and shadows to your advantage, literally learning to paint with light - letting it uncover your subject, and hide what you want to stay out of light. Much like the light module in our Fundamentals course this is very much an AH-HA lesson that will shake your photography to its core. Module 5: Photographing emotions In this module we get under our subject's skin and focus on photographing emotions. We show you how to reply on more than facial expression to show emotions and how to use your creative toolkit, including colour theory to make the viewer see and understand the emotion felt in the moment. Major Takeaways: Learning how to capture genuine connection with your subject and their true emotions – whether happy or mad! Going beyond the smiles or frowny faces to portray your children’s true selves and capturing the moment. Using body language and other creative means – from colour theory, editing style and more! BONUS Module 6: Your creative self Exploring various photographic styles and conventions. Learning to recognise your own strengths and weaknesses and taking steps to grow further. Bonus creative exercises to take you outof your rut and help you continue to grow your photography. In my opinion Advanced level 2 is absolute must as it expand the knowledge from level 1 to the point, that you can take photos confidently, and knowing what you do. I did it online and my teachers were superb, passionate, helpful and very flexible. Aga Stefaniak Photography for Parents ADVANCED Book your space now: COURSE STARTS : 15th April 2024( 6 weeks incl 1 week break)COURSE COST : £279 (payment plans available) What’s included: 6 weekly modules covering all key aspects of children’s photography, weekly live online class ( also recorded) - on Wednesday evenings personal feedback and advice on your images private support group PDF workbook Photography for Parents ADVANCED But will it work for me? - our guarantee: We know our course works. We have seen a few thousands of students go through our courses and really improve. BUT, if you find that after the first couple of modules that it just doesn't work for you, you haven't learnt anything new, it's the wrong level for you, you haven't improved, or you simply don't get on or engage with it - we will simply refund you in full. Simple as that!
Rhino 2D | 3D Training Course for Jewellery Design
By London Design Training Courses
Why Opt for the Rhino 3D Training Course in Jewelry Design? Click here for more info Within a span of 10 hours, you'll master the interface and gain insights into how Rhino leverages points, lines, surfaces, and solids to fashion printable 3D objects. Moreover, you'll explore the art of crafting repetitive and intricate geometric shapes, perfect for creating minimalist and elegant jewelry. Flexible Scheduling: 1-on-1 training sessions tailored to your schedule. Pick any hour between 9 am and 7 pm from Mon to Sat. Course Duration: 10 hours. Training Methods: Choose between in-person sessions or live online training. Why Choose Our Rhino 3D Training Course for Jewelry Design? Rhino, also known as Rhinoceros, stands as a robust 3D computer graphics and computer-aided design software extensively utilized in various industries, including architecture, industrial design, and multimedia. LDTC offers meticulously crafted Rhino courses to empower you in mastering this software. Led by experienced instructors, our courses ensure a comprehensive understanding of Rhino, equipping you to create exceptional designs, specifically tailored for jewelry creation. Rhino 3D Training for Jewelry Design: Our Rhino 3D training caters to both beginners and those aspiring to acquire advanced techniques, emphasizing its application in jewelry design. Course Highlights: Precise 3D Modeling: Master the art of crafting free-form 3D NURBS models with utmost precision. Advanced Functionality: Explore Rhino's advanced surfacing commands and features tailored for jewelry design. User Interface Mastery: Navigate Rhino's interface seamlessly and refine your skills in curves, surfaces, and solids. Expert Guidance: Acquire expertise in Rhino's modeling environment under the guidance of seasoned professionals. Modeling Why Choose Our Rhino 3D Training Course for Jewelry Design? Rhino, also known as Rhinoceros, stands as a robust 3D computer graphics and computer-aided design software extensively utilized in various industries, including architecture, industrial design, and multimedia. LDTC offers meticulously crafted Rhino courses to empower you in mastering this software. Led by experienced instructors, our courses ensure a comprehensive understanding of Rhino, equipping you to create exceptional designs, specifically tailored for jewelry creation. Rhino for Jewelry Design - 16-Hour Course Module 1: Introduction and Navigation Get acquainted with Rhino's interface, menus, and screen layout. Navigate Rhino models with precision in 2D lines, polylines, and NURBS curves. Use modeling setup features like snap, ortho, and planar constraints for accuracy. Leverage object snaps and Smart Track functionality for enhanced precision. Module 2: Solid and Surface Modeling Fundamentals Rapidly develop 3D solids and surfaces using Rhino's organized layering system. Utilize coordinates and constraints for meticulous modeling in 3D space. Create diverse shapes, including rectangles, circles, arcs, ellipses, and polygon curves. Enhance models with Rhino render, render color, and free-form curves. Efficiently handle model views with pan, zoom, and view management tools. Implement various editing commands for curve manipulation and transforming curves into surfaces and solids. Utilize history tracking for advanced editing and execute general editing actions. Module 3: Intermediate Edit and Surfacing Techniques Introduce essential NURBS modeling concepts and terminologies. Edit curves and surfaces through control point manipulation and rebuilding for optimal refinement. Use the nudge modeling aid for precise adjustments and generate deformable shapes. Create curves through projection techniques and split surfaces using curves and surfaces. Blend surfaces seamlessly, utilizing symmetry tools, lighting, and rendering effects. Convert intricate 3D objects into detailed 2D drawings and craft page layouts. Module 4: Advanced Surfacing and Solid Modeling Techniques Construct model primitives and solid text using techniques such as pipe and extrusion. Efficiently modify solids using Boolean tools, expanding surface modeling capabilities. Utilize techniques like extrusion, lofting, and revolving for intricate surfaces. Create sweeps using 1 and 2 rail curves and master surface network techniques for complex shapes. Downlaod Rhino. Upon completion of the Rhino 3D Training Course for Jewelry Design, participants can expect the following learning outcomes: Mastering Rhino Interface: Gain a comprehensive understanding of Rhino's interface, menus, and screen layout. Precision in Modeling: Navigate Rhino models with precision using 2D lines, polylines, and NURBS curves. Modeling Setup Proficiency: Utilize modeling setup features such as snap, ortho, and planar constraints for accurate designs. Enhanced Navigation Techniques: Leverage object snaps and Smart Track functionality for enhanced precision during navigation. Solid and Surface Modeling Skills: Rapidly develop 3D solids and surfaces with Rhino's organized layering system. Coordination and Constraint Application: Utilize coordinates and constraints for meticulous modeling in 3D space. Diverse Shape Creation: Create diverse shapes, including rectangles, circles, arcs, ellipses, and polygon curves. Rendering and Enhancement Techniques: Enhance models with Rhino render, render color, and free-form curves. Efficient Model View Handling: Efficiently handle model views with pan, zoom, and view management tools. Intermediate Edit and Surfacing Techniques: Edit curves and surfaces through control point manipulation and rebuilding for optimal refinement. NURBS Modeling Mastery: Introduce essential NURBS modeling concepts and terminologies. Advanced Editing and Modeling Skills: Use the nudge modeling aid for precise adjustments and generate deformable shapes. Complex Shape Creation: Create sweeps using 1 and 2 rail curves and master surface network techniques for intricate shapes. Solid Modeling Proficiency: Construct model primitives and solid text using techniques such as pipe and extrusion. Application of Boolean Tools: Efficiently modify solids using Boolean tools, expanding surface modeling capabilities. Advanced Surfacing Techniques: Utilize techniques like extrusion, lofting, and revolving for intricate surfaces. Conversion and Crafting of 2D Drawings: Convert intricate 3D objects into detailed 2D drawings and craft page layouts. Hands-On Project Experience: Engage in practical exercises and hands-on projects tailored for jewelry design applications. Upon mastering these skills, participants will be well-equipped to create sophisticated jewelry designs using Rhino 3D modeling software.

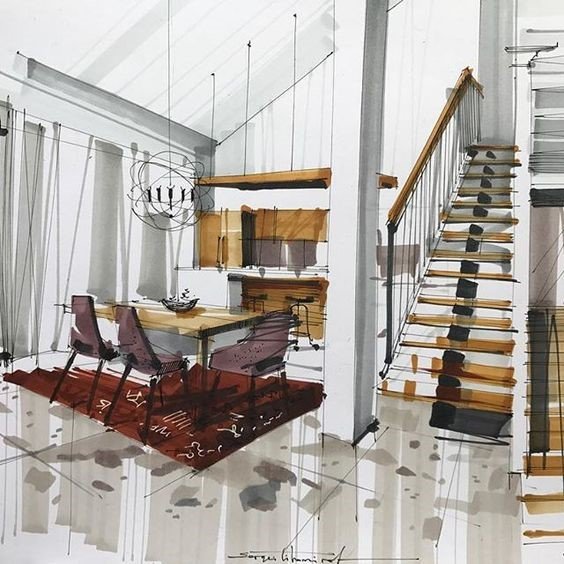
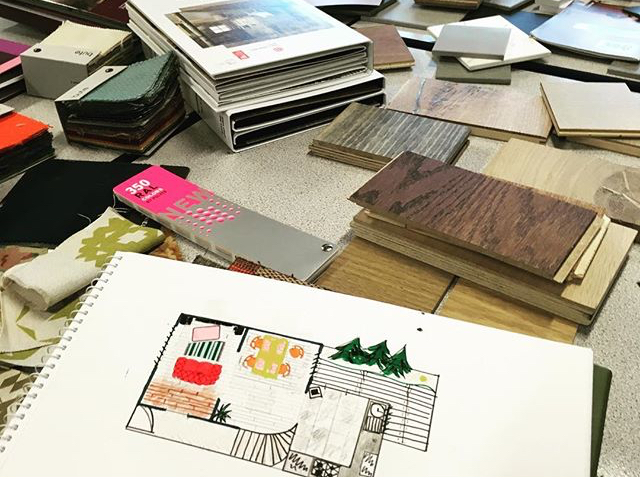
Interior Design Course
By Studio AVC
Learn how to style your space like a pro at our Interior Design Course starting on April 15, 2024,
Best MS (Microsoft) Project Beginners Courses in London, England! This one-day Microsoft Project Beginners Course is designed to cover the concepts of creating, scheduling, baselining and tracking projects using Microsoft Project. We cover all versions of Microsoft Project, instructor-led, classroom-based, practical, and hands-on. We offer the classes on a one-to-one basis, but group sessions are scheduled on request.

Vectorworks Basics to Essentials Training
By London Design Training Courses
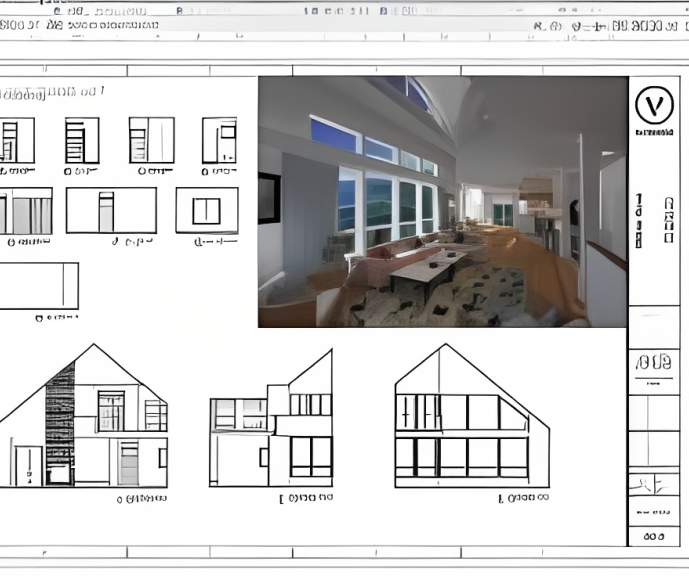
Why Learn Vectorworks Basics to Essentials Training Course? Our Vectorworks training is meticulously crafted to educate and inspire designers of all levels. Whether you're a beginner or an experienced designer, our courses will equip you with new skills, refine your workflows, and teach Plans, sections and elevations. Course Link Duration: 10 hrs. Method: 1-on-1, Personalized attention. Schedule: Tailor your own schedule by pre-booking hours of your choice, available from Mon to Sat between 9 am and 7 pm. Vectorworks Basics to Essentials Training Course Discover and Enhance Your Design Skills Our Vectorworks training is meticulously crafted to educate and inspire designers of all levels. Whether you're a beginner or an experienced designer, our courses will equip you with new skills, refine your workflows, and unlock the full potential of your Vectorworks software. Online Training Options Customized Online Sessions: Tailored training sessions for your specific needs and expertise level. Virtual Classroom: Join interactive virtual classes from the comfort of your office. Getting Started Guides: Comprehensive guides to help you navigate the fundamentals of Vectorworks. In-Person Training Opportunities Customized On-Site Sessions: Hands-on training delivered directly to your office or regional event. One to One: Engage in interactive learning at our training locations. Get Vectorworks https://www.vectorworks.net ⺠downloads ⺠ServicePack Vectorworks, Inc. 2D 3D CAD BIM software for Mac or Windows allows designers to transform the world. Project sharing makes it easy. Download or try today. Module 1: Grasping CAD and Vectorworks Understanding the Role of CAD in Design Getting Acquainted with Vectorworks Software Module 2: Configuring Your Workspace Customizing Your Workspace Essential Options and Preferences Module 3: Mastering Foundational Drawing Skills Techniques for Drawing Object Selection Methods Module 4: Advanced Object Manipulation Merging Shapes Reflecting Objects Rotating Objects Grouping Elements Module 5: Precision Drawing and Scaling Techniques Working with Scale Setting Preferences for Accuracy Creating and Saving Templates Module 6: Achieving Accurate Object Placement Ensuring Drawing Precision Precise Object Movement Module 7: Advanced Editing Methods Utilizing Fillet Tool Applying Offset Function Module 8: Understanding Object Attributes and Groups Basic Attribute Management Editing Object Groups Module 9: Object Duplication Techniques Linear Duplicates Rectangular Duplicates Circular Duplicates Module 10: Crafting Room Plans Designing Walls Incorporating Windows and Doors Module 11: Development of Room Plans Methods for Room Plan Drawing Module 12: Exploring Additional Attributes Hatch Patterns Gradients Image Fills Module 13: Creating Elevation Drawings Elevation Drawing Techniques Effective Approaches Module 14: Importing Images for Graphic Use Graphic Illustration Integrating Images Module 15: Symbols and Resource Handling Symbol Creation Introduction to Resource Browser Module 16: Organizing Drawings Using Design Layers Optimizing Design Layer Utilization Module 17: Labeling Drawings and Title Blocks Drawing Labels Title Block Text Placement Module 18: Plotting and Printing Methods User Interface Navigation and Terminology Printing Approaches Module 19: Generating Drawing Sheets A1, A2, and A3 Sheet Formats Module 20: Utilizing Viewports Effectively Managing Multiple Views Module 21: Professional Model Presentation Techniques Paper Space Presentation Conversion to PDF Formats Module 22: File and Project Management Module 23: Object Display and Terminology Module 24: Objects and Data Management Module 25: Precise Object Placement Object Snapping Quick Selection Module 26: Dividing and Measuring Objects Module 27: Dimensioning and Annotations Module 28: Working with Text Elements Module 29: Customizing Tool Palettes Module 30: Organizing Tool Palettes Module 31: Efficient Tool Palette Usage Module 32: Standard Views and Drawing Techniques Module 33: Drawing Curved Shapes Arcs, Donuts, and Ellipses Drawing Module 34: Real-World Units and Measurements Module 35: Object Manipulation Adjusting Object Angles Module 36: File Handling and Management Saving, Exiting, and Opening Projects Module 37: Creating Mirrored Images Module 38: Introduction to 3D Modeling Creating Extrusions Basic 3D Concepts Understanding For a free 30-day trial of Vectorworks, request an evaluation serial number at the provided link. https://www.vectorworks.net/trial Learning Outcomes of the Vectorworks Basics to Essentials Training Course: Proficiency in Vectorworks software, mastering its basic and essential features. Enhanced design skills and efficient workflows for architectural, landscape, and entertainment projects. Customized training based on individual needs and expertise levels. Flexibility with online and on-site options for convenient learning. Access to Vectorworks University with a wealth of resources for continuous learning. Interactive virtual classrooms and immersive hands-on training for practical experience.
Cyber Secure Coder
By Mpi Learning - Professional Learning And Development Provider
This course presents an approach for dealing with security and privacy throughout the entire software development lifecycle. You will learn about vulnerabilities that undermine security, and how to identify and remediate them in your own projects.

SketchUp Course for Interior Designers and Architects with Layout and Vray
By London Design Training Courses
Why choose SketchUp Course for Interior Designers and Architects with Layout and Vray? Introducing SketchUp Training Course tailored for Interior Designers and Architects. This comprehensive course is designed for interior designers and architects who want to master SketchUp for 3D modeling, Layout for creating construction documents, and V-Ray for rendering. Course info Duration: 10 hrs Method: 1-2-1, Personalized attention Schedule: Tailor your own hours, available from Mon to Sat between 9 am and 7 pm Explore the world of 3D drawing with Sketchup in this beginner-friendly course. With its user-friendly interface, Sketchup offers a gentle learning curve, allowing you to quickly grasp 3D geometries. As you become acquainted with the basic drawing tools, you'll uncover a plethora of advanced techniques to create intricate and complex 3D objects. Who Should Take This Course? This course is ideal for individuals seeking to utilize a 3D drawing tool to solve three-dimensional problems or engage in more advanced design endeavors. Our experienced tutors communicate in accessible English, avoiding complex jargon and ensuring clarity throughout the course. We offer a wealth of learning resources for you to access beyond live lessons. Stay up-to-date, practice, and review key concepts essential to your growth. Course Title: SketchUp Training for Interior Designers and Architects with Layout and V-Ray Course Course Duration: 10 hours Course Description: This comprehensive course is designed for interior designers and architects who want to master SketchUp for 3D modeling, Layout for creating construction documents, and V-Ray for advanced rendering. Participants will learn how to create stunning 3D models for their projects, produce detailed construction documents, and apply professional-grade rendering techniques to bring their designs to life. Course Outline: Module 1: Introduction to SketchUp (1 hour) - Overview of SketchUp for interior design and architecture - Interface and basic tools - Navigation and viewport controls - Creating and saving interior design and architecture projects Module 2: Creating Floor Plans (1 hour) - Importing floor plans and site plans - Drawing walls, windows, and doors - Creating and editing floor levels - Understanding Layers and Scenes Module 3: Adding Furniture and Fixtures (2 hours) - Importing furniture and fixtures from the 3D Warehouse - Creating custom furniture and fixtures - Placing and arranging furniture and fixtures in the space - Creating and editing custom materials Module 4: Advanced Modeling Techniques (2 hours) - Creating more complex 3D models using advanced tools - Using groups and components for model organization - Adding custom details and finishes Module 5: Layout for Construction Documents (2 hours) - Creating construction documents in Layout - Importing SketchUp models into Layout - Creating floor plans, elevations, and sections - Adding annotations and dimensions to construction documents Module 6: Introduction to V-Ray (1 hour) - Overview of V-Ray for SketchUp - Basic V-Ray interface and tools - Understanding V-Ray materials and textures Module 7: Advanced Rendering Techniques (1 hour) - Applying advanced rendering techniques to SketchUp models - Creating artificial lighting and using natural lighting - Adding entourage and landscaping to designs Module 8: Importing and Exporting (30 minutes) - Importing and exporting files from other software - Understanding file formats and compatibility - Exporting models for 3D printing Module 9: Conclusion and Next Steps (30 minutes) - Review of course content - Tips for further learning and resources - Q&A and feedback

Microsoft Project Introduction - Online classroom
By Microsoft Office Training
Course Objectives At the end of this course you will be able to: Identify the components of the Microsoft Project environment Create a new project plan Create the project schedule Use different views to analyse the project plan Create, allocate and manage resources in a project plan Finalise a project plan Track progress View and report project plan information ' 1 year email support service Customer Feedback Very good course. Learnt a lot. Looking forward to the next level. Alexandra - CIAL ' 1 year email support service Take a closer look at the consistent excellent feedback from our growing corporate clients visiting our site ms-officetraining co uk With more than 20 years experience, we deliver courses on all levels of the Desktop version of Microsoft Office and Office 365; ranging from Beginner, Intermediate, Advanced to the VBA level. Our trainers are Microsoft certified professionals with a proven track record with several years experience in delivering public, one to one, tailored and bespoke courses. Our competitive rates start from £550.00 per day of training Tailored training courses: You can choose to run the course exactly as they are outlined by us or we can customise it so that it meets your specific needs. A tailored or bespoke course will follow the standard outline but may be adapted to your specific organisational needs. Introduction to Microsoft Project Recap on project management concepts Project environment overview The 3 databases: Tasks, Resources and Assignments Different ways of displaying the Project Plan Access Help Creating a Project Plan Create a New Project Plan Project Information Create and apply the project calendar Defining recurring exceptions to the calendar Defining the calendar's work weeks Create the Summary tasks Create the Work Breakdown Structure Task creation and scheduling Exploring the Entry Table and its fields Task editing and the Task Information window Task Durations Defining Milestones Manual Scheduling vs Automatic Scheduling Changing the Task's Calendar Create a split in a Task Create Task Relationships Adding Lag or Lead to a Relationship Identifying the Critical Path Adding Constraints and Deadlines to Tasks Create Recurring Activities Adding Notes and links to Tasks Managing Resources Exploring the Entry Table and its fields Resource editing and the Resource Information window Resource Types Fixed Costs vs Variable Costs Adding Resource Costs Defining when costs accrue Changing the Resource Calendar and Availability Project calendar vs Resource and Task Calendar Assigning Resources to Tasks Effort Driven Scheduling Resolving Resource Overallocation Tracking the Project Progress Setting a Project Baseline Entering Actuals Different ways of viewing the Progress Checking if the Project is on track Viewing and Reporting Project Detail Adding Tasks to the Timeline and sharing it Modifying the Timescale and Zoom level Formatting the Gantt View Filtering and Grouping Tasks Print and Troubleshoot the Gantt View Using built-in Reports in Microsoft Project Who is this course for? Who is this course for? This course is designed for a person who has an understanding of project management concepts, who is responsible for creating and modifying project plans, and who needs a tool to manage these project plans. Requirements Requirements General knowledge of the Windows OS Career path Career path Microsoft Office know-how can instantly increase your job prospects as well as your salary. 80 percent of job openings require spreadsheet and word-processing software skills

AUTOCAD Training for Both MAC and PC Users
By Real Animation Works
Face to Face Training Customised and Bespoke.