- Professional Development
- Medicine & Nursing
- Arts & Crafts
- Health & Wellbeing
- Personal Development
Adobe Illustrator and Photoshop Training
By London Design Training Courses
Why Choose Adobe Illustrator and Photoshop Training Course? Click here for more info Master vector graphics, digital illustrations, photo manipulations, and more. Certified tutors provide personalized guidance and feedback. Flexible scheduling available. Receive a Certificate of Completion. Learn Adobe Creative Cloud. Duration: 10 hrs. Method: 1-on-1, Personalized attention. Schedule: Tailor your own schedule by pre-booking a convenient hour of your choice, available from Mon to Sat between 9 am and 7 pm. This comprehensive and hands-on course introduces you to digital design through Adobe Photoshop and Illustrator. Learn how these three programs seamlessly collaborate to create stunning designs. Gain insights into bitmap and vector graphics and discover the most suitable image file formats for different scenarios. 10-hour course outline for Adobe Photoshop and Illustrator: Module 1: Introduction to Adobe Photoshop (1 hour) Overview of Photoshop interface and tools Understanding bitmap graphics and resolution Basic image editing techniques (cropping, resizing, color adjustments) Layers and their importance in design Module 2: Essential Photoshop Tools (1 hour) Working with selection tools (Marquee, Lasso, Magic Wand) Understanding brushes and brush settings Introduction to the Pen tool for precise selections Working with layers and layer styles Module 3: Advanced Image Editing (1 hour) Advanced color adjustments (Curves, Levels, Hue/Saturation) Photo retouching and manipulation techniques Creating composite images using blending modes Filters and special effects for creative designs Module 4: Introduction to Adobe Illustrator (1 hour) Overview of Illustrator interface and tools Working with vector graphics and paths Basic shapes and drawing tools Understanding anchor points and handles Module 5: Creating Vector Artwork (1 hour) Using the Pen tool for precise vector illustration Creating and editing shapes and objects Working with gradients and patterns Understanding the Appearance panel Module 6: Illustrator Typography (1 hour) Text tools and formatting options Creating text effects and artistic typography Combining text with shapes and images Working with text on a path Module 7: Combining Photoshop and Illustrator (1 hour) Importing Illustrator files into Photoshop and vice versa Working with smart objects and vector shapes in Photoshop Creating custom brushes and patterns in Illustrator for use in Photoshop Designing posters and flyers combining elements from both software Module 8: Integration with InDesign (1 hour) Exporting assets from Photoshop and Illustrator for InDesign Designing layouts in InDesign using assets from both programs Understanding print and digital design considerations Preparing files for printing and online use Module 9: Advanced Techniques and Tips (1 hour) Creating custom actions and automation in Photoshop Mastering advanced selection techniques Utilizing Illustrator's advanced tools (Pathfinder, Shape Builder, etc.) Exploring creative design styles and trends Module 10: Final Projects and Portfolio (1 hour) Students work on individual or group projects incorporating Photoshop and Illustrator skills Review and feedback on the projects Preparing a portfolio showcasing their work Download Adobe Illustrator - Free Trial https://www.adobe.com/uk/illustrator Throughout the course, you will explore various processes, including design and layout, workspaces, tools and palettes, importing files, and preparing files for both on-screen and print outputs. Course Objectives: By the course's conclusion, you will have a solid understanding of the fundamentals of each software package and their individual functionalities. You will learn how to efficiently work with all three applications in tandem and skillfully assemble print and digital-ready designs, leveraging elements crafted in Photoshop and Illustrator and integrated using InDesign.

Adobe Lightroom Classic helps solve two of the main problems that afflict digital photographers: how to organise all your files, and how to edit them without spending all of your spare time at a computer screen. Lightroom Classic is a convenient and flexible desktop programme that helps you to organise and sift your photographs into collections, and also gives access to a powerful set of tools that edit, enhance and export your pictures. You can use intuitive pre-set tools, you can create your own favourite adjustments, you can edit large numbers of images with one click of a mouse, and you can fine-tune your image-editing by selectively working on parts of a picture. And you can experiment, secure in the knowledge that you are working in a non-destructive environment and that your pictures are safe. This practical short course will introduce you to the principles of file organisation and image-editing, giving you the knowledge and confidence to choose when to work with this convenient and flexible programme, and whether or not you need the full power of Photoshop Creative Suite. Sample picture files will be provided for you to work with, or you can bring a selection of your own. If you work in RAW, please also bring JPEGs on a memory stick, external hard drive or cloud storage such as Dropbox. Please note this course does not cover the new version of LightRoom CC (which is specifically designed for mobile devices) and only uses the most recent version of LightRoom Classic. Morning You will get to know the Lightroom layout and workspace, importing a set of files into the catalogue and starting to organise the files into collections and adding useful file information. You will explore the opportunities for viewing and aids for analysing the pictures. You will start to use the convenient ‘quick develop’ editing tools. We will then explore the digital image-editing workflow. The usual flow is to correct and optimise before we enhance, interpret or exaggerate. The basic areas to consider are cropping, cloning, colour and tone. Taking each in turn, we will correct and clean up the pictures in a measurable and controllable way. We will investigate techniques to control digital noise, colour distortions and lens corrections. We will work on individual files and also start applying corrections to batches. We will create and apply pre-set corrections. Afternoon Having corrected and optimised the picture files, we can start interpreting, enhancing and exaggerating – the fun part of image-editing! We can try colour to black-and-white conversions, using the many pre-sets to guide; we can selectively boost or restrain colours; we can add grain and textures, vignettes and split tones; we can mix and match these effects and create and save our own favourite effects. We can apply adjustment effects to selected picture areas. Image editing is all good fun, but how do we know where to start? Or when to stop? We‚’ll have a look at some photographic styles and techniques from photography’s rich history to give us some ideas and then try to replicate them. We will discuss ways of using the programme and the technology to develop photographic projects. And we will look at how Lightroom can help us to export those projects as books, prints and slideshows. Designed for those who are already familiar with some digital photography processes but who want to pursue a particular aspect and develop skills in a specific genre. This course is the perfect follow-on from our Digital SLR training courses and will support you in building upon your existing knowledge of camera skills and allow you to work confidently on your own projects. Some prior digital SLR photography experience is therefore recommended. Courses are subject to minimum enrolment. Please register early, within five days of the start date, to reduce the likelihood of course cancellation. Please read our cancellation policy before booking. Students, anyone over the age of 65, and those in receipt of any form of benefits can claim the concessionary price, offering a 10% discount on the full course price. Valid proof of eligibility must be produced on the first day of the course. Please use the code CONCESSION when prompted at checkout.
InDesign Evening Classes
By ATL Autocad Training London
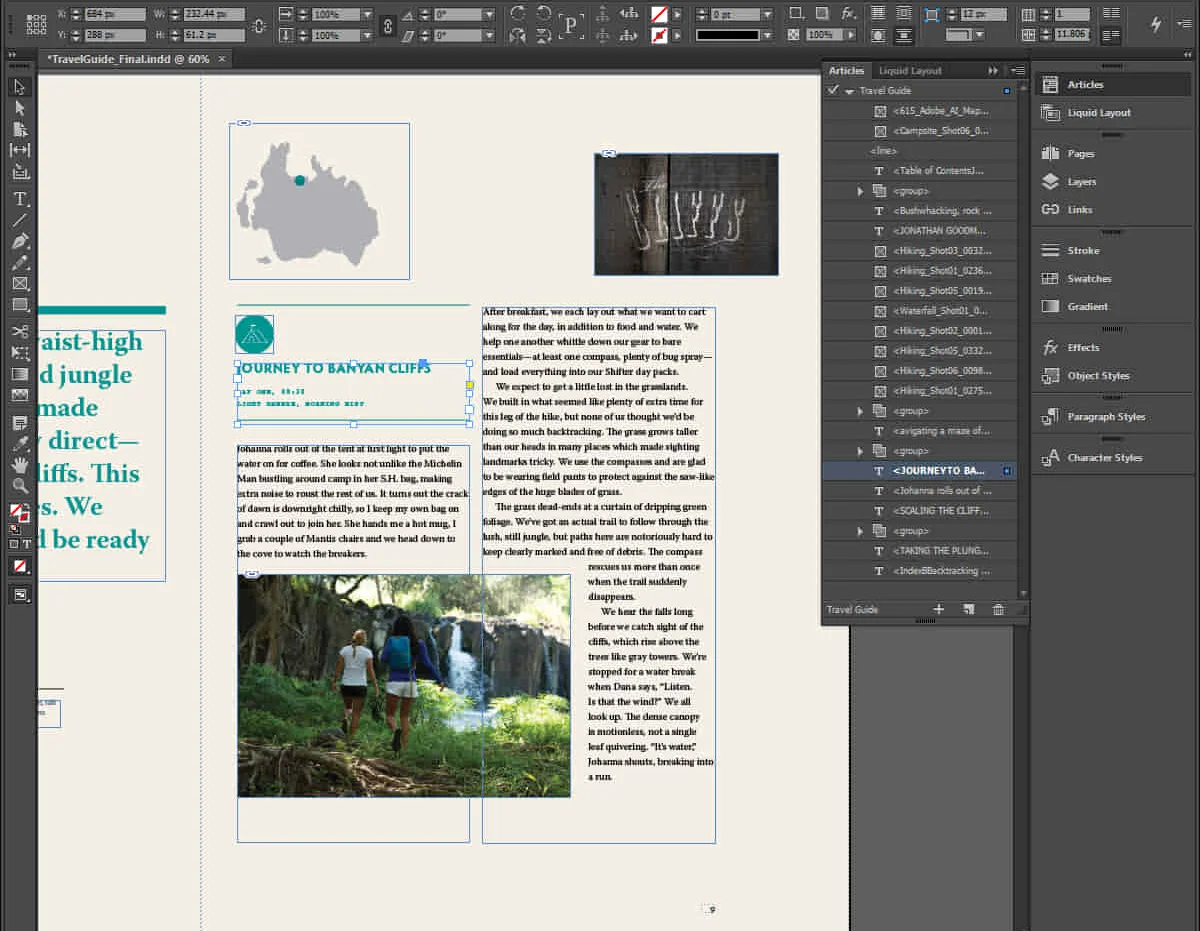
Who is this for? InDesign Evening Classes. Refine your Adobe InDesign skills with expert tutors. Master layout creation, typography, and image manipulation. Design captivating brochures, magazines, and more. Choose between in-person or live online sessions. Earn a Certificate of Completion and enjoy lifetime email support. Explore our complimentary trial session. Check our Website Duration: 10 hours Approach: 1-on-1 sessions with tailored content. Schedule: 1-on-1 sessions, available Mon to Sat from 9 am to 7 pm. Course Title: Mastering Adobe InDesign Course Duration: 10 Hours Session 1: Introduction to Adobe InDesign (1 hour) Overview of Adobe InDesign interface Understanding tools and panels Setting up new documents and document properties Basic navigation and shortcuts Session 2: Mastering Page Layouts (1.5 hours) Working with master pages Creating and managing text frames and image placeholders Managing multiple pages and spreads Using grids and guides for precise layouts Session 3: Typography and Text Formatting (1.5 hours) Working with fonts, styles, and text formatting options Understanding text threading and linking Advanced text composition techniques Utilizing paragraph and character styles for consistency Session 4: Advanced Image Manipulation (1.5 hours) Importing and manipulating images and graphics Understanding image resolution and color modes Working with clipping paths and transparency Applying image effects and filters Session 5: Interactive Documents and Digital Publishing (2 hours) Creating hyperlinks and interactive buttons Embedding multimedia elements (audio, video) in documents Exporting documents for digital platforms (eBooks, PDF forms) Introduction to responsive design for various devices Session 6: Advanced Techniques and Special Effects (1 hour) Utilizing advanced drawing tools and shapes Applying special effects like drop shadows, transparency, and blending modes Working with tables and charts Introduction to data merge for personalized content Session 7: Printing and Prepress (1 hour) Understanding print terminology and specifications Preflighting documents for print readiness Color management and preparing files for different printing processes Exporting files for professional printing Session 8: Project Work and Review (0.5 hour) Participants work on a practical project applying learned skills Instructor-guided project review and feedback Session 9: Tips, Tricks, and Best Practices (0.5 hour) Time-saving shortcuts and productivity hacks Best practices for efficient workflow and file management Troubleshooting common issues and errors Session 10: Q&A and Certification (0.5 hour) Addressing participant queries and concerns Certificate distribution and course completion celebration This comprehensive 10-hour course aims to equip participants with advanced skills in Adobe InDesign, covering essential aspects of design, typography, interactivity, and print preparation. Participants will engage in hands-on activities, projects, and discussions to reinforce their learning throughout the course. By the end of this 10-hour advanced InDesign course, you will: Gain a comprehensive understanding of InDesign's most powerful features and advanced techniques. Create sophisticated page layouts with eye-catching special effects for professional-level designs. Efficiently manage fonts, colors, and shapes to enhance the visual appeal of your documents. Develop interactive PDFs with navigation, page transitions, and embedded video for engaging presentations. Master the use of character styles, paragraph styles, and word styles to streamline text formatting. Utilize advanced object styles and anchored objects for efficient layout design. Work effectively with Adobe Stock, Photoshop, Illustrator, and other Creative Cloud applications for seamless integration. Create PDF forms and implement interactive button-triggered animations for interactive documents. Optimize workflow with keyboard shortcuts, scripts, and advanced preferences for a smoother design process. Learn valuable tips and best practices from industry experts to boost your productivity and efficiency. Enhance your mastery of InDesign through our advanced program, meticulously designed to hone your skills. Explore intricate page layouts and seamlessly integrate captivating special effects into your projects. Our seasoned Adobe trainers, renowned for their approachable teaching style, will guide you through InDesign's powerful features, sharing invaluable insights derived from years of practical experience. This interactive course provides ample opportunities for hands-on practice, ensuring your confidence in harnessing InDesign's diverse technical capabilities. Key Course Highlights: In-depth exploration of InDesign's advanced functionalities. Individualized attention, fostering open discussions and encouraging questions. Expert trainers, small class sizes, and a supportive and collaborative learning environment. Comprehensive learning materials and resources, all inclusive. Continuous support for any post-course inquiries or concerns, ensuring your ongoing success. Enhance your InDesign proficiency, crafting polished designs effortlessly. Elevate your skills with our advanced course, ensuring: Thorough coverage of InDesign's technical capabilities. Personalized attention and ample opportunity for questions. Supportive, knowledgeable trainers in a comfortable learning environment. Comprehensive materials and resources for your learning journey. Continued assistance for post-course queries and concerns. Download InDesign

Data Analysis and Visualization with Microsoft Excel
By Mpi Learning - Professional Learning And Development Provider
This course is designed for students who already have foundational knowledge and skills in Excel and who wish to perform robust and advanced data and statistical analysis with Microsoft Excel using PivotTables, use tools such as Power Pivot and the Data Analysis ToolPak to analyze data and visualize data and insights using advanced visualizations in charts and dashboards in Excel.

Advanced Adobe InDesign Training Program
By ATL Autocad Training London
Advanced Adobe InDesign Training Program Learn InDesign with a course at Real Animation Works. Choose from Weekend, Weekday or Evening Courses and learn from expert tutors. Benefit from professional InDesign training conducted by Adobe Certified Instructors with extensive graphic design expertise. Check our Website Duration: 10 hours. Approach: 1-on-1 and personalized attention. Schedule: 1-on-1 sessions, available Monday to Saturday from 9 am to 7 pm. Course Title: Comprehensive Adobe InDesign Training Duration: 10 Hours Session 1: Introduction to Adobe InDesign (1 hour) Overview of InDesign interface and tools Document setup: page size, margins, and columns Basic text formatting and paragraph styles Introduction to working with images and graphics Session 2: Advanced Text Formatting and Styles (1 hour) In-depth exploration of character and paragraph styles Advanced text composition techniques Managing text flow with threaded frames Incorporating special characters for typographic control Session 3: Mastering Images and Graphics (1 hour) Advanced image manipulation: resizing, cropping, and effects Text wrap options and integrating text with images Creating image frames and working with transparency Interactive elements: buttons and hyperlinks Session 4: Layout Design Techniques (1.5 hours) Grids and guides: precise alignment and spacing Working with layers for efficient design management Advanced object arrangement and distribution Utilizing master pages for consistent layout elements Session 5: Advanced Document Features (1.5 hours) Tables and data merge: organizing and automating data Interactive PDFs: forms, multimedia, and navigation Advanced print preparation: color management and preflighting Exporting for various digital and print outputs Session 6: Advanced Special Effects (1 hour) Creating drop shadows, gradients, and blending modes Working with typography on a path Advanced text and image effects Integrating Adobe Illustrator and Photoshop files Session 7: Project-Based Learning (1 hour) Participants work on a comprehensive project applying learned skills Instructor-guided project review and feedback Session 8: Tips, Tricks, and Time-Saving Techniques (1 hour) Productivity hacks and shortcuts Troubleshooting common issues and errors Best practices for efficient workflow and collaboration Session 9: Portfolio Building and Career Guidance (0.5 hour) Creating a professional portfolio showcasing InDesign projects Career advice and industry insights from the instructor Session 10: Q&A, Certification, and Course Completion (0.5 hour) Addressing participant questions and concerns Certificate of Completion distribution and course review Celebrating the completion of the Adobe InDesign training journey Upon completion of the Comprehensive Adobe InDesign Training course, participants will: Master Core Skills: Develop proficiency in essential InDesign tools, functions, and techniques for effective layout design. Advanced Text and Typography: Understand advanced text formatting, paragraph styles, and typographic controls for professional typography. Image Manipulation Expertise: Acquire skills in advanced image manipulation, text wrapping, transparency, and integration of multimedia elements. Advanced Layout Design: Learn precise layout techniques using grids, guides, layers, and master pages for consistency and visual appeal. Interactive Document Creation: Create interactive PDFs, forms, multimedia-rich content, and navigation elements for digital publications. Data Management and Automation: Master tables, data merge, and automation features for organized data presentation and streamlined workflow. Print and Export Proficiency: Understand color management, preflighting, and export settings for high-quality print and digital output. Special Effects and Integration: Apply advanced effects, gradients, blending modes, and integrate InDesign with Illustrator and Photoshop files seamlessly. Project-Based Expertise: Develop a comprehensive portfolio-worthy project, showcasing a range of InDesign skills and creativity. Efficient Workflow and Troubleshooting: Implement time-saving techniques, shortcuts, and troubleshoot common design challenges effectively. Career Readiness: Gain valuable insights into industry practices, portfolio building, and career guidance for pursuing opportunities in graphic design and desktop publishing. Versatile Learning Choices: Opt for either in-person sessions at our London center or engage in interactive online learning. Both options offer hands-on experience, detailed demonstrations, and ample chances for inquiries. Compatibility and Assistance: InDesign operates smoothly on Windows and Mac systems. Participants receive a comprehensive InDesign training manual for reference and an electronic certificate upon course completion. Additionally, enjoy lifelong email assistance from your InDesign instructor. Entry Requirements: No prior InDesign expertise is necessary. The training concentrates on InDesign 2023, relevant to recent software updates. Guarantees: We ensure exceptional value for your investment, guaranteeing your acquisition of essential skills and concepts during the training. Course Highlights: Master advanced typography techniques, including paragraph styles, character styles, and nested styles. Explore multi-page layout design, long document management, and advanced table formatting. Acquire skills to create and manipulate complex shapes, vector graphics, and custom illustrations. Learn efficient workflows for data merging, interactive documents, and digital/print output. Collaborate seamlessly with other Adobe Creative Cloud applications. Upon completion, receive a Certificate of Completion and access recorded lessons for self-paced learning. Expert Instruction: Learn from certified tutors and industry experts, gaining valuable insights, tips, and best practices for professional-level designs. Flexible Learning Options: Choose between in-person or live online sessions based on your schedule. Sessions are available Monday to Sunday, from 9 am to 8 pm, accommodating your convenience. Lifetime Support: Benefit from lifetime email support for continuous assistance. Our dedicated team is available to address your queries and challenges. Explore Adobe InDesign - Free Trial: https://www.adobe.com/uk/products/indesign/free-trial-download.html
Power BI - dashboards (1 day) (In-House)
By The In House Training Company
Power BI is a powerful data visualisation program that allows businesses to monitor data, analyse trends, and make decisions. This course is designed to provide a solid understanding of the reporting side of Power BI, the dashboards, where administrators, and end users can interact with dynamic visuals that communicates information. This course focuses entirely on the creation and design of visualisations in dashboards, including a range of chart types, engaging maps, and different types of tables. Designing dashboards with KPI's (key performance indicators), heatmaps, flowcharts, sparklines, and compare multiple variables with trendlines. This one-day programme focuses entirely on creating dashboards, by using the many visualisation tools available in Power BI. You will learn to build dynamic, user-friendly interfaces in both Power BI Desktop and Power BI Service. 1 Introduction Power BI ecosystem Things to keep in mind Selecting dashboard colours Importing visuals into Power BI Data sources for your analysis Joining tables in Power BI 2 Working with data Utilising a report theme Table visuals Matrix visuals Drilling into hierarchies Applying static filters Group numbers with lists Group numbers with bins 3 Creating visuals Heatmaps in Power BI Visualising time-intelligence trends Ranking categorical totals Comparing proportions View trends with sparklines 4 Comparing variables Insert key performance indicators (KPI) Visualising trendlines as KPI Forecasting with trendlines Visualising flows with Sankey diagrams Creating a scatter plot 5 Mapping options Map visuals Using a filled map Mapping with latitude and longitude Mapping with ArcGIS or ESRI 6 Creating dashboards High-level dashboard Migration analysis dashboard Adding slicers for filtering Promote interaction with nudge prompts Searching the dashboard with a slicer Creating dynamic labels Highlighting key points on the dashboard Customised visualisation tooltips Syncing slicers across pages 7 Sharing dashboards Setting up and formatting phone views Exporting data Creating PDF files Uploading to the cloud Share dashboards in SharePoint online

Network DevOps course description This course is not a soft skills course covering the concepts of DevOps but instead concentrates on the technical side of tools and languages for network DevOps. Particular technologies focussed on are ansible, git and Python enabling delegates to leave the course ready to starting automating their network. Hands on sessions follow all major sections. More detailed courses on individual aspects of this course are available. What will you learn Evaluate network automation tools. Automate tasks with ansible. Use git for version control. Use Python to manage network devices. Use Python libraries for network devices. Network DevOps course details Who will benefit: Administrators automating tasks. Prerequisites: TCP/IP Foundation Duration 5 days Network DevOps course contents What is DevOps Programming and automating networks, networks and clouds, AWS, OpenStack, SDN, DevOps for network operations. Initial configuration Configuring SSH, ZTP, POAP. Hands on Initial lab configuration. Getting started with ansible The language, the engine, the framework. Uses of ansible, orchestration. The architecture, Controlling machines, nodes, Agentless, SSH, modules. Configuration management, inventories, playbooks, modules, roles. Hands on Installing ansible, running ad hoc commands. Ansible playbooks ansible-playbook, YAML, plays, tasks, handlers, modules. Playbook variables. Register module, debug module. Hands on Running playbooks. Ansible Inventories /etc/ansible/hosts, hosts, groups, static inventories, dynamic inventories. Inventory variables, external variables. Limiting hosts. Hands on Static inventories, variables in inventory files. Ansible modules for networking Built in modules, custom modules, return values. Core modules for network operations. Cisco and/or Juniper modules. ansible_connection. Ansible 2.6 CLI. Hands on Using modules. Ansible templating and roles aConfiguration management, full configurations, partial configurations. The template module, the assemble module, connection: local, Jinja2 templates, variables, if, for, roles. Hands on Generating multiple configurations from a template. Network programming and modules Why use Python? Why use ansible? alternatives, ansible tower, Linux network devices. Programming with Python Python programming Functions. Classes, objects and instances, modules, libraries, packages. Python strings, Python file handling, pip list, pip instal. Hands on Python programming with pyping. More Python programming Functions. Classes, objects and instances, modules, libraries, packages. Python strings, Python file handling, pip list, pip install. Hands on Python programming with pyping. Git Distributed version control, repositories, Git and GitHub, Alternatives to GitHub, Installing git, git workflows, creating repositories, adding and editing files, branching and merging, merge conflicts. Hands on working with Git. Python and networking APIs, Sockets, Telnetlib, pysnmp, ncclient, ciscoconfparse. Paramiko SSH and Netmiko Integrating Python and network devices using SSH. Netmiko, Netmiko methods. Hands on Netmiko. NAPALM What is NAPALM, NAPALM operations, getters, Replace, merge, compare, commit, discard. Hands on Configuration with NAPALM. Integrating ansible and NAPALM. Python and REST REST APIs, enabling the REST API. Accessing the REST API with a browser, cURL, Python and REST, the request library. Hands on Using a REST API with network devices.

Network automation course description This course is not a soft skills course covering the concepts of DevOps but instead concentrates on the technical side of tools and languages for network DevOps. Particular technologies focussed on are ansible, git and Python enabling delegates to leave the course ready to starting automating their network. Hands on sessions follow all major sections. More detailed courses on individual aspects of this course are available. What will you learn Evaluate network automation tools. Automate tasks with ansible. Use git for version control. Use Python to manage network devices. Use Python libraries for network devices. Network automation course details Who will benefit: Network engineers. Prerequisites: TCP/IP foundation for engineers. Duration 5 days Network automation course contents What is DevOps Programming and automating networks, networks and clouds, AWS, OpenStack, SDN, DevOps for network operations. Initial configuration Configuring SSH, ZTP, POAP. Hands on Initial lab configuration. Getting started with ansible The language, the engine, the framework. Uses of ansible, orchestration. The architecture, Controlling machines, nodes, Agentless, SSH, modules. Configuration management, inventories, playbooks, modules, roles. Hands on Installing ansible, running ad hoc commands. Ansible playbooks ansible-playbook, YAML, plays, tasks, handlers, modules. Playbook variables. Register module, debug module. Hands on Running playbooks. Ansible Inventories /etc/ansible/hosts, hosts, groups, static inventories, dynamic inventories. Inventory variables, external variables. Limiting hosts. Hands on Static inventories, variables in inventory files. Ansible modules for networking Built in modules, custom modules, return values. Core modules for network operations. Cisco and/ or Juniper modules. ansible_connection. Ansible 2.6 CLI. Hands on Using modules. Ansible templating and roles Configuration management, full configurations, partial configurations. The template module, the assemble module, connection: local, Jinja2 templates, variables, if, for, roles. Hands on Generating multiple configurations from a template. Network programming and modules Why use Python? Why use ansible? alternatives, ansible tower, Linux network devices. Programming with Python Scripting versus application development, Python interactive mode, Python scripts, Python 2.7 vs Python 3. A simple Python script. Variables, loops, control statements, operators. PEP style guide. Python IDEs. Hands on Simple Python programs. More Python programming Functions. Classes, objects and instances, modules, libraries, packages. Python strings, Python file handling, pip list, pip install, Hands on Python programming with pyping. Git Distributed version control, repositories, Git and GitHub, Alternatives to GitHub, Installing git, git workflows, creating repositories, adding and editing files, branching and merging, merge conflicts. Hands on working with Git. Python and networking APIs, Sockets, Telnetlib, pysnmp, ncclient, ciscoconfparse. Paramiko SSH and Netmiko Integrating Python and network devices using SSH. Netmiko, Netmiko methods. Hands on Netmiko. PyEZ Juniper, NETCONF, installing PyEZ, a first pyEZ script, pyEZ configuration management. Hands on Juniper configuration management with pyEZ. NAPALM What is NAPALM, NAPALM operations, getters, Replace, merge, compare, commit, discard. Hands on Configuration with NAPALM. Integrating ansible and NAPALM. Python and REST REST APIs, enabling the REST API. Accessing the REST API with a browser, cURL, Python and REST, the request library. Hands on Using a REST API with network devices.
NFV training course description Network Functions Virtualization (NFV) brings many benefits, this training course cuts through the hype and looks at the technology, architecture and products available for NFV. What will you learn Explain how NFV works. Describe the architecture of NFV. Explain the relationship between NFV and SDN. Recognise the impact NFV will have on existing networks. NFV training course details Who will benefit: Anyone wishing to know more about NFV. Prerequisites: Introduction to Virtualization. Duration 2 days NFV training course content Introduction What is NfV? What are network Functions? NfV benefits, NfV market drivers. ETSI NfV framework. Virtualization review Server, storage and network virtualization and NfV. Virtual machines, containers and docker. Data centres, clouds, SaaS, IaaS, PaaS. Virtualization of Network Functions Network virtualization versus Network Function virtualization. ETSI NfV architecture ETSI documents, Architecture overview, compute domain, hypervisor domain, infrastructure network domain. IETF and NfV Creating services, Service Functions, Service Function Chaining. SPRING and source packet routing. YANG and NetConf. RESTCONF. VLANs, VPNs, VXLAN. MANO Management and Orchestration. OpenStack, OpenDaylight PaaS and NfV. The VNF domain. Service graphs, MANO descriptors, Open orchestration. The virtualization layer VM centric model, containers versus hypervisors, FD.io. Summary Deploying NfV, performance, testing. Futures.
Data comms training course description A hands on training course introducing the concepts of data communications, moving on to covering both LAN and WAN technology. Quizzes are used extensively to ensure material has sunk in and to maximise learning time. Hands on sessions ensure that by the end of the course delegates have made cables, built LANS and WANS, configured TCP/IP, switches and routers. What will you learn Use the seven layer model to classify networking buzzwords. Build and troubleshoot Ethernet, LAN/WAN and WiFi networks Explain the difference between switches and routers. Connect networks with routers. Data comms training course details Who will benefit: Anyone who requires a technical introduction to networks. Prerequisites: None. Duration 3 days Data comms training course contents What are networks? What is data communications? What are networks? Types of network, LANs, LAN choices, WANs, WAN choices, PANs, SANs, MANs, connecting networks. Internetworks, the internet, clouds. Networks and standards Standards bodies, ISO, ITU, IEEE, IETF, OSI 7 layer reference model, TCP/IP and OSI, ping and the 7 layer model, encapsulation, fragmentation. The physical layer Transmission media: Copper, Fibre, RF, UTP, Cat 5/5e/6/7..., RJ45, straight and cross over cables. Coax, Fibre cable & connectors, SFP, MMF, SMF, radio spectrum, frequencies, ranges, noise and electrical distortion, repeaters. Hands on Cabling, ping. Bandwidth Definition, Bits, bytes, speeds, simplex, half/full duplex, a/symmetrical, aggregation, latency. Calculating bandwidth requirements. The Data Link layer Frames, classifications, standards, LAN/WAN layer 2 technologies (Point to point, virtual circuits). Ethernet What is Ethernet? 802.3, evolution from CSMA/CD, choosing cables, topologies, NICs, MAC addresses. Ethernet frame format. Hands on Analysing Ethernet frames. Ethernet switches Connecting multiple devices, switches work at layer 2, Switches vs. hubs, simultaneous conversations, full duplex, MAC address database, how switches work, switch benefits, loops, STP. Console ports. Hands on Switches and WireShark, configuring switches, broadcast storms, STP. VLANS What are VLANs, why have VLANs. Hands on The effect of VLANs on network traffic. Wireless LANs Type of wireless network. WiFi, 802.11b/g/n/ac, WiFi6, antennae, interference, 802.11 frame format, CSMA/CA, half duplex, Wireless Access Points, security. Hands on Building a WiFi network. WANS WAN architecture, WAN types, service providers, access equipment, DTE, DCE, core equipment, WANs and the 7 layer model, choosing a WAN. WAN access Point to point, multi access, Internet, phone lines, leased lines, xDSL, broadband architecture. DOCSIS, FTTH, PON, SD-WAN. Older technologies (if required): Modems, ISDN, 64k, E1, TDM. Packet switched networks Packet switching, virtual circuits, Hub & spoke, partial & full mesh, MPLS, MPLS and routers, Why MPLS? MPLS -TE, MPLS VPN, Internet VPN. Older technologies (if required). Service provider technologies Transport plane, SDH, SONET, WDM, CWDM, DWDM, DWDM architectures, OTN. TCP/IP Definition, protocols, services, internetworking, the Internet, intranets, IAB, RFCs, IP header, IP addressing, subnet masks, IPv6, TCP, UDP. Hands on IP address and subnet mask configuration. Routers What are routers? Routers vs switches, when to route and when to switch, default gateways, routing tables, static routes, routing protocols. Firewalls, how firewalls work. Hands on Router configuration, tracert. Applications Clients, servers, web, HTTP, Email, resource sharing, IM, VoIP, Video over IP, terminal emulation, ftp, ssh. Hands on telnet