- Professional Development
- Medicine & Nursing
- Arts & Crafts
- Health & Wellbeing
- Personal Development
Photoshop Training Course Basics to Advanced
By ATL Autocad Training London
Photoshop Training Course Basics to Advanced designed for individuals of every skill level, ranging from beginners to advanced image editing professionals. Immerse yourself in the realm of potent image manipulation tools at our school in London. Personalized Photoshop courses either at our facility or directly at your location. Click here for more info: Website Duration: 20 hours. Method: Personalized 1-on-1. Schedule: Customize your learning with pre-booked sessions available Monday to Saturday, from 9 am to 7 pm. Course Title: Mastering Photoshop: From Basics to Advanced Proficiency Course Duration: 20 hours Module 1: Introduction to Photoshop (2 hours) Understanding the Photoshop interface Navigating tools and panels Basic keyboard shortcuts for efficient workflow Introduction to different file formats and their uses Module 2: Essential Tools and Techniques (3 hours) Selection tools and techniques for precise editing Working with layers: management and blending modes Understanding brushes, gradients, and patterns Introduction to basic filters and their applications Module 3: Image Editing and Retouching (4 hours) Color correction and adjustment layers Advanced retouching techniques: Healing Brush, Clone Stamp, and Content-Aware tools Removing backgrounds and unwanted elements Restoring old or damaged photographs Module 4: Advanced Photo Manipulation (3 hours) Compositing multiple images seamlessly Advanced blending modes and layer effects Creative use of masks and clipping paths Special effects: lighting, shadows, and reflections Module 5: Text and Typography (2 hours) Working with text layers and formatting options Creating custom typography and text effects Utilizing layer styles for creative text designs Text manipulation along paths and shapes Module 6: Web and UI Design (3 hours) Designing web banners, buttons, and interfaces Slicing and optimizing images for the web Creating interactive prototypes and mockups Exporting assets for web and app development Module 7: Print Design and Prepress (2 hours) Understanding color modes: CMYK vs. RGB Setting up documents for print: bleed, margins, and resolution Designing print materials: brochures, business cards, and posters Preparing files for professional printing Module 8: Project-Based Learning (1 hour) Applying learned techniques to real-world projects Instructor-led project: creating a digital artwork or advertisement Feedback and critique session for skill refinement Final presentation of completed projects Upon completion, you will: Master Photoshop Skills: Gain proficiency in fundamental and advanced Photoshop techniques, enabling professional-level image editing and creative design. Enhance Creativity: Develop creative problem-solving abilities, enabling innovative and visually appealing design solutions. Job Opportunities: Graphic Designer: Craft compelling visual content for ads, websites, and marketing materials. Photo Retoucher: Edit and enhance photographs to meet professional standards. Digital Artist: Create digital artwork and illustrations for various purposes. Web/UI/UX Designer: Design user-friendly interfaces and engaging online experiences. Marketing Content Creator: Generate eye-catching promotional visuals and social media content. Video Editor: Enhance video footage and create engaging video content for online platforms. Professional Adobe Photoshop Training in London - On-Site & Live Virtual Classes Being the industry-leading image editing software, Photoshop empowers users to manipulate images, enhance colors, and create visually striking designs. Its extensive toolkit allows for intricate adjustments, retouching, and even editing videos, graphic design, and 3D imagery. Enroll in our Photoshop course to establish a strong foundation in creative visuals, focusing on essential skills like image adjustment, composition, and common troubleshooting. For a more in-depth understanding, our Advanced course delves into advanced techniques such as color fills, text and layer styling, and creating web-ready artwork. Explore our masterclass options for advanced training and deeper insights. Both beginner courses are available in physical classrooms and online, providing flexible learning opportunities. Holistic Design Education: Comprehensive training across diverse design fields. Industry-Experienced Instructors: Learn from seasoned professionals in the field. Flexible Learning: Accommodating schedules for busy professionals and students. Practical Projects: Hands-on projects for real-world design experience. Career-Focused Skills: Acquire industry-relevant skills for professional growth. Cutting-Edge Facilities: Access state-of-the-art technology and facilities. Personalized Training: Tailored programs to suit individual learning needs. Networking Opportunities: Connect with design professionals for valuable connections. Innovation Exploration: Explore creative trends and emerging technologies. Ongoing Support: Continuous assistance and post-course guidance.

Arnold for 3dsMax Basic to Advanced Training
By London Design Training Courses
Training duration: 10 hrs. Click here for more info Method: 1-2-1, Personalized attention, Tailored content, Flexible pace, Individual support. Schedule: Personalized training experience with our flexible 1-2-1 sessions. Tailor your own schedule by pre-booking a convenient hour of your choice, available from Monday to Saturday between 9 am and 7 pm. Learn Arnold for 3ds Max and make breath-taking renders with our comprehensive training course. Led by certified tutors and industry experts, you'll master the basics to advanced techniques of creating stunning visual effects and lifelike renderings. Course Duration: 10 hours Course Outline: Session 1: Introduction to Arnold Renderer (1 hour) Unveiling Arnold Renderer's features and capabilities Understanding the benefits of Arnold in 3ds Max Setting up Arnold renderer and exploring its interface Mastering the workflow for exceptional results Session 2: Basic Arnold Shading (1 hour) Navigating the Arnold shading network Creating essential materials with Arnold shaders Working with diverse shader types (standard, Lambert, etc.) Elevating visuals with maps and textures in Arnold's materials Session 3: Arnold Lighting Techniques (1.5 hours) Embracing the art of lighting with Arnold Lights Implementing various light types (area lights, spotlights, etc.) Creating ambiance with Arnold skydome and environment lighting Illuminating scenes using physical sky and image-based lighting Session 4: Arnold Cameras and Rendering Settings (1.5 hours) Mastering Arnold cameras and their settings Achieving depth of field and motion blur effects in Arnold Configuring optimal rendering settings for superior results Fine-tuning rendering with the Arnold Render Setup dialog Session 5: Advanced Arnold Shading (1.5 hours) Creating intricate materials with advanced Arnold shaders Realistic surfaces with Arnold's procedural textures Harnessing the power of advanced shading nodes (bump, displacement, etc.) Unleashing specialized effects with Arnold shaders (subsurface scattering, hair, etc.) Session 6: Arnold Rendering Optimization (1 hour) Streamlining rendering settings for enhanced efficiency Leveraging Arnold features like adaptive sampling and denoising Noise reduction techniques for smoother Arnold renders Troubleshooting common rendering issues and their solutions Session 7: Advanced Lighting Techniques (1 hour) Crafting lifelike lighting setups with Arnold's prowess Exploring advanced lighting properties (exposure, color temperature, etc.) Enhancing lighting with Arnold light filters and modifiers Implementing captivating effects like volumetric lighting and caustics Session 8: Arnold AOVs and Compositing (1 hour) Understanding Arnold AOVs (Arbitrary Output Variables) Configuring and rendering AOVs for post-production control Compositing AOVs for artistic adjustments in post-production Leveraging AOVs for fine-tuning the final image Session 9: Arnold for Animation and Motion Graphics (1 hour) Integrating Arnold seamlessly into animation and motion graphics projects Rendering animation sequences with finesse Managing motion blur and time-based effects with Arnold Unveiling Arnold's potential for particle rendering and dynamic effects Session 10: Arnold Tips, Tricks, and Best Practices (1 hour) Exploring advanced techniques and workflows for exceptional results Optimizing scene setup for enhanced rendering performance Troubleshooting tips for common issues and errors in Arnold Q&A session and final review to consolidate knowledge

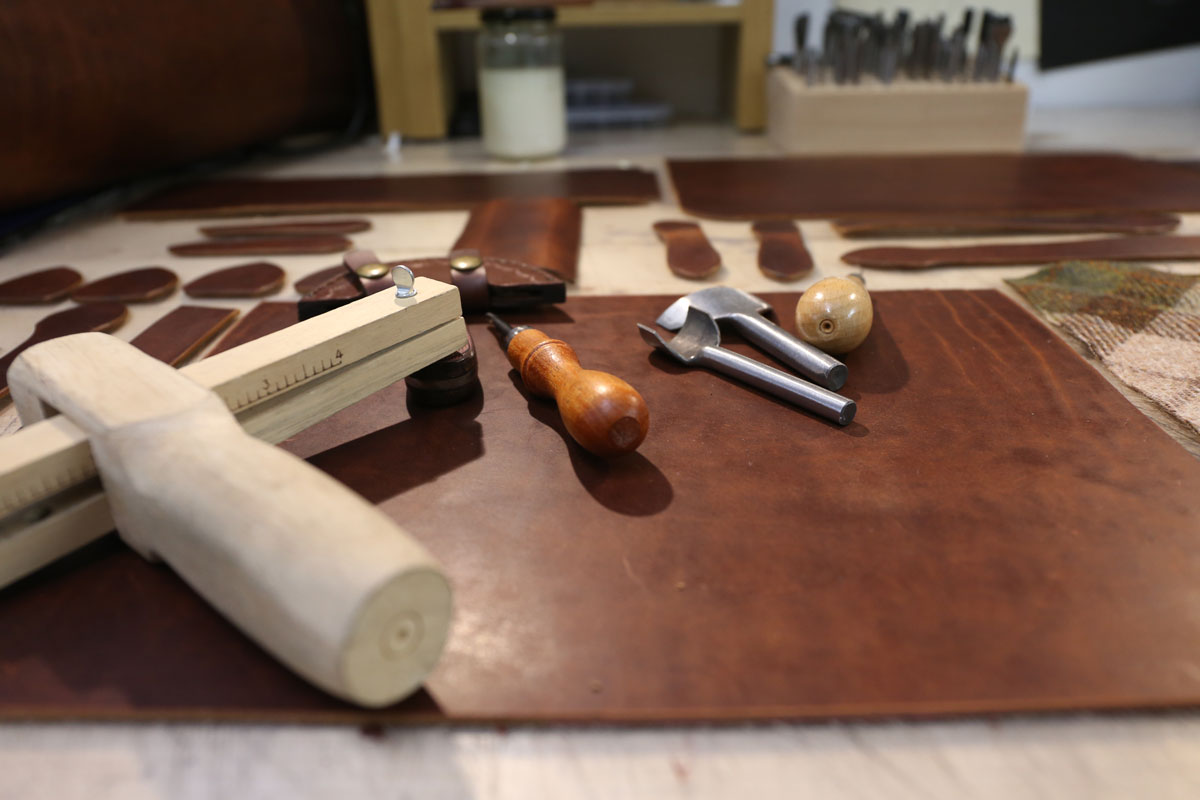
This is a theoretical and practical introductory group tuition during which you will be taught common, essential leather crafting and basic sewing techniques.You will be taught how to correctly use hand tools, how to hand sew leather and understand the most common finishing techniques used in bag and accessory making.You will learn about different types of leather and understand how to select the correct type of material(s) for your project. You will receive an overview of the technical aspects of working with leather and constructing bags and accessories such as preparing, marking, cutting, gluing, reinforcing, debossing and more.You will produce your own samples of work to take home with you.You will receive relevant, useful and informative handouts as well as lists of leather and tool suppliers.This is a professional course delivered by a prototype maker and manufacturer, with the aim of providing an overview and hands-on experience on more common leather working practices. At the end of the tuition you will have:– Gained an understanding of leather types and tanning methods– Understood what it means to work with different leather types and thicknesses and have the ability to source and select the correct tools and materials for your projects.– Gained confidence in using specific tools for preparing, marking, finishing and cutting leather.– Understood and practiced leather craft techniques such as beveling and burnishing techniques– Learnt basic leather hand sewing techniquesWHAT WILL BE TAUGHT?Below is a list of topics covered during the classes:– Understanding leather: overviews on types of leather, tanning, finishings and best use– Vegan leathers: an overview on different types and features– Understanding the importance of choosing the right materials for your project and the right tools for your materials– Leather preparing, pattern placement and marking on leather– Cutting complex shapes using a variety of tools– Using leather punches– Understanding the use of skiving, beveling and grooving– Finishing leather edges: painting vs burnishing– Using various leather glues and tapes– Understand the use of reinforcements, fusings and stabilisers to back leather– To learn basic leather hand sewing techniques– To understand the tools and materials used in saddle stitching– Prototyping and manufacturing leather goods: mentions of different working methods, machines and tools IMPORTANT TO KNOW:We will always try to cover as much on the syllabus as possible and depending on your ability and previous experience, we might not be able to complete the program or we might instead be able to teach you additional techniques relating to the above listed topics, such as:– Understanding fittings, closure types, fastening techniques and tools: sam browns, magnets, pop buttons, eyelets, etc– Sew and finish simple zips styles, handles and straps– Understanding options and the construction of how to line bags and accessories INCLUDED IN THE COURSE:You will be provided with useful digital and paper handouts which contain:– A list of tools and materials used during the lesson(s), including a description of what they are and how they are used– A list of recommended suppliers for both leather and fittings (physically in London and online)– A glossary containing information about leather types and characteristics WHAT ARE THE ENTRY REQUIREMENTS?This course is suitable for total beginners, beginners with some experience and intermediate.You should be able to use measurements and understand verbal and written English instructions. ARE THERE ANY OTHER COSTS? IS THERE ANYTHING I NEED TO BRING?Materials are included.Feel free to bring a notepad, if you would like to take some notes, we will provide the rest. HOW LONG IS THIS TUITION?:This tuition will require up to 6.5 hours to complete.We aim to provide customised and high quality tuition services and by only allowing up to 6 students at a time, we are able to focus on each person needs and interests.As every student has a different level of ability and previous experience, this course might lead some students to complete the core aspects of the lesson in a shorter time frame than others.Students who complete the course early will be welcome to stay and use the studio facilities to exercise on the topics of the lesson.
Vectorworks Garden Design Training
By London Design Training Courses
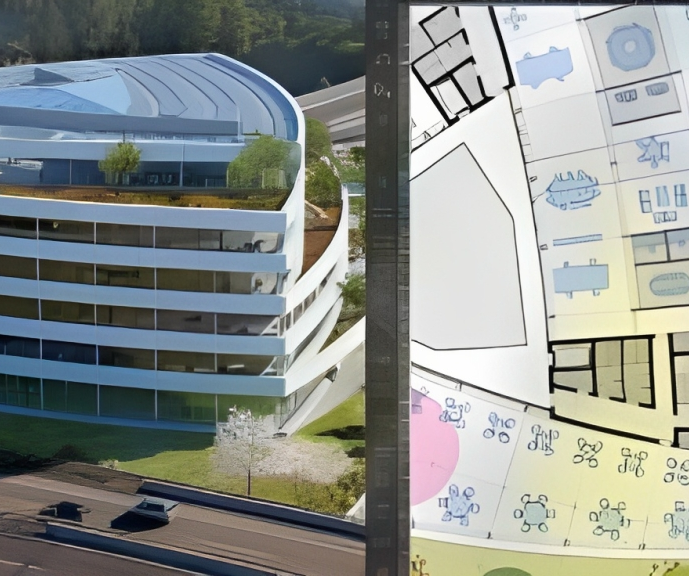
Why choose Vectorworks Garden Design Training Course? Vectorworks, a user-friendly industry-standard software, is perfect for interior design, architectural planning, 3D modeling, and landscaping projects. Its versatility makes it suitable for both home enthusiasts and professionals. Course Info Scheduling: 1-on-1 training, your schedule. Book any hour, Mon to Sat, 9 am - 7 pm. Call 02077202581 to reserve. Duration: 16 hours. Method: In-person face-to-face sessions and live online instruction. Vectorworks Garden Design Training Course: Master the art of garden design with Vectorworks software in our specialized training program. Led by certified tutors and industry experts, this course equips you with comprehensive skills and techniques tailored to garden design. Create stunning 2D layouts and 3D landscapes, visualize designs, and produce professional documentation for your projects. Benefits: In-Person and Live Online Options: Choose between in-person or live online sessions for flexible learning. Certified Tutors and Experts: Learn from experienced tutors passionate about garden design. Comprehensive Curriculum: Cover essential aspects of garden design using Vectorworks. Lesson Recordings: Access valuable session recordings for review and reinforcement. Lifetime Email Support: Receive ongoing assistance from industry experts for continuous growth. Course Duration: 16 hours Course Description: This advanced Vectorworks course is tailored for individuals who already possess basic knowledge of the software and wish to enhance their skills to become proficient users. Participants will learn more advanced 2D and 3D techniques, including advanced 3D modeling, rendering, visualization, and customizing Vectorworks to suit their specific needs and workflows. The course will cover topics such as creating custom tools, working with planting plans, and integrating with AutoCAD. Course Outline: Module 1: Vectorworks Interface and Basic Concepts - Understanding the Vectorworks interface and palettes - Opening, saving, and managing files - Creating and editing objects and shapes - Utilizing Undo/Redo and Snaps for precision - Applying graphic attributes and working with dimensions Module 2: Modeling and Drawing Techniques - Exploring advanced tools and commands in detail - Integrating with AutoCAD and data exchange - Creating, modifying, and editing text - Utilizing callout text tool for annotations - Organizing information using design layers and classes Module 3: Working with Buildings and Models - Utilizing design layers and sheet layers for architectural projects - Assigning objects to layers and classes - Working with viewports and sheet layers for presentation - Drawing buildings, including walls and roofs - Setting up and rendering perspective views Module 4: Creating Site and Landscape Plans - Importing land surveys or architects' files - Drawing site surveys and working with hard landscape elements - Adding and customizing plantings using the plant tool - Editing plant definitions and creating custom plant symbols - Generating plant schedules and reports Module 5: Vectorworks Architect Features - Setting up files and scaling the drawing - Customizing text styles and dimension standards - Working with scanned images and creating site models - Designing floors, doors, and windows using standard Vectorworks elements - Creating and managing title blocks, labels, notes, and keynotes Module 6: Working Drawings and Final Project - Developing the final project with 2D and 3D elements - Applying site modifiers and stairs to the design - Generating printing layouts for presentations - Creating working drawings with detailed plans and elevations Download Vectorworks Trial https://www.vectorworks.net/trial Proficiently use Vectorworks software for garden design, including creating accurate site plans and garden layouts. Apply 2D and 3D modeling techniques to visualize garden designs and present them professionally. Incorporate plants, hardscape elements, and other design elements into garden layouts effectively. Generate detailed construction drawings for seamless implementation of garden projects. Understand the key features and functionalities of Vectorworks specific to garden design. Demonstrate proficiency in utilizing Vectorworks tools for various garden design tasks. Interact collaboratively in face-to-face or online learning environments, engaging with instructors and peers. Utilize lesson recordings to review and reinforce course concepts for continuous learning. Seek personalized guidance and assistance through lifetime email support from certified tutors and industry experts. Transform creative garden design ideas into practical and stunning real-world projects using Vectorworks software.
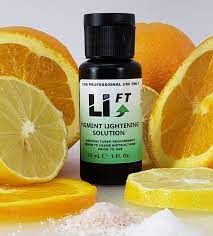
LI-FT Saline Tattoo Removal Course
By Glow Academy London
The alternative to laser tattoo removal. Li-FT is an advanced saline removal system. This course will teach you how to remove tattoos on all areas of the face and body using the Li-FT removal solution. Included in the course is a free bottle of Li-FT and a pre study webinar from Girlz Inc. It’s perfect for PMU and microblading artists. Learn how to remove poor pmu for your clients. Pre-requisites – Students must hold a certificate for microblading and/or machine tattooing for a minimum of 6 months. Upon completion of the course you will be certified and trained to remove using both techniques. Prior to your in person training, you will receive your personal log in details for the Li-FT pre study webinar from Girlz Ink. This must be completed prior to your practical training. On your training day we will cover the theory and practical aspects of removal and answer any of your questions, in addition you will also receive a free bottle of Li-FT solution. Course fee is £795