- Professional Development
- Medicine & Nursing
- Arts & Crafts
- Health & Wellbeing
- Personal Development
208 Animation courses in Walton-on-Thames
Advanced Adobe InDesign Training Program
By ATL Autocad Training London
Advanced Adobe InDesign Training Program Learn InDesign with a course at Real Animation Works. Choose from Weekend, Weekday or Evening Courses and learn from expert tutors. Benefit from professional InDesign training conducted by Adobe Certified Instructors with extensive graphic design expertise. Check our Website Duration: 10 hours. Approach: 1-on-1 and personalized attention. Schedule: 1-on-1 sessions, available Monday to Saturday from 9 am to 7 pm. Course Title: Comprehensive Adobe InDesign Training Duration: 10 Hours Session 1: Introduction to Adobe InDesign (1 hour) Overview of InDesign interface and tools Document setup: page size, margins, and columns Basic text formatting and paragraph styles Introduction to working with images and graphics Session 2: Advanced Text Formatting and Styles (1 hour) In-depth exploration of character and paragraph styles Advanced text composition techniques Managing text flow with threaded frames Incorporating special characters for typographic control Session 3: Mastering Images and Graphics (1 hour) Advanced image manipulation: resizing, cropping, and effects Text wrap options and integrating text with images Creating image frames and working with transparency Interactive elements: buttons and hyperlinks Session 4: Layout Design Techniques (1.5 hours) Grids and guides: precise alignment and spacing Working with layers for efficient design management Advanced object arrangement and distribution Utilizing master pages for consistent layout elements Session 5: Advanced Document Features (1.5 hours) Tables and data merge: organizing and automating data Interactive PDFs: forms, multimedia, and navigation Advanced print preparation: color management and preflighting Exporting for various digital and print outputs Session 6: Advanced Special Effects (1 hour) Creating drop shadows, gradients, and blending modes Working with typography on a path Advanced text and image effects Integrating Adobe Illustrator and Photoshop files Session 7: Project-Based Learning (1 hour) Participants work on a comprehensive project applying learned skills Instructor-guided project review and feedback Session 8: Tips, Tricks, and Time-Saving Techniques (1 hour) Productivity hacks and shortcuts Troubleshooting common issues and errors Best practices for efficient workflow and collaboration Session 9: Portfolio Building and Career Guidance (0.5 hour) Creating a professional portfolio showcasing InDesign projects Career advice and industry insights from the instructor Session 10: Q&A, Certification, and Course Completion (0.5 hour) Addressing participant questions and concerns Certificate of Completion distribution and course review Celebrating the completion of the Adobe InDesign training journey Upon completion of the Comprehensive Adobe InDesign Training course, participants will: Master Core Skills: Develop proficiency in essential InDesign tools, functions, and techniques for effective layout design. Advanced Text and Typography: Understand advanced text formatting, paragraph styles, and typographic controls for professional typography. Image Manipulation Expertise: Acquire skills in advanced image manipulation, text wrapping, transparency, and integration of multimedia elements. Advanced Layout Design: Learn precise layout techniques using grids, guides, layers, and master pages for consistency and visual appeal. Interactive Document Creation: Create interactive PDFs, forms, multimedia-rich content, and navigation elements for digital publications. Data Management and Automation: Master tables, data merge, and automation features for organized data presentation and streamlined workflow. Print and Export Proficiency: Understand color management, preflighting, and export settings for high-quality print and digital output. Special Effects and Integration: Apply advanced effects, gradients, blending modes, and integrate InDesign with Illustrator and Photoshop files seamlessly. Project-Based Expertise: Develop a comprehensive portfolio-worthy project, showcasing a range of InDesign skills and creativity. Efficient Workflow and Troubleshooting: Implement time-saving techniques, shortcuts, and troubleshoot common design challenges effectively. Career Readiness: Gain valuable insights into industry practices, portfolio building, and career guidance for pursuing opportunities in graphic design and desktop publishing. Versatile Learning Choices: Opt for either in-person sessions at our London center or engage in interactive online learning. Both options offer hands-on experience, detailed demonstrations, and ample chances for inquiries. Compatibility and Assistance: InDesign operates smoothly on Windows and Mac systems. Participants receive a comprehensive InDesign training manual for reference and an electronic certificate upon course completion. Additionally, enjoy lifelong email assistance from your InDesign instructor. Entry Requirements: No prior InDesign expertise is necessary. The training concentrates on InDesign 2023, relevant to recent software updates. Guarantees: We ensure exceptional value for your investment, guaranteeing your acquisition of essential skills and concepts during the training. Course Highlights: Master advanced typography techniques, including paragraph styles, character styles, and nested styles. Explore multi-page layout design, long document management, and advanced table formatting. Acquire skills to create and manipulate complex shapes, vector graphics, and custom illustrations. Learn efficient workflows for data merging, interactive documents, and digital/print output. Collaborate seamlessly with other Adobe Creative Cloud applications. Upon completion, receive a Certificate of Completion and access recorded lessons for self-paced learning. Expert Instruction: Learn from certified tutors and industry experts, gaining valuable insights, tips, and best practices for professional-level designs. Flexible Learning Options: Choose between in-person or live online sessions based on your schedule. Sessions are available Monday to Sunday, from 9 am to 8 pm, accommodating your convenience. Lifetime Support: Benefit from lifetime email support for continuous assistance. Our dedicated team is available to address your queries and challenges. Explore Adobe InDesign - Free Trial: https://www.adobe.com/uk/products/indesign/free-trial-download.html
InDesign Evening Training
By London Design Training Courses
Why Choose InDesign Evening Training Course? Course Link. If you aim to enhance your design abilities, acquire proficiency in a new software, or pursue a career in graphic design, an InDesign course is highly beneficial. Tailored for individuals with foundational knowledge of Adobe InDesign, this training is designed to further develop your existing skills. Duration: 10 hrs Method: 1-on-1, Personalized attention Schedule: Tailor your own hours of your choice, available from Mon to Sat between 9 am and 7 pm InDesign Evening Course Outline (10 hours) Introduction Getting Started with Adobe InDesign CC Advanced Course Adjusting Workspace for Maximum Efficiency Customizing Default Font Size for New Documents Utilizing Special Features for Typekit & Open Type Fonts Exploring Sources for Free Fonts in InDesign Mastering Fonts in Adobe InDesign CC Identifying Fonts with Font Guess Selecting Beautiful Font Pairings Incorporating Free Icons from Adobe Market Using the Color Theme Tool Understanding Colour Modes Importing and Setting Default Colors Finding Great Colors with Adobe Color Managing Appearance of Black & Proofing Colors Creating Multiple Shapes with Gridify Live Distribute Drawing Arrows in InDesign CC Designing Complex Flowers in InDesign CC Utilizing Auto Size for Auto-Expanding Text Boxes Exploring Placeholder Text Alternatives Adding Paragraph Borders & Shading Understanding Paragraph vs Single Line Composer Making Paragraphs Span 2 Columns Mastering Justification & Hyphenation Options Aligning Optical Margins Harnessing the Power of Keep Options Working with Advanced Anchored Objects Using Conditional Text Creating Pie Charts & Bar Graphs Pros & Cons of Interactive Types Creating Interactive PDFs Adding Interactive Page Transitions Adding Navigation to Interactive PDFs Understanding Publish Online in InDesign CC Publishing Adobe InDesign Documents Online Adding Video to InDesign Documents Creating Button-Triggered Animations Making Multi-State Objects Incorporating Adobe Animate CC to InDesign Files Adding Maps & Calendars to Interactive Documents Generating QR Codes in InDesign CC Exploring Essential Keyboard Shortcuts Automatically Placing Text on Multiple Pages Creating Cross References & Index Adding Document Name Automatically with Text Variables Utilizing Adobe InDesign CC Book Feature Changing Preferences for Advanced Users Speeding Up Workflow for Advanced Users Using Character Styles Advanced Paragraph Styles Mapping Word Styles with InDesign Styles Creating Nested Styles & Grep Styles Using Next Style Mastering Object Styles Best Practices for Working Across Multiple Documents Utilizing Adobe Stock with InDesign CC Cropping Images Inside Text Making InDesign Layouts with Adobe Comp CC Advanced Use of CC Libraries Integrating Photoshop & Illustrator in InDesign CC Creating PDF Forms in InDesign CC Advanced Use of the Pages Panel Placing InDesign Documents Inside Each Other Installing and Using Scripts in InDesign CC Improving InDesign Performance Advanced Exporting & Printing Tricks Bonus: Software Updates Adobe InDesign https://adobe.com › indesign › get-started Installing for the first time or on a new computer? Click Get InDesign below to begin downloading. Follow the onscreen instructions to sign-in and install.

This Level 4 City and Guilds 2396-01 Design and Verification of Electrical Installations course has been designed to help develop the skills and up date the knowledge of the requirements to enable you to professionally design, erect and then verify an electrical installation. This course is aimed at those who will have responsibility for designing, supervising, installing and testing electrical installations. Further information can be found here: C&G 2396 Electrical Design Course — Optima Electrical Training (optima-ect.com)

The City & Guilds 2365 Level 3 Course is the natural progression for anyone who has completed the Level 2 Diploma 2365 course or related level 2 courses. On completion of this course you will then be able to undertake the Level 3 NVQ thus becoming recognised as a fully qualified electrical engineer within the industry with the ability to apply for JIB (Gold Card) membership upon successful completion of the AM2 Assessment. Further information on the Level 3 can be found here: C&G 2365 Level 3 Diploma in Electrical Installations — Optima Electrical Training (optima-ect.com)

If you want to start installing independently or with an electrical contractor look no further as this course will give you the skills and knowledge required. This package which will allow you to become a fully qualified domestic installer and enable you to join a Competent Person Self-Certification Scheme and certify your own domestic work.

GARDEN DESIGN TRAINING (BEGINNER TO ADVANCE LEVEL)
By Real Animation Works
Garden design face to face training customised and bespoke.

Vray for Sketchup Training
By London Design Training Courses
Why choose Vray for Sketchup Training Course? Course info Our in-person or live online sessions led by certified tutors. Learn advanced rendering techniques, practical hands-on experience, recorded lessons, lifetime email support, and an industry-recognized certification. Enroll now to elevate your Sketchup renderings. Duration: 6 hrs Method: 1-on-1, Personalized attention Schedule: Tailor your own schedule by pre-booking a convenient hour of your choice, available from Monday to Saturday between 9 am and 7 pm Experience V-Ray training, where you'll master the art of creating stunningly realistic 3D architectural and interior design scenes from your SketchUp models. V-Ray for SketchUp is a user-friendly rendering solution, offering faster rendering, enhanced lighting tools, and the ability to visualize intricate scenes effortlessly. Our SketchUp - Rendering with V-Ray course empowers you to seamlessly integrate SketchUp with V-Ray, allowing you to craft scenes with captivating features, including: Various lighting techniques (daylight, sunlight, and skylight). Reflective surfaces for added depth. Dynamic moving cameras for captivating visualizations. This hands-on course is highly practical, ensuring you gain real-world skills and expertise. You have the flexibility to arrange this course on-request, either as one-to-one training or as a 'closed course' for your group. The training can be tailored to accommodate your existing knowledge and specific project requirements. Choose from in-class sessions available at six centers or participate in live online classes. V-Ray works seamlessly on both Windows and Mac platforms, and our centers provide computers for delegates to use, ensuring a familiar environment for all. Upon successful completion, you'll receive an e-certificate to validate your V-Ray training. Following the training, you'll enjoy lifetime email support from your trainer to address any post-course queries or concerns. Prerequisites for this course include familiarity with the fundamentals of SketchUp, such as attending our Introduction to SketchUp course or possessing equivalent knowledge. Our training can accommodate any recent version of SketchUp Pro and V-Ray, ensuring compatibility with your preferred Windows or Mac platform. Experience the transformative power of V-Ray and elevate your SketchUp projects to new heights. Experience V-Ray training, where you'll master the art of creating stunningly realistic 3D architectural and interior design scenes from your SketchUp models. V-Ray for SketchUp is a user-friendly rendering solution, offering faster rendering, enhanced lighting tools, and the ability to visualize intricate scenes effortlessly. Module 1: Introduction to Vray for SketchUp Gain insights into Vray's benefits for SketchUp Install and set up Vray for SketchUp Familiarize with the Vray interface and workflow Explore Vray materials and their properties Module 2: Lighting and Environment Master effective lighting techniques in Vray Understand different Vray light types and settings Create realistic outdoor lighting with Vray sun and sky Utilize Vray dome lighting for interior scenes Introduce IES lights and their usage in Vray Module 3: Camera and Composition Learn Vray camera settings and their impact on the final image Control exposure and adjust camera settings in Vray Create depth of field effects with Vray camera Animate the Vray camera for dynamic shots Explore the Vray frame buffer and its functionalities Module 4: Vray Materials and Textures Gain an in-depth understanding of Vray materials and their properties Create realistic materials using Vray's material editor Save and organize custom Vray material libraries Apply Vray material overrides for quick changes Module 5: Rendering and Post-Production Explore Vray rendering settings and optimization techniques Render high-quality images and animations with Vray Enhance Vray renders using post-production techniques in Photoshop Fine-tune the final output with the Vray frame buffer Compose Vray render elements in Photoshop for added control For those interested in trying Vray for SketchUp, a free trial can be accessed through the following link: https://www.chaosgroup.com/vray/sketchup/free-trial. Additionally, provided material and texture resources (https://www.vray-materials.de/ and https://textures.com/) can enhance the quality of renders by providing access to a variety of materials and textures for use in Vray.

Revit and 3dsMax V-Ray Visualization Basic to Advance Training
By London Design Training Courses
Why Learn Revit and 3dsMax V-Ray Visualization Basic to Advance Training Course? Course info Master architectural visualization and photorealistic renderings. In-person or live online options available. Learn Revit and 3dsMax, V-Ray rendering, and advanced techniques. Hands-on projects for real-world experience. Duration: 40 hrs Method: 1-on-1 - Individual support. Schedule: Tailor your own schedule by pre-booking a convenient hour of your choice, available from Mon to Sat between 9 am and 7 pm. Comprehensive Training: Master Revit, 3dsMax, and advanced visualization techniques for exceptional results. V-Ray Rendering: Explore realistic rendering with V-Ray, including advanced techniques and materials. Real-World Projects: Work on industry-relevant projects for a professional portfolio. Flexible Learning: Choose in-person or live online sessions for an engaging experience. Lesson Recordings: Access recorded classes to reinforce your understanding. Lifetime Email Support: Get guidance and assistance from experienced instructors beyond the course duration. Autodesk Certified Instructors. Comprehensive Training: Master Revit, 3dsMax, and advanced visualization techniques for exceptional results. V-Ray Rendering: Explore realistic rendering with V-Ray, including advanced techniques and materials. Real-World Projects: Work on industry-relevant projects for a professional portfolio. Flexible Learning: Choose in-person or live online sessions for an engaging experience. Lesson Recordings: Access recorded classes to reinforce your understanding. Lifetime Email Support: Get guidance and assistance from experienced instructors beyond the course duration. Autodesk Certified Instructors. Part 1: Revit (16 hours) Module 1: Introduction to Revit Familiarizing with the Revit interface and workspace Embracing the Building Information Modeling (BIM) workflow Creating a fundamental building model as a starting point Module 2: Basic Modeling in Revit Working with essential elements such as walls, doors, and windows Constructing floors and roofs to complete the building structure Crafting functional and visually appealing stairs and railings Module 3: Advanced Modeling in Revit Delving into the creation and manipulation of families Utilizing parameters and constraints to enhance modeling efficiency Exploring intricate geometries for complex designs Module 4: Annotation and Documentation in Revit Enhancing project documentation by adding text and dimensions Generating informative schedules for better project management Mastering the printing and exporting processes for professional output Part 2: 3ds Max (16 hours) Module 1: Introduction to 3ds Max Navigating the 3ds Max interface and workspace Understanding the 3D modeling workflow for design visualization Initiating the creation of basic 3D models Module 2: Basic Modeling in 3ds Max Working with primitive shapes to build foundational models Creating and refining splines to form versatile shapes Advancing to complex 3D model development for intricate designs Module 3: Materials and Textures in 3ds Max Exploring the material editor and its functionalities Skillfully applying and adjusting materials for realistic renders Incorporating textures to add depth and detail to the models Module 4: Lighting and Cameras in 3ds Max Mastering the art of lighting creation and manipulation Utilizing the daylight system for enhanced realism Understanding cameras and perspectives for compelling visual storytelling Part 3: V-Ray (8 hours) Module 1: Introduction to V-Ray Getting acquainted with the V-Ray interface and workflow Exploring V-Ray materials and textures for high-quality renders Module 2: Lighting and Rendering in V-Ray Creating and refining lighting setups for stunning renders Utilizing global illumination to enhance the realism of scenes Implementing advanced rendering techniques for professional output Module 3: Materials and Textures in V-Ray Crafting and modifying V-Ray materials for realistic surfaces Applying V-Ray textures to add depth and realism to objects Utilizing V-Ray displacement maps for intricate details For 3ds Max free trial, visit: https://www.autodesk.co.uk/products/free-trial. To access the V-Ray free trial, visit: https://www.chaosgroup.com/. Start your journey to becoming a proficient designer and renderer in the world of 3D modeling and visualization. Download Revit Revit and 3dsMax V-Ray Visualization Basic to Advance Training Course: Proficient Software Skills: Acquire a strong command of Revit and 3dsMax, along with advanced techniques in V-Ray rendering. High-Quality Visualizations: Create realistic and visually stunning architectural visualizations using V-Ray. Architectural Modeling: Master the process of modeling architectural elements with precision and efficiency. Materials and Textures: Understand how to apply realistic materials and textures to enhance visualizations. Lighting Setup: Set up lighting environments to achieve optimal illumination and ambiance in renderings. Rendering Techniques: Explore advanced rendering techniques, including global illumination, caustics, and ambient occlusion. Real-World Projects: Complete industry-relevant projects to build a professional-grade portfolio. Problem-Solving Skills: Develop the ability to troubleshoot and resolve rendering challenges effectively. Efficient Workflows: Learn time-saving workflows and best practices for efficient visualization production. Portfolio Showcase: Showcase your newly acquired skills through a diverse range of visualizations.

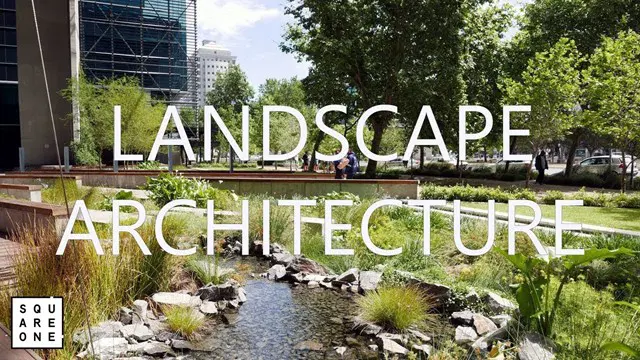
Landscape Architecture Training Course 1-2-1 Basic to Advanced level
By Real Animation Works
Landscape training face to face training customised and bespoke.
Enscape Rendering Training
By London Design Training Courses
Why Choose Enscape Rendering Training Course? Course info Best real-time visualization plugin, integrates with design tools like Revit, SketchUp, Rhino, ArchiCAD, and Vectorworks. Experience swift and real-time visualization within your preferred applications, eliminating extra costs and adjustments. Elevate your design projects effortlessly with Enscape. Duration: 5 hrs Method: 1-on-1, Personalized attention Schedule: Tailor your own hours of your choice, available from Mon to Sat between 9 am and 7 pm What does the Enscape Training & Interactive Workshop offer? The Enscape Training & Interactive Workshop is designed to help you get up and running with Virtual Reality (VR) in a cost-effective manner. It covers hardware and software setup, navigation techniques, real-time updates, material settings, and more. The workshop also allows participants to experience VR firsthand. What will I learn in the Enscape (VR) Training and Interactive Workshop? The workshop covers hardware setup, software installation, and configuration. You will learn how to migrate models from Revit and SketchUp into VR, navigate through designs, update objects and materials in real-time, and utilize various visual styles and settings. The course also includes interactive workshops with support from our expert tutors. Course Outline: Enscape Rendering Software Training (5 hours) Course 1: Enscape for Revit Hour 1: 1. Introduction to Enscape: Overview of Enscape rendering software, its features, and benefits. 2. Installing and Setting up Enscape: Step-by-step guidance on installing and configuring Enscape for Revit. 3. Enscape Interface: Familiarizing with the Enscape user interface and navigation controls within Revit. Hour 2: 4. Enscape Materials: Exploring material creation, application, and customization within Enscape for Revit. 5. Lighting in Enscape: Understanding different lighting options, adjusting light settings, and creating realistic lighting effects. Hour 3: 6. Enscape Camera Settings: Manipulating camera angles, perspectives, and settings for optimal visualization. 7. Enscape Rendering Settings: Exploring various rendering settings and techniques to enhance the quality of the final output. Hour 4: 8. Enscape Rendering Workflow: Demonstrating a step-by-step workflow for generating renderings and walkthroughs using Enscape in Revit. 9. Advanced Features: Introduction to advanced features such as creating panoramas, virtual reality (VR) walkthroughs, and creating animations in Enscape. Hour 5: 10. Tips and Tricks: Sharing tips and techniques for maximizing efficiency and achieving high-quality results in Enscape for Revit. 11. Q&A and Troubleshooting: Addressing participant questions, providing troubleshooting guidance, and discussing common challenges and solutions. OR Course Outline: Enscape Rendering Software Training (5 hours) Course 1: Enscape for Sketchup Hour 1: 1. Introduction to Enscape: Overview of Enscape rendering software, its features, and benefits for SketchUp users. 2. Installing and Setting up Enscape: Step-by-step guidance on installing and configuring Enscape for SketchUp. 3. Enscape Interface: Familiarizing with the Enscape user interface and navigation controls within SketchUp. Hour 2: 4. Enscape Materials: Exploring material creation, application, and customization within Enscape for SketchUp. 5. Lighting in Enscape: Understanding different lighting options, adjusting light settings, and creating realistic lighting effects. Hour 3: 6. Enscape Camera Settings: Manipulating camera angles, perspectives, and settings for optimal visualization in SketchUp. 7. Enscape Rendering Settings: Exploring various rendering settings and techniques to enhance the quality of the final output. Hour 4: 8. Enscape Rendering Workflow: Demonstrating a step-by-step workflow for generating renderings and walkthroughs using Enscape in SketchUp. 9. Advanced Features: Introduction to advanced features such as creating panoramas, virtual reality (VR) walkthroughs, and creating animations in Enscape. Hour 5: 10. Tips and Tricks: Sharing tips and techniques for maximizing efficiency and achieving high-quality results in Enscape for SketchUp. 11. Q&A and Troubleshooting: Addressing participant questions, providing troubleshooting guidance, and discussing common challenges and solutions.