- Professional Development
- Medicine & Nursing
- Arts & Crafts
- Health & Wellbeing
- Personal Development
1045 Adobe courses
Master Business Networking in Just 1 Day - Join our Workshop in Wakefield
By Mangates
Business Networking 1 Day Training in Wakefield

Master Business Networking in Just 1 Day - Join our Workshop in St Davids
By Mangates
Business Networking 1 Day Training in St Davids
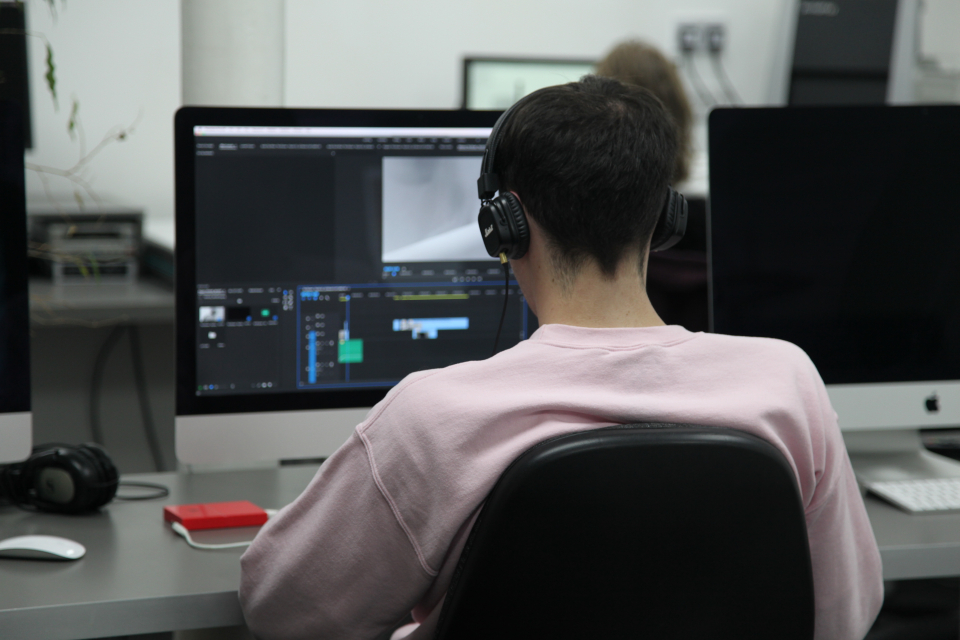
This 6 week course will support you to make the most of the range of applications Adobe Premiere Pro offers in the production of video. Sample footage will be provided for you throughout the course, but you can also bring along your own video files to work on. The course is quite technical so some computer experience is required. We use Macs on the course – the Premiere interface is the same across operating systems but some shortcuts and menu items are different. Week 1- The basics This week we’ll start with some of the basics, introducing you to editing and Premiere Pro through: A short history of editing; from analogue to digital Getting to know the layout of Premiere Pro Working with ‘bins’ (folders) and creating edit Sequences Making selects from the rushes and sound files by creating in and out points Introducing clips to the timeline and making a simple edit with music Understanding rendering for smooth, full quality playback Week 2- Editing narrative sequences This week we’ll get further stuck into editing by building narrative, focus on offline editing‚ better organisation of your projects and breaking down footage through: Re-linking lost or moved footage Video ingest – importing and organising clips Organising and breaking down rushes using annotated markers and sub-clips Basics of the effects and motion settings Using our skills to create a simple narrative sequence Editing a dialogue sequence Considering the best ways of exporting your film for online Learn Adobe Media Encoder for more efficient exporting Week 3- Video settings, effects & titles This week we will focus in on what makes up video from a technical standpoint. We will then look at how we can work with and alter these parameters for different uses in our films through: Transcoding – converting the footage into an editable file and understanding codecs and meta data Adjusting scale and positioning and using motion keyframes to create movement over time Adding titles and animating them Applying transitions and various stock video effects Layering tracks and using opacity and different layer blending effects Creating masks and using motion tracking Working with green-screen footage, creating mattes, mask filters and working with multiple layers Week 4- Audio & sound This week we’ll consider the importance of sound design and music for narrative and atmosphere in film and experimental video through: Learning how to enhance your film with sound and music Introducing audio and music to the timeline, cutting and leveling Laying down music and cutting the footage to fit Building sound design around an existing edit with sync-sound and SFX Common practice and different approaches for syncing external microphone audio and video Mastering the audio and making sure that it is all levelled Learning how to create subtitles for our films and different methods to export/embed them Week 5- Colour This week we’ll start looking at colour in our videos and what role that plays. We will look at the process of colour grading and changing the mood in our films through: Using Lumetri Colour, the colour-correcting function within Premiere Pro CC Matching the colour of different cameras to create a similar look Creating different “colour grades” to create different atmospheres Stylising our footage Understand the colour limitations of video files and the importance of exposure when filming Working with tracked masks to isolate certain areas within your image to colour correct Week 6- Putting it all together In our final week we will get the opportunity to experiment with all the skills we’ve learned to create an opening sequence for a tv series. This is also a great opportunity to revisit any topics from previous weeks. Courses are subject to minimum enrolment. Please register early, within five days of the start date, to reduce the likelihood of course cancellation. Please read our cancellation policy before booking. Students, anyone over the age of 65, and those in receipt of any form of benefits can claim the concessionary price, offering a 10% discount on the full course price. Valid proof of eligibility must be produced on the first day of the course. Please use the code CONCESSION when prompted at checkout.
Adobe Captivate 2019 - The Essentials
By Nexus Human
Duration 2 Days 12 CPD hours Overview #NAME? A course that teaches the core Adobe Captivate skills needed to create eLearning courses. 1 - EXPLORING CAPTIVATE Explore a Finished Captivate Project Zoom and Magnify Navigate a Project Explore and Reset the Workspace Preview the Entire Project 2 - NEW PROJECTS & SOFT SKILLS ELEARNING Create a Blank Project Add Images to Placeholders Import Images Use a Smart Shape as a Button Disable Click Sounds 3 - SCREEN RECORDINGS Rehearse a Script Review Recording Settings Review Recording Modes Record Using Multiple Modes Record a Custom Simulation Record a Demonstration that Pans Manually Record the Screen 4 - VIDEO DEMOS Record a Video Demo Add a Video Zoom Add a Video Pan Smooth a Mouse Path and Show Visual Clicks Split a Video Trim a Video Insert a Video Project into a Standard Project Publish a Video Demo 5 - CAPTIONS, STYLES, TIMING, AND ROUND TRIPPING Insert and Edit Text Captions Edit the Default Caption Style Change a Callout Type Used by a Text Caption Control Slide Timing Control Slide Object Timing Check Spelling Align Slide Objects Export Captions to Word Import Captions from Word into Captivate 6 - POINTERS, PATHS, PATHS, BOXES, AND BUTTONS Control Mouse Effects Edit a Mouse Path Clone an Object Style Insert a Highlight Box Insert an Image Button Control Appear After Timing 7 - IMAGES AND VIDEOS Insert, Resize, and Restore an Image Import Images into the Library Resize, Transform, and Align Images Manage Unused Library Assets Create an Image Slideshow Insert a Video Set Video Properties 8 - AUDIO Work with Rollover Captions Import Audio onto a Slide Object Import Background Audio Add a Slide Note Calibrate a Microphone Record Slide Audio Import Audio onto a Slide Edit an Audio File Insert Silence Convert Text-to-Speech 9 - STATES, ANIMATIONS, AND OBJECT EFFECTS Change State Views for a Button Add an Animation to a slide Insert a Text Animation Apply an Effect to a Slide Object Apply a Free Fall Effect to an Object 10 - SOFTWARE SIMULATIONS Hide the Mouse Replace Phrases Insert a Click Box Insert a Text Entry Box 11 - WORKING WITH POWERPOINT Create a Project from a Presentation Edit the Source Presentation Synchronize with Source Rescale a Project 12 - QUIZZING Edit Quizzing Object Styles Set the Quiz Preferences Question Slides Insert Question Slides Edit a Question Slide Compare Submit All to Submit Buttons Insert a Knowledge Check Review a GIFT File Import a GIFT File into a Project Create Question Pools Move Questions to Pools Insert Random Question Slides 13 - PUBLISHING Apply a Skin Edit, Save, and Delete a Skin Name Slides Check Publish Settings and Add a Loading Screen Publish as SWF and PDF Run the HTML5 Tracker Publish as HTML5


Do you love animations? Have you ever imagined becoming an individual who can produce mind-boggling animations using Adobe software? Well, the 2D Animation course with Adobe Animate for beginners is your dream course. With the successful completion of the course, you can enter the job market with an average salary of more than £30,000 annually. Module one focuses on building a solid foundation on Adobe Animate. As you dive into the 'Workplace' lesson, you will begin to understand toolbars, menus, and the layout of panels. The 'Selection Tools' lesson will give you insights into manipulating plus transforming objects within the animation. Lessons on 'Drawing Tools will increase your skill in crafting and modifying shapes, curves, and lines to add the foundation of animations. At the end of the first module, you can create smooth animations. In module two of this 2D animation course, you will learn to brainstorm ideas, build character concepts, and sketch rough character outlines, which will develop your foundation on character design. The next lesson will make you skilled enough to create visually pleasing characters. Moreover, the idea of choosing suitable colour pallets to express the emotions, moods, and traits of the characters will be introduced in this lesson. You can produce mouth shapes for your animated characters at the end of this module. The third module will help you to create versatile movements and expressions for animated characters, like blinking, waving, nodding, etc. The main focus of the module is to develop character walking. It will teach you the movement and pose related to the animation walk. Moreover, it explains in detail about adding fluidity in the animation to keep the smooth vibe. Join the best 2D animation course for beginners right now and move forward to a bright career. Learning Outcome Gain excellent proficiency in Adobe Animate Achieve mastery in using tools to craft precise shapes Ability to create versatile symbol types for efficient animation Become an expert in frame-by-frame animation Capable of crafting high-quality character design Create realistic anime characters with simple expressions Proficiency in colour and shape application Career path 2D Animator Graphic Designer UI/UX Animator Character Designer Motion Graphics Designer Storyboard Artist Freelance Animator Course Curriculum Introduction Introduction 00:01:00 Adobe Animate Basics Workspace 00:06:00 Selection Tools 00:10:00 Drawing Tools 00:08:00 Remaining Tools Overview 00:08:00 Object Drawing 00:03:00 Graphic Symbols 00:10:00 Movie Clip 00:06:00 Button 00:05:00 Timeline 00:09:00 Shape Tween 00:04:00 Classic Tween 00:04:00 Motion Tween 00:03:00 Frame-by-frame animation 00:10:00 Designing the Character Character Design-Part 1 00:06:00 Character Design-Part 2 00:13:00 Character Design-Part 3 00:11:00 Colouring The Shapes 00:11:00 Converting Shapes To Symbols 00:08:00 Creating Mouth Shapes 00:15:00 Character Rigging 00:14:00 Character Animation Character Simple Animation 00:25:00 Character Walk Cycle Part-1 00:11:00 Character Walk Cycle Part-2 00:12:00 Character Walk Cycle Part-3 00:12:00 Downloadable Files Downloadable Files - Learn 2D Animation with Adobe Animate 00:00:00 Certificate and Transcript Order Your Certificates or Transcripts 00:00:00
Diploma in Graphic Design Canva, Adobe After Effects, User Experience UX Digital Design
By Compete High
Diploma in Graphic Design: Canva, Adobe After Effects, User Experience (UX) Digital Design Welcome to the Diploma in Graphic Design program, a comprehensive course designed to equip you with the essential skills and knowledge to thrive in the dynamic field of graphic design. This diploma program offers a unique blend of theory and practical application, focusing on industry-standard tools such as Canva and Adobe After Effects, along with a deep dive into user experience (UX) digital design principles. Module 1: UI vs UX Design In the digital realm, user interface (UI) and user experience (UX) design are pivotal aspects of creating compelling and intuitive digital experiences. This module serves as a foundational exploration of UI vs UX design, elucidating the key differences between the two disciplines. Through engaging lectures and hands-on activities, students will gain a comprehensive understanding of the role each plays in the design process. Topics covered include: Differentiating between UI and UX design Understanding user behavior and psychology Wireframing and prototyping techniques Conducting user research and usability testing Module 2: Introduction to Canva Canva has revolutionized the graphic design landscape, empowering users to create stunning visuals with ease. In this module, students will embark on a journey through the fundamental features and functionalities of Canva. From creating eye-catching social media graphics to designing captivating presentations, participants will learn how to leverage Canva's intuitive platform to bring their creative visions to life. Key topics include: Navigating the Canva interface Exploring design elements: text, images, and illustrations Designing for various mediums: social media, print, web, etc. Advanced tips and tricks for maximizing efficiency Module 3: Adobe After Effects Adobe After Effects stands as an industry-standard tool for motion graphics and visual effects. In this module, students will delve into the powerful capabilities of After Effects, mastering techniques to animate graphics, add special effects, and enhance video productions. Through a combination of demonstrations and hands-on projects, participants will develop proficiency in: Understanding the After Effects workspace Creating motion graphics and animations Incorporating visual effects and compositing techniques Integrating After Effects with other Adobe Creative Cloud applications Module 4: Digital Design In the digital age, effective design is paramount to capturing and retaining audience attention. This module focuses on honing students' digital design skills, equipping them with the tools and techniques to create visually impactful digital assets. From web design principles to designing for mobile interfaces, participants will explore a range of topics, including: Responsive web design principles Typography and color theory in digital design Creating engaging digital content: websites, apps, and more Optimizing designs for user interaction and engagement Module 5: Understanding the Principles of Design A strong grasp of design principles forms the foundation of every successful graphic designer. In this concluding module, students will deepen their understanding of the principles of design, encompassing concepts such as balance, hierarchy, contrast, and unity. Through real-world case studies and hands-on exercises, participants will learn to apply these principles effectively to their design projects. Key areas of focus include: Gestalt principles and visual perception Applying design principles across various mediums Critiquing and refining design work Developing a personal design aesthetic By the end of the Diploma in Graphic Design program, students will emerge with a robust skill set and portfolio, ready to embark on a fulfilling career in the ever-evolving field of graphic design. Whether aspiring to work as freelance designers, join creative agencies, or pursue entrepreneurial ventures, graduates will be well-equipped to make their mark in the industry. Join us on this transformative journey and unleash your creative potential in the world of graphic design! Course Curriculum Module 1 UI vs UX Design UI vs UX Design 00:00 Module 2 Introduction to Canva Introduction to Canva 00:00 Module 3 Adobe After Effects Adobe After Effects 00:00 Module 4 Digital Design Digital Design 00:00 Module 5 Understanding the Principles of Design Understanding the Principles of Design 00:00

Quickstart Adobe Express Training
By Greta Powell Training
This is a quickstart Adobe Express Training course held online in Janury 2025. Ideal for business owners or freelancers looking to get to grips with social media design and designing for social media marketing.

“You don't take a photograph. You make it" - Ansel Adams Photography For Parents - Editing In Lightroom Next course starts 11 March 2024 Editing is an essential skill for anyone with even just a passing interest in photography. Much as we try, we can't always get everything right in camera and editing tools help us bring our vision to life, help correct problems and allow our images to look beautifully polished. We teach how to do all these things in Adobe Lightroom because it's a powerful, intuitive and affordable tool used by Pros around the world for that very reason. KEY COURSE INFO: Course type: Instructor-led Course duration: 4 weeks + prep module Course format: Online course with interactive edit-along live classes, feedback on your learning and support group WHAT YOU LEARN: From being able to correct issues such as over/under exposure, issues with colour or graininess to bringing your vision to life, creating mood and tone to your images, knowing how to use editing software is a must. But good and purposeful editing goes way beyond just slapping on a preset or a filter - in our course we teach you all about the tools - not just what all of them do but how, and we teach you how to know what to use and when to achieve certain effects.everything you need to allow you to style your photos, confidently use the software and fix common problems. editing to correct common photo problems creating good editing workflow using powerful precision tools editing to achieve beautiful skin tones using light and colour creatively editing to bring out a mood of a feel THIS IS THE COURSE FOR YOU IF : Love taking photos but want them to look more polished - with colours that pop and light that's perfectly balanced You want to be able to fix common issues such as under- or overexposure, white balance or colour casts so that you never need to bin an image just because it wasn't right straight out of camera You want to get more creative with light and colour to make the images look just like the moment felt. Bring on the moody edits or sun soaked edits or light kissed skin tones or creative black and white conversions You want to confidently use the editing techniques so you can bring your vision to life every time, without guesswork You want to be able to prepare your images for print so that your walls can beam with pride at the beauty that you captured Next Editing in Lightroom course starts 11 March 2024 4 core course modules plus prep module Support Facebook group Weekly edit-along live webinar Practice files to learn on Feedback on your images HERE IS WHAT YOU WILL LEARN in this course : Our Photo Editing in Lightroom course guides you through the photo editing process in Adobe Lightroom from start to finish – from setting it up correctly, organising your collections and creating a workflow that works for you, through learning the capabilities of all the editing tools - such as adjusting exposure, colours, light or sharpening the images; all the way to printing and creating photo books. We’ll show you how to create specific artistic effects ( high impact Black and white, vintage, light and airy, dark and moody etc ), and how to fix common photography problems ( grainy images, underexposed images, wrong colours etc). At the end of the course you will be able to confidently manage your photo collection with Lightroom, achieve desired artistic effects and make your photos truly stand out. Getting around in Lightroom and Lightroom Classic - shooting in full manual - but with clarity and purpose Correcting common problems - whether your photo started too dark or too bright, your child's face was in a shade, the white balance and colours were off, the grain was heavy, the light looked dull - you can fix it all within a couple of clicks in Lightroom Using Lightroom's super powerful intelligent masking tools to quickly and efficiently edit specific parts of your image - from brightening up the eyes to rescuing overblown skies Enhancing and adding beautiful light - light makes images stand out, but it can be hard capturing the atmosphere it creates in camera at times. Lightroom is where you can bring light to life and make your images feel how what you saw in real life Knowing how to shoot in camera so you can get the most in editing - photographers will often purposefully under or overexpose images in camera so that they have more chance of balancing the image just they way they want in Lightroom. INSIDE THE MODULES - aka WHAT DO YOU LEARN? Module 0: Getting set up in Lightroom This module is released a week before the course starts to give you a chance to fully familiarise yourself with the layout, structure and the best way of working in Lightroom Classic, including guidance of creating a smooth selection and culling process that helps you see and keep the best of your images, without getting bogged down with 100s near duplicates. Module 1: Getting Started In Lightroom - Global Edits In this module we introduce you to Lightroom's most powerful tools - the global edits. We help you understand how to tweak your images to achieve the effects you're after quickly - from adjusting over and under exposure, to correcting white balance in a few different ways, to having a play with my favourite Lightroom tool - the tone curve. Major Takeaways: At the end of the module you will have gained full control of lightroom key global tools and will be able to use them to correct any global - as in affecting the whole image - issues with your images. This includes perfecting your exposure, balancing your colour and white balance, sharpening and creating clarity and more. Module 2: Targeted Edits - Masks! Lightroom allows us to apply edits to selected parts of the image through a range of its very powerful, intelligent and manual masks. This means you can now effortlessly select your subject from the photo to adjust them separately with just one click, you can pick only the sky, the subject's eyes or only colour green or any other element and treat them differently to the rest. Major Takeaways: You will be able to use the full range of masks in lightroom and apply your edits exactly where they are needed, and nowhere else. This includes working with with the new AI powered masks which can detect a person's individual features and allow you to selectively edit them in a few simple steps, as well as those more manual tools, that allow you to literally paint with light and colour on your photographs. Module 3: Creative Editing in Lightroom This is a brand new module in our course where we take all the tools introduced in Modules 1 and 2 and actually use them to achieve different effects on our photos. Wer show you how to be guided by light when editing, how to achieve a light and airy or a moody edit on your images, how to add light and how to convert to black and white, as well as how to edit skin in Lightroom! This module is all play! Major Takeaways: You will learn how to create yoru own editing process - from knowing where to start and to understanding what elements of your photograph may need or benefit from adjusting and knowing how you can do so to achieve different outcomes. You will also learn how to edit your skin tones so they look delightful - no matter what your subject's complexion. Module 4: After the edits We close the course with a module centered around all the things you might want to do after the edits - from preparation for print, creating photo books, but also sharing your images online and syncing them between different machines and adobe workplaces. PLUS there is a little Photoshop intro so you get a glimpse at how it's different and what it can do. Major Takeaways: You will learn how to connect all of your Adobe ecosystem and sync and share your images across multiple devices. You will learn how to prepare your images for print so they look their very best and how to create photobooks. Next course starts 11 March 2024 Absolutely, without a doubt book Editing. I was very unsure at first. My interest in photography is to capture those memories so it felt like it was 'cheating' to edit. I can honestly say it's like magic.To finish off the pictures you love and just give you complete control over the exposure, colours to make them perfect, to rescue the disasters etc. I learnt so much in those few weeks and it made the biggest difference to my photos. Kerry White Editing in LIGHTROOM Book your space now: COURSE STARTS : 11 March 2024 ( 4 weeks + 1 prep week)COURSE COST : £179 ( payment plans available ) What’s included: 4 weekly modules with step by step illustrated tutorials and videos + prep module weekly edit along class online class ( also recorded) - on Wednesday evenings feedback and advice on your edits private support group PDF workbook and downloadable videos Practice images to learn on Join our next group to really bring life to your images and make them look sleep, polished and full of light COURSE PREREQUISITES: Lightroom or Lightroom Classic CC software installed on your computer or tablet. RECOMENDED : Lightroom Photography Plan 25GB – a monthly subscription at approx £9pm – including Lightroom CC, Lightroom Classic CC and Photoshop. This plan can also be occasionally purchased at a lower price via Amazon or Groupon if you purchase a year’s worth of subscription in one go ( average savings – around 2-4 months worth depending on the deal) Please note that Adobe also has a Lightroom Plan with 1TB of storage – we do not recommend this plan as it restricts you to one version of software only. The increased Cloud storage can always be purchased as an add on or your plan can be switched from Photographer plan to CC only at a later stage if you prefer.