- Professional Development
- Medicine & Nursing
- Arts & Crafts
- Health & Wellbeing
- Personal Development
441 3D Modelling courses
Adobe Illustrator Basic to Intermediate Training
By London Design Training Courses
Why Learn Adobe Illustrator Basic to Intermediate Training Course? Course Link With our Illustrator Intermediate Course take your vector graphics to the next level and bring your designs to life with advanced techniques and tools. Gain hands-on skills in creating shapes, patterns, and logos, and learn how to edit images with precision. Duration: 6 hrs. Method: 1-on-1 - Personalized attention Schedule: Schedule by pre-booking a convenient hour of your choice, available from Mon to Sat between 9 am and 7 pm. This course covers fundamental tools and features of Adobe Illustrator, aimed at beginners, to enable them to create and edit vector graphics efficiently and effectively. Adobe Illustrator is the industry-leading vector graphic software for working with vector graphics, providing a comprehensive set of tools for producing exceptional graphics for various media, including print, video, web, and mobile devices. Course Title: Adobe Illustrator Course Outline: Mastering Advanced Drawing Techniques In-Depth Curvature Tool Mastery Advanced Pen Tool Usage: Drawing Complex Paths Understanding Path, Anchor Points, and Handles Precision Editing with Direct Selection Tool Slicing and Dividing Paths using Scissors and Knife Tools Exploring Advanced Stroke and Path Options Custom Width Profiles with the Width Tool Diverse Brushes Exploration in Brush Library Creating Scattered Objects with Scatter Brushes Applying Patterns along Paths with Pattern Brushes Crafting Custom Pattern Brushes Understanding Graphic Styles Efficient Usage of Graphic Style Libraries Creating, Deleting, and Saving Graphic Styles with Graphic Style Panel Leveraging the Power of Graphic Styles Mastering Pattern Manipulation Techniques Creating and Editing Patterns using Pattern Mode Modifying Pattern Elements with Precision Adjusting Spacing and Resizing Patterns using the Tile Tool Rectifying Background Errors with Overlap Options Saving and Exporting Custom Patterns Exploring Advanced Gradient Options Gradient Styles Exploration Fine-Tuning Gradients with the Gradient Annotator Creating Free Transform Gradient Points and Lines Applying Single Gradient across Multiple Objects Gradient and Transparency Integration Creative Applications and Practical Projects Applying Advanced Techniques to Real-World Projects Creative Problem-Solving Strategies Q&A Session and Feedback Gathering Note: Each section includes practical exercises and hands-on projects to reinforce learning. The course emphasizes practical application, ensuring participants leave with tangible skills and a deep understanding of advanced Adobe Illustrator concepts. Q: What will I learn in the London Design Training Course in Adobe Illustrator? A: In this course, you'll learn essential techniques for creating and editing vector graphics using Adobe Illustrator. The training covers drawing tools, shapes, layers, effects, styles, logo design, Image Trace, Live Paint, and integration into your design workflow. Q: What can I expect to achieve after completing the Illustrator training course? A: By the end of the course, you'll be proficient in Illustrator tools, create graphics for print, web, and mobile, design logos with special effects, and manipulate images. You'll receive an accredited Illustrator training certification and post-course support. Q: Is any prior knowledge of Illustrator required to attend the course? A: No, the course is designed for beginners, and no prior knowledge of Illustrator is necessary. Q: Which version of Illustrator will the training be based on? A: The training is primarily based on Illustrator 2023, but the techniques apply to recent releases. Q: Can I attend the course on either a Windows or Mac computer? A: Yes, Illustrator works identically on both Windows and Mac. Our training centers offer both platforms for your convenience.

Photoshop Basics to Fundamentals Training
By London Design Training Courses
Why Choose Photoshop Basics to Fundamentals Training Course? Our Photoshop Basics to Fundamentals Training Course offers a strong skills in Adobe Photoshop, equipping with essential skills. Learn to use layers, selection tools, layer effects, layers, masking, photos, typography, filters, and color theory. Learn features for confident Photoshop usage. Course Link Duration: 10 hrs Method: 1-on-1, Personalized attention Schedule: Tailor your own hours of your choice, available from Mon to Sat between 9 am and 7 pm Course Highlights: Master Advanced Photoshop Skills: Develop expertise in professional image editing, retouching, and manipulation techniques. Hands-on Creative Projects: Engage in practical exercises to enhance real-world design skills. Explore Special Effects: Dive into advanced topics like layer effects, filters, and blending modes for stunning visual creations. Typography and Design Mastery: Learn typography styles, layout design, and color theory for compelling compositions. Build a Professional Portfolio: Receive guidance on crafting a portfolio showcasing your Photoshop expertise. Job Opportunities: Graphic Designer: Create captivating visuals for print and digital media. Digital Artist: Craft digital artwork for various applications, from illustrations to ads. UI/UX Designer: Design user interfaces and experiences for websites and apps. Web Designer: Develop visually engaging websites with expertise in Photoshop. Marketing Content Creator: Produce marketing materials, including banners and social media visuals. Freelance Designer: Offer design services independently to diverse clients. Advertising Creative: Design impactful ad visuals for creative campaigns. Print Production Specialist: Prepare print-ready materials, ensuring high-quality results. Photography Post-Processing Specialist: Enhance and retouch photographs for professional use. Module 1: Interface and Preferences Familiarize with the Photoshop Interface Customize Panels and Toolbars to suit your workflow Explore Photoshop Preferences for optimal settings Discover different Photoshop CC Workspaces for various tasks Get started with essential Keyboard Shortcuts Module 2: Image File Formats Understand various image file formats, including PSD, JPEG, PNG, and PDF Explore File Compression and its impact on image quality Module 3: Creating a New Document Set dimensions and size for new documents Understand media units for precise design specifications Explore Color Profiles and their importance Save presets for quick document setups Module 4: Placing Images Learn about Embedded vs. Linked images Introduction to Smart Objects for non-destructive editing Master the Selection tool for precise image placement Module 5: Image Size and Resolution Save images in different formats and compression settings Learn about Image Size and Resolution for various output requirements Module 6: Layers Introduction Organize your work using Layer management Master layer tasks such as reordering, renaming, grouping, locking, and hiding Module 7: Selection Tools Explore various Selection Tools like Marquee, Magic Wand, Quick Selection, and Lasso Understand Inverse Selection and Deselect for efficient editing Module 8: Layer Effects Apply captivating Layer Effects like Drop Shadow, Stroke, and Outer Glow Save and clone Effects Styles for quick application Combine multiple effects for creative designs Module 9: Introduction to Shapes Utilize the Shapes tool for basic design elements Create Custom Shapes for unique designs Understand Color principles and use the Properties Panel for adjustments Master the Direct Selection tool for precise shape editing Create a basic poster using provided examples Module 10: Type and Typography Work with Type and explore the Character and Paragraph Panel Utilize Styles Panel for consistent text formatting Save favorite fonts for easy access Apply Effects and Layer Styles on Type for impactful typography Learn about Leading, Tracking, and Kerning for optimal text spacing Module 11: Colors Understand RGB vs. CMYK color modes Select colors using the Eyedropper tool Save colors as Swatches for reuse Create gradients using the Gradient Tool Module 12: Creating a Clipping Mask Master the concept of Clipping Masks and its usage Apply Clipping Masks to Type, Images, and Shapes Combine Layer Effects with Clipping Masks for creative designs Module 13: Introduction to Masking Understand Masking and its importance in image editing Utilize the Brush tool for creating masks Learn Masking shortcuts and use Gradient Mask for smooth transitions Module 14: Adjustment Layers Explore Color and Gradient Adjustment Layers for image enhancements Master Curves, Levels, and Hue/Saturation Adjustment Layers for precise color control Convert images to Black and White using Adjustment Layers Combine Adjustment Layer Masks for targeted edits Module 15: Image Touch Up Master various touch-up techniques, including Red Eye Removal, Spot Healing Brush, and Patch Tool Utilize Content Aware Removal for seamless object removal Restore an old photo using Clone Stamp and Dodge/Burn tools Improve portraits by removing blemishes and whitening teeth Module 16: Filters Introduction Understand Smart Objects and Filter usage for non-destructive editing Explore the Filters Gallery and experiment with Blur and Vantage filters Module 17: Blending Modes Introduction Master the concept of Blending Modes and their impact on layer overlays Understand different types of Blending Modes, including Darken, Lighten, and Overlay Master the art of working with layers in Adobe Photoshop. Skillfully utilize various selection tools for precise editing and manipulation. Apply captivating Layer Effects to enhance your designs and visuals. Understand the functionality of Adjustment Layers, Masking, and Clipping Masks for advanced editing and compositing. Acquire the techniques to touch up and restore photographs effectively. Explore typography techniques to create visually appealing text designs. Gain an introductory understanding of Filters and their creative applications. Grasp the principles of Color Theory and its practical application in design.

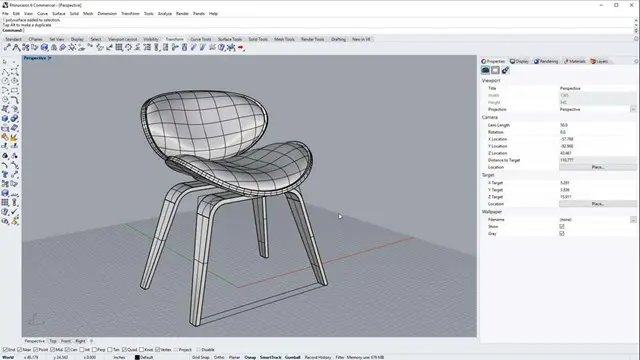
V-Ray for Rhino Essentials Training
By ATL Autocad Training London
Why Choose V-Ray for Rhino Essentials Training? Master photorealistic rendering in Rhino with our intensive V-Ray training. Led by certified experts, learn lighting, material manipulation, rendering configurations, textures, and global illumination. Check our Website Training Duration: 10 hours Approach: 1-on-1, in-Person and Live online and Customized Content. Flexibility: 1-on-1 sessions scheduled at your convenience, from Mon to Sat between 9 am and 7 pm. Vray for Rhino Essentials - 10 Hours Course Session 1: Introduction to Vray and Rhino Integration Overview of Vray: Understanding its importance in architectural and product visualization. Setting up Vray in Rhino: Installation, basic configurations, and interface exploration. Understanding the Rhino-Vray workflow: Navigating between Rhino and Vray seamlessly. Session 2: Basic Lighting Techniques Exploring different light sources: Domes, spotlights, and area lights. Adjusting light intensity and color temperature for realistic ambiance. Creating natural lighting scenarios: Daylight, twilight, and night scenes. Session 3: Mastering Material Creation Introduction to Vray materials: Diffuse, reflection, refraction, and bump maps. Crafting realistic materials: Wood, glass, metal, and fabrics. Utilizing the material editor efficiently for precise adjustments. Session 4: Advanced Rendering Configurations Global Illumination: Understanding photon mapping and irradiance mapping. Fine-tuning render settings: Quality vs. speed, resolution, and anti-aliasing. Exploring Vray frame buffer: Post-processing and image enhancement. Session 5: Texture Manipulation and Mapping Understanding UV mapping: Unwrapping complex geometries for accurate textures. Applying textures in Vray: Diffuse, bump, displacement, and normal maps. Realistic texture manipulation: Scaling, rotation, and blending textures seamlessly. Session 6: Camera Settings and Scene Composition Camera configurations: Focal length, depth of field, and exposure settings. Composing visually appealing scenes: Rule of thirds, focal points, and balance. Rendering interior and exterior scenes: Managing lighting challenges and reflections. Session 7: Real-Time Feedback and Interactive Rendering Introduction to Vray interactive rendering: Real-time feedback for quick adjustments. Utilizing Vray's denoiser for noise reduction in interactive mode. Enhancing productivity with interactive rendering: Modifying materials and lighting on the fly. Session 8: Optimizing Render Times Efficient render optimization techniques: Reducing noise and enhancing quality. Distributed rendering: Utilizing multiple machines for faster rendering. Troubleshooting common rendering issues: Flickering, artifacts, and texture problems. Session 9: Post-Processing and Presentation Post-production in Photoshop: Enhancing renders, adding depth, and adjusting colors. Creating compelling visual narratives: Adding people, context, and atmosphere. Designing professional presentation boards: Layout, annotations, and graphic elements. Session 10: Final Project and Portfolio Review Participants showcase their final Vray-rendered projects. Instructor-led critique and feedback session. Tips for building a strong portfolio: Choosing the best renderings and presenting your work effectively. By the end of this 10-hour course, participants will have a comprehensive understanding of Vray for Rhino, enabling them to create photorealistic renderings and significantly enhance their design visualization skills. Upon completing the Vray for Rhino Essentials course, participants will: Master Lighting Techniques: Expertly utilize various light sources. Create realistic lighting scenarios for diverse scenes. Advanced Material Proficiency: Manipulate complex materials and textures for lifelike renders. Understand reflective surfaces and material interaction. Optimize Rendering Settings: Fine-tune render configurations for optimal quality and speed. Implement noise reduction techniques for cleaner renders. Texture Mapping Mastery: Perfect UV mapping methods for accurate texture application. Seamlessly blend textures for realistic surface mapping. Effective Camera Use and Composition: Configure camera settings, depth of field, and exposure. Compose visually appealing scenes for impactful renders. Real-Time Rendering Skills: Utilize interactive rendering for immediate feedback and adjustments. Enhance scenes in real time for efficient workflow. Post-Processing Expertise: Enhance renders in post-production using software tools. Add depth, adjust colors, and create visually compelling final images. Professional Presentation Techniques: Design layouts, annotations, and context to create impactful visual narratives. Curate a strong portfolio with the best-rendered projects. By honing these skills, participants will produce photorealistic renders and significantly enhance their architectural and product visualization capabilities. Skills You'll Gain: Master lighting techniques for realistic visualization. Learn material manipulation and texture enhancement in Vray. Understand advanced rendering configurations for high-quality results. Explore global illumination concepts for lifelike scenes. Career Opportunities: Upon completing Vray for Rhino Essentials, you'll be well-equipped for various roles in the design and visualization industry, including: Architectural Visualizer: Create stunning architectural visualizations for presentations and client approvals. Product Designer: Enhance product design by creating photorealistic prototypes and visualizations. Interior Designer: Craft immersive interior spaces with realistic lighting and material textures. 3D Visualization Artist: Work in animation studios, gaming companies, or marketing agencies, producing high-quality 3D visualizations. Freelance Rendering Specialist: Offer your skills on platforms like Upwork or Fiverr, providing rendering services to clients worldwide. Course Highlights: Acquire fundamental skills in V-Ray for Rhino, covering lighting, materials, and rendering setups. Explore advanced techniques for lifelike textures, reflections, and global illumination effects. Master the workflow for crafting architectural renderings, both interior and exterior. Harness the power of V-Ray features like proxies, fur, and particle systems for dynamic visuals. Optimize render times and quality using efficient techniques and expert tips. Validate your expertise with a Certificate of Completion, showcasing your V-Ray proficiency. Access recorded lessons for future reference, enabling self-paced learning and continuous improvement. Professional Guidance: Learn from certified tutors and industry experts with extensive practical experience. Gain valuable insights and personalized feedback as you progress through the course, ensuring a comprehensive understanding of V-Ray for Rhino.

SketchUp Pro Training Course For Kitchen Designers
By ATL Autocad Training London
Who is this course for? SketchUp Pro Training Course For Kitchen Designers. This course is designed for kitchen designers aiming to elevate their skills in SketchUp Pro. Learn creating stunning kitchen worktops, cabinets, and designs tailored to perfection. Perfect your skills and bring 3d kitchen to life. Click here for more info: Website Duration: 6 hours. Method: 1-on-1, available in-person or Live Online sessions. Monday to Saturday between 9 am and 7 pm Alternatively, contact us at 02077202581 to book over the phone. Course Outline: SketchUp Pro Training Course For Kitchen Designers (6 hours) Module 1: Exploring 3D Warehouse for Appliance Selection Navigating 3D Warehouse for Appliance Models Selecting and Importing Appliances for Your Kitchen Design Module 2: Cabinetry Layout Introduction to Cabinetry Layout Planning and Arranging Cabinets for Functional Kitchens Module 3: Innovative Approaches to Cabinet Design Creative Strategies for Unique Cabinet Designs Incorporating Special Features and Functions Module 4: Creating Countertops and Sink Arrangements Designing Functional Countertops Integrating Sinks and Faucets Effectively Module 5: Enhancing Kitchen Spaces with Backsplashes Utilizing Backsplashes for Aesthetic and Practical Purposes Designing Custom Backsplash Solutions Module 6: Designing Efficient Range Hoods Range Hood Design Principles Ensuring Proper Ventilation and Aesthetics Module 7: Crafting Upper Cabinet Solutions Maximizing Storage and Style with Upper Cabinets Incorporating Upper Cabinet Design Variations Module 8: Perfecting Crown Moulding Applications Enhancing Cabinet and Wall Transitions Achieving a Polished Look with Crown Moulding Module 9: Optimizing Kitchen Islands Designing Functional and Stylish Kitchen Islands Utilizing Islands for Storage and Dining Module 10: Elevating the Ambiance with Wall Design Details Enhancing Walls with Creative Design Elements Adding Character and Texture to Kitchen Spaces Module 11: Ensuring Precise Dimensions Mastering Dimensioning Techniques Achieving Accuracy in Your Kitchen Design Module 12: Mastering Shadows and Style Customization Controlling Shadows for Realistic Renderings Customizing Styles to Enhance Visualization Upon completing the SketchUp Pro Training Course for Kitchen Designers, you will: Master SketchUp for comprehensive kitchen design. Efficiently select appliances from 3D Warehouse. Plan innovative cabinet layouts. Design functional countertops and sinks. Enhance kitchens with stylish backsplashes. Create efficient range hoods. Maximize storage with upper cabinets. Perfect crown moulding applications. Optimize kitchen islands. Elevate ambiance with wall design details. Ensure precision in dimensions. Customize realistic renderings. Job Opportunities: Kitchen designers can pursue roles such as Kitchen Designer, Interior Designer, Cabinet Designer, CAD Specialist, 3D Modeler, Home Renovation Consultant, and more. Freelance opportunities are also available. Skills Acquired: Advanced Kitchen Modeling: Master the art of creating detailed kitchen worktops, cabinets, and layouts using SketchUp Pro. Texture Mapping and Material Application: Learn to apply realistic textures and materials to enhance kitchen designs. Lighting and Rendering Techniques: Explore lighting setups and rendering tools for lifelike visualizations. Collaborative Design: Enhance skills in collaborative design, enabling seamless communication with clients and colleagues. Job Opportunities: Kitchen Designer: Design custom kitchen spaces, work closely with clients, and bring their visions to life. Interior Designer: Specialize in kitchen interior design, working with a focus on functionality and aesthetics. Furniture Designer: Create bespoke kitchen furniture pieces and optimize space for practical use. Freelance Kitchen Design Consultant: Offer specialized kitchen design services on a freelance basis, catering to various clients and projects. Personalized Learning! Why Choose Us? Tailored One-on-One Training: Exclusive coaching from skilled architects and designers, in-person or live online, Monday to Saturday. Customized Tutorials: Enhance your skills with tailored video tutorials to take home. Comprehensive Learning: Receive digital resources for thorough understanding and revision. Free Ongoing Support: Enjoy continuous assistance via phone or email, ensuring your success beyond the course. Flexible Syllabus: Adapted to your needs for focused learning. Official Certificate: Validate your expertise with our prestigious certification. Why Us? Supported Individual Learning: Personalized guidance, homework assignments, and post-course assistance for mastery. Personal Attention: Experience one-on-one learning for focused and confident progress. Financial Flexibility: Explore payment options tailored to your budget. Expert Instructors: Learn from industry experts dedicated to your success.

Autocad and Sketchup Help in Interior Design projects
By Real Animation Works
Autocad and Sketchup face to face training customised and bespoke.

FURNITURE DESIGN TRAINING
By Real Animation Works
Furniture design face to face training customised and bespoke.
SketchUp Basic to Intermediate Training
By London Design Training Courses
Why choose SketchUp Basic to Intermediate Training Course? Click for more info SketchUp offers a user-friendly experience with its intuitive interface, enabling beginners to start smoothly and professionals to work efficiently. The software provides straightforward tools and shortcuts, ensuring precise and speedy creation of 3D models. Duration: 5 hrs Method: 1-on-1, Personalized attention Schedule: Tailor your own schedule by pre-booking a convenient hour of your choice, available from Mon to Sat between 9 am and 7 pm SketchUp is a popular and robust CAD solution designed for engineers, designers, architects, and more. Its powerful suite of tools includes customizable palettes, lighting effects, animations, textures, and access to the Trimble 3D warehouse. SketchUp Basic Training Course. 1 on 1 Training. 5 hours Understanding the Basics of SketchUpIntroduction to SketchUpNavigating the SketchUp EnvironmentExploring Zoom, Pan, and Rotate FunctionsFamiliarizing Yourself with the XYZ Axis Mastering SketchUp ToolsEfficient Toolbar SelectionsUtilizing Templates for ProjectsDrawing with Precision Using the Pencil ToolWorking with Fundamental Geometric ShapesTaking Accurate Measurements Advanced SketchUp TechniquesCreating Circles and ArcsHarnessing Sticky Geometry SolutionsUnveiling the Power of Tags (Formerly Layers)Streamlining Workflow with Keyboard ShortcutsAccurate Object Measurement within SketchUpInformation Management and Database UsageMoving and Copying ObjectsSimple Array TechniquesMastering Rotational ManipulationsEffortless Rotational CopyingFractional and Relative Scaling Component and Group CreationConstructing Components for ReusabilityCreating Efficient GroupsComparing the Advantages of Components and GroupsSaving and Reusing ComponentsImporting Components from Digital Repositories Advanced Modeling and GeometryLeveraging Push-Pull OperationsCreating Complex Shapes with the Follow Me ToolExploring Geometry IntersectionsDuplicating and Offsetting Faces, Edges, and PolygonsIncorporating 2D Polygons into Your DrawingsSkillful Use of the Paint Bucket Tool Materials and TexturesProficiency with the Materials EditorApplying High-Quality TexturesSourcing and Positioning TexturesGraphics and Bitmap ConsiderationsCrafting Scenes and StylesGenerating and Customizing ScenesManaging Scenes and Styles Introduction to Animation and PresentationAnimation ConceptsAdding Dimensions to Your SketchUp ModelsAnnotating Designs for ClarityPreparing Models for PrintingExporting Images and PDFs in 2D Formats

Adobe InDesign Fundamentals Training
By London Design Training Courses
Why Choose Adobe InDesign Fundamentals Training Course? Course info. Learn Adobe InDesign fundamentals from certified tutors. Master layout creation, typography, layouts and design principles. Choose in-person or live online sessions. Certificate of Completion and lifetime email support provided. Duration: 5 hrs. Method: 1-on-1, Personalized attention. Schedule: Tailor your own hours of your choice, available from Monday to Saturday between 9 am and 7 pm. Adobe Certified Instructors and Expert for InDesign, and a professional graphic designer. In this advanced course, we will delve into InDesign's powerful features, productivity techniques, and workflow speed tricks. 5-hour Adobe InDesign Fundamentals training course, designed to empower you with essential skills for layout and design projects. Suitable for beginners and those with some experience, this course ensures you can confidently create professional-quality documents and publications. Part 1: Introduction to Adobe InDesign (1 hour) Explore the workspace and tools Set up new documents with proper page size and margins Format text and images effectively Customize the interface for efficient workflow Part 2: Text Formatting and Styles (1 hour) Apply character and paragraph styles for consistent formatting Control text flow with text frames Organize lists using bullets and numbering Master special characters for typographic control Part 3: Working with Images (1 hour) Import and position images in the document Adjust image size and alignment within frames Create professional layouts with text wrapping around images Enhance visuals with image frames and effects Part 4: Layout Design (1 hour) Create precise grids and guides for alignment Arrange objects for a balanced layout Streamline design work with layers Maintain consistency with master pages and templates Part 5: Printing and Exporting (1 hour) Understand color modes and printing principles Export to PDF and other formats for various outputs Ensure print readiness through preflighting Efficiently archive and manage InDesign files Through hands-on exercises and practical examples, you'll solidify your understanding of each module. This course equips you to design visually captivating layouts, create documents for diverse purposes, and manage InDesign projects effectively. Adobe InDesign is a powerful desktop publishing tool, and our fundamentals course sets the stage for you to explore and expand your skills in a wide range of design projects. Don't miss this opportunity to unlock your creative potential with InDesign!

3ds max on Demand One to one Training Course
By Real Animation Works
3ds max on One to one Training Course pay as you go

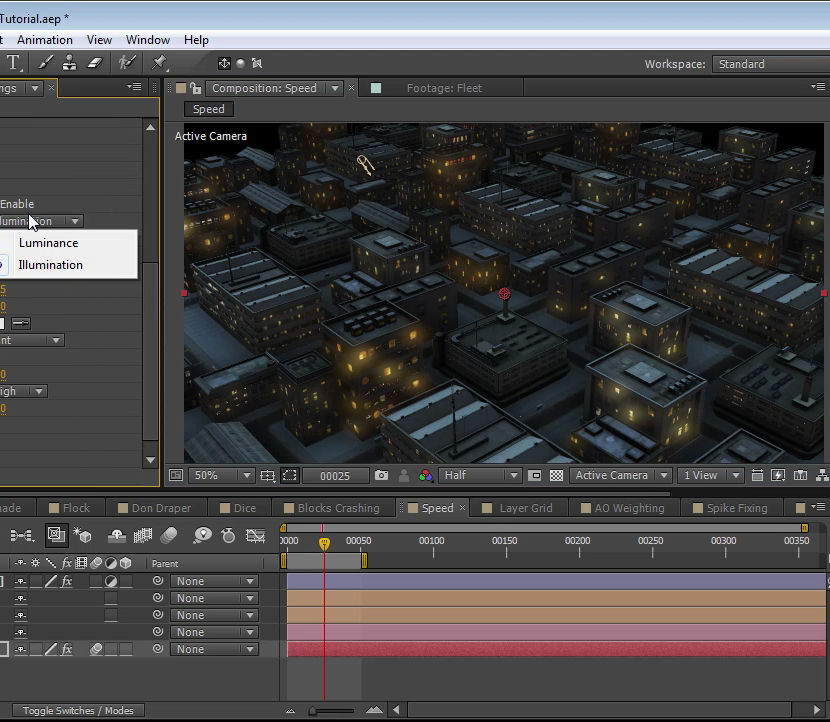
Adobe After Effects Training Fundamentals to Essentials
By ATL Autocad Training London
Adobe After Effects Training Fundamentals to Essentials. Learn essential techniques for creating visual effects and animations. Adobe After Effects Essentials VFX Course to learn auto-correction methods and tools, adjust video effects or presets to layers, and utilize 3D space for modifying composition. Click here for more info: Website Duration: 20 hours Approach: 1-on-1 personalized sessions and Tailored content. Flexibility: Book a time convenient for you, Monday to Saturday, between 9 am and 5 pm. Duration: 20 Hours Module 1: Introduction to After Effects (2 hours) Understanding the After Effects interface Project planning and organization techniques Module 2: Asset Preparation and Composition Setup (3 hours) Importing and organizing multimedia assets Setting up compositions for different media formats Module 3: Applying Transformations and Effects (5 hours) Animating images, videos, and text Applying diverse transformations and effects for dynamic visuals Module 4: Mastering Masking and Compositing (5 hours) Creating and refining masks for precise editing Advanced compositing techniques for seamless integration Module 5: Rendering High-Quality Videos (3 hours) Configuring rendering settings for various output formats Ensuring optimal quality in the final video output Module 6: Project Review and Q&A Session (2 hours) Reviewing projects and addressing individual queries Fine-tuning techniques based on participants' needs Course Benefits: Hands-on learning with personalized attention Mastering crucial After Effects skills for diverse media projects Access to recorded lessons for future reference Continuous email support for post-course inquiries After Effects Download https://www.adobe.com Upon completing the Essential After Effects Skills Mastery course, participants will: Proficiency in After Effects: Master the After Effects interface, gaining confidence in navigating the software effectively. Strategic Project Planning: Acquire skills in project organization and planning, ensuring a systematic approach to video projects. Advanced Asset Management: Learn efficient techniques for importing, organizing, and managing multimedia assets within After Effects projects. Dynamic Composition Creation: Gain expertise in setting up compositions tailored to various media formats, understanding their intricacies and potential applications. Creative Animation Techniques: Apply diverse transformations and effects to images, videos, and text, enhancing the visual appeal of multimedia content. Precision in Masking and Compositing: Master the art of masking, enabling precise editing, and explore advanced compositing techniques for seamless visual integration. High-Quality Video Rendering: Understand rendering settings, ensuring optimal video quality for different output formats, whether for online platforms or professional presentations. Project Review and Refinement: Engage in project reviews and Q&A sessions, refining techniques and addressing individual queries for comprehensive learning. Confidence in Video Production: Develop confidence in producing high-quality videos, equipped with a robust skill set essential for various creative projects. Continuous Learning Support: Benefit from continuous email support, providing assistance with post-course inquiries, ensuring ongoing learning and skill refinement. In this course, you will learn: Efficient workflow planning and asset organization in After Effects projects. Creative project development techniques for engaging visuals. Image and video asset preparation using Photoshop. After Effects project setup, compositions, and asset integration. Animation of transformations and effects on layers. Advanced mask creation and animation for creative compositing. Dynamic text animation and 3D exploration. Keying and seamless visual integration techniques. Understanding export settings, project backup, and archiving. Learning Objectives: Upon completion, you will master asset organization, animations, masks, text effects, and seamless integration, ensuring proficiency in After Effects projects. Prerequisites: Basic computer skills and a fast-paced learning mindset are required. No prior experience is necessary, making this course suitable for beginners. Key Features: Personalized one-on-one or live online coaching sessions. Suitable for both beginners and professionals in motion graphics and animation. Tailored Training: Courses customized to meet your specific requirements. Flexible scheduling options to suit your availability. Industry Standard: Adobe After Effects, the industry-preferred software for visual effects, motion graphics, and compositing. Widely used in filmmaking, video games, and TV production. Learning Approach: Hands-on training with detailed, step-by-step demonstrations. Real-time feedback during sessions, along with access to session recordings. Course Benefits: Certificate of Attendance upon completion. Comprehensive practical training guide for reference. Lifetime email and phone support for continuous assistance. Help with software installation for a seamless learning experience. Lifetime Support: Ongoing email and phone/WhatsApp support for lifelong learning assistance. Elevate your motion graphics expertise with our Adobe After Effects Basic to Fundamentals Training Course. Open doors to exciting opportunities in the ever-evolving realm of visual effects.