- Professional Development
- Medicine & Nursing
- Arts & Crafts
- Health & Wellbeing
- Personal Development
454 3D Design courses in Dunfermline delivered Online
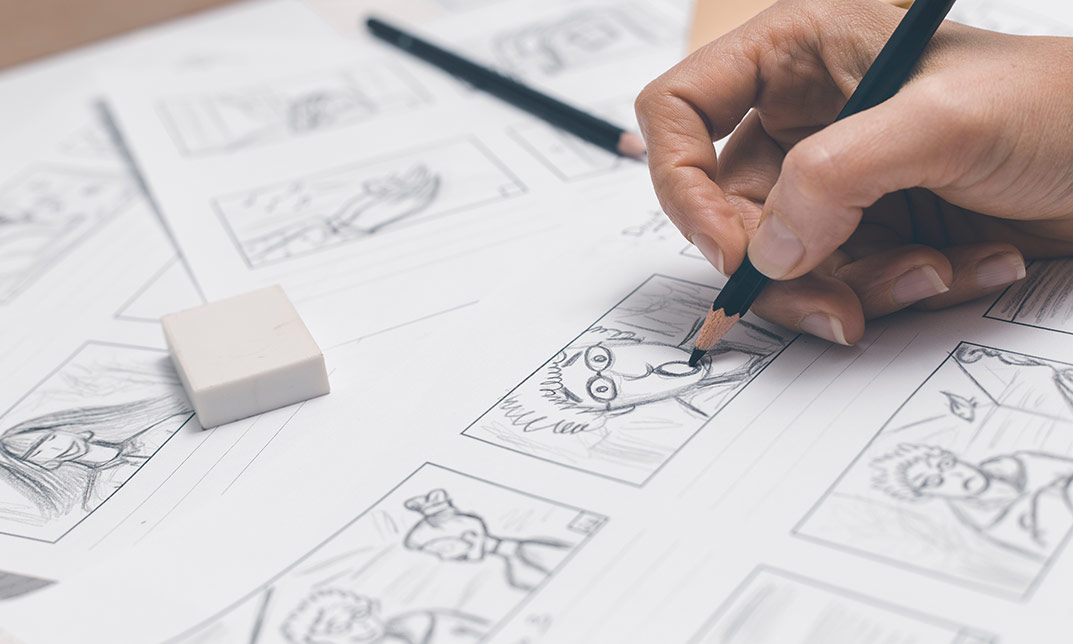
Create A Character From The Post-Apocalypse
By Course Cloud
Course Overview Make a dynamic image of a fictional figure from a far-off future by taking this course on how to Create a Character from The Post-Apocalypse. Exploring the years ahead of humanity has never been more popular in the media and provides plenty of artistic potentials. This tutorial will guide you in visually conceptualising a resident from a distant possible reality. By taking this Character Creation coaching, you can follow the steps to produce a drawing of a fictional figure that might be able to survive and thrive in any circumstance. From blank paper to the final image, you will be guided in seeking inspiration and bringing your ideas to the page. By creating this character and producing an eye-catching image, you will learn how to populate a post-apocalypse world with more of your creations. This best selling Create A Character From The Post-Apocalypse has been developed by industry professionals and has already been completed by hundreds of satisfied students. This in-depth Create A Character From The Post-Apocalypse is suitable for anyone who wants to build their professional skill set and improve their expert knowledge. The Create A Character From The Post-Apocalypse is CPD-accredited, so you can be confident you're completing a quality training course will boost your CV and enhance your career potential. The Create A Character From The Post-Apocalypse is made up of several information-packed modules which break down each topic into bite-sized chunks to ensure you understand and retain everything you learn. After successfully completing the Create A Character From The Post-Apocalypse, you will be awarded a certificate of completion as proof of your new skills. If you are looking to pursue a new career and want to build your professional skills to excel in your chosen field, the certificate of completion from the Create A Character From The Post-Apocalypse will help you stand out from the crowd. You can also validate your certification on our website. We know that you are busy and that time is precious, so we have designed the Create A Character From The Post-Apocalypse to be completed at your own pace, whether that's part-time or full-time. Get full course access upon registration and access the course materials from anywhere in the world, at any time, from any internet-enabled device. Our experienced tutors are here to support you through the entire learning process and answer any queries you may have via email.
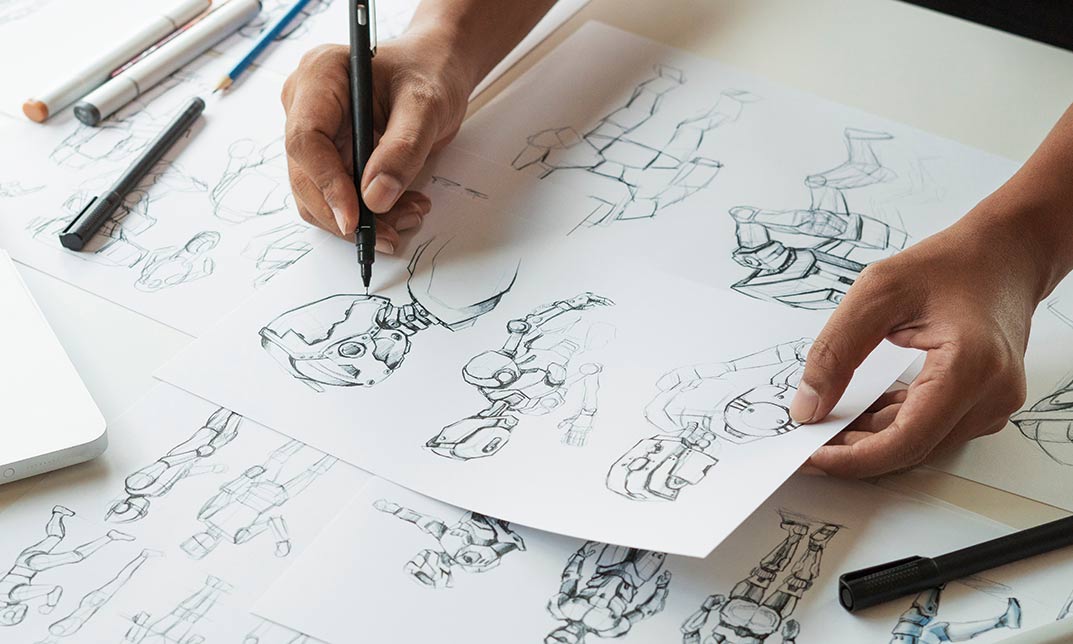
Cartoon Baby Animal in 3D
By Course Cloud
Course Overview Learn how to make an appealing character online by crafting a model in simple steps with this course for creating a Cartoon Baby Animal in 3D. Taking the process in easy stages, you will be shown how to conjure up a cute fictional creature in the digital universe, resulting in a figure that will impress others with its quality and detail. By taking this tailored 3D Modelling coaching, you will quickly learn the necessary skills needed to make an effective figure. From the first conception to sketching designs and then posing the pixels, everything is here to help you become a 3d cartoonist with a cool creation that others will love. Use your attained skills to sculpt many other models, using them for a wide variety of projects and additions to your portfolio. This best selling Cartoon Baby Animal in 3D has been developed by industry professionals and has already been completed by hundreds of satisfied students. This in-depth Cartoon Baby Animal in 3D is suitable for anyone who wants to build their professional skill set and improve their expert knowledge. The Cartoon Baby Animal in 3D is CPD-accredited, so you can be confident you're completing a quality training course will boost your CV and enhance your career potential. The Cartoon Baby Animal in 3D is made up of several information-packed modules which break down each topic into bite-sized chunks to ensure you understand and retain everything you learn. After successfully completing the Cartoon Baby Animal in 3D, you will be awarded a certificate of completion as proof of your new skills. If you are looking to pursue a new career and want to build your professional skills to excel in your chosen field, the certificate of completion from the Cartoon Baby Animal in 3D will help you stand out from the crowd. You can also validate your certification on our website. We know that you are busy and that time is precious, so we have designed the Cartoon Baby Animal in 3D to be completed at your own pace, whether that's part-time or full-time. Get full course access upon registration and access the course materials from anywhere in the world, at any time, from any internet-enabled device. Our experienced tutors are here to support you through the entire learning process and answer any queries you may have via email.
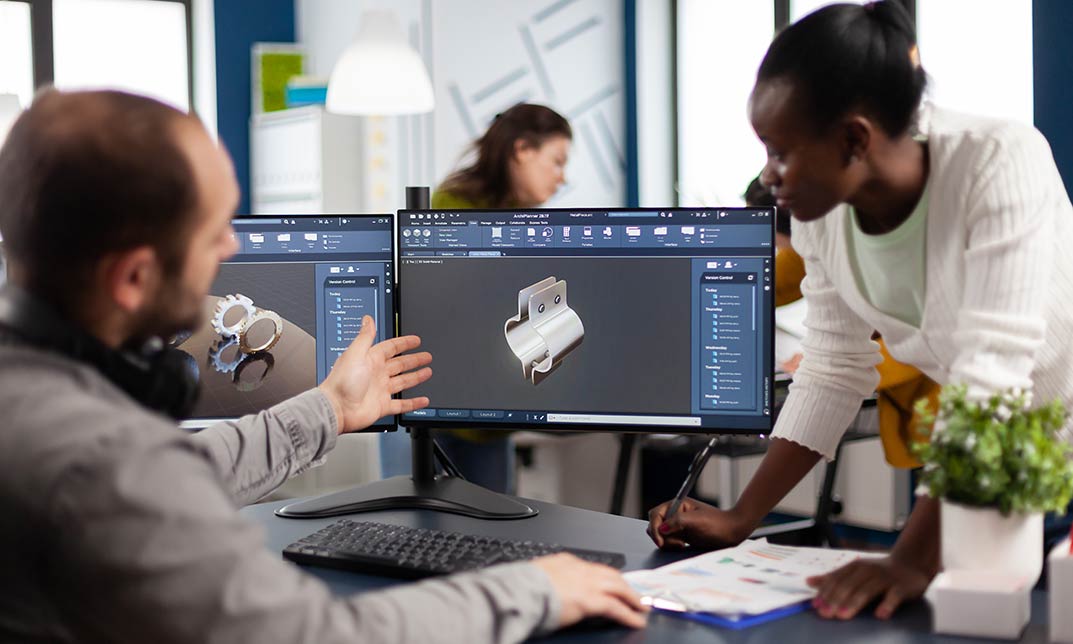
3D Modeling for 3D Printing Level 2
By Course Cloud
Course Overview Learn how to create a special template from which impressive 3D objects can be created from scratch as you work through this course on 3D Modelling for 3D Printing Level 2. Gaining mastery and confidence in using Maya software during this training will allow you to design and manipulate an online schematic. From this start, it will gradually result in a fully-formed 3D image that can transition into the real world. This comprehensive 3D Modelling tutorial delivers the ideal tuition and step-by-step guidance for using the many functions of Autodesk Maya. Technical introductions lead to software fundamentals, and you will soon be capable of creating 3D figures online, enabling a final version to be realised for printing. Following this training, you will be ready to use Maya to produce further models. This best selling 3D Modeling for 3D Printing Level 2 has been developed by industry professionals and has already been completed by hundreds of satisfied students. This in-depth 3D Modeling for 3D Printing Level 2 is suitable for anyone who wants to build their professional skill set and improve their expert knowledge. The 3D Modeling for 3D Printing Level 2 is CPD-accredited, so you can be confident you're completing a quality training course will boost your CV and enhance your career potential. The 3D Modeling for 3D Printing Level 2 is made up of several information-packed modules which break down each topic into bite-sized chunks to ensure you understand and retain everything you learn. After successfully completing the 3D Modeling for 3D Printing Level 2, you will be awarded a certificate of completion as proof of your new skills. If you are looking to pursue a new career and want to build your professional skills to excel in your chosen field, the certificate of completion from the 3D Modeling for 3D Printing Level 2 will help you stand out from the crowd. You can also validate your certification on our website. We know that you are busy and that time is precious, so we have designed the 3D Modeling for 3D Printing Level 2 to be completed at your own pace, whether that's part-time or full-time. Get full course access upon registration and access the course materials from anywhere in the world, at any time, from any internet-enabled device. Our experienced tutors are here to support you through the entire learning process and answer any queries you may have via email.

Maya: UV Mapping 3D Knife
By Course Cloud
Course Overview Gain the skills to create low poly mobile games, explore the fundamentals of 3D art, and learn how to model complex shapes, and more in this Maya masterclass. The Maya: UV Mapping 3D Knife course will teach you step-by-step how to create a 3D weapon model using Maya, from basic primitives. Through instructor-guided video tutorials, you will learn tips and best practices for using Maya's modelling, rendering and texturing tools, to make high quality AAA game assets from scratch. It will equip you with the skills to utilise the shortest possible pipeline, and master UV mapping in no time. This comprehensive training course is open to learners of all levels. Start building your portfolio and kickstart an exciting career in game development today. This best selling Maya: UV Mapping 3D Knife has been developed by industry professionals and has already been completed by hundreds of satisfied students. This in-depth Maya: UV Mapping 3D Knife is suitable for anyone who wants to build their professional skill set and improve their expert knowledge. The Maya: UV Mapping 3D Knife is CPD-accredited, so you can be confident you're completing a quality training course will boost your CV and enhance your career potential. The Maya: UV Mapping 3D Knife is made up of several information-packed modules which break down each topic into bite-sized chunks to ensure you understand and retain everything you learn. After successfully completing the Maya: UV Mapping 3D Knife, you will be awarded a certificate of completion as proof of your new skills. If you are looking to pursue a new career and want to build your professional skills to excel in your chosen field, the certificate of completion from the Maya: UV Mapping 3D Knife will help you stand out from the crowd. You can also validate your certification on our website. We know that you are busy and that time is precious, so we have designed the Maya: UV Mapping 3D Knife to be completed at your own pace, whether that's part-time or full-time. Get full course access upon registration and access the course materials from anywhere in the world, at any time, from any internet-enabled device. Our experienced tutors are here to support you through the entire learning process and answer any queries you may have via email.
Modeling Lowpoly Tree for Mobile Games in Maya & Unity 3D
By Course Cloud
Course Overview Learn how to create a low poly tree for games in Maya and upload it to Unity for mobile game development, with this complete video-guide course. The Modeling Lowpoly Tree for Mobile Games in Maya & Unity 3D course is a complete walk through masterclass for beginners, starting with familiarising you with the basic tools. Through video training tutorials and instructor-led guidance, it will take you through the necessary steps to create a low poly tree from scratch in less than 10 minutes. From mastering 3D mapping, to texturing techniques, you will gain the expertise required to create professional low poly trees for video games and apps. This course is ideal for 3D artists and game developers, and there are no specific entry requirements for enrolment. This best selling Modeling Lowpoly Tree for Mobile Games in Maya & Unity 3D has been developed by industry professionals and has already been completed by hundreds of satisfied students. This in-depth Modeling Lowpoly Tree for Mobile Games in Maya & Unity 3D is suitable for anyone who wants to build their professional skill set and improve their expert knowledge. The Modeling Lowpoly Tree for Mobile Games in Maya & Unity 3D is CPD-accredited, so you can be confident you're completing a quality training course will boost your CV and enhance your career potential. The Modeling Lowpoly Tree for Mobile Games in Maya & Unity 3D is made up of several information-packed modules which break down each topic into bite-sized chunks to ensure you understand and retain everything you learn. After successfully completing the Modeling Lowpoly Tree for Mobile Games in Maya & Unity 3D, you will be awarded a certificate of completion as proof of your new skills. If you are looking to pursue a new career and want to build your professional skills to excel in your chosen field, the certificate of completion from the Modeling Lowpoly Tree for Mobile Games in Maya & Unity 3D will help you stand out from the crowd. You can also validate your certification on our website. We know that you are busy and that time is precious, so we have designed the Modeling Lowpoly Tree for Mobile Games in Maya & Unity 3D to be completed at your own pace, whether that's part-time or full-time. Get full course access upon registration and access the course materials from anywhere in the world, at any time, from any internet-enabled device. Our experienced tutors are here to support you through the entire learning process and answer any queries you may have via email.

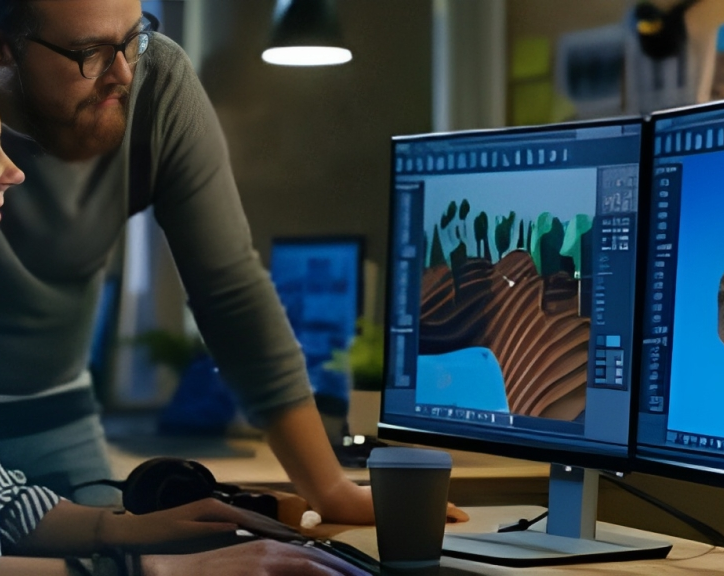
Modeling Environments for Mobile Games in Maya & Unity 3D
By Course Cloud
Course Overview Learn how to create a low poly scene in Maya and import it into Unity for mobile game development, with this step-by-step training course. The Modeling Environments for Mobile Games in Maya & Unity 3D course covers everything you need to know to set up and create your project. It will teach you how to import and export the models from Maya to Unity, model the base of the island, add special camera effects, birds and much more. This course is ideal for game developers and 3D artists. By the end of this training, you will be able to set up the scene in Unity 3D to create the incredible mood and atmosphere of the Monument Valley game. You will have a range of in-demand skills required to work across a wide range of creative fields. This best selling Modeling Environments for Mobile Games in Maya & Unity 3D has been developed by industry professionals and has already been completed by hundreds of satisfied students. This in-depth Modeling Environments for Mobile Games in Maya & Unity 3D is suitable for anyone who wants to build their professional skill set and improve their expert knowledge. The Modeling Environments for Mobile Games in Maya & Unity 3D is CPD-accredited, so you can be confident you're completing a quality training course will boost your CV and enhance your career potential. The Modeling Environments for Mobile Games in Maya & Unity 3D is made up of several information-packed modules which break down each topic into bite-sized chunks to ensure you understand and retain everything you learn. After successfully completing the Modeling Environments for Mobile Games in Maya & Unity 3D, you will be awarded a certificate of completion as proof of your new skills. If you are looking to pursue a new career and want to build your professional skills to excel in your chosen field, the certificate of completion from the Modeling Environments for Mobile Games in Maya & Unity 3D will help you stand out from the crowd. You can also validate your certification on our website. We know that you are busy and that time is precious, so we have designed the Modeling Environments for Mobile Games in Maya & Unity 3D to be completed at your own pace, whether that's part-time or full-time. Get full course access upon registration and access the course materials from anywhere in the world, at any time, from any internet-enabled device. Our experienced tutors are here to support you through the entire learning process and answer any queries you may have via email.

Photoshop Evening Training
By London Design Training Courses
Why Choose Photoshop Evening Training Course? Click here for more info Become proficient in Photoshop, the premier photo editing software, with our London Software Training course. Gain essential skills in photo editing, enabling independent navigation of the interface for successful edits and graphic creation. Duration: 10 hours Approach: 1-on-1 guidance, Customized instruction. Schedule: Tailor your own hours, available from Mon to Sat between 9 am and 7 pm.Or Call 02077202581 or WhatsApp 07970325184. Participate in our Photoshop Evening Training Course, hosted at the UK's largest training school. Whether you're a beginner or an expert, our course is tailored to suit your level, offered both live online and in person. Adobe Photoshop Course Highlights: Embark on your design journey with our Adobe Photoshop course, conducted at the UK's leading Adobe Training Centre. Acquire proficiency in Adobe's premier digital imaging software, crucial for digital content creation. Our courses prioritize hands-on exercises, ensuring practical learning experiences. Whether you're new to Photoshop or an experienced user seeking efficiency, our diverse courses cater to your needs. Join us to master Photoshop and unleash your creative potential. Course Details: Duration: 10 hours Approach: Personalized 1-on-1 guidance, customized instruction. Schedule: Flexible hours available from Mon to Sat between 9 am and 7 pm. For inquiries, call 02077202581 or WhatsApp 07970325184. Evening Adobe Photoshop - 10-Hour Training Course Module 1: Introduction to Photoshop (1 hour) Overview of Photoshop interface and tools Understanding file formats and resolution Navigating the workspace and customizing preferences Essential keyboard shortcuts for efficient workflow Module 2: Working with Layers (1 hour) Mastering the concept of layers and their importance Organizing and managing layers effectively Applying layer styles for creative effects Utilizing blend modes for stunning compositions Module 3: Selection Techniques (1 hour) Understanding different selection tools and their uses Precise selections using the Marquee, Lasso, and Magic Wand tools Advanced selections with Quick Selection and Refine Edge Creating masks for non-destructive editing Module 4: Image Editing and Retouching (1 hour) Essential photo retouching techniques for portraits and landscapes Correcting exposure, color, and tone with Adjustment Layers Using the Healing Brush and Clone Stamp for seamless repairs Removing distractions and blemishes with Content-Aware tools Module 5: Typography and Text Effects (1 hour) Working with text layers and formatting options Creating eye-catching text effects using Layer Styles Manipulating text along paths and shapes Designing typographic compositions Module 6: Advanced Image Manipulation (1 hour) Combining images with layer masks and blending modes Creating composite images and surreal artwork Applying transformations and distortions for creative effects Working with Smart Objects for non-destructive editing Module 7: Filters and Special Effects (1 hour) Exploring various filters for artistic and practical purposes Applying blur, sharpening, and distortion filters Creating artistic effects with the Filter Gallery Using smart filters for flexible editing Module 8: Drawing and Vector Graphics (1 hour) Working with shape layers and vector tools Creating custom shapes and icons Utilizing the Pen tool for precise illustrations Designing logos and scalable graphics Module 9: Advanced Color Correction (1 hour) Mastering color adjustments with Curves and Levels Using Adjustment Layers for selective color control Understanding color spaces and profiles Creating duotones and split-tones Module 10: Designing for Web and Print (1 hour) Preparing images for web and social media platforms Understanding resolution and color modes for print Exporting files in various formats for different purposes Final project: Designing a digital artwork or print-ready composition Learning Outcome refers to what students are expected to know, understand, or be able to do at the end of a learning experience, such as a course, training program, or educational module. Learning outcomes are usually specific, measurable, and achievable objectives that demonstrate the effectiveness of the learning process. For example, learning outcomes for a Photoshop course could include: Participants will be proficient in using essential Photoshop tools and features. Participants will demonstrate the ability to apply advanced image editing and retouching techniques. Participants will be able to create visually appealing designs using layers, typography, and special effects. Participants will understand and utilize different file formats and color modes for various output requirements. Participants will produce a final project showcasing their skills and creativity in Adobe Photoshop.
V-Ray for Rhino Essentials Training
By ATL Autocad Training London
Why Choose V-Ray for Rhino Essentials Training? Master photorealistic rendering in Rhino with our intensive V-Ray training. Led by certified experts, learn lighting, material manipulation, rendering configurations, textures, and global illumination. Check our Website Training Duration: 10 hours Approach: 1-on-1, in-Person and Live online and Customized Content. Flexibility: 1-on-1 sessions scheduled at your convenience, from Mon to Sat between 9 am and 7 pm. Vray for Rhino Essentials - 10 Hours Course Session 1: Introduction to Vray and Rhino Integration Overview of Vray: Understanding its importance in architectural and product visualization. Setting up Vray in Rhino: Installation, basic configurations, and interface exploration. Understanding the Rhino-Vray workflow: Navigating between Rhino and Vray seamlessly. Session 2: Basic Lighting Techniques Exploring different light sources: Domes, spotlights, and area lights. Adjusting light intensity and color temperature for realistic ambiance. Creating natural lighting scenarios: Daylight, twilight, and night scenes. Session 3: Mastering Material Creation Introduction to Vray materials: Diffuse, reflection, refraction, and bump maps. Crafting realistic materials: Wood, glass, metal, and fabrics. Utilizing the material editor efficiently for precise adjustments. Session 4: Advanced Rendering Configurations Global Illumination: Understanding photon mapping and irradiance mapping. Fine-tuning render settings: Quality vs. speed, resolution, and anti-aliasing. Exploring Vray frame buffer: Post-processing and image enhancement. Session 5: Texture Manipulation and Mapping Understanding UV mapping: Unwrapping complex geometries for accurate textures. Applying textures in Vray: Diffuse, bump, displacement, and normal maps. Realistic texture manipulation: Scaling, rotation, and blending textures seamlessly. Session 6: Camera Settings and Scene Composition Camera configurations: Focal length, depth of field, and exposure settings. Composing visually appealing scenes: Rule of thirds, focal points, and balance. Rendering interior and exterior scenes: Managing lighting challenges and reflections. Session 7: Real-Time Feedback and Interactive Rendering Introduction to Vray interactive rendering: Real-time feedback for quick adjustments. Utilizing Vray's denoiser for noise reduction in interactive mode. Enhancing productivity with interactive rendering: Modifying materials and lighting on the fly. Session 8: Optimizing Render Times Efficient render optimization techniques: Reducing noise and enhancing quality. Distributed rendering: Utilizing multiple machines for faster rendering. Troubleshooting common rendering issues: Flickering, artifacts, and texture problems. Session 9: Post-Processing and Presentation Post-production in Photoshop: Enhancing renders, adding depth, and adjusting colors. Creating compelling visual narratives: Adding people, context, and atmosphere. Designing professional presentation boards: Layout, annotations, and graphic elements. Session 10: Final Project and Portfolio Review Participants showcase their final Vray-rendered projects. Instructor-led critique and feedback session. Tips for building a strong portfolio: Choosing the best renderings and presenting your work effectively. By the end of this 10-hour course, participants will have a comprehensive understanding of Vray for Rhino, enabling them to create photorealistic renderings and significantly enhance their design visualization skills. Upon completing the Vray for Rhino Essentials course, participants will: Master Lighting Techniques: Expertly utilize various light sources. Create realistic lighting scenarios for diverse scenes. Advanced Material Proficiency: Manipulate complex materials and textures for lifelike renders. Understand reflective surfaces and material interaction. Optimize Rendering Settings: Fine-tune render configurations for optimal quality and speed. Implement noise reduction techniques for cleaner renders. Texture Mapping Mastery: Perfect UV mapping methods for accurate texture application. Seamlessly blend textures for realistic surface mapping. Effective Camera Use and Composition: Configure camera settings, depth of field, and exposure. Compose visually appealing scenes for impactful renders. Real-Time Rendering Skills: Utilize interactive rendering for immediate feedback and adjustments. Enhance scenes in real time for efficient workflow. Post-Processing Expertise: Enhance renders in post-production using software tools. Add depth, adjust colors, and create visually compelling final images. Professional Presentation Techniques: Design layouts, annotations, and context to create impactful visual narratives. Curate a strong portfolio with the best-rendered projects. By honing these skills, participants will produce photorealistic renders and significantly enhance their architectural and product visualization capabilities. Skills You'll Gain: Master lighting techniques for realistic visualization. Learn material manipulation and texture enhancement in Vray. Understand advanced rendering configurations for high-quality results. Explore global illumination concepts for lifelike scenes. Career Opportunities: Upon completing Vray for Rhino Essentials, you'll be well-equipped for various roles in the design and visualization industry, including: Architectural Visualizer: Create stunning architectural visualizations for presentations and client approvals. Product Designer: Enhance product design by creating photorealistic prototypes and visualizations. Interior Designer: Craft immersive interior spaces with realistic lighting and material textures. 3D Visualization Artist: Work in animation studios, gaming companies, or marketing agencies, producing high-quality 3D visualizations. Freelance Rendering Specialist: Offer your skills on platforms like Upwork or Fiverr, providing rendering services to clients worldwide. Course Highlights: Acquire fundamental skills in V-Ray for Rhino, covering lighting, materials, and rendering setups. Explore advanced techniques for lifelike textures, reflections, and global illumination effects. Master the workflow for crafting architectural renderings, both interior and exterior. Harness the power of V-Ray features like proxies, fur, and particle systems for dynamic visuals. Optimize render times and quality using efficient techniques and expert tips. Validate your expertise with a Certificate of Completion, showcasing your V-Ray proficiency. Access recorded lessons for future reference, enabling self-paced learning and continuous improvement. Professional Guidance: Learn from certified tutors and industry experts with extensive practical experience. Gain valuable insights and personalized feedback as you progress through the course, ensuring a comprehensive understanding of V-Ray for Rhino.
Autocad and Sketchup Help in Interior Design projects
By Real Animation Works
Autocad and Sketchup face to face training customised and bespoke.

Photoshop Basics to Fundamentals Training
By London Design Training Courses
Why Choose Photoshop Basics to Fundamentals Training Course? Our Photoshop Basics to Fundamentals Training Course offers a strong skills in Adobe Photoshop, equipping with essential skills. Learn to use layers, selection tools, layer effects, layers, masking, photos, typography, filters, and color theory. Learn features for confident Photoshop usage. Course Link Duration: 10 hrs Method: 1-on-1, Personalized attention Schedule: Tailor your own hours of your choice, available from Mon to Sat between 9 am and 7 pm Course Highlights: Master Advanced Photoshop Skills: Develop expertise in professional image editing, retouching, and manipulation techniques. Hands-on Creative Projects: Engage in practical exercises to enhance real-world design skills. Explore Special Effects: Dive into advanced topics like layer effects, filters, and blending modes for stunning visual creations. Typography and Design Mastery: Learn typography styles, layout design, and color theory for compelling compositions. Build a Professional Portfolio: Receive guidance on crafting a portfolio showcasing your Photoshop expertise. Job Opportunities: Graphic Designer: Create captivating visuals for print and digital media. Digital Artist: Craft digital artwork for various applications, from illustrations to ads. UI/UX Designer: Design user interfaces and experiences for websites and apps. Web Designer: Develop visually engaging websites with expertise in Photoshop. Marketing Content Creator: Produce marketing materials, including banners and social media visuals. Freelance Designer: Offer design services independently to diverse clients. Advertising Creative: Design impactful ad visuals for creative campaigns. Print Production Specialist: Prepare print-ready materials, ensuring high-quality results. Photography Post-Processing Specialist: Enhance and retouch photographs for professional use. Module 1: Interface and Preferences Familiarize with the Photoshop Interface Customize Panels and Toolbars to suit your workflow Explore Photoshop Preferences for optimal settings Discover different Photoshop CC Workspaces for various tasks Get started with essential Keyboard Shortcuts Module 2: Image File Formats Understand various image file formats, including PSD, JPEG, PNG, and PDF Explore File Compression and its impact on image quality Module 3: Creating a New Document Set dimensions and size for new documents Understand media units for precise design specifications Explore Color Profiles and their importance Save presets for quick document setups Module 4: Placing Images Learn about Embedded vs. Linked images Introduction to Smart Objects for non-destructive editing Master the Selection tool for precise image placement Module 5: Image Size and Resolution Save images in different formats and compression settings Learn about Image Size and Resolution for various output requirements Module 6: Layers Introduction Organize your work using Layer management Master layer tasks such as reordering, renaming, grouping, locking, and hiding Module 7: Selection Tools Explore various Selection Tools like Marquee, Magic Wand, Quick Selection, and Lasso Understand Inverse Selection and Deselect for efficient editing Module 8: Layer Effects Apply captivating Layer Effects like Drop Shadow, Stroke, and Outer Glow Save and clone Effects Styles for quick application Combine multiple effects for creative designs Module 9: Introduction to Shapes Utilize the Shapes tool for basic design elements Create Custom Shapes for unique designs Understand Color principles and use the Properties Panel for adjustments Master the Direct Selection tool for precise shape editing Create a basic poster using provided examples Module 10: Type and Typography Work with Type and explore the Character and Paragraph Panel Utilize Styles Panel for consistent text formatting Save favorite fonts for easy access Apply Effects and Layer Styles on Type for impactful typography Learn about Leading, Tracking, and Kerning for optimal text spacing Module 11: Colors Understand RGB vs. CMYK color modes Select colors using the Eyedropper tool Save colors as Swatches for reuse Create gradients using the Gradient Tool Module 12: Creating a Clipping Mask Master the concept of Clipping Masks and its usage Apply Clipping Masks to Type, Images, and Shapes Combine Layer Effects with Clipping Masks for creative designs Module 13: Introduction to Masking Understand Masking and its importance in image editing Utilize the Brush tool for creating masks Learn Masking shortcuts and use Gradient Mask for smooth transitions Module 14: Adjustment Layers Explore Color and Gradient Adjustment Layers for image enhancements Master Curves, Levels, and Hue/Saturation Adjustment Layers for precise color control Convert images to Black and White using Adjustment Layers Combine Adjustment Layer Masks for targeted edits Module 15: Image Touch Up Master various touch-up techniques, including Red Eye Removal, Spot Healing Brush, and Patch Tool Utilize Content Aware Removal for seamless object removal Restore an old photo using Clone Stamp and Dodge/Burn tools Improve portraits by removing blemishes and whitening teeth Module 16: Filters Introduction Understand Smart Objects and Filter usage for non-destructive editing Explore the Filters Gallery and experiment with Blur and Vantage filters Module 17: Blending Modes Introduction Master the concept of Blending Modes and their impact on layer overlays Understand different types of Blending Modes, including Darken, Lighten, and Overlay Master the art of working with layers in Adobe Photoshop. Skillfully utilize various selection tools for precise editing and manipulation. Apply captivating Layer Effects to enhance your designs and visuals. Understand the functionality of Adjustment Layers, Masking, and Clipping Masks for advanced editing and compositing. Acquire the techniques to touch up and restore photographs effectively. Explore typography techniques to create visually appealing text designs. Gain an introductory understanding of Filters and their creative applications. Grasp the principles of Color Theory and its practical application in design.