- Professional Development
- Medicine & Nursing
- Arts & Crafts
- Health & Wellbeing
- Personal Development
8397 Courses
Building Better Careers with Soft Skills: 1-Day Workshop in Wolverhampton
By Mangates
10 Soft Skills You Need 1 Day Training in Wolverhampton

Building Better Careers with Soft Skills: 1-Day Workshop in Preston
By Mangates
10 Soft Skills You Need 1 Day Training in Preston
Building Better Careers with Soft Skills: 1-Day Workshop in Doncaster
By Mangates
10 Soft Skills You Need 1 Day Training in Doncaster
Building Better Careers with Soft Skills: 1-Day Workshop in Lincoln
By Mangates
10 Soft Skills You Need 1 Day Training in Lincoln
NCFE Entry Level Creative Craft
By Technology Triumphs
This course is designed as a caroussel allowing the learner to experience and trial 3 different specialisms; Cookery, Textiles and Mixed Media. The entire course covers all three Entry Level Qualifications and successful completion will result in the learner receiving 3 NCFE qualifications (Entry Level 1, 2 and 3). The following video explains in detail how the course works and what the course covers: Click here to download Entry Level Creative Craft Information Pack.pdf The course is designed to be completed within 1 year but there is complete flexibility around submission dates. Whilst there is some theory work, written submission is minimal, making this course great for reluctant writes or even those who aren't sure which specialism they want to focus on for Level 1 or 2. All of our courses have been designed to be as affordable as possible with the use of general crafting tools and equipment. The following is not an ehaustive list but does provide an idea for the biggest outlays. For further information or to ask any questions please feel free to reach out to us, in the assurance that you are speaking to another fellow home edder. Support can be found in our dedicated Facebook group where you will also have access to a free sample session (within the file section): Entry Level Creative Craft Group Learning Outcomes and Assessment CriteriaEntry Level 11 understand how a craft or design project is made :1.1 demonstrate awareness of materials to create crafted items or designsLearning outcome 2be able to create a crafted item or design :2.1 combine 2 or more materials/items to create a craft item or designEntry Level 21 understand how a craft or design product is made1.1 demonstrate awareness of the combination of materials/methods to create crafted items or designs2 The learner will:2 be able to create a crafted item or design2.1 select from given materials to create a crafted item or design Entry Level 3 1 be able to select items needed to make an art or craft product 1.1 organise resources needed to make the product 1.2 prepare work area 2 be able to make the art or craft product 2.1 make the art or craft product using the required materials 3 be able to work safely 3.1 work in a way that minimises risks to self and others 3.2 wear the appropriate personal protective equipment 3.3 use tools and equipment safely and effectively

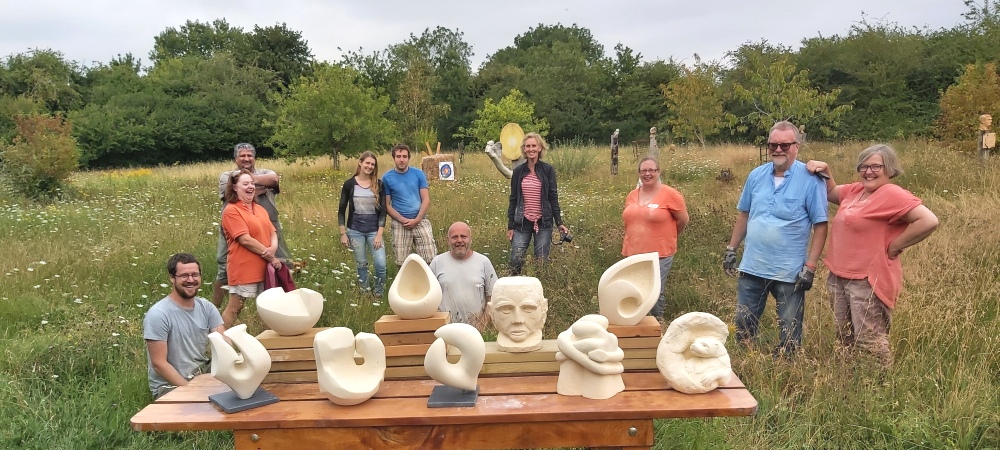
Stone Carving made a return to the Phoenix last year when we welcomed Mark Stonestreet to come teach us the joys of creating free-standing abstract sculpture. It was an absolutely fantastic course! This year Mark is coming back for more and this time we’re giving the students more stone to create with and more time – 5 days to be precise! The dusty nature of stone means that we will be working under a marquee set within the studio’s beautiful meadow – what better way to spend your summer – especially when none of us can go abroad? Outside of a global pandemic, Mark spends half the year creating sculpture in the South Downs and the other half in Mamallapuram in India – a village of over 200 stone carving workshops. His life is in stone and I liked him the instant we met. He is everything you would expect a stone carver to be – sturdy, weathered (meant in the nicest possible way, I promise Mark!) with a warm, no-nonsense personality that immediately puts you at ease. Our students are in safe hands working with him and I cannot wait to see what they will achieve this year! 23/08/2021 - 27/08/2021 10:00 am - 4:30 pm Location: The Phoenix Studio This fun course includes: Informal, relaxed & attentive guidance for every student, provided by Mark Stonestreet Step-by-step demonstrations covering… How to work with the tools and stone safely, How to create an abstract design that will look good and have structural integrity, How to transfer your design to the stone and carve into it efficiently to create the basic shape, How to add detail and refine the carved form, How to finish and present the form (looking at finishes, treatment, and mounting). This course is for you if: You want to realise drawings and 2D designs into 3D or have an introduction to visualizing your ideas in 3D You want to explore your creativity but lack the confidence to do so on your own You want to learn how to work safely and competently in stone You want to get away from it all and immerse yourself in a fun, creative environment Suitable for? Anyone, but please note that you will be using a chisel and mallet throughout the three days and this will take it’s toll on your arms and body. We generally limit the age to 16 years old+ though exceptions can be made where appropriate. Please contact James Orts and ask. What is included in the price? Five full days tuition (10 am-4.30 pm) Materials, including a piece of Portland stone (approximately 55cm x 25cm x 22cm), safety gear, and the tools you will need for when on the course You could consider making a simple printed course handout outlining the technique’s main principles and useful links/suppliers – Totally your choice though! Tea, coffee, biscuits/cakes Use of a beautiful, purpose-built art studio with all the equipment & materials you will need Beautiful countryside setting Pre-course prep It would be useful to gather, sketch out or think about what abstract shapes you are drawn to. Mark will be able to provide ideas as well and advise you on which of your ideas may work best so having some ideas to work from would be useful. You will be working outdoors so come prepared for the forecasted weather and all students must work in sturdy shoes. You will be sent an automated email on booking which prompts you towards documents that help you prepare for your time here. If this does not happen then please email James before the course. Beyond The Course Having completed a Phoenix Studio course many of our students choose to explore the medium further. They may come on another weekend course, start coming to our Phoenix Art Club Sessions or our Creative Monday Sessions, or carry on independently at home. We are more than happy to help and advise you in taking those first creative steps! Need accommodation? If you are travelling from further afield and would like to stay in the area for your visit then have a look at our recommend B&Bs and hotels. Click here for the list.
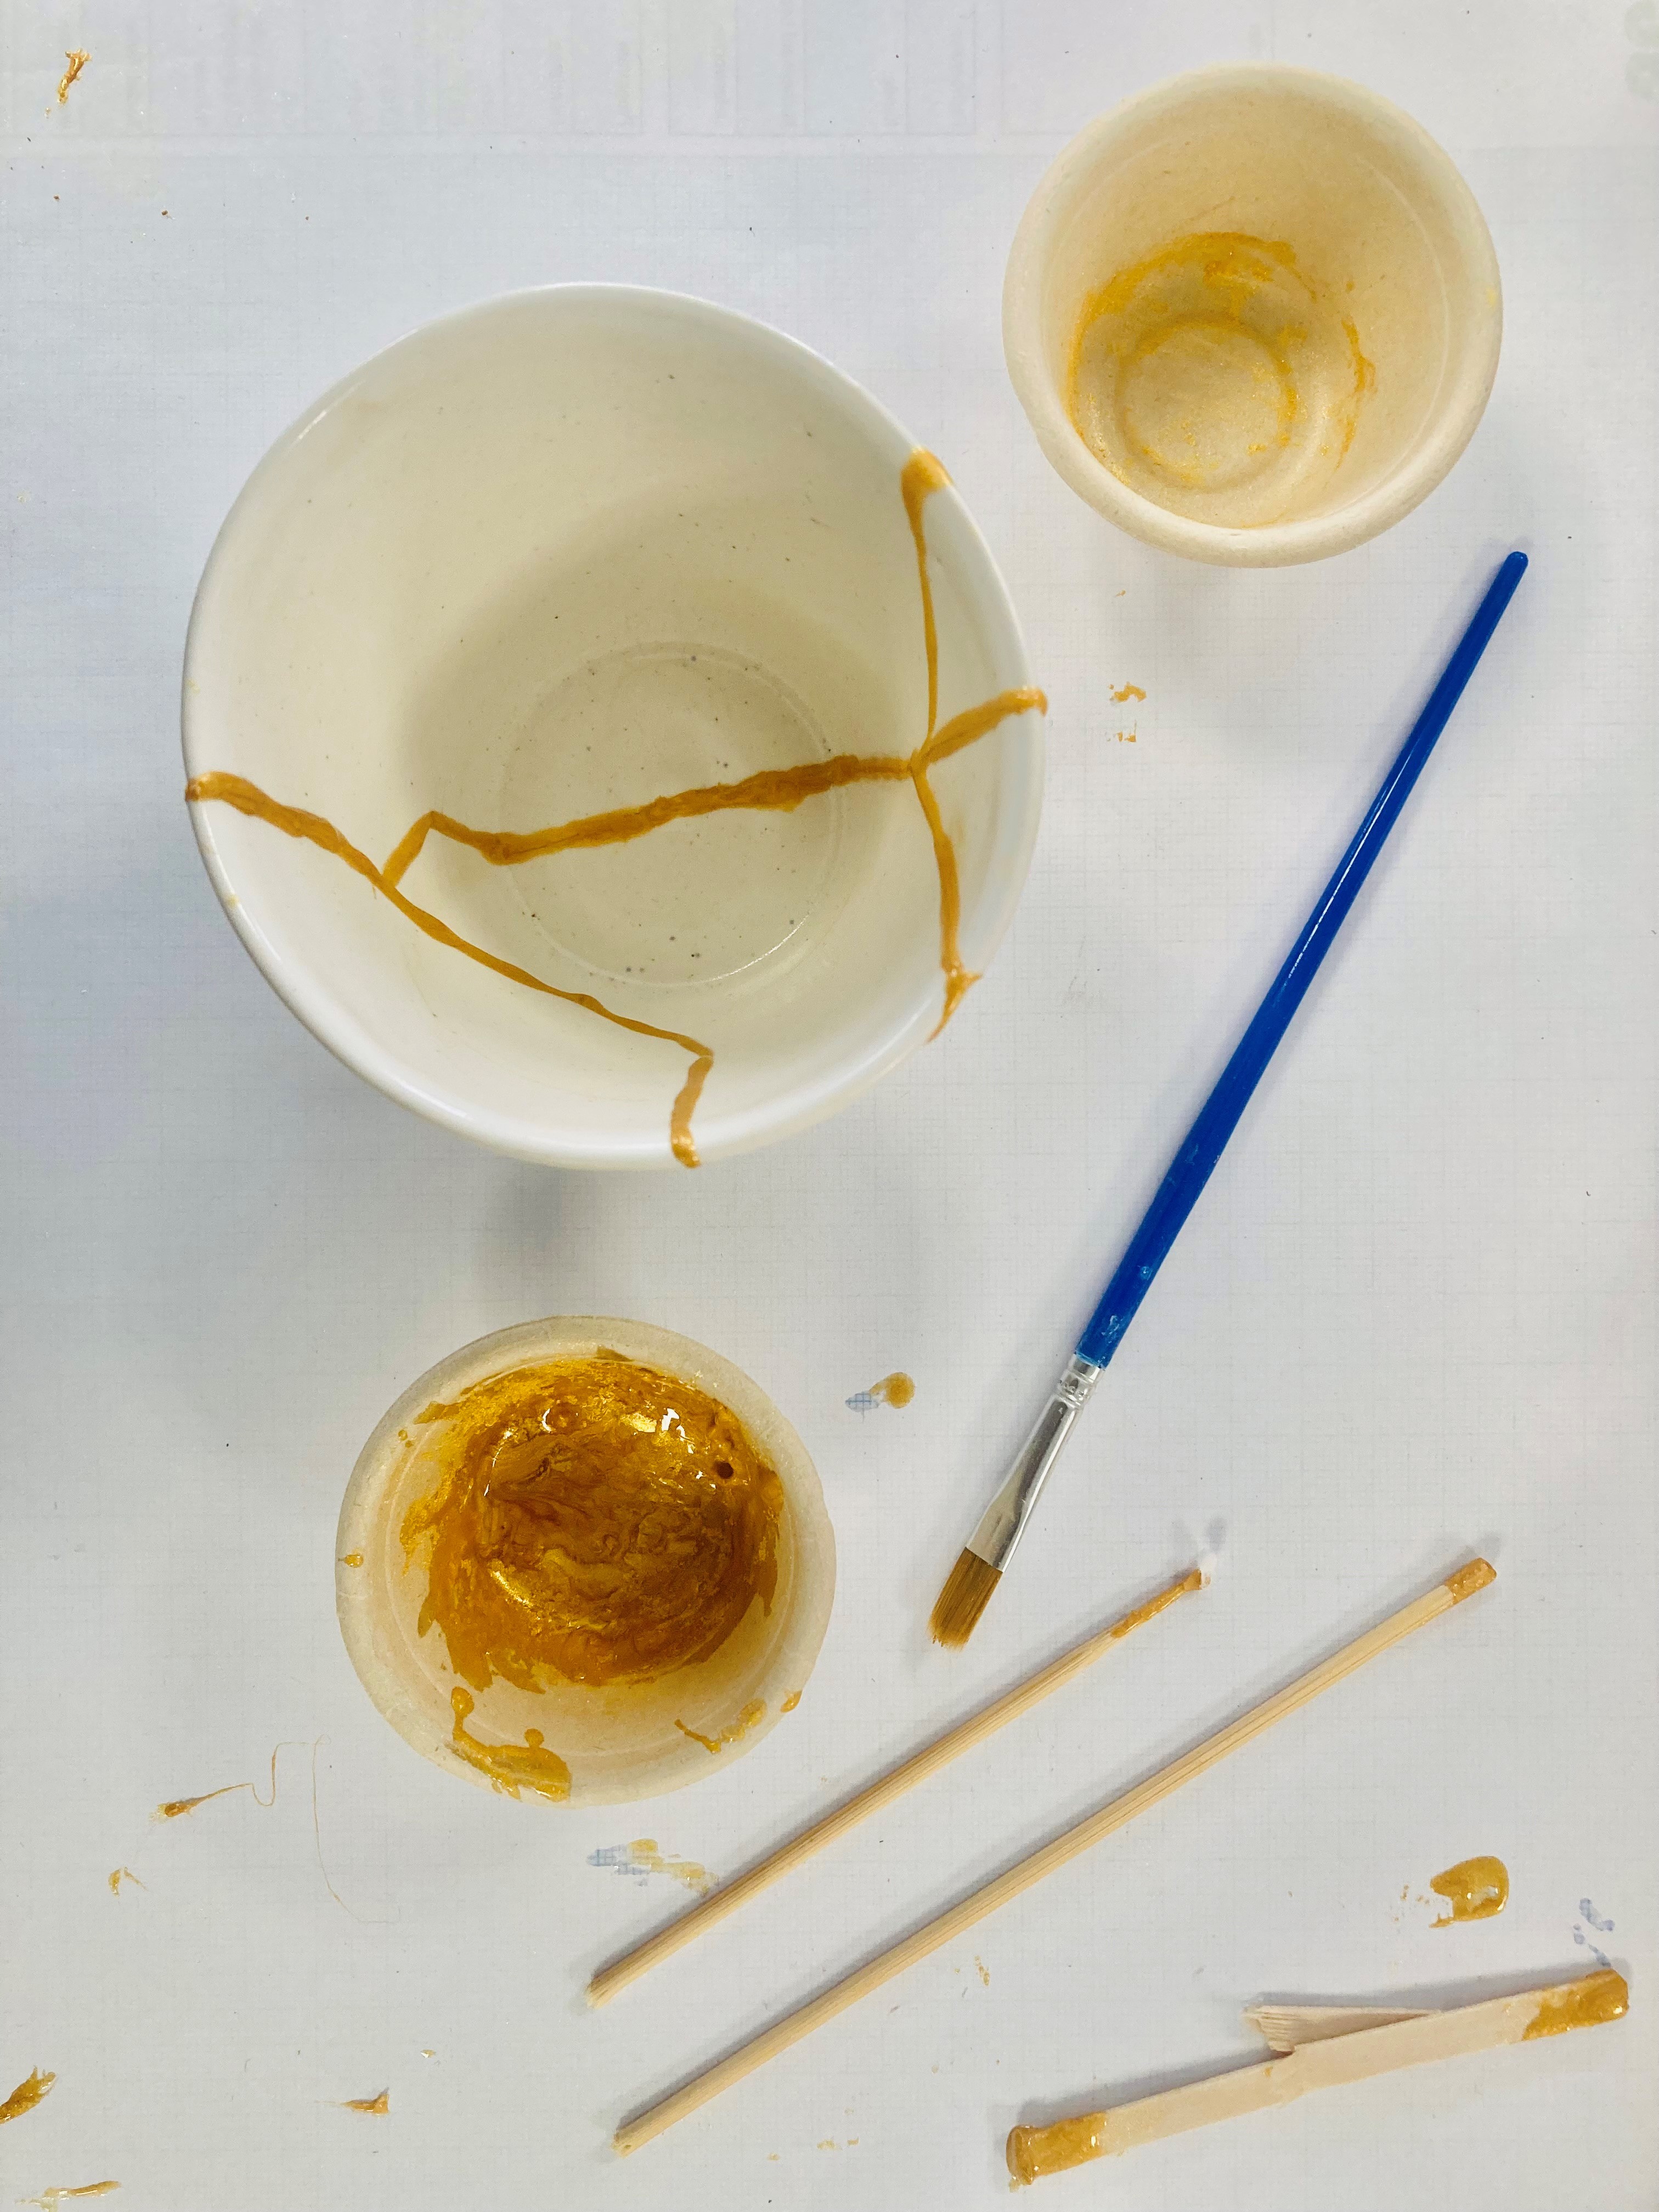
Discover the art of Japanese Pottery: Kintsugi
By Art Craft Studios
Discover the golden art of Kintsugi. The perfect answer to fixing or upcycling sentimental pottery. Whether it's your favourite cup or your Nan's best vase, during this uplifting pottery workshop, we'll take you on a step-by-step journey to fix or upcycle pottery using gold metallic lacquer that is visible and beautiful. Loosely translated, Kintsugi means 'golden joinery' that highlights your object's events rather than disguises them. It can also be seen as a variant of "Waste not, want not". All materials and tools are provided to fix one piece of ceramics per person across 1.5 hours. You can bring your own broken pottery or we have some pottery ready for you to upcycle and take home. You don’t need any experience, as your guide will be on hand with plenty of one-to-one support, letting you switch off from the world to focus entirely on yourself and follow your mind, body and spirit during the session. At the end of this Kintsugi class in London, you'll have a beautiful piece of pottery, along with a new skill to continue developing in your own time! Good to know: All workshops take place at AC Studios, CC1 Studio 2, Trinity Buoy Wharf, E14 OJW Group workshop of up to 10 people All materials and tools are provided to fix one piece of ceramics per person across 1.5 hours that you can take home there and then. Feel free to bring your own broken pottery otherwise, we have some pottery ready for you to upcycle and take home. Ideal for anyone & everyone no matter your experience but persons under 18 years of age must be accompanied by a paying adult By purchasing it will imply you have read & understood our t&c’s. If you have any questions please feel free to contactus. Otherwise we look forward to welcoming you in the studio.
Vector Game Art Creation
By iStudy UK
If you want to learn vector graphics and want to create unique vector 2D game assets, this Vector Game Art Creation course is for you. This course will make you qualified to create characters, platforms, buttons, and simple animations for mobile games. Inkspace is a free vector graphics program which is helpful in creating all the game art needed to create a 2D mobile game. Throughout this Vector Game Art Creation course, you'll learn how to use this free design tool and create much more than just game art. This course will also give you the chance to use and experiment with 30+ unique elements in games. Take this game art course today and equip yourself with the essential skills to make tremendous graphics with this free program. What you'll learn create characters, platforms, buttons and simple animations for your mobile game! Create quality game graphics, that can sell on online marketplaces! create 2d game graphics suitable for Yoyo games Game Maker, Gamesalad, unity 2d or any other program! use the free design tool Inkscape and create much more than just game art Requirements You will need Inkscape (download it for free!) Who this course is for: This course is for you, if you want to create your own game and keep a low budget. This course will help you create all 2d game graphics you might need! This course is not about 3d and won't help you develop and build your game. But it will help you make some awesome graphics with a free program! Welcome to Inkscape Introduction FREE 00:02:00 The user interface 00:03:00 Drawing in Inkscape Drawing your first object 00:07:00 Working with multiple objects 00:07:00 Colors in Inkscape 00:06:00 Path operations - creating simple shapes 00:09:00 Gradients and groups 00:11:00 Modify path - the best way refine your objects 00:09:00 Use what you learned draw a bomb in Inkscape 00:09:00 Exporting Export bitmap image 00:07:00 How and why to save to SVG 00:03:00 GUI elements - Creating buttons First step - learn the text tool 00:06:00 Align and distribute 00:05:00 Button states 00:05:00 Buton variations 00:17:00 Creating Platforms Design a basic platform 00:08:00 Tiling platforms 00:09:00 Platform mutations 00:08:00 Design and animate game characters Draw and move a character or a top down shooter 00:09:00 Design a a game hero! 00:11:00 Character poses 00:11:00 Practice animation The blob! 00:14:00 Set up and understand a more complex walk cycle 00:14:00 Finish the walk cycle 00:09:00 Backgrounds for your game Understanding backgrounds 00:05:00 Tiling backgrounds 00:14:00 Add foreground elements 00:20:00 Bacground variations 00:17:00 More tips and tricks Modularity - be more creative and efficient 00:11:00 Bonus lecture 00:01:00 Additional Material Resource Files: Vector Game Art Creation 00:00:00
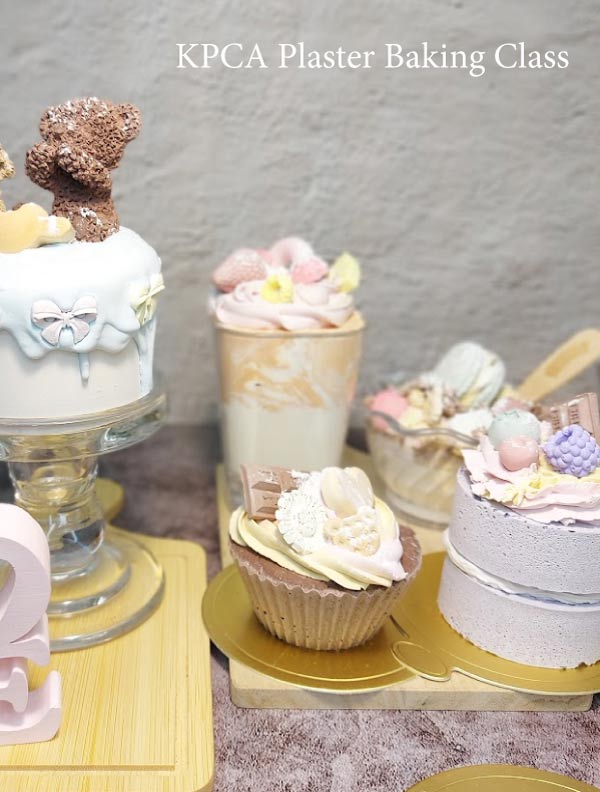
KPCA Baking Plaster Making Course
By Noel Candle
Create realistic baking plaster items in our KPCA Baking Plaster Class. Transform plaster into unique diffuser art that enhances your space with delightful fragrances.