- Professional Development
- Medicine & Nursing
- Arts & Crafts
- Health & Wellbeing
- Personal Development
806 Courses
Vray for Architects and Interior Designers 3ds max or Sketchup Training
By London Design Training Courses
Why Choose Vray for Architects and Interior Designers 3ds max or Sketchup Training Course? Click here for info Achieve stunningly realistic renders with our tailored course in V-Ray. Designed for experienced SketchUp and 3ds max users, this advanced training covers model preparation and rendering techniques, customized to your skill level and preferences. Duration: 10 hrs. Method: 1-on-1, Personalized attention. Schedule: Tailor your own hours of your choice, available from Mon to Sat between 9 am and 7 pm. SketchUp is renowned for its user-friendly interface and widespread usage in 3D modeling. Now, with V-Ray for SketchUp, users can take advantage of a powerful rendering tool for unparalleled visualization quality and realism. V-Ray seamlessly integrates into the SketchUp environment, allowing for efficient rendering within your existing workflows. Our course is ideal for those seeking to enhance their SketchUp proficiency by incorporating V-Ray's potent rendering capabilities for 3D models. We adapt the training to your current skill levels in both SketchUp and V-Ray and tailor the content to your modeling requirements and desired rendering quality. V-Ray Rendering Training Course. Course Duration: 10 hours Course Description: This 10-hour course enhances rendering skills with V-Ray, a leading 3D visualization engine. Participants master photorealistic renders, focusing on lighting, materials, and post-production. Covering key concepts, workflow, lighting techniques, material creation, rendering settings, and post-processing, the course ensures stunning visual results. Course Outline: Module 1: Introduction to V-Ray Rendering (1 hour) Overview of V-Ray and its role in 3D rendering Understanding the rendering workflow Setting up V-Ray for your 3D software platform Module 2: Essential Rendering Concepts (1 hour) Understanding global illumination and its impact on renders Exploring image sampling and antialiasing techniques Introduction to render elements for post-processing Module 3: Lighting Techniques (2 hours) Mastering various lighting types in V-Ray Creating natural lighting with HDRI maps Implementing artificial lighting with V-Ray lights Achieving realistic daylight with V-Ray sun and sky Module 4: Material Creation (2 hours) Creating realistic materials using V-Ray material editor Applying textures and procedural maps for added realism Understanding material reflections and refractions Advanced techniques for materials like glass, metal, and fabric Module 5: Rendering Settings and Optimization (1.5 hours) Exploring V-Ray rendering settings for different scenarios Understanding render output options and resolution settings Efficiently using V-Ray distributed rendering for faster results Module 6: Post-Processing with Photoshop (1.5 hours) Enhancing renders through post-processing techniques Compositing render elements for added control Adjusting colors, contrast, and lighting in Photoshop Adding effects and final touches to achieve photorealism Module 7: Advanced Rendering Techniques (1 hour) Working with V-Ray proxies and instancing for complex scenes Utilizing V-Ray displacement for intricate detailing Understanding depth of field and motion blur effects Module 8: Real-World Project (1 hour) Applying the skills learned to complete a real-world rendering project Guidance and feedback from the instructor

AUTOCAD Training for Both MAC and PC Users
By Real Animation Works
Face to Face Training Customised and Bespoke.
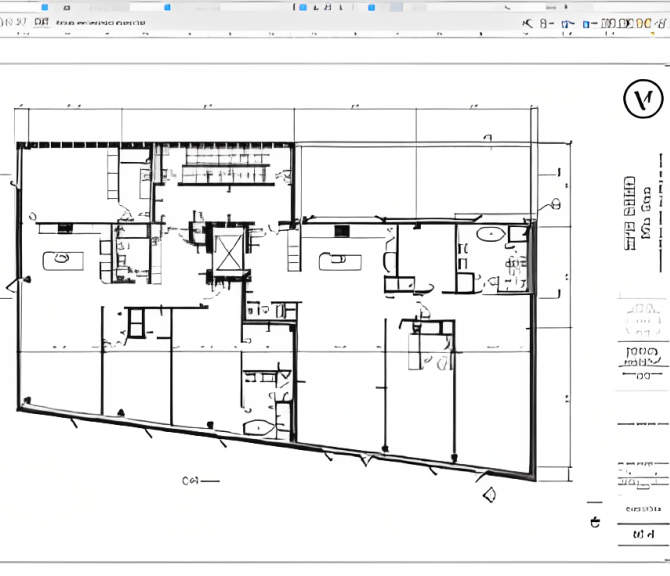
V-Ray Course For Architects
By ATL Autocad Training London
Why learn V-Ray for architects and designers? Realistic Visuals: V-Ray produces lifelike renderings for precise design visualization. Enhanced Presentations: Stunning visuals secure approvals and investments effectively. Time and Cost Efficiency: Streamlines design iterations, cutting down prototyping expenses. Click here for more info: Website Scheduling Your Training: You can also call 02077202581 to book. Training Duration: 10 hours Method: In-person face-to-face sessions or live online. Course Title: V-Ray Essentials for Architects and Designers Course Duration: 10 Hours Course Overview: Unlock the power of V-Ray, the industry-standard rendering software, and elevate your architectural and design projects to new heights. In this comprehensive 10-hour course, you'll dive deep into V-Ray and gain the skills needed to create stunning visualizations. Whether you're an architect or designer, this course will equip you with the knowledge and techniques to bring your ideas to life. Module 1: Introduction to V-Ray (1 hour) Understanding the V-Ray interface Navigating the V-Ray toolbar Setting up your first V-Ray project Module 2: Lighting Mastery (2 hours) Utilizing various light sources Achieving realistic daylight simulations Creating artificial lighting setups Mastering V-Ray's advanced lighting tools Module 3: Material Magic (2 hours) Exploring V-Ray materials Creating realistic textures and finishes Understanding material properties Working with material libraries Module 4: Perfecting Render Settings (1 hour) Configuring render settings for optimal results Setting up render elements for post-processing Achieving photorealistic renderings Module 5: Advanced Rendering Techniques (2 hours) Fine-tuning render settings for specific scenarios Creating stunning visual effects Optimizing render times Rendering animations and walkthroughs Module 6: Realistic Environments (1 hour) Incorporating background images and environments Adding context to your architectural scenes Achieving seamless integration of 3D models and backgrounds Module 7: Portfolio-Ready Projects (1 hour) Applying V-Ray skills to complete a professional project Assembling a portfolio showcasing your work Course Benefits: Master V-Ray for architectural and design projects. Create photorealistic renderings with confidence. Customize lighting, materials, and textures for your designs. Optimize render settings for efficiency and quality. Enhance your portfolio with impressive visualizations. Receive lifetime email support for continued guidance. Explore career opportunities as a rendering specialist. Who Should Attend: Architects Interior Designers 3D Artists Visualization Specialists CGI Artists Architectural Renderers Game Environment Artists Virtual Reality (VR) Developers Anyone passionate about architectural rendering and design Method of Instruction: 1-on-1 personalized training In-person or live online sessions Hands-on exercises and practical projects Upon completing the "V-Ray Essentials for Architects and Designers" course, participants will: V-Ray Proficiency: Master V-Ray rendering for photorealistic visualizations. Advanced Lighting Skills: Create dynamic and realistic lighting scenarios. Material Expertise: Customize textures and materials for enhanced visuals. Optimized Renders: Configure settings for efficient workflows. Advanced Techniques: Learn rendering tricks for stunning effects. Realistic Environments: Integrate 3D models seamlessly into real-world settings. Portfolio Development: Build a competitive portfolio showcasing advanced rendering skills. Benefits for Interior Designers and Architects: Enhanced Visualization: Improve design communication with realistic visualizations. Competitive Edge: Stand out with high-quality renderings. Efficient Decision-Making: Experiment and refine designs before execution. Streamlined Workflows: Produce quality renders efficiently. Career Opportunities: Explore roles in architectural visualization, 3D art, and CGI. In short, this course equips interior designers and architects with V-Ray skills to create impressive visualizations, improve communication, gain a competitive edge, streamline workflows, and expand career options. Master Vray Rendering: Achieve proficiency in Vray rendering for architectural and interior design projects. Industry Excellence: Learn industry-standard practices and workflows to produce high-quality results. Flexible Learning: Choose between in-person or live online training to suit your schedule. Resourceful Learning: Access recorded lessons for convenient review and reinforcement. Ongoing Support: Benefit from lifetime email support, ensuring you receive guidance beyond the course. Career Guidance: Receive free career advice to make informed decisions about your professional growth. Upon completion, our Vray for Architects and Interior Designers Training Course opens doors to various career opportunities in the architecture and design industry. Graduates with advanced rendering skills can explore roles such as: Architectural Visualizer Interior Designer 3D Artist Rendering Specialist Visualization Specialist CGI Artist Architectural Renderer Game Environment Artist Virtual Reality (VR) Developer Freelance Rendering Professional Vray Mastery: Gain expertise in Vray rendering for architectural and interior design projects. Industry-Approved Methods: Learn tried-and-true workflows for exceptional results. Flexible Learning: Opt for in-person or live online training at your convenience. Easy Review: Access recorded lessons to reinforce your knowledge conveniently. Lifelong Support: Receive ongoing guidance even after course completion. Career Consultation: Make informed decisions about your professional growth. Career Opportunities: Unlock doors to diverse roles in architecture and design, including Architectural Visualizer, Interior Designer, 3D Artist, Rendering Specialist, and more.

Adobe Photoshop Training course One to One Weekends
By Real Animation Works
Photoshop pay per hr training flexible time weekend evening
Rhino Introduction to Intermediate Training Course
By ATL Autocad Training London
Why Choose Rhino Introduction to Intermediate Training Course? Learn: 3D NURBS models. Master: Surfacing modeling. Interface: Rhino's navigation. Rendering Skills: Enhance presentations with Rhino renderings. Check our Website Flexible Scheduling: 1-on-1 training sessions according to your convenience. Choose any hour between 9 a.m. and 7 p.m., Mon to Sat. You can call us at 02077202581 to book over the phone. Duration: 10 hours. Methods: Personalized training either in-person, or live online. Introduction and Navigation Become acquainted with Rhino's interface, menus, and screen layout. Efficiently traverse through Rhino models, ensuring precision in 2D lines, polylines, and NURBS curves. Utilize modeling setup features, incorporating constraints like snap, ortho, and planar for accuracy. Leverage object snaps and Smart Track functionality to enhance precision. Solid and Surface Modeling Develop rapid 3D solids and surfaces, employing Rhino's organized layering system. Utilize coordinates and constraints for meticulous modeling, exploring 3D space and elevations. Create diverse shapes, such as rectangles, circles, arcs, ellipses, and polygon curves. Elevate models with Rhino render and render color, incorporating free-form curves, helix, and spiral curves. Efficiently handle model views with pan, zoom, and view management tools. Implement various editing commands for curve manipulation and transform curves into surfaces and solids. Utilize history tracking for advanced editing and execute general editing actions: move, copy, rotate, mirror, and scale. Create arrays with both polar and rectangular arrangements and employ boolean operations like union, difference, and intersection. Offset curves and surfaces effectively, ensuring meticulous detailing. Intermediate Edit and Surfacing Introduce key NURBS modeling concepts and terminologies. Edit curves and surfaces via control point manipulation and rebuild them for optimal refinement. Employ the nudge modeling aid for precise adjustments and generate deformable shapes. Create curves through projection techniques and split surfaces using curves and surfaces. Blend surfaces seamlessly, utilizing symmetry tools, lighting, and rendering effects. Convert intricate 3D objects into detailed 2D drawings, expertly crafting page layouts. Advanced Surfacing and Solid Modeling Construct model primitives and solid text, employing techniques such as pipe and extrusion. Modify solids efficiently using Boolean tools, expanding your surface modeling capabilities. Employ techniques like extrusion, lofting, and revolving for intricate surfaces. Create sweeps using 1 and 2 rail curves, mastering surface network techniques for complex shapes. Upon completion, you will: Master Rhino Tools: Navigate interfaces, utilize advanced tools for precise modeling, and employ features like object snaps and Smart Track. Expert Solid and Surface Modeling: Develop intricate 3D solids and surfaces, create diverse shapes, and use Rhino render effectively. Advanced Editing Skills: Apply intermediate and advanced editing techniques, including symmetry tools and realistic rendering. Precision Modeling: Utilize coordinates, constraints, and advanced aids for accurate detailing and problem-solving. Professional Project Execution: Create high-quality renderings, 2D drawings, and polished 3D models for real-world design scenarios. Upon completion, you'll be adept at 3D modeling, product design, and architecture, positioning you as a valuable asset in the design industry. Why Choose Our Rhino Courses? Rhino, also known as Rhinoceros, stands as a robust 3D computer graphics and computer-aided design software, utilized extensively in domains like architecture, industrial design, and multimedia. Our Rhino courses are meticulously crafted to empower you in mastering this software. Led by seasoned instructors, our courses provide a comprehensive understanding of Rhino, enabling you to create exceptional designs. Rhino 3D Training: Our Rhino 3D training caters to beginners and those seeking advanced techniques. Course Highlights: Precise 3D Modeling: Master free-form 3D NURBS models with precision. Advanced Functionality: Explore Rhino's features, including advanced surfacing commands. User Interface Mastery: Navigate Rhino's interface and hone skills in curves, surfaces, and solids. Expert Guidance: Acquire expertise in Rhino's modeling environment under expert guidance. Modeling Techniques: Learn free-form and precision modeling techniques. Modeling Aids: Utilize tools for accurate modeling and create basic Rhino renderings. Benefits of our Courses: Expert Guidance: Receive instruction from experienced architects and designers, providing practical, real-world insights for comprehensive learning. Comprehensive Resources: Access bespoke video tutorials for additional learning and reference, enhancing your understanding of the course materials. Digital Reference Material: Receive a digital reference book to support your revision efforts, providing a comprehensive resource for your studies. Ongoing Support: Enjoy free after-support through phone or email even after course completion, ensuring continuous assistance and guidance. Tailored Learning Experience: Customize your learning journey by adapting the syllabus and projects to align with your specific needs and interests, fostering a personalized educational experience. Certificate: Upon completion, earn a certificate from us, validating your achievement and recognizing your expertise in the field.

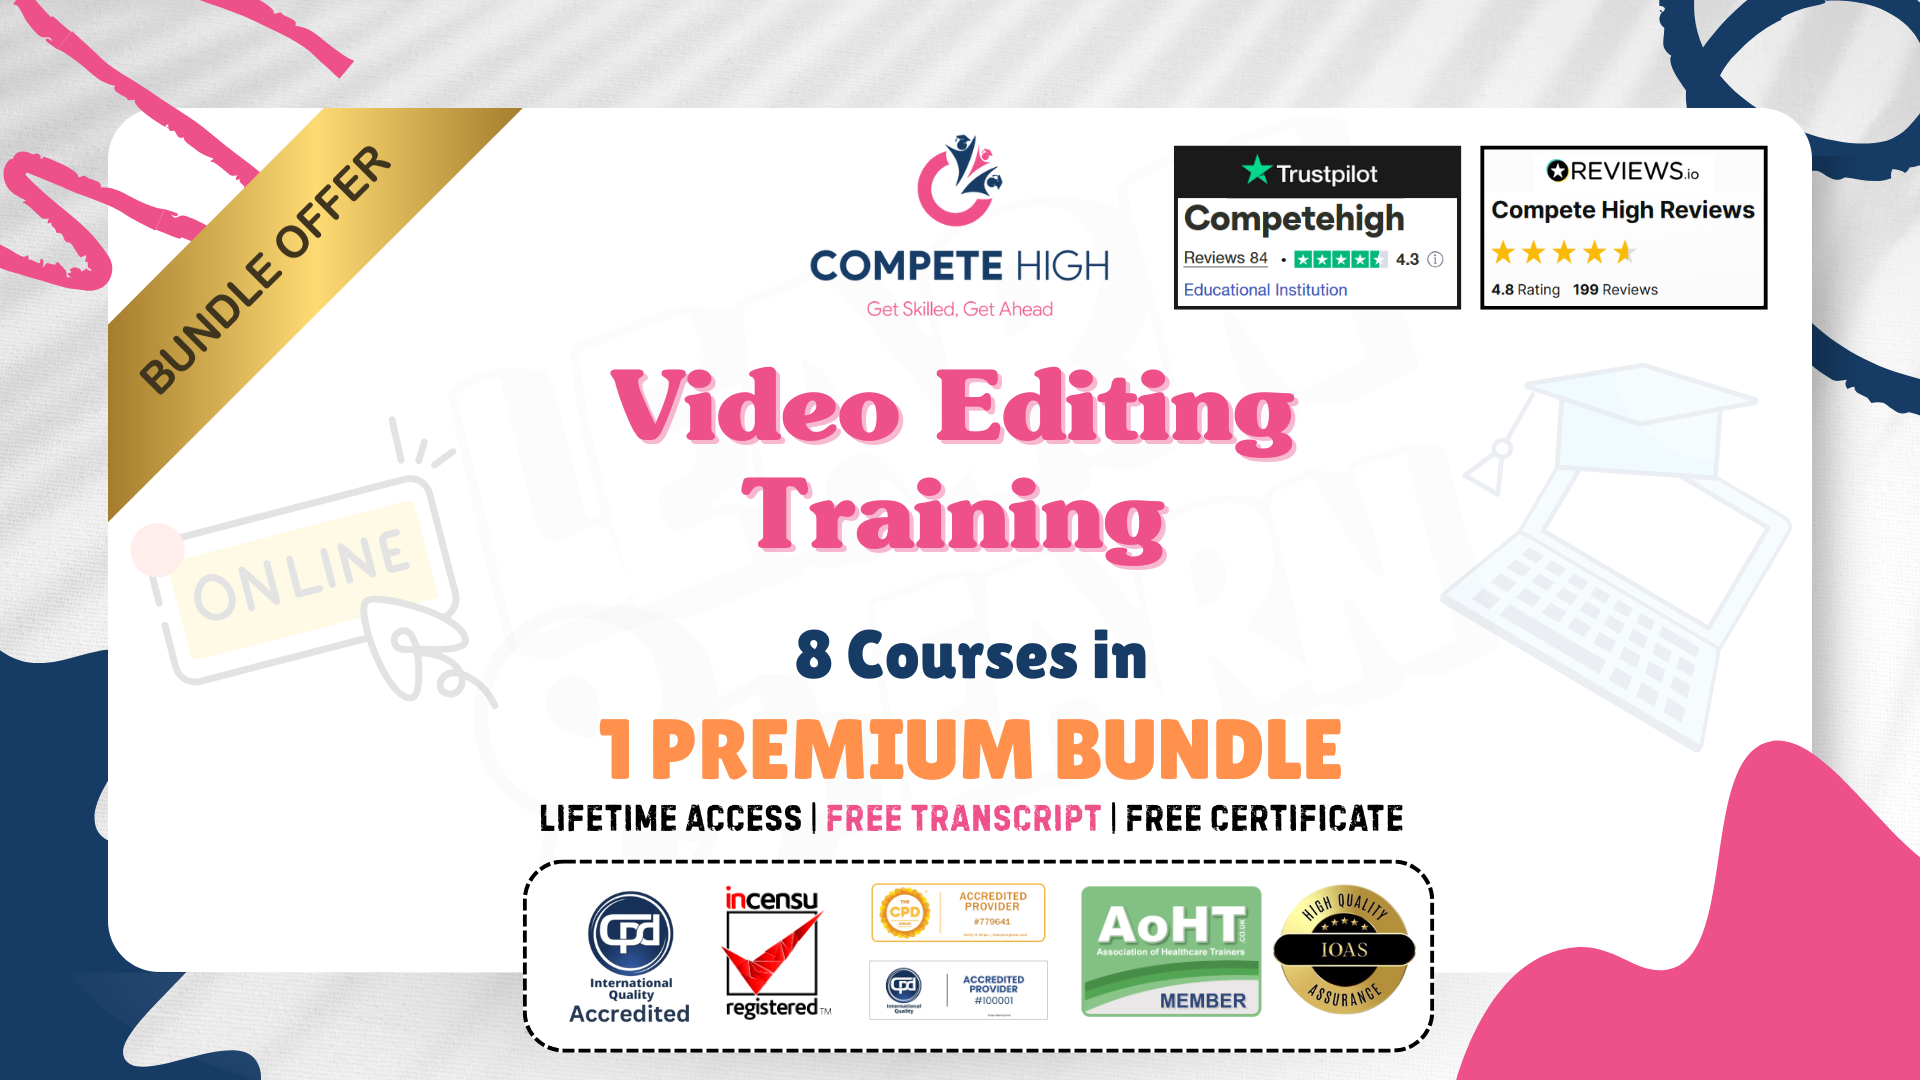
Video Editing Training: 8-in-1 Premium Online Courses Bundle
By Compete High
Launch your creative career with the Video Editing Training: 8-in-1 Premium Online Courses Bundle—your all-in-one toolkit for digital media, content creation, animation, and editing. Perfect for YouTubers, marketers, freelancers, and aspiring video pros. 🎥✨ 🧾 Description Featuring modules in Adobe Premiere Pro, animation, UX, and social media, this powerhouse bundle targets high-paying careers in video production, digital marketing, graphic design, and media strategy. It also covers Google Analytics, AdSense, and drawing to ensure you're job-ready in both technical and creative roles. 🎨 Relevant industries: Film & Media Animation Studios YouTube Channels UX/UI Agencies Digital Marketing Firms 📹 Stop waiting to build your portfolio. Start editing your future. ⭐ Compete High has 4.8 on 'Reviews.io' and 4.3 on Trustpilot ❓ FAQ Q: Can I apply these skills to social media work? A: Yes! The bundle covers everything from editing to analytics, perfect for content creation and monetisation. Q: Is any prior software knowledge required? A: Nope! You can jump in even if you're just starting out.
Digital Electronics
By Hi-Tech Training
The course will be delivered through 9 online virtual classroom sessions. The 10th and last session will involve the additional practical work for the course as well as the written examination (multiple choice for City & Guilds and written for Hi-Tech Training) which will take place at our training centre at 43 North Great Georges Street, Dublin 1 (completed online for non ROI learners). During the virtual classroom sessions, trainees will have a live video feed with their instructor talking to them, doing practical live demonstrations on equipment being involved actively in the learning. We will send out a practical kit so that trainees can complete assignments and practical work at home. The kit is the property of Hi-Tech Training and will be returned to Hi-Tech Training on the last day of the course. (The kits may also be purchased by the learner….see the Kits Page Link for more details). The kit consists of power supply unit breadboard, multimeter, cables, The kit consists of breadboard, multimeter, oscilloscope, battery and connectors, components including resistors, LEDs and ICs (AND, NAND, OR, NOR, X-OR, X-NOR, Inverter, Buffer, Latches, Flip-Flops, Timers, etc). Trainees will build various projects as part of the course. The kit forms an integral part of the course, so full course fees need to be paid at least 7 days prior to course commencement to allow time to ship the kit in time for the course.

Vray for 3ds max Training
By London Design Training Courses
Why Learn Vray for 3ds max Training Course? Course Link 3ds Max - Rendering with V-Ray training offers an extensive master class in utilizing V-Ray, a widely used tool in architecture, interior design, film, and various industries. Topics covered include lighting techniques for interiors using both natural and artificial light sources. Duration: 10 hrs Method: 1-2-1, Personalized attention. Schedule: Tailor your own hours of your choice, available from Mon to Sat between 9 am and 7 pm. Module 1: Introduction to Vray for 3ds Max (2 hours) Learn the purpose and advantages of Vray for 3ds Max. Install and set up Vray for 3ds Max. Get familiar with the Vray interface and workflow. Understand Vray materials and their usage in 3ds Max. Module 2: Lighting with Vray (2 hours) Explore lighting techniques using Vray in 3ds Max. Work with different types of Vray lights and their settings. Create and control Vray sun and sky for outdoor scenes. Utilize Vray dome lighting for interior scenes. Learn about IES lights in Vray and their usage. Establish an efficient lighting workflow with Vray. Module 3: Vray Camera (2 hours) Understand Vray camera settings and their impact on renders. Control exposure and use Vray depth of field. Create camera animations with Vray for dynamic shots. Explore Vray frame buffer functionalities for post-processing. Module 4: Vray Materials (2 hours) Learn about properties and settings of Vray materials. Create realistic and visually appealing materials with Vray. Save and organize custom Vray material libraries. Use Vray material overrides for efficient material changes. Module 5: Vray Rendering and Post Production (2 hours) Get an overview of Vray rendering settings for high-quality output. Render still images and animations using Vray. Enhance Vray renders in Photoshop with post-production techniques. Utilize Vray frame buffer for fine-tuning renders. Composit Vray render elements in Photoshop for added control. Work with Vray denoiser for noise reduction in renders. You can access the free trial of Vray for 3ds Max here: (https://www.chaosgroup.com/vray/sketchup/free-trial), material libraries here: (https://www.vray-materials.de/), and textures here: (https://textures.com/).

Revit Basic to Fundamentals
By London Design Training Courses
Why Choose Revit Basic to Fundamentals Course Course Link In this course you will learn Revit skills for BIM modeling. In-person or live online. Autodesk Revit Architecture training for students to create full 3D architectural project models and set them up in working drawings. Duration: 10hours Method: 1-on-1 method with tailored content and flexible pace, backed by individual support. Schedule: Choose a convenient hour from Mon to Sat between 9 am and 7 pm to create your own schedule. Revit Essentials Training: Learn Revit fundamentals for architecture and structural design, supporting efficient building construction with BIM workflows. Delivery Options: In-class at our center Live online sessions I. Introduction to Revit Overview of Revit and its uses Revit interface and basic tools Navigation and viewport controls Creating and saving projects II. Setting up a Project Creating a new project Setting up project levels and grids Adding site and building information Setting up project units III. Creating Building Elements Creating and modifying walls Adding doors and windows Creating and modifying floors and ceilings Creating roofs and modifying roof shapes Creating stairs and railings IV. Views and Sheets Creating and managing views Creating and managing sheets Adding schedules and tags Creating construction documents V. Annotation and Detailing Adding text and dimensions Creating and modifying detail components Adding symbols and keynote legends Adding annotations to construction documents VI. Conclusion and Next Steps Review of course content Tips for further learning and resources Q&A and feedback Note: The above course outline is just a suggestion, and the course content and duration can be adjusted according to the needs and level of the learners. Detailed Course Outline. 1. Starting a Project Creating a new project and the importance of a template. Understanding project settings and scales Adding levels Adding grids Adding columns 2. Modeling Basics Adding walls Using snaps Wall properties and wall types Using the modified tools Adding doors and windows Using constraints See: Autodesk Seek and Revit City websites 3. Links, Imports, and Groups Working with DWG files Creating topography from a DWG link Understanding CAD inserts Using import tips Creating a group Working with Revit links Managing links 4. Sketch-Based Modeling Components Working with floors Working with roofs Adding openings Working with stairs Working with railings Working with ceilings 5. Complex Walls Creating a custom basic wall type Adding curtain walls Adding curtain grids and mullions 6. Visibility and Graphics Controls Using object styles Working with visibility/graphic overrides Using Hide/Isolate Understanding view range Using the Linework Using cutaway views 7. Rooms Adding rooms Controlling room numbering Understanding room bounding elements 8. Schedules and Tags Understanding tags Adding schedules Modifying schedules Creating a key schedule 9. Annotation and Details Adding text Adding dimensions Adding symbols Adding legend views Creating a detail callout Using detail components Adding filled and masking regions 10. The Basics of Families Understanding familiesUsing reference planes, parameters, and constraints Adding solid geometry Adding void geometry Completing the family 11. Sheets, Plotting, and Publishing Adding sheets Exporting to AutoCAD and JPG

Vectorworks Evening Training
By London Design Training Courses
Why choose Vectorworks Evening Training Course? Course Link. This course led by certified expert, this course offers flexibility for evening learning. Choose in-person or live online sessions to master Vectorworks in architecture, interior design, and landscaping. Enroll now even after business hours! Duration: 10 hrs. Method: 1-on-1, Personalized attention. Schedule: Tailor your own schedule by pre-booking a convenient hour of your choice, available from Mon to Sat between 9 am and 7 pm. The Vectorworks course provides comprehensive training in computer-aided design (CAD) and Building Information Modeling (BIM) using the powerful Vectorworks software. This hands-on, instructor-led course covers 2D drafting, technical drawing, and 3D modeling, enabling participants to apply Vectorworks effectively in real-world projects. Key Features: Hands-on, instructor-led classroom training. Practical Vectorworks CAD projects for real-world application. Part-time evening or weekend options available. 1-2-1 Private learning experience. Module 1: Grasping CAD and Vectorworks Understanding the Role of CAD in Design Getting Acquainted with Vectorworks Software Module 2: Configuring Your Workspace Customizing Your Workspace Essential Options and Preferences Module 3: Mastering Foundational Drawing Skills Techniques for Drawing Object Selection Methods Module 4: Advanced Object Manipulation Merging Shapes Reflecting Objects Rotating Objects Grouping Elements Module 5: Precision Drawing and Scaling Techniques Working with Scale Setting Preferences for Accuracy Creating and Saving Templates Module 6: Achieving Accurate Object Placement Ensuring Drawing Precision Precise Object Movement Module 7: Advanced Editing Methods Utilizing Fillet Tool Applying Offset Function Module 8: Understanding Object Attributes and Groups Basic Attribute Management Editing Object Groups Module 9: Object Duplication Techniques Linear Duplicates Rectangular Duplicates Circular Duplicates Module 10: Crafting Room Plans Designing Walls Incorporating Windows and Doors Module 11: Development of Room Plans Methods for Room Plan Drawing Module 12: Exploring Additional Attributes Hatch Patterns Gradients Image Fills Module 13: Creating Elevation Drawings Elevation Drawing Techniques Effective Approaches Module 14: Importing Images for Graphic Use Graphic Illustration Integrating Images Module 15: Symbols and Resource Handling Symbol Creation Introduction to Resource Browser Module 16: Organizing Drawings Using Design Layers Optimizing Design Layer Utilization Module 17: Labeling Drawings and Title Blocks Drawing Labels Title Block Text Placement Module 18: Plotting and Printing Methods User Interface Navigation and Terminology Printing Approaches Module 19: Generating Drawing Sheets A1, A2, and A3 Sheet Formats Module 20: Utilizing Viewports Effectively Managing Multiple Views Module 21: Professional Model Presentation Techniques Paper Space Presentation Conversion to PDF Formats Module 22: File and Project Management Module 23: Object Display and Terminology Module 24: Objects and Data Management Module 25: Precise Object Placement Object Snapping Quick Selection Module 26: Dividing and Measuring Objects Module 27: Dimensioning and Annotations Module 28: Working with Text Elements Module 29: Customizing Tool Palettes Module 30: Organizing Tool Palettes Module 31: Efficient Tool Palette Usage Module 32: Standard Views and Drawing Techniques Module 33: Drawing Curved Shapes Arcs, Donuts, and Ellipses Drawing Module 34: Real-World Units and Measurements Module 35: Object Manipulation Adjusting Object Angles Module 36: File Handling and Management Saving, Exiting, and Opening Projects Module 37: Creating Mirrored Images Module 38: Introduction to 3D Modeling By the end of the Vectorworks Evening Training Course, participants will: Demonstrate proficiency in using the Vectorworks interface, tools, and navigation. Create and edit 2D drawings, including walls, doors, windows, floors, ceilings, stairs, and railings. Effectively manage layers, classes, and views for organized and controlled object placement. Create and edit dimensions and annotations for accurate measurements and documentation. Develop skills in creating, modifying, and utilizing symbols for increased efficiency. Generate and edit 3D geometry, apply textures, and create sections and elevations from 3D models. Create polished presentation drawings using viewports, annotations, and text for clarity. Summarize course content and confidently apply learned skills in Vectorworks projects. Utilize available resources for further learning and professional development.