- Professional Development
- Medicine & Nursing
- Arts & Crafts
- Health & Wellbeing
- Personal Development
581 Courses
Diploma in Interior Design - Level 5 (QLS Endorsed)
By Kingston Open College
QLS Endorsed + CPD QS Accredited - Dual Certification | Instant Access | 24/7 Tutor Support

Level 3 Diploma in Carpentry & Joinery (Woodwork) - CPD Certified
(47)By Academy for Health and Fitness
The UK trade industry is flourishing, and amidst this boom, Carpenters and Joiners are clinching the top spots! With a staggering 63% job increase during the pandemic, the path to success has never been clearer. If the lure of going self-employed, running your own business, or securing a well-paid job intrigues you, our Carpentry & Joinery Diploma is your key. Each lesson in this Carpentry & Joinery: Woodwork Training course is crafted for easy understanding, enabling you to become proficient in Carpentry & Joinery: Woodwork Training. Whether you are a beginner or looking to sharpen your existing carpentry skills, this Carpentry & Joinery: Woodwork Training is the ideal choice. Our Carpentry & Joinery: Woodwork Training Bundle contains 4 of our premium courses for one discounted price: Course 01: Carpentry & Joinery: Woodwork Training Course 02: Furniture Restoration Course 03: Interior Design & Home Styling Course 04: DIY Home Improvement With this comprehensive Carpentry & Joinery: Woodwork Training Bundle, you can achieve your dreams and train for your ideal career. This Carpentry & Joinery: Woodwork Training Bundle provides students with an in-depth learning experience that they can work through at their own pace to enhance their professional development. This Carpentry & Joinery: Woodwork Training Bundle covers everything you need in order to progress in your chosen career. Learning Outcomes of Carpentry & Joinery: Woodwork Training Bundle: Familiarise with the roles and responsibilities of carpenters in the modern world. Gain insight into the various fields and specialities within Carpentry & Joinery: Woodwork Training. Identify and distinguish between various carpentry tools and their specific uses. Learn the safe handling, maintenance, and storage of carpentry tools. Gain knowledge of the various materials used in carpentry, from wood to metals and synthetic materials. Delve into the different types of adhesives and their appropriate application. Understand the foundational concepts behind different flooring systems. So enrol now in this Carpentry & Joinery: Woodwork Training course Today to advance your career. Carpentry & Joinery: Woodwork Training Start your learning journey straight away with this Carpentry & Joinery: Woodwork Bundle and take a step toward a brighter future! Experts created the Carpentry & Joinery: Woodwork Bundle to provide a rich and in-depth training experience for all students who enrol in it. Enrol now and you'll have immediate access to all of the Carpentry & Joinery: Woodwork Bundle materials. Then, from any internet-enabled device, access the materials and learn when it's convenient for you. Assessment Process of Carpentry & Joinery: Woodwork Training Bundle Once you have completed all the modules in the Carpentry & Joinery: Woodwork Bundle course, you can assess your skills and knowledge with an optional assignment. Our expert trainers will assess your assignment and give you feedback afterwards. CPD 50 CPD hours / points Accredited by CPD Quality Standards Who is this course for? This Carpentry & Joinery: Woodwork Bundle is ideal for anyone interested in this topic and who wants to learn more about it. Requirements Carpentry & Joinery: Woodwork Training The Carpentry & Joinery: Woodwork Bundle does not require any prior knowledge; everyone may participate! This Carpentry and Joinery is open to anyone who is interested in learning from anywhere in the world. Career path Carpentry & Joinery: Woodwork Training Complete this Carpentry & Joinery: Woodwork Training and look to get opportunities in the following sectors: Carpenter Carpenter Helper Joiner Shuttering Carpenter Carpentry Assessor In the UK, the positions are getting paid typically amounting to around £25,000 - £30,000 per annum. Certificates CPD Accredited Certificate Digital certificate - Included CPD Accredited Certificate Hard copy certificate - £29 If you are an international student, you will be required to pay an additional fee of 10 GBP for international delivery, and 4.99 GBP for delivery within the UK, for each certificate

Fashion and Beauty: Hairdressing & Barbering Training
By Wise Campus
Hairdressing: Hairdressing Course Online Do you ever dream of becoming a master hairstylist? If so, the best way for you to convert your interest into a career is through our Diploma of Hairdressing (Online). Our Diploma of Hairdressing (Online) includes instruction in hair cutting, styling, and colouring, among other things. This Diploma of Hairdressing (Online) course encounters self-discovery and creativity. Also, this Diploma of Hairdressing (Online) covers receptionist duties. Additionally, the Diploma of Hairdressing (Online) course describes salon health and safety regulations. Hair treatment and hair extensions are part of this Diploma of Hairdressing (Online) course. Overall, this Diploma of Hairdressing (Online) course gives students a basic grasp of hair colour corrective services. Start building your future in the beauty industry with our Diploma of Hairdressing (Online) course! Main Course: Diploma of Hairdressing Course Free Courses are including with this Hairdressing: Hairdressing Course Along with The Hairdressing Course, We Offer a free Hair & Beard Barbering Course Along with The Hairdressing Course, We Offer a free Level 5 Fashion & Beauty Course Special Offers of this Hairdressing: Hairdressing Course This Hairdressing Course includes a FREE PDF Certificate. Lifetime access to this Hairdressing Course Instant access to this Hairdressing Course Get FREE Tutor Support to this Hairdressing Course Hairdressing: Hairdressing Course Online With the help of our intensive and thorough training program, you will gain the skills and knowledge required for success in the hairdressing industry. The significance of professionalism, communication, and customer service is also emphasized in this hairdressing course. You'll pick up new skills for communicating with customers and giving them the best possible care. Who is this course for? Hairdressing: Hairdressing Course Online Anyone who enjoys beauty, creativity, and changing people's lives is welcome to enrol in our Hairdressing: Hairdressing Course training programme. Requirements Hairdressing: Hairdressing Course Online To enrol in this Hairdressing: Hairdressing Course, students must fulfil the following requirements. To join in our Hairdressing: Hairdressing Course, you must have a strong command of the English language. To successfully complete our Hairdressing: Hairdressing Course, you must be vivacious and self driven. To complete our Hairdressing: Hairdressing Course, you must have a basic understanding of computers. A minimum age limit of 15 is required to enrol in this Hairdressing: Hairdressing Course. Career path Hairdressing: Hairdressing Course Online You can go into various occupations in the hairdressing industry after finishing our Hairdressing: Hairdressing Course training.
Duolingo Crash Course (4 One-to-One Sessions & 30-Day Course Access)
(5)By TEFL Wonderland - Brilliant Minds
Duolingo Test Preparation

Delve into the fascinating realm of web application development with our comprehensive course, 'Web Applications for Specialisation on Development.' Tailored for aspiring web developers, this program offers an extensive curriculum covering everything from CSS intricacies to advanced PHP and MySQL techniques. Picture yourself mastering the art of web design and backend programming, a skillset highly sought after in today's digital landscape. The course sets off with a thorough introduction to CSS, paving the way for more advanced topics. As you progress, you'll journey through various levels of CSS expertise, from basic to expert, equipping you with the skills to create visually stunning and responsive websites. Transitioning into the backend, the course introduces PHP, a cornerstone in web application development. Learn to manipulate strings, utilise operators, and make decisive programming decisions. PHP's control flow statements, functions, and object-oriented programming are also covered in detail, offering you a robust understanding of server-side scripting. The latter part of the course focuses on MySQL, essential for database management and operations. By the end of this course, you'll have a comprehensive understanding of both front-end styling and backend functionality, preparing you for a thriving career in web development. Learning Outcomes Master CSS from basic to expert level for front-end web design. Gain a thorough understanding of PHP for effective server-side scripting. Learn MySQL for database creation, querying, and management. Develop skills in PHP and MySQL for building dynamic web applications. Acquire expertise in error handling, data validation, and security in web development. Why choose this Web Applications for Specialisation on Development course? Unlimited access to the course for a lifetime. Opportunity to earn a certificate accredited by the CPD Quality Standards and CIQ after completing this course. Structured lesson planning in line with industry standards. Immerse yourself in innovative and captivating course materials and activities. Assessments designed to evaluate advanced cognitive abilities and skill proficiency. Flexibility to complete the Course at your own pace, on your own schedule. Receive full tutor support throughout the week, from Monday to Friday, to enhance your learning experience. Unlock career resources for CV improvement, interview readiness, and job success. Who is this Web Applications for Specialisation on Development course for? Aspiring web developers seeking comprehensive knowledge in CSS, PHP, and MySQL. IT professionals aiming to specialise in web application development. Computer science students wanting practical skills in web technologies. Front-end developers looking to expand their backend development skills. Anyone interested in building a career in web design and development. Career path Web Developer - £24,000 to £40,000 Front-End Developer - £26,000 to £42,000 Back-End Developer - £28,000 to £45,000 Full Stack Developer - £30,000 to £50,000 Database Administrator - £27,000 to £43,000 PHP Developer - £25,000 to £41,000 Prerequisites This Web Applications for Specialisation on Development does not require you to have any prior qualifications or experience. You can just enrol and start learning.This Web Applications for Specialisation on Development was made by professionals and it is compatible with all PC's, Mac's, tablets and smartphones. You will be able to access the course from anywhere at any time as long as you have a good enough internet connection. Certification After studying the course materials, there will be a written assignment test which you can take at the end of the course. After successfully passing the test you will be able to claim the pdf certificate for £4.99 Original Hard Copy certificates need to be ordered at an additional cost of £8.

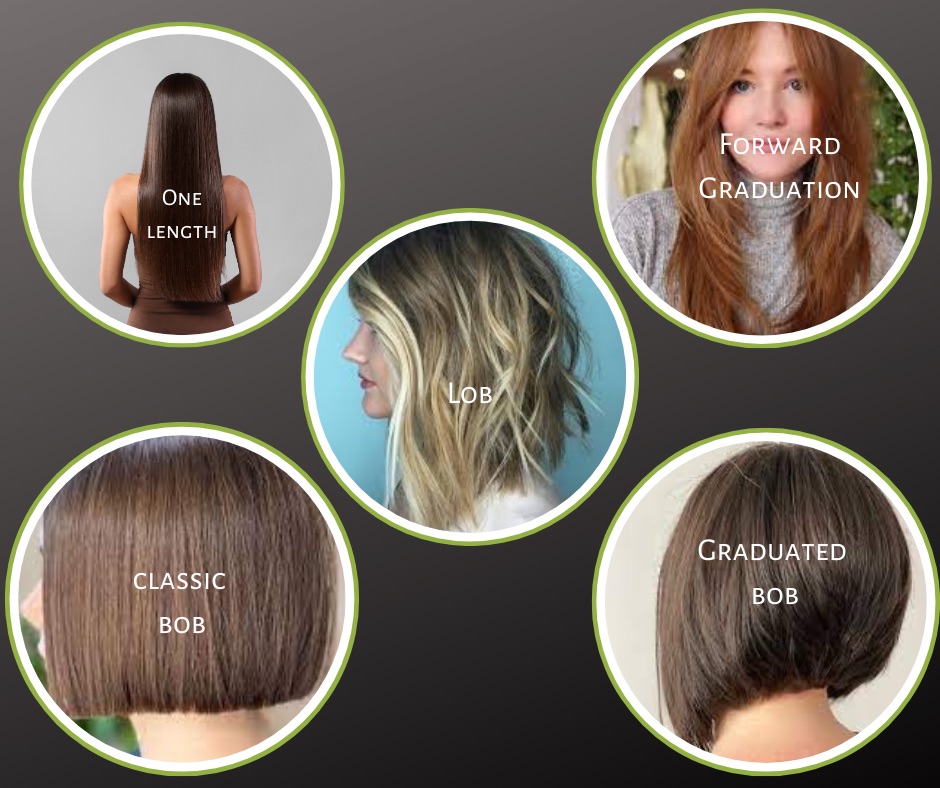
Foundation Ladies Cutting & Blowdrying Course
By VIPHAIR4UTRAINING
Viphair4utraining.com Ladies Foundation Cutting and Styling Course
Overview This comprehensive course on Build an Amazon Affiliate E-Commerce Store from Scratch will deepen your understanding on this topic. After successful completion of this course you can acquire the required skills in this sector. This Build an Amazon Affiliate E-Commerce Store from Scratch comes with accredited certification from CPD, which will enhance your CV and make you worthy in the job market. So enrol in this course today to fast track your career ladder. How will I get my certificate? You may have to take a quiz or a written test online during or after the course. After successfully completing the course, you will be eligible for the certificate. Who is This course for? There is no experience or previous qualifications required for enrolment on this Build an Amazon Affiliate E-Commerce Store from Scratch. It is available to all students, of all academic backgrounds. Requirements Our Build an Amazon Affiliate E-Commerce Store from Scratch is fully compatible with PC's, Mac's, Laptop, Tablet and Smartphone devices. This course has been designed to be fully compatible with tablets and smartphones so you can access your course on Wi-Fi, 3G or 4G. There is no time limit for completing this course, it can be studied in your own time at your own pace. Career Path Learning this new skill will help you to advance in your career. It will diversify your job options and help you develop new techniques to keep up with the fast-changing world. This skillset will help you to- Open doors of opportunities Increase your adaptability Keep you relevant Boost confidence And much more! Course Curriculum 6 sections • 29 lectures • 05:03:00 total length •Course Introduction: 00:05:00 •The Amazon Affiliate Program - Introduction: 00:05:00 •Tips on Domain Registration: 00:13:00 •Domain Registration & Hosting: 00:12:00 •Installing WordPress CMS: 00:18:00 •The WordPress Interface: 00:15:00 •Installing Free SSL: 00:10:00 •Advantages of WordPress: 00:03:00 •Installing Required Themes & Plugins: 00:18:00 •Creating an Amazon Affiliate Account: 00:08:00 •Importing Products from Amazon: 00:09:00 •Customizing the Layout with : 00:09:00 •Creating Headings & Descriptions: 00:09:00 •Adding & Customizing Buttons: 00:06:00 •Adding Category Widgets: 00:18:00 •Adding Category Images: 00:09:00 •Populating the Recent & Best Seller Categories: 00:09:00 •Adding Icon Boxes: 00:12:00 •Installing & Configuring Rank Math for SEO: 00:11:00 •Rank Match SEO Configuration Continued: 00:15:00 •Adding a Blog Page: 00:12:00 •Blog, About Page, & Contact Us: 00:21:00 •Customizing Menus: 00:08:00 •Creating a Logo & Customized Header: 00:10:00 •Adding & Styling a Footer: 00:12:00 •Customizing Product Pages & Final Changes: 00:11:00 •Customizing the Sidebar Menu: 00:06:00 •Promote your Amazon Affiliate Store & Products: 00:09:00 •Assignment - Build an Amazon Affiliate E-Commerce Store from Scratch: 00:00:00

Go Full Stack with Spring Boot and React
By Packt
Build your first full stack application with React and Spring Boot. Become a full-stack web developer now!
Python for Data Visualization - A Beginner's Guide
By Packt
This beginner-friendly course takes us on a journey into data visualization. You will learn to transform raw data into stunning visuals using Matplotlib, Seaborn, and Plotly. From charts to dynamic heatmaps, we will master the essentials. Fuel your curiosity, enhance your skills, and communicate insights effectively to become a Python data visualization pro!

Beauty Therapy: Facial, Manicure & Pedicure Techniques
By IOMH - Institute of Mental Health
Experience the perfect blend of self-care and regeneration with our captivating beauty therapy journey. In the UK, the beauty industry is a thriving £28.4 billion market, offering endless opportunities for those passionate about enhancing physical well-being and confidence. This comprehensive Beauty Therapy: Facial, Manicure & Pedicure Techniques course is a gateway to unlocking the secrets of radiant skin, flawless nails, and an overall polished appearance. Enrol today and unlock a world of creative possibilities in the ever-evolving beauty therapy industry! Improving and moving forward is key to getting ahead personally. The Beauty Therapy: Facial, Manicure & Pedicure Techniques course is designed to teach you the important stuff quickly and well, helping you to get off to a great start in the field. So, what are you looking for? Enrol now! You will Learn The Following Things: Learn strategies to boost your workplace efficiency. Hone your skills to help you advance your career. Acquire a comprehensive understanding of various topics and tips. Learn in-demand skills that are in high demand among UK employers This course covers the topic you must know to stand against the tough competition. The future is truly yours to seize with this Beauty Therapy: Facial, Manicure & Pedicure Techniques. Enrol today and complete the course to achieve a certificate that can change your career forever. Details Perks of Learning with IOMH One-to-one support from a dedicated tutor throughout your course. Study online - whenever and wherever you want. Instant Digital/ PDF certificate 100% money back guarantee 12 months access Process of Evaluation After studying the course, an MCQ exam or assignment will test your skills and knowledge. You have to get a score of 60% to pass the test and get your certificate. Certificate of Achievement Certificate of Completion - Digital/PDF Certificate After completing the Beauty Therapy: Facial, Manicure & Pedicure Techniques course, you can order your CPD-accredited Digital/PDF Certificate for £5.99. Certificate of Completion - Hard copy Certificate You can get the CPD Accredited Hard Copy Certificate for £12.99. (Each) Shipping Charges: Inside the UK: £3.99 International: £10.99 Who Is This Course for? This Beauty Therapy: Facial, Manicure & Pedicure Techniques is suitable for anyone aspiring to start a career in relevant field; even if you are new to this and have no prior knowledge, this course is going to be very easy for you to understand. On the other hand, if you are already working in this sector, this course will be a great source of knowledge for you to improve your existing skills and take them to the next level. This course has been developed with maximum flexibility and accessibility, making it ideal for people who don't have the time to devote to traditional education. Requirements There is no prerequisite to enrol in this course. You don't need any educational qualification or experience to enrol in the Beauty Therapy: Facial, Manicure & Pedicure Techniques course. Do note: you must be at least 16 years old to enrol. Any internet-connected device, such as a computer, tablet, or smartphone, can access this online course. Career Path The certification and skills you get from this Beauty Therapy: Facial, Manicure & Pedicure Techniques Course can help you advance your career and gain expertise in several fields, allowing you to apply for high-paying jobs in related sectors. Course Curriculum Module 01: Fundamentals of Beauty Therapy Fundamentals of Beauty Therapy 00:20:00 Module 02: Skin Analysis and Facial Treatments Skin Analysis and Facial Treatments 00:20:00 Module 03: Make-up Artistry Make-up Artistry 00:19:00 Module 04: Nail Care and Manicure & Pedicure Techniques Nail Care and Manicure & Pedicure Techniques 00:19:00 Module 05: Hair Care and Styling Hair Care and Styling 00:20:00 Module 06: Hair Removal and Body Treatments Hair Removal and Body Treatments 00:17:00