- Professional Development
- Medicine & Nursing
- Arts & Crafts
- Health & Wellbeing
- Personal Development
916 Courses in London
Decision Making for Managers
By Mpi Learning - Professional Learning And Development Provider
In today's dynamic business environment, Managers need to evaluate different courses of action and make decisive decisions.

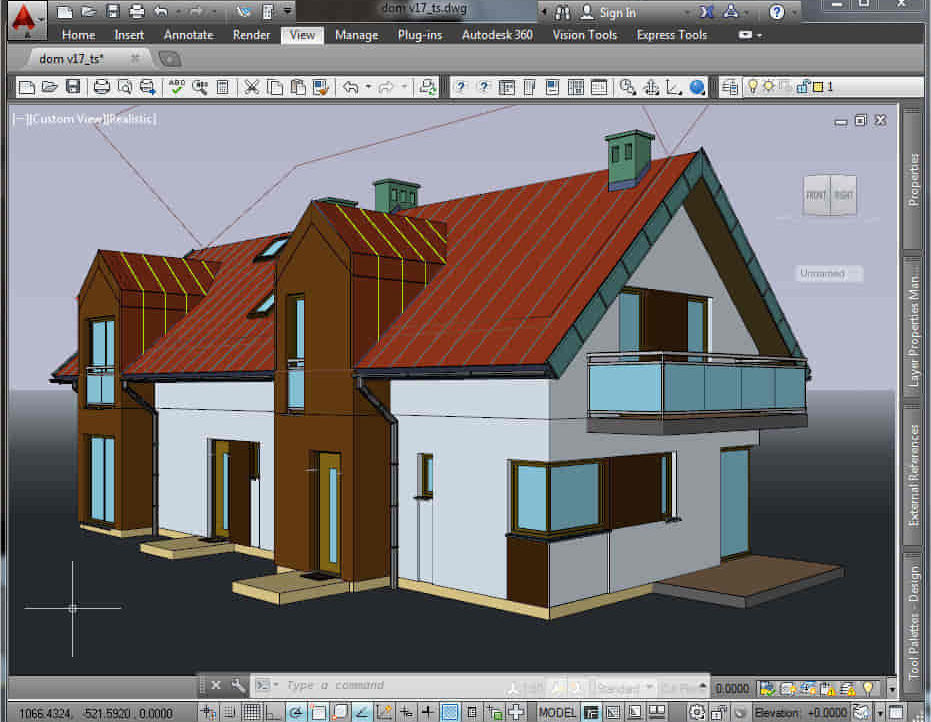
AutoCAD Architecture 1 on 1 Course
By ATL Autocad Training London
Why Choose AutoCAD Architecture 1 on 1 Course? Our courses for AutoCAD and AutoCAD Architecture. AutoCAD conveys design intent through Lines and Circles, AutoCAD Architecture enhances these elements with walls, doors, windows and AEC. Click here for more info: Website When Can I Reserve My Spot? 1 on 1 training and available from Monday to Saturday, 9 am to 7 pm Duration: 16 hours, which you can flexibly book. Training Method: 1-on-1, in-person face-to-face or live online training. AutoCAD Architecture 3D Course Overview: AutoCAD Architecture Introduction Distinguishing AutoCAD Architecture from AutoCAD LT Exploring the User Interface and 3D Viewing Wall Construction and Customization: Adding Walls to the Model Creating Specialized Curtain Walls Modifying Walls for Specific Needs Joining Walls for Complex Structures Incorporating Wall Openings for Doors and Windows Ceiling Plans (Reflected): Establishing Ceiling Grids and Construction Details Customizing Ceiling Grids for Design Consistency Inserting Ceiling Fixtures and Detailed Construction Structural Design and Analysis: Utilizing Structural Elements and Online Resources Constructing Column Grids and Annotating Columns Adjusting Column Grids and Annotations Enhancing Clarity with Column Grid Annotations Stairs: Designing and Customizing Stairs Adding Railings and Detailed Construction Refining Railings and Detailed Construction Floors and Slabs: Creating Floor Slabs with Construction Details Aligning Floor Slabs with Design Specifications Editing Slabs Using Slab Tools and Construction Details Roofs and Roof Detailing: Roof Creation for the Building Designing Roof Slabs for Specific Areas Modifying Roofs and Roof Slabs as Needed Precise Roof Detailing with Roof Slab Tools Annotation: Scaling Detail Drawings and Annotations Incorporating Text, Leaders, and Comments Accurate Dimensioning in AutoCAD Architecture Enhancing Clarity with Various Annotation Tools Equipment and Furnishings: Integrating Interior and Exterior Furnishings Incorporating Blocks and 3D Models for Realism Leveraging Tool Palettes and Autodesk Seek Resources Model Views Ready for Printing PDF: Creating Callouts for Specific Views Designing Elevations, Sections, and Construction Details Modifying Callout Objects for Improved Visualization Implementing Live Sections and Elevations Generating Reports and Managing Project Resources Schedules: Adding Door and Window Labels Editing Label Data for Accuracy Creating Schedules for Efficient Project Management Customizing Schedules to Meet Specific Requirements This comprehensive AutoCAD Architecture 3D course equips participants with the skills needed to create intricate 3D architectural models, implement construction details, and efficiently manage project resources. It empowers participants to produce professional-grade architectural designs using AutoCAD Architecture software." Upon completion of the AutoCAD Architecture 1-on-1 Course, participants will demonstrate proficiency in architectural design using the application. They will have mastered essential techniques, gained expertise in drawing management, refined their model visualization skills, and earned an accredited certificate. This tailored learning experience, coupled with post-course support and practical exercises, will significantly boost career prospects in the field. Download Autocad Architecture Training Choices: Personalized in-person or Live online courses. Tailored courses designed to meet your specific knowledge and project needs. Customized Learning: Adapt the course to match your existing skills and project requirements. Certifications: Instructors certified by Autodesk. AutoCAD Architecture training Certificate of Attendance. Expert Guidance: Learn from Autodesk Certified Instructors with extensive professional experience. Interactive Learning: Engage in practical, hands-on training. Follow step-by-step demonstrations and practice in real-time. Keep your course-created files for future reference. Comprehensive Resources: Receive a detailed training guide for ongoing reference. Earn an e-certificate upon successful course completion. Post-Course Assistance: Access lifetime email support from your instructor. Prerequisites: Basic familiarity with standard AutoCAD or equivalent knowledge. Version Versatility: Training available for any AutoCAD Architecture version to suit your requirements." Thorough Learning Experience: Establish a robust 3ds Max foundation and master vital skills for crafting impressive 3D models and visualizations. Customized Instruction: Benefit from one-on-one guidance provided by seasoned instructors, ensuring focused and tailored learning. Flexible Learning Paths: Select between in-person or live online sessions, granting you the flexibility to learn from any location. Lesson Recordings: Gain access to recorded lessons for future reference, facilitating self-paced review of course content. Ongoing Email Assistance: Access continuous email support from our experts to address any queries or seek clarifications. Complimentary Career Guidance: Receive valuable career advice from industry professionals, assisting you in charting a successful course in the realm of 3D modeling and visualization."
Arnold for 3dsMax Basic to Advanced Training
By London Design Training Courses
Training duration: 10 hrs. Click here for more info Method: 1-2-1, Personalized attention, Tailored content, Flexible pace, Individual support. Schedule: Personalized training experience with our flexible 1-2-1 sessions. Tailor your own schedule by pre-booking a convenient hour of your choice, available from Monday to Saturday between 9 am and 7 pm. Learn Arnold for 3ds Max and make breath-taking renders with our comprehensive training course. Led by certified tutors and industry experts, you'll master the basics to advanced techniques of creating stunning visual effects and lifelike renderings. Course Duration: 10 hours Course Outline: Session 1: Introduction to Arnold Renderer (1 hour) Unveiling Arnold Renderer's features and capabilities Understanding the benefits of Arnold in 3ds Max Setting up Arnold renderer and exploring its interface Mastering the workflow for exceptional results Session 2: Basic Arnold Shading (1 hour) Navigating the Arnold shading network Creating essential materials with Arnold shaders Working with diverse shader types (standard, Lambert, etc.) Elevating visuals with maps and textures in Arnold's materials Session 3: Arnold Lighting Techniques (1.5 hours) Embracing the art of lighting with Arnold Lights Implementing various light types (area lights, spotlights, etc.) Creating ambiance with Arnold skydome and environment lighting Illuminating scenes using physical sky and image-based lighting Session 4: Arnold Cameras and Rendering Settings (1.5 hours) Mastering Arnold cameras and their settings Achieving depth of field and motion blur effects in Arnold Configuring optimal rendering settings for superior results Fine-tuning rendering with the Arnold Render Setup dialog Session 5: Advanced Arnold Shading (1.5 hours) Creating intricate materials with advanced Arnold shaders Realistic surfaces with Arnold's procedural textures Harnessing the power of advanced shading nodes (bump, displacement, etc.) Unleashing specialized effects with Arnold shaders (subsurface scattering, hair, etc.) Session 6: Arnold Rendering Optimization (1 hour) Streamlining rendering settings for enhanced efficiency Leveraging Arnold features like adaptive sampling and denoising Noise reduction techniques for smoother Arnold renders Troubleshooting common rendering issues and their solutions Session 7: Advanced Lighting Techniques (1 hour) Crafting lifelike lighting setups with Arnold's prowess Exploring advanced lighting properties (exposure, color temperature, etc.) Enhancing lighting with Arnold light filters and modifiers Implementing captivating effects like volumetric lighting and caustics Session 8: Arnold AOVs and Compositing (1 hour) Understanding Arnold AOVs (Arbitrary Output Variables) Configuring and rendering AOVs for post-production control Compositing AOVs for artistic adjustments in post-production Leveraging AOVs for fine-tuning the final image Session 9: Arnold for Animation and Motion Graphics (1 hour) Integrating Arnold seamlessly into animation and motion graphics projects Rendering animation sequences with finesse Managing motion blur and time-based effects with Arnold Unveiling Arnold's potential for particle rendering and dynamic effects Session 10: Arnold Tips, Tricks, and Best Practices (1 hour) Exploring advanced techniques and workflows for exceptional results Optimizing scene setup for enhanced rendering performance Troubleshooting tips for common issues and errors in Arnold Q&A session and final review to consolidate knowledge

Acrylgel Course
By Majestic Academy
Acrylgel is a fusion between builder gel and acrylic powder tailored to create durable and extremely natural looking nail enchantments. Acrylgel is a revolutionary product for nail design. It convinces with an easy and quick application and its very long durability. Because of the extremely high viscosity you can model all nails on one hand and cure them at once without getting any gel in the nail edges. Our Acrylgel is very easy to file. - Stable as acrylic, flexible as a gel. - Quick and easy application, max. saving of time.This course will take you through the application procedure, ‘French Pink and White’ techniques, sculpting with forms and maintenance procedure, including aftercare advice. THE REQUIREMENTS Salon attire must be worn during the course. Student must have clean nail without enhancements and long hair tied back. To ensure maximum practice, students will be required to work on each other throughout the day or on own hands. THE CONTENT Health, safety & hygiene Consultation techniques Contraindications Nail preparation Introduction to tip application Extend nail bed using sculpting techniques French Pink and White techniques Maintenance procedure Removal procedure Aftercare advice DURATION This is one day course which runs from 10am to 5pm PRICE INCLUDES Acrylgel training kit . Upon successful completion an course certificate will be awarded

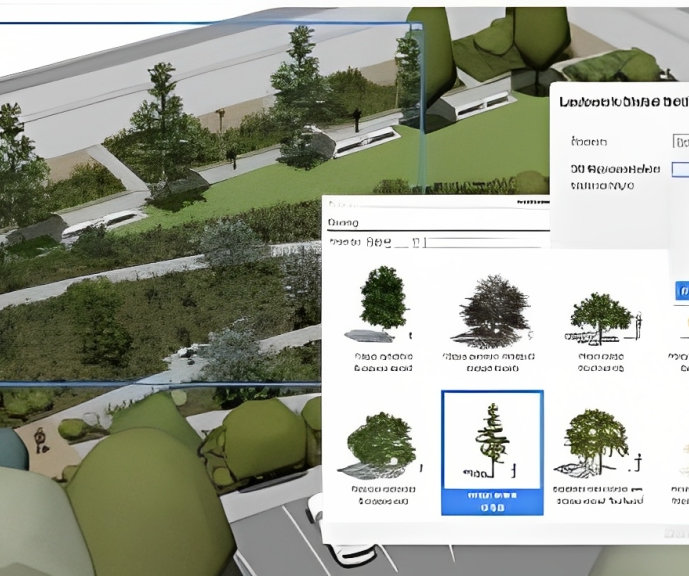
Vectorworks Landmark Training
By London Design Training Courses
Why choose Vectorworks Landmark Training Course? Course info Explore the Vectorworks Landmark Training Course! 1-on-1 Live Online sessions led by certified tutors and industry experts. Master Vectorworks Landmark for landscape and site design, creating captivating outdoor spaces. Enroll now to unleash your design skills. Duration: 16 hrs. Method: 1-on-1, Personalized attention. Schedule: Tailor your own schedule by pre-booking a convenient hour of your choice, available from Mon to Sat between 9 am and 7 pm. This course focuses on Vectorworks Landmark fundamentals, providing essential tools and techniques for landscape architecture, design, and related disciplines. Participants should have a basic understanding of Vectorworks software. The course covers 2D and 3D drawing, file organization, landscape plan/model creation, and more. Learning Objectives: Organize drawing files using industry standards and best practices for effective collaboration. Utilize imported files and field-collected data for base plans and site inventories. Integrate 2D and 3D elements for plan documentation and model analysis. Utilize worksheet features for material quantification and project efficiency. Course Prerequisites: Participants should be familiar with basic drafting concepts, computer operations, and keyboard shortcuts. This training demonstrates sustainable design principles and the use of CAD tools for erosion control, runoff calculations, plant tracking, and sun/shade analysis. Participants will learn to create a 3D site digital terrain model and assess proposed plantings' effects on solar heat gain and water usage. Vectorworks Landmark Basic to Intermediate Training Course Duration: 16 hours Join our comprehensive Vectorworks Landmark Basic to Intermediate Training, designed for landscape architects and designers. Master 2D and 3D landscape design with essential techniques, covering site analysis, plans, irrigation, and 3D visualization. Unleash your creativity with custom plant symbols and detailed planting plans using the plant database. Course Outline: I. Introduction to Vectorworks Landmark (1 hour) An overview of Vectorworks Landmark for landscape design Interface orientation and basic tool usage Navigation and viewport controls Landscape design project creation and management II. Site Analysis and Site Plans (3 hours) Collecting site information and producing site analysis drawings Crafting site plans and hardscape design Working with contours, elevations, and terrain models Incorporating site amenities like paths, fences, and walls III. Planting Plans (5 hours) Utilizing the plant database to select suitable plants for specific regions Creating personalized plant symbols Developing comprehensive planting plans and plant lists Understanding plant compatibility and growth patterns IV. Irrigation Design (2 hours) Designing and editing irrigation systems and zones Integrating irrigation components into the site plan Generating irrigation reports for efficient planning V. 3D Visualization (3 hours) Creating captivating 3D models of landscape designs Applying textures and materials to hardscape elements and plants Utilizing the Renderworks engine for high-quality rendering Enhancing designs with lighting and special effects VI. Customization (1 hour) Tailoring the interface for landscape design efficiency Creating custom object styles and resource libraries VII. Collaboration and Sharing (1 hour) Importing and exporting data from other software platforms Sharing landscape design drawings with colleagues and collaborators VIII. Conclusion and Next Steps (1 hour) Comprehensive review of course content Guidance on further learning resources Q&A session and feedback gathering Enroll in our Vectorworks Landmark Basic to Intermediate Training to enhance your landscape design expertise and unleash your creative prowess. Download Vectorworks Landmark https://www.vectorworks.net/en-GB/landmark By the end of the Vectorworks Landmark Training Course, participants will: Understand the key features and functionalities of Vectorworks Landmark for landscape design. Demonstrate proficiency in using essential tools for site analysis, site plans, and hardscape design. Create detailed planting plans, selecting appropriate plants, and understanding their compatibility and growth patterns. Design efficient and effective irrigation systems, including generating irrigation reports. Create 3D visualizations of landscape designs, applying textures, materials, lighting, and special effects. Customize the interface and create personalized object styles and resources. Collaborate and share landscape design drawings with other software users. Have the foundation to pursue further learning and exploration in landscape design using Vectorworks Landmark.
Microsoft Project Advanced (now with live online classes)
By Microsoft Office Training
Course Objectives At the end of this course you will be able to: Manage project costs Consolidate and reuse project plan information Exchange project plan data with other applications Update a project plan Customise Project to meet specific requirements ' 1 year email support service Take a look at the consistent excellent feedback from our corporate clients visiting our site ms-officetraining co uk Customer Feedback Really useful and engaging course. Learnt a lot that will be very beneficial in my job. Trainer was great. Kelly Moreley - TACT Very happy with the course. Worked as a good refresher from what I knew already and enhanced my knowledge further Jenny Price - Acer ' With more than 20 years experience, we deliver courses on all levels of the Desktop version of Microsoft Office and Office 365; ranging from Beginner, Intermediate, Advanced to the VBA level. Our trainers are Microsoft certified professionals with a proven track record with several years experience in delivering public, one to one, tailored and bespoke courses. Our competitive rates start from £550.00 per day of training Tailored training courses: You can choose to run the course exactly as they are outlined by us or we can customise it so that it meets your specific needs. A tailored or bespoke course will follow the standard outline but may be adapted to your specific organisational needs. Exchanging Project Plan Data with Other Applications Import a list of tasks from Outlook Import a Task List from an Excel File Create a Custom Import Map Export Project Plan Cost Data into Excel Save Project Plan Information as a Web Page Updating a Project Plan Enter Task Progress Information View Task Progress Split a Task Reschedule a Task Creating Custom Fields Text fields Lookup fields Calculated fields with the use of formulas and functions Inserting Graphical Indicators Customizing how you look at data Filter Tasks in a Project Plan Create a Custom Table Create a Custom View Copy custom Views and Tables between projects Earned value analysis Understanding Earned Value Fields View Multiple Baselines in a Single Project Tracking progress between interim plans Creating Custom Reports Create a Custom Report Modify a Custom Report's Header and Footer Add a Picture to a Report Modify a Custom Report's Margins Print a Custom Report Re-using Project Plan Information Create a Project Plan Template Create a Custom Combination View Make Custom Views Available to Other Project Plans Share Resources between Projects, Create a Master Project Plan with sub projects Who is this course for? Who is this course for? This course is designed for those that who already have the skills to create and modify project plans and would like to acquire a more in depth and thorough knowledge of more advanced functionalities in project planning and tracking. Requirements Requirements Preferably, delegates would have attended the MS Project Introduction course. Career path Career path Microsoft Office know-how can instantly increase your job prospects as well as your salary. 80 percent of job openings require spreadsheet and word-processing software skills

Autodesk Maya Evening Training
By London Design Training Courses
Training duration: 10 hrs Click here for info Method: 1-2-1, Personalized attention, Tailored content, Flexible pace, Individual support. Schedule: Personalized training experience with our flexible 1-2-1 sessions. Tailor your own schedule by pre-booking a convenient hour of your choice, available from Monday to Saturday between 9 am and 7 pm. Autodesk Maya Training Course with our flexible evening training course. Designed to accommodate busy schedules, this course allows you to learn Maya at your convenience, either in-person or through live online sessions. Master essential features and workflows to create captivating 3D models, animations, and visual effects. Benefit from expert guidance, hands-on projects, and lifetime email support, ensuring a rewarding learning experience. Enroll now to ignite your creativity and open doors to exciting opportunities in the animation and visual effects industry. The Autodesk Maya Evening Training Course offers a flexible learning option for busy professionals and students with daytime commitments. Master the powerful tools and capabilities of Autodesk Maya during convenient evening sessions. Participants will receive comprehensive training in 3D modeling, materials, animation, lighting, and rendering. The course progresses to advanced topics, including dynamics, character rigging, shading, and compositing. Enroll in this course to develop valuable skills in 3D computer graphics and animation. Benefit from interactive learning experiences and expert guidance, whether attending in-person or joining live online sessions. Maya Evening Training Courses Duration: 10 hours Course Outline: I. Introduction to Maya (1 hour) Gain insights into Maya's versatile applications and interface. Master navigation and project management. II. Creating 3D Models (2 hours) Learn polygon modeling basics and refine objects with precision. III. Texturing and Materials (1 hour) Apply and customize materials for enhanced visuals. IV. Lighting and Rendering (1.5 hours) Explore lighting techniques and rendering. V. Animation (2.5 hours) Understand animation principles and rig characters. VI. Special Effects (1 hour) Harness particle systems and create captivating effects. VII. Intermediate Modeling Techniques (1 hour) Venture into NURBS modeling and sculpting tools. VIII. Conclusion and Next Steps (0.5 hour) Recap and explore further learning resources. Autodesk Maya Evening Training Course Topics Covered: Modeling, Texturing, Animation, Lighting, Rendering, and more. Download Autodesk Maya! Create expansive worlds, characters, and effects. Subscribe now for a year and start your 3D model and animation journey. Visit https://www.autodesk.co.uk/maya for a free trial. Upon completing the Autodesk Maya Evening Training Course, participants will gain proficiency in 3D modeling, texturing, animation, lighting, and rendering using Autodesk Maya. They will acquire the skills to create captivating visuals and animations, opening up opportunities in diverse industries such as entertainment, gaming, and architectural visualization. The flexible evening schedule allows for convenient learning, accommodating busy professionals and students.

Manual Handling in Healthcare
By M&K Update Ltd
To enable learners to develop their knowledge and skills in relation to manual handling activities

Twinmotion Realtime Rendering Training
By London Design Training Courses
Why Choose Twinmotion Realtime Rendering Training Course? Click here for info Empower architects, designers, and visualization experts with our Twinmotion training. Learn tools, materials, lighting, animation, and rendering. Explore advanced techniques for lifelike landscape and special effects using Twinmotion's asset library. Opt for in-person or live online sessions. Duration: 10 hrs Method: 1-on-1, Personalized attention Schedule: Tailor your own hours of your choice, available from Mon to Sat between 9 am and 7 pm Twinmotion Real-time 3D Architecture Visualization Course Outline: Module 1: Introduction to Twinmotion Explore Twinmotion's real-time 3D visualization capabilities Master the Twinmotion interface for efficient scene manipulation Prepare 3D files for import and manage the workflow Module 2: Materials and Realism Enhance scenes with realistic materials and visual quality Utilize videos as materials and apply glow effects Create grunge materials for added texture and realism Employ the X-ray material for specific visualization needs Module 3: Landscape and Vegetation Integrate vegetation using Twinmotion's scatter, HQ trees, and growth features Customize grass and utilize HQ vegetation assets for realism Create time-lapse effects for vegetation growth Module 4: Library and Object Import Access the Twinmotion library for furniture and objects Seamlessly import external 3D objects Obtain high-quality 3D assets from the internet and add to the user library Utilize BIM-objects for additional assets Module 5: Lighting and Animation Work with various lighting options, including area light and volumetric light Add animated characters and vehicles for dynamism Incorporate construction vehicles and aircraft for realism Module 6: Volumes and Interactivity Utilize volumes and the animator feature for dynamic scenes Implement urban elements and measurement tools for accuracy Module 7: Nature and Weather Effects Utilize Twinmotion's nature features, including physical sky and weather effects Create realistic lighting for outdoor scenes Add ocean effects for water elements Module 8: Rendering Techniques Master rendering processes, from creating images to exporting panoramas and animations Implement depth of field improvements for captivating visuals Create BIM motion virtual reality phases for immersive experiences Utilize the Twinmotion presenter feature for streamlined presentations Module 9: Final Project Apply knowledge and skills to complete a final render project in Twinmotion Download Twinmotion https://www.twinmotion.com › download Learn how to download and install Twinmotion, the fast, easy real-time archvis tool.