- Professional Development
- Medicine & Nursing
- Arts & Crafts
- Health & Wellbeing
- Personal Development
The Rewind Technique: Effective treatment for trauma (PTSD) and phobias
By Human Givens College
Essential skill for all mental health professionals This 2-day workshop gives you the opportunity to see demonstrated, experience, and practice the steps of this powerful technique in a small group under the careful guidance of our expert tutor… Accredited CPD Certificate : 12 hours Length 2 days (9:30am - 4:00pm) Excellent course. A brilliantly encouraging and supportive environment in which to learnHARRIET, WORKSHOP PARTICIPANT Life-changing! A great weight has been lifted off my shoulders.NURSE (PREVIOUSLY TRAUMATISED BY A CAR ACCIDENT) Why take this course We have over 20 years of experience in teaching the rewind technique to health and welfare professionals – we’ve drawn on that experience to develop a course which gives you enough time to thorough absorb and practice the technique, understand why it works and to experience it yourself, so that you leave confident in your ability to use the rewind safely and effectively. The Rewind Technique* is an effective psychological intervention for successfully treating trauma and phobias and one of the most important skills you need to master to be able to work successfully with any anxiety disorder or condition which may have developed as a result of unresolved trauma. Even the most severe phobic and post-traumatic stress (PTSD) symptoms can be successfully addressed using the the rewind technique taught on this 2-day course, which has been refined* in line with understandings from neuroscience to make it as safe and reliably effective as possible. An essential therapeutic technique to have in your therapeutic ‘toolkit’, it is important to learn and practice it under the careful guidance of our expert tutor – you will leave the course knowing how to use the rewind technique safely and effectively having watched live demonstrations, had plenty of time to practice the steps involved with fellow students, the opportunity to experience the technique yourself and more. Our workshop has limited numbers so you will have plenty of opportunities for asking questions and the tutor, who has extensive clinical experience. Using the rewind technique you can, often surprisingly quickly, detraumatise bad memories, stop flashbacks and other PTSD symptoms, cure phobias, banish nightmares and reduce anxiety so you can help the victims of abuse, rape, violence, car accidents, fire, terrorism and panic attacks, heart attacks and other life-threatening experiences. Another key benefit of this technique is non disclosure – there is no need for people to repeatedly revisit or talk about specific details of the events that have traumatised them. This helps avoid embedding the trauma further and making the situation worse – as can sometimes inadvertently happen in other therapeutic approaches to treating trauma – and helps prevent the therapist or counsellor being vicariously traumatised by what they might hear. It is also invaluable when working therapeutically with people who have suffered persistent physical or sexual abuse, and people with OCD. People suffering from other conditions, such as depression, addictions or uncontrollable anger, may have experienced a traumatic event, which needs to be successfully detraumatised in order for them to move on with their lives. As a result of our training in the rewind technique – which we have been delivering for over 20 years – our graduates have brought relief to literally thousands of people (eg. case history / PTSD Resolution). Please note This is a powerful technique, which needs to be implemented with care – we recommend you take the time to learn it in person in a small group with a skilled and highly experienced tutor who can guide you through the important steps involved, oversee you as you practise them, answer your questions and give you crucial direct feedback. The version of the rewind technique* you will learn on this course has been refined in line with understandings from neuroscience to make it as safe and reliably effective as possible. The course is taught over two days to ensure you have enough time to thoroughly absorb and practice the steps involved so that you are confident in using it and know how to do so safely and effectively with clients. You will also learn when it is NOT appropriate to use this technique and how to ensure you avoid embedding any trauma further, or making a phobia worse. Guided imagery and visualisation skills form an essential part of the rewind technique, which is why they are a requirement for attending this course. This has huge potential to change people's lives for the better. I can't wait to put what I've learnt here to good usePSYCHIATRIC SUPPORT WORKER What will you learn How to detraumatise people quickly and safely The necessary skills to treat even severe phobias Why this version of the rewind technique is so effective, and how it works Under careful guidance from the tutor, you will: revisit key skills for relaxing clients in order to successfully work using the technique walk and talk through a step-by-step breakdown of the rewind technique see a live demonstration of working with a phobia or trauma practice each stage of the rewind technique in pairs practice the entire process, with other course participants, under supervision You will also gain: Vital tools for psycho-education – both adding to your own understanding and to pass on to clients A clear understanding of the fear response and how PTSD and phobias develop The detrimental impact traumas and phobias can have on a person’s life The crucial role of the pattern-matching processes in the brain in triggering phobic responses and post traumatic stress symptoms How the main treatment techniques for treating post traumatic stress disorder (PTSD), sub-threshold trauma and phobias (including EMDR, EFT and CBT) work – their advantages and disadvantages Why the rewind technique draws on the innate ability we all have to recover from trauma Pre-disposing factors for suffering a problematic post-traumatic response (or developing a phobia) Why critical incident debriefing increases the incidence of PTSD How this version of the rewind technique has been modified to make it safer and more reliable Trauma-focused rewinding: the psycho-biological reason why this refined rewind technique works so consistently well A step-by-step breakdown of the essential stages of the rewind technique The chance to see a live demonstration of working with a phobia or trauma You will leave with: The confidence to begin using the technique ethically and safely A clear understanding of the advantages of using a non-intrusive psychological technique to treat trauma, PTSD and phobias (where the client does not have to go into details about or repeatedly ‘revisit’ what has traumatised them) What to do if a client as an abreaction Important information about when not to use this technique – and what can be done instead An understanding of how the rewind technique can be used to work with Complex Trauma and cases involving ‘freeze’, shutdown or dissociative responses How you can carefully apply this technique to relieve a huge range of anxiety disorders Greater confidence in dealing with anxiety disorders and distress caused by trauma, phobias and flashbacks An understanding of how rapidly transformative this technique can be; on the last afternoon we view a filmed therapy session (and follow up) in which Joe Griffin uses the rewind technique to relieve a young man of his severe shark phobia There is also plenty of opportunity for you to ask questions and to experience and practice, under careful guidance, the various stages of the rewind technique yourself. Who is this course suitable for? Anyone working with distressed, phobic or traumatised people, who has already taken our Guided Imagery and Visualisation workshop (and ideally the Therapeutic Power of Language workshop too) as these skills are essential components of the rewind technique. If you help traumatised people (including children) or people suffering from any form of phobia or anxiety disorder – this includes: psychotherapists, counsellors, mental health nurses, OTs, health visitors, social workers, psychiatrists, GPs, clinical psychologists, midwives, welfare officers, youth workers, hypnotherapists and those working with traumatised members of public services, such as: firefighters, police, paramedics and military personnel – you will find the rewind technique and associated skills hugely helpful. Course requirements Guided imagery, relaxation and visualisation are an integral component of the Rewind Technique – if you don’t already have experience in using these skills therapeutically with others you must complete our Guided Imagery and Visualisation for Therapeutic Change workshop before attending this course (this is always run the day before our rewind technique training). This is to ensure you get the most out of this 2-day course and also have the necessary skills for practising the rewind technique safely and effectively. You would also find it useful to attend the Therapeutic Power of Language workshop beforehand if you can. All 3 workshops count towards Part 1 of the HG Diploma. Ros Townsend’s live online training Trauma: Patterns of the past is also useful for anyone working with or supporting someone suffering from unresolved trauma, or who would like to understand their own experiences of trauma better. She also runs a workshop on working with Complex Trauma. *About the Rewind Technique The Rewind Technique originated from one developed by Richard Bandler, one of the founders of NLP, when it was called the Visual/Kinaesthetic Dissociation protocol. A variant of this was developed by Dr David Muss, who called it the Rewind Technique. The version of the Rewind Technique you will learn on this 2-day course was refined by Joe Griffin and Ivan Tyrrell, co-founders of the human givens approach, to make it as reliably effective and safe as is possible by aligning the method with their insights into how trauma and phobias are processed in the brain. HG Therapists now follow a specific Rewind Protocol which follows the essential steps of the process that Griffin and Tyrrell set out. Course format This intense 2-day training proceeds through a blend of talks, live demonstrations, skill-developing exercises, practice sessions (under careful guidance) and deconstruction of filmed examples of the technique being used, including one with a severely traumatised young woman. There is also plenty of opportunity for networking and discussion during the breaks. The course was previously entitled: The fast phobia and trauma (PTSD) cure – a 2-day workshop in the rewind technique This course has been independently accredited by the internationally recognised CPD Standards Office for 12 hours of CPD training. On completion of this training you’ll receive CPD certificates from the College and the CPD Standards Office.

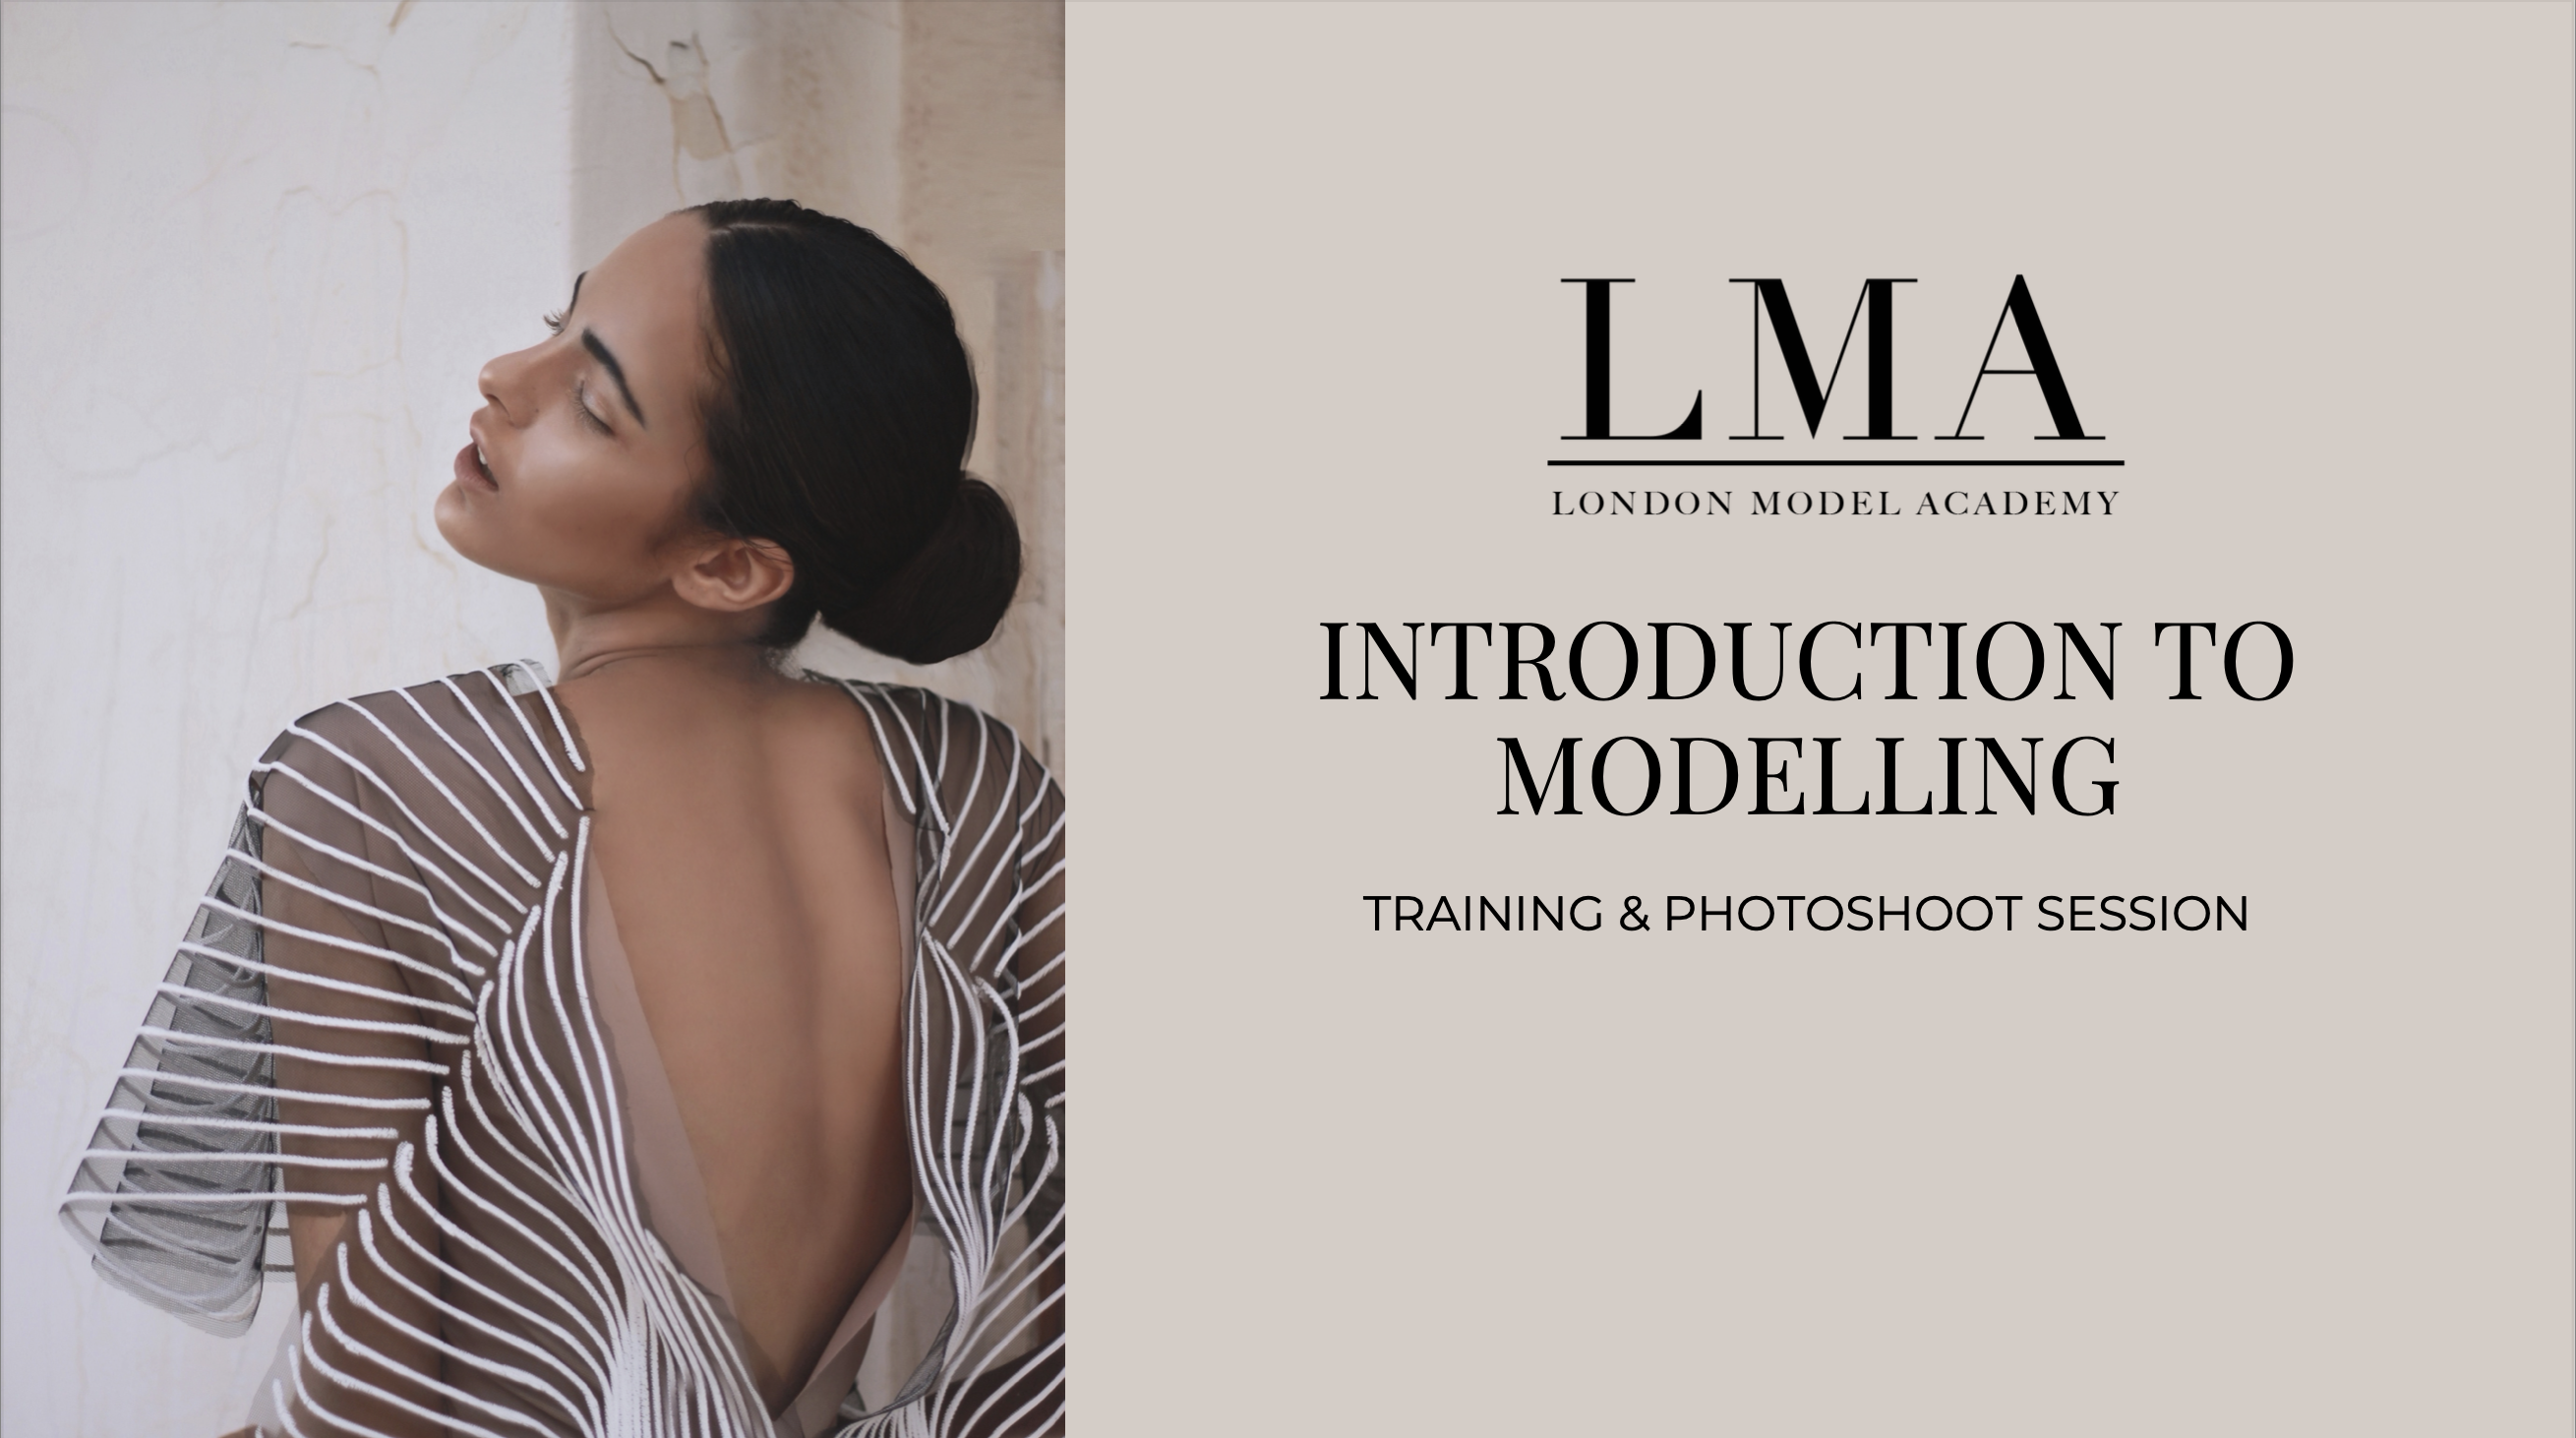
Unlock modeling success with our tailored training session! Ideal for aspiring models in fashion, beauty, or commercial industries. Receive one-to-one coaching, master fundamental posing techniques, and conclude with a test shoot. Get RAW images for analysis, plus three free retouched images for your portfolio and social media. Elevate your modeling journey with us! 🌟 #ModelingTraining #ProfessionalDevelopment
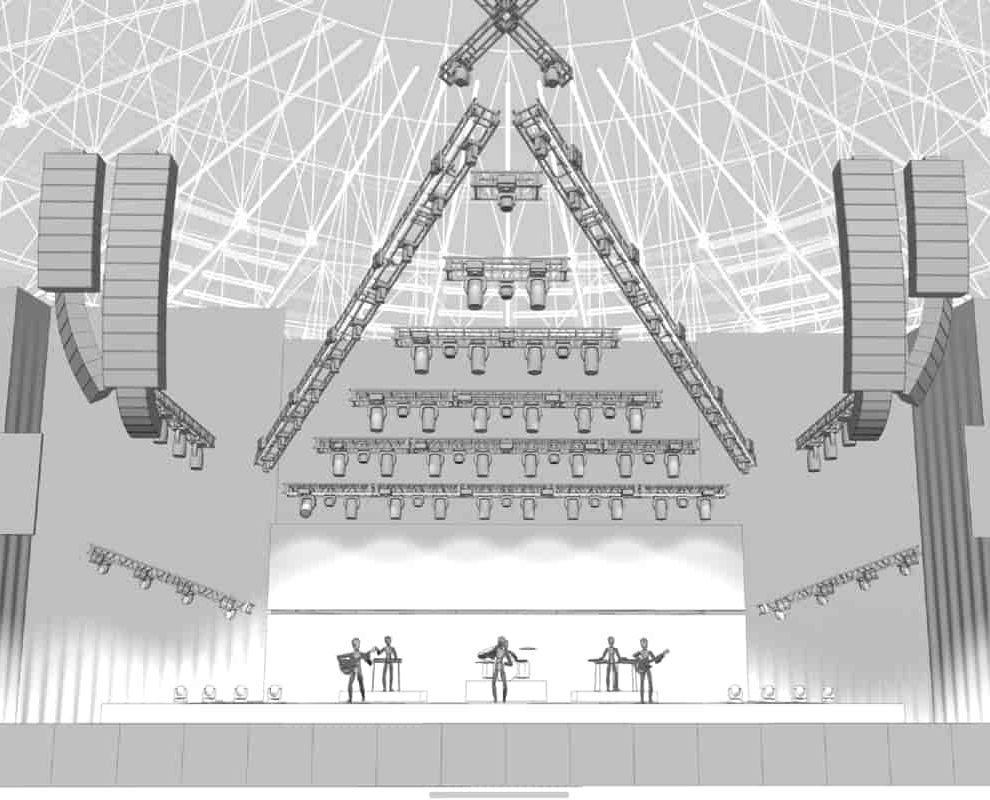
Lumion Training Course
By ATL Autocad Training London
Who is this coure for? Lumion Training Course. Whether you're an architect, designer, 3D artist, or simply someone passionate about crafting captivating architectural visualizations, this course equips you with the essential skills to harness Lumion as a potent tool within your creative process. Click here for more info: Website Duration: 10 Hours Customize your training. Choose any hour from Mon to Sat, 9 a.m. to 7 p.m. Call 02077202581 or WhatsApp at 07970325184 to book. Lumion 3D Course Outline Module 1: Introduction to Lumion 3D Explore Lumion 3D's Features and Navigate the Interface. Master Efficient Workflow with Shortcut Keys. Customize Settings for Optimal Performance. Module 2: 3D Models and Materials Import 3D Models in Various Formats. Apply and Fine-Tune Materials. Create Procedural Materials and Achieve Glass Effects. Troubleshoot Common Issues. Module 3: Building Projects in Lumion Craft Scenes and Sculpt Terrain. Enhance Realism with Alpha and Height Maps. Module 4: The 3D World Manage Multiple 3D Objects and Their Properties. Implement Grass and Scattering Elements. Module 5: Lighting in Lumion 3D Utilize Weather Settings for Dynamic Scenes. Master Lumion Lights, Interior and Exterior Illumination. Create 3D Reflections and Spotlight Effects. Module 6: Realistic Visualizations Integrate Special Effects like Fire, Smoke, and Fog. Achieve Realism with Camera Effects and Shadow Manipulation. Render Still Images and Dynamic Animations. Module 7: NPR Visualizations Create Non-Photorealistic Visualizations with Artistic Effects. Implement Unique Styles for Enhanced Visual Impact. Module 8: Artistic Effects in Lumion 3D Explore Conceptual Visualizations with Painting and Sketch Effects. Craft Cartoon Effects and Understand Perspective Concepts. Module 9: Animation in Lumion 3D Master Timing and Camera Techniques for Dynamic Shots. Compose Animation Clips and Incorporate Effects. Utilize Layers and Control Objects for Precise Animation. Module 10: Advanced Features Understand Import and Output Formats in Lumion. Expand Your Asset Library with the 3D Model Library. Integrate Animated Characters and Sound Effects. Maximize the Advanced Material Library's Potential. Control Environments and Weather for Dynamic Scenes. Efficient Scene Management and Movie Editing in Lumion 3D. For students, download Lumion at: Lumion for Students Download Lumion for Students https://lumion.com⺠Upon completing the Lumion 3D course, participants will: Master Lumion Tools: Navigate the interface, optimize settings, and use shortcuts efficiently. 3D Modeling and Materials: Import models, refine materials, troubleshoot, and enhance realism. Scene Crafting: Create detailed scenes, manage objects, and implement elements for lifelike environments. Lighting Mastery: Utilize weather settings, create reflections, and manage dynamic lighting. Visual Effects Integration: Add special effects, manipulate shadows, and create still images and animations. Artistic Visualization: Explore artistic effects, conceptual visualizations, and cartoon techniques. Advanced Animation: Master timing, camera techniques, and precise animation control. Advanced Features: Understand formats, expand asset libraries, and manage scenes efficiently. Effective Communication: Communicate design concepts effectively to clients and stakeholders. Independence in 3D Rendering: Gain expertise to create complex visualizations independently. Course Overview: What is Lumion? Lumion is specialized 3D rendering software designed for architects and designers. It enables the swift transformation of 3D design models, allowing application of materials, interior and exterior furnishing, and showcasing lighting and shadows without specialized training. Course Objectives: This course focuses on initiating Lumion projects, integrating environments, cameras, lighting, populating scenes, creating terrains, and producing animations. Expectations from the Course: By enrolling, you'll master high-quality render creation, enhance your portfolio, impress clients with top-tier visuals, and gain confidence to elevate your service rates. This course equips you with tools and skills to craft exquisite architectural renders, elevating your work significantly. Intended Audience: Architects, landscape architects, interior architects, civil engineers interested in 3D visualization, and students exploring the realm of 3D visualization. Course Benefits: Delve into Lumion's world-class rendering with speed and precision. This course emphasizes achieving superior quality and realism in the shortest rendering time. Whether you're an architect, interior designer, 3D visualization artist, or Lumion enthusiast, this course empowers you to create exceptional 3D render images. Essential assets, including 3D models and textures, are provided, allowing you to follow the step-by-step process at your own pace. Advantages of Personalized Training: Expertise in Real-Time Rendering: Gain in-depth mastery of Lumion, mastering its features for creating stunning real-time visualizations. Navigate the interface seamlessly and leverage powerful tools for immersive architectural experiences. Enhanced Design Presentations: Elevate design presentations with dynamic visualizations that effectively communicate concepts, lighting nuances, material details, and spatial relationships. Rich Asset Repository: Access a wide variety of high-quality assets, from vegetation to weather effects, enhancing realism and creating captivating scenes that engage viewers. Authentic Landscapes and Effects: Develop skills to create lifelike landscapes, atmospheric weather effects, and unique visual elements that add depth and intrigue to your projects. Flexible Learning Options: Choose between in-person or live online sessions, ensuring convenient and accessible learning tailored to your preferences. Additionally, access recorded lessons for self-paced review and revision. Continuous Support: Benefit from lifelong email support, allowing you to stay connected with instructors for ongoing learning and guidance, even after completing the course.

Home Renovation Course - 3 weeks evening course
By Studio AVC
Learn how to plan your home renovation project successfully in just 3 weeks with our evening course !

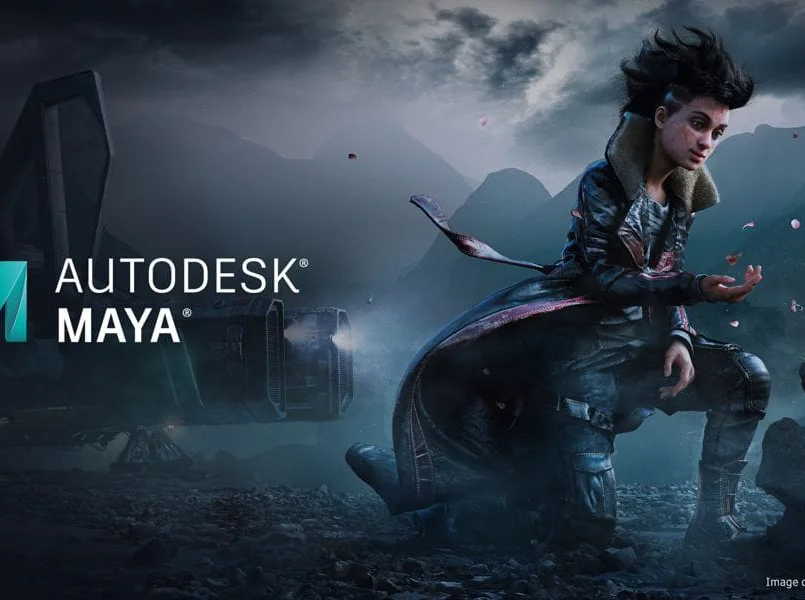
Maya Evening Learning Sessions
By ATL Autocad Training London
Maya Evening Learning Sessions. Maya Evening Learning Sessions offer flexibility for professionals, interactive classes, supportive community, and skill enhancement in a convenient after-work schedule. Perfect for work-life balance and continued education. Click here for more info: Website Tailored Learning: Custom curriculum catering to your skill level. Course Duration: 10 hours. Approach: 1-to-1 Schedule: Craft your learning path by pre-booking hours from Mon to Sat, 9 am to 7 pm, accommodating your convenience. Maya 10-Hour Course Key Details: Duration: 10 hours of intensive training. Approach: Hands-on, interactive sessions focusing on essential Maya concepts and techniques. Curriculum Highlights: Introduction to Maya: Understanding the software interface and basic tools. 3D Modeling: Mastering polygon modeling techniques and object manipulation. Texturing and Materials: Learning to apply textures, materials, and UV mapping. Lighting and Rendering: Exploring lighting setups, camera compositions, and rendering methods. Animation Fundamentals: Grasping keyframe animation, editing clips, and basic character rigging. Special Effects and Dynamics: Creating particle systems, fluid simulations, and basic special effects. Who Should Attend: Beginners: Individuals new to 3D modeling and animation. Aspiring 3D Artists: Those aiming to pursue careers in animation, gaming, or visual effects. Creative Professionals: Designers and artists looking to expand their skill set into 3D graphics. Job Opportunities: Completing this Maya course equips participants with the skills necessary for various roles, including: 3D Modeler: Creating detailed 3D models for games, movies, or simulations. Animator: Bringing characters and scenes to life through animation. Texture Artist: Designing textures and materials to enhance 3D models. Lighting Artist: Illuminating scenes to evoke specific moods and atmospheres. Visual Effects Artist: Specializing in creating stunning visual effects for films and games. Participants completing the Maya 10-Hour Course will: Master Maya basics including modeling, texturing, lighting, and animation. Create 3D models, apply textures, and understand lighting and rendering principles. Develop essential skills in animation and special effects. Troubleshoot common issues in 3D projects. Recommended Books: "Introducing Autodesk Maya 2022" by Derakhshani: Comprehensive guide with hands-on tutorials. "Maya Character Creation" by Maraffi: Focuses on character modeling and animation techniques. "The Animator's Survival Kit" by Williams: Timeless principles applicable to any animation software. Maya 10-Hour Course Key Details: Duration: 10 hours of intensive training. Approach: Hands-on, interactive sessions focusing on essential Maya concepts and techniques. Curriculum Highlights: Introduction to Maya: Understanding the software interface and basic tools. 3D Modeling: Mastering polygon modeling techniques and object manipulation. Texturing and Materials: Learning to apply textures, materials, and UV mapping. Lighting and Rendering: Exploring lighting setups, camera compositions, and rendering methods. Animation Fundamentals: Grasping keyframe animation, editing clips, and basic character rigging. Special Effects and Dynamics: Creating particle systems, fluid simulations, and basic special effects. Who Should Attend: Beginners: Individuals new to 3D modeling and animation. Aspiring 3D Artists: Those aiming to pursue careers in animation, gaming, or visual effects. Creative Professionals: Designers and artists looking to expand their skill set into 3D graphics. Job Opportunities: Completing this Maya course equips participants with the skills necessary for various roles, including: 3D Modeler: Creating detailed 3D models for games, movies, or simulations. Animator: Bringing characters and scenes to life through animation. Texture Artist: Designing textures and materials to enhance 3D models. Lighting Artist: Illuminating scenes to evoke specific moods and atmospheres. Visual Effects Artist: Specializing in creating stunning visual effects for films and games. Adaptable Evening Maya Classes In-Depth 10-Hour Maya Program Hands-On Maya Projects Professional Maya Expertise Diverse Maya Applications Guidance from Experts Tailored Learning Experience Ongoing Email Assistance Access to Maya Trial and Resources Ignite Your Creative Potential!
Vectorworks Night Training Courses
By ATL Autocad Training London
Why Choose Vectorworks Night Training Courses? Flexibility: Learn around your work schedule. Personalized Attention: Small classes for focused guidance. Practical Learning: Hands-on training for immediate application. Convenience: Balance work and learning seamlessly. Check our Website Training Duration: 10 hours. Approach: Personalized 1-on-1 Training and customized training. Timings: Schedule a convenient hour, Mon to Sat, between 9 am and 7 pm. Course Outline: Mastering Vectorworks Basics I. Introduction to CAD and Vectorworks Software Understanding the role of Computer-Aided Design (CAD) in modern workflows. Comprehensive introduction to Vectorworks software. II. Workspace Setup and Fundamental Options Configuring the workspace for efficient navigation and operation. Exploring basic options to enhance user experience. III. Basic Skills in Drawing and Object Selection Mastering fundamental drawing techniques. Expertise in selecting and manipulating objects. IV. Advanced Editing Techniques Combining shapes, mirroring, rotating, and grouping objects effectively. Working with precise scaling, preferences, and templates. V. Detailed Object Manipulation and Attributes Drawing and moving objects accurately within the design space. Utilizing advanced editing tools like fillet and offset. Introduction to basic attributes and group editing. VI. Advanced Drawing Techniques and Graphics Creating room plans with walls, windows, and doors. Implementing graphic elements such as hatching, gradients, and image fills. Drawing elevations using various methods and techniques. VII. Resource Management and Design Layers Importing images for graphic illustration. Creating symbols and navigating the Resource Browser. Organizing the drawing effectively using design layers. VIII. Labels, Annotations, and User Interface Mastery Labeling drawings and incorporating simple title block text. Navigating the user interface, understanding key terminologies. Plotting, printing, creating sheets (A1, A2, A3), and working with viewports. IX. Advanced Object Manipulation and Customization Converting drawings into PDF files. Efficiently working with files, objects, and data. Utilizing object snaps, quick selection, division, and measurement. X. Dimensioning, Text, and Tool Palettes Implementing dimensioning and annotations effectively. Working with text, custom tool palettes, and organizing these palettes. Creating standard views and additional drawing objects (Arc, Donut, Ellipse). XI. 3D Modeling Introduction and Real-World Units Introduction to 3D modeling, focusing on creating extrudes. Working with real-world units for accurate representation. XII. Advanced Object Manipulation and Exporting Manipulating objects, changing object angles, creating mirror images. Dealing with architectural elements like walls, doors, windows, and floors. By the end of the Vectorworks Evening Training Course, participants will: Demonstrate proficiency in using the Vectorworks interface, tools, and navigation. Create and edit 2D drawings, including walls, doors, windows, floors, ceilings, stairs, and railings. Effectively manage layers, classes, and views for organized and controlled object placement. Create and edit dimensions and annotations for accurate measurements and documentation. Develop skills in creating, modifying, and utilizing symbols for increased efficiency. Generate and edit 3D geometry, apply textures, and create sections and elevations from 3D models. Create polished presentation drawings using viewports, annotations, and text for clarity. Summarize course content and confidently apply learned skills in Vectorworks projects. Utilize available resources for further learning and professional development. Who Should Attend? Perfect for those aiming to master Advanced 2D Plans, Sections, Elevations and Construction detailing, lighting, and rendering in Vectorworks. Schedule Flexibility: Book personalized 1-on-1 sessions, Monday to Saturday, 9 a.m. to 7 p.m. Split 10 hours to fit your schedule. Method: Choose in-person or Live Online 1-on-1 sessions with tailored content and individual support, including Zoom options. Why Vectorworks? A pioneering CAD software, Vectorworks seamlessly integrates 2D and 3D capabilities, making it ideal for architects and designers. Free Educational Access: Students and professors can access a complimentary Vectorworks Designer license via the Academic Portal. Explore Vectorworks: Transform your designs with Vectorworks, the leading 2D, 3D, CAD, BIM software. Download or try now: https://www.vectorworks.net Tailored Training Solutions: We offer customized and project-focused training programs, designed to meet your specific needs and goals. Individualized Coaching: Receive personalized one-on-one guidance tailored exclusively for you. Adaptable Timings: Choose training slots that align with your schedule, ensuring flexibility in your learning journey. Ongoing Assistance: Access continuous post-course support to enhance your understanding and resolve queries. Comprehensive Learning Resources: Receive detailed materials providing in-depth insights for effective learning and reference. Recognition of Participation: Earn a Certificate of Attendance upon completion of your personalized training. Affordable Learning: Benefit from cost-effective rates, making quality education accessible to all. Software Setup Guidance: Get expert assistance in setting up your software on your devices for seamless learning experiences. Rewards for Referrals: Recommend our courses to others and enjoy special rewards for each successful referral. Group Learning Benefits: Enjoy exclusive discounts when you opt for group training, making it an ideal choice for teams. Convenient Hours of Operation: Access our training services at your convenience, with operating hours extending to accommodate your busy schedule. Tailored Learning Paths: Experience courses curated specifically for your needs, ensuring targeted and effective learning outcomes.
SketchUp Night Training Courses
By ATL Autocad Training London
Who is this course for? SketchUp Night Training Courses. This course is designed for professionals and students interested in enhancing their SketchUp skills through evening sessions. Whether you're a beginner looking to learn the basics or an experienced user seeking advanced techniques, this course offers tailored instruction to suit various skill levels during evening hours. Click here for more info: Website 1-on-1 sessions. Mon to Sat between 9 am and 7 pm Course Duration: 10 hours Method: 1-on-1 (In-person or Live Online) Design Your Own Template Craft custom templates 2D Geometry Essentials Construct fundamental 2D shapes (lines, arcs, circles, rectangles) Grasp the concept of geometric stickiness Exploring 3D Geometry Develop basic 3D shapes Master 3D geometric stickiness Visualize your model in 3D Effective Model Organization Organize your model effectively using layers Geometry Shaping Tools Shape geometry with the Push/Pull tool Manipulate geometry by moving entities Maintain coplanar geometry integrity Connect and generate complex forms Lock inferences for precision Expedite form generation Restore and refine surfaces Create and apply surfaces to your model Employ mirroring and array techniques Enhancing Visuals Apply materials for enhanced visuals Craft 3D text elements Utilize essential tools for creating and manipulating 3D structures Integration and Expansion Integrate component models from the 3D Warehouse Explore display options and styles Position and export models to Google Earth Model Efficiency Techniques Overcome stickiness challenges in your model Optimize modeling efficiency with component nesting Understand the impact of scaling on similar components Leverage groups and components for isolating geometry Efficiently manage components using the Component Browser 3D Warehouse Collaboration Access and share components via the 3D Warehouse Harness the power of dynamic components Master component inferencing and editing Combine and integrate components seamlessly Integration and Multimedia Import external sites into SketchUp Incorporate photographs into your projects Employ the Follow Me tool effectively Enhance your designs with the Materials Browser Collaborate with the 3D Warehouse community Fine-tune your model's style Interactive Presentations Create immersive scene-based walk-throughs Generate sections and animated scenes for compelling presentations Export and Integration Seamlessly export your work to AutoCAD and LayOut Learning Outcomes for Designers after this course: SketchUp Proficiency: Acquire mastery of essential 3D modeling and design tools. Advanced Modeling Skills: Apply intricate modeling techniques for architectural and interior components. Effective Space Planning: Organize interior spaces efficiently with space planning expertise. Architectural Precision: Create detailed architectural models and facades with precision. Custom Furniture Design: Craft bespoke furniture designs that enhance interior spaces. Texture Realism: Apply textures skillfully to achieve lifelike visualizations. Compelling Visual Presentations: Present design concepts with captivating visualizations. Effective Presentation Skills: Showcase ideas convincingly to clients and stakeholders. Professional Collaboration: Communicate seamlessly with industry professionals using SketchUp. Workflow Streamlining: Enhance project efficiency by streamlining design workflows for rapid iterations. Additional Benefits: Complimentary Portfolio Review Mock Interviews for Skill Enhancement Skills Acquired: Proficient SketchUp Mastery: Gain expertise in using SketchUp for 3D modeling, design, and visualization. Advanced Rendering Techniques: Learn to create realistic renders using plugins like V-Ray or Twilight Render. Efficient Workflow: Develop skills to streamline your design process and enhance productivity. Collaboration and Presentation: Explore techniques for collaborative work and compelling project presentations. Job Opportunities: Architectural Designer: Create detailed 3D models and visualizations for architectural projects. Interior Designer: Design and visualize interior spaces for residential and commercial clients. Landscape Architect: Develop 3D landscape designs and presentations for outdoor spaces. Freelance 3D Artist: Offer your services for various projects, from architectural visualization to product modeling. Visualization Specialist: Provide visualization services to real estate agencies, design firms, or marketing companies. Why Us? Personalized Training: Dive into SketchUp with exclusive coaching from experienced architects and designers. Enjoy 1-on-1, in-person sessions at (SW96DE) or participate in live online classes. Flexible Schedule: We're available Monday to Saturday from 9 am to 7 pm, ensuring learning fits into your busy life. Tailored Tutorials: Take home custom video tutorials crafted to enhance your SketchUp skills. Comprehensive Learning: Access a digital reference book for thorough revision, ensuring a deep understanding of every SketchUp concept. Continuous Support: Enjoy ongoing assistance via phone or email, even after the course ends, ensuring your continued success. Adaptable Syllabus: We customize the syllabus and projects to meet your specific needs, ensuring focused learning on what matters most to you. Official Certification: Certificate upon course completion, validating your SketchUp expertise. Why Choose Us? Individualized Support: Our courses, ranging from 10 to 120 hours, provide unwavering assistance at every stage. Personalized homework assignments and post-course support pave the way for mastering SketchUp with expert guidance. Personal Attention, No Crowded Classes: Experience the intimacy of one-on-one learning. Say goodbye to overcrowded classrooms, ensuring you receive the focused attention you deserve in a confident and comfortable environment. Financial Flexibility: Your educational journey shouldn't strain your finances. We offer a range of payment plans tailored to your needs. Explore the available options and embark on your SketchUp learning adventure today. Expert Instructors, Real-world Expertise: Our instructors, meticulously chosen for their industry expertise and passion for teaching, are dedicated to imparting invaluable SketchUp skills to eager learners.

Vray for Architects and Interior Designers 3ds max or Sketchup Training
By London Design Training Courses
Why Choose Vray for Architects and Interior Designers 3ds max or Sketchup Training Course? Click here for info Achieve stunningly realistic renders with our tailored course in V-Ray. Designed for experienced SketchUp and 3ds max users, this advanced training covers model preparation and rendering techniques, customized to your skill level and preferences. Duration: 10 hrs. Method: 1-on-1, Personalized attention. Schedule: Tailor your own hours of your choice, available from Mon to Sat between 9 am and 7 pm. SketchUp is renowned for its user-friendly interface and widespread usage in 3D modeling. Now, with V-Ray for SketchUp, users can take advantage of a powerful rendering tool for unparalleled visualization quality and realism. V-Ray seamlessly integrates into the SketchUp environment, allowing for efficient rendering within your existing workflows. Our course is ideal for those seeking to enhance their SketchUp proficiency by incorporating V-Ray's potent rendering capabilities for 3D models. We adapt the training to your current skill levels in both SketchUp and V-Ray and tailor the content to your modeling requirements and desired rendering quality. V-Ray Rendering Training Course. Course Duration: 10 hours Course Description: This 10-hour course enhances rendering skills with V-Ray, a leading 3D visualization engine. Participants master photorealistic renders, focusing on lighting, materials, and post-production. Covering key concepts, workflow, lighting techniques, material creation, rendering settings, and post-processing, the course ensures stunning visual results. Course Outline: Module 1: Introduction to V-Ray Rendering (1 hour) Overview of V-Ray and its role in 3D rendering Understanding the rendering workflow Setting up V-Ray for your 3D software platform Module 2: Essential Rendering Concepts (1 hour) Understanding global illumination and its impact on renders Exploring image sampling and antialiasing techniques Introduction to render elements for post-processing Module 3: Lighting Techniques (2 hours) Mastering various lighting types in V-Ray Creating natural lighting with HDRI maps Implementing artificial lighting with V-Ray lights Achieving realistic daylight with V-Ray sun and sky Module 4: Material Creation (2 hours) Creating realistic materials using V-Ray material editor Applying textures and procedural maps for added realism Understanding material reflections and refractions Advanced techniques for materials like glass, metal, and fabric Module 5: Rendering Settings and Optimization (1.5 hours) Exploring V-Ray rendering settings for different scenarios Understanding render output options and resolution settings Efficiently using V-Ray distributed rendering for faster results Module 6: Post-Processing with Photoshop (1.5 hours) Enhancing renders through post-processing techniques Compositing render elements for added control Adjusting colors, contrast, and lighting in Photoshop Adding effects and final touches to achieve photorealism Module 7: Advanced Rendering Techniques (1 hour) Working with V-Ray proxies and instancing for complex scenes Utilizing V-Ray displacement for intricate detailing Understanding depth of field and motion blur effects Module 8: Real-World Project (1 hour) Applying the skills learned to complete a real-world rendering project Guidance and feedback from the instructor

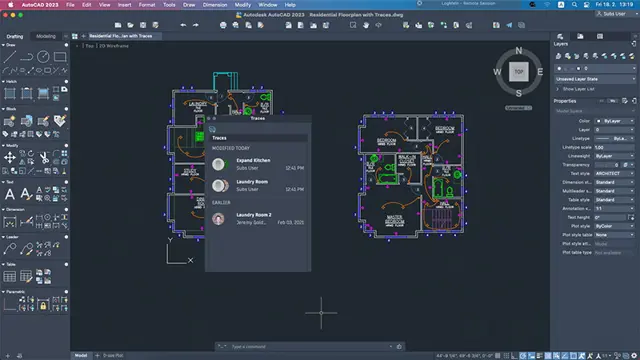
Bespoke AutoCAD Mac Basic-Intermediate Course
By ATL Autocad Training London
Why Learn Bespoke AutoCAD Mac Basic-Intermediate Course? Learn AutoCAD using your projects and learn how to use powerful tools and techniques for drawing, dimensioning, and printing 2D drawings with our Intermediate AutoCAD course. Check our Website How long is the training? 10 hours, Choose and split 10 hrs Mon to Sat 9 am to 7 pm. Book online or call 02077202581 or 07970325184. Method? 1-on-1, available in both in-person and Live Online. Course Topics Include: Building Fundamental Shapes Working with Lines, Arcs, and Polylines Utilizing Grip Tools Precision Object Alignment Data Management and Backups Exploring File Formats Ensuring Disaster Recovery Mastering Object Creation Handling Measurement Units Dynamic Input Techniques Inquiring Commands and Measurement Tools Effective Object Viewing Navigating Zoom and Pan Object Manipulation Strategies Object Selection Methods Swift Object Management Object Transformation Techniques Scaling and Altering Objects Trim, Extend, and Offset Functions Creating Geometric Variations Object Joining and Editing Corner Filleting and Chamfering Stretching Objects Organizing Your Drawings Layer Management Customizing Object Properties Applying Linetypes Layout Design and Setup Efficient Page Configurations Scaling Drawing Views Adding Annotations Multiline and Single-Line Text Creation Text Styling and Editing Dimensioning Concepts Customizing Dimension Styles Dimension Editing Implementing Multileaders Object Hatching Hatching Editing Reusable Content Management Blocks and Symbols Tool Palette Usage Working with Groups Model Space and Paper Space Understanding Layout Creation and Viewports Viewport Scaling Plotting and PDF Output Managing Multiple Sheet Drawings Utilizing Plotstyles Crafting Custom Drawing Templates Download AutoCAD Mac https://www.autodesk.co.uk After completing the AutoCAD for Mac course, learners can expect the following learning outcomes: Proficiency in AutoCAD: Participants will acquire the skills and knowledge needed to confidently use AutoCAD for Mac, including creating and editing drawings, managing objects, and applying precision techniques. Effective Design Skills: They will gain the ability to produce accurate 2D drawings, making them valuable assets in design-related professions. Jobs that individuals can pursue after completing this course include: Draftsperson: Working in architectural, engineering, or construction firms to create technical drawings and plans. CAD Technician: Assisting in the development of designs for various projects, such as product design or urban planning. Interior Designer: Using AutoCAD for space planning and layout design in the interior design industry. Architectural Designer: Collaborating on architectural projects, including creating floor plans and elevations. Mechanical Designer: Participating in the design and development of mechanical components and systems. Civil Engineering Technician: Supporting civil engineers in designing infrastructure projects, such as roads and bridges. Electrical or Electronics Designer: Assisting in the creation of electrical schematics and electronic circuit diagrams. Landscape Designer: Planning and visualizing outdoor spaces, gardens, and landscapes. Completing this AutoCAD course opens doors to various industries where precise and detailed 2D drawing skills are highly valued. The AutoCAD Mac Bespoke 1 on 1 Basics to Intermediate Level Training Course provides participants with a comprehensive skill set, enabling them to attain proficiency in using AutoCAD Mac. This course covers a wide range of functionalities and caters to individuals at all skill levels, whether they are beginners or experienced users. Participants will begin by learning fundamental features such as drawing, editing, annotations, and dimensioning. As they progress, they will delve into more advanced topics like object manipulation, customizing workspaces, and streamlining workflows. Key Benefits of the Course: Mastery of Mac-AutoCAD: Acquire expertise in both essential and advanced techniques for creating precise 2D drawings. Enhanced Productivity: Increase efficiency by implementing time-saving tips and optimizing your work processes. Versatile Design Abilities: Develop the skills to undertake diverse projects in fields such as architecture, engineering, and more. Industry-Relevant Competencies: Elevate your career prospects across various industries by gaining in-demand AutoCAD skills. Access to Recorded Lessons: Review and reinforce your learning at your convenience with access to recorded lesson sessions. Ongoing Email Support: Receive continuous assistance and guidance via email even after completing the course. Enroll today to benefit from interactive learning experiences guided by experienced instructors. Choose between flexible in-person or online sessions, gain access to lesson recordings, and enjoy a lifetime of email support. Tailored Guidance: Get personalized coaching and instruction tailored to your unique learning needs and objectives. Convenient Scheduling: Choose from flexible training slots available Monday to Saturday from 9 am to 7 pm, accommodating your busy schedule. Versatile Learning Options: Select between in-person training at our location, conveniently situated just 5 minutes away from Oval Tube Station, or participate in live online sessions from anywhere. Engaging Interactions: Participate in interactive sessions designed for questions, discussions, and problem-solving, creating an immersive learning experience. Effective Progression: Accelerate your learning with focused guidance, allowing you to advance at your own pace while mastering the material. Tailored Curriculum: Customize the course content to align with your prior knowledge and specific areas of interest, ensuring a relevant and engaging learning experience. Real-Time Guidance: Receive immediate feedback from the instructor, enhancing your comprehension and skill development. Comprehensive Support: Enjoy ongoing assistance and clarification opportunities through email or additional sessions beyond the course for an in-depth learning experience.
