- Professional Development
- Medicine & Nursing
- Arts & Crafts
- Health & Wellbeing
- Personal Development
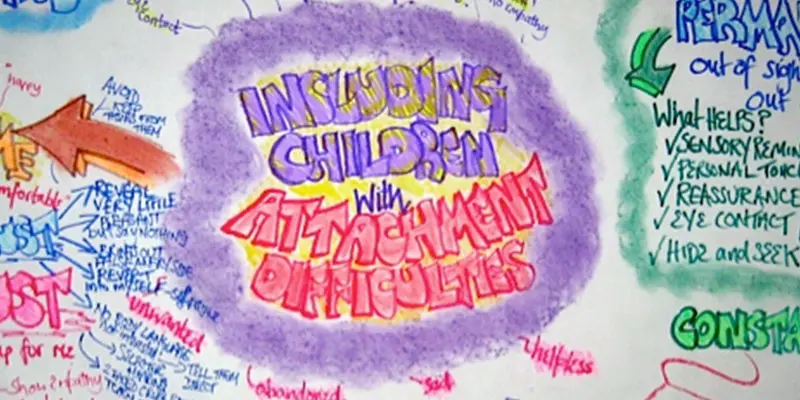
ATTACHMENT DIFFICULTIES: INCLUDING CHILDREN
By Inclusive Solutions
This is a practical ‘non medical’ day for front line practitioners working with children and young people with serious attachment issues arising from loss, trauma and abuse. We look at what Psychology may help us in our understanding of children who have faced issues with love and attachment. Splitting, handling projected feelings, constancy and permanence are explored. Online Course now available via Teachable Platform – Understanding Attachment Learn at your own pace… lots of text and video support Course Category Meeting emotional needs Behaviour and Relationships Inclusion Teaching and Learning Description This is a practical ‘non medical’ day for front line practitioners working with children and young people with serious attachment issues arising from loss, trauma and abuse. Drawing from the international research and literature and our own experience over many years as educational psychologists of the challenges of children with major social and emotional needs, we will explore together what the best practice can and could look like. We explore the language of attachment and outline very practical classroom strategies. We look at what Psychology may help us in our understanding of children who have faced issues with love and attachment. We explore the feelings of being on a desolate island of relational poverty or to imagine swimming with sharks. We explore the themes of violence, anxiety and experience of being a victim as young people grow older. We look at telling lies and explore how we can respectfully understand this. We reveal the new and innovative compass of vulnerability – the cognitive errors to which some are much more vulnerable. We look at triggers, self regulation and unpack a range of strategies. Transference and counter transference are examined along with splitting, handling projected feelings, constancy and permanence. We explore what young people with these difficulties really need from us. We also spend time looking at the emotional impact on practitioners working with children with such needs and what helps at an personal and team level. We can all do something – we do not have to wait for expert therapists to arrive! Testimonials Very moving presentation I will always try and think behind the behaviour now It had a huge impact on all levels We all seem to need it Belonging and feelings are so important Very user friendly Excellent! Learning Objectives Increased confidence regarding developing inclusive practice for children with serious attachment needs in mainstream schools Simple understandable explanation of attachment understood Access to a wider range of practical strategies to impact on social and behavioural needs Deeper understanding of core values surrounding inclusion of emotionally disabled children Opportunity to reflect on professional attitudes and behaviour towards parents and pupils with complex emotional needs New skills, scripts and processes to make inclusion successful Who Is It For ? Practitioners working in schools and other settings with children and young people of all ages Key workers Teaching Assistants with support roles Heads and deputies SENCOs Advanced skills teachers Primary and secondary classroom teachers Parents Local authority support services Course Content The course explores the questions : How can we start to develop an understanding of children with attachment needs? What is the true impact of loss, trauma and abuse? What else can we do to go about including high profile children or young people with challenging emotional needs? What useful psychological constructs can we use to guide us? This course also explores practical strategies and language for key adults rebuilding relationships with individual pupils. This is a participative day that aims to be explorative and practical. Opportunities to develop empathy with the children of concern will be created.
Hydrodermabrasion Course In Person
By KBH Training Academy
Hydrodermabrasion Course *machine and other kit is not inlcuded. You will train using our equipment. What Is Hydrodermabrasion? This treatment is often mistaken for microdermabrasion, however, these two are different. Microdermabrasion is used to exfoliate your skin without any crystals, unlike microdermabrasion. The process is a lot more comfortable for your skin and is safe for sensitive skin as well. Course Content - History of Hydrodermabrasion - Anatomy and physiology - Contraindications - How to perform the treatment - Use of the machine - Aftercare How does the course work? The course is divided into 2 parts, the first part is theoretical which you have to complete before you come for your practical training, and the second one is a practical assignment. The practical assignment is done on the day which will be agreed upon course purchase. You will spend around 2-3 hours practising on a model in our venue in London E106RA. We will call you to arrange date once you sign up for the course. Will I require a model? Yes, usually 1 model is required Do I Need Experience Before Booking a Course? We’re pleased to offer courses to people with lots of different experiences. However, previous experience nor qualifications are not necessary if you would like to enrol on our Course. Certificate You will receive an end of course certificate which is accredited by the cpd group and allows you to work on public Payment By paying for the course you agree to our Terms and Conditions

Enscape Rendering Training Course
By ATL Autocad Training London
Who is this course for? Enscape Rendering Training Course. The Enscape Rendering Training Course is tailored for architects, interior designers, and design students aiming to learn realistic visualizations using Enscape. Whether you prefer 1-on-1 in-person or online courses, this training is best for you. Click here for more info: Website Training duration: 5 hrs Method: 1-on-1 and Tailored content Schedule: Customize your training. Choose any hour from Mon to Sat, 9 am to 7 pm Call 02077202581 or WhatsApp at 07970325184 to book. Course Outline: Enscape Rendering Software Training (5 hours) Course 1: Enscape for Revit Hour 1: 1. Introduction to Enscape: Overview of Enscape rendering software, its features, and benefits. 2. Installing and Setting up Enscape: Step-by-step guidance on installing and configuring Enscape for Revit. 3. Enscape Interface: Familiarizing with the Enscape user interface and navigation controls within Revit. Hour 2: 4. Enscape Materials: Exploring material creation, application, and customization within Enscape for Revit. 5. Lighting in Enscape: Understanding different lighting options, adjusting light settings, and creating realistic lighting effects. Hour 3: 6. Enscape Camera Settings: Manipulating camera angles, perspectives, and settings for optimal visualization. 7. Enscape Rendering Settings: Exploring various rendering settings and techniques to enhance the quality of the final output. Hour 4: 8. Enscape Rendering Workflow: Demonstrating a step-by-step workflow for generating renderings and walkthroughs using Enscape in Revit. 9. Advanced Features: Introduction to advanced features such as creating panoramas, virtual reality (VR) walkthroughs, and creating animations in Enscape. Hour 5: 10. Tips and Tricks: Sharing tips and techniques for maximizing efficiency and achieving high-quality results in Enscape for Revit. 11. Q&A and Troubleshooting: Addressing participant questions, providing troubleshooting guidance, and discussing common challenges and solutions. OR Course Outline: Enscape Rendering Software Training (5 hours) Course 1: Enscape for Sketchup Hour 1: 1. Introduction to Enscape: Overview of Enscape rendering software, its features, and benefits for SketchUp users. 2. Installing and Setting up Enscape: Step-by-step guidance on installing and configuring Enscape for SketchUp. 3. Enscape Interface: Familiarizing with the Enscape user interface and navigation controls within SketchUp. Hour 2: 4. Enscape Materials: Exploring material creation, application, and customization within Enscape for SketchUp. 5. Lighting in Enscape: Understanding different lighting options, adjusting light settings, and creating realistic lighting effects. Hour 3: 6. Enscape Camera Settings: Manipulating camera angles, perspectives, and settings for optimal visualization in SketchUp. 7. Enscape Rendering Settings: Exploring various rendering settings and techniques to enhance the quality of the final output. Hour 4: 8. Enscape Rendering Workflow: Demonstrating a step-by-step workflow for generating renderings and walkthroughs using Enscape in SketchUp. 9. Advanced Features: Introduction to advanced features such as creating panoramas, virtual reality (VR) walkthroughs, and creating animations in Enscape. Hour 5: 10. Tips and Tricks: Sharing tips and techniques for maximizing efficiency and achieving high-quality results in Enscape for SketchUp. 11. Q&A and Troubleshooting: Addressing participant questions, providing troubleshooting guidance, and discussing common challenges and solutions. Learning Outcome: After completing the Enscape (VR) Training and Interactive Workshop, participants will master real-time walkthroughs, set up VR applications, efficiently migrate models, navigate designs dynamically, update objects in real-time, control visual styles, adjust day-time settings, export and share designs, utilize the asset library, and gain a comprehensive overview of Enscape. These skills will enable them to confidently visualize and display 3D designs without cloud uploads or external software, enhancing communication and collaboration in architectural projects. What does the Enscape Training & Interactive Workshop offer? The Enscape Training & Interactive Workshop is designed to help you get up and running with Virtual Reality (VR) in a cost-effective manner. It covers hardware and software setup, navigation techniques, real-time updates, material settings, and more. The workshop also allows participants to experience VR firsthand. What are the benefits of attending the Enscape (VR) Training and Interactive Workshop? By attending this workshop, you will gain the ability to perform real-time walkthroughs of your designs in 3D. You can view your projects in VR without the need for cloud uploads or exporting to other 3D software. The workshop offers extensive asset libraries, collaboration, and annotation sharing, enhancing your design visualization capabilities. What are the prerequisites for attending the Enscape (VR) Training and Interactive Workshop? No prior knowledge of Enscape is required. However, assistance from IT management may be necessary for hardware and software installation. Logistics, such as room suitability and technical requirements, will be discussed before the workshop. What will I learn in the Enscape (VR) Training and Interactive Workshop? The workshop covers hardware setup, software installation, and configuration. You will learn how to migrate models from Revit and SketchUp into VR, navigate through designs, update objects and materials in real-time, and utilize various visual styles and settings. The course also includes interactive workshops with support from our expert tutors. Enscape rendering courses offer valuable benefits: Real-time Visualization: Instantly visualize designs for quick iterations and informed decisions. Seamless Integration: Streamline rendering by integrating with popular design software. High-Quality Visuals: Create photorealistic presentations and walkthroughs. Efficient Design Communication: Enhance collaboration and communication during presentations. Enhanced Design Iteration: Explore options and make informed decisions in real-time. Time and Cost Savings: Reduce rendering time and deliver projects more efficiently. Portfolio Enhancement: Elevate your portfolio with visually striking renderings, opening new opportunities.

NVQ Level 3 Electrical Facials Unit
By The Angel Academy Of Teaching & Training
Electrical Facials Course This course is becoming more popular than ever before due to the amazing electrical equipment now available at reasonable prices for salons and therapist. An Electrical facial treatment can postpone early signs of ageing, improve the appearance of the skin and erase minor sun damage, scarring and pigmentation. Duration The course last two days, usually on a weekend, so you dont have to take time out of your busy week! Machines Covered: EMS, Galvanic, Microdermabrasion, High Frequency, Micro-current, Melia Extraction/Microlance

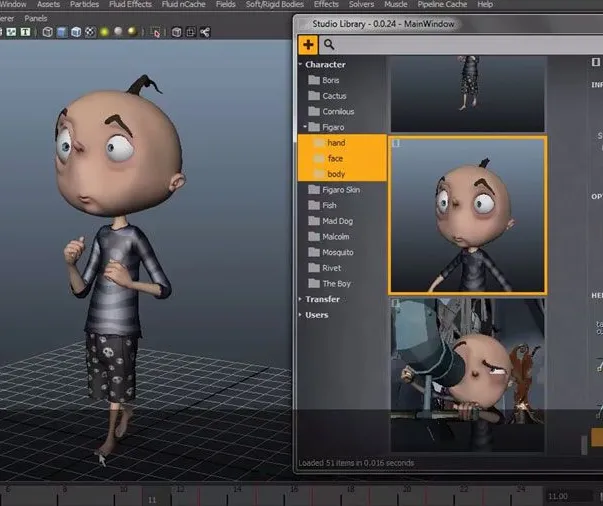
Mastering Maya Basics to Intermediate Course
By ATL Autocad Training London
Why Choose Mastering Maya Basics to Intermediate Course? Click here for more info: Website Our courses cater to graphic designers, animators, and beginners, providing industry-standard animation skills. Dive into 3D animation, modeling, simulation, and rendering for film, TV, games, and ads. Duration: 20 hours Approach: 1-on-1 Sessions. Schedule: Design your own schedule by pre-booking a convenient hour of your choice, available Mon to Sat between 9 am and 7 pm. I. Introduction to Maya (1.5 hours) Understanding Maya and its Applications Navigating the Maya Interface and Basic Tools Creating and Managing Projects II. 3D Modeling (3 hours) Basics of Polygon Modeling Creating Simple and Complex 3D Shapes Organic Shape Creation using NURBS Advanced Techniques: Extrusions, Bevels, and Editable Objects III. Texturing and Materials (1.5 hours) Introduction to Texturing and Material Creation UV Unwrapping and Texture Mapping Importing and Applying Textures and Images IV. Lighting and Rendering (2 hours) Fundamental Lighting Techniques Camera Setup and Composition Rendering Images and Animations Output Options and File Formats V. Animation (4 hours) Keyframe Animation and Animation Curves Rigging and Animating Characters Motion Paths and Animation Layers Editing Animation Clips VI. Rigging (2 hours) Introduction to Rigging and Skeletons Binding Skin and Weight Maps Creating Rigging Systems for Characters VII. Special Effects (1.5 hours) Particle Systems and Dynamics Creating Fluids, Fire, and Other Effects Special Effects Editing: Explosions, Smoke, and more VIII. Advanced Modeling Techniques (1.5 hours) Complex Objects using Booleans and Deformers Modifying Curves and Surfaces Organic Shape Creation with Sculpting Tools IX. Conclusion and Next Steps (0.5 hours) Course Review Further Learning Tips and Resources Q&A and Feedback Please note: The course content and duration are flexible, tailored to match learners' needs and skill levels. Throughout the course, lifetime email support ensures you receive guidance with any challenges you face. Embark on your Autodesk Maya journey, exploring 3D modeling and animation with confidence. Additional Topics Covered: Modeling: Surfaces, Control Vertex, Polygons, Extrusion, Vertices, Edges, Bridge Tool, Combining, Smooth, Mirror Geometry, Merging Vertices, Subdivision Modeling. Deformations: Twist, Lattice, Flare, Bend. Shapes: Lines, Pen Tools. Animations: Basic Keyframes, Vertex Animation, Clusters, Path Animations, Skeletons, Bones, IK Handle Tool, Skinning. Dynamics: Fire, Lighting, Soft and Rigid Bodies, Particles, Collisions, Gravity. Fur and Paint Effects: Fur Basics, Fur Color Corrections, Paint Effects, Paint Modifier, Brush Animations. Texturing: Diffuse and Bump Maps, Reflections, Transparency, Shaders, Toon Shaders, Glow Textures. Lighting: Basic and Advanced Lights, Shadows, Special Light Effects. Camera: Free and Aim Cameras, Camera Effects, Path Animations. Fluid Effects and Ncloth: 2D and 3D Containers, Collision Effects, Gravity, Wind Effects. Rendering: Images and Animations, Render Techniques, Resolution Settings, Batch Rendering. Download Maya Maya Proficiency: Master Maya's interface, tools, and functions, advancing from basic to intermediate levels. 3D Modeling Expertise: Create diverse 3D models using polygonal and NURBS techniques, from simple shapes to intricate designs. Texturing and Rendering Skills: Apply textures, create materials, and utilize advanced rendering techniques for high-quality visuals. Animation Techniques: Understand keyframe animation, rigging, and character animation, producing engaging animations and special effects. Special Effects and Dynamics: Explore particle systems, fluid dynamics, and advanced visual effects, enhancing realism in animations. Advanced Modeling and Sculpting: Master complex modeling techniques, including Booleans, deformers, and organic shape creation through sculpting tools. Professional Portfolio: Develop a diverse portfolio showcasing 3D modeling and animation skills, ready for presentation to employers or clients. Problem-Solving Skills: Learn creative approaches to solve complex 3D challenges effectively. Collaborative Abilities: Understand team dynamics and collaboration within the 3D production pipeline. Recommended Books: "Introducing Autodesk Maya 202X" by Dariush Derakhshani and Randi L. Derakhshani: Comprehensive beginner's guide to Maya's essential tools and techniques. "Mastering Autodesk Maya 20XX" by Todd Palamar: In-depth intermediate guide covering advanced features, modeling, animation, and rendering. "Maya Character Creation: Modeling and Animation Controls" by Chris Maraffi: Focuses on character creation, covering modeling, rigging, and animation. "Maya Secrets of the Pros" by Todd Palamar: Expert tips and techniques from professional Maya artists, detailing advanced workflows and best practices. "Stop Staring: Facial Modeling and Animation Done Right" by Jason Osipa: Specialized book on facial modeling and animation, perfect for character expression enthusiasts. "The Art of 3D Computer Animation and Effects" by Isaac Kerlow: Offers foundational knowledge in 3D computer animation principles, applicable to various software, including Maya. Mastering Maya Basics to Intermediate Course Benefits: Comprehensive Skill Development: Master essential tools and techniques, from basics to intermediate, with hands-on projects mirroring real industry scenarios. Industry-Grade Proficiency: Acquire expertise in Autodesk Maya, enhancing credibility in animation, visual effects, and gaming industries. Creative Exploration: Unlock creative potential through advanced shading, lighting, dynamics, and simulations, enabling imaginative project realization. Portfolio Enhancement: Build a strong portfolio showcasing skills in 3D modeling, animation, and rendering for career advancement. Individualized Support: Receive personalized guidance and feedback, ensuring tailored learning experiences and skill refinement. Potential Jobs After Course: 3D Animator: Create lifelike character animations for films, games, and advertisements. 3D Modeler: Design detailed 3D characters, environments, and objects for various applications. Visual Effects Artist: Produce stunning visual effects for movies, TV shows, and commercials. Texture/Lighting Artist: Develop intricate textures and set the mood with expert lighting. Rigging Specialist: Rig characters and objects for realistic movement in animations. Rendering Specialist: Optimize rendering capabilities for high-quality images and animations. Game Developer: Contribute to interactive game development using Maya's features. Freelance Artist/Animator: Work independently on diverse projects, collaborating with studios and agencies. Skill Advancement: Progressive Mastery: Develop from basics to intermediate levels in Autodesk Maya, honing essential tools for stunning 3D visuals and animations. Hands-On Learning: Interactive Practice: Engage in practical projects, refining your skills in 3D modeling, advanced materials, character animation, and high-quality renders. Industry-Ready Proficiency: In-Demand Skills: Acquire proficiency in Autodesk Maya, a key software in animation and gaming, enhancing your employability. Creative Exploration: Unlock Creativity: Experiment with advanced shading, lighting, and dynamic animations, unleashing your creative potential in Maya. Flexible Support: Tailored Learning: Access recorded lessons for review, deepening your understanding, with lifetime email support for continuous guidance.
Unity 3d one day course 1-2-1
By Real Animation Works
Unity 3d face to face training customised and bespoke.
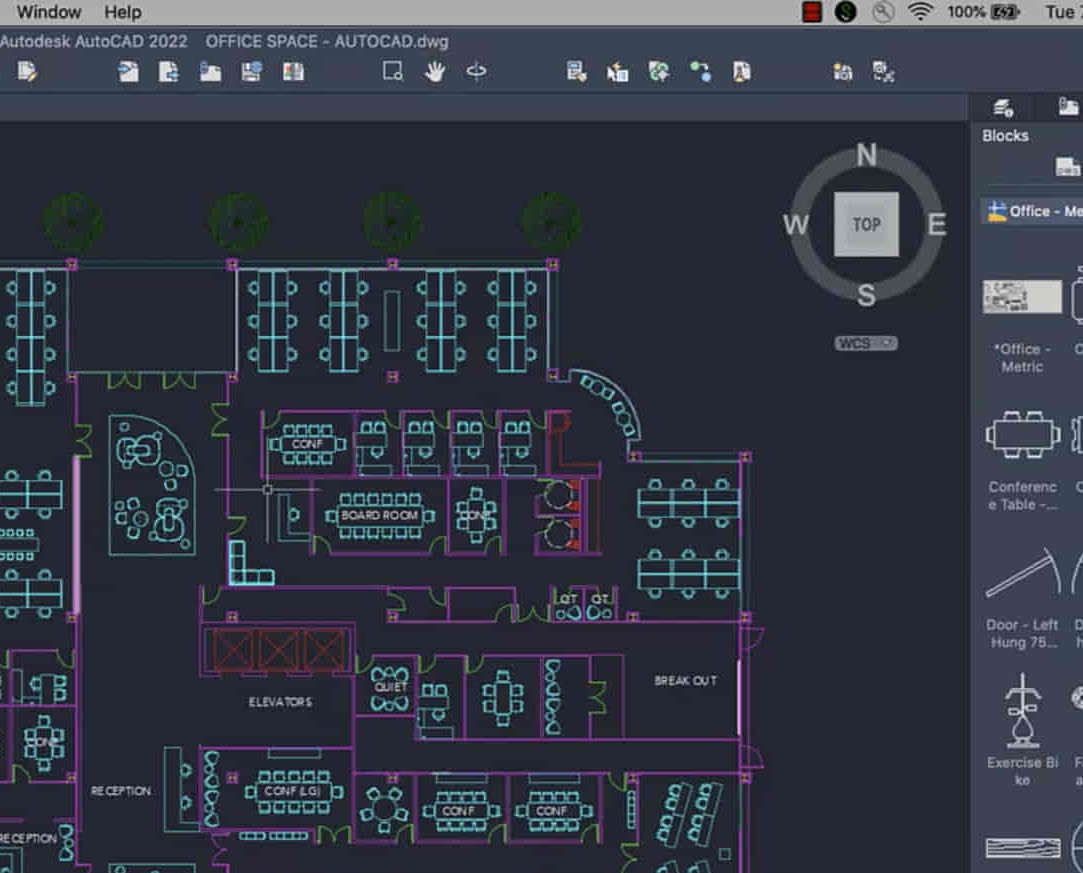
AutoCAD-Mac Introduction to Advanced Training Course
By ATL Autocad Training London
AutoCAD-Mac Introduction to Advanced Training Course This project-based course is tailored for AutoCAD Mac users, architecture and interior design students and professionals. Click here for more info: Website When Can I Book This Training Course? Personalized experience with 1-on-1 sessions designed to fit your unique needs. Available from Monday to Saturday, 9 am to 7 am Or Call to Book 02077202581. Duration of Training: 16 hours. Training Method: 1-on-1, providing the option for in-person sessions or live online training. Course Content Section 1: Introduction Course Overview Section 2: Basic Concepts Status Bar and The Units Drawing Commands Control Points - Vertex or Verteces Modifying Commands Snap Settings Drawing An Outline Section 3: Dimensions and Customization Adding Dimensions and Dimension Style Manager Importing Dimension Styles Customizing Shortcuts Section 4: Advanced Techniques Adding Walls Thickness with Offset Command Adding interior layout Cleaning Layout lines with Trim Section 5: Text and Styling Text Editing and Importing Text Styles Main File Formats in AutoCAD Section 6: Design Elements Creating Openings in the Floor Plan Adding Openings - Part 2 Adding Openings - Part 3 Drawing Doors & Windows Using Line Types & Linetype Scale Group and Ungroup Commands Using Blocks Using Blocks Library & Dynamic Blocks Section 7: Layers and Furnishing Layers - Part 2 Layers - Part 3 Furnishing Bedrooms & Bathrooms - Part 1 Adding Furniture, Fixtures, and Equipments | part 2 Adding Furniture, Fixtures, and Equipments | part 3 Drawing the Kitchen Drawing the Living Room Drawing Dining Room & Adding Casework Adding Steps and Railings Using Stretch Command Finishing Steps and patio areas Hatch command Hatch Customization Adding Plants & Finishing Floor Plan Section 8: Layout and Printing Paper Space & Page Setup Manager Working with Viewport & Using Print Command Scale & Using Multiple Viewports Locking Viewport Scale Drawing A Titleblock - Part 1 Drawing A Titleblock - Part 2 Copying the Titleblock Using Titleblock with Attributes Section 9: Roof Plan and Organization Drawing The Roof Plan Placing Roof Plan on Sheet Organizing Project Drawings & Using Layer Freeze AutoCAD Crashing And What To Do Section 10: Elevations Exterior elevations - Drawing the Outline Exterior elevations - Drawing the Openings Elevations - Detailing - Part 1 Elevations - Detailing - Part 2 Elevations - Repeating the workflow Elevations - Finishing 3rd Elevation Elevations - Drawing the final elevation Section 11: Sections Sections: Drawing Cut Lines & the Outline Sections: Placing 1st Section on Sheet Sections: Drawing Section #2 - Different Technique Sections: Adding Final Detail Section 12: Interior Elevations Interior Elevations: Drawing the Outline Interior Elevations: Placing on Sheet Interior Elevations: Using Block Clip Interior Elevations: Final Drawing Section 13: Conclusion Putting the Final Set Together Proficient AutoCAD Skills: Master essential tools for efficient drawing creation and manipulation. Accurate 2D Designs: Create precise and high-quality layouts with attention to detail. Effective Object Handling: Excel in selecting, moving, copying, and scaling objects. File Management: Organize drawings efficiently and understand different file formats. Precise Measurements: Utilize inquiry commands for accurate design analysis. Annotations and Hatching: Apply text, dimensions, and hatching to enhance drawings. Object Organization: Manage layers and object properties for organized designs. Reusable Content: Efficiently use blocks, tool palettes, and groups for productivity. Layout Optimization: Create layouts with viewports for optimal design presentation. Professional Output: Generate professional plots and PDF output for polished results. Enhanced Productivity: Explore AutoCAD toolsets and web/mobile apps for streamlined workflow. Course Overview: Learn versatile AutoCAD for Mac drawing techniques, applicable across all industries, enabling you to excel in the application. Our trainers incorporate exercises from various disciplines. Who Should Attend: Ideal for newcomers to AutoCAD for Mac, self-taught users seeking correct techniques, and those transitioning from other CAD tools. Requirements: A solid Mac OS understanding is essential, while prior CAD knowledge is not required. Pre-course preparation guidance is provided for new AutoCAD users. Highlights: Perfect for AutoCAD for Mac beginners. Gain skills for precise 2D layouts and designs. Versatile drawing techniques for all industries. Choose between in-class or live online training. Autodesk Certified Tutors: AutoCAD 1-2-1 courses. Hands-on learning with expert trainers. Lifetime post-course email support. Tailored on-request training available. Certificate: Digital certificate included. Tailored Mac Training: Excel in AutoCAD with specialized Mac training, leveraging its distinct features and interface for heightened efficiency. Comprehensive Skill Enhancement: Advance from fundamental to intermediate AutoCAD Mac proficiency, creating precise and professional 2D drawings. Industry-Relevant Expertise: Attain in-demand skills valued by employers in architecture, engineering, and design sectors. Hands-On Project Exposure: Immerse yourself in practical exercises mirroring real-world design scenarios, fostering practical competence. Lesson Recordings for Review: Access recorded lessons for reinforcement and deeper AutoCAD Mac comprehension. Ongoing Email Support: Benefit from lifetime email support, ensuring assistance beyond course completion."
Spanish language courses - online and in person - All levels
By Beatriz Luna Gijon - Lubidioms
https://www.lubidioms.com/spanish-language https://www.facebook.com/Lubidioms

Rhino 3d and V-ray for Rhino Basic to Intermediate Training
By London Design Training Courses
Why Learn Rhino 3d and V-ray for Rhino Basic to Intermediate Training Course? Course Link Learn Rhino 3D and V-Ray for Rhino Basic to Intermediate Training Course. Designed for beginners and experienced users, this course empowers you with essential modeling and rendering techniques. Choose between in-person or live online sessions. Duration: 16 hrs. Method: 1-on-1, Personalized attention. Schedule: Tailor your own schedule by pre-booking hours of your choice, available from Mon to Sat between 9 am and 7 pm. London Design Training Course Certified tutors for Rhino 3D and Vray Training - Online, On-Site, or In-Class one to one. Choose from a diverse range of Rhino courses conducted by expert trainers with extensive production experience. Rhino 3D and V-Ray Comprehensive Training Course Duration: 16 hours Course Overview: Learn Rhino 3D and V-Ray with our Basic to Intermediate Training Course. Perfect for beginners, this course equips you with the skills to navigate Rhino's interface, create captivating 3D models, apply textures, and utilize V-Ray for stunning renders. Course Outline: I. Introduction to Rhino 3D and V-Ray (1 hour) Get familiar with Rhino 3D and V-Ray interfaces and essential tools Master viewport navigation with expert controls Understand units and tolerance for precise designs Customize your workspace for seamless workflow II. Creating Basic 3D Objects (3 hours) Craft captivating 3D shapes and objects Edit objects and work with curves for refined designs Explore surfaces and solids for advanced modeling Utilize transformations and copying techniques for enhancements III. Materials and Textures (2 hours) Unleash the power of materials and textures on your designs Apply stunning materials to bring your creations to life Enhance your designs with custom materials for an aesthetic boost IV. Basic Lighting Techniques in V-Ray (2 hours) Discover the magic of lighting with V-Ray for impactful renders Utilize V-Ray lights and HDRI maps for striking lighting effects Adjust lighting settings for impeccable results V. Enhancing Renders with V-Ray Settings (3 hours) Optimize V-Ray render settings for the best output Adjust global illumination and reflection settings for desired looks Elevate renders with dynamic effects like depth of field and motion blur VI. Advanced Modeling Techniques (2 hours) Master advanced modeling tools for intricate shapes Refine curve and surface creation and editing skills Handle solids with Boolean operations and trimming techniques VII. Advanced Lighting Techniques in V-Ray (2 hours) Create and adjust artificial lights for perfect illumination Utilize V-Ray's Sun and Sky system for realism Craft custom HDR images for enhanced lighting VIII. Exporting and Importing (1 hour) Learn file formats for seamless sharing and collaboration Prepare models for 3D printing with best practices Integrate models from other software for a unified workflow IX. Conclusion and Next Steps (30 minutes) Recap course knowledge and highlights Access valuable tips and resources for continuous learning Engage in interactive Q&A for feedback and support Resources: Explore V-Ray with a free trial at: https://www.chaosgroup.com/vray/sketchup/free-trial Access material library at: https://www.vray-materials.de/ Discover textures at: https://textures.com/ Downloads: Download Rhino 7 for Windows for a full 90-day evaluation at: https://www.rhino3d.com Experience Rhino 7 for Mac Evaluation with a user-friendly interface and seamless performance for 90 days. Upon completing the Rhino 3D and V-Ray Basic to Intermediate Training Course, participants can expect to achieve the following learning outcomes: Proficiency in Rhino 3D and V-Ray: Develop a comprehensive understanding of Rhino 3D and V-Ray interfaces, tools, and functionalities, enabling participants to navigate and utilize the software effectively. 3D Modeling Skills: Master the art of creating captivating 3D objects and shapes using Rhino 3D, including editing, transforming, and refining designs for diverse applications. Material Application: Acquire the ability to apply and customize materials and textures to enhance the visual appeal and realism of 3D models, elevating the quality of designs. Lighting Techniques: Gain expertise in utilizing V-Ray lighting tools, such as V-Ray lights and HDRI maps, to achieve striking lighting effects in rendered scenes. Rendering Excellence: Learn to optimize V-Ray render settings, control global illumination, and apply dynamic effects like depth of field and motion blur for high-quality and impressive renders. Advanced Modeling: Develop skills in advanced modeling techniques, including handling curves, surfaces, and solids, enabling participants to tackle complex design challenges. Lighting Mastery: Acquire the knowledge and expertise to create and adjust artificial lights, utilize the Sun and Sky system, and craft custom HDR images for realistic lighting setups. Seamless File Management: Understand various file formats for exporting and importing 3D models, facilitating efficient collaboration and preparation for 3D printing. Creative Problem-Solving: Enhance creative thinking and problem-solving abilities through hands-on practice and exploration of diverse design scenarios. Professional Presentation: Learn post-production techniques in Photoshop to enhance renders and create visually appealing design presentations for effective communication. Continuous Learning: Access valuable resources and tips to encourage continuous learning and professional growth in Rhino 3D and V-Ray.