- Professional Development
- Medicine & Nursing
- Arts & Crafts
- Health & Wellbeing
- Personal Development
3ds max character animation training course 1-2-1
By Real Animation Works
face to face training customised and bespoke. One to One Online or Face to Face
3ds Max Basics Training Course
By ATL Autocad Training London
Who is this course for? 3ds Max Basics Training Course. This course is designed for beginners and enthusiasts looking to learn the fundamentals of 3ds Max. Whether you're a budding 3D artist, designer, or hobbyist, this training course provides a comprehensive introduction to the basics of 3ds Max. Click here for more info: Website Duration: 10 hrs Method: 1-on-1 and Personalized attention. Schedule: Tailor your own schedule by pre-booking a convenient hour of your choice, available from Mon to Sat between 9 am and 7 pm. Course Outline: 3D Modeling and Animation with 3ds Max I. Introduction to 3ds Max - Course overview and objectives - Navigating the user interface - Basic settings and preferences II. Creating 3D Objects - Building simple shapes with primitive objects - Craft complex designs using Editable Poly - Enhancing objects with modifiers - Applying materials and textures for realistic effects III. Lighting Techniques - Illuminating scenes with different light sources - Exploring various types of lighting - Adjusting light properties for desired effects - Casting shadows to enhance realism IV. Camera Control - Creating and configuring camera views - Fine-tuning camera settings for optimal shots - Animating cameras for dynamic scenes V. Animation Fundamentals - Mastering keyframe animation techniques - Utilizing the time slider and track view - Animating object transformations - Adding movement to materials and textures VI. Rendering Process - Configuring render settings for high-quality output - Selecting appropriate output formats - Streamlining rendering with batch processing - Enhancing final renders with post-processing effects VII. Project-Based Learning - Applying acquired skills to complete a final project - Exercising creativity and problem-solving abilities - Integrating modeling, animation, lighting, and rendering into the project In-Depth Course Outline: 1. Modeling - Edit Poly Modeling: Extrude, Chamfer, Cut, and Slices - Symmetry Mirror Modeling - Designing a Table and Chair - Creating a Basic House Model - Working with Lines and Shapes - Importing Plans from AutoCAD/Vectorworks - Crafting Interior Spaces - Adding Doors, Windows, Railings, and Trees - Implementing Stairs 2. Modifiers - Exploring Compound Objects - Utilizing Connect, Scatter, Pro Boolean, Loft, and Terrain Modifiers - Manipulating Bend, Taper, Twist, Stretch, Skew, FFD, Wave, Ripple, and Lattice - Employing the Lathe Modifier for Curved Objects 3. 3ds Max Basic Lights - Mastering Omni, Spot, and Direct Lights for Illumination 4. 3ds Max Camera - Understanding Free and Target Cameras for Optimal Shots 5. Texturing and Rendering - Applying Diffuse and Bump Mapping Techniques - Integrating Environment and Background Images - Configuring Render Settings for High-Quality Images - Lighting and Rendering Scenes in 3ds Max Upon completing our 3ds Max Basic Training Course, participants will: Master Fundamental 3D Modeling: Acquire proficiency in basic 3D modeling techniques, including object creation and manipulation. Texturing and Material Application: Learn the art of texturing and applying materials to 3D models for realistic rendering. Essential Lighting and Rendering Skills: Understand fundamental lighting principles and rendering techniques to create visually appealing scenes. Basic Animation Knowledge: Grasp the basics of animation, including keyframe animation and movement principles. Scene Composition and Camera Setup: Learn how to compose scenes effectively and set up cameras for different perspectives. Recommended Resources: Official Autodesk Documentation: Explore Autodesk's official website for 3ds Max documentation, including tutorials, user guides, and forums for troubleshooting. Books: Consider essential reads like '3ds Max For Dummies' by Kelly L. Murdock or '3ds Max 2022 Essentials' by Randi L. Derakhshani and Dariush Derakhshani for detailed guides on mastering the software. By utilizing these resources, participants can further enhance their 3ds Max skills and stay updated with the latest industry trends and techniques." Skills Acquired: Fundamental 3D Modeling Techniques in 3ds Max Texturing and Material Application Skills Lighting and Rendering Fundamentals Animation Basics and Keyframe Animation Introduction to Scene Composition and Camera Setup Career Opportunities: Entry-Level 3D Modeler Junior 3D Animator Texturing and Lighting Assistant CAD Designer in Architectural Firms Product Visualization Artist in Marketing Agencies Upon completing our 3ds Max Basic Training Course, students will acquire foundational 3D modeling and animation skills, opening doors to entry-level positions in various industries, including animation studios, architectural firms, and marketing agencies." Step into Personalized Learning with Us! Why Choose Us? Our Exclusive Benefits: Tailored One-on-One Training: Experience personalized coaching from skilled architects and designers, either face-to-face at (SW96DE) or via live online sessions. Sessions are available Monday to Saturday, 9 am to 7 pm. Customized Tutorials: Take home unique video tutorials crafted to elevate your learning experience. Comprehensive Learning Resources: Access a digital reference book for thorough revision, ensuring you grasp every concept effectively. Free Ongoing Support: Enjoy continuous post-course assistance via phone or email, ensuring your success extends beyond the class. Flexible Syllabus: We adapt syllabus and projects to match your specific needs, ensuring you learn exactly what matters most to you. Official Certificate: Certificate upon completing the course. Why Us? Personalized Learning Support: Our courses, ranging from 10 hours to 120 hrs Diploma training Courses, provide unwavering support at every stage. With personalized homework assignments and free after-course assistance, we pave the way to mastering software with unparalleled guidance. Individual Attention, No Crowded Classrooms: Bid farewell to overcrowded classrooms. Experience the intimacy of one-on-one learning. This ensures you receive the undivided attention you deserve, creating a confident and comfortable learning environment. Financial Flexibility: Embarking on your educational journey shouldn't be a financial burden. We offer a range of payment plans tailored to your needs. Explore the available options and embark on your learning adventure today. Expert Instructors, Real-world Expertise: Our instructors are meticulously chosen experts, renowned for their extensive industry knowledge and passion for teaching. They are dedicated to imparting invaluable skills to anyone eager to learn. Download 3ds max. Autodesk Download a free 30 day trial of 3ds Max
V-Ray for Rhino Essentials Training
By ATL Autocad Training London
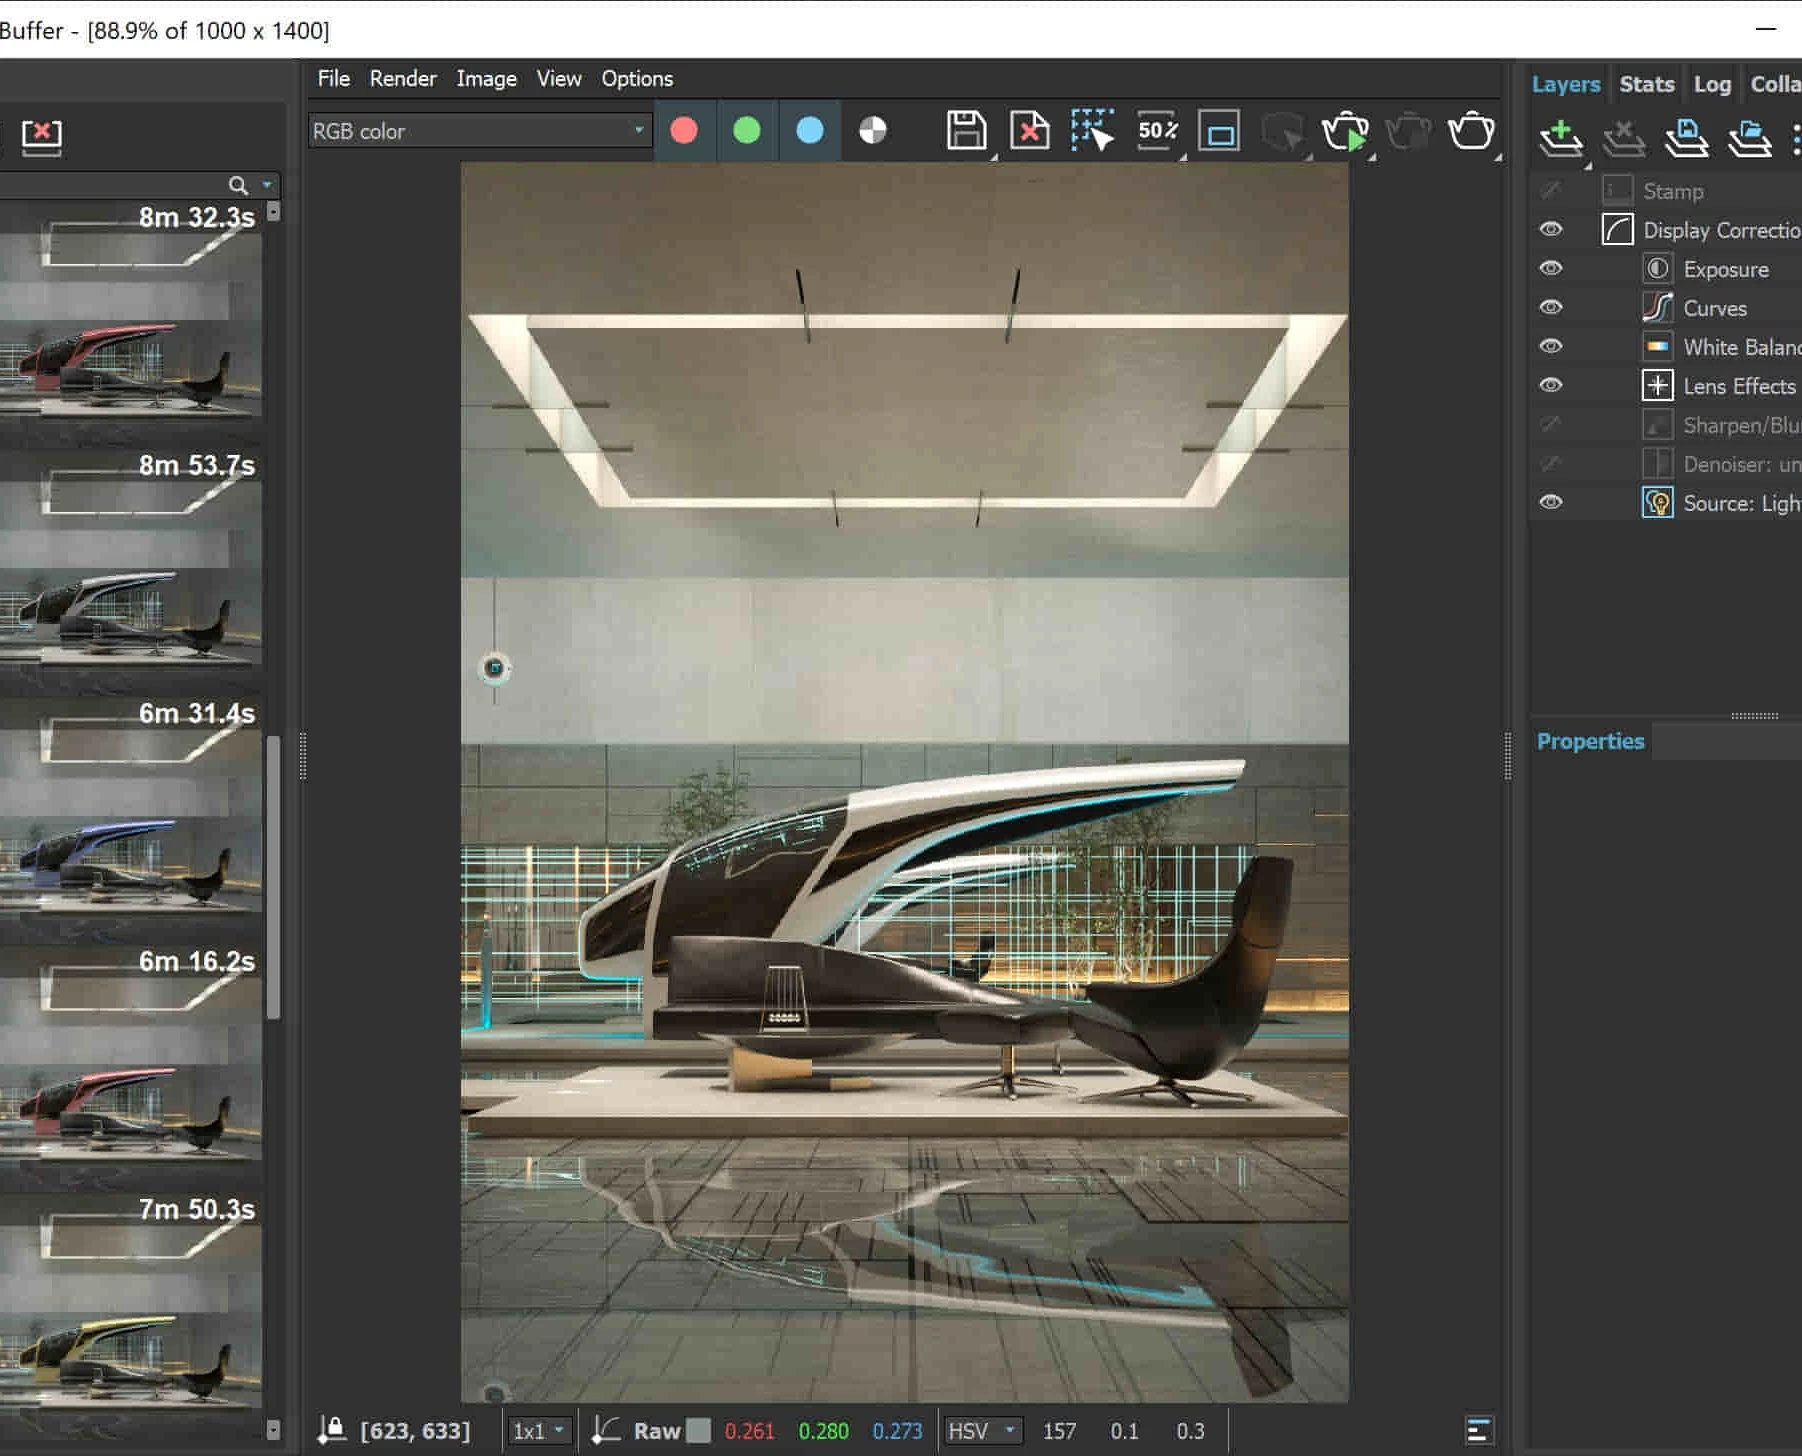
Why Choose V-Ray for Rhino Essentials Training? Master photorealistic rendering in Rhino with our intensive V-Ray training. Led by certified experts, learn lighting, material manipulation, rendering configurations, textures, and global illumination. Check our Website Training Duration: 10 hours Approach: 1-on-1, in-Person and Live online and Customized Content. Flexibility: 1-on-1 sessions scheduled at your convenience, from Mon to Sat between 9 am and 7 pm. Vray for Rhino Essentials - 10 Hours Course Session 1: Introduction to Vray and Rhino Integration Overview of Vray: Understanding its importance in architectural and product visualization. Setting up Vray in Rhino: Installation, basic configurations, and interface exploration. Understanding the Rhino-Vray workflow: Navigating between Rhino and Vray seamlessly. Session 2: Basic Lighting Techniques Exploring different light sources: Domes, spotlights, and area lights. Adjusting light intensity and color temperature for realistic ambiance. Creating natural lighting scenarios: Daylight, twilight, and night scenes. Session 3: Mastering Material Creation Introduction to Vray materials: Diffuse, reflection, refraction, and bump maps. Crafting realistic materials: Wood, glass, metal, and fabrics. Utilizing the material editor efficiently for precise adjustments. Session 4: Advanced Rendering Configurations Global Illumination: Understanding photon mapping and irradiance mapping. Fine-tuning render settings: Quality vs. speed, resolution, and anti-aliasing. Exploring Vray frame buffer: Post-processing and image enhancement. Session 5: Texture Manipulation and Mapping Understanding UV mapping: Unwrapping complex geometries for accurate textures. Applying textures in Vray: Diffuse, bump, displacement, and normal maps. Realistic texture manipulation: Scaling, rotation, and blending textures seamlessly. Session 6: Camera Settings and Scene Composition Camera configurations: Focal length, depth of field, and exposure settings. Composing visually appealing scenes: Rule of thirds, focal points, and balance. Rendering interior and exterior scenes: Managing lighting challenges and reflections. Session 7: Real-Time Feedback and Interactive Rendering Introduction to Vray interactive rendering: Real-time feedback for quick adjustments. Utilizing Vray's denoiser for noise reduction in interactive mode. Enhancing productivity with interactive rendering: Modifying materials and lighting on the fly. Session 8: Optimizing Render Times Efficient render optimization techniques: Reducing noise and enhancing quality. Distributed rendering: Utilizing multiple machines for faster rendering. Troubleshooting common rendering issues: Flickering, artifacts, and texture problems. Session 9: Post-Processing and Presentation Post-production in Photoshop: Enhancing renders, adding depth, and adjusting colors. Creating compelling visual narratives: Adding people, context, and atmosphere. Designing professional presentation boards: Layout, annotations, and graphic elements. Session 10: Final Project and Portfolio Review Participants showcase their final Vray-rendered projects. Instructor-led critique and feedback session. Tips for building a strong portfolio: Choosing the best renderings and presenting your work effectively. By the end of this 10-hour course, participants will have a comprehensive understanding of Vray for Rhino, enabling them to create photorealistic renderings and significantly enhance their design visualization skills. Upon completing the Vray for Rhino Essentials course, participants will: Master Lighting Techniques: Expertly utilize various light sources. Create realistic lighting scenarios for diverse scenes. Advanced Material Proficiency: Manipulate complex materials and textures for lifelike renders. Understand reflective surfaces and material interaction. Optimize Rendering Settings: Fine-tune render configurations for optimal quality and speed. Implement noise reduction techniques for cleaner renders. Texture Mapping Mastery: Perfect UV mapping methods for accurate texture application. Seamlessly blend textures for realistic surface mapping. Effective Camera Use and Composition: Configure camera settings, depth of field, and exposure. Compose visually appealing scenes for impactful renders. Real-Time Rendering Skills: Utilize interactive rendering for immediate feedback and adjustments. Enhance scenes in real time for efficient workflow. Post-Processing Expertise: Enhance renders in post-production using software tools. Add depth, adjust colors, and create visually compelling final images. Professional Presentation Techniques: Design layouts, annotations, and context to create impactful visual narratives. Curate a strong portfolio with the best-rendered projects. By honing these skills, participants will produce photorealistic renders and significantly enhance their architectural and product visualization capabilities. Skills You'll Gain: Master lighting techniques for realistic visualization. Learn material manipulation and texture enhancement in Vray. Understand advanced rendering configurations for high-quality results. Explore global illumination concepts for lifelike scenes. Career Opportunities: Upon completing Vray for Rhino Essentials, you'll be well-equipped for various roles in the design and visualization industry, including: Architectural Visualizer: Create stunning architectural visualizations for presentations and client approvals. Product Designer: Enhance product design by creating photorealistic prototypes and visualizations. Interior Designer: Craft immersive interior spaces with realistic lighting and material textures. 3D Visualization Artist: Work in animation studios, gaming companies, or marketing agencies, producing high-quality 3D visualizations. Freelance Rendering Specialist: Offer your skills on platforms like Upwork or Fiverr, providing rendering services to clients worldwide. Course Highlights: Acquire fundamental skills in V-Ray for Rhino, covering lighting, materials, and rendering setups. Explore advanced techniques for lifelike textures, reflections, and global illumination effects. Master the workflow for crafting architectural renderings, both interior and exterior. Harness the power of V-Ray features like proxies, fur, and particle systems for dynamic visuals. Optimize render times and quality using efficient techniques and expert tips. Validate your expertise with a Certificate of Completion, showcasing your V-Ray proficiency. Access recorded lessons for future reference, enabling self-paced learning and continuous improvement. Professional Guidance: Learn from certified tutors and industry experts with extensive practical experience. Gain valuable insights and personalized feedback as you progress through the course, ensuring a comprehensive understanding of V-Ray for Rhino.

Vectorworks Evening Training
By London Design Training Courses
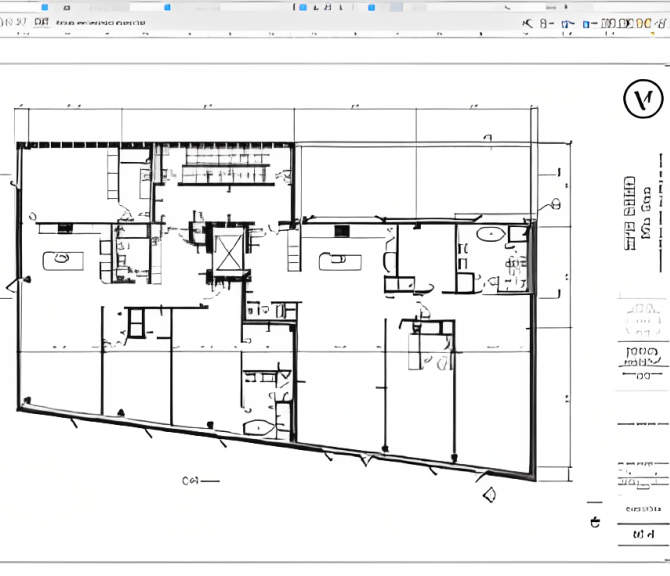
Why choose Vectorworks Evening Training Course? Course Link. This course led by certified expert, this course offers flexibility for evening learning. Choose in-person or live online sessions to master Vectorworks in architecture, interior design, and landscaping. Enroll now even after business hours! Duration: 10 hrs. Method: 1-on-1, Personalized attention. Schedule: Tailor your own schedule by pre-booking a convenient hour of your choice, available from Mon to Sat between 9 am and 7 pm. The Vectorworks course provides comprehensive training in computer-aided design (CAD) and Building Information Modeling (BIM) using the powerful Vectorworks software. This hands-on, instructor-led course covers 2D drafting, technical drawing, and 3D modeling, enabling participants to apply Vectorworks effectively in real-world projects. Key Features: Hands-on, instructor-led classroom training. Practical Vectorworks CAD projects for real-world application. Part-time evening or weekend options available. 1-2-1 Private learning experience. Module 1: Grasping CAD and Vectorworks Understanding the Role of CAD in Design Getting Acquainted with Vectorworks Software Module 2: Configuring Your Workspace Customizing Your Workspace Essential Options and Preferences Module 3: Mastering Foundational Drawing Skills Techniques for Drawing Object Selection Methods Module 4: Advanced Object Manipulation Merging Shapes Reflecting Objects Rotating Objects Grouping Elements Module 5: Precision Drawing and Scaling Techniques Working with Scale Setting Preferences for Accuracy Creating and Saving Templates Module 6: Achieving Accurate Object Placement Ensuring Drawing Precision Precise Object Movement Module 7: Advanced Editing Methods Utilizing Fillet Tool Applying Offset Function Module 8: Understanding Object Attributes and Groups Basic Attribute Management Editing Object Groups Module 9: Object Duplication Techniques Linear Duplicates Rectangular Duplicates Circular Duplicates Module 10: Crafting Room Plans Designing Walls Incorporating Windows and Doors Module 11: Development of Room Plans Methods for Room Plan Drawing Module 12: Exploring Additional Attributes Hatch Patterns Gradients Image Fills Module 13: Creating Elevation Drawings Elevation Drawing Techniques Effective Approaches Module 14: Importing Images for Graphic Use Graphic Illustration Integrating Images Module 15: Symbols and Resource Handling Symbol Creation Introduction to Resource Browser Module 16: Organizing Drawings Using Design Layers Optimizing Design Layer Utilization Module 17: Labeling Drawings and Title Blocks Drawing Labels Title Block Text Placement Module 18: Plotting and Printing Methods User Interface Navigation and Terminology Printing Approaches Module 19: Generating Drawing Sheets A1, A2, and A3 Sheet Formats Module 20: Utilizing Viewports Effectively Managing Multiple Views Module 21: Professional Model Presentation Techniques Paper Space Presentation Conversion to PDF Formats Module 22: File and Project Management Module 23: Object Display and Terminology Module 24: Objects and Data Management Module 25: Precise Object Placement Object Snapping Quick Selection Module 26: Dividing and Measuring Objects Module 27: Dimensioning and Annotations Module 28: Working with Text Elements Module 29: Customizing Tool Palettes Module 30: Organizing Tool Palettes Module 31: Efficient Tool Palette Usage Module 32: Standard Views and Drawing Techniques Module 33: Drawing Curved Shapes Arcs, Donuts, and Ellipses Drawing Module 34: Real-World Units and Measurements Module 35: Object Manipulation Adjusting Object Angles Module 36: File Handling and Management Saving, Exiting, and Opening Projects Module 37: Creating Mirrored Images Module 38: Introduction to 3D Modeling By the end of the Vectorworks Evening Training Course, participants will: Demonstrate proficiency in using the Vectorworks interface, tools, and navigation. Create and edit 2D drawings, including walls, doors, windows, floors, ceilings, stairs, and railings. Effectively manage layers, classes, and views for organized and controlled object placement. Create and edit dimensions and annotations for accurate measurements and documentation. Develop skills in creating, modifying, and utilizing symbols for increased efficiency. Generate and edit 3D geometry, apply textures, and create sections and elevations from 3D models. Create polished presentation drawings using viewports, annotations, and text for clarity. Summarize course content and confidently apply learned skills in Vectorworks projects. Utilize available resources for further learning and professional development.
3ds max and V-Ray Training Course
By ATL Autocad Training London
Why 3ds max and V-Ray Training Course? This course is ideal for 3D artists and professionals in various industries seeking advanced rendering skills. If you work with 3ds Max and want to master superior photorealistic rendering using V-Ray, this course is tailored for you. V-Ray, a third-party engine compatible with 3ds Max, Click here for more info: Website Duration: 10 hours. Approach: Personalized 1-on-1 Sessions and Flexible Learning. Scheduling Flexibility: Mon to Sat between 9 am and 7 pm. Choose your own day and time. 10-hour Vray for 3ds Max Training Course Outline: Module 1: Introduction to Vray for 3ds Max (2 hours) What is Vray and its integration with 3ds Max? Installation and setup of Vray for 3ds Max Understanding Vray interface and workflow Overview of Vray materials Module 2: Lighting with Vray (2 hours) Various lighting techniques in Vray Types of Vray lights and their configurations Creating and managing Vray sun and sky Vray dome lighting and IES light usage Efficient lighting workflows in Vray Module 3: Vray Camera (2 hours) Understanding Vray camera settings Controlling exposure with Vray camera Working with Vray depth of field Creating Vray camera animations Utilizing Vray frame buffer Module 4: Vray Materials (2 hours) Understanding Vray material properties Creating realistic materials using Vray Building and storing custom Vray material libraries Implementing Vray material overrides Module 5: Vray Rendering and Post Production (2 hours) Overview of Vray rendering settings Rendering images and animations with Vray Post-production techniques in Photoshop Understanding and utilizing Vray frame buffer Compositing Vray render elements in Photoshop Working with Vray denoiser Modeling Techniques: Edit Poly Modeling Extrude, Chamfer, Cut, and Slices Symmetry Mirror Modeling Designing furniture and basic architectural models Lines, Shapes, and Plan Import from AutoCAD/Vectorworks Modifiers: Compound objects (Connect, Scatter, Pro Boolean, Loft, Terrain) Bend and Taper Basic Lights: Omni Light, Spot Light, Direct Light Camera Control: Free Camera, Target Camera Texturing and Rendering: Diffuse and Bump Mapping Environment and Background Images Advanced Rendering Techniques (Interior and Exterior Scenes) Vray Specifics: VRay Lights (Plane, Dome, Sphere, Sun, Shadow) VRay Camera Settings (Focal Length, Film Speed, Shutter Speed) VRay Materials (Diffuse Color, Reflection, Refraction, Blurry Reflections) Upon completing the 10-hour Vray for 3ds Max Training Course, participants will: Master Vray Integration: Understand setup, interface, and tools for effective usage. Excel in Vray Lighting Techniques: Learn diverse Vray lighting methods, enhancing scene realism. Vray Camera Control: Manipulate camera settings, exposure, and create dynamic animations. Vray Material Skills: Create realistic materials, manage libraries, and override material properties. Perfect Rendering and Post-Production: Optimize rendering, produce high-quality images, and enhance results in post-production. Advanced 3D Modeling Expertise: Develop complex shapes, utilize modifiers, and import plans effectively. Recommended Resources: "V-Ray My Way: A Practical Designer's Guide to Creating Realistic Imagery Using V-Ray & 3ds Max" by Lee Wylde "3ds Max Modeling for Games: Insider's Guide to Game Character, Vehicle, and Environment Modeling" by Andrew Gahan "Photoshop for 3D Artists, Volume 1" by 3DTotal Publishing Job Opportunities: Students can pursue careers as: 3D Visualization Artists: Creating realistic visuals for architecture, products, and entertainment. Game Designers: Developing game environments and assets for interactive experiences. Architectural Visualizers: Producing high-quality architectural renders for firms and clients. Product Designers: Crafting detailed product visualizations for marketing and prototyping. Freelance 3D Artists: Offering services on platforms like Upwork, catering to diverse client needs. Opportunities exist in architecture, gaming, animation, advertising, and freelancing. A strong portfolio and networking enhance job prospects. Skills Acquired: Vray Advanced Lighting: HDRI, Global Illumination Mastery. Vray Material Expertise: Shaders, Textures, Realistic Material Replication. Scene Optimization: Large-scale Scene Handling, Speed Optimization. Post-Production Skills: Vray and Photoshop Enhancement, Atmosphere Addition. Career Opportunities: Architectural Visualization Specialist Product Design Visualizer 3D Visualization Artist Freelance Rendering Expert In-House Rendering Consultant Learn the advanced Vray rendering skills, 1-on-1 training courses, boost your career prospects in architectural visualization, product design, and animation industries. Download 3ds max. Autodesk Download a free 30 day trial of 3ds Max, 3D modelling and rendering software for design visualisation, games and animation to create with full artistic Download Vray V-Ray for 3ds max is an integral rendering software for SketchUp, enabling designers to experience their designs in real-time. Say Goodbye to Group Courses: Welcome to our Personalized Learning Experience! Why Choose Us? Our Course Benefits Include: â One-on-One Training: Experience personalized coaching from practicing architects and designers tailored exclusively for you. 1-on-1, Face to Face at (SW96DE) or Live online. Open: Monday to Saturday 9 am to 7 pm. Customized Tutorials: Take home bespoke video tutorials designed to enhance your learning journey. Comprehensive Resources: Receive a digital reference book for thorough revision, ensuring you grasp every concept. Free Ongoing Support: Enjoy continuous after-course support via phone or email, guaranteeing your success even after the class ends. Flexible Syllabus: We adapt syllabus and projects to match your needs, ensuring you learn precisely what matters most to you. Official Certificate: Certificate upon course completion. Why Us? Supported Individual Learning: Our courses, ranging from 10 hours to 120 hrs Diploma training Courses, offer unwavering support at every step. With personalized homework assignments and free after-course assistance, we pave the way to mastering software with unparalleled guidance. Personalized Attention, Not Crowded Classrooms: Bid farewell to crowded classrooms. Experience the intimacy of one-on-one learning. This ensures you receive the undivided attention you deserve, fostering a confident and comfortable learning environment. Financial Flexibility: Embarking on your educational journey shouldn't be a financial burden. We offer a variety of payment plans tailored to your needs. Discover the options available to you and start your learning adventure today. Expert Instructors, Real-world Insight: Our instructors are experts meticulously chosen for their extensive industry knowledge and passion for teaching. They are dedicated to imparting invaluable skills to anyone eager to learn.

Stitch Sampler Crochet Course – Make a Bolster or Cushion Cover 4 x2 hour sessions – Cheam
By Merrian Holland
Crochet class in Surrey. Learn some new crochet stitches and make a bolster or cushion cover in a friendly setting.

“You don't take a photograph. You make it" - Ansel Adams Photography For Parents - Editing In Lightroom Next course starts 11 March 2024 Editing is an essential skill for anyone with even just a passing interest in photography. Much as we try, we can't always get everything right in camera and editing tools help us bring our vision to life, help correct problems and allow our images to look beautifully polished. We teach how to do all these things in Adobe Lightroom because it's a powerful, intuitive and affordable tool used by Pros around the world for that very reason. KEY COURSE INFO: Course type: Instructor-led Course duration: 4 weeks + prep module Course format: Online course with interactive edit-along live classes, feedback on your learning and support group WHAT YOU LEARN: From being able to correct issues such as over/under exposure, issues with colour or graininess to bringing your vision to life, creating mood and tone to your images, knowing how to use editing software is a must. But good and purposeful editing goes way beyond just slapping on a preset or a filter - in our course we teach you all about the tools - not just what all of them do but how, and we teach you how to know what to use and when to achieve certain effects.everything you need to allow you to style your photos, confidently use the software and fix common problems. editing to correct common photo problems creating good editing workflow using powerful precision tools editing to achieve beautiful skin tones using light and colour creatively editing to bring out a mood of a feel THIS IS THE COURSE FOR YOU IF : Love taking photos but want them to look more polished - with colours that pop and light that's perfectly balanced You want to be able to fix common issues such as under- or overexposure, white balance or colour casts so that you never need to bin an image just because it wasn't right straight out of camera You want to get more creative with light and colour to make the images look just like the moment felt. Bring on the moody edits or sun soaked edits or light kissed skin tones or creative black and white conversions You want to confidently use the editing techniques so you can bring your vision to life every time, without guesswork You want to be able to prepare your images for print so that your walls can beam with pride at the beauty that you captured Next Editing in Lightroom course starts 11 March 2024 4 core course modules plus prep module Support Facebook group Weekly edit-along live webinar Practice files to learn on Feedback on your images HERE IS WHAT YOU WILL LEARN in this course : Our Photo Editing in Lightroom course guides you through the photo editing process in Adobe Lightroom from start to finish – from setting it up correctly, organising your collections and creating a workflow that works for you, through learning the capabilities of all the editing tools - such as adjusting exposure, colours, light or sharpening the images; all the way to printing and creating photo books. We’ll show you how to create specific artistic effects ( high impact Black and white, vintage, light and airy, dark and moody etc ), and how to fix common photography problems ( grainy images, underexposed images, wrong colours etc). At the end of the course you will be able to confidently manage your photo collection with Lightroom, achieve desired artistic effects and make your photos truly stand out. Getting around in Lightroom and Lightroom Classic - shooting in full manual - but with clarity and purpose Correcting common problems - whether your photo started too dark or too bright, your child's face was in a shade, the white balance and colours were off, the grain was heavy, the light looked dull - you can fix it all within a couple of clicks in Lightroom Using Lightroom's super powerful intelligent masking tools to quickly and efficiently edit specific parts of your image - from brightening up the eyes to rescuing overblown skies Enhancing and adding beautiful light - light makes images stand out, but it can be hard capturing the atmosphere it creates in camera at times. Lightroom is where you can bring light to life and make your images feel how what you saw in real life Knowing how to shoot in camera so you can get the most in editing - photographers will often purposefully under or overexpose images in camera so that they have more chance of balancing the image just they way they want in Lightroom. INSIDE THE MODULES - aka WHAT DO YOU LEARN? Module 0: Getting set up in Lightroom This module is released a week before the course starts to give you a chance to fully familiarise yourself with the layout, structure and the best way of working in Lightroom Classic, including guidance of creating a smooth selection and culling process that helps you see and keep the best of your images, without getting bogged down with 100s near duplicates. Module 1: Getting Started In Lightroom - Global Edits In this module we introduce you to Lightroom's most powerful tools - the global edits. We help you understand how to tweak your images to achieve the effects you're after quickly - from adjusting over and under exposure, to correcting white balance in a few different ways, to having a play with my favourite Lightroom tool - the tone curve. Major Takeaways: At the end of the module you will have gained full control of lightroom key global tools and will be able to use them to correct any global - as in affecting the whole image - issues with your images. This includes perfecting your exposure, balancing your colour and white balance, sharpening and creating clarity and more. Module 2: Targeted Edits - Masks! Lightroom allows us to apply edits to selected parts of the image through a range of its very powerful, intelligent and manual masks. This means you can now effortlessly select your subject from the photo to adjust them separately with just one click, you can pick only the sky, the subject's eyes or only colour green or any other element and treat them differently to the rest. Major Takeaways: You will be able to use the full range of masks in lightroom and apply your edits exactly where they are needed, and nowhere else. This includes working with with the new AI powered masks which can detect a person's individual features and allow you to selectively edit them in a few simple steps, as well as those more manual tools, that allow you to literally paint with light and colour on your photographs. Module 3: Creative Editing in Lightroom This is a brand new module in our course where we take all the tools introduced in Modules 1 and 2 and actually use them to achieve different effects on our photos. Wer show you how to be guided by light when editing, how to achieve a light and airy or a moody edit on your images, how to add light and how to convert to black and white, as well as how to edit skin in Lightroom! This module is all play! Major Takeaways: You will learn how to create yoru own editing process - from knowing where to start and to understanding what elements of your photograph may need or benefit from adjusting and knowing how you can do so to achieve different outcomes. You will also learn how to edit your skin tones so they look delightful - no matter what your subject's complexion. Module 4: After the edits We close the course with a module centered around all the things you might want to do after the edits - from preparation for print, creating photo books, but also sharing your images online and syncing them between different machines and adobe workplaces. PLUS there is a little Photoshop intro so you get a glimpse at how it's different and what it can do. Major Takeaways: You will learn how to connect all of your Adobe ecosystem and sync and share your images across multiple devices. You will learn how to prepare your images for print so they look their very best and how to create photobooks. Next course starts 11 March 2024 Absolutely, without a doubt book Editing. I was very unsure at first. My interest in photography is to capture those memories so it felt like it was 'cheating' to edit. I can honestly say it's like magic.To finish off the pictures you love and just give you complete control over the exposure, colours to make them perfect, to rescue the disasters etc. I learnt so much in those few weeks and it made the biggest difference to my photos. Kerry White Editing in LIGHTROOM Book your space now: COURSE STARTS : 11 March 2024 ( 4 weeks + 1 prep week)COURSE COST : £179 ( payment plans available ) What’s included: 4 weekly modules with step by step illustrated tutorials and videos + prep module weekly edit along class online class ( also recorded) - on Wednesday evenings feedback and advice on your edits private support group PDF workbook and downloadable videos Practice images to learn on Join our next group to really bring life to your images and make them look sleep, polished and full of light COURSE PREREQUISITES: Lightroom or Lightroom Classic CC software installed on your computer or tablet. RECOMENDED : Lightroom Photography Plan 25GB – a monthly subscription at approx £9pm – including Lightroom CC, Lightroom Classic CC and Photoshop. This plan can also be occasionally purchased at a lower price via Amazon or Groupon if you purchase a year’s worth of subscription in one go ( average savings – around 2-4 months worth depending on the deal) Please note that Adobe also has a Lightroom Plan with 1TB of storage – we do not recommend this plan as it restricts you to one version of software only. The increased Cloud storage can always be purchased as an add on or your plan can be switched from Photographer plan to CC only at a later stage if you prefer.

GTi Gel Polish
By The Beauty Click Academy
Gel Polish treatments are an increasingly popular treatment within the professional beauty industry. Gel Polish is applied to the client’s nail and then cured using an LED or UV lamp to create a longer lasting nail treatment (up to 3 weeks) than a standard manicure. Not only does this treatment keep clients happy due to its long-lasting effects, clients will need to return to the salon to have the gel polish removed, guaranteeing you repeat bookings. On completion of the course you will receive a certificate and a recognised, insurable qualification. All tools/products required for the course will be provided on the day. No take home kit included on this course. Includes: Hard copy take home training manual. Duration – Fast track half day practical classroom-based training plus online theory work. Theory work to be completed in your own time via The Guild student portal before your practical course date. Practical day – 5PM – 8PM. It is advisable that students arrive 15 mins early to ensure a prompt start. Qualification - GTi award. Widely recognisable and insurable qualification, allowing you to deliver this treatment on the paying general public. Class size - Maximum 8 students in a class
A pioneering provider of independent mentoring services For adults who are training to be teachers and Early Career Teachers (ECTs), our mission is to support and empower aspiring educators as they navigate their journey towards becoming skilled and confident professionals in the teaching profession. As a mentorship program tailored specifically for adults pursuing a teaching career, we understand the unique challenges and expectations placed upon trainees in the profession. We are committed to providing comprehensive and personalised support to help trainees meet the teaching standards set by the Department for Education in England. The teaching standards and expectations in England Our experienced mentors are well-versed in the teaching standards and expectations in England. We provide guidance and practical assistance to trainees in areas such as lesson planning, classroom management, assessment strategies, and creating inclusive learning environments. Our aim is to help trainees develop a deep understanding of the curriculum, pedagogical approaches, and effective teaching techniques. Planning Planning is a crucial aspect of a teacher's role, and we offer specialised support to trainees in this area. Our mentors work closely with trainees to develop effective lesson plans that align with curriculum requirements and engage students in meaningful learning experiences. We provide guidance on designing differentiated instruction to meet the diverse needs of students, fostering a supportive and inclusive classroom environment. Confidence Confidence is essential for success in the teaching profession, and we are dedicated to helping trainees build their self-assurance. Our mentors provide individualised coaching and feedback, helping trainees develop their teaching skills, classroom presence, communication abilities, and interpersonal skills with other staff. We create a safe and supportive environment where trainees can explore their strengths, identify areas for growth, and gain the confidence needed to deliver impactful lessons and engage with students and the wider school community effectively. High quality resources In addition to planning and confidence-building, GLA Tutorsoffers a range of other support services to trainees. We provide resources and guidance on effective behavior management strategies, assessment and feedback techniques, and effective use of technology in the classroom. Our mentors also offer guidance on professional development opportunities, helping trainees stay updated with the latest educational research and best practices in teaching. A collaborative and ongoing process At GLA Tutors, we believe that mentorship is a collaborative and ongoing process. Our mentors build strong relationships with trainees, offering ongoing support, guidance, and encouragement throughout their training and early career stages. We understand the challenges and triumphs that trainees may encounter, and we are dedicated to helping them navigate their journey towards becoming successful and impactful teachers. ChooseGLA Tutorsas your trusted partner in your teaching journey. With our experienced mentors, personalised support, and comprehensive resources, we are committed to helping you meet the teaching standards, develop as a confident educator, and make a positive impact in the lives of your students. Invest in your future as a teacher and join us at GLA Tutors today.