- Professional Development
- Medicine & Nursing
- Arts & Crafts
- Health & Wellbeing
- Personal Development
Certified Internet of Things Practitioner
By Mpi Learning - Professional Learning And Development Provider
In this course, students will learn general strategies for planning, designing, developing, implementing, and maintaining an IoT system through various case studies and by assembling and configuring an IoT device to work in a sensor network.

Certified ScrumMaster: In-House Training
By IIL Europe Ltd
Certified ScrumMaster®: In-House Training This course covers Scrum and the principles and tools required to be an effective ScrumMaster. You will come away with a good understanding of the Scrum framework and the underlying principles required to make effective decisions regarding the application of Scrum to different situations. At the end of the course, you will receive membership to the Scrum Alliance for two years and, following completion of an online test, will become a Scrum Alliance Certified ScrumMaster®. Our Certified Scrum Trainers pay the initial, two-year membership fee for each student who successfully completes our Certified ScrumMaster® course. This membership fee also covers the cost of the CSM Test. A link to the test will be sent to you following your course. The CSM test has a passing score of 37 out of 50 questions within a 60-minute timeframe. You will have two attempts within 90 days after you receive your welcome e-mail to pass the test at no cost. After two attempts or 90 days, you will be charged $25 for each additional attempt. What you will Learn At the end of this program, you will be able to: Provide a clear understanding of the fundamental principles of Scrum Use the principles, practices, and tools required to be an effective ScrumMaster Make effective decisions regarding the application of the Scrum framework to different situations, including: Practical, project-proven practices The essentials for getting a project off on the right foot How to write user stories and structure your product backlog How to help both new and experienced teams be more successful How to successfully scale Scrum Tips and tricks from the instructor's many years of using Scrum in a wide variety of environments Getting Started Introduction Course structure Course goals and objectives Agile Principles and Scrum Overview Agile Principles Lean Principles Process control models Incremental and Iterative development Shifting the focus on product management Overview of the Scrum process The Team Dedicated cross-functional teams T-shaped people Sprint Planning Team capacity Facilitating the Sprint Planning meeting The Sprint backlog Sprint Burndown chart Scrum Roles and Responsibilities The team and building effective teams ScrumMaster responsibilities Product Owner responsibilities The Scrum project community What happens to traditional roles in Scrum? Scrum Meetings Daily Scrum Reviews Retrospectives Product Backlog and User Stories Product backlog characteristics User stories Getting your first backlog Getting backlog items ready Slicing User stories Estimation for Forward Planning Why comparative estimation works Planning poker Affinity estimation Release Planning and Tracking Progress Velocity Release planning Tracking release progress Scaling Scrum Scrum of Scrums Scaling the product backlog Scaling across a program and business areas Distributed teams

Certified ScrumMaster
By IIL Europe Ltd
Certified ScrumMaster® This course covers Scrum and the principles and tools required to be an effective ScrumMaster. You will come away with a good understanding of the Scrum framework and the underlying principles required to make effective decisions regarding the application of Scrum to different situations. At the end of the course, you will receive membership to the Scrum Alliance for two years and, following completion of an online test, will become a Scrum Alliance Certified ScrumMaster®. Our Certified Scrum Trainers pay the initial, two-year membership fee for each student who successfully completes our Certified ScrumMaster® course. This membership fee also covers the cost of the CSM Test. A link to the test will be sent to you following your course. The CSM test has a passing score of 37 out of 50 questions within a 60-minute timeframe. You will have two attempts within 90 days after you receive your welcome e-mail to pass the test at no cost. After two attempts or 90 days, you will be charged $25 for each additional attempt. What you will Learn At the end of this program, you will be able to: Provide a clear understanding of the fundamental principles of Scrum Use the principles, practices, and tools required to be an effective ScrumMaster Make effective decisions regarding the application of the Scrum framework to different situations, including: Practical, project-proven practices The essentials for getting a project off on the right foot How to write user stories and structure your product backlog How to help both new and experienced teams be more successful How to successfully scale Scrum Tips and tricks from the instructor's many years of using Scrum in a wide variety of environments Getting Started Introduction Course structure Course goals and objectives Agile Principles and Scrum Overview Agile Principles Lean Principles Process control models Incremental and Iterative development Shifting the focus on product management Overview of the Scrum process The Team Dedicated cross-functional teams T-shaped people Sprint Planning Team capacity Facilitating the Sprint Planning meeting The Sprint backlog Sprint Burndown chart Scrum Roles and Responsibilities The team and building effective teams ScrumMaster responsibilities Product Owner responsibilities The Scrum project community What happens to traditional roles in Scrum? Scrum Meetings Daily Scrum Reviews Retrospectives Product Backlog and User Stories Product backlog characteristics User stories Getting your first backlog Getting backlog items ready Slicing User stories Estimation for Forward Planning Why comparative estimation works Planning poker Affinity estimation Release Planning and Tracking Progress Velocity Release planning Tracking release progress Scaling Scrum Scrum of Scrums Scaling the product backlog Scaling across a program and business areas Distributed teams
FURNITURE DESIGN TRAINING
By Real Animation Works
Furniture design face to face training customised and bespoke.
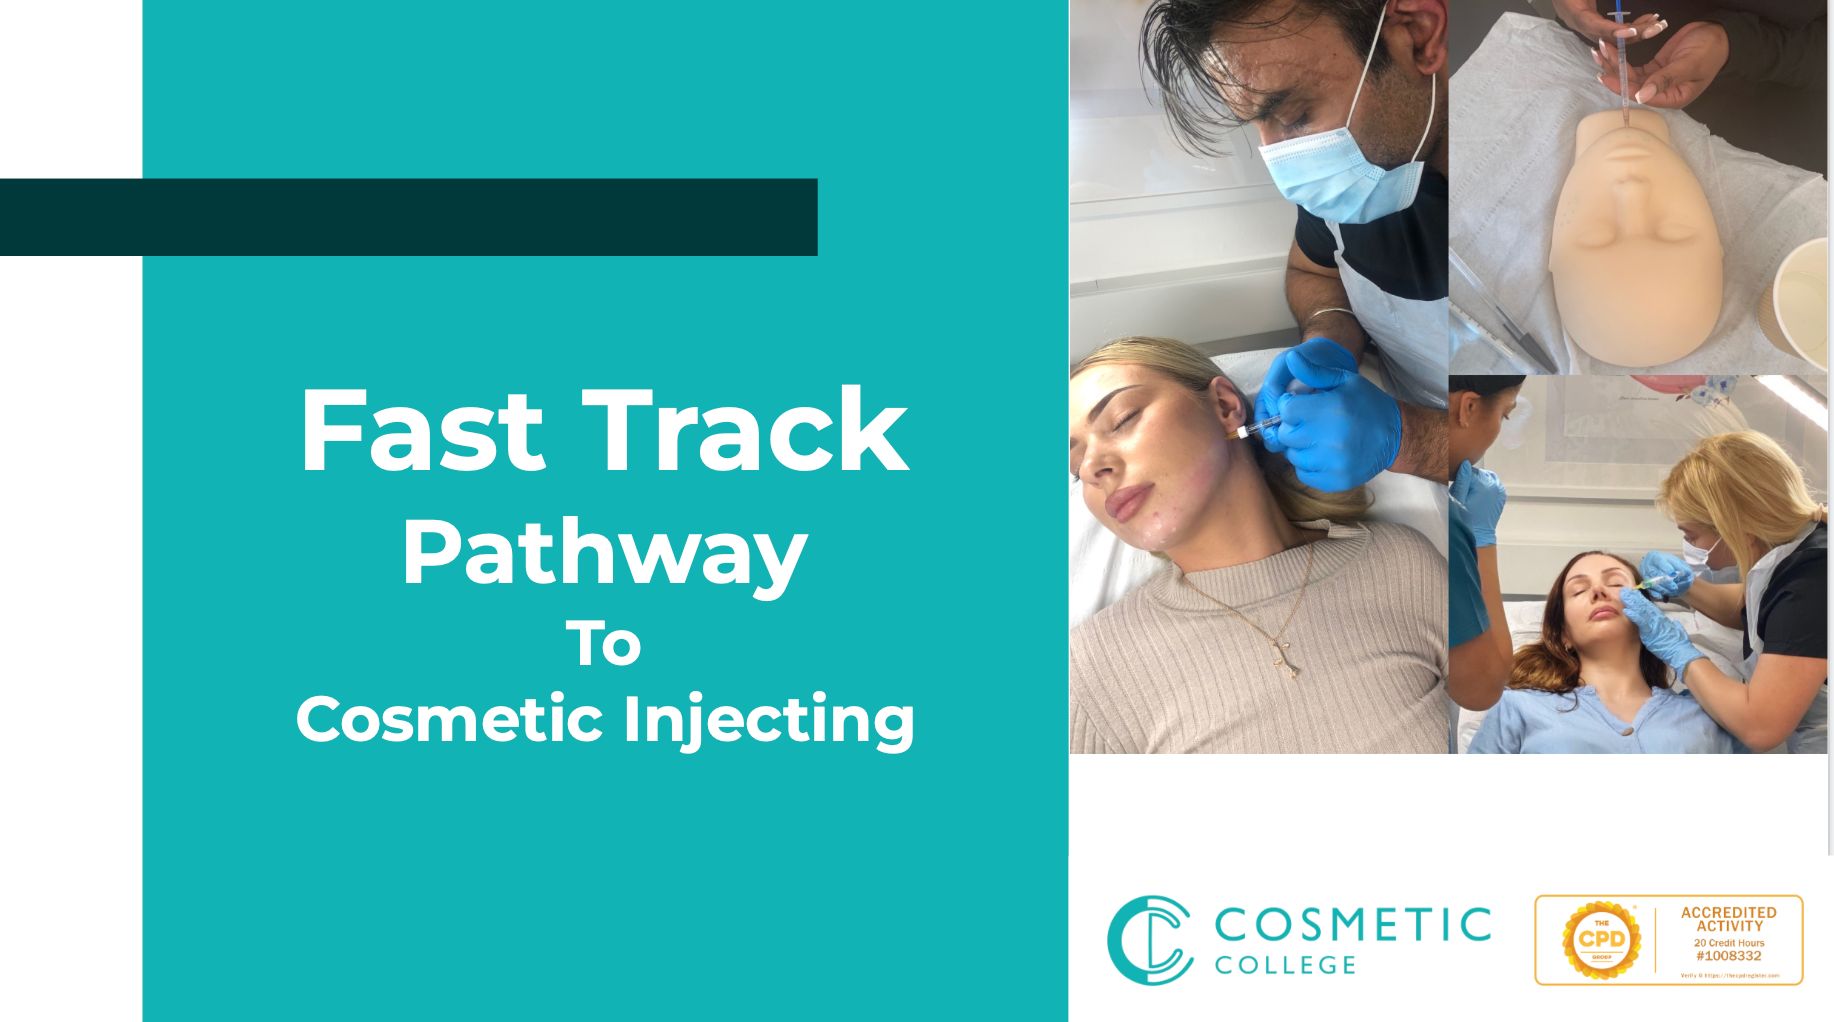
Fast Track To Aesthetics - Dermal filler training
By Cosmetic College
Are you looking to start a career in aesthetics but need the prerequisites for a traditional course? Look no further! Cosmetic College offers a fast-track pathway to becoming an accredited and insurable cosmetic injector. Our five day course is designed specifically for non-medics who want to pursue a career in aesthetics but need to meet the standard course prerequisites. Expert practitioners and educators deliver our course with years of industry experience. We prioritise safety and ensure that all learners will leave the system with the competency and knowledge necessary to perform injectables and aesthetic procedures with confidence. Before starting the course, you'll complete online pre-study and virtual lectures to give you a solid foundation in anatomy and physiology, health and safety, contraindications, complications, first aid, and infection control. Then, you'll spend 6-8 days of practical training, depending on your chosen course path, to hone your skills and get hands-on experience. Our fast-track pathway to injectables covers various topics, including microneedling, B12 dermaplaning, foundation lip dermal fillers, and more. To enrol in our fast-track course, you must be at least 21 years of age and have a good command of English. You should also be able to learn independently and have a strong desire to build a career in aesthetics. Invest in your future with Cosmetic College's fast-track pathway to injectables. With our comprehensive curriculum, expert instructors, and hands-on training, you'll be ready to start your aesthetic career. Take advantage of this opportunity to fast-track your aesthetic career. Enrol in our fast-track pathway to injectables today! Course Entry Requirements: Minimum age of 21 years Good command of English Be able to learn independently A strong desire to build a career in Aesthetics Course Pre-Study/Practical & Length: Online study and virtual lectures A series of online assessments Five days of practical training Course Agenda: Microneedling B12 Dermaplaning Foundation Lip Dermal Fillers Anatomy and Physiology Anaphylaxis Awareness Infection control Sharps and hazardous waste Complication management First aid Course Benefits Student Benefits Comprehensive Education: Our training program provides a comprehensive education on dermal fillers, equipping you with the knowledge and skills necessary to excel in the field of aesthetics. You will gain a deep understanding of facial anatomy, product selection, injection techniques, safety protocols, and patient assessment. Practical Hands-on Experience: We emphasise practical training, giving you ample opportunities to practice your skills under the guidance of experienced trainers. Working with live models will enhance your confidence and proficiency in performing dermal filler treatments. Industry-Standard Techniques: You will learn industry-standard techniques for administering dermal fillers, ensuring that you provide safe and effective treatments to your clients. This knowledge will enable you to achieve natural-looking results and meet the expectations of your clients. Personalised Guidance and Mentorship: Our trainers are highly experienced professionals who will provide personalised guidance and mentorship throughout the training. They will address your questions, offer constructive feedback, and help you refine your techniques, ensuring your continuous growth and improvement. Business and Marketing Support: In addition to the technical skills, we provide guidance on the business aspects of aesthetics. You will learn strategies for building and marketing your aesthetics practice, attracting clients, and maximizing your earning potential. This knowledge will empower you to establish a successful career in aesthetics. Client Benefits Expertise and Safety: Clients will have confidence knowing that you have received comprehensive training in dermal fillers. Your expertise will enable you to provide safe and high-quality treatments, minimising the risks and complications associated with the procedures. Natural and Desired Results: Through your training, you will be able to deliver natural and desired results to your clients. Your understanding of facial anatomy, product selection, and injection techniques will allow you to enhance their features, rejuvenate their appearance, and boost their self-confidence. Professionalism and Trust: By enrolling in our training program, you demonstrate your commitment to professionalism and continuous learning. Clients will trust in your skills and knowledge, knowing that you have received proper training from a reputable institution. Earning Potential Earning potential in the aesthetics industry can be significant. As a trained professional in dermal fillers, you can offer sought-after services to clients. The increasing demand for aesthetic treatments, combined with your expertise and ability to deliver exceptional results, can lead to a thriving client base and increased earning potential. The Fast Track To Aesthetics - Dermal Filler Training provides you with the foundation and skills necessary to capitalise on these opportunities and maximise your earning potential in the aesthetics field. Frequently Asked Questions Is this training suitable for beginners with no prior experience in aesthetics? Absolutely! Our Fast Track To Aesthetics program is designed to cater to beginners who are new to the field of aesthetics. We provide comprehensive training that covers the fundamentals of dermal fillers, ensuring that you gain the necessary knowledge and skills to start your journey in aesthetics. What topics are covered in the training program? Our training program covers a wide range of topics including facial anatomy, patient assessment, product selection, injection techniques, safety protocols, and client management. You will also receive hands-on training with live models to practice your skills under the guidance of experienced trainers. Are the trainers experienced in the field of aesthetics? Yes, our trainers are highly experienced professionals with extensive knowledge and practical experience in the field of aesthetics. They are dedicated to providing you with the guidance and support you need to excel in your training.
Application of Structural Geology in Seismic Interpretation
By EnergyEdge - Training for a Sustainable Energy Future
About this Training Course Seismic interpretation requires an understanding of structural development and its interrelation with the stratigraphic system. Bias and misunderstanding have unfortunately resulted in countless dry holes. So go beyond tracing horizons and understand their context within the structural system by extracting key information from seismic surveys and other datasets. In this 5 full-day training course, participants will learn a variety of modern structural concepts and techniques and their role in the interpretation of seismic data. Using an applied 'hands-on' approach, participants will be exposed to a diversity of worldwide case examples with complementary exercises - both of an individual and group nature. The course is designed from an applied standpoint, with numerous examples and hands-on exercises from the petroleum industry. This course can also be offered through Virtual Instructor Led Training (VILT) format. Training Objectives By the end of this course, the participants will be able to: Go beyond tracing horizons and marking faults and truly understand the structural and stratigraphic system. Understand the role of tectonics and deformation in the formation of various types and orientations of geologic structures. Understand the interaction of the structural system with the stratigraphic and sedimentologic environment for better prediction of reservoir formation. Integrate data from the large seismic scale to subseismic scale, including seismic anisotropy, to understand better the overall petroleum system. Learn about the common pitfalls of interpretation. Target Audience This course is intended for geologists, geophysicists, reservoir engineers, and exploration/production managers. Course Level Intermediate Trainer Your expert course leader received his B.S. and M.S. degrees in Geology from the now University of Louisiana-Lafayette in 1989 and 1990 respectively, and his Ph.D. as a National Science Foundation fellow at Baylor University, Waco, Texas, in 1993. From 1994 - 1996, he studied planetary tectonics as a NASA-funded postdoctoral fellow at Southern Methodist University. In 1996, he returned to UL-Lafayette, where he was awarded in 1997 the Hensarling-Chapman Endowed Professorship in Geology. He began independent consulting activities in 1991, and in 2001, he left academia for full-time consulting for clients ranging from one-man shops to supermajors. He rejoined UL-Lafayette as an adjunct professor from 2011 - 2018. He is an active researcher, receiving several million dollars in grants from federal, state, and industry sources, presenting numerous talks, including a 2019 AAPG Levorsen award, and publishing on a diversity of geoscience topics, including a Grover E. Murray Best Published Paper award in 2017. He is co-author of the inaugural GCAGS/GCSSEPM Transactions Best Student Paper award in 2018. He served as the GCAGS Publisher since 2006 and in various GCAGS/GCSSEPM Transactions editing capacities since 2006, including the 2014 and 2017 - 2022 Editor (named Permanent Transactions Editor in 2017), and Managing Editor since 2011, receiving a GCAGS Distinguished Service Award in 2018. He served as the General Chair for GeoGulf 2020 (70th GCAGS/GCSSEPM Convention), the 1st hybrid geoscience conference in the world. He is a Past President of the Lafayette Geological Society and served as its Editor and Publisher from 2002 - 2018. In 2018, he founded the Willis School of Applied Geoscience, reformulating decades of industry-training experience to provide alternative opportunities for graduate-level education. In 2020, he received an Honorary Membership from GCSSEPM. He also joined the LSU faculty as an adjunct professor in 2020. In 2021, he co-founded the Society of Applied Geoscientists and Engineers, serving as its President, General Chair for the SAGE 2022 Convention & Exposition, and Vice-Chair for the Benghazi International Geoscience & Engineering Conference 2022 (BIGEC 2022). POST TRAINING COACHING SUPPORT (OPTIONAL) To further optimise your learning experience from our courses, we also offer individualized 'One to One' coaching support for 2 hours post training. We can help improve your competence in your chosen area of interest, based on your learning needs and available hours. This is a great opportunity to improve your capability and confidence in a particular area of expertise. It will be delivered over a secure video conference call by one of our senior trainers. They will work with you to create a tailor-made coaching program that will help you achieve your goals faster. Request for further information about post training coaching support and fees applicable for this. Accreditions And Affliations

Navigating Petrophysics: Log Analysis, LWD & Wireline
By EnergyEdge - Training for a Sustainable Energy Future
About this Training Course Petrophysics remains a vital component to many facets of the petroleum industry, from quantification of hydrocarbon reserves to developmental strategies to real-time decision making for reservoir navigation. Targeted at awareness to knowledge level, this course addresses the tenets of petrophysics and formation evaluation, using integrative perspective of multiple datasets, including geological, geophysical, and logging and core data. Significant worldwide case histories are included, as well as several exercises designed to provide hands-on experience. This course can also be offered through Virtual Instructor Led Training (VILT) format. Training Objectives By attending this course, the participants will be able to: Understand better the latest geological, geophysical, and logging/core technologies and their role in petrophysical analysis, formation evaluation, and reservoir characterization. Address the pros and cons of key datasets, with emphasis on need for integrative studies and calibration of datasets. Apply quick-look qualitative techniques as well as quantitative aspects to understand vital aspects such as volume of shale/clay, porosity, permeability, and water saturation determinations. Select tool combinations to resolve key issues and for specific applications. Assess uncertainty in petrophysical measurements and techniques and its influence on reserve estimation. Target Audience This course is recommended for development and exploration geologists, petrophysicists, log and core analysts, geophysicists, petroleum engineers, managers, and technical personnel. Course Level Intermediate Trainer Your expert course leader received his B.S. and M.S. degrees in Geology from the now University of Louisiana-Lafayette in 1989 and 1990 respectively, and his Ph.D. as a National Science Foundation fellow at Baylor University, Waco, Texas, in 1993. From 1994 - 1996, he studied planetary tectonics as a NASA-funded postdoctoral fellow at Southern Methodist University. In 1996, he returned to UL-Lafayette, where he was awarded in 1997 the Hensarling-Chapman Endowed Professorship in Geology. He began independent consulting activities in 1991, and in 2001, he left academia for full-time consulting for clients ranging from one-man shops to supermajors. He rejoined UL-Lafayette as an adjunct professor from 2011 - 2018. He is an active researcher, receiving several million dollars in grants from federal, state, and industry sources, presenting numerous talks, including a 2019 AAPG Levorsen award, and publishing on a diversity of geoscience topics, including a Grover E. Murray Best Published Paper award in 2017. He is co-author of the inaugural GCAGS/GCSSEPM Transactions Best Student Paper award in 2018. He served as the GCAGS Publisher since 2006 and in various GCAGS/GCSSEPM Transactions editing capacities since 2006, including the 2014 and 2017 - 2022 Editor (named Permanent Transactions Editor in 2017), and Managing Editor since 2011, receiving a GCAGS Distinguished Service Award in 2018. He served as the General Chair for GeoGulf 2020 (70th GCAGS/GCSSEPM Convention), the 1st hybrid geoscience conference in the world. He is a Past President of the Lafayette Geological Society and served as its Editor and Publisher from 2002 - 2018. In 2018, he founded the Willis School of Applied Geoscience, reformulating decades of industry-training experience to provide alternative opportunities for graduate-level education. In 2020, he received an Honorary Membership from GCSSEPM. He also joined the LSU faculty as an adjunct professor in 2020. In 2021, he co-founded the Society of Applied Geoscientists and Engineers, serving as its President, General Chair for the SAGE 2022 Convention & Exposition, and Vice-Chair for the Benghazi International Geoscience & Engineering Conference 2022 (BIGEC 2022). POST TRAINING COACHING SUPPORT (OPTIONAL) To further optimise your learning experience from our courses, we also offer individualized 'One to One' coaching support for 2 hours post training. We can help improve your competence in your chosen area of interest, based on your learning needs and available hours. This is a great opportunity to improve your capability and confidence in a particular area of expertise. It will be delivered over a secure video conference call by one of our senior trainers. They will work with you to create a tailor-made coaching program that will help you achieve your goals faster. Request for further information about post training coaching support and fees applicable for this. Accreditions And Affliations
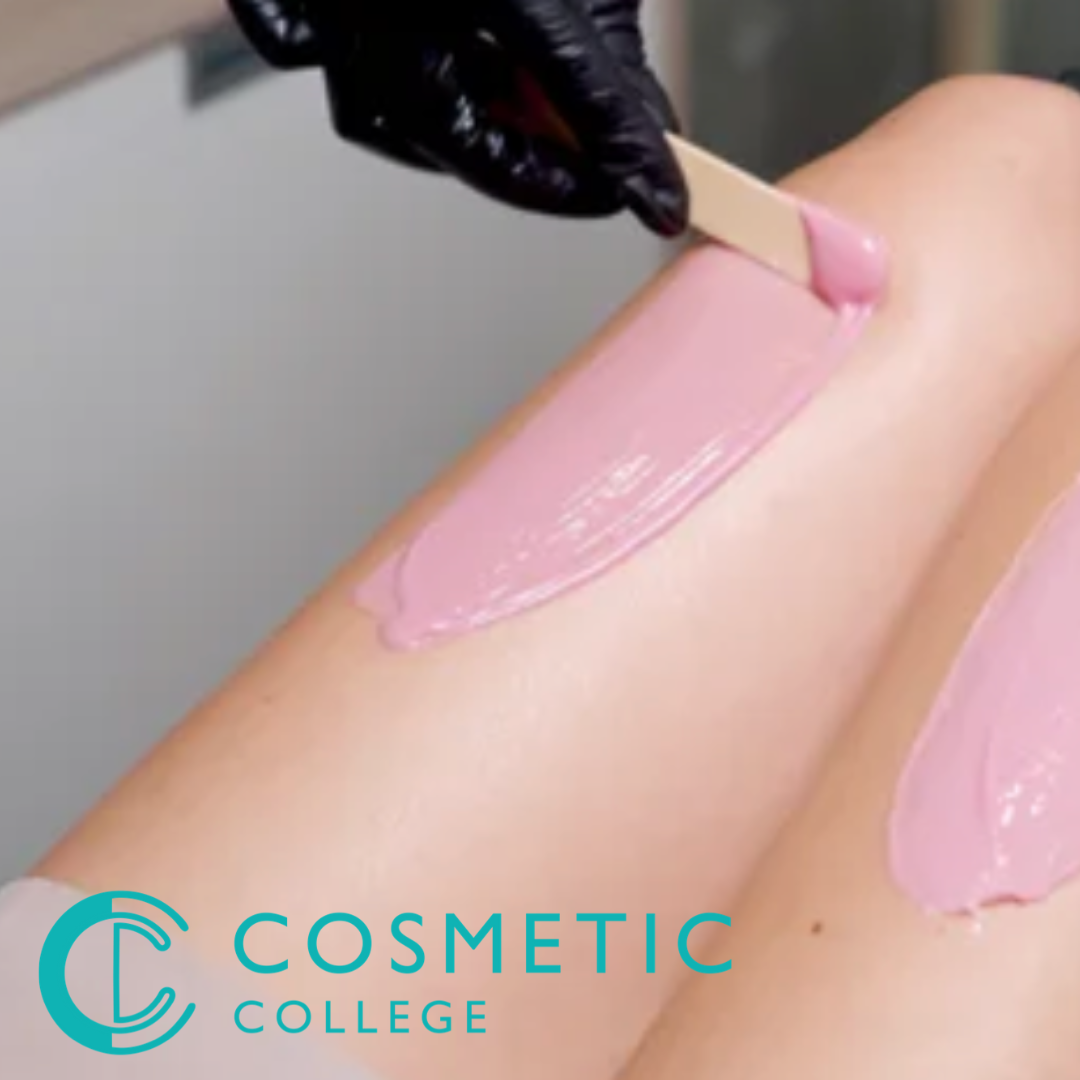
Face & Body Waxing Course
By Cosmetic College
This course is designed to teach students how to safely and successfully carry out a variety of waxing treatments. Our course offers a blend of practical training and online learning to give you the knowledge and skills to deliver face and body waxing services to your clients. Our courses are kept intimate with a maximum of 6 learners to a class. Course Prerequisites We accept students aged 18 and over. The student must have good written and spoken English. Course Agenda Health, safety & hygiene Consultation techniques Contraindications Different types of waxing products Use of hot and warm wax Aftercare advice Pre-study Intimate Waxing theory Professional live demo Practical training 1 model Practical areas covered: Legs Underarms Lip Chin Bikini

Manicure Course
By Majestic Academy
Manicure is one of the most widely practiced beauty rituals. This course covers the entire manicure procedure using the Spa Ritual line of products. The course is focused on the natural nail, hand and lower forearm anatomy and physiology for a comprehensive understanding of the manicure process. THE REQUIREMENTS No experience is necessary to attend this course. Salon attire must be worn during the course. Student must have clean nail without enhancements. To ensure maximum practice students will be required to work on each other throughout the day. Student need to bring own model for the day 3. COURSE CONTENT Theoretical part: Day 1 /time 10am-18pm Methods of working safely & hygienically and the principles of avoiding cross-infection. Client consultation / record keeping The structure of the natural nail / Contra indications Nail Diseases / Disorders/ Importance of Sanitising and Sterilising Importance of a professional work area and environment / How to organise a workspace Nail treatment preparation Nail Shapes & shine effect Procedure for Manicure (demonstration) Polish Techniques (French & Dark Colour - demonstration) Hand and Nail Treatment (Spa Ritual, Paraffin Wax, Warm Oil ritual) Home care & aftercare advice Practical Part Day 2 / time 10am – 18pm Tool and Product Introduction Manicure Procedures Hand and Nail Treatment Spa Ritual, Paraffin Wax, Warm Oil ritual Hand Massage Nail Painting Professional Advice and tips on fixing mistakes Common problems Exam Day 3 Students need to come with own model. Practical exam duration is 2 hours. Certificates will be issued after the completion of the exam. Price included Kit for work, upon successful completion an course certificate will be awarded