- Professional Development
- Medicine & Nursing
- Arts & Crafts
- Health & Wellbeing
- Personal Development
607 Courses in London
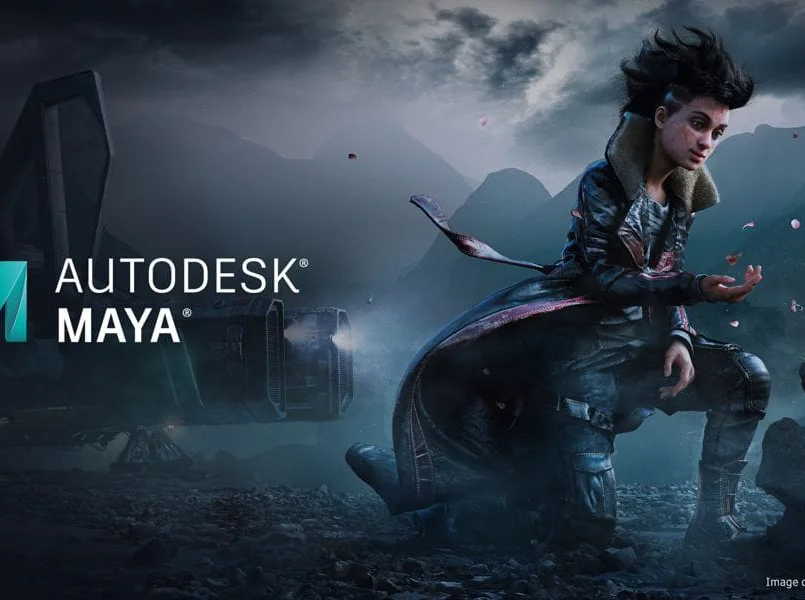
Maya Essentials Basic to Fundamental Training Program
By ATL Autocad Training London
Autodesk Maya Basic to Fundamentals Training. Ideal for beginners, learn to navigate Maya's interface, create models, apply textures, animate objects, and delve into advanced topics. Engage in interactive in-person or online sessions. Access recorded lessons for review and receive lifelong email support. Learn 3D modeling and animation - enroll today! Click here for more info: Website Duration: 10 hours of immersive learning. Method: Personalized 1-to-1 sessions and Choose your own day and time Monday to Saturday 9 am to 7 pm. Course Overview: I. Introduction to Maya (1 hour) Maya overview and applications Basic interface and navigation tools Project creation and management II. 3D Modeling Techniques (2 hours) Polygon modeling fundamentals Creating, editing, and refining objects Advanced techniques like extrusions and bevels III. Texturing and Materials (1 hour) Introduction to texturing concepts Material creation and application Texture mapping, UV unwrapping, and image importing IV. Lighting and Rendering (1.5 hours) Basic lighting techniques and composition setup Rendering images and animations effectively Output options and file formats V. Animation Skills (2.5 hours) Keyframe animation and animation curves Character rigging and animation Special effects: particles, fluids, explosions, and smoke VI. Intermediate Modeling Techniques (1 hour) NURBS modeling basics and advanced curves/surfaces manipulation Creating organic shapes with NURBS and sculpting tools VII. Conclusion and Next Steps (0.5 hours) Course review and recap Further learning resources and tips Q&A and feedback session Autodesk Maya Basic to Fundamentals Training Course Key Learning Areas: Advanced modeling techniques: Surfaces, Polygons, Subdiv Modeling, etc. Deformation methods: Twist, Lattice, Flare, Bend Shape manipulation: Lines, Pen tools, Revolve, Loft, Planer, Text in Maya Animation: Keyframes, Path animations, Timeline Texturing and Rendering: Diffuse, Reflections, Transparency, Shaders, Resolution settings Lighting and Camera: Basic & advanced lights, Shadows, Camera effects, Path animation Note: The course content and duration are adaptable to cater to learners' needs and proficiency levels. Maya Interface Proficiency: Participants will develop a comprehensive understanding of Maya's interface, tools, and workflow, allowing them to navigate seamlessly and manage projects efficiently. 3D Modeling Skills: Students will be equipped with polygon modeling techniques to create both basic and complex 3D models with precision. They will master the art of shaping and refining objects, elevating their creativity in 3D design. Texturing and Materials Mastery: Learners will gain expertise in texturing, applying materials, and incorporating images to enhance the visual appeal of their 3D models. They will create captivating surfaces with colors, textures, and reflectivity. Lighting and Rendering Expertise: Participants will learn essential lighting techniques to illuminate their scenes effectively. They will set up cameras and produce high-quality still images and dynamic animations with Maya's powerful rendering capabilities. Animation Techniques: Students will explore the world of animation, utilizing keyframe techniques and animation curves to bring their creations to life. They will delve into character rigging, animating characters with sophistication and realism. Special Effects and Dynamics: Learners will unleash their creativity with mesmerizing particle systems, fluid simulations, and dynamic effects. They will craft captivating visuals, such as explosions and smoke, adding depth and excitement to their projects. Intermediate Modeling Techniques: Participants will refine their skills with NURBS modeling, mastering curve and surface manipulation. They will create intricate organic shapes, pushing the boundaries of their artistic expression. Creative Problem-Solving: Throughout the course, students will tackle real-world projects, facing challenges that foster creative problem-solving skills. They will gain confidence in overcoming obstacles in 3D modeling and animation. Maya Essentials Basic to Fundamental Training Program: Course Focus: Autodesk Maya Essentials, covering fundamental concepts and techniques. Duration: Flexible scheduling, tailored to individual learning pace. Method: Personalized 1-1 training, interactive sessions, hands-on projects. Curriculum Highlights: Introduction to Maya (1 hour): Interface overview, navigation, project management. 3D Modeling Techniques (2 hours): Polygon basics, object creation, advanced editing. Texturing and Materials (1 hour): Texture mapping, material application, UV unwrapping. Lighting and Rendering (1.5 hours): Lighting fundamentals, composition setup, effective rendering. Animation Skills (2.5 hours): Keyframe animation, character rigging, special effects. Intermediate Modeling (1 hour): NURBS modeling, organic shapes, sculpting tools. Conclusion and Next Steps (0.5 hours): Course review, learning resources, Q&A session. These resources will complement your training, providing additional support and insights as you explore the world of Autodesk Maya. Explore the World of 3D Animation: Master the intricacies of 3D computer graphics and animation using Autodesk Maya. Delve into modeling, texturing, animation, and rendering to bring your creative visions to life. Practical Learning Experience: Dive into hands-on projects refining your skills. Craft 3D models, apply textures, animate characters, and produce polished renders. Recognized Industry Expertise: Gain proficiency in Autodesk Maya, a leading software in entertainment, gaming, and animation. Enhance your employability with highly sought-after skills, opening doors to diverse career paths. Endless Applications: Uncover Maya's versatility in entertainment, architectural visualization, product design, and more. Tailor your expertise to align with your passions and career aspirations. Reinforcement through Recordings: Access comprehensive lesson recordings for thorough review. Revisit specific topics, reinforcing your grasp of Autodesk Maya at your own pace. Continuous Guidance: Receive lifetime email support for ongoing mentorship. Seek answers, clarifications, and expert advice, ensuring your continuous growth even after completing the course.

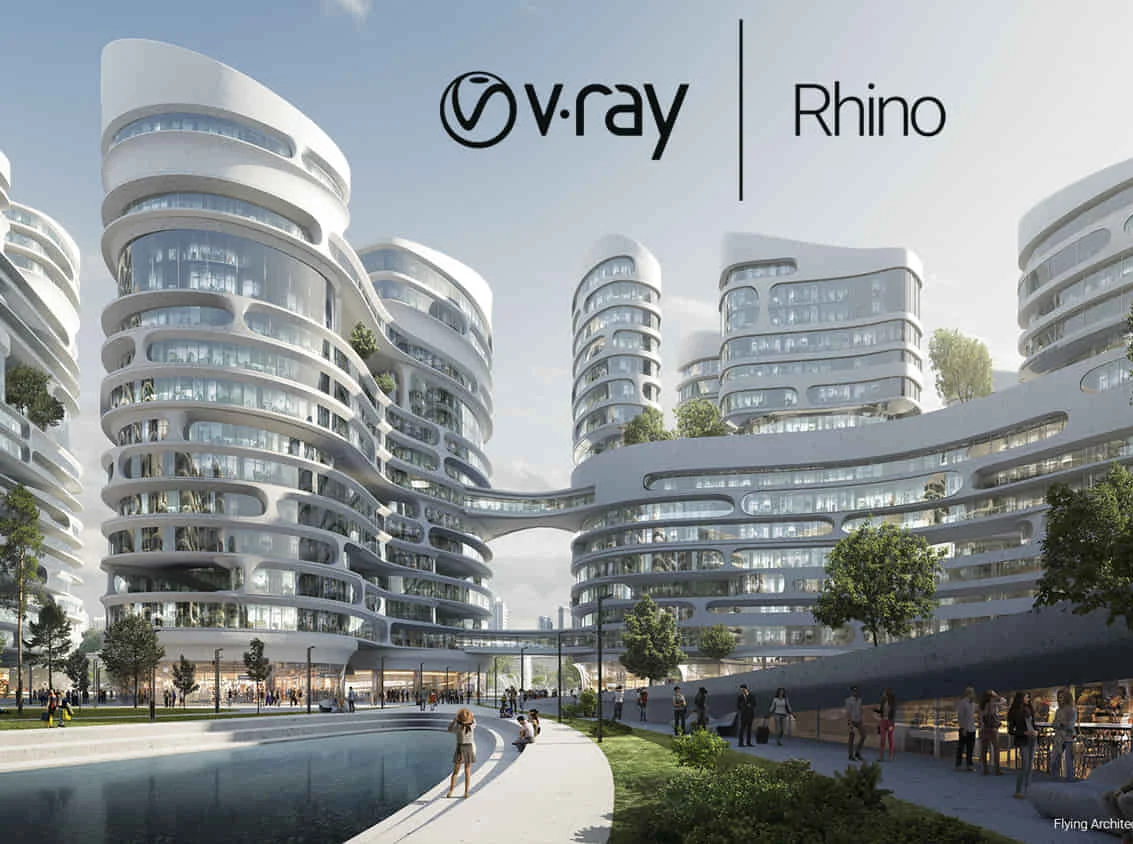
V-Ray for Rhino Essentials Training
By ATL Autocad Training London
Why Choose V-Ray for Rhino Essentials Training? Master photorealistic rendering in Rhino with our intensive V-Ray training. Led by certified experts, learn lighting, material manipulation, rendering configurations, textures, and global illumination. Check our Website Training Duration: 10 hours Approach: 1-on-1, in-Person and Live online and Customized Content. Flexibility: 1-on-1 sessions scheduled at your convenience, from Mon to Sat between 9 am and 7 pm. Vray for Rhino Essentials - 10 Hours Course Session 1: Introduction to Vray and Rhino Integration Overview of Vray: Understanding its importance in architectural and product visualization. Setting up Vray in Rhino: Installation, basic configurations, and interface exploration. Understanding the Rhino-Vray workflow: Navigating between Rhino and Vray seamlessly. Session 2: Basic Lighting Techniques Exploring different light sources: Domes, spotlights, and area lights. Adjusting light intensity and color temperature for realistic ambiance. Creating natural lighting scenarios: Daylight, twilight, and night scenes. Session 3: Mastering Material Creation Introduction to Vray materials: Diffuse, reflection, refraction, and bump maps. Crafting realistic materials: Wood, glass, metal, and fabrics. Utilizing the material editor efficiently for precise adjustments. Session 4: Advanced Rendering Configurations Global Illumination: Understanding photon mapping and irradiance mapping. Fine-tuning render settings: Quality vs. speed, resolution, and anti-aliasing. Exploring Vray frame buffer: Post-processing and image enhancement. Session 5: Texture Manipulation and Mapping Understanding UV mapping: Unwrapping complex geometries for accurate textures. Applying textures in Vray: Diffuse, bump, displacement, and normal maps. Realistic texture manipulation: Scaling, rotation, and blending textures seamlessly. Session 6: Camera Settings and Scene Composition Camera configurations: Focal length, depth of field, and exposure settings. Composing visually appealing scenes: Rule of thirds, focal points, and balance. Rendering interior and exterior scenes: Managing lighting challenges and reflections. Session 7: Real-Time Feedback and Interactive Rendering Introduction to Vray interactive rendering: Real-time feedback for quick adjustments. Utilizing Vray's denoiser for noise reduction in interactive mode. Enhancing productivity with interactive rendering: Modifying materials and lighting on the fly. Session 8: Optimizing Render Times Efficient render optimization techniques: Reducing noise and enhancing quality. Distributed rendering: Utilizing multiple machines for faster rendering. Troubleshooting common rendering issues: Flickering, artifacts, and texture problems. Session 9: Post-Processing and Presentation Post-production in Photoshop: Enhancing renders, adding depth, and adjusting colors. Creating compelling visual narratives: Adding people, context, and atmosphere. Designing professional presentation boards: Layout, annotations, and graphic elements. Session 10: Final Project and Portfolio Review Participants showcase their final Vray-rendered projects. Instructor-led critique and feedback session. Tips for building a strong portfolio: Choosing the best renderings and presenting your work effectively. By the end of this 10-hour course, participants will have a comprehensive understanding of Vray for Rhino, enabling them to create photorealistic renderings and significantly enhance their design visualization skills. Upon completing the Vray for Rhino Essentials course, participants will: Master Lighting Techniques: Expertly utilize various light sources. Create realistic lighting scenarios for diverse scenes. Advanced Material Proficiency: Manipulate complex materials and textures for lifelike renders. Understand reflective surfaces and material interaction. Optimize Rendering Settings: Fine-tune render configurations for optimal quality and speed. Implement noise reduction techniques for cleaner renders. Texture Mapping Mastery: Perfect UV mapping methods for accurate texture application. Seamlessly blend textures for realistic surface mapping. Effective Camera Use and Composition: Configure camera settings, depth of field, and exposure. Compose visually appealing scenes for impactful renders. Real-Time Rendering Skills: Utilize interactive rendering for immediate feedback and adjustments. Enhance scenes in real time for efficient workflow. Post-Processing Expertise: Enhance renders in post-production using software tools. Add depth, adjust colors, and create visually compelling final images. Professional Presentation Techniques: Design layouts, annotations, and context to create impactful visual narratives. Curate a strong portfolio with the best-rendered projects. By honing these skills, participants will produce photorealistic renders and significantly enhance their architectural and product visualization capabilities. Skills You'll Gain: Master lighting techniques for realistic visualization. Learn material manipulation and texture enhancement in Vray. Understand advanced rendering configurations for high-quality results. Explore global illumination concepts for lifelike scenes. Career Opportunities: Upon completing Vray for Rhino Essentials, you'll be well-equipped for various roles in the design and visualization industry, including: Architectural Visualizer: Create stunning architectural visualizations for presentations and client approvals. Product Designer: Enhance product design by creating photorealistic prototypes and visualizations. Interior Designer: Craft immersive interior spaces with realistic lighting and material textures. 3D Visualization Artist: Work in animation studios, gaming companies, or marketing agencies, producing high-quality 3D visualizations. Freelance Rendering Specialist: Offer your skills on platforms like Upwork or Fiverr, providing rendering services to clients worldwide. Course Highlights: Acquire fundamental skills in V-Ray for Rhino, covering lighting, materials, and rendering setups. Explore advanced techniques for lifelike textures, reflections, and global illumination effects. Master the workflow for crafting architectural renderings, both interior and exterior. Harness the power of V-Ray features like proxies, fur, and particle systems for dynamic visuals. Optimize render times and quality using efficient techniques and expert tips. Validate your expertise with a Certificate of Completion, showcasing your V-Ray proficiency. Access recorded lessons for future reference, enabling self-paced learning and continuous improvement. Professional Guidance: Learn from certified tutors and industry experts with extensive practical experience. Gain valuable insights and personalized feedback as you progress through the course, ensuring a comprehensive understanding of V-Ray for Rhino.
Vray for Architects and Interior Designers 3ds max or Sketchup Training
By London Design Training Courses
Why Choose Vray for Architects and Interior Designers 3ds max or Sketchup Training Course? Click here for info Achieve stunningly realistic renders with our tailored course in V-Ray. Designed for experienced SketchUp and 3ds max users, this advanced training covers model preparation and rendering techniques, customized to your skill level and preferences. Duration: 10 hrs. Method: 1-on-1, Personalized attention. Schedule: Tailor your own hours of your choice, available from Mon to Sat between 9 am and 7 pm. SketchUp is renowned for its user-friendly interface and widespread usage in 3D modeling. Now, with V-Ray for SketchUp, users can take advantage of a powerful rendering tool for unparalleled visualization quality and realism. V-Ray seamlessly integrates into the SketchUp environment, allowing for efficient rendering within your existing workflows. Our course is ideal for those seeking to enhance their SketchUp proficiency by incorporating V-Ray's potent rendering capabilities for 3D models. We adapt the training to your current skill levels in both SketchUp and V-Ray and tailor the content to your modeling requirements and desired rendering quality. V-Ray Rendering Training Course. Course Duration: 10 hours Course Description: This 10-hour course enhances rendering skills with V-Ray, a leading 3D visualization engine. Participants master photorealistic renders, focusing on lighting, materials, and post-production. Covering key concepts, workflow, lighting techniques, material creation, rendering settings, and post-processing, the course ensures stunning visual results. Course Outline: Module 1: Introduction to V-Ray Rendering (1 hour) Overview of V-Ray and its role in 3D rendering Understanding the rendering workflow Setting up V-Ray for your 3D software platform Module 2: Essential Rendering Concepts (1 hour) Understanding global illumination and its impact on renders Exploring image sampling and antialiasing techniques Introduction to render elements for post-processing Module 3: Lighting Techniques (2 hours) Mastering various lighting types in V-Ray Creating natural lighting with HDRI maps Implementing artificial lighting with V-Ray lights Achieving realistic daylight with V-Ray sun and sky Module 4: Material Creation (2 hours) Creating realistic materials using V-Ray material editor Applying textures and procedural maps for added realism Understanding material reflections and refractions Advanced techniques for materials like glass, metal, and fabric Module 5: Rendering Settings and Optimization (1.5 hours) Exploring V-Ray rendering settings for different scenarios Understanding render output options and resolution settings Efficiently using V-Ray distributed rendering for faster results Module 6: Post-Processing with Photoshop (1.5 hours) Enhancing renders through post-processing techniques Compositing render elements for added control Adjusting colors, contrast, and lighting in Photoshop Adding effects and final touches to achieve photorealism Module 7: Advanced Rendering Techniques (1 hour) Working with V-Ray proxies and instancing for complex scenes Utilizing V-Ray displacement for intricate detailing Understanding depth of field and motion blur effects Module 8: Real-World Project (1 hour) Applying the skills learned to complete a real-world rendering project Guidance and feedback from the instructor

Maya Evening Learning Sessions
By ATL Autocad Training London
Maya Evening Learning Sessions. Maya Evening Learning Sessions offer flexibility for professionals, interactive classes, supportive community, and skill enhancement in a convenient after-work schedule. Perfect for work-life balance and continued education. Click here for more info: Website Tailored Learning: Custom curriculum catering to your skill level. Course Duration: 10 hours. Approach: 1-to-1 Schedule: Craft your learning path by pre-booking hours from Mon to Sat, 9 am to 7 pm, accommodating your convenience. Maya 10-Hour Course Key Details: Duration: 10 hours of intensive training. Approach: Hands-on, interactive sessions focusing on essential Maya concepts and techniques. Curriculum Highlights: Introduction to Maya: Understanding the software interface and basic tools. 3D Modeling: Mastering polygon modeling techniques and object manipulation. Texturing and Materials: Learning to apply textures, materials, and UV mapping. Lighting and Rendering: Exploring lighting setups, camera compositions, and rendering methods. Animation Fundamentals: Grasping keyframe animation, editing clips, and basic character rigging. Special Effects and Dynamics: Creating particle systems, fluid simulations, and basic special effects. Who Should Attend: Beginners: Individuals new to 3D modeling and animation. Aspiring 3D Artists: Those aiming to pursue careers in animation, gaming, or visual effects. Creative Professionals: Designers and artists looking to expand their skill set into 3D graphics. Job Opportunities: Completing this Maya course equips participants with the skills necessary for various roles, including: 3D Modeler: Creating detailed 3D models for games, movies, or simulations. Animator: Bringing characters and scenes to life through animation. Texture Artist: Designing textures and materials to enhance 3D models. Lighting Artist: Illuminating scenes to evoke specific moods and atmospheres. Visual Effects Artist: Specializing in creating stunning visual effects for films and games. Participants completing the Maya 10-Hour Course will: Master Maya basics including modeling, texturing, lighting, and animation. Create 3D models, apply textures, and understand lighting and rendering principles. Develop essential skills in animation and special effects. Troubleshoot common issues in 3D projects. Recommended Books: "Introducing Autodesk Maya 2022" by Derakhshani: Comprehensive guide with hands-on tutorials. "Maya Character Creation" by Maraffi: Focuses on character modeling and animation techniques. "The Animator's Survival Kit" by Williams: Timeless principles applicable to any animation software. Maya 10-Hour Course Key Details: Duration: 10 hours of intensive training. Approach: Hands-on, interactive sessions focusing on essential Maya concepts and techniques. Curriculum Highlights: Introduction to Maya: Understanding the software interface and basic tools. 3D Modeling: Mastering polygon modeling techniques and object manipulation. Texturing and Materials: Learning to apply textures, materials, and UV mapping. Lighting and Rendering: Exploring lighting setups, camera compositions, and rendering methods. Animation Fundamentals: Grasping keyframe animation, editing clips, and basic character rigging. Special Effects and Dynamics: Creating particle systems, fluid simulations, and basic special effects. Who Should Attend: Beginners: Individuals new to 3D modeling and animation. Aspiring 3D Artists: Those aiming to pursue careers in animation, gaming, or visual effects. Creative Professionals: Designers and artists looking to expand their skill set into 3D graphics. Job Opportunities: Completing this Maya course equips participants with the skills necessary for various roles, including: 3D Modeler: Creating detailed 3D models for games, movies, or simulations. Animator: Bringing characters and scenes to life through animation. Texture Artist: Designing textures and materials to enhance 3D models. Lighting Artist: Illuminating scenes to evoke specific moods and atmospheres. Visual Effects Artist: Specializing in creating stunning visual effects for films and games. Adaptable Evening Maya Classes In-Depth 10-Hour Maya Program Hands-On Maya Projects Professional Maya Expertise Diverse Maya Applications Guidance from Experts Tailored Learning Experience Ongoing Email Assistance Access to Maya Trial and Resources Ignite Your Creative Potential!
InDesign Evening Classes
By ATL Autocad Training London
Who is this for? InDesign Evening Classes. Refine your Adobe InDesign skills with expert tutors. Master layout creation, typography, and image manipulation. Design captivating brochures, magazines, and more. Choose between in-person or live online sessions. Earn a Certificate of Completion and enjoy lifetime email support. Explore our complimentary trial session. Check our Website Duration: 10 hours Approach: 1-on-1 sessions with tailored content. Schedule: 1-on-1 sessions, available Mon to Sat from 9 am to 7 pm. Course Title: Mastering Adobe InDesign Course Duration: 10 Hours Session 1: Introduction to Adobe InDesign (1 hour) Overview of Adobe InDesign interface Understanding tools and panels Setting up new documents and document properties Basic navigation and shortcuts Session 2: Mastering Page Layouts (1.5 hours) Working with master pages Creating and managing text frames and image placeholders Managing multiple pages and spreads Using grids and guides for precise layouts Session 3: Typography and Text Formatting (1.5 hours) Working with fonts, styles, and text formatting options Understanding text threading and linking Advanced text composition techniques Utilizing paragraph and character styles for consistency Session 4: Advanced Image Manipulation (1.5 hours) Importing and manipulating images and graphics Understanding image resolution and color modes Working with clipping paths and transparency Applying image effects and filters Session 5: Interactive Documents and Digital Publishing (2 hours) Creating hyperlinks and interactive buttons Embedding multimedia elements (audio, video) in documents Exporting documents for digital platforms (eBooks, PDF forms) Introduction to responsive design for various devices Session 6: Advanced Techniques and Special Effects (1 hour) Utilizing advanced drawing tools and shapes Applying special effects like drop shadows, transparency, and blending modes Working with tables and charts Introduction to data merge for personalized content Session 7: Printing and Prepress (1 hour) Understanding print terminology and specifications Preflighting documents for print readiness Color management and preparing files for different printing processes Exporting files for professional printing Session 8: Project Work and Review (0.5 hour) Participants work on a practical project applying learned skills Instructor-guided project review and feedback Session 9: Tips, Tricks, and Best Practices (0.5 hour) Time-saving shortcuts and productivity hacks Best practices for efficient workflow and file management Troubleshooting common issues and errors Session 10: Q&A and Certification (0.5 hour) Addressing participant queries and concerns Certificate distribution and course completion celebration This comprehensive 10-hour course aims to equip participants with advanced skills in Adobe InDesign, covering essential aspects of design, typography, interactivity, and print preparation. Participants will engage in hands-on activities, projects, and discussions to reinforce their learning throughout the course. By the end of this 10-hour advanced InDesign course, you will: Gain a comprehensive understanding of InDesign's most powerful features and advanced techniques. Create sophisticated page layouts with eye-catching special effects for professional-level designs. Efficiently manage fonts, colors, and shapes to enhance the visual appeal of your documents. Develop interactive PDFs with navigation, page transitions, and embedded video for engaging presentations. Master the use of character styles, paragraph styles, and word styles to streamline text formatting. Utilize advanced object styles and anchored objects for efficient layout design. Work effectively with Adobe Stock, Photoshop, Illustrator, and other Creative Cloud applications for seamless integration. Create PDF forms and implement interactive button-triggered animations for interactive documents. Optimize workflow with keyboard shortcuts, scripts, and advanced preferences for a smoother design process. Learn valuable tips and best practices from industry experts to boost your productivity and efficiency. Enhance your mastery of InDesign through our advanced program, meticulously designed to hone your skills. Explore intricate page layouts and seamlessly integrate captivating special effects into your projects. Our seasoned Adobe trainers, renowned for their approachable teaching style, will guide you through InDesign's powerful features, sharing invaluable insights derived from years of practical experience. This interactive course provides ample opportunities for hands-on practice, ensuring your confidence in harnessing InDesign's diverse technical capabilities. Key Course Highlights: In-depth exploration of InDesign's advanced functionalities. Individualized attention, fostering open discussions and encouraging questions. Expert trainers, small class sizes, and a supportive and collaborative learning environment. Comprehensive learning materials and resources, all inclusive. Continuous support for any post-course inquiries or concerns, ensuring your ongoing success. Enhance your InDesign proficiency, crafting polished designs effortlessly. Elevate your skills with our advanced course, ensuring: Thorough coverage of InDesign's technical capabilities. Personalized attention and ample opportunity for questions. Supportive, knowledgeable trainers in a comfortable learning environment. Comprehensive materials and resources for your learning journey. Continued assistance for post-course queries and concerns. Download InDesign
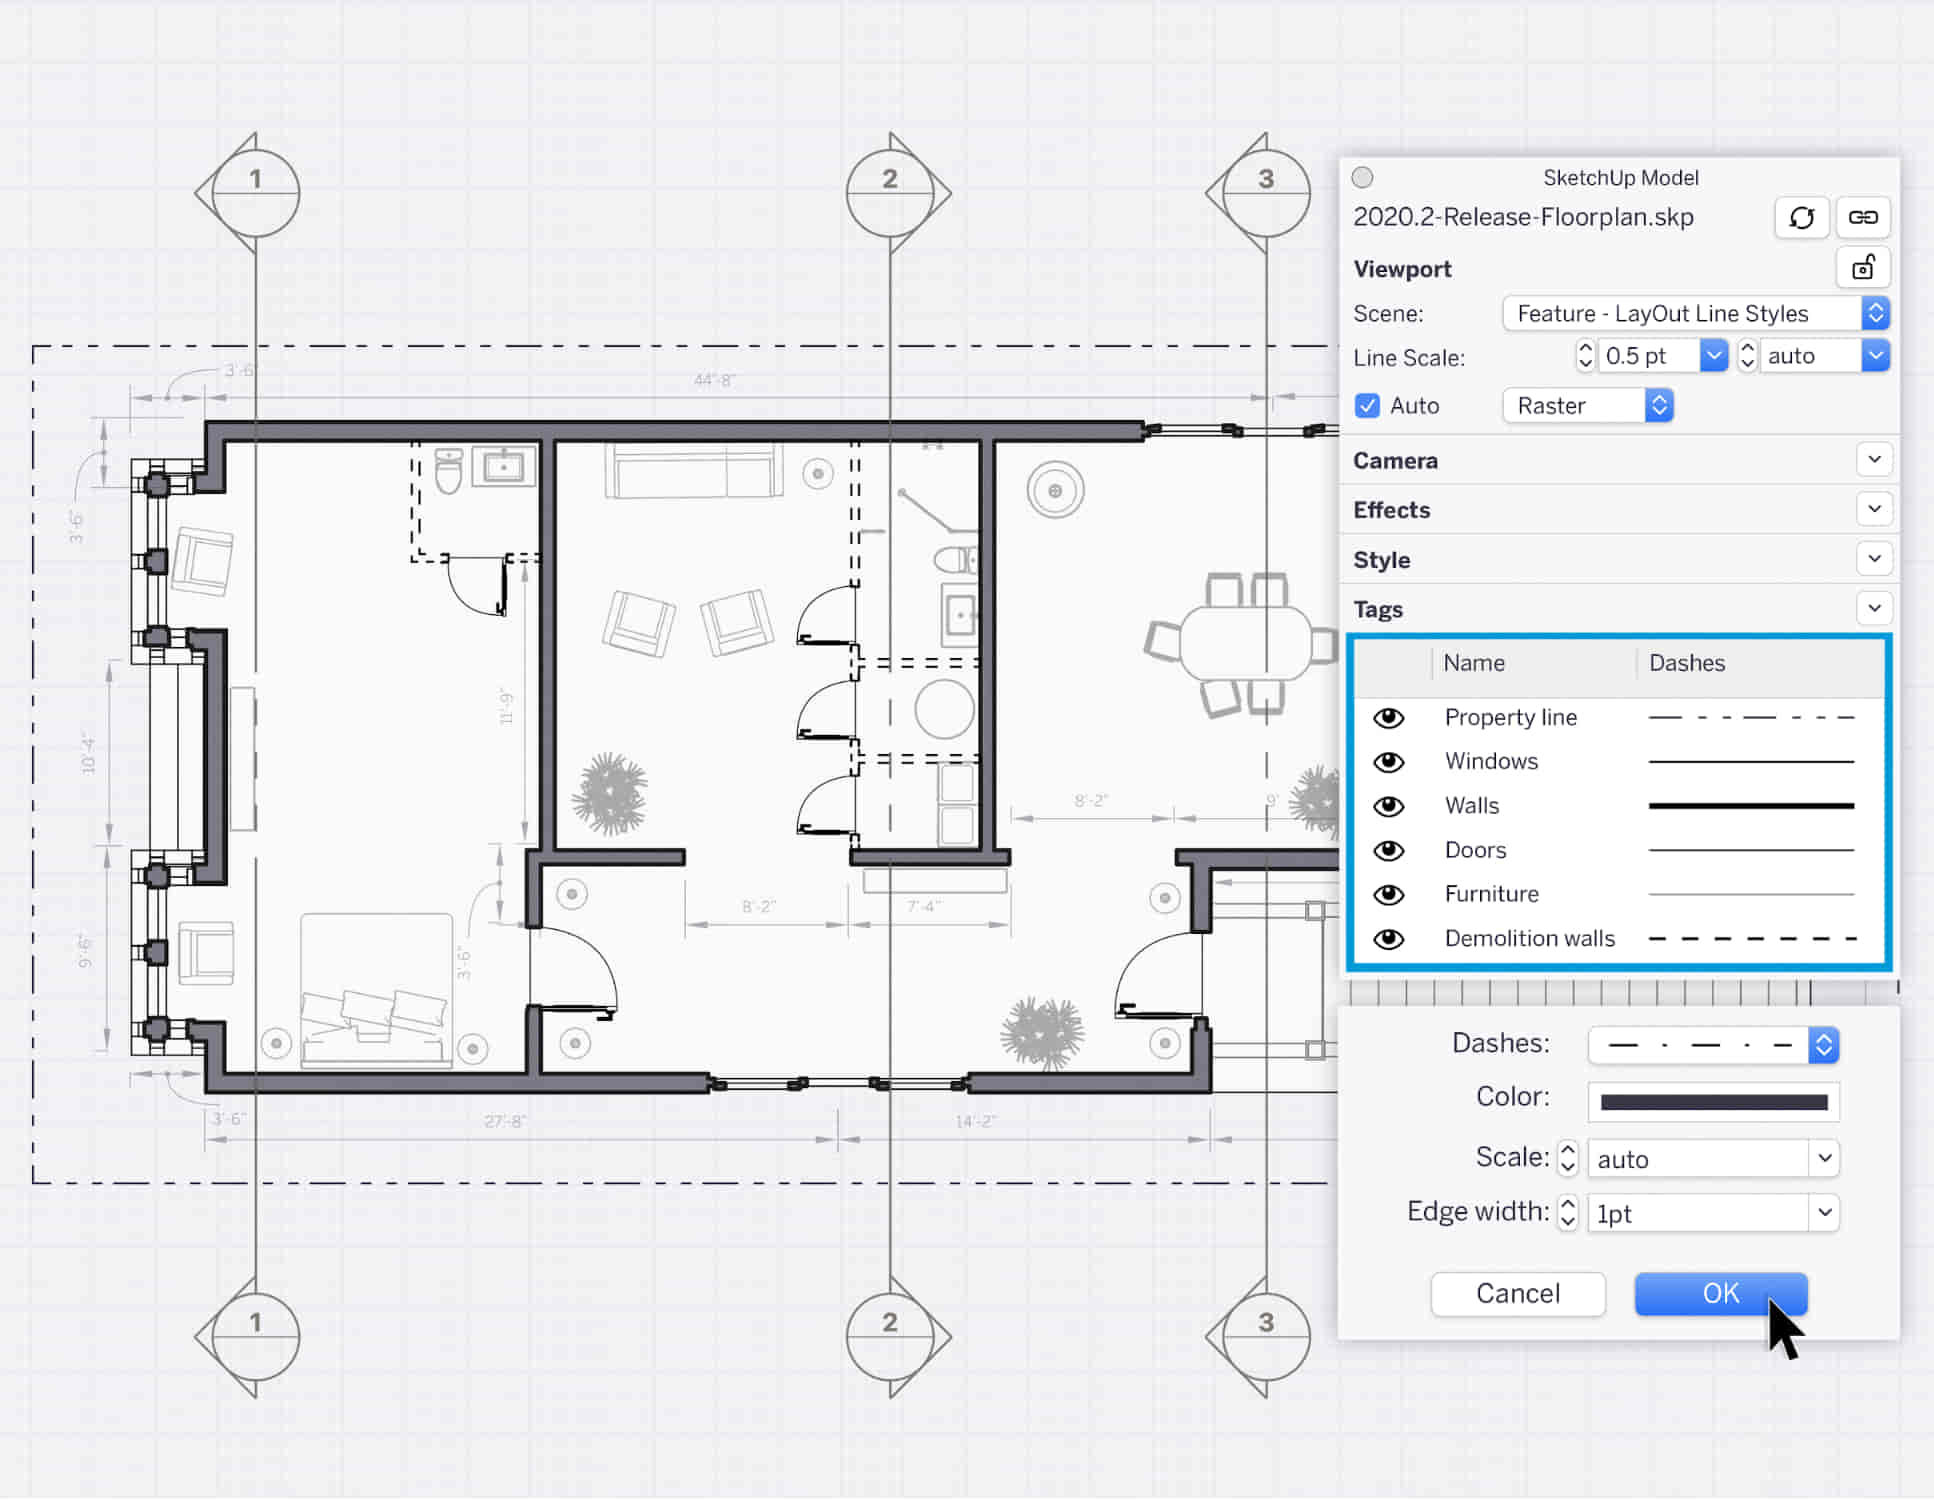
SketchUp Course With Layout and V-Ray
By ATL Autocad Training London
Why Opt for SketchUp Course With Layout and V-Ray? Learn SketchUp with Layout and V-Ray for professional 3D modeling, detailed modeling, and high-quality rendering. Essential for architects and designers for creating visualizations and precise presentations. Check our Website When can I Enrol? 1-on-1 training. Mon to Sat 9 am and 7 pm Book over the Phone 02077202581. Training Duration: 10 hours. You have the flexibility to split these hours over multiple days. Training Method: In-person or live online. Course Outline: SketchUp, Layout, and V-Ray - 10-Hour Training Module 1: Introduction to SketchUp (1 Hour) SketchUp Interface: Explore the basics of the SketchUp user interface. Navigation and View Tools: Learn how to navigate and manipulate 3D space. Module 2: SketchUp Fundamentals (1 Hour) Drawing and Modeling: Begin creating 3D objects and structures. Editing Tools: Manipulate and modify objects efficiently. Module 3: Advanced SketchUp Techniques (1 Hour) Components and Groups: Understand component and group organization. Layers and Scenes: Organize your model and create dynamic views. Module 4: SketchUp for Architectural Design (1 Hour) Architectural Modeling: Explore architectural modeling techniques. Interior Design: Apply SketchUp to interior space design. Module 5: Landscape Design with SketchUp (1 Hour) Landscape Modeling: Use SketchUp for outdoor environment design. Terrain and Topography: Model terrain and natural landscapes. Module 6: Introduction to Layout (1 Hour) Layout Basics: Get familiar with the Layout interface. Setting Up Viewports: Begin using viewports for presenting your SketchUp models. Module 7: Creating Layout Documents (2 Hours) Document Setup: Set up and customize your layout documents. Inserting SketchUp Models: Import SketchUp models into Layout viewports. Dimensioning and Labeling: Add dimensions and labels to your layout documents. Module 8: Presentation and Export (1 Hour) Styling and Rendering: Enhance your SketchUp models for presentations. Exporting and Printing: Learn how to export and print your Layout documents. Module 9: Introduction to V-Ray (1 Hour) V-Ray Interface: Get acquainted with the V-Ray user interface. Materials and Lighting: Learn the basics of materials and lighting in V-Ray. Module 10: Advanced V-Ray Rendering (1 Hour) Advanced Materials: Explore advanced material creation and customization. Realistic Lighting: Master V-Ray lighting techniques for photorealistic renders. By the end of this 10-hour course, you'll have a comprehensive understanding of SketchUp for 3D modeling, Layout for professional documentation, and V-Ray for rendering, empowering you to create stunning 3D designs and presentations. Upon completing this course, you will: Master SketchUp: Create 3D models with precision and creativity. Layout Proficiency: Produce professional design documentation. V-Ray Rendering Skills: Craft photorealistic visualizations. Advanced Techniques: Explore advanced modeling and rendering. Project Experience: Apply skills to real-world projects. Job Opportunities: Architectural Designer Interior Designer Landscape Designer CAD Technician 3D Modeler Rendering Specialist Visualization Artist Layout Specialist Freelance Designer Urban Planner Learning Objectives: Mastering SketchUp with Layout: Learn to create precise 2D floor plans, elevations, and construction documents using SketchUp's Layout tool. Advanced Rendering with V-Ray: Dive into V-Ray to create photorealistic renders, enhancing your visualizations with lighting, textures, and realistic materials. Collaborative Design: Develop skills for collaborative project planning and presentation, enabling effective communication with clients and teams. Job Opportunities: Architectural Visualization Specialist: Create detailed architectural visualizations and presentations for clients and marketing purposes. Interior Designer: Design interior spaces, produce detailed layouts, and create realistic renders for residential and commercial projects. 3D Visualization Artist: Work in the gaming or animation industry, creating 3D models and environments. Freelance Rendering Expert: Offer specialized rendering services to architectural firms, interior designers, or real estate developers. Layout Designer: Specialize in creating professional 2D layouts and construction documents for architectural projects. Why Choose Us? Tailored One-on-One Training: Personalized coaching from industry experts, in-person or online, Monday to Saturday. Customized Tutorials: Enhance skills with exclusive video tutorials designed for your learning journey. Comprehensive Resources: Access a digital reference book for thorough concept revision. Free Ongoing Support: Enjoy continuous assistance via phone or email even after the course ends. Flexible Syllabus: Adapted to your needs for focused and efficient learning. Official Certification: Ccertificate upon course completion. Why Us? Supported Individual Learning: Unwavering support with personalized homework and post-course assistance. Personalized Attention: Experience one-on-one learning, fostering a confident and comfortable environment. Financial Flexibility: Choose from various payment plans tailored to your budget. Expert Instructors: Learn from industry experts dedicated to your success.
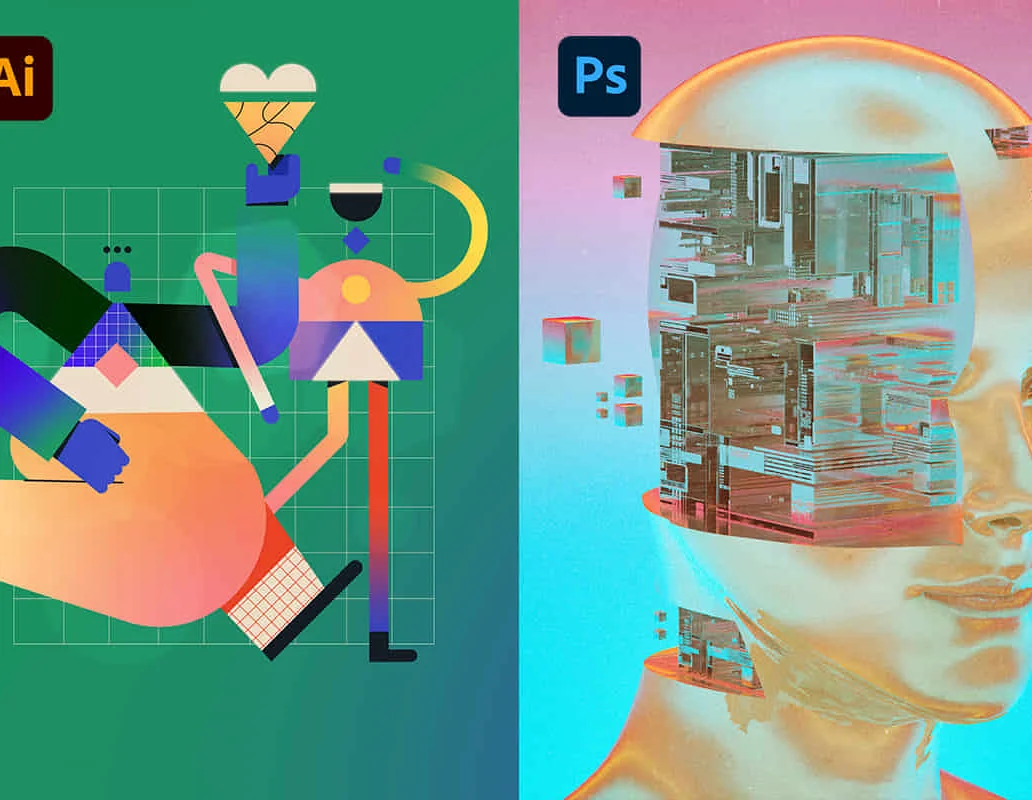
Adobe Illustrator and Photoshop Masterclass Training
By ATL Autocad Training London
Adobe Illustrator and Photoshop Masterclass Training, your gateway to Photoshop and Illustrator. Learn with the best software for publishing and marketing materials. This comprehensive training covers Photoshop, Illustrator, and InDesign, offering step-by-step tutorials tailored for creative professionals. Click here for more info: Website Duration: 10 hours Approach: Individualized, Tailored Content, Flexible Pace, Personal Support Scheduling Flexibility: 1-on-1 sessions from Mon to Sat, 9 am to 7 pm, based on your availability. Course Title: Adobe Photoshop and Illustrator Mastery Workshop Duration: 10 Hours (Divided into 10 Modules) Module 1: Introduction to Adobe Photoshop (1 hour) Familiarization with Photoshop interface and tools Understanding bitmap graphics and resolution Basic image editing techniques (cropping, resizing, color adjustments) Significance of layers in design Module 2: Essential Photoshop Tools (1 hour) Mastery of selection tools (Marquee, Lasso, Magic Wand) Understanding brushes and their settings Introduction to the Pen tool for precise selections Working adeptly with layers and layer styles Module 3: Advanced Image Editing (1 hour) Proficiency in advanced color adjustments (Curves, Levels, Hue/Saturation) Techniques for photo retouching and manipulation Creating composite images using blending modes Application of filters and special effects for creative designs Module 4: Introduction to Adobe Illustrator (1 hour) Exploration of Illustrator interface and tools Working with vector graphics and paths Basic shapes and drawing tools Understanding anchor points and handles Module 5: Creating Vector Artwork (1 hour) Expert use of the Pen tool for precise vector illustration Creating and editing shapes and objects Mastery in handling gradients and patterns Understanding the Appearance panel Module 6: Illustrator Typography (1 hour) Text tools and advanced formatting options Crafting text effects and artistic typography Integration of text with shapes and images Working adeptly with text on a path Module 7: Combining Photoshop and Illustrator (1 hour) Importing Illustrator files into Photoshop and vice versa Efficient use of smart objects and vector shapes in Photoshop Creation of custom brushes and patterns in Illustrator for seamless use in Photoshop Designing posters and flyers by combining elements from both software Module 8: Integration with InDesign (1 hour) Exporting assets from Photoshop and Illustrator for InDesign Crafting layouts in InDesign using assets from both programs Understanding print and digital design nuances Preparing files for printing and online use Module 9: Advanced Techniques and Tips (1 hour) Creating custom actions and automation in Photoshop Mastery in advanced selection techniques Utilizing Illustrator's advanced tools (Pathfinder, Shape Builder, etc.) Exploration of creative design styles and trends Module 10: Final Projects and Portfolio (1 hour) Individual or group projects incorporating Photoshop and Illustrator skills Detailed review and feedback on the projects Preparation of a portfolio showcasing the work Upon completion of the Adobe Photoshop and Illustrator Mastery Workshop, participants will: Master Advanced Design Techniques: Acquire expert skills in both Adobe Photoshop and Illustrator, delving into advanced tools, filters, and effects for intricate design work. Seamlessly Integrate Software: Learn to seamlessly integrate Photoshop and Illustrator, enabling the creation of dynamic and visually appealing designs by leveraging the unique strengths of both programs. Develop Creative Problem-Solving: Cultivate creative problem-solving abilities by exploring diverse design styles and industry-relevant trends, empowering the creation of innovative and captivating visuals. Construct Professional Portfolios: Gain the expertise to construct professional portfolios, showcasing a diverse range of projects incorporating advanced Photoshop and Illustrator techniques. Collaborate on Real-World Projects: Collaborate effectively on real-world design projects, combining Photoshop and Illustrator skills to produce high-quality marketing materials, promotional content, and digital artwork. Career Opportunities: Upon mastering Photoshop and Illustrator, participants can pursue a range of creative careers, including: Graphic Designer: Craft visually appealing designs for print and digital media, ranging from marketing materials to social media graphics. Digital Illustrator: Create intricate digital illustrations and artworks for various applications, including book covers, digital publications, and games. Web Designer: Develop engaging and user-friendly website layouts and elements, optimizing user experience through appealing visuals. Advertising Artist: Design compelling advertisements for print and online platforms, captivating audiences and promoting brands effectively. Freelance Designer: Work as a freelance designer, taking on diverse projects from clients and agencies, showcasing versatility in both Photoshop and Illustrator skills. By mastering these Adobe tools, participants open doors to a multitude of creative opportunities in the ever-expanding digital design industry. Skills Acquired: Participants in the Adobe Illustrator and Photoshop Masterclass Training will develop advanced skills in vector graphics, digital illustration, and photo manipulation using Adobe Illustrator and Photoshop. Key skills include: Precision Vector Graphic Design in Illustrator Creative Digital Illustration Techniques Advanced Photo Editing and Manipulation in Photoshop Job Opportunities: Upon completion, individuals can pursue roles such as: Graphic Designer Digital Illustrator Advertising Creative Branding Specialist Elevate Your Design Skills: Master Adobe Illustrator and Photoshop, crafting stunning graphics, logos, and digital illustrations. Understand design principles, tools, and workflows. Receive a recognized Certificate of Completion and access recorded lessons for future reference. Expert Guidance, Your Schedule: Learn from certified experts, tailored to your timetable-flexible online or in-person sessions, Monday to Sunday, 9 am to 8 pm. Enjoy lifetime email support for seamless learning. Unleash Your Creativity Today: Enroll now to ignite your creative potential in Adobe Illustrator and Photoshop. Elevate your designs effortlessly.
Basic Photoshop Training Course
By ATL Autocad Training London
Learn the Basic PhotoshopTraining Course Learn retouching, layers, color, correction, shapes, and symbols. Delve into graphic design, photo editing, and digital art. From beginner to pro, gaining expertise in UX strategies, ensuring your websites are impactful and user-friendly. Click here for more info: Website Duration: 10 hours Approach: 1-on1 sessions and Personalized guidance. Schedule: Customize your schedule by booking a convenient hour, available from Monday to Saturday between 9 am and 7 pm. Module 1: Interface and Preferences Familiarize yourself with the Photoshop Interface Customize Panels and Toolbars to match your workflow Explore Photoshop Preferences to optimize settings Discover various Photoshop CC Workspaces tailored for different tasks Begin with essential Keyboard Shortcuts Module 2: Image File Formats Understand diverse image file formats such as PSD, JPEG, PNG, and PDF Delve into File Compression and its influence on image quality Module 3: Creating a New Document Set dimensions and size for new documents Grasp media units for accurate design specifications Explore Color Profiles and their significance Save presets for swift document setups Module 4: Placing Images Differentiate Embedded vs. Linked images Introduction to Smart Objects for non-destructive editing Master the Selection tool for precise image placement Module 5: Image Size and Resolution Save images using various formats and compression settings Understand Image Size and Resolution for diverse output needs Module 6: Layers Introduction Organize your work with Layer management Master layer tasks such as reordering, renaming, grouping, locking, and hiding Module 7: Selection Tools Explore Selection Tools like Marquee, Magic Wand, Quick Selection, and Lasso Grasp Inverse Selection and Deselect for efficient editing Module 8: Layer Effects Apply captivating Layer Effects such as Drop Shadow, Stroke, and Outer Glow Save and replicate Effects Styles for quick application Combine multiple effects for creative designs Module 9: Introduction to Shapes Utilize the Shapes tool for fundamental design elements Create Custom Shapes for unique designs Understand Color principles and use the Properties Panel for adjustments Master the Direct Selection tool for precise shape editing Create a basic poster using provided examples Module 10: Type and Typography Work with Type and explore the Character and Paragraph Panel Utilize Styles Panel for consistent text formatting Save favorite fonts for easy access Apply Effects and Layer Styles on Type for impactful typography Learn about Leading, Tracking, and Kerning for optimal text spacing Module 11: Colors Understand RGB vs. CMYK color modes Select colors using the Eyedropper tool Save colors as Swatches for reuse Create gradients using the Gradient Tool Module 12: Creating a Clipping Mask Master the concept of Clipping Masks and their application Apply Clipping Masks to Type, Images, and Shapes Combine Layer Effects with Clipping Masks for creative designs Module 13: Introduction to Masking Understand Masking and its importance in image editing Utilize the Brush tool for mask creation Learn Masking shortcuts and use Gradient Mask for smooth transitions Module 14: Adjustment Layers Explore Color and Gradient Adjustment Layers for image enhancements Master Curves, Levels, and Hue/Saturation Adjustment Layers for precise color control Convert images to Black and White using Adjustment Layers Combine Adjustment Layer Masks for targeted edits Module 15: Image Touch Up Master various touch-up techniques, including Red Eye Removal, Spot Healing Brush, and Patch Tool Utilize Content Aware Removal for seamless object removal Restore old photos using Clone Stamp and Dodge/Burn tools Enhance portraits by removing blemishes and whitening teeth Module 16: Filters Introduction Understand Smart Objects and Filter usage for non-destructive editing Explore the Filters Gallery and experiment with Blur and Vantage filters Module 17: Blending Modes Introduction Master the concept of Blending Modes and their effects on layer overlays Understand different Blending Modes like Darken, Lighten, and Overlay Layer Mastery: Develop expertise in working with layers, mastering advanced techniques for seamless editing and design organization in Adobe Photoshop. Precision Editing: Skillfully employ a variety of selection tools, ensuring precise and meticulous editing, manipulation, and composition of images and elements. Creative Layer Effects: Apply captivating Layer Effects with finesse, enhancing your designs and visuals to achieve professional-grade aesthetics. Advanced Editing Techniques: Understand the functionalities of Adjustment Layers, Masking, and Clipping Masks, enabling you to perform advanced editing and compositing tasks with confidence and precision. Effective Photo Restoration: Acquire techniques to touch up and restore photographs effectively, ensuring professional-quality results in photo editing and retouching. Typography Expertise: Explore advanced typography techniques, enabling you to create visually appealing text designs that complement your overall compositions. Filter Applications: Gain an introductory understanding of Filters and their creative applications, enhancing your ability to add artistic effects and refine visuals. Practical Color Theory: Grasp the fundamental principles of Color Theory and apply them practically in your designs, ensuring harmonious and visually pleasing color schemes in your work. Course Highlights: Advanced Photoshop Skills: Learn intricate techniques for professional image editing, retouching, and manipulation. Creative Design Projects: Engage in hands-on projects to enhance your practical skills in real-world scenarios. Mastering Special Effects: Dive into advanced topics like layer effects, filters, and blending modes to create stunning visual effects. Typography and Design Principles: Explore typography styles, layout design, and color theory for compelling compositions. Professional Portfolio Development: Receive guidance on creating a professional portfolio showcasing your Photoshop expertise. Potential Job Roles: Graphic Designer: Craft visually appealing graphics for print and digital media. Digital Artist: Create digital artwork for various applications, from illustrations to advertisements. Photo Retoucher: Enhance and manipulate photos for professional use, including portrait retouching. UI/UX Designer: Design user interfaces and experiences for websites and applications. Web Designer: Develop visually engaging websites with expertise in Photoshop for web design. Marketing Content Creator: Produce marketing materials such as banners, brochures, and social media visuals. Freelance Designer: Work independently, offering design services to clients across different industries. Advertising Creative: Contribute to creative campaigns by designing impactful ad visuals. Print Production Specialist: Prepare print-ready materials, ensuring quality in printed products. Photography Post-Processing Specialist: Enhance and retouch photographs, optimizing them for professional use. Comprehensive Photoshop Proficiency: Develop a solid foundation in Photoshop, mastering essential tools and techniques vital for image editing and manipulation. Creative Editing Expertise: Learn advanced retouching, image enhancement, digital artwork creation, and graphic design using Photoshop's powerful features. Professional-Grade Results: Acquire skills for achieving professional-level outcomes in image editing, ensuring precise color correction, seamless retouching, and visually appealing compositions. Optimized Workflow: Discover time-saving tips, shortcuts, and efficient techniques to enhance your Photoshop workflow. Learn layer management, non-destructive editing, and automation for streamlined processes. Versatile Design Skills: Unlock creative possibilities by mastering text effects, digital collages, filters, and graphic design for diverse mediums. Access to Recorded Lessons: Revisit course material and reinforce learning through recorded lessons. Review specific techniques at your own pace, deepening your understanding of Photoshop. Lifetime Email Assistance: Benefit from continuous support with lifetime email assistance. Seek guidance, get answers to questions, and seek clarification even after completing the course.
Photoshop Essentials Evening Training Sessions
By ATL Autocad Training London
Photoshop Essentials Evening Training Sessions, where you'll master the basics and elevate your photography and Photoshop rendering skills. Enhance your photos significantly, learning everything from color correction to retouching techniques. Expertly retouch and repair images during our comprehensive Photoshop training courses. Click here for more info: Website Duration: 10 hours Approach: 1-on1 guidance, Customized instruction and Tailored content. Choose your own time and day Monday to Saturday 9 am to 7 pm Becoming Proficient in Adobe Photoshop - 10-Hour Training Program Module 1: Introduction to Photoshop (1 hour) Familiarization with Photoshop interface and tools Understanding file formats and resolution concepts Navigation within the workspace and customization of preferences Mastering essential keyboard shortcuts for efficient workflow Module 2: Working with Layers (1 hour) Grasping the significance of layers and their efficient organization Application of layer styles to enhance creativity Utilization of blend modes for striking compositions Module 3: Selection Techniques (1 hour) Understanding diverse selection tools and their specific applications Precision in selections using Marquee, Lasso, Magic Wand, Quick Selection, and Refine Edge tools Creation of masks for non-destructive editing Module 4: Image Editing and Retouching (1 hour) Essential techniques for retouching portraits and landscapes Corrections in exposure, color, and tone using Adjustment Layers Seamless repairs with Healing Brush, Clone Stamp, and Content-Aware tools Module 5: Typography and Text Effects (1 hour) Working with text layers and formatting options Crafting captivating text effects using Layer Styles Manipulating text along paths and shapes for creative compositions Module 6: Advanced Image Manipulation (1 hour) Merging images with layer masks and blending modes Crafting composite images and surreal artwork Applying transformations and distortions creatively using Smart Objects Module 7: Filters and Special Effects (1 hour) Exploration of various filters for artistic and practical applications Application of blur, sharpening, distortion filters, and creative effects using the Filter Gallery Flexible editing with smart filters Module 8: Drawing and Vector Graphics (1 hour) Working with shape layers and vector tools Creation of custom shapes, icons, and logos Precision in illustrations using the Pen tool Module 9: Advanced Color Correction (1 hour) Expertise in color adjustments with Curves and Levels Selective color control using Adjustment Layers Understanding color spaces, profiles, and creating duotones and split-tones Module 10: Designing for Web and Print (1 hour) Image preparation for web and social media platforms Understanding resolution and color modes for print File exportation in various formats catering to diverse needs Final Project: Crafting a digital artwork or print-ready composition to showcase acquired skills. Upon completing this 10-hour Adobe Photoshop course, participants will: Master Photoshop Tools: Navigate the interface efficiently, apply advanced tools, and utilize essential shortcuts for streamlined work. Perfect Layer Techniques: Organize layers, use blend modes, and apply styles for visually appealing compositions. Refine Selection Skills: Make precise selections, create masks, and employ advanced selection tools for accuracy. Enhance Images Professionally: Learn advanced retouching, correction, and repair techniques for seamless photo editing. Create Captivating Text: Work with text layers, apply styles, and design typographic compositions creatively. Master Image Manipulation: Merge images seamlessly, apply transformations, and create surreal artwork with Smart Objects. Apply Filters and Effects: Utilize a range of artistic filters and effects for creative enhancements. Professional Vector Graphics: Craft custom shapes, logos, and icons with precision using vector tools. Advanced Color Correction: Master color adjustments, selective color control, and create captivating duotones and split-tones. Produce Print and Web Designs: Prepare images for various platforms, understand resolution, and export files in diverse formats. Hands-On Project Proficiency: Apply skills in real-world projects, demonstrating professional design expertise. Upon completion, participants will have the confidence and proficiency to excel in Photoshop, enabling high-quality, professional design work in both digital and print media. Adobe Photoshop Course: Adobe Photoshop course, hosted at the UK's top Adobe Training Centre. Develop expertise in Adobe's premier digital imaging software, crucial for crafting compelling visuals across a multitude of digital platforms. Our Photoshop training programs focus on interactive, real-life exercises, ensuring a hands-on and practical learning environment. Whether you are a novice aiming for a robust foundation or a proficient user striving for increased efficiency, our wide-ranging Photoshop courses are tailored to meet your specific requirements. Enroll today to master Photoshop and tap into a world of creative possibilities. Jobs You Can Pursue: Graphic Designer: Create visually appealing graphics for print and digital media. Digital Artist: Craft digital artwork for various applications, from illustrations to advertisements. Photo Retoucher: Enhance and manipulate photos to achieve desired visual effects. UI/UX Designer: Design user interfaces and experiences for websites and applications. Web Designer: Develop visually engaging websites by incorporating Photoshop skills into web design. Marketing Content Creator: Produce marketing materials like banners, brochures, and social media visuals. Freelance Designer: Work independently, offering design services to clients across different industries. Advertising Creative: Contribute to creative campaigns by designing impactful ad visuals. Print Production Specialist: Prepare print-ready materials, ensuring quality in printed products. Photography Post-Processing Specialist: Enhance and retouch photographs, optimizing them for professional use. Course Advantages: Master Vital Photoshop Skills: Gain expertise in essential image editing and manipulation techniques. Craft Striking Digital Artwork: Create visually appealing digital art and design graphics with finesse. Attain Professional-Quality Results: Achieve high-quality outcomes with accuracy and speed in your work. Unleash Creative Potential: Explore versatile design capabilities, tapping into your full creative spectrum. Flexible Learning: Access recorded lessons for convenient learning and revision. Continuous Assistance: Benefit from lifetime email support, ensuring ongoing guidance and support.

Advanced Adobe InDesign Training Program
By ATL Autocad Training London
Advanced Adobe InDesign Training Program Learn InDesign with a course at Real Animation Works. Choose from Weekend, Weekday or Evening Courses and learn from expert tutors. Benefit from professional InDesign training conducted by Adobe Certified Instructors with extensive graphic design expertise. Check our Website Duration: 10 hours. Approach: 1-on-1 and personalized attention. Schedule: 1-on-1 sessions, available Monday to Saturday from 9 am to 7 pm. Course Title: Comprehensive Adobe InDesign Training Duration: 10 Hours Session 1: Introduction to Adobe InDesign (1 hour) Overview of InDesign interface and tools Document setup: page size, margins, and columns Basic text formatting and paragraph styles Introduction to working with images and graphics Session 2: Advanced Text Formatting and Styles (1 hour) In-depth exploration of character and paragraph styles Advanced text composition techniques Managing text flow with threaded frames Incorporating special characters for typographic control Session 3: Mastering Images and Graphics (1 hour) Advanced image manipulation: resizing, cropping, and effects Text wrap options and integrating text with images Creating image frames and working with transparency Interactive elements: buttons and hyperlinks Session 4: Layout Design Techniques (1.5 hours) Grids and guides: precise alignment and spacing Working with layers for efficient design management Advanced object arrangement and distribution Utilizing master pages for consistent layout elements Session 5: Advanced Document Features (1.5 hours) Tables and data merge: organizing and automating data Interactive PDFs: forms, multimedia, and navigation Advanced print preparation: color management and preflighting Exporting for various digital and print outputs Session 6: Advanced Special Effects (1 hour) Creating drop shadows, gradients, and blending modes Working with typography on a path Advanced text and image effects Integrating Adobe Illustrator and Photoshop files Session 7: Project-Based Learning (1 hour) Participants work on a comprehensive project applying learned skills Instructor-guided project review and feedback Session 8: Tips, Tricks, and Time-Saving Techniques (1 hour) Productivity hacks and shortcuts Troubleshooting common issues and errors Best practices for efficient workflow and collaboration Session 9: Portfolio Building and Career Guidance (0.5 hour) Creating a professional portfolio showcasing InDesign projects Career advice and industry insights from the instructor Session 10: Q&A, Certification, and Course Completion (0.5 hour) Addressing participant questions and concerns Certificate of Completion distribution and course review Celebrating the completion of the Adobe InDesign training journey Upon completion of the Comprehensive Adobe InDesign Training course, participants will: Master Core Skills: Develop proficiency in essential InDesign tools, functions, and techniques for effective layout design. Advanced Text and Typography: Understand advanced text formatting, paragraph styles, and typographic controls for professional typography. Image Manipulation Expertise: Acquire skills in advanced image manipulation, text wrapping, transparency, and integration of multimedia elements. Advanced Layout Design: Learn precise layout techniques using grids, guides, layers, and master pages for consistency and visual appeal. Interactive Document Creation: Create interactive PDFs, forms, multimedia-rich content, and navigation elements for digital publications. Data Management and Automation: Master tables, data merge, and automation features for organized data presentation and streamlined workflow. Print and Export Proficiency: Understand color management, preflighting, and export settings for high-quality print and digital output. Special Effects and Integration: Apply advanced effects, gradients, blending modes, and integrate InDesign with Illustrator and Photoshop files seamlessly. Project-Based Expertise: Develop a comprehensive portfolio-worthy project, showcasing a range of InDesign skills and creativity. Efficient Workflow and Troubleshooting: Implement time-saving techniques, shortcuts, and troubleshoot common design challenges effectively. Career Readiness: Gain valuable insights into industry practices, portfolio building, and career guidance for pursuing opportunities in graphic design and desktop publishing. Versatile Learning Choices: Opt for either in-person sessions at our London center or engage in interactive online learning. Both options offer hands-on experience, detailed demonstrations, and ample chances for inquiries. Compatibility and Assistance: InDesign operates smoothly on Windows and Mac systems. Participants receive a comprehensive InDesign training manual for reference and an electronic certificate upon course completion. Additionally, enjoy lifelong email assistance from your InDesign instructor. Entry Requirements: No prior InDesign expertise is necessary. The training concentrates on InDesign 2023, relevant to recent software updates. Guarantees: We ensure exceptional value for your investment, guaranteeing your acquisition of essential skills and concepts during the training. Course Highlights: Master advanced typography techniques, including paragraph styles, character styles, and nested styles. Explore multi-page layout design, long document management, and advanced table formatting. Acquire skills to create and manipulate complex shapes, vector graphics, and custom illustrations. Learn efficient workflows for data merging, interactive documents, and digital/print output. Collaborate seamlessly with other Adobe Creative Cloud applications. Upon completion, receive a Certificate of Completion and access recorded lessons for self-paced learning. Expert Instruction: Learn from certified tutors and industry experts, gaining valuable insights, tips, and best practices for professional-level designs. Flexible Learning Options: Choose between in-person or live online sessions based on your schedule. Sessions are available Monday to Sunday, from 9 am to 8 pm, accommodating your convenience. Lifetime Support: Benefit from lifetime email support for continuous assistance. Our dedicated team is available to address your queries and challenges. Explore Adobe InDesign - Free Trial: https://www.adobe.com/uk/products/indesign/free-trial-download.html