- Professional Development
- Medicine & Nursing
- Arts & Crafts
- Health & Wellbeing
- Personal Development
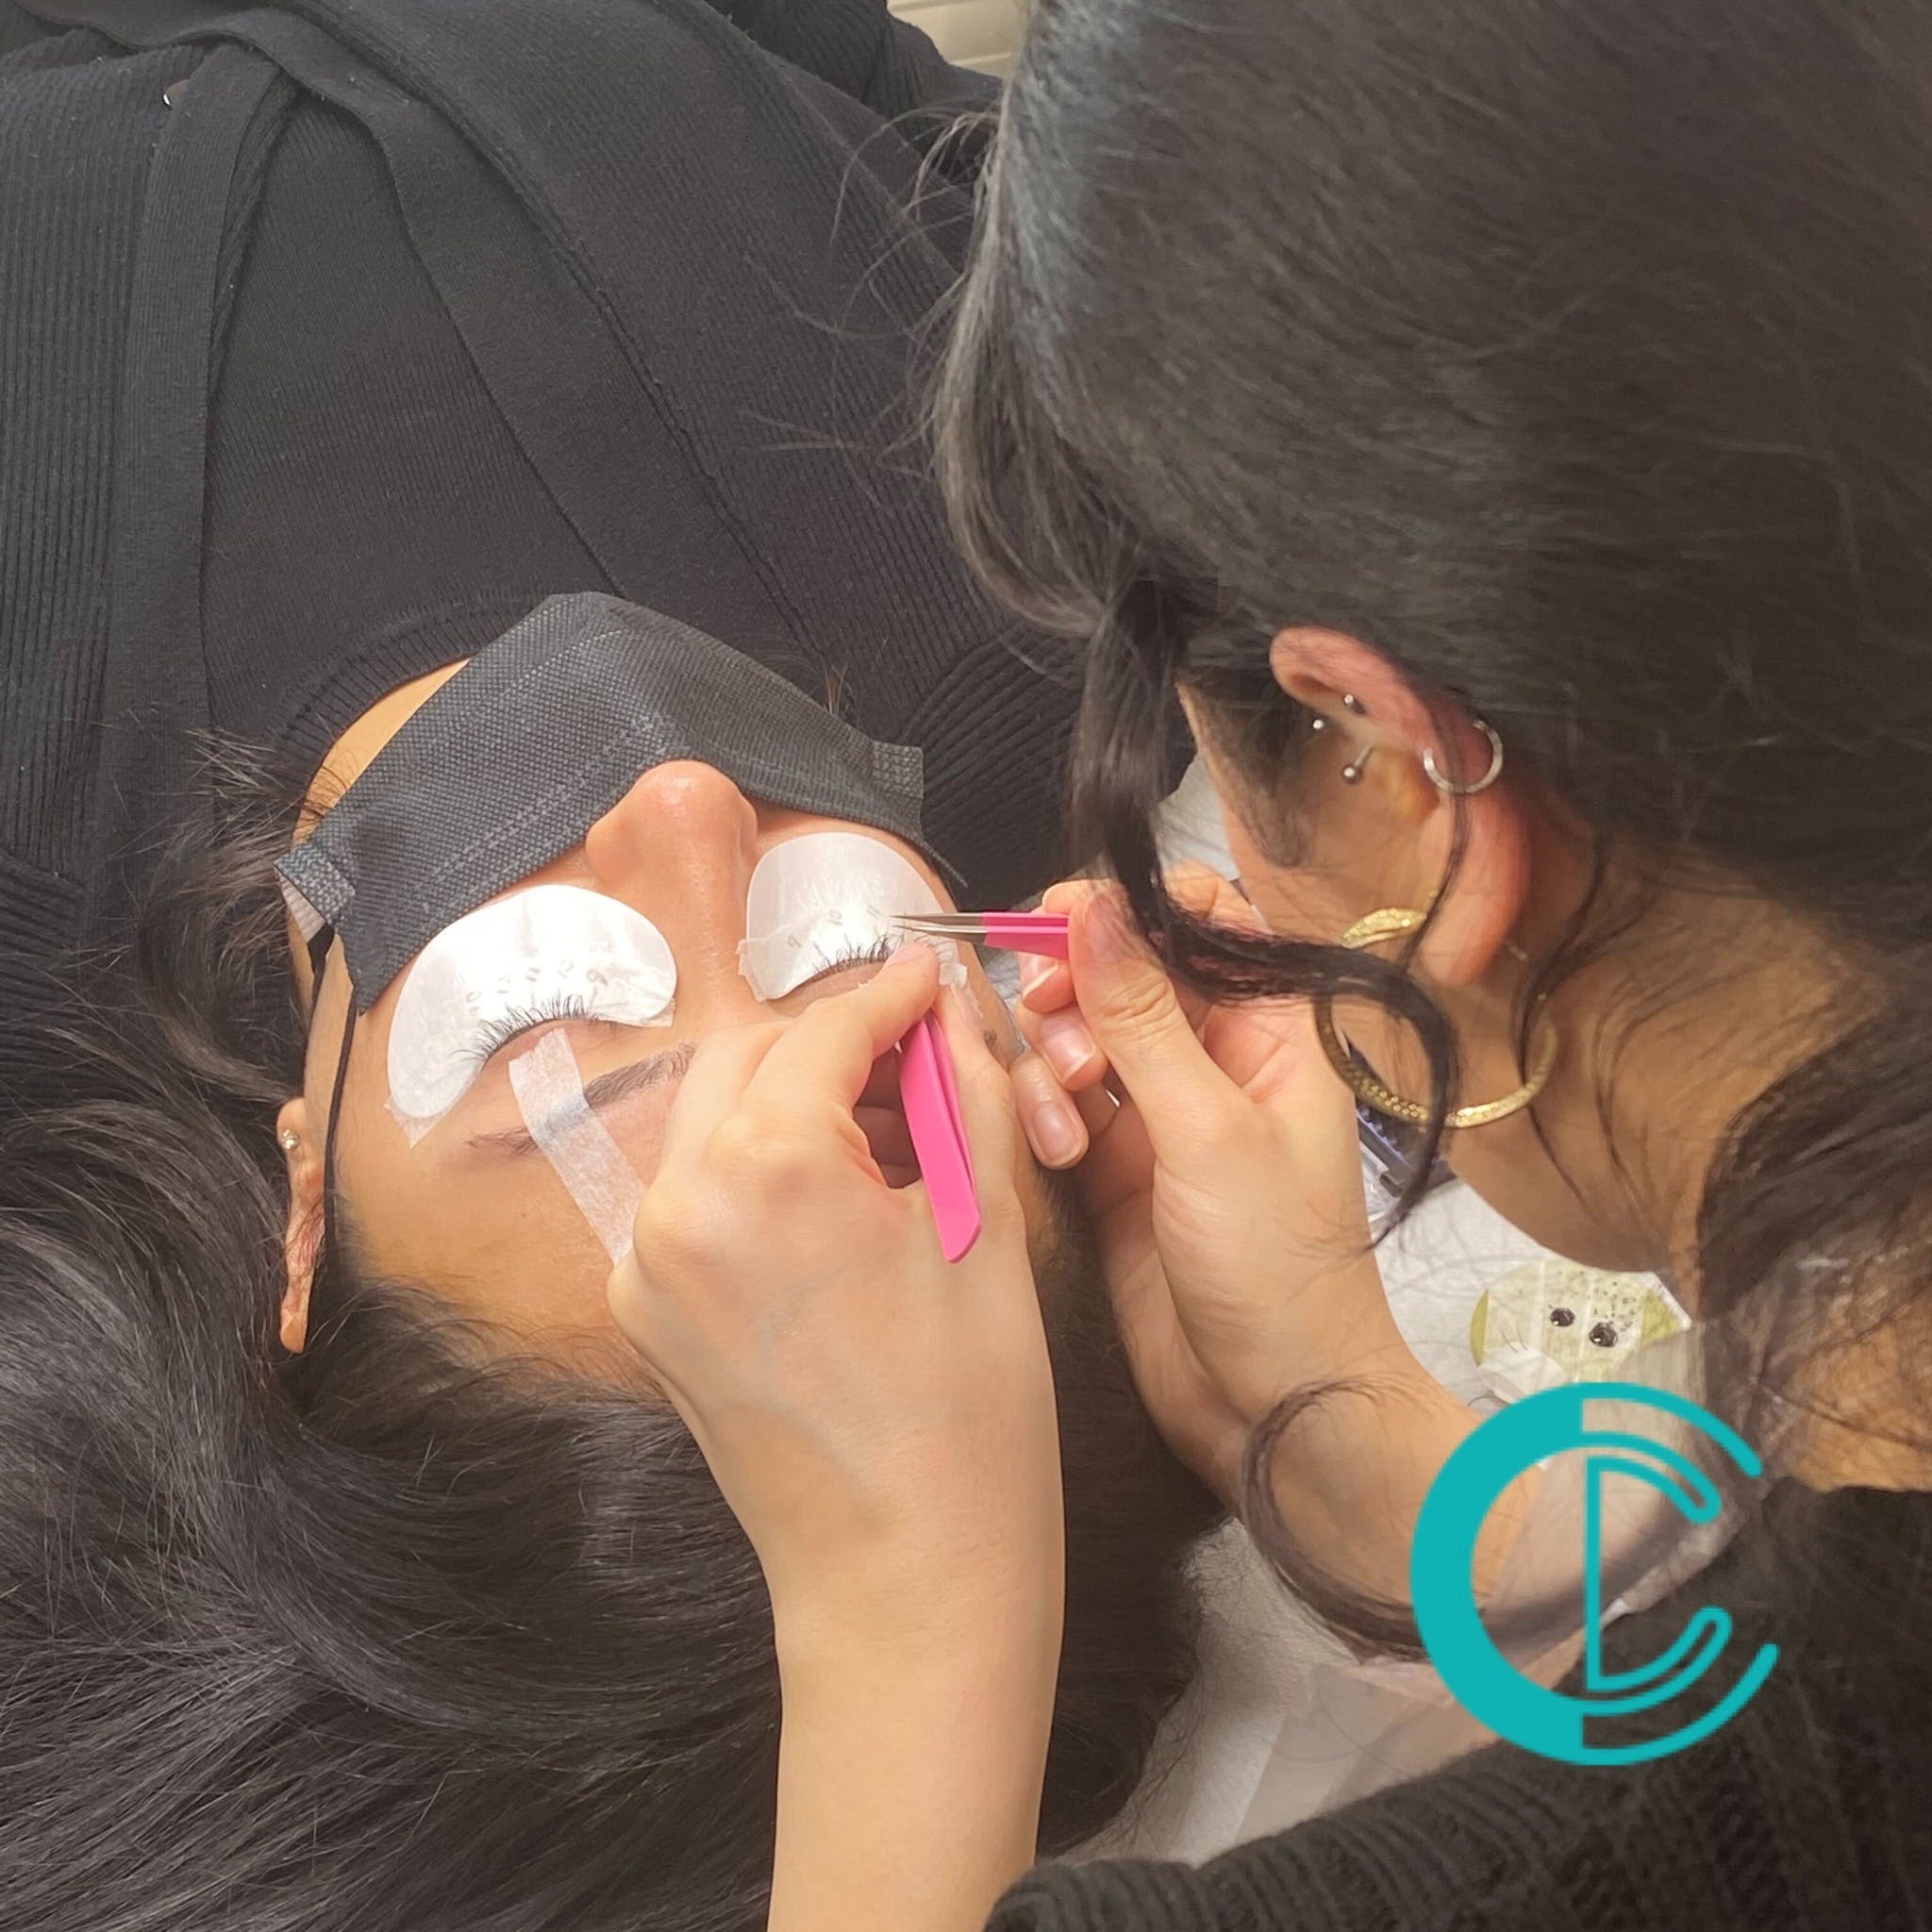
Individual Classic Eyelash Extensions Training Course
By Cosmetic College
Eyelash extensions are one of the most popular treatments that the beauty industry offers. This treatment is highly profitable and easy to add to an existing salon treatment menu whilst also perfect for beginners to the industry and mobile therapists. Course Prerequisites Students must have good written and spoken English Course Structure This course includes 4 hours of theory study via our online portal and 5 practical hours. All courses are kept intimate with a maximum of 4 learners to a class. Course Agenda: First Aid Health, Safety and Hygiene Anatomy and Physiology What are Individual Eyelash Extension? Individual Eyelash Extension Products Trolley Set Up Consultation Patch Testing Adhesive Individual Eyelash Extension Step by Step Procedure Individual Eyelash Demonstration Eyelash Removal Step by Step Eyelash Removal Aftercare Upgrade and include a professional starter kit using exclusive discount for Cosmetic College students
US College Soccer Preparatory Programme
By Elite U.s. Academy
12 Month complete preparatory programme for the US College experience; includes an Academic, Athletic, and Footballing syllabus.

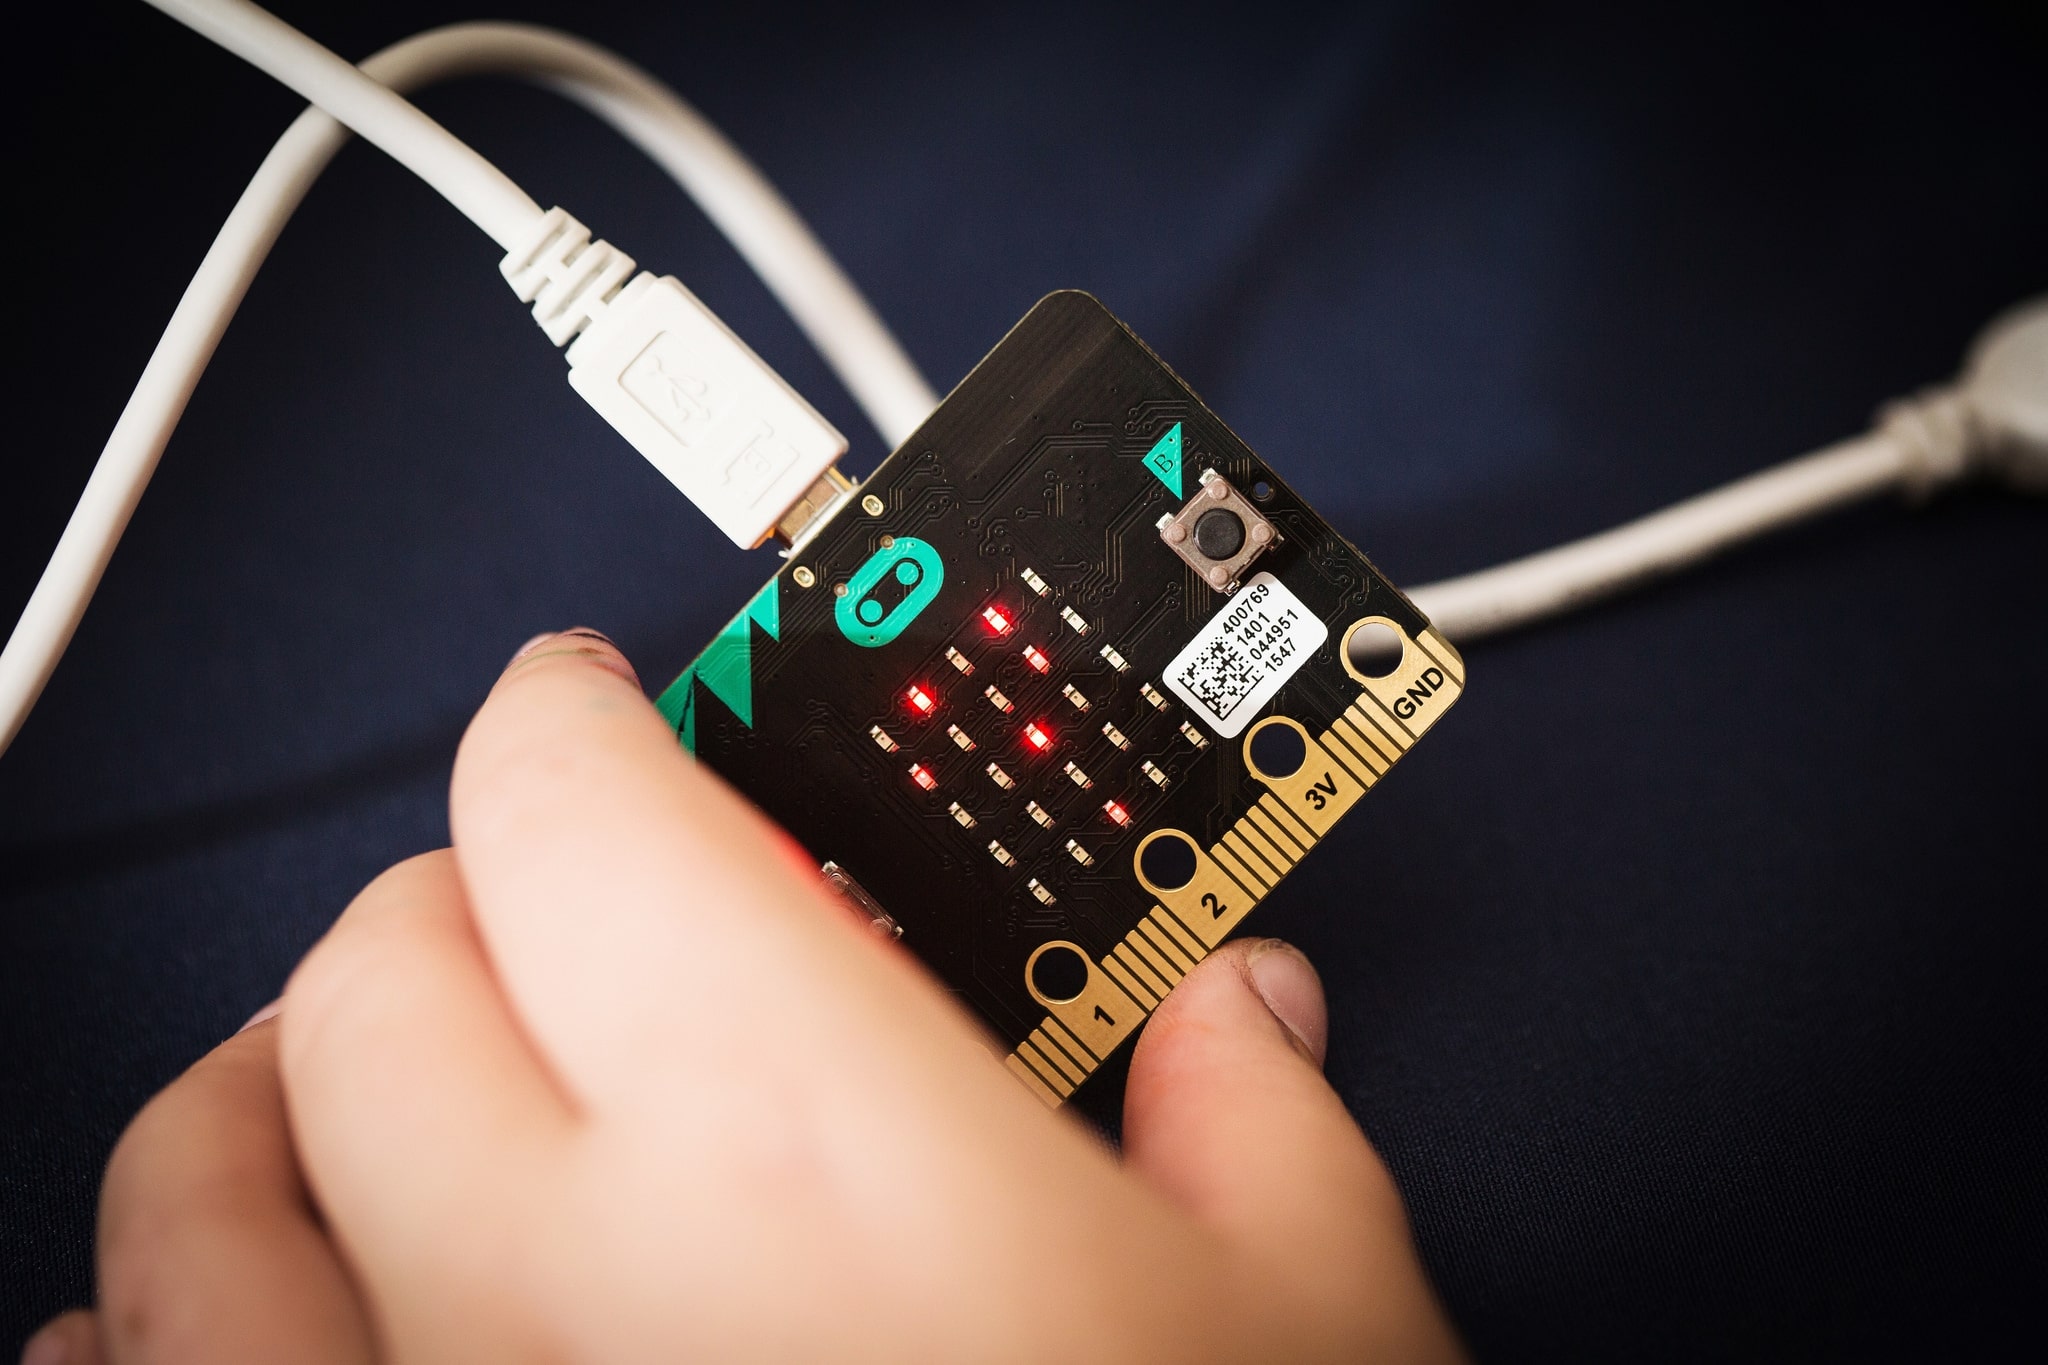
BBC micro:bit Coding Workshop
By Code Created (Coding Workshops for Schools)
For pupils aged 9 - 16 | Delivered in UK Schools by Real World App and Games Developers Our micro:bit Workshop teaches your class about the micro:bit, making some apps and games with them during the workshop (we bring our own micro:bits too if your school doesn't yet have any!). We’ll introduce them to MakeCode, the coding language that the micro:bit uses, and teach them the fundamentals of coding before we work on some really fun projects! For older students, we can even use Python with the micro:bit!
Photoshop Evening Training
By London Design Training Courses
Why Choose Photoshop Evening Training Course? Click here for more info Become proficient in Photoshop, the premier photo editing software, with our London Software Training course. Gain essential skills in photo editing, enabling independent navigation of the interface for successful edits and graphic creation. Duration: 10 hours Approach: 1-on-1 guidance, Customized instruction. Schedule: Tailor your own hours, available from Mon to Sat between 9 am and 7 pm.Or Call 02077202581 or WhatsApp 07970325184. Participate in our Photoshop Evening Training Course, hosted at the UK's largest training school. Whether you're a beginner or an expert, our course is tailored to suit your level, offered both live online and in person. Adobe Photoshop Course Highlights: Embark on your design journey with our Adobe Photoshop course, conducted at the UK's leading Adobe Training Centre. Acquire proficiency in Adobe's premier digital imaging software, crucial for digital content creation. Our courses prioritize hands-on exercises, ensuring practical learning experiences. Whether you're new to Photoshop or an experienced user seeking efficiency, our diverse courses cater to your needs. Join us to master Photoshop and unleash your creative potential. Course Details: Duration: 10 hours Approach: Personalized 1-on-1 guidance, customized instruction. Schedule: Flexible hours available from Mon to Sat between 9 am and 7 pm. For inquiries, call 02077202581 or WhatsApp 07970325184. Evening Adobe Photoshop - 10-Hour Training Course Module 1: Introduction to Photoshop (1 hour) Overview of Photoshop interface and tools Understanding file formats and resolution Navigating the workspace and customizing preferences Essential keyboard shortcuts for efficient workflow Module 2: Working with Layers (1 hour) Mastering the concept of layers and their importance Organizing and managing layers effectively Applying layer styles for creative effects Utilizing blend modes for stunning compositions Module 3: Selection Techniques (1 hour) Understanding different selection tools and their uses Precise selections using the Marquee, Lasso, and Magic Wand tools Advanced selections with Quick Selection and Refine Edge Creating masks for non-destructive editing Module 4: Image Editing and Retouching (1 hour) Essential photo retouching techniques for portraits and landscapes Correcting exposure, color, and tone with Adjustment Layers Using the Healing Brush and Clone Stamp for seamless repairs Removing distractions and blemishes with Content-Aware tools Module 5: Typography and Text Effects (1 hour) Working with text layers and formatting options Creating eye-catching text effects using Layer Styles Manipulating text along paths and shapes Designing typographic compositions Module 6: Advanced Image Manipulation (1 hour) Combining images with layer masks and blending modes Creating composite images and surreal artwork Applying transformations and distortions for creative effects Working with Smart Objects for non-destructive editing Module 7: Filters and Special Effects (1 hour) Exploring various filters for artistic and practical purposes Applying blur, sharpening, and distortion filters Creating artistic effects with the Filter Gallery Using smart filters for flexible editing Module 8: Drawing and Vector Graphics (1 hour) Working with shape layers and vector tools Creating custom shapes and icons Utilizing the Pen tool for precise illustrations Designing logos and scalable graphics Module 9: Advanced Color Correction (1 hour) Mastering color adjustments with Curves and Levels Using Adjustment Layers for selective color control Understanding color spaces and profiles Creating duotones and split-tones Module 10: Designing for Web and Print (1 hour) Preparing images for web and social media platforms Understanding resolution and color modes for print Exporting files in various formats for different purposes Final project: Designing a digital artwork or print-ready composition Learning Outcome refers to what students are expected to know, understand, or be able to do at the end of a learning experience, such as a course, training program, or educational module. Learning outcomes are usually specific, measurable, and achievable objectives that demonstrate the effectiveness of the learning process. For example, learning outcomes for a Photoshop course could include: Participants will be proficient in using essential Photoshop tools and features. Participants will demonstrate the ability to apply advanced image editing and retouching techniques. Participants will be able to create visually appealing designs using layers, typography, and special effects. Participants will understand and utilize different file formats and color modes for various output requirements. Participants will produce a final project showcasing their skills and creativity in Adobe Photoshop.

AutoCAD Mac Basic-Intermediate Training Courses
By London Design Training Courses
AutoCAD Mac Basic to Intermediate Training: Clickhere for more info Learn to produce accurate, to-scale 2D drawings with AutoCAD for Mac training. A project-based course made for AutoCAD Mac users and focused on architecture & interior designs students and professionals. Duration: 10 hrs Method: 1-on-1, Personalized attention. Schedule: Tailor your own schedule by pre-booking a convenient hour of your choice, available from Monday to Saturday between 9 am and 7 pm. AutoCAD Mac Basic to Intermediate Training: Master precise, to-scale 2D drawings with tailored AutoCAD for Mac training. Designed for architecture and interior design professionals and students. Duration: 10 hours of in-depth learning. Method: Personalized 1-on-1 attention for an immersive learning experience. Flexible Scheduling: Choose your convenient hour from Monday to Saturday, between 9 am and 7 pm. Book now to customize your training journey! AutoCAD Mac Basic to Intermediate Training: Master precise, to-scale 2D drawings with tailored AutoCAD for Mac training. Designed for architecture and interior design professionals and students. Duration: 10 hours of in-depth learning. Method: Personalized 1-on-1 attention for an immersive learning experience. Flexible Scheduling: Choose your convenient hour from Monday to Saturday, between 9 am and 7 pm. Book now to customize your training journey! AutoCAD Mac Basic to Intermediate Training: Master precise, to-scale 2D drawings with tailored AutoCAD for Mac training. Designed for architecture and interior design professionals and students. Duration: 10 hours of in-depth learning. Method: Personalized 1-on-1 attention for an immersive learning experience. Flexible Scheduling: Choose your convenient hour from Monday to Saturday, between 9 am and 7 pm. Book now to customize your training journey! AutoCAD Mac Basic to Intermediate Training: Master precise, to-scale 2D drawings with tailored AutoCAD for Mac training. Designed for architecture and interior design professionals and students. Duration: 10 hours of in-depth learning. Method: Personalized 1-on-1 attention for an immersive learning experience. Flexible Scheduling: Choose your convenient hour from Monday to Saturday, between 9 am and 7 pm. Book now to customize your training journey!

AUTOCAD Training for Both MAC and PC Users
By Real Animation Works
Face to Face Training Customised and Bespoke.
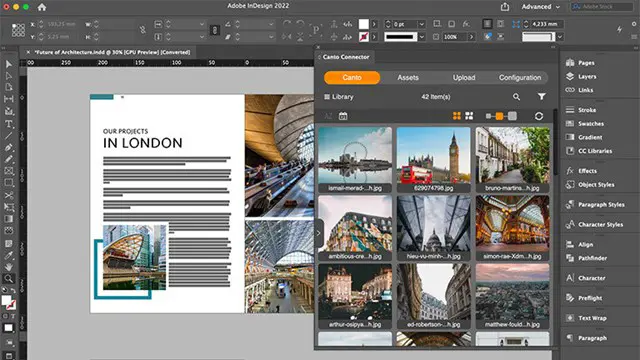
Adobe Illustrator and Photoshop Training
By London Design Training Courses
Why Choose Adobe Illustrator and Photoshop Training Course? Click here for more info Master vector graphics, digital illustrations, photo manipulations, and more. Certified tutors provide personalized guidance and feedback. Flexible scheduling available. Receive a Certificate of Completion. Learn Adobe Creative Cloud. Duration: 10 hrs. Method: 1-on-1, Personalized attention. Schedule: Tailor your own schedule by pre-booking a convenient hour of your choice, available from Mon to Sat between 9 am and 7 pm. This comprehensive and hands-on course introduces you to digital design through Adobe Photoshop and Illustrator. Learn how these three programs seamlessly collaborate to create stunning designs. Gain insights into bitmap and vector graphics and discover the most suitable image file formats for different scenarios. 10-hour course outline for Adobe Photoshop and Illustrator: Module 1: Introduction to Adobe Photoshop (1 hour) Overview of Photoshop interface and tools Understanding bitmap graphics and resolution Basic image editing techniques (cropping, resizing, color adjustments) Layers and their importance in design Module 2: Essential Photoshop Tools (1 hour) Working with selection tools (Marquee, Lasso, Magic Wand) Understanding brushes and brush settings Introduction to the Pen tool for precise selections Working with layers and layer styles Module 3: Advanced Image Editing (1 hour) Advanced color adjustments (Curves, Levels, Hue/Saturation) Photo retouching and manipulation techniques Creating composite images using blending modes Filters and special effects for creative designs Module 4: Introduction to Adobe Illustrator (1 hour) Overview of Illustrator interface and tools Working with vector graphics and paths Basic shapes and drawing tools Understanding anchor points and handles Module 5: Creating Vector Artwork (1 hour) Using the Pen tool for precise vector illustration Creating and editing shapes and objects Working with gradients and patterns Understanding the Appearance panel Module 6: Illustrator Typography (1 hour) Text tools and formatting options Creating text effects and artistic typography Combining text with shapes and images Working with text on a path Module 7: Combining Photoshop and Illustrator (1 hour) Importing Illustrator files into Photoshop and vice versa Working with smart objects and vector shapes in Photoshop Creating custom brushes and patterns in Illustrator for use in Photoshop Designing posters and flyers combining elements from both software Module 8: Integration with InDesign (1 hour) Exporting assets from Photoshop and Illustrator for InDesign Designing layouts in InDesign using assets from both programs Understanding print and digital design considerations Preparing files for printing and online use Module 9: Advanced Techniques and Tips (1 hour) Creating custom actions and automation in Photoshop Mastering advanced selection techniques Utilizing Illustrator's advanced tools (Pathfinder, Shape Builder, etc.) Exploring creative design styles and trends Module 10: Final Projects and Portfolio (1 hour) Students work on individual or group projects incorporating Photoshop and Illustrator skills Review and feedback on the projects Preparing a portfolio showcasing their work Download Adobe Illustrator - Free Trial https://www.adobe.com/uk/illustrator Throughout the course, you will explore various processes, including design and layout, workspaces, tools and palettes, importing files, and preparing files for both on-screen and print outputs. Course Objectives: By the course's conclusion, you will have a solid understanding of the fundamentals of each software package and their individual functionalities. You will learn how to efficiently work with all three applications in tandem and skillfully assemble print and digital-ready designs, leveraging elements crafted in Photoshop and Illustrator and integrated using InDesign.
Calling all aspiring filmmakers and film enthusiasts! Join us for an engaging taster session on filmmaking, specially designed for students like you. Led by BA Practical Course Leader Devon Dickson, this session aims to explore the art of creating films that go beyond traditional performances and instead capture evocative and unforgettable cinematic truth. Discover how visual narrative can unlock your unique voice as a filmmaker. Devon Dickson, an accomplished writer, producer, and director with over 25 years of experience, will share his valuable insights gained from working on feature films, television shows, and over 300 commercials across 30 countries. His work has reached billions of viewers worldwide, making him a remarkable mentor for budding filmmakers. During this taster session, you'll delve into the philosophy and principles that form the foundations of our teaching here at Central Film School. Through practical examples and captivating case studies, you'll witness how this innovative approach to filmmaking can elevate your creativity and storytelling skills. Whether you're a film student, a passionate movie lover, or simply curious about the art of cinema, this taster session promises to be an inspiring and educational experience. No prior experience in filmmaking is required, so all students are welcome to attend. Don't miss out on this unique opportunity to learn from one of the industry's most experienced professionals. Reserve your spot now and embark on a journey to unlock your unique voice in filmmaking!
Speech Writing for Public Speaking
By AIR Courses, London
Speech Writing for Public Speaking- one day interactive course. Please register interest to be updated of new dates. Email us at air(@gold.ac.uk). There can be no quality public speaking without masterful use of words. What participants of this course say “It was a very wonderful course ... The Teacher was awesome! Thank you.” “It was excellent. A lot of lessons learned. Would consider a longer course. Thanks for a great day!” Not-for-profit 100% of AIR income, beyond operational expense, is used towards education and research - enabling us to provide our training at exceptional value. Tutoring This course is directed by Fatos Selita, a multidisciplinary trained communication expert. Booking Information Group bookings To book this 'Public Speaking and Presenting' course for a group, please email us air@gold.ac.uk. The price for group bookings starts from £1,925, covering a maximum of 8 people. VAT-Free except when provided in Clients' Offices: as a University, we are able to offer our courses at minimum prices, and free of VAT - to make knowledge available to as wide audience as possible. Refund policy: For this training course, where the number of participants is capped at 8, we offer you the following flexibility: If you cannot attend on the date booked, we will be happy to move your booking to a new date or provide you with a refund of our fee - if you notify us more than 7 days ahead of the start date. If you need to cancel the course within 7 days ahead of the start date - we will be happy to offer you one change to a future date. 10% discount when a participant enrols for more than one of our courses at the same time. 20% discount for UK students. 20% for members of the Society for Personality and Social Psychology (SPSP) (spsp.org). 25% discount for Members of the UK Law and Society Association (UKLSA) (uklsa.co.uk). Goldsmiths students, staff, or alumni, please email us for current discounts. Sponsored places: We are currently offering a number of sponsored places on all AIR Courses for those in extremely difficult financial circumstances. Please email us for details: air(@gold.ac.uk). Bespoke training Public Speaking for Diplomacy Interview Skills Public Speaking for Academics / Researchers Public Speaking for Business Professionals (Bankers, Lawyers, Media Professionals) Enquiries For all enquiries, and to be regularly updated on upcoming AIR courses, please email: air (@gold.ac.uk). For anything urgent, or if emailing is not a good option for you, you can also call us via WhatsApp or phone on +44 (0)7908 566 949.

Combatting Fear of Public Speaking
By AIR Courses, London
Combatting Fear of Public Speaking- one day interactive course This is a one-day interactive course where you will learn techniques for fast improvements, as well as methods for building lasting confidence. What participants of this course say: "Unbelievably useful course, with a lot of materials, practice, feedback. It should be included in every scholar/ university program intro. Many thanks!" University Lecturer, Sheffield. "This course was an eyeopener - it was like going to a personal training session in the gym paralysed and starting moving and developing muscles during the session." CEO, City of London company. Not-for-profit 100% of AIR income, beyond operational expense, is used towards education and research - making it possible we offer our training at exceptional value. Tutoring This course is directed by Fatos Selita, a multidisciplinary trained communication expert. Booking Information Group bookings To book this 'Public Speaking and Presenting' course for a group, please email us air@gold.ac.uk. The price for group bookings starts from £1,925, covering a maximum of 8 people. VAT-Free except when provided in Clients' Offices: as a University, we are able to offer our courses at minimum prices, and free of VAT - to make knowledge available to as wide audience as possible. Refund policy: For this training course, where the number of participants is capped at 8, we offer you the following flexibility: If you cannot attend on the date booked, we will be happy to move your booking to a new date or provide you with a refund of our fee - if you notify us more than 7 days ahead of the start date. If you need to cancel the course within 7 days ahead of the start date - we will be happy to offer you one change to a future date. 10% discount when a participant enrols for more than one of our courses at the same time. 20% discount for UK students. 20% for members of the Society for Personality and Social Psychology (SPSP) (spsp.org). 25% discount for Members of the UK Law and Society Association (UKLSA) (uklsa.co.uk). Goldsmiths students, staff, or alumni, please email us for current discounts. Sponsored places: We are currently offering a number of sponsored places on all AIR Courses for those in extremely difficult financial circumstances. Please email us for details: air(@gold.ac.uk). Bespoke training Public Speaking for Diplomacy Interview Skills Public Speaking for Academics / Researchers Public Speaking for Business Professionals (Bankers, Lawyers, Media Professionals) Find out more about all of the AIR courses available to you. Enquiries For all enquiries, and to be regularly updated on upcoming AIR courses, please email: air (@gold.ac.uk). For anything urgent, or if emailing is not a good option for you, you can also call us via WhatsApp or phone on +44 (0)7908 566 949.