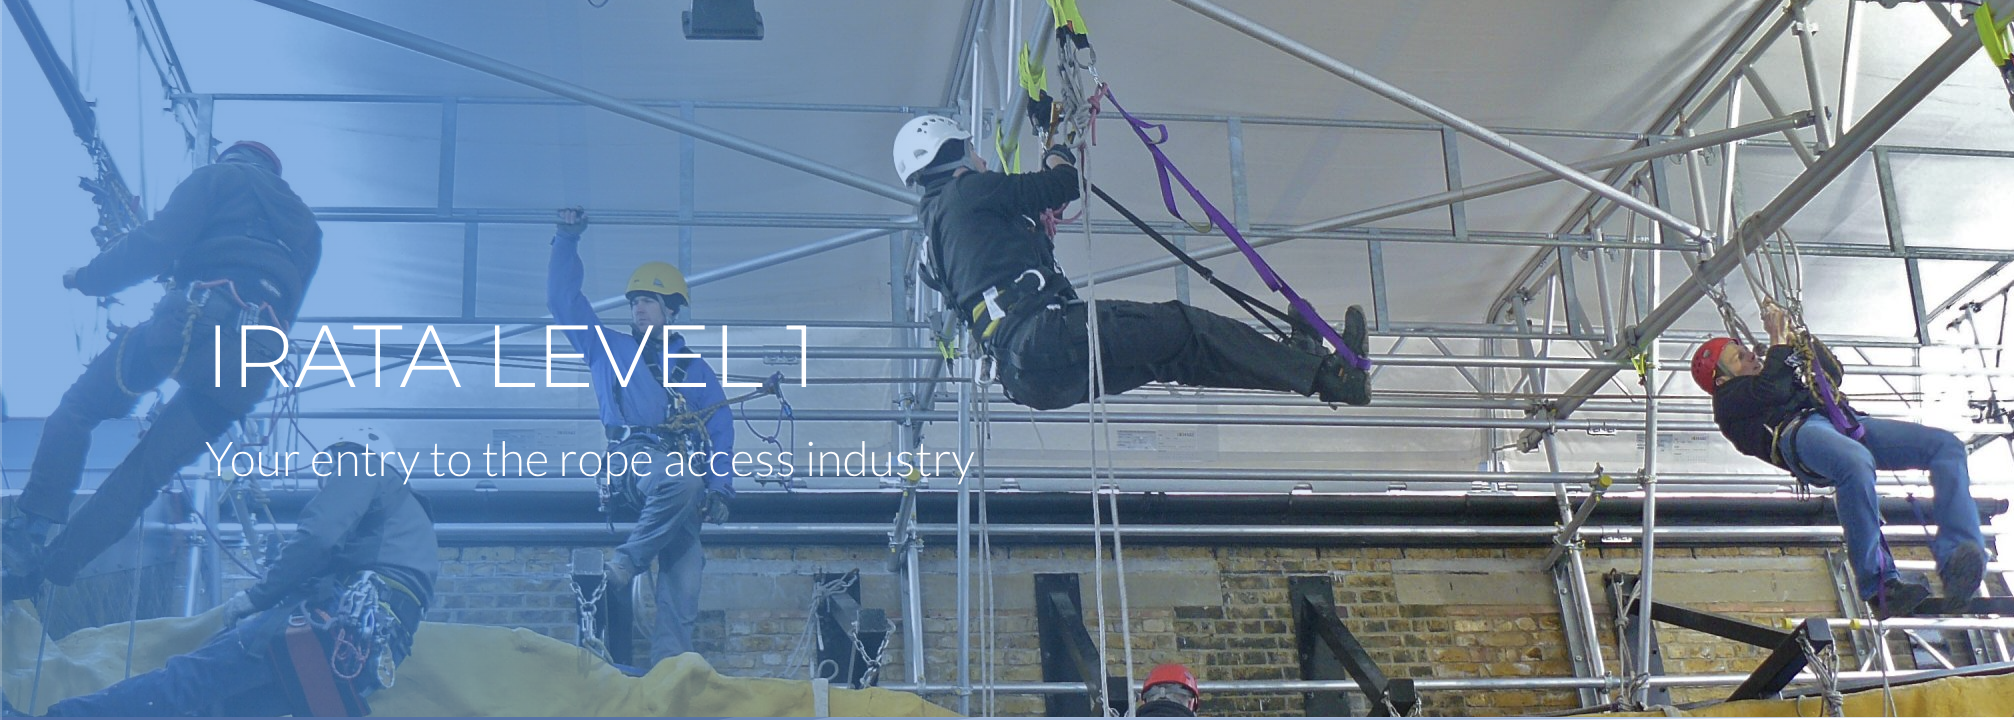
- Professional Development
- Medicine & Nursing
- Arts & Crafts
- Health & Wellbeing
- Personal Development
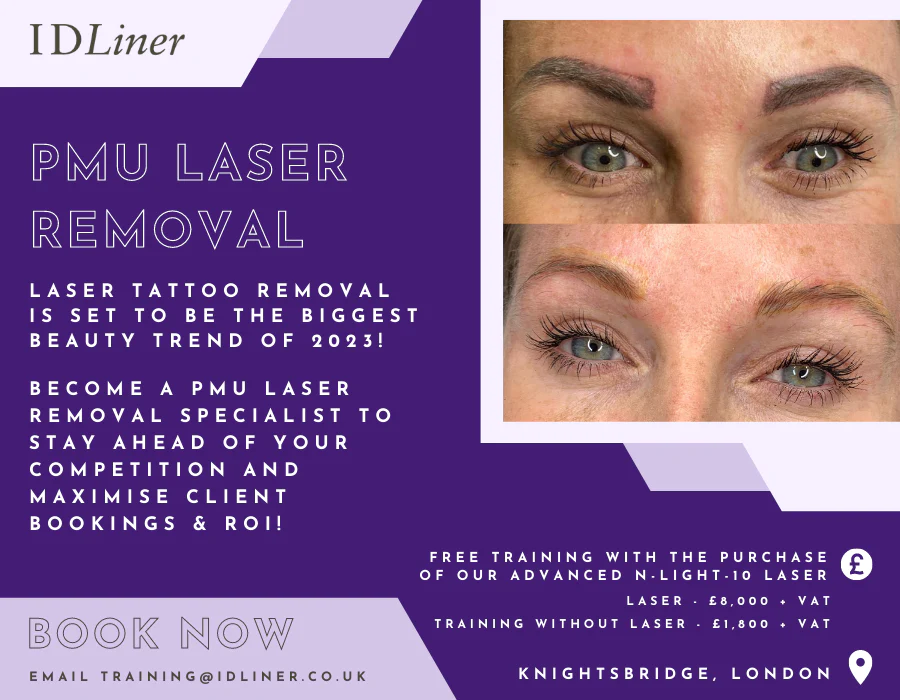
Permanent Makeup Laser Removal | N-Light-10 Laser Only
By ID Liner | Permanent Makeup Training & Supplies
HIGHLY SOUGHT-AFTER AND ALREADY AN EXTREMELY LUCRATIVE INDUSTRY, LASER TATTOO REMOVAL IS SET TO BE THE BIGGEST BEAUTY TREND OF 2023!
Permanent Makeup Laser Removal - Small Group Training - N-Light-10 Laser
By ID Liner | Permanent Makeup Training & Supplies
HIGHLY SOUGHT-AFTER AND ALREADY AN EXTREMELY LUCRATIVE INDUSTRY, LASER TATTOO REMOVAL IS SET TO BE THE BIGGEST BEAUTY TREND OF 2023!
18th edition course Dover
By MJ Electrical Training
City & Guilds 18th edition course with 2382-22 final exam only £234.00. Exams available every week across the UK, same day results, quick certificate, best prices..

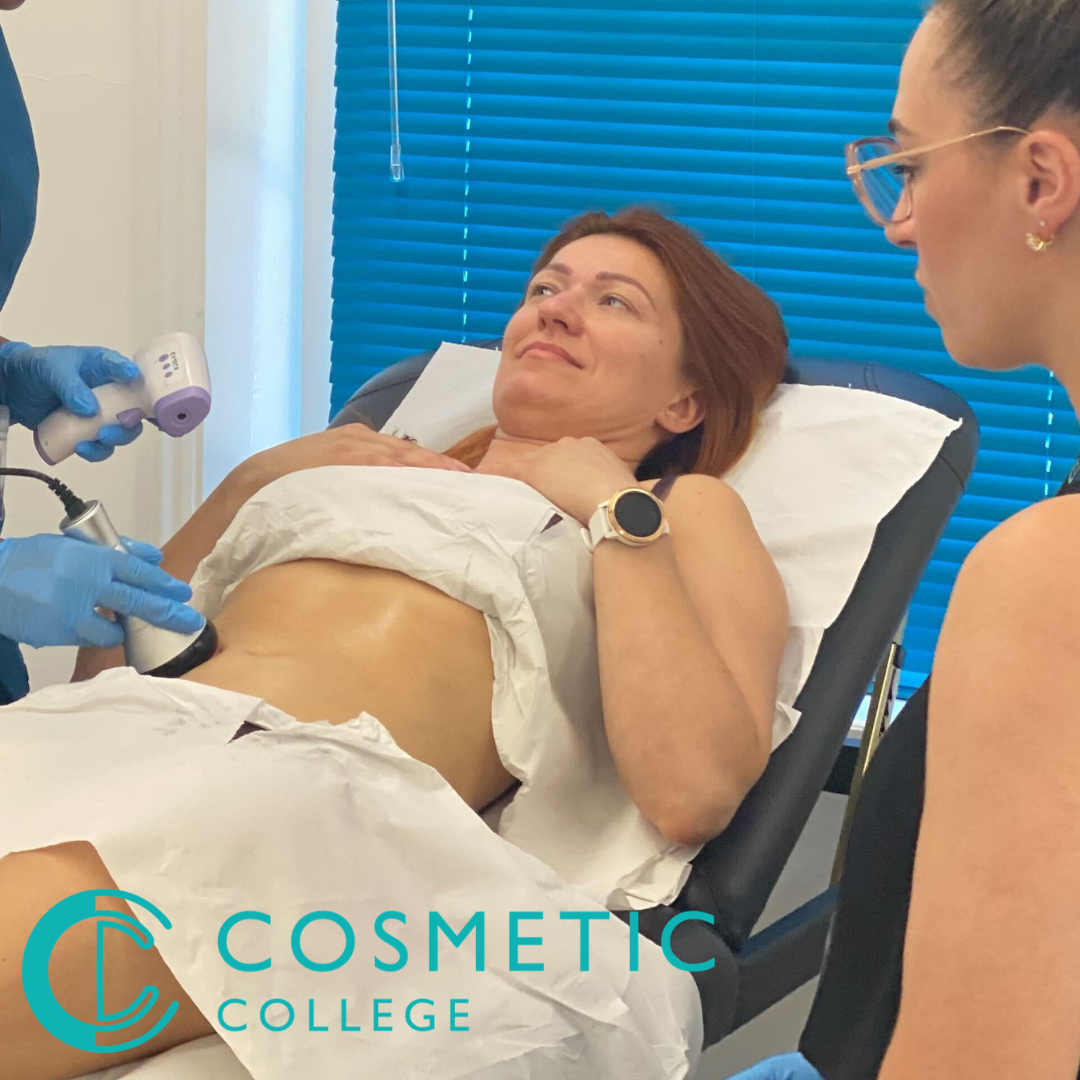
Body Sculpting Training Course
By Cosmetic College
Non-surgical treatments for inch-loss & body contouring. This course is designed to train candidates to provide expert treatments to the highest standards. This will enable you to gain insurance and to commence work legally to perform these treatments in the public sector. Ultrasonic Cavitation & Radio frequency can be used in the following areas: Abdomen Buttocks Arms Inner and Outer Thighs Love Handles Course prerequisites No previous experience or qualifications are necessary to enrol onto this course with a good command of english required. Course structure You are required to complete our online theory study via our accessible e-learning portal and practical training onsite. All courses are kept intimate with a maximum of 6 learners to a class. Areas covered within the course: What are Ultrasonic Cavitation and RF, and how do they work? Benefits of Ultrasonic Cavitation and RF include fat reduction and skin tightening Anatomy and Physiology related to Ultrasonic Cavitation and RF Understanding Fat Cells Client consultation Pre and post-treatment advice Contraindications Treatment contra-actions Treatment process including live model experience for cavitation Frequently Asked Questions How can I book? We have a few options for you to book. You can book by selecting an available training date above here on our website, by contacting us through email at hello@cosmetic.college or by contacting us on 0333 015 5117. Where is the Cosmetic College The Cosmetic College is located at: 3 Locks Court, 429 Crofton Road, Orpington, BR6 8NL Is a deposit required to book? All enrolments are charged an administration fee which is non-refundable. When you enrol you can elect to pay a deposit of 10% plus the administration fee or pay the total training course in full. We have full details of the terms and conditions of training course enrolments here What is the course duration? 1 day + pre-study via our online learning platform. Is there a kit included in this course? The are a few different options we provide for our students on this course. The advertised price is for training only. We stock table-top machines at a separate cost subject to availability as well as provide links to recommended alternative suppliers.
Areola Micropigmentation Training Course
By Cosmetic College
You will also learn how to visually improve scarring and areola asymmetries resulting from breast reduction and uplift surgical procedures. The specialist knowledge and techniques are gained through theory and step-by-step practice, which progresses from drawing on paper, to breast mound exercises and finally working on models. Course Prerequisites This course is suitable for those with no prior experience and is designed to provide the student with the ability to seek employment or start their own business upon qualification. Course Pre Study Before beginning practical training, students are required to complete: 30 hours of easy to access e-learning A series of online assessments Course Structure This is a 1 day course with intensive theory and practical sessions. All courses are kept intimate with a maximum of 4 students per course. Areas of study: The fundamental theory of cosmetic tattooing Anatomy and Physiology Health and Safety Colour Theory Client Assessment and Suitability Legal requirements, obtaining consent with consultation techniques and documentation Clinical setup procedures Pre-treatment drawing techniques Practical technique sessions on practice materials and model clients. Professional live demonstrations Industry leading pre and post treatment care for your clients Practical areas included in depth within the course are: Correct areola design planning Blending techniques Sanitation and sterilisation Correct station set up Skin colour matching analysis Needle specification
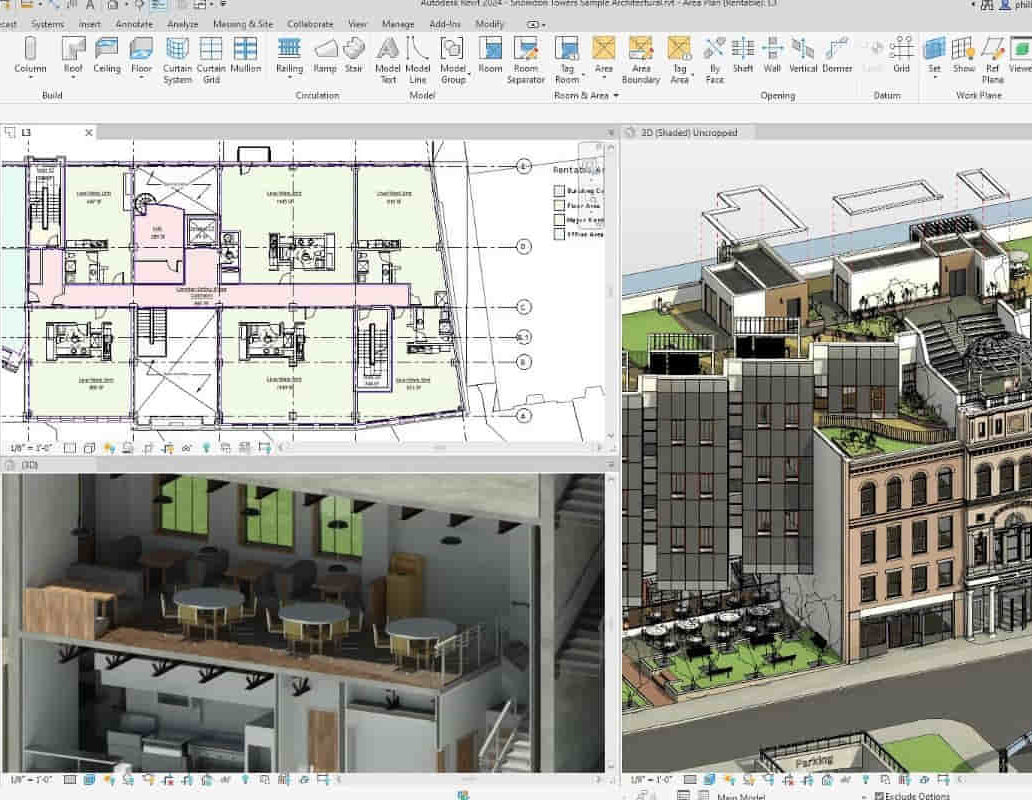
Revit V-Ray 3ds Max Visualization Training Course
By ATL Autocad Training London
Why Learn Revit V-Ray 3ds Max Visualization Training Course? Revit is perfect for architecture, and 3ds Max, with V-Ray rendering, offers super results. Autodesk Revit Interoperability integrates Revit and 3ds Max seamlessly, combining metadata, materials, and lighting. Architects and designers using 3ds Max tools for architectural designs. Check our Website Booking: 1-on-1 Duration: You can split these 40 hours over as many days, Mon to Sat between 9 am to 7 pm, or call 02077202581 to book In-person or Live Online Module 1: Revit Fundamentals (16 hours) Introduction to Revit: Acquaint yourself with Revit's essential concepts and tools. Interface and Workspace: Navigate Revit's interface and workspace seamlessly. Building Information Modeling (BIM) Workflow: Grasp the fundamental BIM workflow principles for effective modeling. Basic Building Model Creation: Learn to craft a foundational building model using Revit. Basic Modeling Techniques: Master elements like walls, doors, windows, floors, roofs, stairs, and railings. Advanced Revit Modeling: Dive into advanced topics, including family creation and working with intricate geometries. Annotation and Documentation: Enhance your projects with text, dimensions, schedules, and efficient printing/exporting methods. Module 2: 3ds Max Mastery (16 hours) Introduction to 3ds Max: Familiarize yourself with the core aspects and interface of 3ds Max. 3D Modeling Workflow: Understand the intricacies of creating basic 3D models in 3ds Max. Basic 3D Modeling Techniques: Work with primitive shapes, splines, and create complex 3D models. Materials and Textures: Explore the material editor, apply materials, and craft realistic textures. Lighting and Cameras: Learn to illuminate scenes, utilize the daylight system, and optimize camera angles. Module 3: V-Ray Rendering Proficiency (8 hours) Introduction to V-Ray: Grasp the fundamentals of V-Ray, including its interface and workflow. V-Ray Materials and Textures: Understand the intricacies of V-Ray materials and textures for lifelike renderings. Basic Rendering Techniques: Dive into essential rendering techniques, including lighting adjustments and global illumination. Advanced Rendering Methods: Explore advanced techniques to elevate the quality of your renders. Gain expertise in Revit, 3ds Max, and V-Ray through our comprehensive training, mastering the core concepts and advanced techniques necessary for stunning architectural visualizations. Upon completing the course, you will: Master Architectural Modeling: Proficiently create intricate architectural models using Revit and 3ds Max. Visualize Realistically: Utilize advanced rendering techniques in V-Ray for lifelike visualizations with realistic lighting and materials. Efficient Documentation: Learn annotation and documentation skills for clear and effective project communication. Enhance Collaboration: Understand file interoperability for seamless collaboration with diverse software platforms. Build a Professional Portfolio: Create a diverse portfolio showcasing your skills in architectural visualization. Career Opportunities: Upon completion, you can pursue roles such as: Architectural Visualizer 3D Modeler Render Artist BIM Specialist Freelancer/Consultant Architectural Technician Visualization Trainer Mastering these tools opens doors to versatile career opportunities in architectural visualization. Download Revit Download 3ds max Download Vray Revit and 3dsMax V-Ray Visualization Training: Master architectural visualization with our intensive course blending Revit, 3dsMax, and V-Ray. Dive into modeling, materials, lighting, and rendering for photorealistic results. Course Highlights: Comprehensive Learning: Cover fundamental and advanced techniques in Revit and 3dsMax, enhancing your visualization skills. V-Ray Expertise: Explore advanced V-Ray rendering techniques, from global illumination to realistic material creation. Real-World Projects: Work on industry-relevant projects, building a portfolio of professional-grade visualizations. Flexible Learning: Choose in-person or live online sessions for interactive instruction and engaging discussions. Lesson Recordings: Access session recordings to review concepts, reinforcing your learning at your own pace. Lifetime Support: Enjoy lifetime email support for ongoing guidance from experienced instructors, ensuring your success beyond the course. Enroll now to transform your architectural designs into captivating visualizations, impressing clients with your skills and creativity. Join our training for a comprehensive learning experience, enhancing your expertise in Revit, 3dsMax, and V-Ray. Revit | 3ds max | V-Ray Course Benefits: Comprehensive Skill Set: Master Revit, 3dsMax, and V-Ray for exceptional architectural visualization, from basic modeling to advanced rendering. Realistic Rendering: Harness V-Ray's capabilities for lifelike visuals, covering global illumination, materials, and textures. Practical Experience: Work on industry-relevant projects, building a professional portfolio with hands-on exercises. Flexible Learning: Choose in-person or live online sessions for interactive instruction and discussion, tailored to your preferences. Review Resources: Access recorded class sessions to reinforce your knowledge and skills at your convenience. Lifetime Support: Enjoy lifetime email support from experienced instructors, ensuring ongoing guidance for your projects.
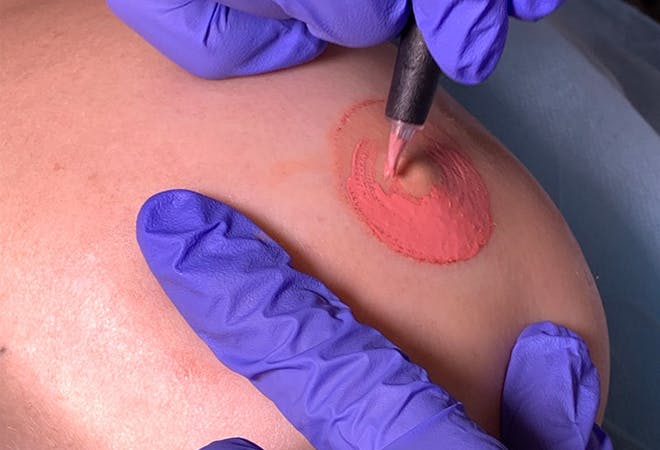
Scalp Micropigmentation Training Course
By Cosmetic College
Scalp micropigmentation, otherwise known as SMP, is applying pigment to the epidermal level of the scalp to replicate the natural appearance of hair follicles. Similar to tattooing, the ink used during scalp micropigmentation permanently marks the scalp, giving the look of a full head of hair that has been shaved or adding density to hair that may be thinning. For many people suffering from hair loss, Alopecia or scarring, this cosmetic treatment offers a life-changing, viable and long-term solution. As a practitioner, scalp micropigmentation requires in-depth training, specialised equipment and extensive knowledge and skill. The process consists of multiple sessions in which carefully selected pigment is implanted into the scalp using specialised needles. One of the great things about doing micropigmentation training is that it does not require you to have any medicine or surgery background. You can undertake micropigmentation courses and become proficient in the technique in a short time. This means you can start practising extremely quickly after deciding to join the industry. Course Prerequisites This course is suitable for those with no prior experience and is designed to provide the student with the ability to seek employment or start their own business upon qualification. Course Pre Study Before beginning practical training, students are required to complete: 30 hours of easy to access e-learning A series of online assessments Course Structure This is a 1 days intensive theory and practical sessions. All courses are kept intimate with a maximum of 4 students per course. Areas of study: The fundamental theory of cosmetic tattooing Anatomy and Physiology Health and Safety Colour Theory Client Assessment and Suitability Legal requirements, obtaining consent with consultation techniques and documentation Clinical setup procedures Pre-treatment drawing techniques Practical technique sessions on practice materials and model clients. Professional live demonstrations Industry leading pre and post treatment care for your clients Practical areas included in depth within the course are: Proper hairline design Blending techniques Sanitation and sterilisation Proper station set up Skin colour matching analysis Needle specification

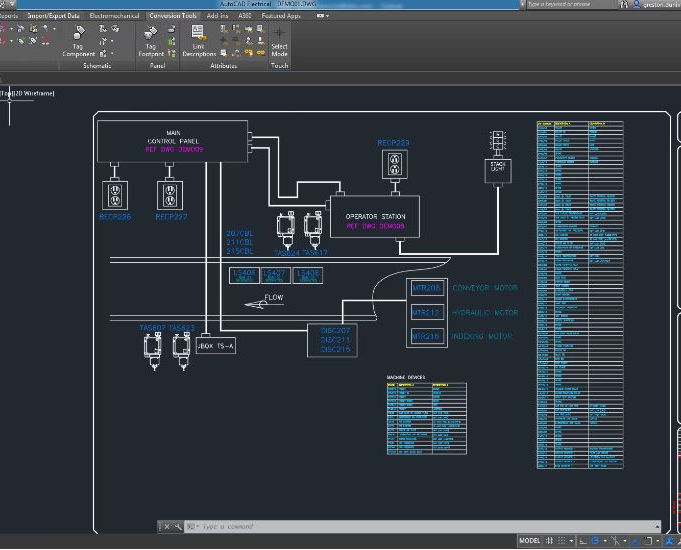
AutoCAD Electrical Training Course | Bespoke
By London Design Training Courses
Why Choose AutoCAD Electrical Training Course | Bespoke? Course Link Master electrical drawings, schematics, and layouts. Utilize symbol libraries and automated circuit design. Access recorded lessons and lifetime email support. "Say goodbye to group classes and hello to 1-on-1 Courses. Dial 02077202581 or WhatsApp 07970325184 to reserve your dates. Duration: 16 hrs. Method: 1-on-1, Personalized attention. Schedule: Tailor your own hours of your choice, available from Mon to Sat between 9 am and 7 pm. AutoCAD Electrical Training Course: Specialized electrical CAD design skills with precision. Streamlined workflows for efficient design. Consistent adherence to industry standards. Increased productivity in electrical design. Enhanced collaboration with other professionals. Access to recorded lessons for review. Lifetime email support for ongoing assistance. Learn AutoCAD for electrical design. Enroll now and create accurate and professional electrical drawings with confidence. Choose in-person or live online sessions. AutoCAD Electrical Training Course: Specialized electrical CAD design skills with precision. Streamlined workflows for efficient design. Consistent adherence to industry standards. Increased productivity in electrical design. Enhanced collaboration with other professionals. Access to recorded lessons for review. Lifetime email support for ongoing assistance. Learn AutoCAD for electrical design. Enroll now and create accurate and professional electrical drawings with confidence. Choose in-person or live online sessions. AutoCAD Electrical Course Content: Introduction to AutoCAD Electrical Software: Overview and features of AutoCAD Electrical Understanding the software interface and tools Project file structure and management Layout and Navigation: Navigating the AutoCAD Electrical workspace Creating new project files and using attribute editors Understanding WDD, WDX, and WDF project files Exploring the Project Manager interface and attribute editors Electrical Diagram Drawing: Numbering and titling wires in diagrams Labelling components Utilizing diagram symbol libraries Creating and editing Electrical Control Circuits (ECC) Component dialog box and Circuit Scale dialog box Introduction to Programmable Logic Controllers (PLCs) and Integrated Systems: PLC Symbols and Concepts Inserting Programmable Logic Controllers (PLCs) into diagrams Adding PLC Units to diagrams Working with PLC Input and Output points and circuits Understanding PLC-based classification Using the Spreadsheet to PLC Input and Output Points utility Custom and Bespoke Symbols: Creating custom symbols for Switches, Wires, Contactors, Motors, Transformers, etc. Specifying symbol conventions and standards Offline and online usage of AutoCAD Electrical databases Drawing for Terminals and Plans: Implementing Terminal symbols in diagrams Handling terminal plans and locations Working with compound level terminals and locations Utilizing the Component command for single and multiple components Managing Jumpers and wiring Modifying Terminal Strips and Dual In-Line Packages (DIP) Understanding DIN Rail, Electrical Enclosure, Circuit Breakers, and Electrical Equipment Generating PDFs and Reports: Exporting drawings to PDF format Organizing report templates Automating the generation of reports Creating Electrical Audit Reports This AutoCAD Electrical course provides comprehensive knowledge of the software, focusing on electrical diagram drawing, symbol creation, PLC integration, terminal planning, and report generation. Participants will gain the skills needed to efficiently design electrical systems using AutoCAD Electrical software. Upon completing the AutoCAD Electrical course, participants will master the intricacies of the software. They will adeptly create accurate electrical diagrams, seamlessly integrate PLCs, design personalized symbols, strategize terminal layouts, and produce reports with precision and efficiency. Armed with these skills, graduates will possess the expertise to confidently design complex electrical systems. This proficiency opens avenues in various job roles such as Electrical Design Engineer, CAD Technician, Control Systems Designer, or even Project Manager in industries like manufacturing, automation, and engineering consultancy.
V-Ray Course For Architects
By ATL Autocad Training London
Why learn V-Ray for architects and designers? Realistic Visuals: V-Ray produces lifelike renderings for precise design visualization. Enhanced Presentations: Stunning visuals secure approvals and investments effectively. Time and Cost Efficiency: Streamlines design iterations, cutting down prototyping expenses. Click here for more info: Website Scheduling Your Training: You can also call 02077202581 to book. Training Duration: 10 hours Method: In-person face-to-face sessions or live online. Course Title: V-Ray Essentials for Architects and Designers Course Duration: 10 Hours Course Overview: Unlock the power of V-Ray, the industry-standard rendering software, and elevate your architectural and design projects to new heights. In this comprehensive 10-hour course, you'll dive deep into V-Ray and gain the skills needed to create stunning visualizations. Whether you're an architect or designer, this course will equip you with the knowledge and techniques to bring your ideas to life. Module 1: Introduction to V-Ray (1 hour) Understanding the V-Ray interface Navigating the V-Ray toolbar Setting up your first V-Ray project Module 2: Lighting Mastery (2 hours) Utilizing various light sources Achieving realistic daylight simulations Creating artificial lighting setups Mastering V-Ray's advanced lighting tools Module 3: Material Magic (2 hours) Exploring V-Ray materials Creating realistic textures and finishes Understanding material properties Working with material libraries Module 4: Perfecting Render Settings (1 hour) Configuring render settings for optimal results Setting up render elements for post-processing Achieving photorealistic renderings Module 5: Advanced Rendering Techniques (2 hours) Fine-tuning render settings for specific scenarios Creating stunning visual effects Optimizing render times Rendering animations and walkthroughs Module 6: Realistic Environments (1 hour) Incorporating background images and environments Adding context to your architectural scenes Achieving seamless integration of 3D models and backgrounds Module 7: Portfolio-Ready Projects (1 hour) Applying V-Ray skills to complete a professional project Assembling a portfolio showcasing your work Course Benefits: Master V-Ray for architectural and design projects. Create photorealistic renderings with confidence. Customize lighting, materials, and textures for your designs. Optimize render settings for efficiency and quality. Enhance your portfolio with impressive visualizations. Receive lifetime email support for continued guidance. Explore career opportunities as a rendering specialist. Who Should Attend: Architects Interior Designers 3D Artists Visualization Specialists CGI Artists Architectural Renderers Game Environment Artists Virtual Reality (VR) Developers Anyone passionate about architectural rendering and design Method of Instruction: 1-on-1 personalized training In-person or live online sessions Hands-on exercises and practical projects Upon completing the "V-Ray Essentials for Architects and Designers" course, participants will: V-Ray Proficiency: Master V-Ray rendering for photorealistic visualizations. Advanced Lighting Skills: Create dynamic and realistic lighting scenarios. Material Expertise: Customize textures and materials for enhanced visuals. Optimized Renders: Configure settings for efficient workflows. Advanced Techniques: Learn rendering tricks for stunning effects. Realistic Environments: Integrate 3D models seamlessly into real-world settings. Portfolio Development: Build a competitive portfolio showcasing advanced rendering skills. Benefits for Interior Designers and Architects: Enhanced Visualization: Improve design communication with realistic visualizations. Competitive Edge: Stand out with high-quality renderings. Efficient Decision-Making: Experiment and refine designs before execution. Streamlined Workflows: Produce quality renders efficiently. Career Opportunities: Explore roles in architectural visualization, 3D art, and CGI. In short, this course equips interior designers and architects with V-Ray skills to create impressive visualizations, improve communication, gain a competitive edge, streamline workflows, and expand career options. Master Vray Rendering: Achieve proficiency in Vray rendering for architectural and interior design projects. Industry Excellence: Learn industry-standard practices and workflows to produce high-quality results. Flexible Learning: Choose between in-person or live online training to suit your schedule. Resourceful Learning: Access recorded lessons for convenient review and reinforcement. Ongoing Support: Benefit from lifetime email support, ensuring you receive guidance beyond the course. Career Guidance: Receive free career advice to make informed decisions about your professional growth. Upon completion, our Vray for Architects and Interior Designers Training Course opens doors to various career opportunities in the architecture and design industry. Graduates with advanced rendering skills can explore roles such as: Architectural Visualizer Interior Designer 3D Artist Rendering Specialist Visualization Specialist CGI Artist Architectural Renderer Game Environment Artist Virtual Reality (VR) Developer Freelance Rendering Professional Vray Mastery: Gain expertise in Vray rendering for architectural and interior design projects. Industry-Approved Methods: Learn tried-and-true workflows for exceptional results. Flexible Learning: Opt for in-person or live online training at your convenience. Easy Review: Access recorded lessons to reinforce your knowledge conveniently. Lifelong Support: Receive ongoing guidance even after course completion. Career Consultation: Make informed decisions about your professional growth. Career Opportunities: Unlock doors to diverse roles in architecture and design, including Architectural Visualizer, Interior Designer, 3D Artist, Rendering Specialist, and more.