- Professional Development
- Medicine & Nursing
- Arts & Crafts
- Health & Wellbeing
- Personal Development
Dressmaking 3 day workshop
By cheekyhandmades
Start by learning to read a commercial dressmaking pattern, adjusting it to your own unique measurements, and then learn to sew up your garment. The class has a maximum of 4 people in it so you get tons of one to one support, and you will learn a lot! This is a really comprehensive introduction to learning to make your own clothes. It is a small class and nicely paced so you will be able to ask all the questions and really delve quite deep into it all. Most of my past students now regulary make their own clothes! I am passionate about teaching people about fit and we will talk about dart manipulation, bust adjustments, neckline and sleeve adjustments etc. We usually all work from the same pattern but if you want to make something else because you, for example, don't wear dresses, I am very flexible.
V-Ray Course For Architects
By ATL Autocad Training London
Why learn V-Ray for architects and designers? Realistic Visuals: V-Ray produces lifelike renderings for precise design visualization. Enhanced Presentations: Stunning visuals secure approvals and investments effectively. Time and Cost Efficiency: Streamlines design iterations, cutting down prototyping expenses. Click here for more info: Website Scheduling Your Training: You can also call 02077202581 to book. Training Duration: 10 hours Method: In-person face-to-face sessions or live online. Course Title: V-Ray Essentials for Architects and Designers Course Duration: 10 Hours Course Overview: Unlock the power of V-Ray, the industry-standard rendering software, and elevate your architectural and design projects to new heights. In this comprehensive 10-hour course, you'll dive deep into V-Ray and gain the skills needed to create stunning visualizations. Whether you're an architect or designer, this course will equip you with the knowledge and techniques to bring your ideas to life. Module 1: Introduction to V-Ray (1 hour) Understanding the V-Ray interface Navigating the V-Ray toolbar Setting up your first V-Ray project Module 2: Lighting Mastery (2 hours) Utilizing various light sources Achieving realistic daylight simulations Creating artificial lighting setups Mastering V-Ray's advanced lighting tools Module 3: Material Magic (2 hours) Exploring V-Ray materials Creating realistic textures and finishes Understanding material properties Working with material libraries Module 4: Perfecting Render Settings (1 hour) Configuring render settings for optimal results Setting up render elements for post-processing Achieving photorealistic renderings Module 5: Advanced Rendering Techniques (2 hours) Fine-tuning render settings for specific scenarios Creating stunning visual effects Optimizing render times Rendering animations and walkthroughs Module 6: Realistic Environments (1 hour) Incorporating background images and environments Adding context to your architectural scenes Achieving seamless integration of 3D models and backgrounds Module 7: Portfolio-Ready Projects (1 hour) Applying V-Ray skills to complete a professional project Assembling a portfolio showcasing your work Course Benefits: Master V-Ray for architectural and design projects. Create photorealistic renderings with confidence. Customize lighting, materials, and textures for your designs. Optimize render settings for efficiency and quality. Enhance your portfolio with impressive visualizations. Receive lifetime email support for continued guidance. Explore career opportunities as a rendering specialist. Who Should Attend: Architects Interior Designers 3D Artists Visualization Specialists CGI Artists Architectural Renderers Game Environment Artists Virtual Reality (VR) Developers Anyone passionate about architectural rendering and design Method of Instruction: 1-on-1 personalized training In-person or live online sessions Hands-on exercises and practical projects Upon completing the "V-Ray Essentials for Architects and Designers" course, participants will: V-Ray Proficiency: Master V-Ray rendering for photorealistic visualizations. Advanced Lighting Skills: Create dynamic and realistic lighting scenarios. Material Expertise: Customize textures and materials for enhanced visuals. Optimized Renders: Configure settings for efficient workflows. Advanced Techniques: Learn rendering tricks for stunning effects. Realistic Environments: Integrate 3D models seamlessly into real-world settings. Portfolio Development: Build a competitive portfolio showcasing advanced rendering skills. Benefits for Interior Designers and Architects: Enhanced Visualization: Improve design communication with realistic visualizations. Competitive Edge: Stand out with high-quality renderings. Efficient Decision-Making: Experiment and refine designs before execution. Streamlined Workflows: Produce quality renders efficiently. Career Opportunities: Explore roles in architectural visualization, 3D art, and CGI. In short, this course equips interior designers and architects with V-Ray skills to create impressive visualizations, improve communication, gain a competitive edge, streamline workflows, and expand career options. Master Vray Rendering: Achieve proficiency in Vray rendering for architectural and interior design projects. Industry Excellence: Learn industry-standard practices and workflows to produce high-quality results. Flexible Learning: Choose between in-person or live online training to suit your schedule. Resourceful Learning: Access recorded lessons for convenient review and reinforcement. Ongoing Support: Benefit from lifetime email support, ensuring you receive guidance beyond the course. Career Guidance: Receive free career advice to make informed decisions about your professional growth. Upon completion, our Vray for Architects and Interior Designers Training Course opens doors to various career opportunities in the architecture and design industry. Graduates with advanced rendering skills can explore roles such as: Architectural Visualizer Interior Designer 3D Artist Rendering Specialist Visualization Specialist CGI Artist Architectural Renderer Game Environment Artist Virtual Reality (VR) Developer Freelance Rendering Professional Vray Mastery: Gain expertise in Vray rendering for architectural and interior design projects. Industry-Approved Methods: Learn tried-and-true workflows for exceptional results. Flexible Learning: Opt for in-person or live online training at your convenience. Easy Review: Access recorded lessons to reinforce your knowledge conveniently. Lifelong Support: Receive ongoing guidance even after course completion. Career Consultation: Make informed decisions about your professional growth. Career Opportunities: Unlock doors to diverse roles in architecture and design, including Architectural Visualizer, Interior Designer, 3D Artist, Rendering Specialist, and more.

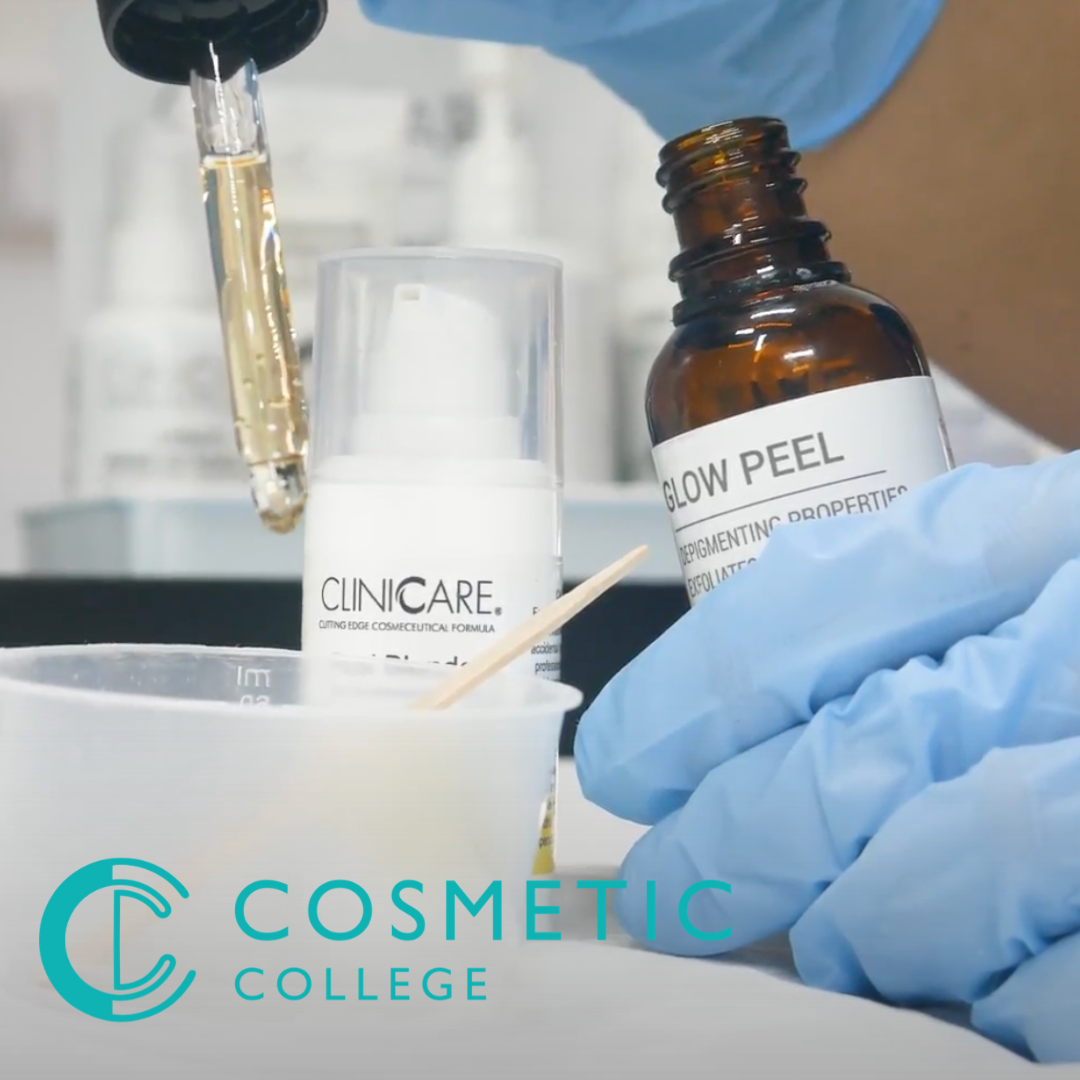
Chemical Skin Peels (ClinicCare) Training Course
By Cosmetic College
As the field of skin technology and products continues to evolve, skin peels have undergone a remarkable resurgence in popularity. These treatments, also known as "chemical" peels, harness the advancements in specialised products to exfoliate the skin and eliminate dead cells, providing remarkable results while ensuring client comfort. Our course will introduce you to a variety of natural acids, such as glycolic, lactic, and salicylic acid, which are used in modern skin peels. You'll learn the art of mixing peels and working with pre-mixed products, enabling you to customise treatments to address specific skincare concerns and conditions. Our comprehensive training will empower you to confidently combine various skin peels, enhancing the effectiveness of your existing facial treatments. By extending the efficacy of your services, you'll provide your clients with exceptional results and a rejuvenated complexion. Moreover, you'll gain a deep understanding of the science behind skin peels, allowing you to educate your clients on the benefits and guide them towards achieving their skincare goals. Join our Skin Peel Course and unlock the potential of these innovative treatments. With our expert guidance, you'll acquire the expertise and knowledge to become a trusted skincare professional. Course Entry Requirements: Minimum of 18 years Good command of English Previous skin and facial training are desirable; we suggest that learners new to the industry enrol on our facial and skincare course before enrolling on our ClinicCare skin peel course. Course Pre-Study/Practical & Length: This course is a combination of theory study, virtual lectures and onsite practical Course Agenda: All courses are intimate with four learners in class 2-1 ratio. Areas covered within this course are: Anatomy and Physiology of the Skin Infection control Sharps and hazardous waste Pre-study chemical peel theory Practical training 1 model Professional live demonstrations Clinical setup Acids covered in this course: Glycolic acid Kojic acid Lactic acid Enzyme peels Mandelic acid Arbutin Phytic Acid Salicylic acid Equipment / Starter Kits A professional starter kit can be purchased with this course. The kit costs 200 and is an additional cost to the training fees. Key Information A very popular treatment that is growing in popularity. Quick appointments. Minimal downtime which produces quality results. We gear the training around the use of the Clinicare brand which is well-known, reputable and produces effective results. Training in chemical skin peels is the first step for many beauty therapists to become aestheticians. 8 types of chemical peels are covered in this training course, providing you with the knowledge and skills to help clients with a wide range of skin concerns. The course offers hands-on practical training in a small group setting, allowing for personalised instruction and support from the instructor. The course covers a comprehensive curriculum, including the theory behind chemical peels and their various types, as well as practical application techniques. Upon completion, participants will receive a certificate of achievement that demonstrates their newfound knowledge and skills. The use of the Clinicare brand in the training program ensures that participants are learning with products that are highly effective and widely recognised in the beauty industry. The combination of e-learning and practical training provides participants with a well-rounded educational experience, allowing them to build their knowledge and confidence in a convenient and flexible manner. Chemical skin peels are in high demand, making this training program a valuable investment for anyone looking to expand their skills and grow their business. The course is accredited by ABT & CPD, providing participants with the assurance that the training is of high quality and meets industry standards. Course Benefits Benefits for Students Expertise in Skin Rejuvenation: By completing this training course, you will gain in-depth knowledge of chemical skin peels and their application. You will learn various peel types, their effects on the skin, and how to select the appropriate peel for different skin concerns. This expertise will enable you to provide effective treatments and achieve remarkable results for your clients. Versatility in Treating Skin Concerns: Chemical skin peels can address a wide range of skin concerns, including acne, hyperpigmentation, fine lines, and uneven skin texture. By enrolling in this course, you will acquire the skills to tailor treatments to meet individual client needs, helping them achieve healthier, smoother, and more radiant skin. Advanced Techniques and Safety: Our training course focuses on the latest techniques and safety protocols in performing chemical skin peels. You will learn about skin assessment, pre-treatment preparation, peel application methods, post-treatment care, and potential complications. This knowledge will ensure the safety of your clients and enhance your professional credibility. Practical Hands-on Experience: Practical training is an essential component of our course. You will have the opportunity to practice chemical skin peel techniques on models under the guidance of experienced instructors. This hands-on experience will boost your confidence and proficiency in performing the treatments. Benefits for Clients Personalised Treatment Plans: With your comprehensive understanding of chemical skin peels, you will be able to assess clients' skin concerns and develop customised treatment plans. This tailored approach will address their specific needs, leading to more effective and satisfactory results. Improved Skin Texture and Appearance: Chemical skin peels can significantly improve skin texture, reduce hyperpigmentation, diminish acne scars, and minimise the appearance of fine lines and wrinkles. Your expertise in performing these treatments will help clients achieve smoother, clearer, and more youthful-looking skin. Confidence and Trust: Clients will have confidence in your abilities as a trained professional in chemical skin peels. Your knowledge of different peel types and their effects, along with your commitment to safety, will build trust and assurance in your clients, creating a positive treatment experience. Earning Potential Your earning potential can increase after completing the Chemical Skin Peels (ClinicCare) Training Course: Expanded Service Offerings: With expertise in chemical skin peels, you can expand your service menu and offer a popular and in-demand treatment. This diversification can attract new clients and increase your earning potential. Client Retention and Referrals: Satisfied clients who experience positive results from chemical skin peels are more likely to become repeat customers. Additionally, they may refer friends, family, and colleagues to your practice, further growing your client base and increasing your revenue. Professional Advancement: By enhancing your skills and knowledge in chemical skin peels, you position yourself as a knowledgeable and sought-after aesthetics professional. This can lead to opportunities for career advancement, such as working in prestigious clinics, and spas, or establishing your own practice, which can contribute to higher earning potential. Frequently Asked Questions Is this training course suitable for beginners or those with prior experience? Our Chemical Skin Peels (ClinicCare) Training Course is designed for both beginners and experienced professionals in the aesthetics industry. Whether you are just starting your career or looking to enhance your skills, this course will provide you with the necessary knowledge and techniques. What will I learn in this training course? In this course, you will learn about different types of chemical skin peels, their indications, and the process of performing the treatment. You will gain a comprehensive understanding of skin anatomy, product selection, client assessment, treatment planning, application techniques, and post-treatment care. Will I receive hands-on training during the course? Yes, hands-on training is an integral part of our Chemical Skin Peels (ClinicCare) Training Course. You will have the opportunity to practice the techniques on models under the guidance and supervision of our experienced instructors. This practical experience will help you develop confidence and proficiency in performing chemical skin peels. What products or brands will be used in the training course? Our training course focuses on ClinicCare chemical skin peels. ClinicCare is a renowned brand known for its high-quality and effective skincare products. You will learn about their specific range of peels and gain hands-on experience in working with these products. Will I receive a certification upon completion of the course? Yes, upon successfully completing our Chemical Skin Peels (ClinicCare) Training Course, you will receive a certification of completion. This certification validates your training and demonstrates your competence in performing chemical skin peels using ClinicCare products. Are there any post-training support or resources available? Yes, we provide post-training support to our students. Our instructors are available to answer any questions or provide guidance even after you complete the course. Additionally, you will have access to resources and materials that can further enhance your knowledge and skills in chemical skin peels. Can I incorporate chemical skin peels into my existing practice? Absolutely! Chemical skin peels are a popular and effective treatment for various skin concerns. Upon completing the course, you will be equipped with the skills to incorporate chemical skin peels into your existing practice or start offering this service to your clients.
18th edition course Dover
By MJ Electrical Training
City & Guilds 18th edition course with 2382-22 final exam only £234.00. Exams available every week across the UK, same day results, quick certificate, best prices..

Sew a child's garment
By cheekyhandmades
Learn to sew a child's garment in this long (6 hours ish) day class. I stock the Two Stitches patterns (https://www.twostitchespatterns.com/printed-patterns-1) and one of these is included in your class fee. I also have patterns for quite a few simple baby and toddler garments you can use. Once you ket me know what you want to make and what size I will let you know how much and what kind of fabric you need and what else you need to bring. This is a fairly high paced class so you need to be ok with threading up etc aline and know how to make seams, backstitch etc. The sewing won't be complex but we won't have time to explain how a machine works. If you are not sure please do a beginners or refresher's class first.

Maya Essentials Basic to Fundamental Training Program
By ATL Autocad Training London
Autodesk Maya Basic to Fundamentals Training. Ideal for beginners, learn to navigate Maya's interface, create models, apply textures, animate objects, and delve into advanced topics. Engage in interactive in-person or online sessions. Access recorded lessons for review and receive lifelong email support. Learn 3D modeling and animation - enroll today! Click here for more info: Website Duration: 10 hours of immersive learning. Method: Personalized 1-to-1 sessions and Choose your own day and time Monday to Saturday 9 am to 7 pm. Course Overview: I. Introduction to Maya (1 hour) Maya overview and applications Basic interface and navigation tools Project creation and management II. 3D Modeling Techniques (2 hours) Polygon modeling fundamentals Creating, editing, and refining objects Advanced techniques like extrusions and bevels III. Texturing and Materials (1 hour) Introduction to texturing concepts Material creation and application Texture mapping, UV unwrapping, and image importing IV. Lighting and Rendering (1.5 hours) Basic lighting techniques and composition setup Rendering images and animations effectively Output options and file formats V. Animation Skills (2.5 hours) Keyframe animation and animation curves Character rigging and animation Special effects: particles, fluids, explosions, and smoke VI. Intermediate Modeling Techniques (1 hour) NURBS modeling basics and advanced curves/surfaces manipulation Creating organic shapes with NURBS and sculpting tools VII. Conclusion and Next Steps (0.5 hours) Course review and recap Further learning resources and tips Q&A and feedback session Autodesk Maya Basic to Fundamentals Training Course Key Learning Areas: Advanced modeling techniques: Surfaces, Polygons, Subdiv Modeling, etc. Deformation methods: Twist, Lattice, Flare, Bend Shape manipulation: Lines, Pen tools, Revolve, Loft, Planer, Text in Maya Animation: Keyframes, Path animations, Timeline Texturing and Rendering: Diffuse, Reflections, Transparency, Shaders, Resolution settings Lighting and Camera: Basic & advanced lights, Shadows, Camera effects, Path animation Note: The course content and duration are adaptable to cater to learners' needs and proficiency levels. Maya Interface Proficiency: Participants will develop a comprehensive understanding of Maya's interface, tools, and workflow, allowing them to navigate seamlessly and manage projects efficiently. 3D Modeling Skills: Students will be equipped with polygon modeling techniques to create both basic and complex 3D models with precision. They will master the art of shaping and refining objects, elevating their creativity in 3D design. Texturing and Materials Mastery: Learners will gain expertise in texturing, applying materials, and incorporating images to enhance the visual appeal of their 3D models. They will create captivating surfaces with colors, textures, and reflectivity. Lighting and Rendering Expertise: Participants will learn essential lighting techniques to illuminate their scenes effectively. They will set up cameras and produce high-quality still images and dynamic animations with Maya's powerful rendering capabilities. Animation Techniques: Students will explore the world of animation, utilizing keyframe techniques and animation curves to bring their creations to life. They will delve into character rigging, animating characters with sophistication and realism. Special Effects and Dynamics: Learners will unleash their creativity with mesmerizing particle systems, fluid simulations, and dynamic effects. They will craft captivating visuals, such as explosions and smoke, adding depth and excitement to their projects. Intermediate Modeling Techniques: Participants will refine their skills with NURBS modeling, mastering curve and surface manipulation. They will create intricate organic shapes, pushing the boundaries of their artistic expression. Creative Problem-Solving: Throughout the course, students will tackle real-world projects, facing challenges that foster creative problem-solving skills. They will gain confidence in overcoming obstacles in 3D modeling and animation. Maya Essentials Basic to Fundamental Training Program: Course Focus: Autodesk Maya Essentials, covering fundamental concepts and techniques. Duration: Flexible scheduling, tailored to individual learning pace. Method: Personalized 1-1 training, interactive sessions, hands-on projects. Curriculum Highlights: Introduction to Maya (1 hour): Interface overview, navigation, project management. 3D Modeling Techniques (2 hours): Polygon basics, object creation, advanced editing. Texturing and Materials (1 hour): Texture mapping, material application, UV unwrapping. Lighting and Rendering (1.5 hours): Lighting fundamentals, composition setup, effective rendering. Animation Skills (2.5 hours): Keyframe animation, character rigging, special effects. Intermediate Modeling (1 hour): NURBS modeling, organic shapes, sculpting tools. Conclusion and Next Steps (0.5 hours): Course review, learning resources, Q&A session. These resources will complement your training, providing additional support and insights as you explore the world of Autodesk Maya. Explore the World of 3D Animation: Master the intricacies of 3D computer graphics and animation using Autodesk Maya. Delve into modeling, texturing, animation, and rendering to bring your creative visions to life. Practical Learning Experience: Dive into hands-on projects refining your skills. Craft 3D models, apply textures, animate characters, and produce polished renders. Recognized Industry Expertise: Gain proficiency in Autodesk Maya, a leading software in entertainment, gaming, and animation. Enhance your employability with highly sought-after skills, opening doors to diverse career paths. Endless Applications: Uncover Maya's versatility in entertainment, architectural visualization, product design, and more. Tailor your expertise to align with your passions and career aspirations. Reinforcement through Recordings: Access comprehensive lesson recordings for thorough review. Revisit specific topics, reinforcing your grasp of Autodesk Maya at your own pace. Continuous Guidance: Receive lifetime email support for ongoing mentorship. Seek answers, clarifications, and expert advice, ensuring your continuous growth even after completing the course.

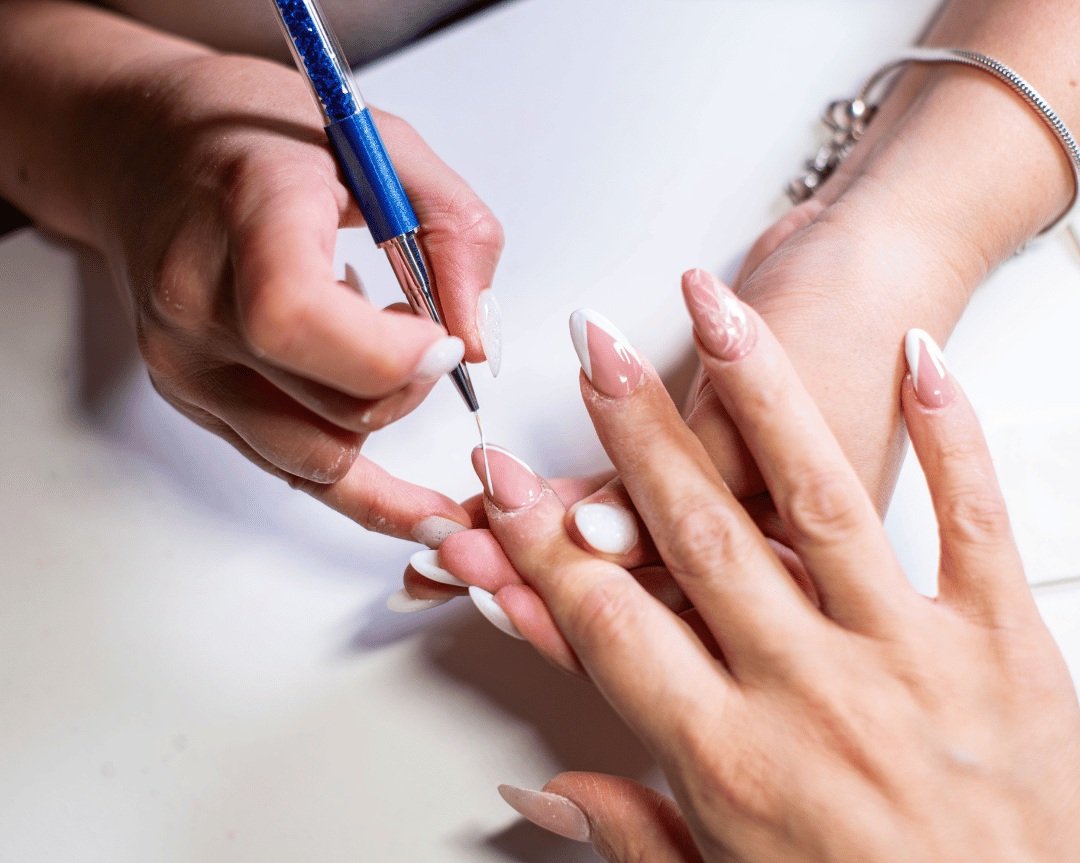
SCULPTING GEL COURSE
By Majestic Academy
Hard gel nail extension course is the most comprehensive UV gel extension course available in London. Our unique course structure and great teaching skills will help you to learn everything quickly and efficiently, all techniques are learnt in "hands-on" practical way. This course is a perfect balance of theory, demonstrations, and practice. Generation X - Sculpting Gels are specially formulated gels that complement a uniquely developed training Gel is one of the basic techniques in the world of professional nail enhancements, it is easier to apply than Acrylic and odour free. The product hardens in LED lamp and for that reason it gives you more time for creating a beautiful design, making it the ideal system for beginners. THE REQUIREMENTS Salon attire must be worn during the course. Student must have clean nail without enhancements and long hair tied back. To ensure maximum practice, students will be required to work on each other throughout the day or on own hands. To attend this course must you have diploma for manicure or Gel polish course. Model for the day 3 THE CONTENT Safety & hygiene Client consultation Record keeping Importance of sanitising and sterilising Aftercare advice How to organise a workspace Technical structure of a nail’s enhancement Troubleshooting gel Correct shape of extended nail Correct White & Pink application Troubleshooting gel Rules on nail design In-fills and removal Advice on products & suppliers Portfolio building process Getting models for practice Charges and loyalty schemes for clients Marketing advice, website, and brand building Organising advertising events Tool and Product introduction Clear overlay – practice on tip & hand Pink & White – practice on tip & hand Application of UV gel set of nails using sculpting technique Form& tips on real hands. Day 3 The 3rd day is a practice and exam day which you will book at the end of day 2. Price Include N2- David Collection Generation X - Sculpting Gels . Upon successful completion an course certificate will be awarded
Mastering Maya Basics to Intermediate Course
By ATL Autocad Training London
Why Choose Mastering Maya Basics to Intermediate Course? Click here for more info: Website Our courses cater to graphic designers, animators, and beginners, providing industry-standard animation skills. Dive into 3D animation, modeling, simulation, and rendering for film, TV, games, and ads. Duration: 20 hours Approach: 1-on-1 Sessions. Schedule: Design your own schedule by pre-booking a convenient hour of your choice, available Mon to Sat between 9 am and 7 pm. I. Introduction to Maya (1.5 hours) Understanding Maya and its Applications Navigating the Maya Interface and Basic Tools Creating and Managing Projects II. 3D Modeling (3 hours) Basics of Polygon Modeling Creating Simple and Complex 3D Shapes Organic Shape Creation using NURBS Advanced Techniques: Extrusions, Bevels, and Editable Objects III. Texturing and Materials (1.5 hours) Introduction to Texturing and Material Creation UV Unwrapping and Texture Mapping Importing and Applying Textures and Images IV. Lighting and Rendering (2 hours) Fundamental Lighting Techniques Camera Setup and Composition Rendering Images and Animations Output Options and File Formats V. Animation (4 hours) Keyframe Animation and Animation Curves Rigging and Animating Characters Motion Paths and Animation Layers Editing Animation Clips VI. Rigging (2 hours) Introduction to Rigging and Skeletons Binding Skin and Weight Maps Creating Rigging Systems for Characters VII. Special Effects (1.5 hours) Particle Systems and Dynamics Creating Fluids, Fire, and Other Effects Special Effects Editing: Explosions, Smoke, and more VIII. Advanced Modeling Techniques (1.5 hours) Complex Objects using Booleans and Deformers Modifying Curves and Surfaces Organic Shape Creation with Sculpting Tools IX. Conclusion and Next Steps (0.5 hours) Course Review Further Learning Tips and Resources Q&A and Feedback Please note: The course content and duration are flexible, tailored to match learners' needs and skill levels. Throughout the course, lifetime email support ensures you receive guidance with any challenges you face. Embark on your Autodesk Maya journey, exploring 3D modeling and animation with confidence. Additional Topics Covered: Modeling: Surfaces, Control Vertex, Polygons, Extrusion, Vertices, Edges, Bridge Tool, Combining, Smooth, Mirror Geometry, Merging Vertices, Subdivision Modeling. Deformations: Twist, Lattice, Flare, Bend. Shapes: Lines, Pen Tools. Animations: Basic Keyframes, Vertex Animation, Clusters, Path Animations, Skeletons, Bones, IK Handle Tool, Skinning. Dynamics: Fire, Lighting, Soft and Rigid Bodies, Particles, Collisions, Gravity. Fur and Paint Effects: Fur Basics, Fur Color Corrections, Paint Effects, Paint Modifier, Brush Animations. Texturing: Diffuse and Bump Maps, Reflections, Transparency, Shaders, Toon Shaders, Glow Textures. Lighting: Basic and Advanced Lights, Shadows, Special Light Effects. Camera: Free and Aim Cameras, Camera Effects, Path Animations. Fluid Effects and Ncloth: 2D and 3D Containers, Collision Effects, Gravity, Wind Effects. Rendering: Images and Animations, Render Techniques, Resolution Settings, Batch Rendering. Download Maya Maya Proficiency: Master Maya's interface, tools, and functions, advancing from basic to intermediate levels. 3D Modeling Expertise: Create diverse 3D models using polygonal and NURBS techniques, from simple shapes to intricate designs. Texturing and Rendering Skills: Apply textures, create materials, and utilize advanced rendering techniques for high-quality visuals. Animation Techniques: Understand keyframe animation, rigging, and character animation, producing engaging animations and special effects. Special Effects and Dynamics: Explore particle systems, fluid dynamics, and advanced visual effects, enhancing realism in animations. Advanced Modeling and Sculpting: Master complex modeling techniques, including Booleans, deformers, and organic shape creation through sculpting tools. Professional Portfolio: Develop a diverse portfolio showcasing 3D modeling and animation skills, ready for presentation to employers or clients. Problem-Solving Skills: Learn creative approaches to solve complex 3D challenges effectively. Collaborative Abilities: Understand team dynamics and collaboration within the 3D production pipeline. Recommended Books: "Introducing Autodesk Maya 202X" by Dariush Derakhshani and Randi L. Derakhshani: Comprehensive beginner's guide to Maya's essential tools and techniques. "Mastering Autodesk Maya 20XX" by Todd Palamar: In-depth intermediate guide covering advanced features, modeling, animation, and rendering. "Maya Character Creation: Modeling and Animation Controls" by Chris Maraffi: Focuses on character creation, covering modeling, rigging, and animation. "Maya Secrets of the Pros" by Todd Palamar: Expert tips and techniques from professional Maya artists, detailing advanced workflows and best practices. "Stop Staring: Facial Modeling and Animation Done Right" by Jason Osipa: Specialized book on facial modeling and animation, perfect for character expression enthusiasts. "The Art of 3D Computer Animation and Effects" by Isaac Kerlow: Offers foundational knowledge in 3D computer animation principles, applicable to various software, including Maya. Mastering Maya Basics to Intermediate Course Benefits: Comprehensive Skill Development: Master essential tools and techniques, from basics to intermediate, with hands-on projects mirroring real industry scenarios. Industry-Grade Proficiency: Acquire expertise in Autodesk Maya, enhancing credibility in animation, visual effects, and gaming industries. Creative Exploration: Unlock creative potential through advanced shading, lighting, dynamics, and simulations, enabling imaginative project realization. Portfolio Enhancement: Build a strong portfolio showcasing skills in 3D modeling, animation, and rendering for career advancement. Individualized Support: Receive personalized guidance and feedback, ensuring tailored learning experiences and skill refinement. Potential Jobs After Course: 3D Animator: Create lifelike character animations for films, games, and advertisements. 3D Modeler: Design detailed 3D characters, environments, and objects for various applications. Visual Effects Artist: Produce stunning visual effects for movies, TV shows, and commercials. Texture/Lighting Artist: Develop intricate textures and set the mood with expert lighting. Rigging Specialist: Rig characters and objects for realistic movement in animations. Rendering Specialist: Optimize rendering capabilities for high-quality images and animations. Game Developer: Contribute to interactive game development using Maya's features. Freelance Artist/Animator: Work independently on diverse projects, collaborating with studios and agencies. Skill Advancement: Progressive Mastery: Develop from basics to intermediate levels in Autodesk Maya, honing essential tools for stunning 3D visuals and animations. Hands-On Learning: Interactive Practice: Engage in practical projects, refining your skills in 3D modeling, advanced materials, character animation, and high-quality renders. Industry-Ready Proficiency: In-Demand Skills: Acquire proficiency in Autodesk Maya, a key software in animation and gaming, enhancing your employability. Creative Exploration: Unlock Creativity: Experiment with advanced shading, lighting, and dynamic animations, unleashing your creative potential in Maya. Flexible Support: Tailored Learning: Access recorded lessons for review, deepening your understanding, with lifetime email support for continuous guidance.
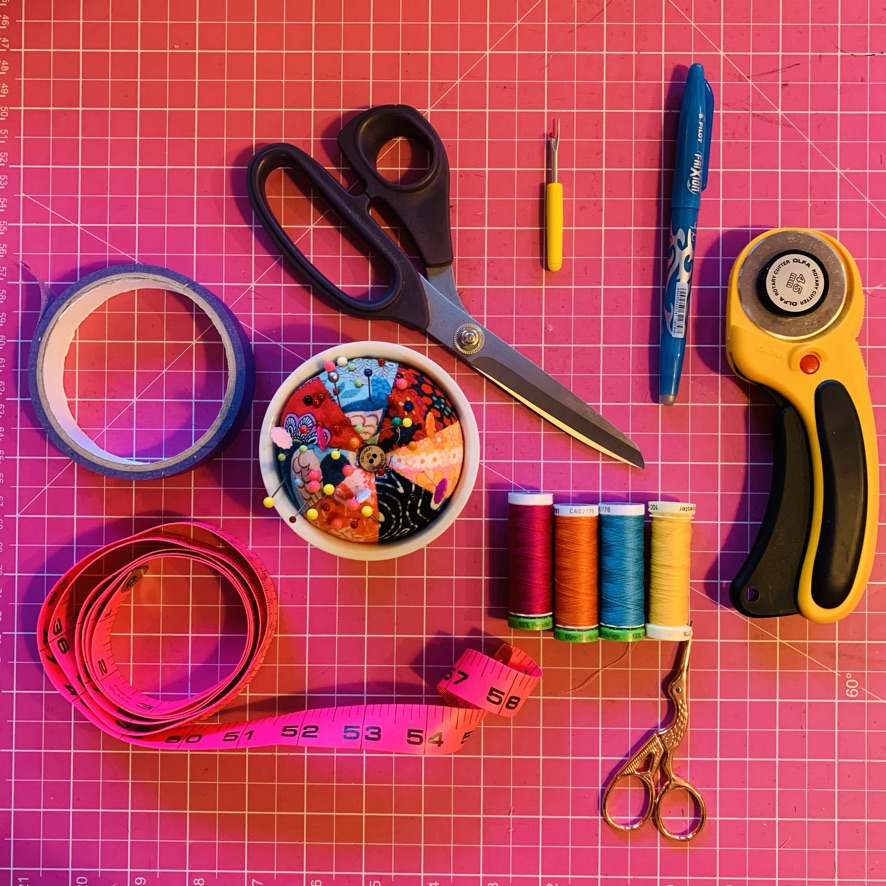
Quilting course
By cheekyhandmades
4 day quilting workshop covering everything from tools, techniques, designing, measuring, cutting, stitching, wadding, binding, some history too. You will receive two feet for your machine, a book, and all the materials are included too