• Professional Development
  • Medicine & Nursing
  • Arts & Crafts
  • Health & Wellbeing
  • Personal Development

117 Educators providing Icon courses

How to Change TikTok Username

how to change tiktok username

HOW TO CHANGE TIKTOK USERNAME - EASY STEPS AND FAQS Changing your TikTok username is a simple process, but it's important to choose wisely, as it represents your identity on the platform. This guide provides a clear, step-by-step walkthrough on how to change TikTok username [https://litcommerce.com/blog/how-to-change-your-tiktok-username/], along with answers to frequently asked questions. Whether you're rebranding, want a fresh start, or just tired of your current handle, we've got you covered. CHANGING YOUR TIKTOK USERNAME: A SIMPLE HOW-TO Follow these easy steps to change your TikTok username: 1. Open the TikTok app: Locate the TikTok app icon on your mobile device and tap to open it. 2. Navigate to your profile: In the bottom right corner of the screen, tap the profile icon (usually a person's silhouette). 3. Access "Edit profile": On your profile page, find and tap the "Edit profile" button. The wording might vary slightly, but it will be clearly visible. 4. Tap your existing username: Within the edit profile section, tap on the field displaying your current username. 5. Enter your desired new username: Type in the new username you'd like to use. Keep in mind that usernames must be unique on TikTok. The app will usually tell you immediately if the username is already taken. 6. Save the changes: Once you've entered a valid and available username, tap the "Save" button, typically located in the top right corner. Congratulations, you’ve successfully changed your TikTok username! Get More Insights: https://litcommerce.com/blog/how-to-change-your-tiktok-username/ [https://litcommerce.com/blog/how-to-change-your-tiktok-username/] COMMON QUESTIONS ABOUT CHANGING YOUR TIKTOK USERNAME Here are answers to some common questions users have about changing their TikTok usernames: How to change TikTok username before 30 days: TikTok implements a 30-day waiting period between username changes. If you’ve recently changed your username, you won’t be able to change it again until the 30-day period has elapsed. There are no workarounds for this limitation. It’s a security measure to prevent frequent username changes and potential confusion. So, if you're searching for "how to change tiktok username before 30 days," the answer is simply to wait. How to change username on TikTok on desktop/computer: You can access TikTok through a web browser on your computer, but changing your username is only possible through the mobile app on your phone or tablet. Discover More: https://linkr.bio/change.username.on.tiktok [https://linkr.bio/change.username.on.tiktok] What if my desired username is taken? If the username you want is already in use by another TikTok user, you'll need to come up with an alternative. Try adding numbers, underscores, or slight variations of the name until you find an available option. Can I get my old username back if someone else has it? If you changed your username and someone else claimed your old one, there's no official way to reclaim it. You could try contacting the person who has it and asking if they'd be willing to change theirs, but there's no guarantee they will. Delve Deeper: https://www.flowgrow.de/members/change-tiktok-username.25308/#about [https://www.flowgrow.de/members/change-tiktok-username.25308/#about] TIPS FOR A GREAT TIKTOK USERNAME: CHANGE USERNAME ON TIKTOK STRATEGICALLY Choosing a good username is crucial for your TikTok presence. Here are some tips to consider when changing your username on TikTok: * Brevity and memorability: Keep your username short, easy to remember, and easy to type. * Relevance to your content: If your content focuses on a specific theme or niche, consider incorporating it into your username. * Creativity is key: Use wordplay, puns, or a unique style to make your username stand out. * Avoid excessive special characters: While some special characters are allowed, too many can make your username look cluttered. * Cross-platform consistency: If you use the same handle on other social media platforms, consider using it on TikTok as well for brand consistency. Changing your TikTok username is a small change that can make a big difference. We hope this guide has been helpful in answering your questions about "how to change your TikTok username" and empowered you to choose a username that best represents you on the platform.

Voice In The Room

voice in the room

Newcastle Upon Tyne

I was working with someone recently who held a very senior position in an organisation and he hadn’t been in a good place. He was terrified of an upcoming key note he had to deliver. At the end of our session he said: “I can’t believe it Jo but I’m really looking forward to it now. I’ve got the tools I need”. That is why I do what I do. What makes Voice in the Room different from other training companies is the different perspective Jo brings. Her unique approach has been shaped by her background and story. It’s worth understanding in full so grab a cuppa or a glass of something and dive in. Logo Icon About Up About Down Theatre Director 1999 - 2007 Theatre Director “Just before the play was due to start my group refused to go on. We were backstage and you could hear this buzz of expectation from the audience outside. I’d used all the security resources available to put it on and here I was with my actors saying they wouldn’t go through with it” Jo Darby set up Voice in the Room in 2016 but the seeds for the business were planted many years before. As a teenager with a love of acting she attended the National Youth Theatre. “I saw how directors were trying to help us to get the message of the play across and make a connection with the audience. That’s what they facilitated and that was the bit I found really interesting. How do you support people in a really positive way to achieve that? That was the point when I decided I didn’t want to do acting, I wanted to direct. When I later had the opportunity to do that at University, I grabbed it with both hands. Directing was a hobby that became a job.” As a Theatre Director Jo began creating productions in the North East at Northern Stage and the Live Theatre. She went onto launch her own theatre company and travel overseas to direct for the Australian Theatre for Young People before later working at Pilot Theatre Company and Bristol Old Vic. One early experience creating a brand new play with inmates at Northallerton Young Offenders Institute was particularly influential. “I was left on my own with the group to get on with rehearsals when one day things all kicked off, a fight broke out, there were chairs flying, the lot. I never felt threatened. I knew it wasn’t aimed at me and I was able to reassure staff such that we were allowed to continue. I persuaded the governor we should put on the play in front of the whole prison – in the prison chapel. Looking back now this seems unbelievable but it’s true! Just before the play was due to start my group refused to go on. We were backstage and you could hear this buzz of expectation from the audience outside. I’d used all the security resources available to put it on and here I was with my actors saying they wouldn’t go through with it. So I had to give them a big pep talk about how this was their opportunity to be heard and express themselves, remind them that they felt no one ever listened to them and this was their big chance. Eventually, they went out and did it. Everyone cheered and it all turned out fine. I still think now, goodness know’s what would have happened if it hadn’t gone ahead!

Moody Monday

moody monday

It all started with the little sketches and poems on the wall, where my bed was up against in Jakarta, Indonesia, which I regularly visited with a biro. I would draw around the cracks and any peeling paint on that wall, refusing for it to be repainted. It all started with the exciting and inquisitive union of a misplaced pair of scissors and the innocent green t-shirt I was wearing at the time, as a child. Years later, my mum then decided to get me a set of rapidograph pens as my choice of ‘creative weapon’, possibly to keep me away from misplaced scissors. So, I carried on in my teens where I would draw on pretty much anything, even on my friends at school. I would then daydream during geography while I gleefully sketch away on my textbooks, table, and bags, with this wonderful gift. Eliza in studio Photo credit: Cro & Kow, 2021 I’m Eliza, a printed textiles designer and maker, specializing in meticulously crafted hand-printed wallpaper and fabrics and the founder of Moody Monday. I started the design studio and business in early 2011, after receiving my first wallpaper commission from a design-boutique in the Grassmarket, Edinburgh. Following the widespread acclaim the work garnered through various exhibitions since, I then established Moody Monday in 2014. After graduating with a degree in Design for Textiles from Heriot-Watt University in 2006, I undertook numerous freelance projects and work experience opportunities with notable design companies. I joined a major interiors company, as part of their communication and design team in 2008, and then decided to follow my dream and set-up on my own in 2011. Eliza in studio looking through a wallpaper sample book. Photo credit: Cro & Kow, 2021 I have always seen the things around me from a different lens. Little did I know that I would embark on a career as a printed textiles designer as an adult. To me, a wall is never just ‘a wall’, a piece of fabric, furniture, right to an unassuming piece of trash is never just that, they are a world of visual possibilities, a treasure trove of delights! I love making the connections between objects and subjects that are unconventionally meant for each other and see what new wonders would exist in the world from that exploration, like an alchemist. Challenging what ‘beauty’ really means in relation to the chosen subject matter and how it resonates with the eye of the beholder. Being a visual alchemist through my designs and craft gives me a sense of excitement, fulfillment and connection to the wider world beyond my own imagination. Old habits die hard it seems. Here I am many years later, still drawing with ink, about anything that catches my imagination, thankfully, not on anything anymore. page icon-01 Below is a short film by Cro + Kow that delves into Eliza’s work in the studio. Conversations with Creators: designer Eliza Kesuma from Cro + Kow on Vimeo. page icon-01 Testimonials Keith Wilson – Private Commission “Very skilled and professional work. Eliza was quick to understand my requirements and produced a high quality bespoke product exactly as I had envisioned it. Highly recommended.” Dale Gibson of EDINBURGH PALETTE – Wallpaper Commission “Moody Monday’s originality and attention to detail always ensures an exceptionally high quality product.” Beth L – Textiles Printing Level 1 & 2 (TP1 & TP2) “This course was a real blessing when I was feeling a bit lost in my own practice by giving me the chance to learn a new skill and see the possibilities this opens up. Eliza is a very energetic warm course leader, she encourages everyone to experiment and provides a thorough foundation of the practical skills on which you build throughout the weeks. I’ve left this feeling more confident and keen to pursue screen printing. Definitely recommend!!” Megan L – Textile Printing Level 1 (TP1) “The textile printing course with Eliza at Moody Monday was fantastic. I’ve learnt so much & to end with being able to print our own designs was a real highlight. I’d highly recommend this course for anyone interested in printing. Eliza is knowledgable, fun & a supportive & engaging teacher. She also has a steady supply of tea & biscuits!” Gaya KH – Print Your Own Silk Scarf “I took a one day class with Eliza on silk screen printing, and enjoyed it a lot! It was extremely well organised both ahead of time and at the duration of the course. Eliza is very knowledgeable and provided with plenty of examples of prints supported with reference materials for own research. I was very pleased with the outcome, and it actually exceeded my expectations, and now I am a happy owner of self painted a very unique silk scarf. In addition, it was a relaxed and cozy environment with lots of hot tea and biscuits to keep us warm on a rainy day. I will ideally be looking for a longer course sessions to learn more about the techniques, colour mixing, as there is plenty to learn. Many thanks for a great class, Moody Monday! Highly recommend for anyone interested in silk screen printing.” Charlotte – Textile Printing Level 1 (TP1) “Last year, Eliza’s level 1 textiles printmaking course and thoroughly enjoyed. Beforehand, the idea of screen printing seemed scary and beyond my ability but Eliza made it so much fun and easy to understand by demonstrating and having us follow all the steps to producing prints. It is a brilliant course and I would recommend it to anyone. Recently, I bought 3 of Eliza’s handmade masks – they fit amazingly, are very breathable and MOST IMPORTANTLY have stopped my glasses steaming up when outside!! Thanks so much Eliza!! 🥳” Ally – Customer “I bought designer coasters from Moody Monday. The quality and design were top notch. I visited Moody Monday at Out Of The Blue Abbeymount Studios and she seemed very down to earth but also very professional and I would definitely recommend purchasing from Moody Monday.” Tania – Customer “These are fab quality face masks! I particularly love the overhead loop ones as they are easy to wear with glasses and even a winter hat. I feel they don’t restrain my breathing too. With the special 3FOR2 offer, I got myself enough masks to fit my various outfits, moods and even got one for special occasions! Do get your local and stylish mask from Moody Monday. You won’t regret it.” Anonymous – Textiles Printing Level 1 (TP1) “Great course, I’ve been looking for one for so long and I’m so glad I found Moody Monday and Eliza.” Anonymous – Textiles Printing Level 1 (TP1) “Eliza is a great tutor and I have discovered a love for the medium. Great course!” Anonymous – Textiles Printing Level 1 (TP1) “Thanks for the experience and I’m considering level 2!” Anonymous – Textiles Printing Level 1 (TP1) “I enjoyed the hands-on style of learning and a very in depth explanation of printing processes. I cannot think of anything I would change.” Anonymous – Textiles Printing Level 2 (TP2) “I enjoy the freedom of the course. The sense that you gain confidence from the equipment and process from an early stage then can adapt it to your own ideas. Eliza is loads of fun and really supportive.” Anonymous – Textiles Printing Level 2 (TP2) “I really enjoyed discovering painting on the screen and having the chance to experiment with this technique. Also I loved making something completely by hand, right from original drawings to finished printed textile. I found it really rewarding gaining knowledge of the printing process and creating a design I wouldn’t have otherwise thought of if it weren’t for the course.” Anonymous – Textiles Printing Level 2 (TP2) “Its a practical course so there was a balance between learning through making and listening to Eliza. It was energetic and I didn’t feel like I was being inundated with a ton of information.” Anonymous – Textiles Printing Level 2 (TP2) “All subjects were explained thoroughly and it was great to get an overview of all aspects of the process from the drawing stages to mixing dyes to finishing the printed fabrics. ” Anonymous – Print Your Own Silk Scarf “Was a good balance between doing your own design and making something manageable within the time/persons abilities. Could do with being a bit longer (maybe an extra hour).” Anonymous – Print Your Own Silk Scarf “Eliza is very supportive and knowledgeable. Really good at helping to come up with something that is your own and manageable.” It all started with the little sketches and poems on the wall, where my bed was up against in Jakarta, Indonesia, which I regularly visited with a biro. I would draw around the cracks and any peeling paint on that wall, refusing for it to be repainted. It all started with the exciting and inquisitive union of a misplaced pair of scissors and the innocent green t-shirt I was wearing at the time, as a child. Years later, my mum then decided to get me a set of rapidograph pens as my choice of ‘creative weapon’, possibly to keep me away from misplaced scissors. So, I carried on in my teens where I would draw on pretty much anything, even on my friends at school. I would then daydream during geography while I gleefully sketch away on my textbooks, table, and bags, with this wonderful gift. Eliza in studio Photo credit: Cro & Kow, 2021 I’m Eliza, a printed textiles designer and maker, specializing in meticulously crafted hand-printed wallpaper and fabrics and the founder of Moody Monday. I started the design studio and business in early 2011, after receiving my first wallpaper commission from a design-boutique in the Grassmarket, Edinburgh. Following the widespread acclaim the work garnered through various exhibitions since, I then established Moody Monday in 2014. After graduating with a degree in Design for Textiles from Heriot-Watt University in 2006, I undertook numerous freelance projects and work experience opportunities with notable design companies. I joined a major interiors company, as part of their communication and design team in 2008, and then decided to follow my dream and set-up on my own in 2011. Eliza in studio looking through a wallpaper sample book. Photo credit: Cro & Kow, 2021 I have always seen the things around me from a different lens. Little did I know that I would embark on a career as a printed textiles designer as an adult. To me, a wall is never just ‘a wall’, a piece of fabric, furniture, right to an unassuming piece of trash is never just that, they are a world of visual possibilities, a treasure trove of delights! I love making the connections between objects and subjects that are unconventionally meant for each other and see what new wonders would exist in the world from that exploration, like an alchemist. Challenging what ‘beauty’ really means in relation to the chosen subject matter and how it resonates with the eye of the beholder. Being a visual alchemist through my designs and craft gives me a sense of excitement, fulfillment and connection to the wider world beyond my own imagination. Old habits die hard it seems. Here I am many years later, still drawing with ink, about anything that catches my imagination, thankfully, not on anything anymore. page icon-01 Below is a short film by Cro + Kow that delves into Eliza’s work in the studio. Conversations with Creators: designer Eliza Kesuma from Cro + Kow on Vimeo. page icon-01 Testimonials Keith Wilson – Private Commission “Very skilled and professional work. Eliza was quick to understand my requirements and produced a high quality bespoke product exactly as I had envisioned it. Highly recommended.” Dale Gibson of EDINBURGH PALETTE – Wallpaper Commission “Moody Monday’s originality and attention to detail always ensures an exceptionally high quality product.” Beth L – Textiles Printing Level 1 & 2 (TP1 & TP2) “This course was a real blessing when I was feeling a bit lost in my own practice by giving me the chance to learn a new skill and see the possibilities this opens up. Eliza is a very energetic warm course leader, she encourages everyone to experiment and provides a thorough foundation of the practical skills on which you build throughout the weeks. I’ve left this feeling more confident and keen to pursue screen printing. Definitely recommend!!” Megan L – Textile Printing Level 1 (TP1) “The textile printing course with Eliza at Moody Monday was fantastic. I’ve learnt so much & to end with being able to print our own designs was a real highlight. I’d highly recommend this course for anyone interested in printing. Eliza is knowledgable, fun & a supportive & engaging teacher. She also has a steady supply of tea & biscuits!” Gaya KH – Print Your Own Silk Scarf “I took a one day class with Eliza on silk screen printing, and enjoyed it a lot! It was extremely well organised both ahead of time and at the duration of the course. Eliza is very knowledgeable and provided with plenty of examples of prints supported with reference materials for own research. I was very pleased with the outcome, and it actually exceeded my expectations, and now I am a happy owner of self painted a very unique silk scarf. In addition, it was a relaxed and cozy environment with lots of hot tea and biscuits to keep us warm on a rainy day. I will ideally be looking for a longer course sessions to learn more about the techniques, colour mixing, as there is plenty to learn. Many thanks for a great class, Moody Monday! Highly recommend for anyone interested in silk screen printing.” Charlotte – Textile Printing Level 1 (TP1) “Last year, Eliza’s level 1 textiles printmaking course and thoroughly enjoyed. Beforehand, the idea of screen printing seemed scary and beyond my ability but Eliza made it so much fun and easy to understand by demonstrating and having us follow all the steps to producing prints. It is a brilliant course and I would recommend it to anyone. Recently, I bought 3 of Eliza’s handmade masks – they fit amazingly, are very breathable and MOST IMPORTANTLY have stopped my glasses steaming up when outside!! Thanks so much Eliza!! 🥳” Ally – Customer “I bought designer coasters from Moody Monday. The quality and design were top notch. I visited Moody Monday at Out Of The Blue Abbeymount Studios and she seemed very down to earth but also very professional and I would definitely recommend purchasing from Moody Monday.” Tania – Customer “These are fab quality face masks! I particularly love the overhead loop ones as they are easy to wear with glasses and even a winter hat. I feel they don’t restrain my breathing too. With the special 3FOR2 offer, I got myself enough masks to fit my various outfits, moods and even got one for special occasions! Do get your local and stylish mask from Moody Monday. You won’t regret it.” Anonymous – Textiles Printing Level 1 (TP1) “Great course, I’ve been looking for one for so long and I’m so glad I found Moody Monday and Eliza.” Anonymous – Textiles Printing Level 1 (TP1) “Eliza is a great tutor and I have discovered a love for the medium. Great course!” Anonymous – Textiles Printing Level 1 (TP1) “Thanks for the experience and I’m considering level 2!” Anonymous – Textiles Printing Level 1 (TP1) “I enjoyed the hands-on style of learning and a very in depth explanation of printing processes. I cannot think of anything I would change.” Anonymous – Textiles Printing Level 2 (TP2) “I enjoy the freedom of the course. The sense that you gain confidence from the equipment and process from an early stage then can adapt it to your own ideas. Eliza is loads of fun and really supportive.” Anonymous – Textiles Printing Level 2 (TP2) “I really enjoyed discovering painting on the screen and having the chance to experiment with this technique. Also I loved making something completely by hand, right from original drawings to finished printed textile. I found it really rewarding gaining knowledge of the printing process and creating a design I wouldn’t have otherwise thought of if it weren’t for the course.” Anonymous – Textiles Printing Level 2 (TP2) “Its a practical course so there was a balance between learning through making and listening to Eliza. It was energetic and I didn’t feel like I was being inundated with a ton of information.” Anonymous – Textiles Printing Level 2 (TP2) “All subjects were explained thoroughly and it was great to get an overview of all aspects of the process from the drawing stages to mixing dyes to finishing the printed fabrics. ” Anonymous – Print Your Own Silk Scarf “Was a good balance between doing your own design and making something manageable within the time/persons abilities. Could do with being a bit longer (maybe an extra hour).” Anonymous – Print Your Own Silk Scarf “Eliza is very supportive and knowledgeable. Really good at helping to come up with something that is your own and manageable.”

Courses matching "Icon"

Show all 514

ONLINE. Icon Painting Course - Beginners. With live demonstrations.

4.4(18)

By Edinburgh School of Icon Painting

We are excited to announce the Online version of the Step by Step Course. It will include live demonstrations of the process that you will then follow. Unique opportunity to be guided step by step and experience meditative practice of icon painting.

ONLINE. Icon Painting Course - Beginners. With live demonstrations.
Delivered OnlineFlexible Dates
£280

Thursday Online Classes (5 Classes)

4.4(18)

By Edinburgh School of Icon Painting

You can join us any Thursday. Cost £175 for 5 Classes. The main focus of this workshop is on helping you to find your own personal style.

Thursday Online Classes (5 Classes)
Delivered OnlineFlexible Dates
£175

Monday Online Class

4.4(18)

By Edinburgh School of Icon Painting

The main focus of this workshop is on helping you to find your own personal style. To help you develop creative practice and find the confidence that you need to make creativity a part of your daily life.

Monday Online Class
Delivered OnlineFlexible Dates
£175

Flat Design Icons in Illustrator

4.7(160)

By Janets

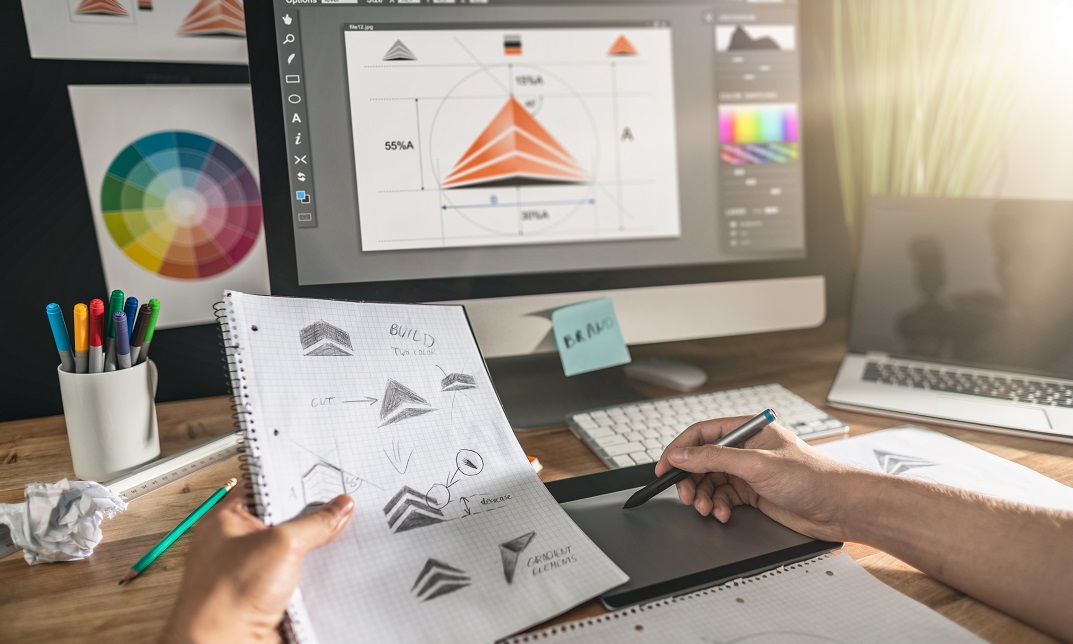
Register on the Flat Design Icons in Illustrator today and build the experience, skills and knowledge you need to enhance your professional development and work towards your dream job. Study this course through online learning and take the first steps towards a long-term career. The course consists of a number of easy to digest, in-depth modules, designed to provide you with a detailed, expert level of knowledge. Learn through a mixture of instructional video lessons and online study materials. Receive online tutor support as you study the course, to ensure you are supported every step of the way. Get an e-certificate as proof of your course completion. The Flat Design Icons in Illustrator is incredibly great value and allows you to study at your own pace. Access the course modules from any internet-enabled device, including computers, tablet, and smartphones. The course is designed to increase your employability and equip you with everything you need to be a success. Enrol on the now and start learning instantly! What You Get With The Flat Design Icons in Illustrator Receive a e-certificate upon successful completion of the course Get taught by experienced, professional instructors Study at a time and pace that suits your learning style Get instant feedback on assessments 24/7 help and advice via email or live chat Get full tutor support on weekdays (Monday to Friday) Course Design The course is delivered through our online learning platform, accessible through any internet-connected device. There are no formal deadlines or teaching schedules, meaning you are free to study the course at your own pace. You are taught through a combination of Video lessons Online study materials Certification Upon successful completion of the course, you will be able to obtain your course completion e-certificate free of cost. Print copy by post is also available at an additional cost of £9.99 and PDF Certificate at £4.99. Who Is This Course For: The course is ideal for those who already work in this sector or are an aspiring professional. This course is designed to enhance your expertise and boost your CV. Learn key skills and gain a professional qualification to prove your newly-acquired knowledge. Requirements: The online training is open to all students and has no formal entry requirements. To study the Flat Design Icons in Illustrator, all your need is a passion for learning, a good understanding of English, numeracy, and IT skills. You must also be over the age of 16.  Course Content Module 01: Introduction And The Flat Design Principles Introduction And The Principles Of Flat Design 00:04:00 Module 02: Create A Flat Design Lab Flask Icon Let's Create A Flat Lab Flask Icon 00:13:00 Module 03: Create A Flat Design Beer Icon Let's Create A Flat Beer Icon 00:13:00 Module 04: Create A Flat Design Barbecue Icon Let's Create A Flat Barbecue Icon 00:16:00 Module 05: Let's Create Wine Glasses Flat Design Icon Let's Create The Wine Glasses Icon 00:10:00 Let's Finish The Icon And Add The Background 00:05:00 Module 06: Create A-Sun Flat Design Icon Let's Create The Sun Flat Design Icon 00:14:00 Module 07: Let's Create the Dumbbell Flat Design Icon Let's create a dumbbell flat design icon 00:16:00 Module 08: Let's Create The Sushi Flat Design Icon Let's Create a Sushi Flat Design Icon 00:06:00 Let's Finish The Sushi Flat Design Icon 00:06:00 Module 09: Let's Create A Suitcase Flat Design Icon Let's Create A Suitcase Flat Design Icon 00:08:00 Let's Finish The Icon 00:04:00 Module 10: Let's Create A Girl Flat Design Icon Let's Start Creating The Character 00:05:00 Add The Torso And The Background 00:06:00 Module 11: Let's Create A Bird Flat Icon Let's Start Creating The Icon01 00:04:00 Let's Finish Creating The Bird Flat Icon 00:05:00 Module 12: Let's Create The Smartphone Icon Let's Start Creating The Main Shape 00:04:00 Let's Finish The Icon 00:02:00 Module 13: Design An Ios Inspired Calendar App Icon Let's Start Creating The Icon 00:04:00 Let's Finish The Icon 00:02:00 Module 14: Design An Android Lollipop Inspired Camera App Icon Let's Start The Design Process 00:05:00 Let's Finish The Project 00:05:00 Module 15: Design A Windows Phone Inspired Podcast App Icon Let's Start The Main Shape 00:05:00 Let's Add The Effects And Background 00:04:00 Module 16: How To Create A Flat Design Back Pack Let's Start Designing The Flat Design Back Pack 00:08:00 Let's Finish The Back Pack 00:06:00 Module 17: Create A Flat Design Stopwatch Let's Start The Icon 00:05:00 Let's Finish The Process 00:05:00 Module 18: How To Design A Flat Design Xbox Controller Let's Start The Design 00:04:00 How To Create The Xbox Template 00:03:00 How To Create The Base Shape Of The Controller 00:07:00 How To Create The Smaller Part Of The Base 00:05:00 How To Create The Button 00:06:00 How To Create The Button Texture 00:06:00 How To Create The Second Button 00:04:00 How To Create The Middle Buttons77 00:05:00 How To Create The Color Buttons 00:06:00 How To Create The Middle Buttons 00:06:00 How To Create The Xbox Logo 00:06:00 How To Create The Shading 00:05:00 Summary 00:02:00 Module 19: How To Create Flat Design Headphones Introduction To The Project 00:01:00 Let's Add The Background First 00:03:00 Let's Create The Main Piece 00:07:00 Let's Add The Padding 00:03:00 Let's Attach The Man Piece With The Earpiece 00:02:00 Let's Add The Earpiece 00:04:00 Let's Add The Cable 00:02:00 Finish The Project 00:02:00 Frequently Asked Questions Are there any prerequisites for taking the course? There are no specific prerequisites for this course, nor are there any formal entry requirements. All you need is an internet connection, a good understanding of English and a passion for learning for this course. Can I access the course at any time, or is there a set schedule? You have the flexibility to access the course at any time that suits your schedule. Our courses are self-paced, allowing you to study at your own pace and convenience. How long will I have access to the course? For this course, you will have access to the course materials for 1 year only. This means you can review the content as often as you like within the year, even after you've completed the course. However, if you buy Lifetime Access for the course, you will be able to access the course for a lifetime. Is there a certificate of completion provided after completing the course? Yes, upon successfully completing the course, you will receive a certificate of completion. This certificate can be a valuable addition to your professional portfolio and can be shared on your various social networks. Can I switch courses or get a refund if I'm not satisfied with the course? We want you to have a positive learning experience. If you're not satisfied with the course, you can request a course transfer or refund within 14 days of the initial purchase. How do I track my progress in the course? Our platform provides tracking tools and progress indicators for each course. You can monitor your progress, completed lessons, and assessments through your learner dashboard for the course. What if I have technical issues or difficulties with the course? If you encounter technical issues or content-related difficulties with the course, our support team is available to assist you. You can reach out to them for prompt resolution.

Flat Design Icons in Illustrator
Delivered Online On Demand4 hours 39 minutes
£25

Electron from Scratch: Build Desktop Applications with JavaScript

By Packt

Create 3 useful desktop applications with web technologies using Electron

Electron from Scratch: Build Desktop Applications with JavaScript
Delivered Online On Demand5 hours 47 minutes
£58.99

An Introduction to Real Estate (12 Hours Online Self-Study)

4.3(5)

By Bayfield Training

Are you looking to enter the dynamic world of real estate? Our course is designed to equip you with the knowledge and tools you need to communicate effectively with real estate professionals and develop key skills in real estate investment strategy and analytics. At the end of the course, you'll be able to read and interpret real estate market reports, and have a firm grasp of how iconic buildings, cities, and companies fit into the overall picture of the real estate sector. On this course, you will… Become familiar with the players, structure, general terminology and overall needs of Real Estate. Learn what is Real Estate and why it is different from other asset classes Get to grips with the overall size and structure of the UK Real Estate Market Learn and analyse the links between the different parts of the property market Understand who works in the Real Estate Market, their qualifications and their job descriptions Recognise how and when to use basic real estate concepts: Rent, Value, Yield, Risk and Return, etc… Learn how to read a real estate market report Understand how current affairs, politics and economics affects Real Estate Investment Use household names and iconic companies, cities and buildings to help consolidate your appreciation of this exciting sector Who will benefit from this course: Graduates or undergraduates studying economics, finance. Professionals working in Marketing or Accounting teams within Real Estate firms. APC students. Anyone interested in Real Estate. School leavers/A-Level Students looking to gain an understanding of Real Estate. Non cognate students who wish to transfer into Real Estate/Finance careers. Course Outline Module 1: What is and why buy Real Estate? The property Market The Size and Structure of the UK property market The impact of Real Estate in the Economy Module 2: The Real Estate Market System The Space Market The Asset Market The Development Market Module 3: How to value Real Estate An Introduction to Financial Mathematics The difference between Price, Value and Worth Property Yield Conventional Valuation Methods Module 4: How to read a Real Estate Market Report Property Market Indicators: Stock Indicators Property Market Indicators: Investment Indicators Module 5: Who works in Real Estate? The build Environment by Cobalt Recruitment Rea; Estate Agents Examples of Real Estate Market Agents CVs Real Estate Network

An Introduction to Real Estate (12 Hours Online Self-Study)
Delivered in person or Online
£1,500

Flat Design in Adobe Illustrator

4.7(160)

By Janets

Register on the Flat Design in Adobe Illustrator today and build the experience, skills and knowledge you need to enhance your professional development and work towards your dream job. Study this course through online learning and take the first steps towards a long-term career. The course consists of a number of easy to digest, in-depth modules, designed to provide you with a detailed, expert level of knowledge. Learn through a mixture of instructional video lessons and online study materials. Receive online tutor support as you study the course, to ensure you are supported every step of the way. Get an e-certificate as proof of your course completion. The Flat Design in Adobe Illustrator is incredibly great value and allows you to study at your own pace. Access the course modules from any internet-enabled device, including computers, tablet, and smartphones. The course is designed to increase your employability and equip you with everything you need to be a success. Enrol on the now and start learning instantly! What You Get With The Flat Design in Adobe Illustrator Receive a e-certificate upon successful completion of the course Get taught by experienced, professional instructors Study at a time and pace that suits your learning style Get instant feedback on assessments 24/7 help and advice via email or live chat Get full tutor support on weekdays (Monday to Friday) Course Design The course is delivered through our online learning platform, accessible through any internet-connected device. There are no formal deadlines or teaching schedules, meaning you are free to study the course at your own pace. You are taught through a combination of Video lessons Online study materials Certification Upon successful completion of the course, you will be able to obtain your course completion e-certificate free of cost. Print copy by post is also available at an additional cost of £9.99 and PDF Certificate at £4.99. Who Is This Course For: The course is ideal for those who already work in this sector or are an aspiring professional. This course is designed to enhance your expertise and boost your CV. Learn key skills and gain a professional qualification to prove your newly-acquired knowledge. Requirements: The online training is open to all students and has no formal entry requirements. To study the Flat Design in Adobe Illustrator, all your need is a passion for learning, a good understanding of English, numeracy, and IT skills. You must also be over the age of 16.  Course Content Module 01: Introduction Introduction to the Course 00:01:00 Module 02: Create a Flat Design Garden and Barbecue Introduction to the Project 00:01:00 How to Set up the Document 00:13:00 One Smart Way of Adding Gradients 00:06:00 Start with the Background 00:07:00 Create the Sky and the Clouds 00:06:00 Adding the Lawn and the Bushes 00:12:00 Need Some Shade in the Garden 00:08:00 Rounding Selected Corners in Older Illustrators 00:04:00 Who Wants Lemonade 00:10:00 Add the Chairs 00:05:00 Creating the First BBQ 00:10:00 Finish the Project 00:04:00 Module 03: Create a Flat Design Landscape Scene Explore the Project 00:01:00 Start with the Background 00:07:00 Add the Sun 00:08:00 Second Way of Creating the Sun 00:05:00 Scream it from the Mountain Top 00:07:00 Planting the Trees 00:04:00 Creating the Forest 00:04:00 Add the Hut 00:08:00 Add the Side Blocks 00:05:00 Add the Roof 00:06:00 Add the Windows 00:04:00 Finish the Project 00:04:00 Module 04: Create a modern Flat Design Night Camping Scene Introduction to the project88 00:02:00 Creating a New Document 00:03:00 Adding Panels and Colours 00:07:00 Create the sky 00:05:00 Add the stars 00:07:00 Add the moon 00:08:00 Create the mountains 00:11:00 Plant Some trees 00:07:00 Add the entrance 00:06:00 Create the tent 00:04:00 Finish the Tent 00:06:00 Add the backpack 00:05:00 Add the Straps and the Handle 00:03:00 Create the stove 00:07:00 Build Some Fire 00:06:00 Create the Wheels of the Camper 00:04:00 Add the Mudguard 00:02:00 Add the Bumpers 00:03:00 Add the Paint Job 00:04:00 Add the Door Knobs 00:03:00 Add the Windows 00:07:00 Add the Reflections and Finish the Project 00:09:00 Module 05: Create a Modern Flat Design Terminal and Luggage Discover the Project 00:01:00 Start with the Background 00:10:00 Add the Chairs 00:06:00 Add the sign and the Arrows 00:07:00 Add the Escalator 00:06:00 Start Creating the Luggage 00:03:00 Add the Handle 00:03:00 Add the Straps 00:03:00 Add the Wheels and the Shading 00:05:00 Adding the Bokeh Effect and Finishing the Project 00:03:00 Module 06: Design a Flat Design Smartphone and App Icons Introduction to the class 00:01:00 Create a new document 00:02:00 Create the smartphone shape 00:04:00 Add the gradient wallpaper 00:04:00 Create the buttons 00:04:00 Add the system buttons 00:04:00 Add the hour and notification icons 00:04:00 Create the signal strength icon 00:03:00 Create the wifi icon 00:07:00 Add the battery icon 00:03:00 Create the app drawer 00:09:00 Create a new document 00:01:00 Create the main telephone shape 00:06:00 Add the gradient background 00:03:00 Create the main compass shape 00:04:00 Add the pointers and start adding colour 00:04:00 Add the gradient background 00:03:00 Create the messages icon 00:06:00 Add the background 00:03:00 How to create an iOS inspired music app icon 00:07:00 Coming up with colour schemes for the projects 00:06:00 Create the main shape of the retro TV 00:03:00 Add the screen 00:03:00 Create the reflections 00:02:00 Add the legs and the antenna 00:04:00 Add the buttons 00:05:00 Finish the retro TV app icon 00:02:00 Create the second TV app icon 00:08:00 Create the contacts app icon 00:05:00 Create the body and the lens 00:03:00 Add the reflections and finish the icon 00:05:00 Create the envelope 00:05:00 Add the letter 00:03:00 Finish the icon 00:02:00 Create the main wallet shape 00:07:00 Round the corners in older version of illustrator 00:03:00 Add the stitching 00:03:00 Create the bottom edge 00:03:00 Add the button 00:02:00 Put the money in the wallet 00:04:00 Finish the icon 00:02:00 Create the main book shape 00:06:00 Add the text and a bookmark 00:04:00 Create the hand and the background 00:09:00 Create the cloud 00:05:00 Create the sun and finish the icon 00:07:00 Create the bun icon 00:03:00 Add the lettuce, cheese and ketchup 00:04:00 Add sesame, background and finish 00:03:00 Create the main app background 00:05:00 Add the navigation pointer 00:04:00 Create the base of the microphone 00:06:00 Add the diaphragm and finish the icon 00:06:00 Introduction to the project 00:01:00 Add the background first 00:03:00 Create the main piece 00:07:00 Add the padding 00:03:00 Attach the earpiece 00:02:00 Add the earpiece 00:04:00 Add the cable 00:02:00 Finish the icon 00:02:00 Create the main cog shapes 00:04:00 Join the cogs and finish the icon 00:05:00 Create the world map 00:06:00 Add the magnifying glass and finish the icon 00:07:00 Create the main clock shape 00:04:00 Add the markers 00:02:00 Add the pointers 00:03:00 Create the bells and finish the icon 00:06:00 Create the main notes shape 00:03:00 Add the bend and the background 00:03:00 Create another version of the icon 00:03:00 How to create a calculator app icon 00:05:00 How to create a file manager app 00:06:00 Create the main flashlight shape 00:04:00 Add the rotating mechanism 00:05:00 Summary 00:01:00

Flat Design in Adobe Illustrator
Delivered Online On Demand10 hours 31 minutes
£25

2D Game UI Design

By iStudy UK

Want to get skilled in designing appealing user interfaces for any app or site! This 2D Game UI Design course will outline the development of games, including the designing and programming of games. Learn how to develop artwork and audio, and familiarise with current best practices and features applicable to UI design, which can be tested to ensure the delivery of intended playing experience and other technical errors. Project's strategy, scope, information architecture, developing sitemaps and wireframes are some of the key issues which will be covered in this program. The field of user interface design is in high demand, but the skills and expertise you will achieve in this area are applicable to a wide variety of professions, from marketing to web design, to human-computer interaction. What you'll learn Create fresh User Interface for 2D video games with Inkscape Create several types of icons and buttons for your game UI Use Inkscape on a higher level to create what you need for your game (i.e. menu items, buttons, icons) Requirements You need the free software Inkscape Inkscape knowledge is not obligatory, but a very basic knowledge helps! Who this course is for: Developers, who want to design their own games Designers, who want to learn more about Game UI Design This course is NOT for you if you are a seasoned UI designer. This is a beginner course! Start with the basics Welcome to Game UI design with Inkscape! FREE 00:02:00 The 3 Cs of good game UIdesign 00:04:00 What is HUD 00:03:00 Before youdraw SKETCH! 00:02:00 Basic Button Bases 00:18:00 Creating general game icons Aligning buttons 00:04:00 What makes a good icon 00:04:00 Very simple icons 00:06:00 More complex icons and drawing methods 00:09:00 Complex icons for a fantasy game 00:20:00 Creating an icon set for a ninja game 00:19:00 Drawing UI for a Space shooter game with Inkscape! Space shooter UI design - Part #1 00:18:00 Space shooter UI design - Part #2 00:18:00 Drawing a fantasy game UI Fantasy game UI - Part #1 00:20:00 Fantasy game UI - Part #2 00:19:00 Fantasy game UI - Part #3 00:16:00 Fantasy game UI - Part #4 00:12:00 Drawing UI for a cartoon style candy or gem matching game Gemstone game UI - Part #1 00:21:00 Gemstone game UI - Part #2 00:20:00

2D Game UI Design
Delivered Online On Demand3 hours 55 minutes
£25

Learn Korean with Song Korean Trot 'Jjiniya' Breakdown

By Study Plex

Have you learned Korean language from standard Korean text books? Are you struggling to memorize many Korean words but can't you remember all the words that you've learned? Please don't panic. It is no wonder that learning a new language like Korean is difficult for beginners. In this course, you will learn Korean language in fun and easy ways with a popular Korean trot music titled as 'Jjiniya' sung by the trot singer 'Young-tak'. He is known as 'jin jin jin man' after singing the song 'Jjiniya' in the award festival held in 2020. 'Korean Trot 'Jjiniya' Lyrics Breakdown' class focuses on teaching spoken Korean language step by step. First, you will learn how to pronounce the Korean lyrics of the trot song and guess the meaning of the lyrics by looking at some pictures. Then, you will compare English lyrics with Korean lyrics in the first verse of the song 'Jjiniya' and be taught some implied meanings in the lyrics. Final lesson is about the review of the Korean trot music 'Jjiniya' with the second verse of the song. I will slowly read the Korean language in the song, so I believe that you can pronounce the Korean words in the Korean music as accurately as possible. Be sure to print the downloadable lesson materials that are attached to the section four and seven of the course. I made some blanks in the material to help you easily remember some key words in the Ktrot song. I hope you will enjoy the 'Jjinya' lesson. :) '(Icon made by Freepik from flaticon) (Icon made by iconixar from flaticon)' Recognised Accreditation This course is accredited by continuing professional development (CPD). CPD UK is globally recognised by employers, professional organisations, and academic institutions, thus a certificate from CPD Certification Service creates value towards your professional goal and achievement. Course Curriculum Korean Trot Music ' Jjiniya ' Introduction Introduction 00:01:00 Korean Alphabet ' Hangeut ' Summary Korean Alphabet Summary with Jjiniya 00:11:00 Korean Trot Music ' Jjiniya ' Vocabularies Word Building 00:02:00 Korean Trot Music ' Jjiniya ' Korean Lyrics Pronunciation Korean Lyrics Reading 00:04:00 Korean Trot Music ' Jjiniya ' First Verse Analysis First Verse: English+ Korean 1 00:03:00 First Verse: English+ Korean 2 00:04:00 First Verse: English+ Korean 3 00:03:00 Korean Trot Music ' Jjiniya ' Second Verse Reading +Review Second Verse: English Reading+Review 00:02:00 Supplementary Resources Supplementary Resources - Learn Korean with Song Korean Trot 'Jjiniya' Breakdown 00:00:00 Obtain Your Certificate Order Your Certificate of Achievement 00:00:00 Get Your Insurance Now Get Your Insurance Now 00:00:00 Feedback Feedback 00:00:00

Learn Korean with Song Korean Trot 'Jjiniya' Breakdown
Delivered Online On Demand
£19

Develop 2D Game UI Using Inkscape

4.9(27)

By Apex Learning

Overview This comprehensive course on Develop 2D Game UI Using Inkscape will deepen your understanding on this topic. After successful completion of this course you can acquire the required skills in this sector. This Develop 2D Game UI Using Inkscape comes with accredited certification from CPD, which will enhance your CV and make you worthy in the job market. So enrol in this course today to fast track your career ladder. How will I get my certificate? You may have to take a quiz or a written test online during or after the course. After successfully completing the course, you will be eligible for the certificate. Who is This course for? There is no experience or previous qualifications required for enrolment on this Develop 2D Game UI Using Inkscape. It is available to all students, of all academic backgrounds. Requirements Our Develop 2D Game UI Using Inkscape is fully compatible with PC's, Mac's, Laptop, Tablet and Smartphone devices. This course has been designed to be fully compatible with tablets and smartphones so you can access your course on Wi-Fi, 3G or 4G. There is no time limit for completing this course, it can be studied in your own time at your own pace. Career Path Learning this new skill will help you to advance in your career. It will diversify your job options and help you develop new techniques to keep up with the fast-changing world. This skillset will help you to- Open doors of opportunities Increase your adaptability Keep you relevant Boost confidence And much more! Course Curriculum 5 sections • 19 lectures • 03:55:00 total length •Welcome to Game UI design with Inkscape!: 00:02:00 •The 3 Cs of good game UIdesign: 00:04:00 •What is HUD: 00:03:00 •Before youdraw SKETCH! !: 00:02:00 •Basic Button Bases: 00:18:00 •Aligning buttons: 00:04:00 •What makes a good icon: 00:04:00 •Very simple icons: 00:06:00 •More complex icons and drawing methods: 00:09:00 •Complex icons for a fantasy game: 00:20:00 •Creating an icon set for a ninja game: 00:19:00 •Space shooter UI design - Part #1: 00:18:00 •Space shooter UI design - Part #2: 00:18:00 •Fantasy game UI - Part #1: 00:20:00 •Fantasy game UI - Part #2: 00:19:00 •Fantasy game UI - Part #3: 00:16:00 •Fantasy game UI - Part #4: 00:12:00 •Gemstone game UI - Part #1: 00:21:00 •Gemstone game UI - Part #2: 00:20:00

Develop 2D Game UI Using Inkscape
Delivered Online On Demand3 hours 55 minutes
£12