- Professional Development
- Medicine & Nursing
- Arts & Crafts
- Health & Wellbeing
- Personal Development
13071 Courses delivered Online
If you want to acquire substantial knowledge regarding Cyber Security Training from scratch, you can look into this comprehensive 20-in-1 Cyber Security Training bundle. Quality is a significant issue when it comes to a compilation of courses in Cyber Security Training. Well, we can ensure top-quality content that you can depend on. Our bundle initiates with the title course Cyber Security Training. This top-notch course teaches you with a state-of-the-art video format ensuring an engaging learning experience. With the guidance of an expert instructor, you will learn everything about Cyber Security Training to uplift your career. This Cyber Security Training bundle includes the following courses: Course 01: Cyber Security Awareness Training Course 02: Functional Skills IT Level 2 Course 03: Cyber Law Course 04: Information Management Course 05: Security Management: Security Support Officer Training Course 06: Risk Management and Information Security Protection Course 07: Learn Ethical Hacking From A-Z: Beginner To Expert Course 08: Certificate in Anti Money Laundering (AML) Course 09: GDPR UK Training Course 10: Paralegal & English Law 2021 Course 11: Computer Hacking Forensic Investigator Course 12: AML Investigator Course 13: Security Risk and Fraud Prevention Course 14: Compliance Management System (CMS) Course 15: Workplace Professionalism Certificate Course Course 16: ECommerce Course 17: Javascript Programming for Beginners Course 18: Python Programming: Beginner To Expert Course 19: Quality Tools and Problem Solving Methods Course 20: Microsoft Power BI Key Features of Cyber Security Training Bundle Accredited by CPD Top-notch video lessons Instant e-certificate Entirely online, interactive Cyber Security Training course with audio voiceover Self-paced learning and laptop, tablet, and smartphone-friendly 24/7 Learning Assistance Discounts on bulk purchases So, enrol now in this Cyber Security Training bundle and make your every penny worth it! How You will be Benefited from Cyber Security Training Bundle All through this self-paced training, you will get engaging learning materials with engaging video lessons and acquire the necessary knowledge to work with various concepts to gain a competitive advantage in the employment market. Accreditation All of our courses included in this Cyber Security Training bundleare fully accredited, providing you with up-to-date skills and knowledge and helping you to become more competent and effective in your chosen field. Certification Once you successfully complete your Cyber Security Training course, you will immediately be sent digital certificates for the bundle courses. CPD 200 CPD hours / points Accredited by The CPD Quality Standards (CPD QS) Who is this course for? Anyone with a curious mind and an eagerness to learn can take this Cyber Security Training bundle. Requirements There are no formal requirements for this bundle course to be enrolled. Career path This Cyber Security Training bundle will help you uplift your career or guide you to a new one.
ISTQB® Foundation Training Course for the team (BCS CTFL) - Manchester
By Day Consulting - ISTQBĀ® accredited training provider
ISTQB® FOUNDATION TRAINING COURSE (2 persons minimum) The aim of this course is to provide you with the knowledge and skills to pass an exam certifying you as an ISTQB® Certified Tester - Foundation Level. Most organisations require this certification as a minimum skill requirement for software testers. In this course you will learn a standardized approach to software testing that will be immediately applicable to your projects. In order to get the certification you will be required to pass a 60-minute exam. Our trainers will fully prepare you by employing scenarios that mirror the exam questions, and by focusing course delivery with a balance of theory and practice. Target group: Functional Tester, Agile Tester, User Acceptance Tester, Test Automation Specialist, Performance Testing Specialist, Testing Team Lead, Test Manager, Business analyst Prerequisites: There are no specific prerequisites for this course. This course is suitable for anyone involved in software testing. Duration: 3 days. Training objectives: Learn aspects of test planning, estimation, monitoring and control. Understand and use international standards and terminology. Understand and implement effective testing techniques. Be well prepared for the exam. Identify the missing testing skills for the career development purposes. This course covers the following areas: Fundamentals of software testing Testing throughout the life cycle (software development models, test levels, test types) Test design techniques (e.g. specification-based or black-box techniques, structure-based or white-box techniques) Static testing (static testing techniques, review process, tool-assisted static analysis) Test management (test organisation, test planning and estimation, test progress monitoring and control, risks) Tools to support testing (types, benefits and risks) Language: English
3ds max One Day Bespoke training course 1-2-1
By Real Animation Works
Face to face training customised and bespoke. Online or Face to Face

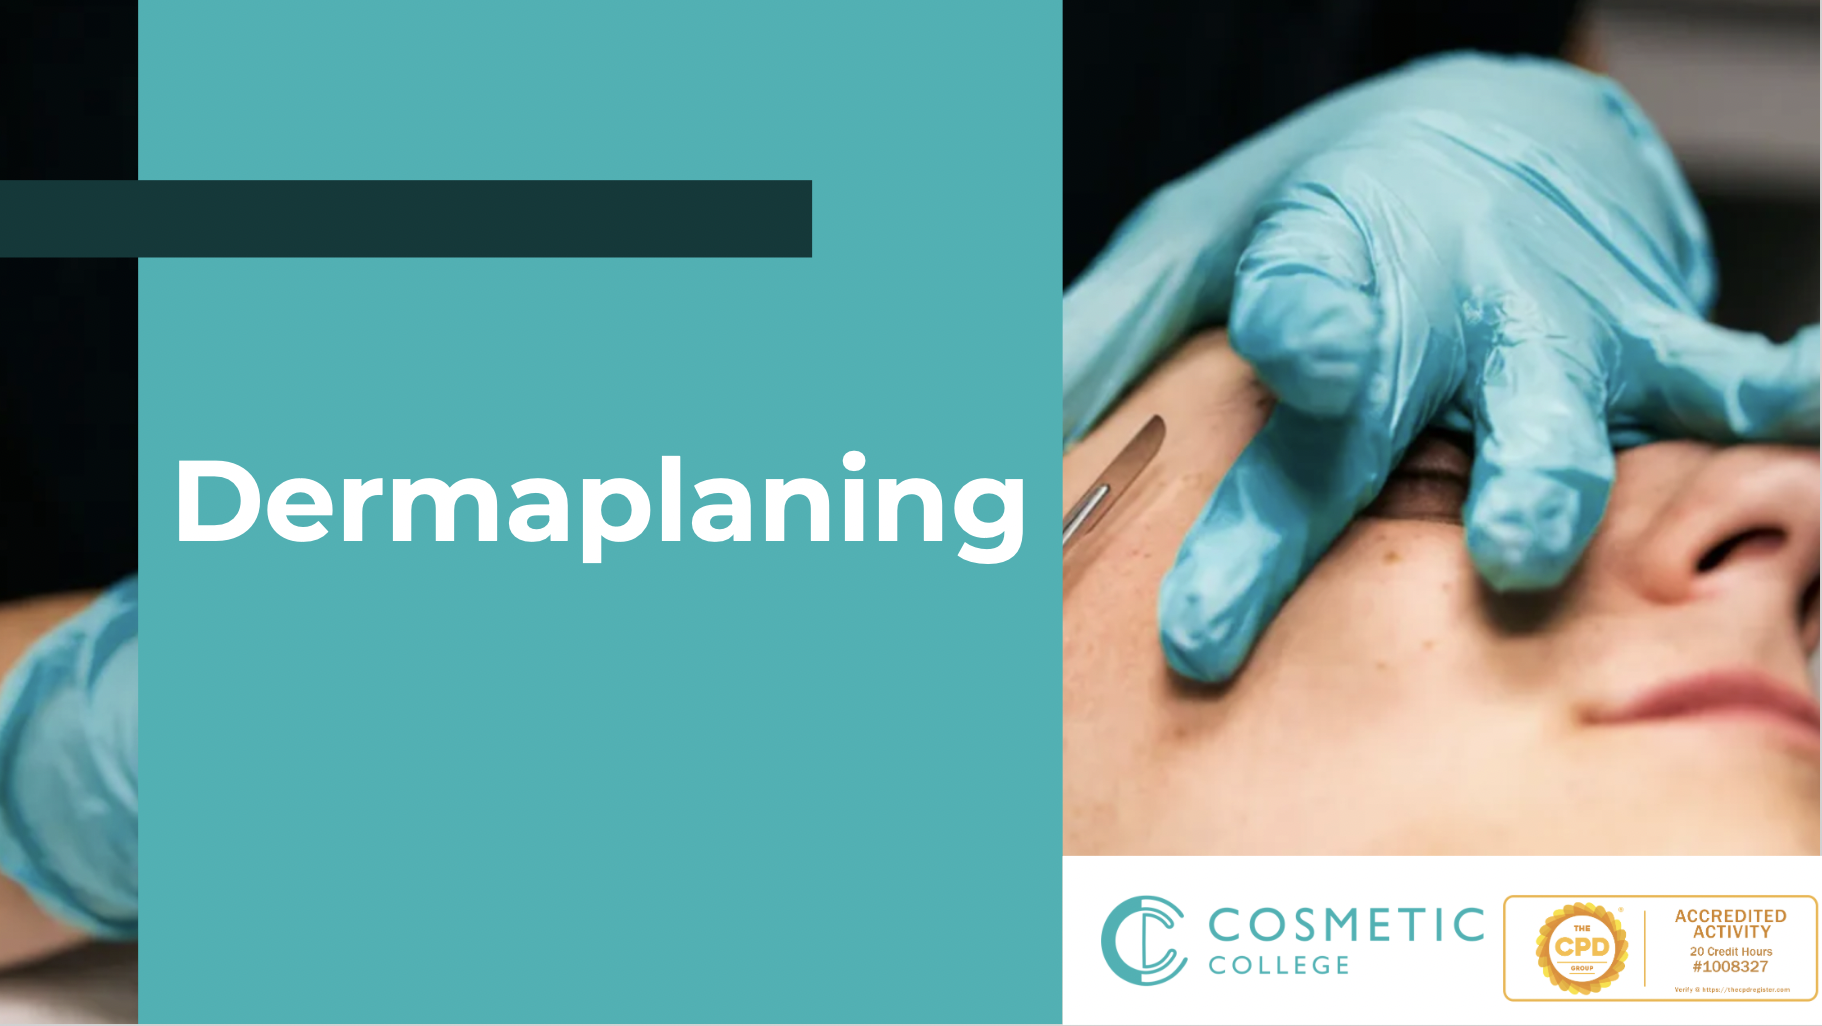
Online Dermaplaning Training Course
By Cosmetic College
Dermaplaning is a cosmetic procedure that removes the top layers of your skin. The procedure aims to remove fine wrinkles and deep acne scarring, as well as make the skin's surface look smooth with ongoing training. Dermaplane training is an excellent way to add more options for your clients' beauty needs. Through our interactive and engaging e-learning platform with comprehensive study materials and video tutorials, this online course will take you through the process for these highly effective treatments, as well as ensuring you have confident knowledge of the essential health and safety, and anatomy and physiology related to these treatments. Additional course details Course Contents Health & Safety Contraindications Client Consultation Preparation of skin Anatomy How to manage the blade Stretching the skin Exfoliating the full face Applying a mask Aftercare This course was designed for learners to refresh their subject knowledge and practical skill; we suggest you attend our onsite training course for learners without prior training. Course Features CPD Accredited CourseVetted accredited trainingFully Online TrainingTrain your way on any deviceFull DemonstrationComplete end to end treatment demonstrationImmediate CertificationDelivered immediately after completion Frequently Asked Questions Is this course accredited? Yes. This training course is accredited by the CPD group. Can I get insurance once I have completed this training? Our online training courses are CPD accredited. Acquiring insurance based on completion and accreditation from our online training courses is insurer specific and as with most cases also takes into account your personal background and status. We advise that you contact your insurance to ensure your prerequisites meets their requirements and that this training course meets their specific criteria for insurance. We have a relationship with Insync Insurance which we recommend. How long do I have to complete the training course? Once you have logged in and started your training course you will have 3 months to complete your training. Can I train straight away after making payment? Yes. Once you have completed payment our system will automatically enrol you onto the training course. You will then receive an email with instructions and a direct link to login and start your course.
Twinmotion Training Course
By ATL Autocad Training London
Who is this course for? Twinmotion Training Course. The Twinmotion course is designed for architects, interior designers and urban planners. Learn how to create architectural visualizations and real-time animations. Students interested in exploring the world of architectural rendering and visualization using Twinmotion software. Click here for more info: Website Duration: 10 hours Approach: 1-on-1 training with tailored content. Schedule: Book a time that suits you, Mon to Sat, from 9 am to 7 pm, and create your own schedule. Course Outline for Twinmotion Real-time 3D Architecture Visualization: Module 1: Twinmotion Introduction Explore the real-time 3D visualization capabilities of Twinmotion Master efficient scene manipulation through the Twinmotion interface Prepare 3D files for import and manage the workflow effectively Module 2: Materials and Realism Enhancement Enhance scenes with realistic materials and elevate visual quality Utilize videos as materials and apply glowing effects Create grunge materials to add texture and realism Employ the X-ray material for specific visualization needs Module 3: Landscape and Vegetation Integration Integrate vegetation using Twinmotion's scatter, HQ trees, and growth features Customize grass and utilize HQ vegetation assets for realistic landscapes Create time-lapse effects for dynamic vegetation growth Module 4: Library and Object Management Access the Twinmotion library for furniture and objects Seamlessly import external 3D objects into your scenes Obtain high-quality 3D assets from the internet and add them to your user library Utilize BIM-objects for additional assets Module 5: Lighting and Animation Techniques Work with various lighting options, including area light and volumetric light, to enhance scenes Add animated characters and vehicles to infuse dynamism into your visuals Incorporate construction vehicles and aircraft for realistic scenes Module 6: Volumes and Interactive Elements Utilize volumes and the animator feature to create dynamic scenes Implement urban elements and measurement tools for precision and accuracy Module 7: Nature and Weather Effects Utilization Harness Twinmotion's nature features, such as physical sky and weather effects, to create lifelike outdoor scenes Establish realistic lighting for outdoor environments Add ocean effects to enhance water elements in your scenes Module 8: Advanced Rendering Techniques Master rendering processes, from creating images to exporting panoramas and animations Implement depth of field improvements to create visually captivating scenes Create BIM motion virtual reality phases for immersive experiences Utilize the Twinmotion presenter feature for seamless presentations Module 9: Final Project Apply acquired knowledge and skills to complete a final rendering project in Twinmotion Download Twinmotion https://www.twinmotion.com ⺠download Learn how to download and install Twinmotion, the fast, easy real-time archvis tool. Learning Outcomes of Real-Time Rendering: Efficient Scene Creation: Rapid development of immersive 3D environments using essential tools and techniques. Realistic Material Application: Expertise in applying authentic textures and shaders for visually convincing scenes. Dynamic Lighting: Understanding dynamic lighting effects for visually compelling, realistic scenes. Interactive Elements: Integration of animations and dynamic objects for engaging user experiences. Performance Optimization: Optimizing assets and scenes for smooth real-time rendering across diverse hardware. Library Utilization: Efficient use of asset libraries to enhance scene complexity without compromising performance. Visual Effects: Application of weather conditions, particle systems, and post-processing effects for stunning environments. Collaborative Rendering: Mastering real-time collaborative rendering techniques for teamwork and live interactions. Future Trends in Real-Time Rendering: Ray Tracing Advancements: Real-time ray tracing for realistic lighting, shadows, and reflections. AI-Powered Rendering: AI-driven predictive rendering for faster, high-quality outcomes. Immersive Experiences: Real-time rendering enabling immersive simulations in gaming, education, and architecture. Cross-Platform Compatibility: Seamless experiences across devices, from gaming consoles to VR headsets. Blockchain Integration: Blockchain tech ensuring asset authenticity and ownership verification. Real-Time Cinematography: Revolutionizing film and animation with efficient real-time visual effects. Environmental Sustainability: Focus on energy-efficient algorithms for reduced environmental impact. Collaborative Design: Real-time rendering facilitating interactive design reviews and creative collaboration. Twinmotion Course: Expertise in Real-Time Visualization: Develop mastery in Twinmotion, enabling the creation of captivating architectural environments in real-time. Improved Design Communication: Enhance concept communication by utilizing dynamic visualizations, elevating the quality of design presentations. Access to High-Quality Assets: Utilize an extensive library of premium assets to enrich scenes, adding realism and creativity to your projects. Crafting Lifelike Environments: Learn to create realistic landscapes, water effects, weather conditions, and special effects, providing immersive and lifelike experiences. Flexible Learning Options: Choose between in-person or live online sessions, ensuring a personalized and convenient learning experience tailored to your needs. Lifetime Access and Support: Benefit from perpetual access to lesson recordings and receive continuous support through lifetime email assistance, allowing you to stay connected with knowledgeable instructors for ongoing guidance. Course Advantages: Mastery of Real-Time Visualization: Acquire expertise in Twinmotion for creating captivating architectural environments. Enhanced Design Communication: Improve concept communication through dynamic visualizations, elevating design presentations. Abundant High-Quality Assets: Utilize an extensive library of top-notch assets, enriching scenes with realism and creativity. Creation of Lifelike Environments: Craft realistic landscapes, water effects, weather conditions, and special effects for immersive experiences. Flexible Learning Options: Choose between in-person or live online sessions, ensuring a personalized and convenient learning experience. Lifetime Access and Support: Enjoy perpetual access to lesson recordings and receive continuous support through lifetime email assistance, staying connected with knowledgeable instructors.

Online Microneedling Training Course
By Cosmetic College
Learn the background, theory, protocols and more with our Microneedling e-learning course from the expert tuition team at the Cosmetic College. Microneedling is one of the fastest-growing treatments in the beauty industry, so this is a great opportunity to learn this popular facial technique. This online training course for Microneedling is specially developed for the advanced facial beauty specialist who wants to offer Microneedling as a new treatment to their clientele. Additional course details Course Contents Bespoke First Aid for the Beauty and Aesthetic Sector Health, Hygiene and safety Anatomy and Physiology What is Microneedling Benefits of Microneedling Products and Trolley set up Client Consultation Process and Procedure Client Suitability and Pricing Different Skin Types Ageing and Healing Processes Insurance and Legal Requirements Treatment Areas and their Techniques Practising Techniques Microneedling Step by Step Microneedling Procedure - Video Demonstration Aftercare Course Features CPD Accredited CourseVetted accredited trainingFully Online TrainingTrain your way on any deviceFull DemonstrationComplete end to end treatment demonstrationImmediate CertificationDelivered immediately after completion Frequently Asked Questions Is this course accredited? Yes. This training course is accredited by the CPD group. Can I get insurance once I have completed this training? Our online training courses are CPD accredited. Acquiring insurance based on completion and accreditation from our online training courses is insurer specific and as with most cases also takes into account your personal background and status. We advise that you contact your insurance to ensure your prerequisites meets their requirements and that this training course meets their specific criteria for insurance. We have a relationship with Insync Insurance which we recommend. Do you offer in-person training? Yes, we perform in-person training at our training academy in Orpington, Kent. You can find out more details of our in-person Microneedling training here Can I train straight away after making payment? Yes. Once you have completed payment our system will automatically enrol you onto the training course. You will then receive an email with instructions and a direct link to login and start your course. How long do I have to complete the training course? Once you have logged in and started your training course you will have 3 months to complete your training.
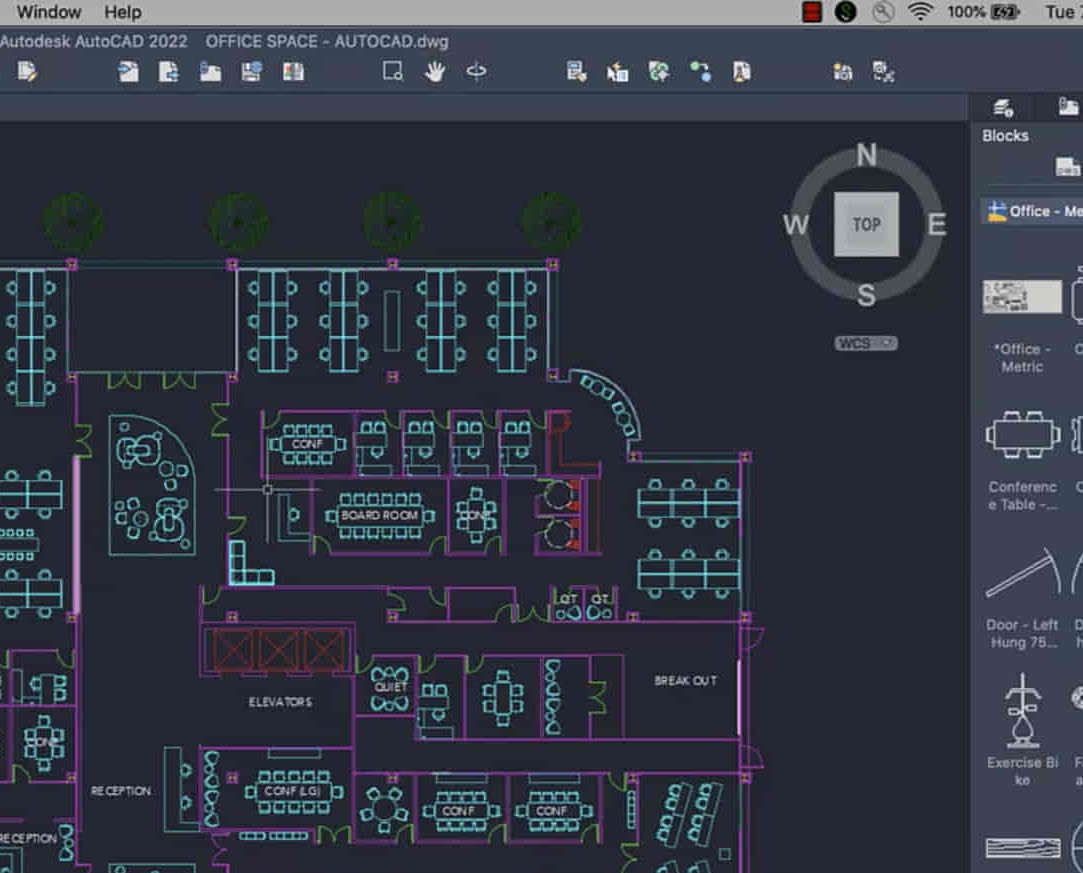
AutoCAD-Mac Introduction to Advanced Training Course
By ATL Autocad Training London
AutoCAD-Mac Introduction to Advanced Training Course This project-based course is tailored for AutoCAD Mac users, architecture and interior design students and professionals. Click here for more info: Website When Can I Book This Training Course? Personalized experience with 1-on-1 sessions designed to fit your unique needs. Available from Monday to Saturday, 9 am to 7 am Or Call to Book 02077202581. Duration of Training: 16 hours. Training Method: 1-on-1, providing the option for in-person sessions or live online training. Course Content Section 1: Introduction Course Overview Section 2: Basic Concepts Status Bar and The Units Drawing Commands Control Points - Vertex or Verteces Modifying Commands Snap Settings Drawing An Outline Section 3: Dimensions and Customization Adding Dimensions and Dimension Style Manager Importing Dimension Styles Customizing Shortcuts Section 4: Advanced Techniques Adding Walls Thickness with Offset Command Adding interior layout Cleaning Layout lines with Trim Section 5: Text and Styling Text Editing and Importing Text Styles Main File Formats in AutoCAD Section 6: Design Elements Creating Openings in the Floor Plan Adding Openings - Part 2 Adding Openings - Part 3 Drawing Doors & Windows Using Line Types & Linetype Scale Group and Ungroup Commands Using Blocks Using Blocks Library & Dynamic Blocks Section 7: Layers and Furnishing Layers - Part 2 Layers - Part 3 Furnishing Bedrooms & Bathrooms - Part 1 Adding Furniture, Fixtures, and Equipments | part 2 Adding Furniture, Fixtures, and Equipments | part 3 Drawing the Kitchen Drawing the Living Room Drawing Dining Room & Adding Casework Adding Steps and Railings Using Stretch Command Finishing Steps and patio areas Hatch command Hatch Customization Adding Plants & Finishing Floor Plan Section 8: Layout and Printing Paper Space & Page Setup Manager Working with Viewport & Using Print Command Scale & Using Multiple Viewports Locking Viewport Scale Drawing A Titleblock - Part 1 Drawing A Titleblock - Part 2 Copying the Titleblock Using Titleblock with Attributes Section 9: Roof Plan and Organization Drawing The Roof Plan Placing Roof Plan on Sheet Organizing Project Drawings & Using Layer Freeze AutoCAD Crashing And What To Do Section 10: Elevations Exterior elevations - Drawing the Outline Exterior elevations - Drawing the Openings Elevations - Detailing - Part 1 Elevations - Detailing - Part 2 Elevations - Repeating the workflow Elevations - Finishing 3rd Elevation Elevations - Drawing the final elevation Section 11: Sections Sections: Drawing Cut Lines & the Outline Sections: Placing 1st Section on Sheet Sections: Drawing Section #2 - Different Technique Sections: Adding Final Detail Section 12: Interior Elevations Interior Elevations: Drawing the Outline Interior Elevations: Placing on Sheet Interior Elevations: Using Block Clip Interior Elevations: Final Drawing Section 13: Conclusion Putting the Final Set Together Proficient AutoCAD Skills: Master essential tools for efficient drawing creation and manipulation. Accurate 2D Designs: Create precise and high-quality layouts with attention to detail. Effective Object Handling: Excel in selecting, moving, copying, and scaling objects. File Management: Organize drawings efficiently and understand different file formats. Precise Measurements: Utilize inquiry commands for accurate design analysis. Annotations and Hatching: Apply text, dimensions, and hatching to enhance drawings. Object Organization: Manage layers and object properties for organized designs. Reusable Content: Efficiently use blocks, tool palettes, and groups for productivity. Layout Optimization: Create layouts with viewports for optimal design presentation. Professional Output: Generate professional plots and PDF output for polished results. Enhanced Productivity: Explore AutoCAD toolsets and web/mobile apps for streamlined workflow. Course Overview: Learn versatile AutoCAD for Mac drawing techniques, applicable across all industries, enabling you to excel in the application. Our trainers incorporate exercises from various disciplines. Who Should Attend: Ideal for newcomers to AutoCAD for Mac, self-taught users seeking correct techniques, and those transitioning from other CAD tools. Requirements: A solid Mac OS understanding is essential, while prior CAD knowledge is not required. Pre-course preparation guidance is provided for new AutoCAD users. Highlights: Perfect for AutoCAD for Mac beginners. Gain skills for precise 2D layouts and designs. Versatile drawing techniques for all industries. Choose between in-class or live online training. Autodesk Certified Tutors: AutoCAD 1-2-1 courses. Hands-on learning with expert trainers. Lifetime post-course email support. Tailored on-request training available. Certificate: Digital certificate included. Tailored Mac Training: Excel in AutoCAD with specialized Mac training, leveraging its distinct features and interface for heightened efficiency. Comprehensive Skill Enhancement: Advance from fundamental to intermediate AutoCAD Mac proficiency, creating precise and professional 2D drawings. Industry-Relevant Expertise: Attain in-demand skills valued by employers in architecture, engineering, and design sectors. Hands-On Project Exposure: Immerse yourself in practical exercises mirroring real-world design scenarios, fostering practical competence. Lesson Recordings for Review: Access recorded lessons for reinforcement and deeper AutoCAD Mac comprehension. Ongoing Email Support: Benefit from lifetime email support, ensuring assistance beyond course completion."
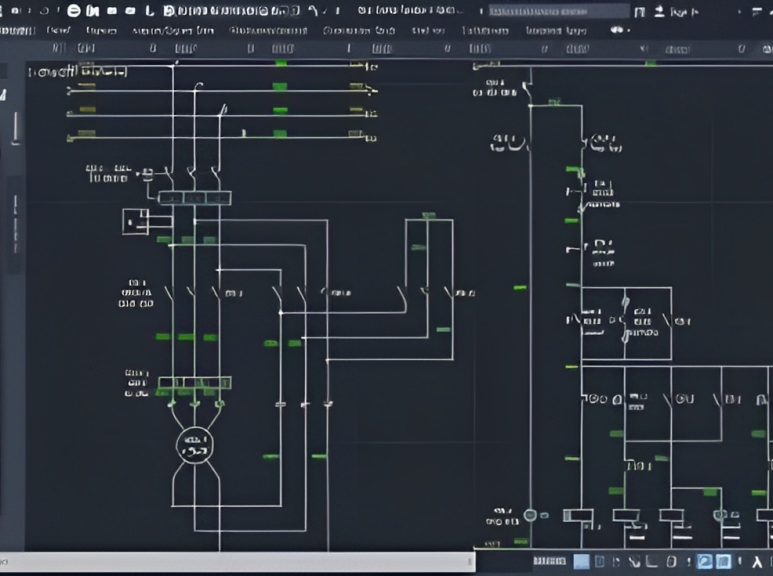
AutoCAD Training Course for Electrical
By ATL Autocad Training London
Exclusive to AutoCAD subscribers, the AutoCAD Electrical toolset simplifies electrical system creation. Click here for more info: Website Our course provides a strong foundation in 2D electrical design, covering essential tools. Flexible one-on-one sessions from 9 a.m. to 7 p.m., Monday to Saturday. Call 02077202581 or book online. The 16-hour course offers flexibility, divide hours across days. Benefit from individualized attention and tailored content. Enroll for in-person or Zoom sessions to excel in AutoCAD Electrical. AutoCAD Electrical Course Content: Introduction to AutoCAD Electrical Software: Overview and features of AutoCAD Electrical Understanding the software interface and tools Project file structure and management Layout and Navigation: Navigating the AutoCAD Electrical workspace Creating new project files and using attribute editors Understanding WDD, WDX, and WDF project files Exploring the Project Manager interface and attribute editors Electrical Diagram Drawing: Numbering and titling wires in diagrams Labelling components Utilizing diagram symbol libraries Creating and editing Electrical Control Circuits (ECC) Component dialog box and Circuit Scale dialog box Introduction to Programmable Logic Controllers (PLCs) and Integrated Systems: PLC Symbols and Concepts Inserting Programmable Logic Controllers (PLCs) into diagrams Adding PLC Units to diagrams Working with PLC Input and Output points and circuits Understanding PLC-based classification Using the Spreadsheet to PLC Input and Output Points utility Custom and Bespoke Symbols: Creating custom symbols for Switches, Wires, Contactors, Motors, Transformers, etc. Specifying symbol conventions and standards Offline and online usage of AutoCAD Electrical databases Drawing for Terminals and Plans: Implementing Terminal symbols in diagrams Handling terminal plans and locations Working with compound level terminals and locations Utilizing the Component command for single and multiple components Managing Jumpers and wiring Modifying Terminal Strips and Dual In-Line Packages (DIP) Understanding DIN Rail, Electrical Enclosure, Circuit Breakers, and Electrical Equipment Generating PDFs and Reports: Exporting drawings to PDF format Organizing report templates Automating the generation of reports Creating Electrical Audit Reports This AutoCAD Electrical course provides comprehensive knowledge of the software, focusing on electrical diagram drawing, symbol creation, PLC integration, terminal planning, and report generation. Participants will gain the skills needed to efficiently design electrical systems using AutoCAD Electrical software. Upon completion, participants will proficiently use AutoCAD Electrical to create precise electrical diagrams, integrate PLCs, design custom symbols, plan terminals, and generate reports efficiently. They will possess the skills needed to confidently design electrical systems and enhance their expertise in electrical design and drawing. AutoCAD Electrical Training Course: Master precision in specialized electrical design skills. Optimize your design process with streamlined workflows. Ensure compliance with industry standards consistently. Boost productivity in electrical design tasks. Facilitate seamless collaboration with fellow professionals. Benefit from recorded lessons for convenient review. Enjoy continuous support with lifetime email assistance. Unleash the complete power of AutoCAD for your electrical design needs. Enroll today and craft precise, professional electrical drawings confidently. Select between in-person and live online sessions to suit your preference. Flexible Evening Sessions: Learn AutoCAD at your own pace with evening sessions designed for busy individuals. Boost your career opportunities in computer-aided design. Comprehensive Skill Development: Gain a strong foundation in AutoCAD's core features and advance to 3D modeling and rendering techniques, enhancing your design capabilities. Industry-Standard Knowledge: Become proficient in AutoCAD, a widely used CAD software in architecture, engineering, and construction fields, making you highly sought after by employers. Practical Application: Apply AutoCAD skills to real-world design scenarios, creating detailed plans for professional projects in architecture, engineering, and mechanical fields. Recorded Lessons for Review: Access lesson recordings to reinforce learning and review specific topics or techniques whenever needed. Lifetime Email Support: Enjoy ongoing support with lifetime email assistance, even after completing the course, for guidance and clarification.
THIS COURSE PACKAGE INCLUDES: 1: PERIPHERAL I.V. CANNULATION - IV THERAPIES COURSE (GPT008) 2: VACCINATION / INJECTION COURSE (GPT601) Learn how to administer injectables and intravenous therapies ... FAST-TRACK YOUR AESTHETICS TRAINING WITH OUR COMPLETE TRAINING PACKAGE 20% Multi-Course Discount Cover all stages from Level 1 through to Level 4 (FDSc) Cover your theory training online Complete your advanced practical training in 1 day Practical training in Classroom or Virtual Classroom Comprehensive Practise@Home training kits for VC Awards 2 accredited qualifications Dual Accreditations for all courses Covers all steps required to safely perform injectables Covers all steps required to safely perform IV therapies Practise IV on artificial arm with fake blood Practise injection techniques on realistic injection pads Learn beginner to advanced skills and techniques Basic understanding of English language required OPEN TO ALL APPLICANTS

Enscape Rendering Training Course
By ATL Autocad Training London
Who is this course for? Enscape Rendering Training Course. The Enscape Rendering Training Course is tailored for architects, interior designers, and design students aiming to learn realistic visualizations using Enscape. Whether you prefer 1-on-1 in-person or online courses, this training is best for you. Click here for more info: Website Training duration: 5 hrs Method: 1-on-1 and Tailored content Schedule: Customize your training. Choose any hour from Mon to Sat, 9 am to 7 pm Call 02077202581 or WhatsApp at 07970325184 to book. Course Outline: Enscape Rendering Software Training (5 hours) Course 1: Enscape for Revit Hour 1: 1. Introduction to Enscape: Overview of Enscape rendering software, its features, and benefits. 2. Installing and Setting up Enscape: Step-by-step guidance on installing and configuring Enscape for Revit. 3. Enscape Interface: Familiarizing with the Enscape user interface and navigation controls within Revit. Hour 2: 4. Enscape Materials: Exploring material creation, application, and customization within Enscape for Revit. 5. Lighting in Enscape: Understanding different lighting options, adjusting light settings, and creating realistic lighting effects. Hour 3: 6. Enscape Camera Settings: Manipulating camera angles, perspectives, and settings for optimal visualization. 7. Enscape Rendering Settings: Exploring various rendering settings and techniques to enhance the quality of the final output. Hour 4: 8. Enscape Rendering Workflow: Demonstrating a step-by-step workflow for generating renderings and walkthroughs using Enscape in Revit. 9. Advanced Features: Introduction to advanced features such as creating panoramas, virtual reality (VR) walkthroughs, and creating animations in Enscape. Hour 5: 10. Tips and Tricks: Sharing tips and techniques for maximizing efficiency and achieving high-quality results in Enscape for Revit. 11. Q&A and Troubleshooting: Addressing participant questions, providing troubleshooting guidance, and discussing common challenges and solutions. OR Course Outline: Enscape Rendering Software Training (5 hours) Course 1: Enscape for Sketchup Hour 1: 1. Introduction to Enscape: Overview of Enscape rendering software, its features, and benefits for SketchUp users. 2. Installing and Setting up Enscape: Step-by-step guidance on installing and configuring Enscape for SketchUp. 3. Enscape Interface: Familiarizing with the Enscape user interface and navigation controls within SketchUp. Hour 2: 4. Enscape Materials: Exploring material creation, application, and customization within Enscape for SketchUp. 5. Lighting in Enscape: Understanding different lighting options, adjusting light settings, and creating realistic lighting effects. Hour 3: 6. Enscape Camera Settings: Manipulating camera angles, perspectives, and settings for optimal visualization in SketchUp. 7. Enscape Rendering Settings: Exploring various rendering settings and techniques to enhance the quality of the final output. Hour 4: 8. Enscape Rendering Workflow: Demonstrating a step-by-step workflow for generating renderings and walkthroughs using Enscape in SketchUp. 9. Advanced Features: Introduction to advanced features such as creating panoramas, virtual reality (VR) walkthroughs, and creating animations in Enscape. Hour 5: 10. Tips and Tricks: Sharing tips and techniques for maximizing efficiency and achieving high-quality results in Enscape for SketchUp. 11. Q&A and Troubleshooting: Addressing participant questions, providing troubleshooting guidance, and discussing common challenges and solutions. Learning Outcome: After completing the Enscape (VR) Training and Interactive Workshop, participants will master real-time walkthroughs, set up VR applications, efficiently migrate models, navigate designs dynamically, update objects in real-time, control visual styles, adjust day-time settings, export and share designs, utilize the asset library, and gain a comprehensive overview of Enscape. These skills will enable them to confidently visualize and display 3D designs without cloud uploads or external software, enhancing communication and collaboration in architectural projects. What does the Enscape Training & Interactive Workshop offer? The Enscape Training & Interactive Workshop is designed to help you get up and running with Virtual Reality (VR) in a cost-effective manner. It covers hardware and software setup, navigation techniques, real-time updates, material settings, and more. The workshop also allows participants to experience VR firsthand. What are the benefits of attending the Enscape (VR) Training and Interactive Workshop? By attending this workshop, you will gain the ability to perform real-time walkthroughs of your designs in 3D. You can view your projects in VR without the need for cloud uploads or exporting to other 3D software. The workshop offers extensive asset libraries, collaboration, and annotation sharing, enhancing your design visualization capabilities. What are the prerequisites for attending the Enscape (VR) Training and Interactive Workshop? No prior knowledge of Enscape is required. However, assistance from IT management may be necessary for hardware and software installation. Logistics, such as room suitability and technical requirements, will be discussed before the workshop. What will I learn in the Enscape (VR) Training and Interactive Workshop? The workshop covers hardware setup, software installation, and configuration. You will learn how to migrate models from Revit and SketchUp into VR, navigate through designs, update objects and materials in real-time, and utilize various visual styles and settings. The course also includes interactive workshops with support from our expert tutors. Enscape rendering courses offer valuable benefits: Real-time Visualization: Instantly visualize designs for quick iterations and informed decisions. Seamless Integration: Streamline rendering by integrating with popular design software. High-Quality Visuals: Create photorealistic presentations and walkthroughs. Efficient Design Communication: Enhance collaboration and communication during presentations. Enhanced Design Iteration: Explore options and make informed decisions in real-time. Time and Cost Savings: Reduce rendering time and deliver projects more efficiently. Portfolio Enhancement: Elevate your portfolio with visually striking renderings, opening new opportunities.