- Professional Development
- Medicine & Nursing
- Arts & Crafts
- Health & Wellbeing
- Personal Development
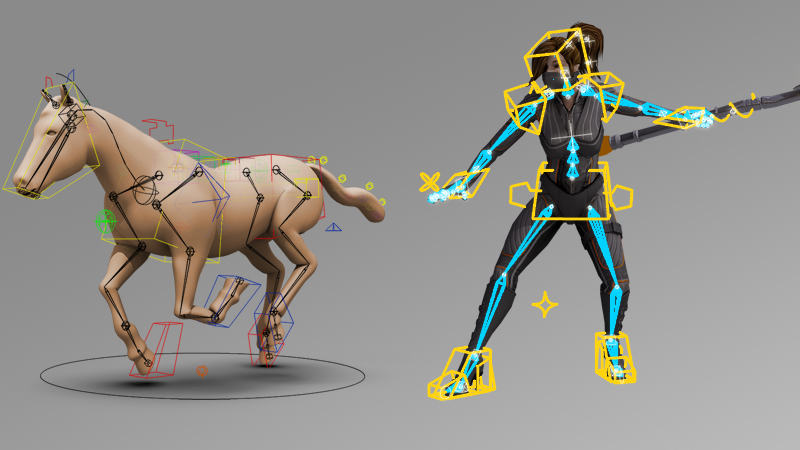
Character Animation in 3ds Max Training
By London Design Training Courses
Why Choose Character Animation in 3ds Max Training Course? Click here for more info. Top character animation course in 3ds Max, this course provides an accessible learning experience. Learning character animation enables you to create your own short films. It's not just a means of income; it evolves into a passion. Duration: 20 hrs Method: 1-on-1, Personalized attention. Schedule: Tailor your own hours of your choice, available from Monday to Saturday between 9 am and 7 pm. Enroll in our exclusive "Character Animation Fundamentals in 3ds Max" course at London Design Training, guided by experienced tutors Sitwat Ali, Qasim Ali, and Jess. Gain in-depth insights into animating 3D characters, covering essential techniques like character rigging, pose creation, and seamless pose-to-pose animation. 3ds Max Character Animation Course Duration: 20 hours Course Overview: Master the art of character animation in 3ds Max with our comprehensive course. Ideal for beginners and those with some 3D modeling and animation experience, this course covers everything you need to know to bring characters to life. Course Outline: Introduction to Character Animation Explore animation principles Get familiar with 3ds Max animation tools Learn to create character rigs and manage the timeline Basic Animation Principles Understand keyframes and animation cycles Apply the 12 principles of animation Work with the graph editor and ease-in/out techniques Advanced Animation Techniques Utilize the reaction manager for complex animations Master non-linear animation methods Animate with inverse kinematics, custom controllers, expressions, and scripts Creating Characters Craft a character model with proper topology Create UV maps and apply textures Prepare characters for rigging Facial Animation Learn facial animation principles Create blend shapes and morph targets Master lip syncing techniques Body Animation Animate walk cycles and character motion Achieve believable character poses Implement character physics Advanced Character Animation Work with motion capture data Use CAT and Biped tools Understand motion blur and create special effects Render and output animations Character Animation Projects Bring all skills together in practical projects Create basic and complex character animations Course Requirements: Computer with 3ds Max installed Basic computer operations knowledge Passion for character animation Course Goals: Upon completion, you'll have a thorough grasp of character animation in 3ds Max, capable of creating realistic and sophisticated character animations using advanced techniques. You'll be equipped with the skills to continue honing your character animation abilities independently.

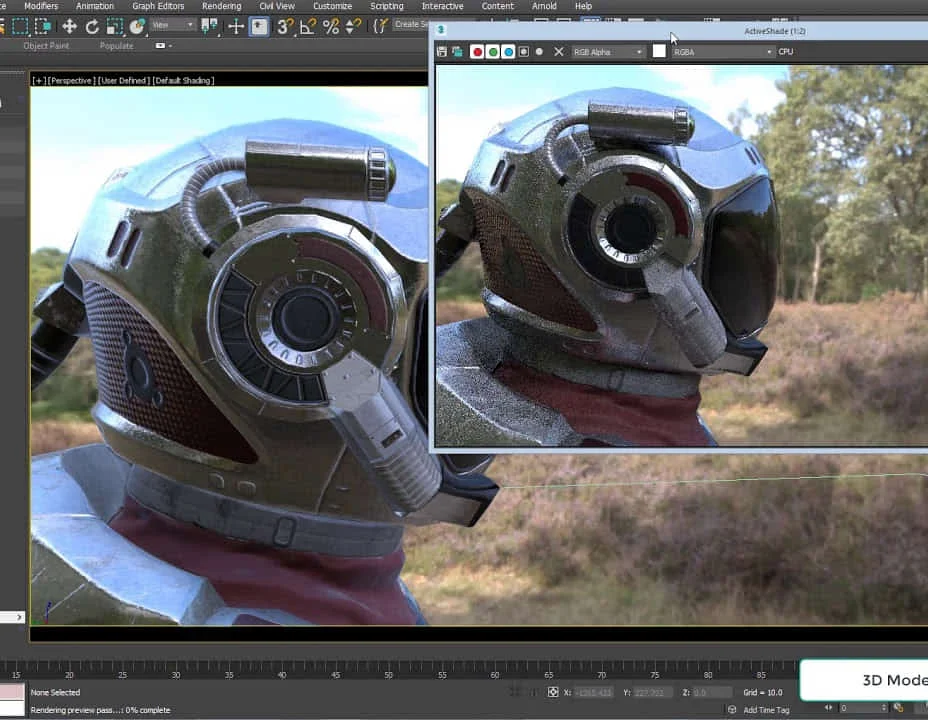
Arnold for 3dsMax Basic to Advanced Training Course
By ATL Autocad Training London
Learn 3ds Max + Arnold Photo Realistic Rendering Workflow. Enhance your skills with our Arnold renderer training for 3ds Max users. Learn to create lifelike 3D scenes and animations, mastering accurate light simulation. Explore essential Arnold features in lighting, materials, and rendering. Click here for more info: Website Training duration: 10 hrs. Method: 1-on-1 and Personalized attention. Schedule: Choose a convenient time from Monday to Saturday, 9 am to 7 pm, and book your slot. Course Duration: 10 hours Course Outline: Session 1: Introduction to Arnold Renderer (1 hour) Unveiling Arnold Renderer's features and capabilities Understanding the benefits of Arnold in 3ds Max Setting up Arnold renderer and exploring its interface Mastering the workflow for exceptional results Session 2: Basic Arnold Shading (1 hour) Navigating the Arnold shading network Creating essential materials with Arnold shaders Working with diverse shader types (standard, Lambert, etc.) Elevating visuals with maps and textures in Arnold's materials Session 3: Arnold Lighting Techniques (1.5 hours) Embracing the art of lighting with Arnold Lights Implementing various light types (area lights, spotlights, etc.) Creating ambiance with Arnold skydome and environment lighting Illuminating scenes using physical sky and image-based lighting Session 4: Arnold Cameras and Rendering Settings (1.5 hours) Mastering Arnold cameras and their settings Achieving depth of field and motion blur effects in Arnold Configuring optimal rendering settings for superior results Fine-tuning rendering with the Arnold Render Setup dialog Session 5: Advanced Arnold Shading (1.5 hours) Creating intricate materials with advanced Arnold shaders Realistic surfaces with Arnold's procedural textures Harnessing the power of advanced shading nodes (bump, displacement, etc.) Unleashing specialized effects with Arnold shaders (subsurface scattering, hair, etc.) Session 6: Arnold Rendering Optimization (1 hour) Streamlining rendering settings for enhanced efficiency Leveraging Arnold features like adaptive sampling and denoising Noise reduction techniques for smoother Arnold renders Troubleshooting common rendering issues and their solutions Session 7: Advanced Lighting Techniques (1 hour) Crafting lifelike lighting setups with Arnold's prowess Exploring advanced lighting properties (exposure, color temperature, etc.) Enhancing lighting with Arnold light filters and modifiers Implementing captivating effects like volumetric lighting and caustics Session 8: Arnold AOVs and Compositing (1 hour) Understanding Arnold AOVs (Arbitrary Output Variables) Configuring and rendering AOVs for post-production control Compositing AOVs for artistic adjustments in post-production Leveraging AOVs for fine-tuning the final image Session 9: Arnold for Animation and Motion Graphics (1 hour) Integrating Arnold seamlessly into animation and motion graphics projects Rendering animation sequences with finesse Managing motion blur and time-based effects with Arnold Unveiling Arnold's potential for particle rendering and dynamic effects Session 10: Arnold Tips, Tricks, and Best Practices (1 hour) Exploring advanced techniques and workflows for exceptional results Optimizing scene setup for enhanced rendering performance Troubleshooting tips for common issues and errors in Arnold Q&A session and final review to consolidate knowledge Upon completing this course, you will: Gain a solid understanding of Arnold, its rendering concepts, and its integration into 3D projects. Master the setup of Arnold renderer, optimizing performance, and ensuring compatibility with various platforms. Effectively create and manage materials for Arnold, enabling you to produce realistic and visually appealing scenes. Demonstrate proficiency in working with different shapes, lighting techniques, cameras, and shaders to enhance the visual quality of your 3D projects. Harness the power of textures to add depth and realism to your rendered scenes. Utilize Arnold scene sources efficiently, empowering you to streamline your workflow and achieve desired results in a faster and more organized manner. Overall, this course equips you with the necessary skills to confidently utilize Arnold in your projects and achieve exceptional rendering outcomes. Arnold is an advanced Monte Carlo ray tracing renderer designed for feature-length animation and visual effects. This comprehensive course equips you with the skills to produce photo-realistic 3D rendered scenes and animations. Learn accurate light simulation, artistic style techniques, and more. Our 3ds Max - Rendering with Arnold training is customizable, offering one-to-one sessions. Whether in-class or live online, our Autodesk Certified Instructors with vast rendering experience will guide you through hands-on exercises and provide a training guide for future reference. Upon completing the course, you'll receive an e-certificate and liftime email support from your Arnold trainer. Prior experience with 3ds Max is recommended, but no prior Arnold knowledge is required. Choose the Arnold version that suits your needs for this training course. Lifetime email support provided. Comprehensive handouts and useful documents included. Flexible financial support options available, including installment packages and funding through job center plus and DWP (Contact us for details). Money-back guarantee: Unsatisfied after your first session? We address your concerns and offer a refund if needed (Terms and conditions may apply). Assistance with computer optimization for improved software performance in Autocad, 3ds Max, and Photoshop on both MAC and PC platforms. Industry connections for portfolio promotion and job opportunities.
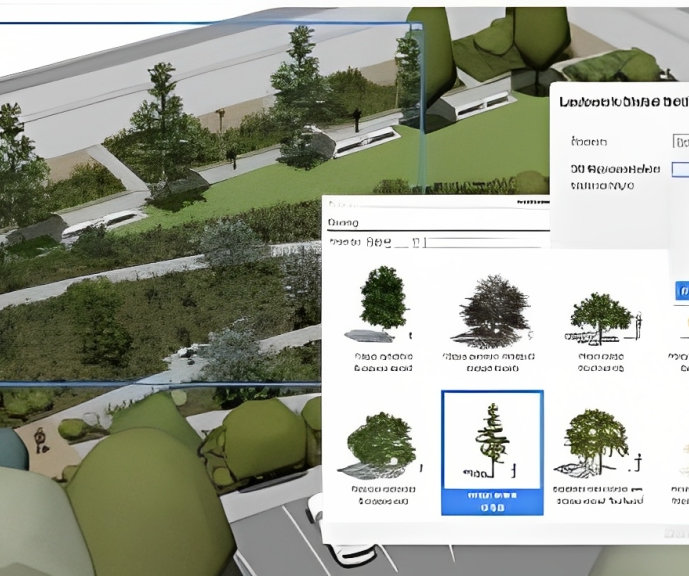
Vectorworks Landmark Training
By London Design Training Courses
Why choose Vectorworks Landmark Training Course? Course info Explore the Vectorworks Landmark Training Course! 1-on-1 Live Online sessions led by certified tutors and industry experts. Master Vectorworks Landmark for landscape and site design, creating captivating outdoor spaces. Enroll now to unleash your design skills. Duration: 16 hrs. Method: 1-on-1, Personalized attention. Schedule: Tailor your own schedule by pre-booking a convenient hour of your choice, available from Mon to Sat between 9 am and 7 pm. This course focuses on Vectorworks Landmark fundamentals, providing essential tools and techniques for landscape architecture, design, and related disciplines. Participants should have a basic understanding of Vectorworks software. The course covers 2D and 3D drawing, file organization, landscape plan/model creation, and more. Learning Objectives: Organize drawing files using industry standards and best practices for effective collaboration. Utilize imported files and field-collected data for base plans and site inventories. Integrate 2D and 3D elements for plan documentation and model analysis. Utilize worksheet features for material quantification and project efficiency. Course Prerequisites: Participants should be familiar with basic drafting concepts, computer operations, and keyboard shortcuts. This training demonstrates sustainable design principles and the use of CAD tools for erosion control, runoff calculations, plant tracking, and sun/shade analysis. Participants will learn to create a 3D site digital terrain model and assess proposed plantings' effects on solar heat gain and water usage. Vectorworks Landmark Basic to Intermediate Training Course Duration: 16 hours Join our comprehensive Vectorworks Landmark Basic to Intermediate Training, designed for landscape architects and designers. Master 2D and 3D landscape design with essential techniques, covering site analysis, plans, irrigation, and 3D visualization. Unleash your creativity with custom plant symbols and detailed planting plans using the plant database. Course Outline: I. Introduction to Vectorworks Landmark (1 hour) An overview of Vectorworks Landmark for landscape design Interface orientation and basic tool usage Navigation and viewport controls Landscape design project creation and management II. Site Analysis and Site Plans (3 hours) Collecting site information and producing site analysis drawings Crafting site plans and hardscape design Working with contours, elevations, and terrain models Incorporating site amenities like paths, fences, and walls III. Planting Plans (5 hours) Utilizing the plant database to select suitable plants for specific regions Creating personalized plant symbols Developing comprehensive planting plans and plant lists Understanding plant compatibility and growth patterns IV. Irrigation Design (2 hours) Designing and editing irrigation systems and zones Integrating irrigation components into the site plan Generating irrigation reports for efficient planning V. 3D Visualization (3 hours) Creating captivating 3D models of landscape designs Applying textures and materials to hardscape elements and plants Utilizing the Renderworks engine for high-quality rendering Enhancing designs with lighting and special effects VI. Customization (1 hour) Tailoring the interface for landscape design efficiency Creating custom object styles and resource libraries VII. Collaboration and Sharing (1 hour) Importing and exporting data from other software platforms Sharing landscape design drawings with colleagues and collaborators VIII. Conclusion and Next Steps (1 hour) Comprehensive review of course content Guidance on further learning resources Q&A session and feedback gathering Enroll in our Vectorworks Landmark Basic to Intermediate Training to enhance your landscape design expertise and unleash your creative prowess. Download Vectorworks Landmark https://www.vectorworks.net/en-GB/landmark By the end of the Vectorworks Landmark Training Course, participants will: Understand the key features and functionalities of Vectorworks Landmark for landscape design. Demonstrate proficiency in using essential tools for site analysis, site plans, and hardscape design. Create detailed planting plans, selecting appropriate plants, and understanding their compatibility and growth patterns. Design efficient and effective irrigation systems, including generating irrigation reports. Create 3D visualizations of landscape designs, applying textures, materials, lighting, and special effects. Customize the interface and create personalized object styles and resources. Collaborate and share landscape design drawings with other software users. Have the foundation to pursue further learning and exploration in landscape design using Vectorworks Landmark.
Access to HE Diploma (Medicine)
By Egraduate College
Access to Medicine. Regulated by QAA. Widely accepted by UK universities.
Microsoft Dynamics 365 Associate Certification Bundle (with 4 Exams)
By Hudson
The Microsoft Certified Associate is a new breed of Microsoft certification. It is referred to as a ‘role-based certification’. According to Microsoft, role-based certifications show that individuals that possess them are keeping pace with today’s technical roles and requirements. They allow a learner to skill up and prove their expertise to employers and peers, plus get the recognition and opportunities they’ve earned
Delivering Presentations with Impact
By Underscore Group
Learn and practice the skills needed to deliver a brilliant presentation.

Wellbeing Coaching Programme - ILM Recognised
By British School of Coaching
A short course in Wellbeing Coaching for individuals who would like to develop coaching skills to support others in improving their wellbeing.

14 in 1 "Solidworks" Bundle only at £100 Get Hard Copy + PDF Certificates + Transcript + Student ID Card + e-Learning App as a Gift - Enrol Now Tired of browsing and searching for course you are looking for? Can't find the complete package that fulfils all your needs? Then don't worry as you have just found the solution. Take a minute and look through this extensive bundle that has everything you need to succeed. After surveying thousands of learners just like you and considering their valuable feedback, this all-in-one Solidworks bundle has been designed by industry experts. We prioritised what learners were looking for in a complete package and developed this in-demand course that will enhance your skills and prepare you for the competitive job market. Also, our experts are available for answering your queries on Solidworks and help you along your learning journey. Advanced audio-visual learning modules of these Solidworks courses are broken down into little chunks so that you can learn at your own pace without being overwhelmed by too much material at once. Furthermore, to help you showcase your expertise in Solidworks, we have prepared a special gift of 1 hardcopy certificate and 1 PDF certificate for the title course completely free of cost. These certificates will enhance your credibility and encourage possible employers to pick you over the rest. This Bundle Consists of the following Premium courses: Course 01: Solidworks: Beginner to Advanced Course 02: Solidworks Foundation Training Course 03: Finite Element Analysis Using Solidworks Course 04: Drawing and Illustration Level 2 Course 05: Digital Art - Sketching In Photoshop Course 06: Diploma in Animation Design Course 07: Level 2 Adobe Graphics Design Course Course 08: Adobe Illustrator CC Masterclass Course 09: Advanced Diploma in User Experience UI/UX Design Course 10: Video Editing Course 11: Toon Boom: Create Your First Character Course 12: Freelancing on UpWork Course 13: Essential IT Skills Level 3 Course 14: Decision Making and Critical Thinking Enrol now in Solidworks to advance your career, and use the premium study materials from Apex Learning. The bundle incorporates basic to advanced level skills to shed some light on your way and boost your career. Hence, you can strengthen your expertise and essential knowledge, which will assist you in reaching your goal. Curriculum of this Bundle Course 01: Solidworks: Beginner to Advanced Introduction About the course Course concept Getting to Know Solidworks Creating a New Document User Interface Mouse Movements - Sketch Mouse Movements - Part Sketch Creating a Sketch Document Basic Sketch Tools Dimensions and Relations Mirror Entities Linear and Circular Sketch Pattern Units Sketch to Part Conversion Opening/Saving Part Document Part Modeling Basics Extruded Boss Base Extruded Boss Base Additional Extruded Cut Sketch on the Part Sketch on the New Plane Draft Shell Fillet and Chamfer Convert and Offset Entities Lofted Boss Revolved Boss Swept Boss Part and Sketch Modification Part Modeling Advanced 3D Sketch Density and Material Measuring Tools Linked Dimensions Equations Mirror Hole Wizard Reference Geometry Feature Scope Configurations And Design Table Creating a Design Table Adding Configurations Assembly Basics Inserting Part Relative to the Origin Inserting Parts Relative to Planes Standard Mates Move Components Mirror Component Assembly Advanced Distance and Angle Profile Centre Symmetry and Width Path Mate Linear Coupler Collision Detection Interference Detection Assembly Features Subassembly Drawing Basics Creating a Drawing Sheet Orthographic Views and Edit Sheet Projected View and View Properties Smart Dimension and Model Item Saving Options Relative to Model View View Auxiliary View Detail View Broken Out Section Break View Alternate Position View View Focus Drawing Advanced Bill of Materials (BOM) Bom Sort Missing Item in Bom Custom Properties Equations in Bom Show/Hide Component Linked Notes Measuring Tool Isometric View Appearance, Scene and Rendering Applying Materials Appearance Working with Woods Working with Glass Scene Light Camera Decals Text Options Rendering Panel Schedule Rendering Animation Creating Motion Study Animation Wizard Applying Motor Appearance and Camera Position Walkthrough Part-1 Walkthrough Part-2 How will I get my Certificate? After successfully completing the course, you will be able to order your CPD Accredited Certificates (PDF + Hard Copy) as proof of your achievement. PDF Certificate: Free (For The Title Course ) Hard Copy Certificate: Free (For The Title Course ) CPD 145 CPD hours / points Accredited by CPD Quality Standards Who is this course for? Anyone from any background can enrol in this bundle. Requirements Our course is fully compatible with PCs, Macs, laptops, tablets and Smartphone devices. Career path Having this expertise will increase the value of your CV and open you up to multiple job sectors. Certificates Certificate of completion Digital certificate - Included Certificate of completion Hard copy certificate - Included P.S. The delivery charge inside the UK is £3.99, and the international students have to pay £9.99.

Hands-On: Create a Website from Scratch
By iStudy UK
Go hands-on and create a fully functional, low-maintenance, modern responsive website using HTML5, CSS3, and JavaScript. No WordPress, no Bootstrap, no jQuery no libraries of any kind. Learn to share header, nav, and footer HTML code across web pages using PHP, which most web hosting providers include for free. You'll learn to choose fonts, a color scheme, create a header, nav bar, and footer, make the site responsive so it looks and works as well on phones and mobile devices as it does on larger screens. Use free FontAwesome fonts to add social media icons and stylized lists to your site. Create your own media cards, and learn some tricks for modernizing your HTML form controls. What Will I Learn? Create a modern responsive website using just HTML5, CSS3, and JavaScript - and perhaps a few lines of PHP code if you're like to share header, nav, and footer content across pages. Requirements Some hands-on experience with basic HTML and CSS and a code editor. Basic file and folder skills for Mac or Windows. Who is the target audience? People learning web development who want to focus on the core front-end languages HTML5, CSS3, and JavaScript WITHOUT Bootstrap, jQuery, or other libraries. Beginning developers looking to create great, low-maintenance websites for themselves or others. Developers who are looking for easy ways to share content, like header, nav, and footer HTML code, across pages. Get Started What This is About 00:05:00 Start Building 00:18:00 Choose Your Fonts 00:05:00 Choose Your Color Scheme 00:05:00 Create the Nav Bar 00:11:00 Add a Page Footer 00:08:00 Beyond the Basic Structure Style the Body Content 00:05:00 Make it Responsive 00:10:00 Activate the Hamburger Menu 00:17:00 Make it Professional with Animations 00:04:00 Share Content Across Pages Why Share Content Across Pages? 00:08:00 Install AMPPS - Windows 00:11:00 Install AMPPS - Mac 00:13:00 Break Out the Shared Content 00:10:00 Professional-Grade Touches External JavaScript and Meta Tags 00:07:00 Adding More Pages to the Site 00:06:00 Highlight the Current Page in the Nav Bar 00:14:00 More Body Text Styling 00:10:00 Creating the Media Cards 00:13:00 Styling Lists 00:09:00 Styling Form Controls 00:15:00