- Professional Development
- Medicine & Nursing
- Arts & Crafts
- Health & Wellbeing
- Personal Development
2189 Courses in Coventry delivered Live Online
Power BI - introduction (2 day) (In-House)
By The In House Training Company
There is a lot to learn in Power BI, this course takes a comprehensive look at the fundamentals of analysing data and includes a balanced look at the four main components that make up Power BI Desktop: Report view, Data view, Model view, and the Power Query Editor. It also demonstrates how to utilise the online Power BI service. It looks at authoring tools that enable you to connect to and transform data from a variety of sources, allowing you to produce detailed reports through a range of visualisations, in an interactive and dynamic way. It also includes a detailed look at formulas by writing both M functions in Power Query, and DAX functions in Desktop view. This knowledge will allow you to take your reports to the next level. The aim of this course is to provide a complete introduction to understanding the Power BI analysis process, by working hands-on with examples that will equip you with the necessary skills to start applying your learning straight away. 1 Getting Started The Power BI ecosystem Opening Power BI Desktop Power BI's four views Introduction to Dashboards 2 Importing Files Importing data sources Importing an Excel file Importing a CSV file Importing a database Connect to an SQL Server Database Import vs. Direct Query Importing from the web Importing a folder of files Managing file connections 3 Shape Data in the Query Editor The process of shaping data Managing data types Keeping and removing rows Add a custom column Appending tables together Hiding queries in reports Fixing error issues Basic maths operations 4 The Data Model Table relationships Relationship properties 5 Merge Queries Table join kinds Merging tables 6 Inserting Dashboard Visuals Things to keep in mind Inserting maps Formatting Maps Inserting charts Formatting Charts Inserting a tree map Inserting a table, matrix, and card Controlling number formats About report themes Highlighting key points Filter reports with slicers Sync slicers across dashboards Custom web visuals 7 Publish and share Reports Publishing to Power BI service Editing online reports Pinning visuals to a dashboard What is Q&A? Sharing dashboards Exporting reports to PowerPoint Exporting reports as PDF files 8 The Power Query Editor Fill data up and down Split column by delimiter Add a conditional column More custom columns Merging columns 9 The M Functions Inserting text functions Insert an IF function Create a query group 10 Pivoting Tables Pivot a table Pivot and append tables Pivot but don't aggregate Unpivot tables Append mismatched headers 11 Data Modelling Expanded Understanding relationships Mark a date table 12 DAX New Columns New columns and measures New column calculations Insert a SWITCH function 13 Introduction to DAX Measures Common measure functions Insert a SUM function Insert a COUNTROWS function Insert a DISTINCTCOUNT function Insert a DIVIDE function DAX rules 14 The CALCULATE Measure The syntax of CALCULATE Insert a CALCULATE function Control field summarisation Things of note 15 The SUMX measure X iterator functions Anatomy of SUMX Insert a SUMX function When to use X functions 16 Time Intelligence Measures Importance of a calendar table Insert a TOTALYTD function Change financial year end date Comparing historical data Insert a DATEADD function 17 Hierarchies and Groups Mine data using hierarchies Compare data in groups

Scrum Master Exam Prep: Virtual In-House Training
By IIL Europe Ltd
Scrum Master Exam Prep: Virtual In-House Training This workshop prepares you for the Scrum.org Professional Scrum Master (PSM)™ I certification. A voucher for the exam and the access information you will need to take the exam will be provided to you via email after you have completed the course. NOTE: If you have participated in any of IIL's other Scrum workshops, you can bypass this program and focus on reading/studying the Scrum Guide and taking practice exams from Scrum.org. A Scrum Master helps project teams properly use the Scrum framework, increasing the likelihood of the project's overall success. Scrum Masters understand Scrum values, practices, and applications and provide a level of knowledge and expertise above and beyond that of typical project managers. Scrum Masters act as 'servant leaders', helping the rest of the Scrum Team work together and learn the Scrum framework. Scrum Masters also protect the team from both internal and external distractions. The Professional Scrum Master™ I (PSM I) certificate is a Scrum.org credential that enables successful candidates to demonstrate a fundamental level of Scrum mastery. PSM I credential holders will grasp Scrum as described in The Scrum Guide™1 and recognize how those concepts can be applied. They will also share a consistent terminology and approach to Scrum with other certified professionals. Scrum.org does not require that you take their own sponsored or any preparatory training. However, training can facilitate your preparation for this credential. And this course is based on IIL's Scrum Master Workshop, which is aligned with The Scrum Guide™ and was built based on PSM I credentialed expertise. It will provide you with the information you need to pass the exam and IIL will make the arrangements for your online exam. You will be provided with an exam code and instructions, so that you can take the exam at your convenience, any time you are ready after the course. Passwords have no expiration date, but they are valid for one attempt only. What you will Learn You'll learn how to: Successfully prepare for the Scrum.org PSM I exam Comprehend the Agile Manifesto and mindset Explain the fundamental principles of Scrum, including events, artifacts, and roles Guide the Scrum team in their responsibilities Define Ready and Done Write requirements in the form of user stories Estimate using planning poker and prioritize using MoSCoW Facilitate the team through the 5 Sprint events Fulfill the role of Scrum Master in a Scrum project Create Information Radiators to enable transparency Define the structure of the retrospective Getting Started Introductions Workshop orientation Exam prep preview Foundation Concepts Agile History, Values, and Mindset Introduction to Scrum Scrum events Scrum artifacts Scrum Roles and Responsibilities Product Owner responsibilities Scrum Master responsibilities The Team responsibilities Cross-functional teams Building effective teams The Product Backlog and User Stories The Product Backlog User Stories Definition of Done Backlog grooming Estimating User Stories Story points, planning poker Prioritizing User Stories The Sprint Team capacity and velocity The Sprint Planning Meeting The Sprint Backlog The Sprint Learning to self-manage, self-organize, self-improve Sprint Review and Retrospective Project Progress and Completion The Daily Scrum The Task Board and The Burndown Chart Information Radiators Closing a Scrum Project Summary and Next Steps Review of course goals, objectives, and content Exam prep next steps

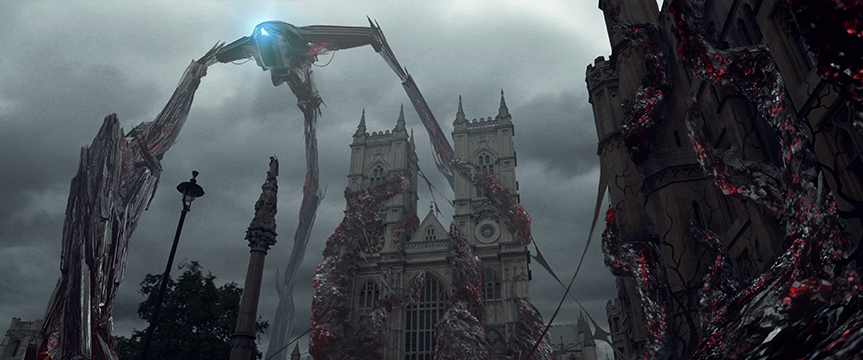
Game Designing Training Course 3ds Max and Unity 3D (Live Online Only)
By London Design Training Courses
Why Learn Game Designing Training Course 3ds Max and Unity 3D? Click for more info Learn Game Designing with 3ds Max and Unity 3D for industry demand, 3d and 2d skills, game design, AR/VR projects, game programming, and 3d visualization. Enhance your career in the thriving gaming and interactive media industry. Duration: 40 hrs. Method: 1-on-1 & Tailored content. Schedule: Tailor your own schedule by pre-booking a convenient hour of your choice, available from Mon to Sat 9 am and 7 pm. Explore the World of Unity 3D with Our Training Courses Unity is a robust cross-platform game development engine, responsible for creating a significant portion of the world's games. Learn ultimate game development platform to build top-notch 3D & 2D games, deployable on mobile, desktop, VR/AR, consoles, or the Web. The opportunities are limitless. Led by certified and experienced Unity instructors, our training courses are filled with practical, real-world exercises. 40-hour Game Designing Training Course with 3ds Max and Unity 3D: Course Overview: Module 1: Introduction to 3ds Max and Unity 3D (4 hours) Get acquainted with 3ds Max and Unity 3D interfaces and workflows Efficiently set up and manage projects Master importing and handling assets Module 2: 3D Modeling with 3ds Max (8 hours) Dive into 3D modeling techniques Create stunning 3D models using 3ds Max Explore polygonal, spline, and NURBS modeling Enhance models with textures and materials Module 3: Animation and Rigging with 3ds Max (8 hours) Understand animation techniques in 3ds Max Rig 3D models for smooth animations Bring creations to life with keyframe animation Employ procedural animation methods Export animations for Unity 3D integration Module 4: Game Design with Unity 3D (8 hours) Learn the Unity 3D game engine Grasp essential game mechanics and concepts Create and manage game scenes and levels Master control of game objects and components Utilize physics and collision detection for immersive experiences Module 5: Scripting and Programming with Unity 3D (8 hours) Introduce Unity 3D scripting with C# Understand variables, data types, and functions in C# Control game objects and components using C# Explore game loops and events for interactive gameplay Module 6: User Interfaces and Audio with Unity 3D (4 hours) Design captivating user interfaces within Unity 3D Implement interactive buttons, sliders, and input fields Elevate games with audio import and editing Control sound effects and background music Module 7: Optimization and Deployment (4 hours) Master game optimization in Unity 3D Enhance game performance through scripting techniques Build and test games for various platforms Publish games on the web or app stores Game Designing Training Course 3ds Max and Unity 3D (Live Online Only): Explore advanced 3ds Max techniques for modeling, lighting, and cameras Dive into character animation for lifelike characters Enhance Unity 3D skills with real-time development and game authoring settings Unity - Real-time 3D Development Platform: Unlock Your Creativity https://www.unity.com/ Create 3D, 2D, VR & AR Experiences For Any Industry: Games, Auto, AEC, Film, And More. Complete Solution To Develop Better, Iterate Faster, And Grow Your Business. Amazing Games. Immersive Experiences. Multi-Platform Support. 3ds Max Free Trial | Autodesk Download a free 30-day trial of 3ds Max, 3D modeling, and rendering software for design visualization, games, and animation.

Vectorworks 2d | 3d and Spotlight training
By London Design Training Courses
Why Learn Vectorworks 2d | 3d and Spotlight training Course? Course info Led by experts, this comprehensive program equips you with skills in 2D drafting, immersive 3D modeling, and dynamic lighting design. Master Vectorworks' powerful features, including the Spotlight module tailored for entertainment and events. Duration: 16 hrs Method: 1-on-1, Personalized attention. Schedule: Tailor your own hours, available from Mon to Sat between 9 am and 7 pm. Or Call 02077202581 or WhatsApp 07970325184. Course Details: Format: 1-on-1 Training Schedule: Flexible, Any Day, Anytime (Monday to Saturday), 9 AM to 7 PM Duration: Customizable to Individual Learning Pace Content: Comprehensive training in Vectorworks, focusing on 2D Drafting, Immersive 3D Modeling, and Dynamic Lighting Design. Specialization: Spotlight Module for Entertainment and Events Instructors: Expert-led sessions ensuring personalized attention and effective learning. Outcome: Mastery of Vectorworks' Powerful Features, Proficiency in 2D and 3D Design, and Expertise in Dynamic Lighting Design for Entertainment Purposes. Note: Schedule and course duration are flexible to accommodate individual preferences and learning needs. Course Details: Format: 1-on-1 Training Schedule: Flexible, Any Day, Anytime (Monday to Saturday), 9 AM to 7 PM Duration: Customizable to Individual Learning Pace Content: Comprehensive training in Vectorworks, focusing on 2D Drafting, Immersive 3D Modeling, and Dynamic Lighting Design. Specialization: Spotlight Module for Entertainment and Events Instructors: Expert-led sessions ensuring personalized attention and effective learning. Outcome: Mastery of Vectorworks' Powerful Features, Proficiency in 2D and 3D Design, and Expertise in Dynamic Lighting Design for Entertainment Purposes. Note: Schedule and course duration are flexible to accommodate individual preferences and learning needs. Vectorworks 2D | 3D and Spotlight Training Course Course Duration: 16 hours Course Description: I. Introduction to Vectorworks (1 hour) Overview of Vectorworks software and its applications Familiarization with the user interface and navigation Customizing preferences and settings for optimal workflow II. 2D Drawing Tools (2 hours) Using basic drawing tools for creating lines, rectangles, circles, and polygons Utilizing text and dimension tools for annotations Applying modify tools for editing and transforming objects Organizing elements with layers and classes III. 3D Modeling Tools (3 hours) Introduction to extrude, revolve, sweep, and loft tools for 3D modeling Creating 3D objects from 2D shapes for spatial representation Modifying and refining 3D models Exploring the 3D modeling environment IV. Advanced 3D Modeling Tools (2 hours) Utilizing solid modeling tools for complex geometry creation Performing Boolean operations to combine or subtract shapes Creating and utilizing symbols for efficient workflow V. Introduction to Spotlight (1 hour) Overview of the Spotlight workspace and its features Adding and configuring lighting devices for stage and event design Creating and modifying lighting positions for accurate placement VI. Spotlight Tools and Techniques (3 hours) Creating and editing lighting instruments for customized setups Using visualization tools for lighting simulations Creating and applying labels and legends for documentation Generating worksheets and reports for lighting analysis VII. Advanced Spotlight Techniques (2 hours) Utilizing video and projection tools for multimedia presentations Incorporating audio and sound systems for immersive experiences Understanding rigging and hoisting for stage setup Managing paperwork and documentation for effective planning VIII. Integration with Other Software (1 hour) Importing and exporting files to collaborate with other software Utilizing Vectorworks in CAD and BIM workflows for interoperability Exploring plugins and add-ons for expanded functionality IX. Project-based Exercises (1 hour) Applying learned techniques to real-world scenarios Creating a lighting plan for a concert or theater production Designing a 3D model of a building or interior space Free 30-day, BIM & CAD Software Trial Request | Vectorworks https://www.vectorworks.net/trial Vectorworks Trial Version Request. Please fill out the following form. We will provide you with an evaluation serial number to activate your trial copy. Learning Outcomes of Vectorworks 2D | 3D and Spotlight Training Course: Master Vectorworks with 2D and 3D design skills. Create precise 2D drawings and detailed 3D models. Learn specialized tools for lighting and event planning in Spotlight. Optimize workflows and improve project coordination. Produce realistic renderings and visualizations. Apply skills to real-world projects in architecture and events.

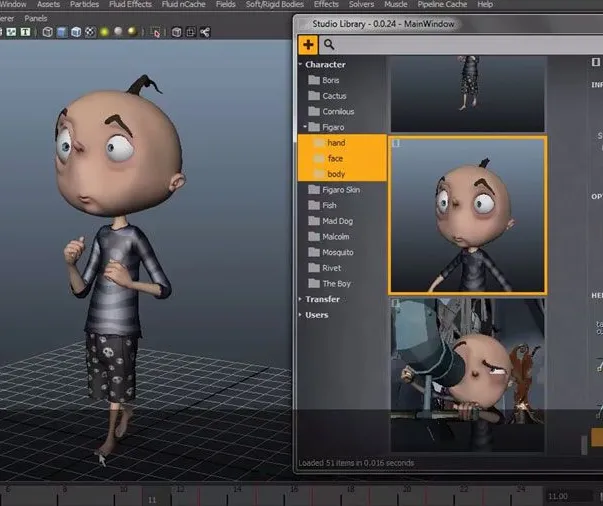
Mastering Maya Basics to Intermediate Course
By ATL Autocad Training London
Why Choose Mastering Maya Basics to Intermediate Course? Click here for more info: Website Our courses cater to graphic designers, animators, and beginners, providing industry-standard animation skills. Dive into 3D animation, modeling, simulation, and rendering for film, TV, games, and ads. Duration: 20 hours Approach: 1-on-1 Sessions. Schedule: Design your own schedule by pre-booking a convenient hour of your choice, available Mon to Sat between 9 am and 7 pm. I. Introduction to Maya (1.5 hours) Understanding Maya and its Applications Navigating the Maya Interface and Basic Tools Creating and Managing Projects II. 3D Modeling (3 hours) Basics of Polygon Modeling Creating Simple and Complex 3D Shapes Organic Shape Creation using NURBS Advanced Techniques: Extrusions, Bevels, and Editable Objects III. Texturing and Materials (1.5 hours) Introduction to Texturing and Material Creation UV Unwrapping and Texture Mapping Importing and Applying Textures and Images IV. Lighting and Rendering (2 hours) Fundamental Lighting Techniques Camera Setup and Composition Rendering Images and Animations Output Options and File Formats V. Animation (4 hours) Keyframe Animation and Animation Curves Rigging and Animating Characters Motion Paths and Animation Layers Editing Animation Clips VI. Rigging (2 hours) Introduction to Rigging and Skeletons Binding Skin and Weight Maps Creating Rigging Systems for Characters VII. Special Effects (1.5 hours) Particle Systems and Dynamics Creating Fluids, Fire, and Other Effects Special Effects Editing: Explosions, Smoke, and more VIII. Advanced Modeling Techniques (1.5 hours) Complex Objects using Booleans and Deformers Modifying Curves and Surfaces Organic Shape Creation with Sculpting Tools IX. Conclusion and Next Steps (0.5 hours) Course Review Further Learning Tips and Resources Q&A and Feedback Please note: The course content and duration are flexible, tailored to match learners' needs and skill levels. Throughout the course, lifetime email support ensures you receive guidance with any challenges you face. Embark on your Autodesk Maya journey, exploring 3D modeling and animation with confidence. Additional Topics Covered: Modeling: Surfaces, Control Vertex, Polygons, Extrusion, Vertices, Edges, Bridge Tool, Combining, Smooth, Mirror Geometry, Merging Vertices, Subdivision Modeling. Deformations: Twist, Lattice, Flare, Bend. Shapes: Lines, Pen Tools. Animations: Basic Keyframes, Vertex Animation, Clusters, Path Animations, Skeletons, Bones, IK Handle Tool, Skinning. Dynamics: Fire, Lighting, Soft and Rigid Bodies, Particles, Collisions, Gravity. Fur and Paint Effects: Fur Basics, Fur Color Corrections, Paint Effects, Paint Modifier, Brush Animations. Texturing: Diffuse and Bump Maps, Reflections, Transparency, Shaders, Toon Shaders, Glow Textures. Lighting: Basic and Advanced Lights, Shadows, Special Light Effects. Camera: Free and Aim Cameras, Camera Effects, Path Animations. Fluid Effects and Ncloth: 2D and 3D Containers, Collision Effects, Gravity, Wind Effects. Rendering: Images and Animations, Render Techniques, Resolution Settings, Batch Rendering. Download Maya Maya Proficiency: Master Maya's interface, tools, and functions, advancing from basic to intermediate levels. 3D Modeling Expertise: Create diverse 3D models using polygonal and NURBS techniques, from simple shapes to intricate designs. Texturing and Rendering Skills: Apply textures, create materials, and utilize advanced rendering techniques for high-quality visuals. Animation Techniques: Understand keyframe animation, rigging, and character animation, producing engaging animations and special effects. Special Effects and Dynamics: Explore particle systems, fluid dynamics, and advanced visual effects, enhancing realism in animations. Advanced Modeling and Sculpting: Master complex modeling techniques, including Booleans, deformers, and organic shape creation through sculpting tools. Professional Portfolio: Develop a diverse portfolio showcasing 3D modeling and animation skills, ready for presentation to employers or clients. Problem-Solving Skills: Learn creative approaches to solve complex 3D challenges effectively. Collaborative Abilities: Understand team dynamics and collaboration within the 3D production pipeline. Recommended Books: "Introducing Autodesk Maya 202X" by Dariush Derakhshani and Randi L. Derakhshani: Comprehensive beginner's guide to Maya's essential tools and techniques. "Mastering Autodesk Maya 20XX" by Todd Palamar: In-depth intermediate guide covering advanced features, modeling, animation, and rendering. "Maya Character Creation: Modeling and Animation Controls" by Chris Maraffi: Focuses on character creation, covering modeling, rigging, and animation. "Maya Secrets of the Pros" by Todd Palamar: Expert tips and techniques from professional Maya artists, detailing advanced workflows and best practices. "Stop Staring: Facial Modeling and Animation Done Right" by Jason Osipa: Specialized book on facial modeling and animation, perfect for character expression enthusiasts. "The Art of 3D Computer Animation and Effects" by Isaac Kerlow: Offers foundational knowledge in 3D computer animation principles, applicable to various software, including Maya. Mastering Maya Basics to Intermediate Course Benefits: Comprehensive Skill Development: Master essential tools and techniques, from basics to intermediate, with hands-on projects mirroring real industry scenarios. Industry-Grade Proficiency: Acquire expertise in Autodesk Maya, enhancing credibility in animation, visual effects, and gaming industries. Creative Exploration: Unlock creative potential through advanced shading, lighting, dynamics, and simulations, enabling imaginative project realization. Portfolio Enhancement: Build a strong portfolio showcasing skills in 3D modeling, animation, and rendering for career advancement. Individualized Support: Receive personalized guidance and feedback, ensuring tailored learning experiences and skill refinement. Potential Jobs After Course: 3D Animator: Create lifelike character animations for films, games, and advertisements. 3D Modeler: Design detailed 3D characters, environments, and objects for various applications. Visual Effects Artist: Produce stunning visual effects for movies, TV shows, and commercials. Texture/Lighting Artist: Develop intricate textures and set the mood with expert lighting. Rigging Specialist: Rig characters and objects for realistic movement in animations. Rendering Specialist: Optimize rendering capabilities for high-quality images and animations. Game Developer: Contribute to interactive game development using Maya's features. Freelance Artist/Animator: Work independently on diverse projects, collaborating with studios and agencies. Skill Advancement: Progressive Mastery: Develop from basics to intermediate levels in Autodesk Maya, honing essential tools for stunning 3D visuals and animations. Hands-On Learning: Interactive Practice: Engage in practical projects, refining your skills in 3D modeling, advanced materials, character animation, and high-quality renders. Industry-Ready Proficiency: In-Demand Skills: Acquire proficiency in Autodesk Maya, a key software in animation and gaming, enhancing your employability. Creative Exploration: Unlock Creativity: Experiment with advanced shading, lighting, and dynamic animations, unleashing your creative potential in Maya. Flexible Support: Tailored Learning: Access recorded lessons for review, deepening your understanding, with lifetime email support for continuous guidance.
Unity 3D Game Design Training Course (Live Online Only)
By London Design Training Courses
Why Choose Unity 3D Game Design Training Course? Course Link Unity transforms ideas into reality, offering limitless possibilities for 2D and 3D games, VR, AR, and AI experiences. From films to architecture, training videos, and interactive tutorials, Unity revolutionizes industries with its interactive engagement, making it the top choice for solutions. Duration: 10 hrs Method: 1-on-1, Personalized attention Schedule: Tailor your own hours of your choice, available from Mon to Sat between 9 am and 7 pm Is Unity Good for Beginners? Definitely! Unity is an ideal starting point for beginners in game development. It offers an accessible platform to learn state logic and C# programming, making it popular among new programmers. Whether you choose self-guided or structured learning, Unity provides a strong foundation for 3D game development. Coding in Unity? Coding is optional in Unity, thanks to the visual scripting tool, Bolt. Users can implement ideas without coding using flow graphs and state graphs for low-level and high-level logic. Paid tools like PlayMaker and Adventure Creator offer more advanced gameplay and AI behaviors. How Does Unity's Game Engine Work? Unity operates as a versatile scene player, initializing settings for graphics, audio, and input devices at game start. It loads scenes with assets and game objects, executing a cycle that renders scenes, runs physics simulations, and handles events, providing a seamless and dynamic game experience. Is Unity Good for Beginners? Definitely! Unity is an ideal starting point for beginners in game development. It offers an accessible platform to learn state logic and C# programming, making it popular among new programmers. Whether you choose self-guided or structured learning, Unity provides a strong foundation for 3D game development. 10-hour Unity 3D Game Design Training Course: Module 1: Introduction to Unity 3D (2 hours) - What is Unity 3D and why use it for game design? - Understanding the Unity 3D interface - Creating and managing projects in Unity 3D - Importing and managing assets in Unity 3D - Understanding game objects and components in Unity 3D Module 2: Game Mechanics (2 hours) - Basic game mechanics and concepts - Player movement and camera control - Creating and controlling game objects - Working with physics and collision detection - Creating interactive environments Module 3: Scripting with C# (2 hours) - Introduction to C# scripting language - Understanding variables and data types in C# - Creating and using functions in C# - Controlling game objects with C# - Understanding game loops and events Module 4: User Interfaces and Audio (2 hours) - Designing user interfaces in Unity 3D - Creating and using buttons, sliders, and input fields - Audio import and editing in Unity 3D - Creating and controlling game sound effects and background music Module 5: Optimization and Deployment (2 hours) - Understanding game optimization in Unity 3D - Optimizing game performance with scripting - Building and testing games for desktop and mobile platforms - Publishing games on the web or app stores Introduction to Unity: - Introduction to gaming and the game development process - Unity Basics - Interface - Inspector - Project and Hierarchy Starting Making a Game: - Working with Projects - Creating Projects - Importing Geometry - Importing Textures - Using the terrain generator to make the terrain - Creating basic primitives in Unity Materials: - Working with materials 1 - Working with materials 2 - Finishing materials on all objects Lighting: - Creating lights - Adjusting Lights - Creating Sunlight Animation: - Animating objects - Animating lights - Adjusting Animations Audio: - Adding Sound - Interacting with sound - Modifying sound Programming Tools: - JavaScript - Editor for JavaScript - Variables and functions - Simple programming Testing: - Testing the game - Fixing bugs - Making changes in games Building the Game: - Game authoring Settings - Building the game for windows - Playing the game Utilize Unity Pro, the ultimate real-time development platform, to craft 3D, 2D, VR, and AR experiences across diverse industries. From games to auto, AEC, and film, Unity Pro empowers you to create immersive content with multi-platform support. Visit https://www.unity.com/ to kickstart your journey today, enabling faster iterations and business growth through unparalleled development capabilities.
Basic Photoshop Training Course
By ATL Autocad Training London
Learn the Basic PhotoshopTraining Course Learn retouching, layers, color, correction, shapes, and symbols. Delve into graphic design, photo editing, and digital art. From beginner to pro, gaining expertise in UX strategies, ensuring your websites are impactful and user-friendly. Click here for more info: Website Duration: 10 hours Approach: 1-on1 sessions and Personalized guidance. Schedule: Customize your schedule by booking a convenient hour, available from Monday to Saturday between 9 am and 7 pm. Module 1: Interface and Preferences Familiarize yourself with the Photoshop Interface Customize Panels and Toolbars to match your workflow Explore Photoshop Preferences to optimize settings Discover various Photoshop CC Workspaces tailored for different tasks Begin with essential Keyboard Shortcuts Module 2: Image File Formats Understand diverse image file formats such as PSD, JPEG, PNG, and PDF Delve into File Compression and its influence on image quality Module 3: Creating a New Document Set dimensions and size for new documents Grasp media units for accurate design specifications Explore Color Profiles and their significance Save presets for swift document setups Module 4: Placing Images Differentiate Embedded vs. Linked images Introduction to Smart Objects for non-destructive editing Master the Selection tool for precise image placement Module 5: Image Size and Resolution Save images using various formats and compression settings Understand Image Size and Resolution for diverse output needs Module 6: Layers Introduction Organize your work with Layer management Master layer tasks such as reordering, renaming, grouping, locking, and hiding Module 7: Selection Tools Explore Selection Tools like Marquee, Magic Wand, Quick Selection, and Lasso Grasp Inverse Selection and Deselect for efficient editing Module 8: Layer Effects Apply captivating Layer Effects such as Drop Shadow, Stroke, and Outer Glow Save and replicate Effects Styles for quick application Combine multiple effects for creative designs Module 9: Introduction to Shapes Utilize the Shapes tool for fundamental design elements Create Custom Shapes for unique designs Understand Color principles and use the Properties Panel for adjustments Master the Direct Selection tool for precise shape editing Create a basic poster using provided examples Module 10: Type and Typography Work with Type and explore the Character and Paragraph Panel Utilize Styles Panel for consistent text formatting Save favorite fonts for easy access Apply Effects and Layer Styles on Type for impactful typography Learn about Leading, Tracking, and Kerning for optimal text spacing Module 11: Colors Understand RGB vs. CMYK color modes Select colors using the Eyedropper tool Save colors as Swatches for reuse Create gradients using the Gradient Tool Module 12: Creating a Clipping Mask Master the concept of Clipping Masks and their application Apply Clipping Masks to Type, Images, and Shapes Combine Layer Effects with Clipping Masks for creative designs Module 13: Introduction to Masking Understand Masking and its importance in image editing Utilize the Brush tool for mask creation Learn Masking shortcuts and use Gradient Mask for smooth transitions Module 14: Adjustment Layers Explore Color and Gradient Adjustment Layers for image enhancements Master Curves, Levels, and Hue/Saturation Adjustment Layers for precise color control Convert images to Black and White using Adjustment Layers Combine Adjustment Layer Masks for targeted edits Module 15: Image Touch Up Master various touch-up techniques, including Red Eye Removal, Spot Healing Brush, and Patch Tool Utilize Content Aware Removal for seamless object removal Restore old photos using Clone Stamp and Dodge/Burn tools Enhance portraits by removing blemishes and whitening teeth Module 16: Filters Introduction Understand Smart Objects and Filter usage for non-destructive editing Explore the Filters Gallery and experiment with Blur and Vantage filters Module 17: Blending Modes Introduction Master the concept of Blending Modes and their effects on layer overlays Understand different Blending Modes like Darken, Lighten, and Overlay Layer Mastery: Develop expertise in working with layers, mastering advanced techniques for seamless editing and design organization in Adobe Photoshop. Precision Editing: Skillfully employ a variety of selection tools, ensuring precise and meticulous editing, manipulation, and composition of images and elements. Creative Layer Effects: Apply captivating Layer Effects with finesse, enhancing your designs and visuals to achieve professional-grade aesthetics. Advanced Editing Techniques: Understand the functionalities of Adjustment Layers, Masking, and Clipping Masks, enabling you to perform advanced editing and compositing tasks with confidence and precision. Effective Photo Restoration: Acquire techniques to touch up and restore photographs effectively, ensuring professional-quality results in photo editing and retouching. Typography Expertise: Explore advanced typography techniques, enabling you to create visually appealing text designs that complement your overall compositions. Filter Applications: Gain an introductory understanding of Filters and their creative applications, enhancing your ability to add artistic effects and refine visuals. Practical Color Theory: Grasp the fundamental principles of Color Theory and apply them practically in your designs, ensuring harmonious and visually pleasing color schemes in your work. Course Highlights: Advanced Photoshop Skills: Learn intricate techniques for professional image editing, retouching, and manipulation. Creative Design Projects: Engage in hands-on projects to enhance your practical skills in real-world scenarios. Mastering Special Effects: Dive into advanced topics like layer effects, filters, and blending modes to create stunning visual effects. Typography and Design Principles: Explore typography styles, layout design, and color theory for compelling compositions. Professional Portfolio Development: Receive guidance on creating a professional portfolio showcasing your Photoshop expertise. Potential Job Roles: Graphic Designer: Craft visually appealing graphics for print and digital media. Digital Artist: Create digital artwork for various applications, from illustrations to advertisements. Photo Retoucher: Enhance and manipulate photos for professional use, including portrait retouching. UI/UX Designer: Design user interfaces and experiences for websites and applications. Web Designer: Develop visually engaging websites with expertise in Photoshop for web design. Marketing Content Creator: Produce marketing materials such as banners, brochures, and social media visuals. Freelance Designer: Work independently, offering design services to clients across different industries. Advertising Creative: Contribute to creative campaigns by designing impactful ad visuals. Print Production Specialist: Prepare print-ready materials, ensuring quality in printed products. Photography Post-Processing Specialist: Enhance and retouch photographs, optimizing them for professional use. Comprehensive Photoshop Proficiency: Develop a solid foundation in Photoshop, mastering essential tools and techniques vital for image editing and manipulation. Creative Editing Expertise: Learn advanced retouching, image enhancement, digital artwork creation, and graphic design using Photoshop's powerful features. Professional-Grade Results: Acquire skills for achieving professional-level outcomes in image editing, ensuring precise color correction, seamless retouching, and visually appealing compositions. Optimized Workflow: Discover time-saving tips, shortcuts, and efficient techniques to enhance your Photoshop workflow. Learn layer management, non-destructive editing, and automation for streamlined processes. Versatile Design Skills: Unlock creative possibilities by mastering text effects, digital collages, filters, and graphic design for diverse mediums. Access to Recorded Lessons: Revisit course material and reinforce learning through recorded lessons. Review specific techniques at your own pace, deepening your understanding of Photoshop. Lifetime Email Assistance: Benefit from continuous support with lifetime email assistance. Seek guidance, get answers to questions, and seek clarification even after completing the course.
Photoshop Basics to Advanced Training
By London Design Training Courses
Why Learn Photoshop Basics to Advanced Training Course? Click here for info In this course, you'll gain basic to advanced Photoshop skills, to edit photos and images, and advanced tasks like creating product designs and photorealistic illustrations. The course is customizable to your requirements, and you'll engage in design projects to enhance your portfolio. Duration: 20 hrs. Method: 1-on-1 Schedule: Tailor your own schedule by pre-booking a convenient hour of your choice, available from Mon to Sat 9 am and 7 pm. Adobe Photoshop Training in London - In-Person & Live Online As the most renowned image editing software, Photoshop provides complete control over your images. With a wide range of editing tools, users can enhance, retouch, and manipulate colors to create stunning visuals. Beyond static images, Photoshop is also capable of editing videos, graphic design, and 3D images. Choose our Photoshop course for a solid foundation in creative visuals, covering image adjustment, composition, and common fixes. For a deeper understanding, our Advanced course core introduction teaches advanced techniques like color fills, text and layer styling, and web-ready artwork creation. Explore our masterclass options for further training and insights at an advanced level. All beginner courses are available in class or online 1-on-1. Photoshop Basics to Advanced Training Course - 20 hours Course Outline: I. Introduction to Photoshop (1 hour) Get familiar with Adobe Photoshop and its applications Set up a personalized workspace for efficient workflow II. Working with Layers and Masks (2 hours) Explore layer styles and advanced management techniques III. Selections and Retouching (2 hours) Master selection and retouching tools for precise edits IV. Working with Text and Vector Graphics (1 hour) Create and format text effectively Combine vector elements with raster graphics V. Color Correction and Image Adjustments (2 hours) Adjust image color and tone for better visual impact VI. Filters and Effects (1 hour) Apply filter effects for creative enhancements VII. Advanced Techniques (6 hours) Dive into advanced layer masking and selection tools Work with 3D models and design for mobile applications VIII. Project-Based Learning (3 hours) Apply Photoshop techniques to real-world projects IX. Advanced Rendering Techniques (1 hour) Explore advanced rendering effects for photorealistic results X. Final Project and Post-Production Techniques (1 hour) Complete a comprehensive final project and implement post-production techniques Enroll now to elevate your Photoshop skills and create visually stunning designs with confidence. Learn from experienced instructors in interactive in-person or live online sessions. Master Adobe Photoshop and unlock your creative potential. By completing the Photoshop Basics to Advanced Training Course, participants will: Develop Proficiency: Acquire a strong command of Adobe Photoshop, mastering both foundational and advanced techniques. Image Editing Expertise: Gain the skills to efficiently edit and retouch images, remove unwanted elements, and enhance visuals using a variety of tools. Creative Design Skills: Explore creative design concepts, combining text, vector graphics, and raster elements for custom designs. Color Correction and Enhancement: Learn to adjust image colors, tones, and apply advanced color correction techniques for professional results. Filters and Effects: Apply various filter effects creatively, giving artistic enhancements to images and designs. Project-Based Learning: Gain practical experience by working on real-world projects, creating composite images, posters, social media graphics, and more. Advanced Rendering Techniques: Discover rendering techniques for achieving photorealistic and visually impactful results. Post-Production Expertise: Implement post-production techniques to refine and polish final outputs for professional-grade designs. Customization and Automation: Create and utilize custom brushes, actions, and scripts to streamline workflows and improve efficiency.

Rapid Prototyping with Axure
By Bunnyfoot
This one-day course introduces the field of user experience and provides an excellent entry point to our other specialised training courses. UX processes and practices have become a central component of product design, service design and web design.
Introduction to Windows 10 and Microsoft Office
By Nexus Human
Duration 0.625 Days 3.75 CPD hours This course is intended for This course is intended for individuals who want to gain basic knowledge of Windows 10 and Microsoft Office. Course Outline Introduction to the Windows 10 Desktop Managing Files and Folders in Windows 10 Word 2016 Ribbon and Navigation Excel 2016 Ribbon and Navigation PowerPoint 2016 Ribbon and Navigation Outlook 2016 Email/Calendar/Contacts Basics (lecture/demo only)
