- Professional Development
- Medicine & Nursing
- Arts & Crafts
- Health & Wellbeing
- Personal Development
2018 Courses in Birmingham delivered Live Online
3DS MAX AND AFTER EFFECTS ONE DAY COURSE One to One. Online or Face to Face
By Real Animation Works
3DS MAX AND AFTER EFFECTS ONE DAY face to face training customised and bespoke. Online or Face to Face

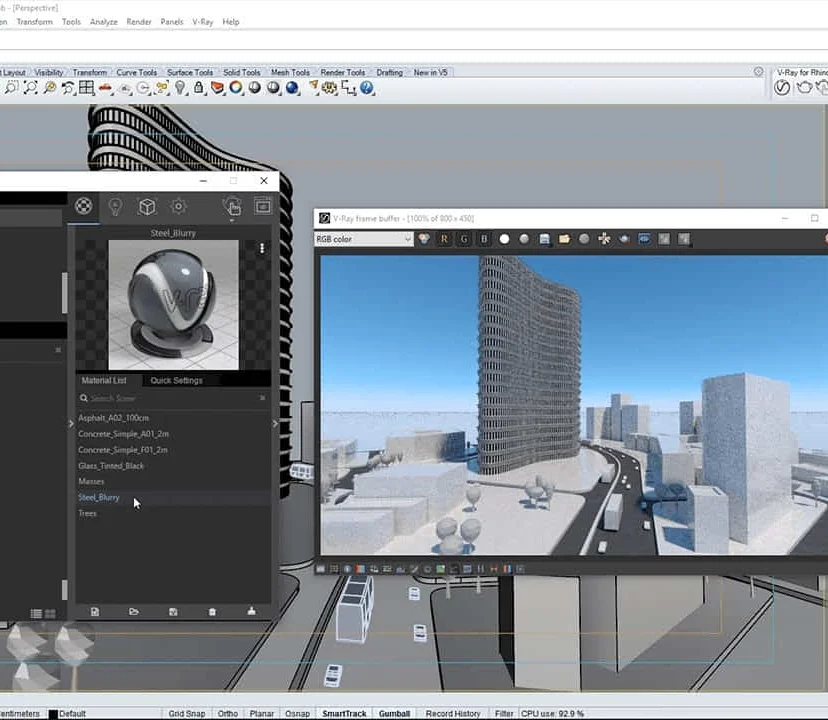
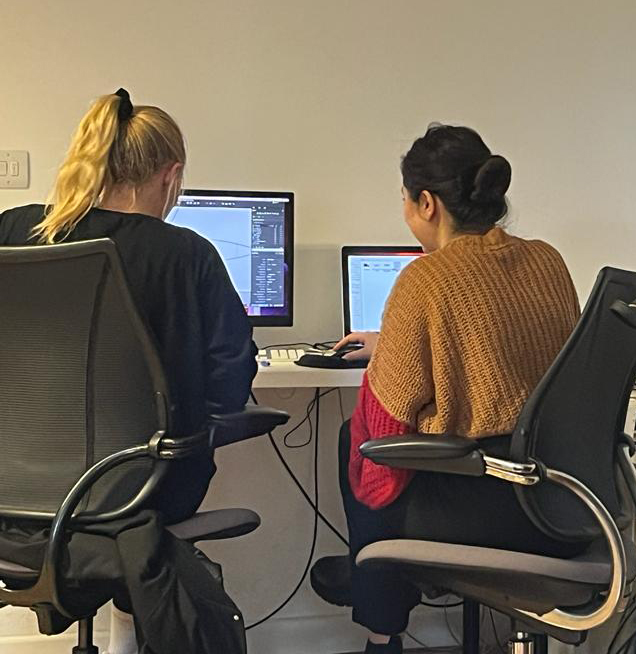
Complete Rhino 3D and V-Ray Training Program: Basic to Intermediate
By ATL Autocad Training London
Why Choose Complete Rhino 3D and V-Ray Training Program: Basic to Intermediate? Learn Rhino 3D and V-Ray for Rhino Basic to Intermediate Training Course. Suitable for beginners and experienced users alike, this program equips you with vital modeling and rendering skills. Opt for in-person or live online sessions. Click here for more info: Website Duration: 16 hours. Approach: 1-on-1 Sessions, Customized Content and Flexible Learning. Scheduling Flexibility: Tailor your sessions from Mon to Sat between 9 am and 7 pm. Course Title: Complete Rhino 3D and V-Ray Training Program: Basic to Intermediate - 16 Hours Session 1-2: Introduction to Rhino 3D Basics (2 hours) Understanding Rhino Interface: Navigating toolbars, command line, and properties panel. Basic Geometric Shapes: Creating lines, circles, and polygons with precision. Editing Tools: Mastering move, rotate, scale, and mirror commands. Session 3-4: Advanced Rhino 3D Modeling Techniques (2 hours) Curves and Surfaces: Delving into NURBS curves, creating complex surfaces, and blending techniques. Modeling Aids: Utilizing grids, snaps, and construction planes for accuracy. Organizing with Layers: Managing complex projects efficiently. Session 5-6: Introduction to V-Ray for Rhino (2 hours) V-Ray Interface: Understanding V-Ray toolbar and settings. Basic Lighting: Exploring different light types and their effects on scenes. Materials: Creating realistic materials, understanding diffuse, reflection, and transparency. Session 7-8: Intermediate V-Ray Concepts (2 hours) Advanced Lighting: Mastering HDRI lighting, creating natural outdoor lighting scenarios. Texture Mapping: Understanding UV mapping, applying textures seamlessly. Rendering Optimization: Reducing noise, optimizing settings for quicker, high-quality renders. Session 9-10: Rhino-V-Ray Integration (2 hours) Model Preparation: Optimizing Rhino models for V-Ray rendering. Advanced Material Manipulation: Creating complex materials, incorporating textures. Interactive Rendering: Real-time adjustments for immediate feedback. Session 11-12: Advanced Modeling Techniques in Rhino (2 hours) Advanced Surface Modeling: Creating organic shapes, advanced surfacing techniques. Precision Modeling: Advanced curve editing, filleting, and trimming. Working with 3D Text: Creating custom 3D text for design projects. Session 13-14: Scene Composition and Presentation (2 hours) Camera Settings: Understanding focal length, depth of field, and perspective. Scene Composition: Design principles, rule of thirds, focal points, and balance. Post-Processing: Enhancing renders in Photoshop, adding atmosphere and context. Session 15-16: Final Project and Portfolio Review (2 hours) Final Project Work: Participants apply learned skills to create a complex 3D scene. Instructor-led Critique: Feedback session for final projects. Portfolio Guidance: Tips for selecting the best works for a professional portfolio. By the end of this 16-hour course, participants will have a deep understanding of both Rhino 3D and V-Ray, allowing them to create intricate 3D models and produce high-quality, realistic renders for various applications. Upon completing the Rhino 3D and V-Ray Basic to Intermediate Training Course, participants can expect to achieve the following learning outcomes: Proficiency in Rhino 3D and V-Ray: Develop a comprehensive understanding of Rhino 3D and V-Ray interfaces, tools, and functionalities, enabling participants to navigate and utilize the software effectively. 3D Modeling Skills: Master the art of creating captivating 3D objects and shapes using Rhino 3D, including editing, transforming, and refining designs for diverse applications. Material Application: Acquire the ability to apply and customize materials and textures to enhance the visual appeal and realism of 3D models, elevating the quality of designs. Lighting Techniques: Gain expertise in utilizing V-Ray lighting tools, such as V-Ray lights and HDRI maps, to achieve striking lighting effects in rendered scenes. Rendering Excellence: Learn to optimize V-Ray render settings, control global illumination, and apply dynamic effects like depth of field and motion blur for high-quality and impressive renders. Advanced Modeling: Develop skills in advanced modeling techniques, including handling curves, surfaces, and solids, enabling participants to tackle complex design challenges. Lighting Mastery: Acquire the knowledge and expertise to create and adjust artificial lights, utilize the Sun and Sky system, and craft custom HDR images for realistic lighting setups. Seamless File Management: Understand various file formats for exporting and importing 3D models, facilitating efficient collaboration and preparation for 3D printing. Creative Problem-Solving: Enhance creative thinking and problem-solving abilities through hands-on practice and exploration of diverse design scenarios. Professional Presentation: Learn post-production techniques in Photoshop to enhance renders and create visually appealing design presentations for effective communication. Continuous Learning: Access valuable resources and tips to encourage continuous learning and professional growth in Rhino 3D and V-Ray. Skills You'll Gain: Master Rhino 3D basics: Curves, surfaces, modeling aids, and precision techniques. Explore intermediate V-Ray concepts: Advanced lighting, material manipulation, and texture mapping. Understand Rhino-V-Ray integration for seamless 3D modeling and rendering workflows. Optimize render settings for high-quality output and reduced rendering times. Career Opportunities: Upon completing this program, you'll be prepared for various roles in the design and visualization industry, such as: 3D Modeler: Create detailed 3D models for diverse industries, including architecture and product design. Architectural Visualizer: Produce realistic architectural visualizations for presentations and marketing materials. Product Designer: Develop visually appealing product prototypes and visualizations for marketing and manufacturing. Visualization Specialist: Work in design studios, advertising agencies, or game development companies, creating immersive visual content. Freelance Designer: Offer your skills on platforms like Upwork or Fiverr, providing 3D modeling and rendering services to clients worldwide. Solidify Rhino 3D Expertise: Master foundational modeling skills, including intricate geometries and surface manipulation, establishing a robust foundation for your 3D design journey. Unlock V-Ray for Rhino: Explore the potential of V-Ray for Rhino, learning to create mesmerizing visualizations and achieve lifelike rendering results that bring vitality to your designs. Enhance Visual Appeal: Grasp advanced lighting techniques, material application, and texture methods to elevate the visual allure of your 3D creations, making them more immersive and authentic. Explore Advanced Concepts: Delve into optimizing rendering settings, post-production tactics, and efficient workflows, advancing your design proficiency to higher levels. Hands-On Experience: Engage in practical exercises and real-world projects, applying your skills in practical contexts to enrich your portfolio and showcase your capabilities effectively. Certification of Achievement: Receive a valuable Certificate of Completion, confirming your expertise in Rhino 3D and V-Ray for Rhino, enhancing your professional credibility as a skilled designer. Flexible Learning Paths: In-Person or Live Online: Opt for in-person sessions, fostering collaborative learning, or choose live online classes for convenience and accessibility, tailoring your learning experience to your preferences. Personalized Guidance: Regardless of your chosen format, benefit from tailored instruction and guidance, ensuring optimal learning outcomes and continuous support throughout the course.
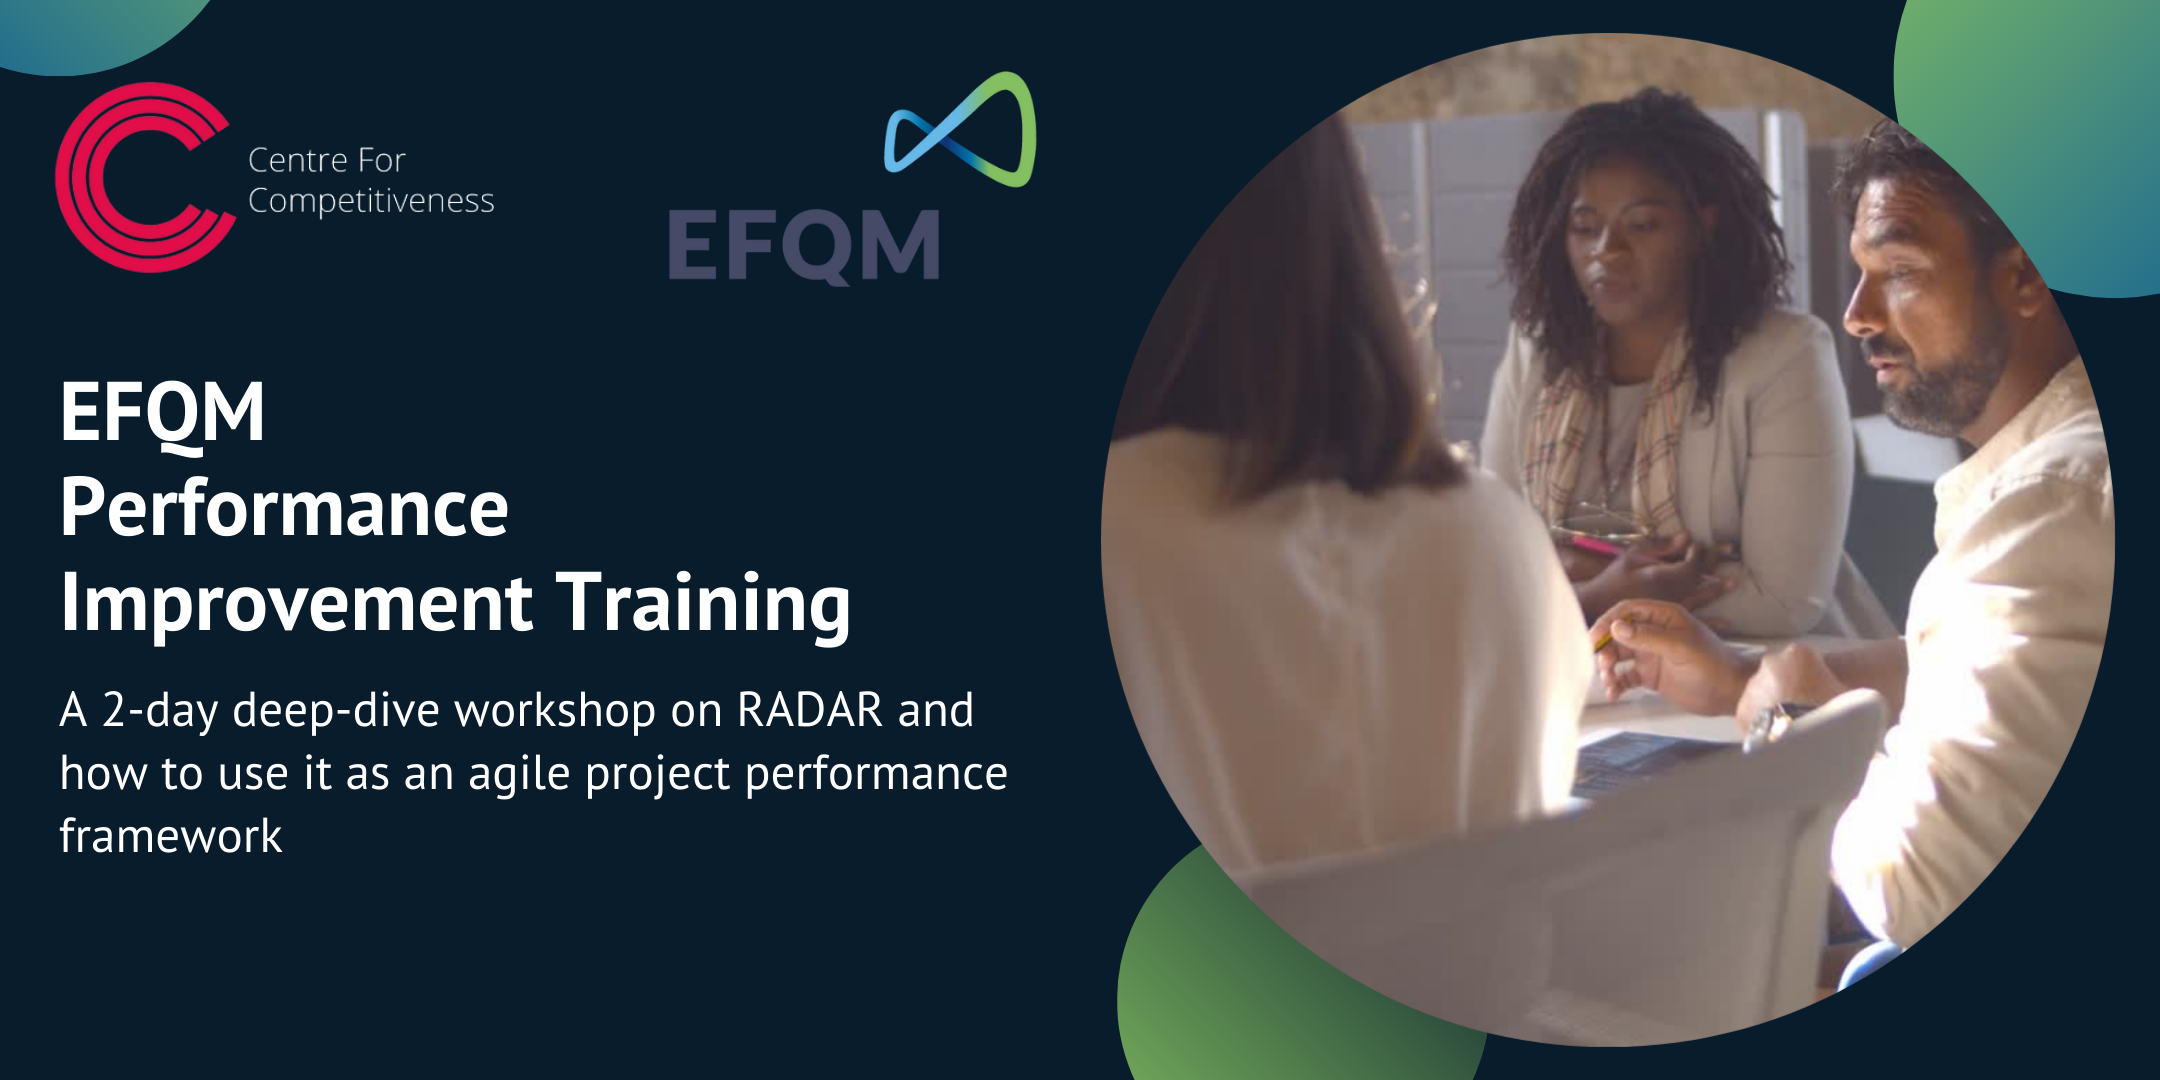
EFQM Performance Improvement Practitioner Workshop - May 2025
By Centre for Competitiveness
EFQM Performance Improvement Practitioner Course A 2-day deep-dive workshop on RADAR and how to use it as an agile project performance framework. The essential course for anyone wanting to learn more about the RADAR logic and how to build a continuous improvement culture and mindset across your whole organisation. Who is it for? This course is suitable for anyone who wants to understand the RADAR logic and how it can be used to make their organisation more effective. Whilst this training is effective as a stand-alone course; it is also a Level 1 option for anyone considering one of the EFQM qualification routes as a way of progressing their management development and career. Benefits By the end of the course, participants will be able to: Explain the overall RADAR logic Explain the main principles of positive culture and mindset for driving performance Describe how RADAR can be implemented into an organisation to improve performance at every level Identify how to use RADAR to drive the management agenda Apply RADAR across day-to-day initiatives and key projects as an agile project performance framework. Programme The main topics covered during the EFQM Performance Improvement Practitioner training are: RADAR logic and examples of how it can be used Using RADAR to drive the management agenda Using RADAR to drive strategic initiatives Using RADAR to set up strategic KPI’s RADAR as a Performance Improvement Framework Case studies and group exercises RADAR Improvement Matrix self-assessment The training is spread over two days and is delivered in a virtual classroom setting (Zoom or Microsoft Teams), using videos, group discussions, case studies and activities in breakout rooms and presentations from the trainer. Further Development The EFQM Performance Improvement Practitioner training provides core knowledge about the RADAR Logic. In some cases, the training will have fulfilled an individual's learning needs. In many cases, the individual will want to consolidate their learning by applying the theory to a practical task. We encourage you to apply RADAR to a practical, work-based project, and we provide guidance on how to approach and complete your project. Completion of the RADAR Performance Improvement Project also allows you to progress to one of the advanced EFQM qualification programmes: EFQM Performance Improvement Leader, EFQM Assessor or EFQM Organisational Change Leader. EFQM Performance Improvement Leader If you successfully complete the EFQM Performance Improvement Practitioner training and the subsequent project, you are invited to apply for the EFQM Performance Improvement Leader assessment. You will be guided and coached by an EFQM trainer and asked to present your project to the EFQM expert panel. Here you will answer questions about how you applied the RADAR logic and principles (we provide participants with templates for running the project, as well as a high-level mid-term review). You will also receive feedback on how to improve and maximise the use of RADAR for future endeavours. Dates and time: This is a two day on-line workshop delivered on the 12th of June & 18th of June from 9:00 AM to 3:30 PM GMT Cost: £1000 + VAT
Twinmotion Realtime Rendering Training
By London Design Training Courses
Why Choose Twinmotion Realtime Rendering Training Course? Click here for info Empower architects, designers, and visualization experts with our Twinmotion training. Learn tools, materials, lighting, animation, and rendering. Explore advanced techniques for lifelike landscape and special effects using Twinmotion's asset library. Opt for in-person or live online sessions. Duration: 10 hrs Method: 1-on-1, Personalized attention Schedule: Tailor your own hours of your choice, available from Mon to Sat between 9 am and 7 pm Twinmotion Real-time 3D Architecture Visualization Course Outline: Module 1: Introduction to Twinmotion Explore Twinmotion's real-time 3D visualization capabilities Master the Twinmotion interface for efficient scene manipulation Prepare 3D files for import and manage the workflow Module 2: Materials and Realism Enhance scenes with realistic materials and visual quality Utilize videos as materials and apply glow effects Create grunge materials for added texture and realism Employ the X-ray material for specific visualization needs Module 3: Landscape and Vegetation Integrate vegetation using Twinmotion's scatter, HQ trees, and growth features Customize grass and utilize HQ vegetation assets for realism Create time-lapse effects for vegetation growth Module 4: Library and Object Import Access the Twinmotion library for furniture and objects Seamlessly import external 3D objects Obtain high-quality 3D assets from the internet and add to the user library Utilize BIM-objects for additional assets Module 5: Lighting and Animation Work with various lighting options, including area light and volumetric light Add animated characters and vehicles for dynamism Incorporate construction vehicles and aircraft for realism Module 6: Volumes and Interactivity Utilize volumes and the animator feature for dynamic scenes Implement urban elements and measurement tools for accuracy Module 7: Nature and Weather Effects Utilize Twinmotion's nature features, including physical sky and weather effects Create realistic lighting for outdoor scenes Add ocean effects for water elements Module 8: Rendering Techniques Master rendering processes, from creating images to exporting panoramas and animations Implement depth of field improvements for captivating visuals Create BIM motion virtual reality phases for immersive experiences Utilize the Twinmotion presenter feature for streamlined presentations Module 9: Final Project Apply knowledge and skills to complete a final render project in Twinmotion Download Twinmotion https://www.twinmotion.com › download Learn how to download and install Twinmotion, the fast, easy real-time archvis tool.

3ds Max Evening Training
By London Design Training Courses
Course Description: 3ds Max Evening Training Course. Training duration: 10 hrs Method: 1-2-1, Personalized attention, Tailored content, Flexible pace, Individual support. Schedule: Personalized training experience with our flexible 1-2-1 sessions. Tailor your own schedule by pre-booking a convenient hour of your choice, available from Monday to Saturday between 9 am and 7 pm. Course Link Unleash the art of character animation with our 3ds Max training course. Perfect for beginners and seasoned artists alike. Benefit from certified tutors and industry experts as your mentors. Opt for in-person or live online sessions with flexible scheduling. Access recorded lessons and lifetime email support. Receive a Certificate of Attendance and a practical training guide. Enjoy hands-on instruction and personalized attention. Ideal for architects, interior designers, game designers, and more. Enroll today and unlock your animation potential with 3ds Max. Try it out for free using the link provided. Module 1: Introduction to 3ds Max (1 hour) Overview of 3ds Max and its applications in various industries Interface tour and navigation controls Working with objects, creating basic shapes, and transformations Understanding the viewport and workspace customization Module 2: Modeling in 3ds Max (2 hours) Polygon modeling techniques Working with modifiers for efficient modeling Creating complex shapes using subdivision surfaces Using splines and lofting for advanced modeling Introduction to NURBS modeling Module 3: Texturing and Materials (2 hours) UVW unwrapping and mapping techniques Applying textures and materials to objects Utilizing the Material Editor and material libraries Creating realistic materials using maps and procedural textures Introduction to PBR materials and material workflows Module 4: Lighting and Cameras (1.5 hours) Types of lights and their properties in 3ds Max Setting up basic and advanced lighting scenarios Working with natural and artificial lighting techniques Introduction to photometric lighting and IES profiles Camera settings and composition for better renders Module 5: Animation and Rigging (1.5 hours) Understanding keyframes and animation controllers Creating simple animations and motion paths Introduction to character rigging and bone systems Basic animation principles and timing Animating objects and cameras for visual storytelling Module 6: Rendering and Output (1.5 hours) Overview of the rendering process in 3ds Max Render settings and output formats Working with render elements for post-processing Introduction to V-Ray rendering (or other popular render engines) Final render setup and optimization techniques Module 7: Particle Systems and Dynamics (1 hour) Introduction to particle systems and particle flow Simulating dynamics and physics in 3ds Max Working with particle operators and events Creating realistic effects like smoke, fire, and water Module 8: Advanced Techniques and Plugins (1 hour) Exploring advanced tools and workflows in 3ds Max Overview of popular plugins and their functionalities Integration with other software and formats (e.g., Adobe Photoshop, CAD software) Utilizing scripts and automation for workflow optimization Downlaod 3ds max for free

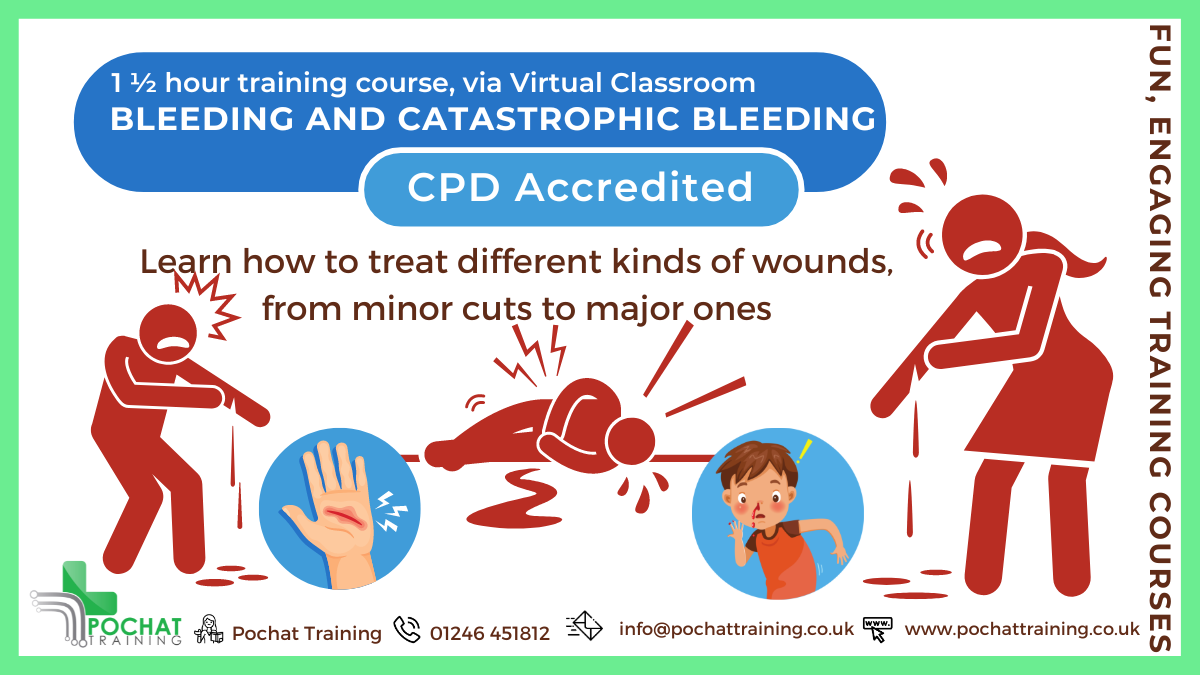
CPD Accredited, Interactive Short Course 1½ hr session Learn to deal with bleeding, from minor bleeds to catastrophic bleeds Become a life-saving hero if ever someone is seriously injured Course Contents: How to treat minor bleeding How to treat major bleeding Types of bleeding How to treat catastrophic bleeding Tourniquets Why to use a tourniquet How to use a tourniquet How to make an improvised tourniquet How to use a Tourni-Key Wound packing How to use Celox Z-Gauze How to improvise packing a wound How to treat gunshot wounds Practical elements: There is an option of learning how to deal with catastrophic bleeding in person, so you get to practice these skills (and play about with fake blood 😀). For that, see our Catastrophic Bleeding course module. Benefits of this Short Course: We all have regular injuries which cause us to bleed If not properly cared for, even a small cut can turn septic and kill or maim Serious car accidents, machinery accidents at work, weapon wounds, terrorist attacks and more can also lead to catastrophic bleeding Did you know that a person could bleed out in just five minutes..? You're got to act quick, decisive and correctly Please don't do what you see in the movies - you will kill the person even quicker...
EXPORT PROCEDURES & DOCUMENTATION
By Export Unlocked Limited
International markets offer huge Export opportunities for UK businesses. Finding and developing new markets for products is a hugely valuable avenue for expansion and in some sectors in particular, global demand for British brands and products makes international trade an excellent means of growth.
3ds Max Basic to Intermediate Training
By London Design Training Courses
Why Choose 3ds Max Basic to Intermediate Training Course? Course info Looking to take your 3D modelling and animation skills to the next level then Our Intermediate 3DS Max course is designed to help you do just that! A bespoke course ideal for anyone who has a solid understanding of modelling in the 3D environment for films & games. Duration: 20 hrs Method: 1-on-1, Personalized attention. Schedule: Tailor your own schedule and hours of your choice, available from Mon to Sat between 9 am and 7 pm. Why Opt for Our 3ds Max Basic to Intermediate Course? Elevate your 3D modeling and animation skills with our tailored Intermediate 3DS Max course, perfect for those proficient in 3D modeling for films and games. 3ds Max Interface: Familiarize yourself with essential interface areas, tool names, and shortcuts. Master the Scene Explorer for comprehensive scene control. Learn initial software settings for an efficient workflow. Organize your project folder for streamlined work management. Enhance workflow through scene navigation shortcuts and visual styles setup. Understand scene unit configuration for precision. Foundations of 3D Modeling: Acquire industry-standard 3D modeling techniques. Implement compositing modeling with procedural geometry. Utilize non-destructive methods via Modifiers to enhance base geometries. Create 3D models using Splines and modifiers like Extrude, Sweep, and Lathe. Explore Boolean operations for complex shape creation. Delve into Mesh Modeling, enabling manual mesh editing for customized objects. Mesh Modeling: Navigate mesh modeling tools in 3ds Max. Model hard surface objects using mesh modeling and other techniques. Unleash creativity in modeling various objects. Material Creation and Application: Understand material basics and texture application. Create, apply, and resize materials on models. Utilize pictures as references for modeling. Apply multiple materials to one object. Incorporate transparency, reflection, and self-illuminating textures. Utilize images with transparency for intricate texture designs. Camera Control Techniques: Learn camera creation and viewpoint adjustment. Modify camera focal length and lock settings for stability. Adjust camera exposure for desired image brightness. Explore cameras with and without targets, understanding their differences. Lighting: Create realistic lighting using daylight systems. Fine-tune daylight settings based on geographical location. Optimize render settings for high-quality output. Utilize various light types for interior illumination. Master light distribution and apply color filters and textures. Implement HDRI environment images for realistic lighting effects. Animation Essentials: Gain a basic understanding of animation principles. Animate objects manually through keyframing. Create walkthrough animations using cameras and paths. Construct efficient camera rigs for path-based animations. Render animations as video output. Advanced Rendering Techniques: Explore rendering with V-Ray Simulate daylight systems and interior lighting in V-Ray Set up studio lighting configurations in both V-Ray advanced rendering. Course Requirements: A computer with 3ds Max and Vray installed (trial versions available on Autodesk and Chaos Group websites) Basic familiarity with 3D modeling concepts is beneficial but not mandatory Enthusiasm for learning 3ds Max and Vray to create impressive 3D models, visualizations, and animations
The City and Guilds 2391-50 electrical course has been designed to meet the needs of the electrical installation industry, and is aimed at practising electricians who have not carried out inspection and testing since qualifying or who require some update of training before going on to other City and Guilds qualifications. Candidates who achieve the City and Guilds 2391-50 qualification could progress on to the City and Guilds 2391-51: the Level 3 Certificate in Inspection, Testing and Certification of Electrical Installations. The City and Guilds 2391-50 course will focus on the teaching and learning of initial verification and certification of electrical installations. In order to claim the full City and Guilds 2391-50 qualification, students must successfully complete: One 1 hour 30 minute online multiple choice test to be completed during the courseOne 3 hour 30 minute practical test to be completed after the course, broken into two sections as follows:Task A – Initial Verification and Certification of the Complete Installation – 2hrs and 30minsTask B – Short Answer Questions – 1hr To further support this course, we offer a 1 day practical workshop (at the cost of £120.00 Net VAT) available to candidates who have completed the course and require further ‘hands on’ practical experience prior to their practical exam. Most students who take this option elect to complete this the day before their practical assessment. The City and Guilds 2391-50 course costs include examination entry fees.
