- Professional Development
- Medicine & Nursing
- Arts & Crafts
- Health & Wellbeing
- Personal Development
3743 Courses in Belfast delivered Live Online
OOAD training course description A workshop course providing thorough practical knowledge of object oriented analysis and design methods. What will you learn Perform Systems Analysis with Object Oriented methods. Identify key classes and objects. Expand and refine OO problem domain models. Design Class hierarchies using inheritance and polymorphism. Design programs with Object Oriented methods. OOAD training course details Who will benefit: System analysts, designers, programmers and project managers. Prerequisites: It is desirable that delegates have experience of programming in C++/Java or some other OOP language. Duration 5 days OOAD training course contents What is OO? Classes, objects, messages, encapsulation, associations, inheritance, polymorphism, reusability. What is Systems Analysis and design? Data flow diagrams, structure diagrams. The OO approach. OOA The problem domain and object modelling. Identifying classes and objects. Generalisation and inheritance. Defining attributes and methods. OOD Refining the OOA results. Designing the User Interface. Designing the algorithms and data structures using objects. Designing the methods. OOP Prototyping. Implementing OOD with OOPs and OOPLs.


Vray for 3ds max One to One training Course
By Real Animation Works
Vray for 3ds max face to face training customised and bespoke.

3ds Max and Unity 3D Game Designing Training Course
By ATL Autocad Training London
Who is this course for? The "3ds Max and Unity 3D Game Designing Training Course" is ideal for aspiring game designers, developers, graphic designers, students, and creative professionals. It's tailored for individuals keen on mastering 3D modeling, animation, and interactive game development using industry-standard software like 3ds Max and Unity 3D. Click here for more info: Website Scheduling: Available from Monday to Saturday, 9 a.m. to 7 p.m. Choose in-person or live online sessions over Zoom. Duration: 40 hours. Module 1: Introduction to 3ds Max (8 hours) Overview of 3ds Max interface and tools Basic 3D modeling techniques: primitives, Editable Poly, modifiers Material creation and application Introduction to lighting and rendering concepts Module 2: Advanced 3ds Max Techniques (8 hours) Advanced modeling: Splines, Loft, Extrude, and ProBoolean Animation basics: Keyframes, paths, and controllers Particle systems and dynamics Introduction to character rigging and animation Module 3: Introduction to Unity 3D (8 hours) Unity interface and project setup Importing 3D assets from 3ds Max Physics and colliders in Unity Basic scripting and interactions Module 4: Advanced Unity 3D Features (8 hours) Unity scripting: C# fundamentals Advanced physics and particle systems User interface design and implementation Integrating audio and visual effects Module 5: Game Design and Optimization (8 hours) Game design principles and mechanics Level design and interactive gameplay elements Optimizing game performance: LOD, batching, and asset optimization User testing and feedback incorporation Final Project (4 hours) Collaborative game development project using 3ds Max and Unity 3D Implementation of learned skills in a real-world scenario Presentation and feedback session Note: The course outline is designed to provide a comprehensive understanding of both 3ds Max and Unity 3D, covering fundamental and advanced topics. The final project aims to apply the acquired skills in a practical context, fostering creativity and collaboration among participants. Unity - Real-time 3D https://www.unity.com/. 3ds Max Trial https://www.autodesk.co.uk ⺠products ⺠free-trial Upon completion of the 40-hour 3ds Max and Unity 3D Game Design Masterclass, students will: Master 3D Modeling: Acquire proficient skills in creating detailed 3D models, understanding various techniques, and utilizing advanced tools in 3ds Max. Expertise in Animation: Gain expertise in animating characters and objects, employing keyframes, paths, and controllers for realistic motion. Material Creation and Texturing: Understand material creation, application, and advanced texturing techniques for creating visually appealing game assets. Unity Game Development: Learn Unity's interface, project setup, and scripting fundamentals to create interactive games. Physics and Interactivity: Explore physics systems, colliders, and interactive elements, enhancing gameplay experiences. Advanced Scripting: Develop proficiency in C# scripting, enabling the implementation of complex game mechanics and interactions. Optimization Techniques: Understand techniques to optimize game assets, improving performance and ensuring smooth gameplay. Game Design Principles: Grasp essential game design principles, including level design, user experience, and gameplay mechanics. Real-World Application: Apply learned skills in a collaborative final project, integrating 3D models, animations, scripting, and game design principles. Presentation Skills: Develop the ability to present and explain game concepts, designs, and mechanics effectively. Troubleshooting and Debugging: Gain skills in identifying and resolving common issues and errors in both 3ds Max and Unity 3D projects. Team Collaboration: Enhance teamwork and collaboration skills through the final project, working effectively with peers in a creative environment. Upon completing the course, students will have a well-rounded skill set in 3D modeling, animation, game design, and Unity development, making them proficient candidates for roles in game development studios, animation companies, or freelance projects. 3ds Max and Unity 3D Game Designing Training Course: Skills & Careers! Skills Acquired: Advanced 3D Modeling Texturing and Animation Unity 3D Game Development Lighting and Rendering Interactive UI/UX Design Career Opportunities: Game Developer 3D Modeler Texture Artist Game Tester UI/UX Designer Embrace Personalized Learning. Why Us? Discover the Benefits: One-on-One Training: Experience tailored coaching from practicing architects and designers, either face-to-face at (SW96DE) or in live online sessions. Available Monday to Saturday, 9 am to 7 pm. Customized Tutorials: Take home exclusive video tutorials crafted to enhance your learning journey. Comprehensive Resources: Access a digital reference book for thorough revision, ensuring a deep understanding of every concept. Free Ongoing Support: Enjoy continuous post-course assistance via phone or email, ensuring your success even after class completion. Flexible Syllabus: We adapt syllabus and projects to your needs, ensuring focused learning on what matters most to you. Official Certificate: Certificate upon course completion. Why Choose Us? Individualized Support: Our courses, ranging from 10 to 120 hours, offer unwavering assistance at every stage. With personalized homework assignments and free after-course support, we guide you toward mastering software with unparalleled expertise. Personal Attention, No Crowded Classrooms: Experience the intimacy of one-on-one learning. Bid farewell to crowded classrooms, ensuring you receive the undivided attention you deserve in a confident and comfortable environment. Financial Flexibility: Embarking on your educational journey shouldn't strain your finances. Diverse payment plans tailored to your needs. Explore available options and embark on your learning adventure today. Expert Instructors, Real-world Experience: Our instructors, chosen for their industry expertise and passion for teaching, are dedicated to imparting invaluable skills to eager learners.
Management of Risk (M_o_R) Foundation: In-House Training
By IIL Europe Ltd
Management of Risk (M_o_R®) Foundation: In-House Training This M_o_R® Foundation course prepares learners to demonstrate knowledge and comprehension of the four elements of the M_o_R framework: Principles, Approach, Processes, Embedding and Reviewing and how these elements support corporate governance. The M_o_R Foundation Course is also a prerequisite for the M_o_R Practitioner qualification. What you will Learn At the end of the M_o_R Foundation course, participants will gain competencies in and be able to: Describe the key characteristics of risk and the benefits of risk management List the eight M_o_R Principles List and describe the use of the key M_o_R Approach documents Create Probability and Impact scales Define and distinguish between risks and issues Create a Risk Register Create a Stakeholder map Identify the key roles in risk management Use the key techniques and describe specialisms in risk management Undertake the M_o_R Foundation examination Introduction Introduction to the M_o_R course What is a risk? What is risk management? Why is risk management so important? Basic risk definitions The development of knowledge about risk management Corporate governance and internal control Where and when should risk management be applied? M_o_R Principles The purpose of M_o_R principles Aligns with objectives Fits the context Engages stakeholders Provides clear guidance Informs decision-making Facilitates continual improvement Creates a supportive culture Achieves measurable value Risk management maturity models M_o_R Approach Relationship between the documents Risk management policy Risk management process guide Risk management strategy Risk register Issue register Risk response plan Risk improvement plan Risk communications plan M_o_R Process Common process barriers Identify contexts Identify the risks Assess estimate Assess evaluate Plan Implement Communication throughout the process M_o_R Perspectives Strategic perspective Program perspective Project perspective Operational perspective Risk Specialisms Business continuity management Incident and crisis management Health and Safety management Financial risk management Environmental risk management Reputational risk management Contract risk management

ITIL 4 Specialist: High Velocity IT: Virtual In-House Training
By IIL Europe Ltd
ITIL® 4 Specialist: High Velocity IT: Virtual In-House Training The ITIL® 4 Specialist: High-Velocity IT module is part of the Managing Professional stream for ITIL® 4. Candidates need to pass the related certification exam for working towards the Managing Professional (MP) designation. This course is based on the ITIL® 4 Specialist: High-Velocity IT exam specifications from AXELOS. With the help of ITIL® 4 concepts and terminology, exercises, and examples included in the course, candidates acquire the relevant knowledge required to pass the certification exam. This module addresses the specifics of digital transformation and helps organizations to evolve towards a convergence of business and technology, or to establish a new digital organization. It was designed to enable practitioners to explore the ways in which digital organizations and digital operating models function in high-velocity environments. Working practices such as Agile and Lean, and technical practices and technologies such as Cloud, Automation, and Automatic Testing are included. What You Will Learn At the end of this course, participants will be able to: Understand concepts regarding the high-velocity nature of the digital enterprise, including the demand it places on IT. Understand the digital product lifecycle in terms of the ITIL operating model. Understand the importance of the ITIL guiding principles and other fundamental concepts for delivering high-velocity IT. Know how to contribute to achieving value with digital products. Course Introduction Let's Get to Know Each Other Course Learning Objectives Target Audience Characteristics ITIL® 4 Certification Scheme Course Components Course Agenda Module-End Exercises Exam Details Introduction to High-Velocity IT High-Velocity IT Digital Technology Digital Organizations Digital Transformation High-Velocity IT Approaches Relevance of High-Velocity IT Approaches High-Velocity IT Approaches in Detail High-Velocity IT Operating Models Introduction ITIL® Perspective High-Velocity IT Aspects High-Velocity IT Applications ITIL® Building Blocks for High-Velocity IT Digital Product Lifecycle Service Value Streams Four Dimensions of Service Management ITIL® Management Practices High-Velocity IT Culture Key Behavior Patterns ITIL® Guiding Principles Supporting Models and Concepts for Purpose Ethics Design Thinking Supporting Models and Concepts for People Reconstructing for Service Agility Safety Culture Stress Prevention Supporting Models and Concepts for Progress Working in Complex Environments Lean Culture ITIL® Continual Improvement Model High-Velocity IT Objectives and Techniques High-Velocity IT Objectives High-Velocity IT Techniques Techniques for Valuable Investments Prioritization Techniques Minimum Viable Products and Services Product / Service Ownership A/B Testing Techniques for Fast Developments Basic Concepts Related to Fast Development Infrastructure as Code Reviews Continual Business Analysis Continuous Integration / Continuous Delivery (CI/CD) Continuous Testing Kanban Techniques for Resilient Operations Introduction to Resilient Operations Technical Debt Chaos Engineering Definition of Done Version Control Algorithmic IT Operations ChatOps Site Reliability Engineering (SRE) Techniques for Co-created Value Basic Concepts of Co-created Value Service Experience Techniques for Assured Conformance DevOps Audit Defense Toolkit DevSecOpsPeer Review
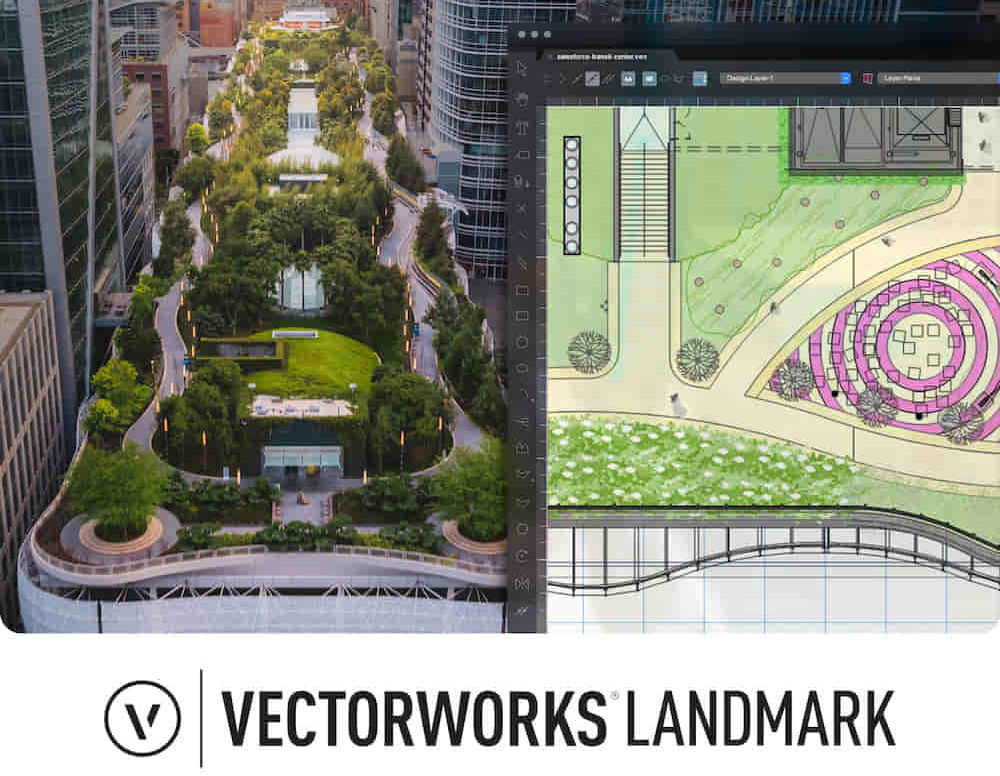
Landmark Training Course With Vectorworks
By ATL Autocad Training London
Who is this course for? Landmark Training Course With Vectorworks. Dive into terrain modeling, planting, irrigation, and site analysis guided by certified tutors. Master these tools for precise landscape designs and effective documentation. Check our Website Enrollment : 1-on-1 Landmark Training. Tailor your schedule. Mon to Sat between 9 am and 7 pm Call 02077202581 to book your slot. Duration: 16 hours. "Split these hours over multiple days as needed for your ideal schedule." Approach: In-person or live online. Landmark Training Course with Vectorworks: Basic to Intermediate Level Course Duration: 16 Hours Embark on a transformative journey with our Landmark Training Course tailored for landscape architects and designers. Over 16 intensive hours, dive deep into Vectorworks Landmark, mastering fundamental and intermediate techniques crucial for comprehensive 2D and 3D landscape design. Craft intricate site analyses, plans, irrigation systems, and elevate your designs with mesmerizing 3D visualizations. Explore custom plant symbols, detailed planting plans, and learn the art of efficient collaboration and customization. Course Highlights: I. Introduction to Vectorworks Landmark (1 hour) Explore Vectorworks Landmark for landscape design Master interface, tool usage, and project management II. Site Analysis and Site Plans (3 hours) Craft detailed site analyses and hardscape designs Work with contours, elevations, and terrain models III. Planting Plans (5 hours) Utilize the plant database for region-specific plant selection Create personalized plant symbols and comprehensive planting plans IV. Irrigation Design (2 hours) Design and edit efficient irrigation systems and zones Integrate irrigation components into site plans V. 3D Visualization (3 hours) Create captivating 3D models with realistic textures and materials Enhance designs with advanced lighting and special effects VI. Customization (1 hour) Tailor the interface for efficient landscape design Create custom object styles and resource libraries VII. Collaboration and Sharing (1 hour) Seamlessly import/export data from other platforms Share designs effectively with colleagues and collaborators VIII. Conclusion and Next Steps (1 hour) Review course content comprehensively Receive guidance on further learning resources Engage in a Q&A session and provide valuable feedback Enhance your landscape design expertise and unleash your creativity. Enroll now in our Vectorworks Landmark Basic to Intermediate Training and transform your designs. Download Vectorworks Landmark By the end of the Vectorworks Landmark Training Course, participants will: Understand the key features and functionalities of Vectorworks Landmark for landscape design. Demonstrate proficiency in using essential tools for site analysis, site plans, and hardscape design. Create detailed planting plans, selecting appropriate plants, and understanding their compatibility and growth patterns. Design efficient and effective irrigation systems, including generating irrigation reports. Create 3D visualizations of landscape designs, applying textures, materials, lighting, and special effects. Customize the interface and create personalized object styles and resources. Collaborate and share landscape design drawings with other software users. Have the foundation to pursue further learning and exploration in landscape design using Vectorworks Landmark. Mastering Foundations Begin your project by organizing your files and importing survey data. Learn to sketch existing buildings using Building Shell tools and model neighboring structures with Massing Model. Explore different methods for laying out survey points and marking existing features with precision. Objectives: Review File Organization Techniques Import Survey Data (DWG Import) Create Building Structures with Building Shell Tools Utilize Triangulation and Arc Tool for Precision Master Various Tape Measurement Techniques Elevating Your Design Enhance your survey with detailed ground, existing trees, and fences. Conduct shadow analysis to optimize planting locations. Dive into the Vectorworks Plant tool, your key design companion. Objectives: Develop Detailed Ground Surfaces Incorporate Existing Trees and Fences Design with Railing Fence Tool Conduct Shadow Analysis using Heliodon Tool Utilize Plant Tool Modes for Plant Placement Access Existing Plant Libraries and Customize Plants in 2D/3D Crafting Landscapes Create vibrant plant mixes using Landscape Area tool and apply them across your site models. Design intricate hardscapes, aligning them effortlessly even in complex paving scenarios. Learn to use components for detailed reporting, cut and fill calculations, and precise detailing. Explore custom object creation and site furniture placement. Objectives: Design Landscape Areas and Define Custom Plant Mixes Create Hardscapes and Define Custom Paving Constructions Generate Reports and Tags for Landscape Areas and Hardscapes Access and Manage Objects in Resource Manager Craft Custom Objects and Site Furniture Polished Presentation Present your designs professionally using Sheet layers and viewports. Create Section viewports to cut through your model and Detail viewports to focus on specific areas. Enhance visual appeal with mood boards and annotations, ensuring a refined, detailed presentation. Objectives: Craft Sheet Layers for Presentation Create Plan, Elevation, and Perspective Viewports Generate Section and Detail Viewports Annotate Viewports for Clear Communication Incorporate Images and Plant Reports for Comprehensive Presentations Master Vectorworks Landmark: Gain expertise in essential and advanced 2D/3D landscape design tools for precision and efficiency. Boost Efficiency: Learn time-saving techniques and workflows tailored to Vectorworks Landmark, enhancing productivity. Versatile Landscape Skills: Develop proficiency in site analysis, planting plans, hardscapes, and irrigation systems for diverse projects. Industry-Ready Expertise: Acquire sought-after skills in landscape architecture, paving the way for career growth. Flexible Learning: Access recorded lessons for convenient review and receive lifetime email support for ongoing guidance.
Certified Associate in Project Management (CAPM) Exam Prep: In-House Training
By IIL Europe Ltd
Certified Associate in Project Management (CAPM)® Exam Prep: In-House Training: In-House Training This course gives you the knowledge you need to pass the exam and covers CAPM®-critical information on project management theory, principles, techniques, and methods Are you planning on taking the CAPM® examination? This course gives you the knowledge you need to pass the exam and covers CAPM®-critical information on project management theory, principles, techniques, and methods. You'll also have an opportunity for practical applications and time to review the kinds of questions you'll find in the CAPM® Exam. What you Will Learn Apply for the CAPM® Examination Develop a personal exam preparation plan Describe the structure, intent, and framework principles of the current edition of the PMBOK® Guide Explain the PMBOK® Guide Knowledge Areas, as well as their inter-relationships with the each other and the Process Groups Getting Started Program orientation The CAPM® certification process Certified Associate in Project Management (CAPM®) Examination Content Outline CAPM® eligibility requirements Code of Ethics and Professional Conduct Application options Foundation Concepts Skills and qualities of a project manager Project management terminology and definitions Relationship of project, program, portfolio, and operations management Project lifecycle approaches Project Integration Management Review Project Integration Management Knowledge Area Develop Project Charter Develop Project Management Plan Direct and Manage Project Work Manage Project Knowledge Monitoring and Controlling Perform Integrated Change Control Close Project or Phase Project Stakeholder Management Review Project Stakeholder Management Knowledge Area Identify Stakeholders Plan Stakeholder Engagement Manage Stakeholder Engagement Monitor Stakeholder Engagement Project Scope Management Review Project Scope Management Knowledge Area Plan Scope Management Collect Requirements Define Scope Create WBS Validate Scope Control Scope Project Schedule Management Review Project Schedule Management Knowledge Area Plan Schedule Management Define Activities Sequence Activities Estimate Activity Durations Develop Schedule Control Schedule Project Cost Management Review Project Cost Management Knowledge Area Plan Cost Management Estimate Costs Determine Budget Control Schedule Project Resource Management Review Project Resource Management Knowledge Area Plan Resource Management Estimate Activity Resources Acquire Resources Develop Team Manage Team Control Resources Project Quality Management Review Project Quality Management Knowledge Area Plan Quality Management Manage Quality Control Quality Project Risk Management Review Project Risk Management Knowledge Area Plan Risk Management Identify Risks Perform Qualitative Risk Analysis Perform Quantitative Risk Analysis Plan Risk Responses Implement Risk Responses Monitor Risks Project Communications Management Review Project Communications Management Knowledge Area Plan Communications Management Manage Communications Monitor Communications Project Procurement Management Review Project Procurement Management Knowledge Area Plan Procurement Management Conduct Procurements Control Procurements Summary and Next Steps Program Review Mock CAPM® Exam Getting Prepared for the CAPM® Exam After the CAPM® Exam
MICRO & NANOFAT GRAFTING TRAINING COURSE
By Harley Elite Academy (HeLa)
EXPERT – MASTERCLASS 8 CPD POINTS 1 DAY INTENSIVE COURSE ONLINE or IN-CLINIC NOTE! After booking we will contact you for scheduling the exact course date! Courses dates are subject to change due to mentors availability. We will inform you via email if a date becomes available! DERMAGRAFT AND ENRICHED NANO-MICROFAT TRANSFER FOR FACE, NECK & HANDS – VOLUMIZATION & REJUVINATION WHAT IS MICROFAT AND NANOFAT GRAFTING FOR FACE AND NECK LIFT? Microfat and enriched nanofat graft transfer (also known as autologous fat transfer or lipoinjection), to the face and the neck is a minimally invasive, short-lasting procedure with rapid recovery, and can be done under local anaesthesia. Following completion of the procedure, the patient can return to the normal daily life activities. But firstly, we need to clearly explain what the terms microfat and nanofat grafts mean…. Microfat is defined a small-diameter fat particle and is used to improve the appearance of wrinkles, grooves and the lack of volume and sagginess of the skin of the face and neck, in response to the aging process. Similarly, nanofat, is referred to as the smallest diameter fat particle. The main advantage of the nanofat is that it contains cells that have the ability to differentiate in any type of body cell. Stem cells – as they are called- play a very important role in the process of rejuvenation, as they can differentiate into cells called fibroblasts which in turn produce collagen thus making the skin firmer and more youthful in appearance. The Course can be divided into two stages: 1. In the first stage, fat cells will be obtained from one or more parts of the body and are then purified and injected into the face and the neck. The doctor will identify an area in your body where the fat will be obtained from. This area is usually the flanks, but fat can also be obtained from other areas such as the abdomen, and the outer and inner thighs. You will be given enough local anaesthesia to numb the area where the fat will be harvested from. Then, a small-diameter cannula called microcannula connected to a special vacuum syringe will be gently introduced under the skin to obtain the fat. During this process, you should not feel any pain, the local anaesthetic will have made you numb. After the fat is harvested, it will contain a mixture of fat cells, blood, water, and local anaesthetic. Therefore, this fat will not be pure. This mixture of fat, blood, water and local anaesthetic will then become filtered into a special filtering and processing device whereby all the blood, water and local anaesthetic are being washed out, so that pure fat remains. This fat is then further processed by passing it through special filters whereby it becomes a smaller-sized fat particle known as microfat and nanofat graft. You need to be medically qualified as a doctor, dentist, nurse, pharmacist or paramedic with full governing body registration and have completed a Foundation Filler Course and to have administered a number of cases. Additional information ATTENDANCE ONLINE (theory), IN-CLINIC (Practice) COURSE LEVEL EXPERT | Masterclass Course

Compressors & Pumps: Selection, Applications, Operation, Troubleshooting and Maintenance
By EnergyEdge - Training for a Sustainable Energy Future
Enhance your expertise in compressor and pump selection, operation, troubleshooting, and maintenance with EnergyEdge's comprehensive classroom training. Elevate your skills today!
