- Professional Development
- Medicine & Nursing
- Arts & Crafts
- Health & Wellbeing
- Personal Development
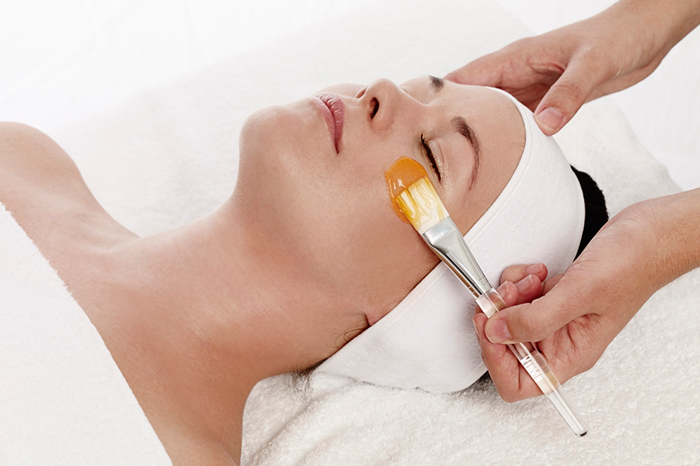
A huge part of a facial is steam extractions to clear out blackheads, white heads and skin congestion using various tools to give your clients beautiful fresh skin. Please confirm dates and availability with us prior to purchasing Why Do This Masterclass? Great refresher for experienced estheticians. Blackhead removal is always in demand so you can offer this treatment as a stand alone treatment or as an add on to another treatment such as microdermabrasion or dermaplaning Great for ]yourself too. Learn to use a blackhead extraction tool correctly. Everyone is suitable for this treatment. Who Is This Course Suitable For? Experienced and qualified beauty therapists who wish to refresh their skills or add extractions to their treatment list. This is a non accredited masterclass as it will fall under basic facials on your insurance. You are adding to your skill set. Course Content Extraction techniques for different types of congestion Using metal extraction tool correctly Using the ultrasonic cleansing wand Use of steaming equipment correctly Hands on practice Course Duration & Cost Half day practical. Blackhead Extractions Masterclass £250 Why Choose Us? This course will allow you to offer the most on trend and in demand treatments that are results driven. The key to a successful business is to offer services that clients will want to keep coming back for. All of the treatments within this diploma have proven results which will support you in customer retention. We do not offer online courses for treatments that require the skill that can only be performed in front an experienced trainer. We ensure we offer a practical course that allows you to work on 2 models per treatment. We want you to be confident in the skill so you can start your business straight away. We are not an Academy and we take pride in this. This means we offer more than just training you in a skill. We understand how difficult and overwhelming it can be to start a new business and our ethos is to provide guidance and support to get you started. All our sessions have an option of 1-2-1 sessions for a personalised experience and have a maximum of 4 students per session. Your journey with us doesn’t end in the practical training session. When you train with Elixir Skin Training you become a part of our brand. We stay in touch with all our graduates and provide that motivation to get you going, which you will not find in large Academies. Quality of training is important but so is what comes after- we support you in every aspect because we want to see you build your business. Categories: Advanced Skin Care Courses
This course is ideal for all, from beginners to confident makers. You will learn the basics of leather craft for accessories and be introduced to techniques including machine stitching on leather, hand finishing and hand cutting. You will also be working with the full spectrum of leather types from soft leathers and suedes to a hard sturdy veg tanned leather. This is a perfect introductory course to start your journey into leatherwork and bag making as you will experience the wide variety of tasks involved in the work. In order to complete your bag in a day we will use part pre-prepared components and the bag will be made from a ‘Hands of Tym’ pattern but do not fear there is still plenty of work for you to do. During the day you will be directed by your tutor Leathersmith and London College of Fashion Lecturer Georgie Tym to make one of the following bag - A fully lined ‘Turned Seam’ ‘T-Base’ mini Leather bucket bag with raw edge strap. The dimensions of the mini bucket bag are 185mm x 190mm x 110mm. It will be the same construction as the bag in the photos - please contact for more info or view online Parking available on the drive with easy access via the M40. Banbury train station is a 30 min walk. Trains run from both London Marylebone and Birmingham to Banbury in 50mins. Also well connected to Reading, Oxford, Leamington Spa to name a few. Maximum class size is 5 What's included in the price? There are no additional costs. All leather, hardware and other materials will be included. There will be a selection of leather and hardware colours for you to choose from.There will be lunch served at midday and tea/ coffee breaks throughout. Cancellation policy Easy - Cancellation and a full refund can be obtained up to 2 weeks before the course starts About Georgie at Hands of Tym During training at Cordwainers, London College of Fashion in 2010 I learnt how to design, make and manufacture bags professionally. Following a varied career in Accessories design and development across many roles and international brands I set up Hands of Tym in 2016. The courses I offer are suitable for all, from experienced to total novice. Come along to learn something new, and design and make your own leather bag in a day.

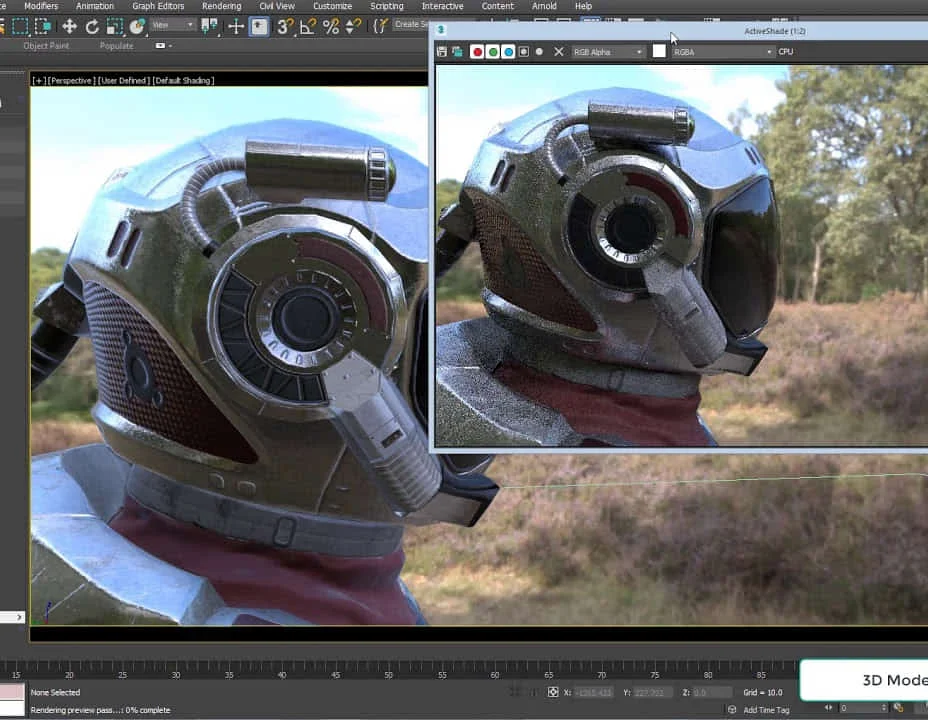
Arnold for 3dsMax Basic to Advanced Training Course
By ATL Autocad Training London
Learn 3ds Max + Arnold Photo Realistic Rendering Workflow. Enhance your skills with our Arnold renderer training for 3ds Max users. Learn to create lifelike 3D scenes and animations, mastering accurate light simulation. Explore essential Arnold features in lighting, materials, and rendering. Click here for more info: Website Training duration: 10 hrs. Method: 1-on-1 and Personalized attention. Schedule: Choose a convenient time from Monday to Saturday, 9 am to 7 pm, and book your slot. Course Duration: 10 hours Course Outline: Session 1: Introduction to Arnold Renderer (1 hour) Unveiling Arnold Renderer's features and capabilities Understanding the benefits of Arnold in 3ds Max Setting up Arnold renderer and exploring its interface Mastering the workflow for exceptional results Session 2: Basic Arnold Shading (1 hour) Navigating the Arnold shading network Creating essential materials with Arnold shaders Working with diverse shader types (standard, Lambert, etc.) Elevating visuals with maps and textures in Arnold's materials Session 3: Arnold Lighting Techniques (1.5 hours) Embracing the art of lighting with Arnold Lights Implementing various light types (area lights, spotlights, etc.) Creating ambiance with Arnold skydome and environment lighting Illuminating scenes using physical sky and image-based lighting Session 4: Arnold Cameras and Rendering Settings (1.5 hours) Mastering Arnold cameras and their settings Achieving depth of field and motion blur effects in Arnold Configuring optimal rendering settings for superior results Fine-tuning rendering with the Arnold Render Setup dialog Session 5: Advanced Arnold Shading (1.5 hours) Creating intricate materials with advanced Arnold shaders Realistic surfaces with Arnold's procedural textures Harnessing the power of advanced shading nodes (bump, displacement, etc.) Unleashing specialized effects with Arnold shaders (subsurface scattering, hair, etc.) Session 6: Arnold Rendering Optimization (1 hour) Streamlining rendering settings for enhanced efficiency Leveraging Arnold features like adaptive sampling and denoising Noise reduction techniques for smoother Arnold renders Troubleshooting common rendering issues and their solutions Session 7: Advanced Lighting Techniques (1 hour) Crafting lifelike lighting setups with Arnold's prowess Exploring advanced lighting properties (exposure, color temperature, etc.) Enhancing lighting with Arnold light filters and modifiers Implementing captivating effects like volumetric lighting and caustics Session 8: Arnold AOVs and Compositing (1 hour) Understanding Arnold AOVs (Arbitrary Output Variables) Configuring and rendering AOVs for post-production control Compositing AOVs for artistic adjustments in post-production Leveraging AOVs for fine-tuning the final image Session 9: Arnold for Animation and Motion Graphics (1 hour) Integrating Arnold seamlessly into animation and motion graphics projects Rendering animation sequences with finesse Managing motion blur and time-based effects with Arnold Unveiling Arnold's potential for particle rendering and dynamic effects Session 10: Arnold Tips, Tricks, and Best Practices (1 hour) Exploring advanced techniques and workflows for exceptional results Optimizing scene setup for enhanced rendering performance Troubleshooting tips for common issues and errors in Arnold Q&A session and final review to consolidate knowledge Upon completing this course, you will: Gain a solid understanding of Arnold, its rendering concepts, and its integration into 3D projects. Master the setup of Arnold renderer, optimizing performance, and ensuring compatibility with various platforms. Effectively create and manage materials for Arnold, enabling you to produce realistic and visually appealing scenes. Demonstrate proficiency in working with different shapes, lighting techniques, cameras, and shaders to enhance the visual quality of your 3D projects. Harness the power of textures to add depth and realism to your rendered scenes. Utilize Arnold scene sources efficiently, empowering you to streamline your workflow and achieve desired results in a faster and more organized manner. Overall, this course equips you with the necessary skills to confidently utilize Arnold in your projects and achieve exceptional rendering outcomes. Arnold is an advanced Monte Carlo ray tracing renderer designed for feature-length animation and visual effects. This comprehensive course equips you with the skills to produce photo-realistic 3D rendered scenes and animations. Learn accurate light simulation, artistic style techniques, and more. Our 3ds Max - Rendering with Arnold training is customizable, offering one-to-one sessions. Whether in-class or live online, our Autodesk Certified Instructors with vast rendering experience will guide you through hands-on exercises and provide a training guide for future reference. Upon completing the course, you'll receive an e-certificate and liftime email support from your Arnold trainer. Prior experience with 3ds Max is recommended, but no prior Arnold knowledge is required. Choose the Arnold version that suits your needs for this training course. Lifetime email support provided. Comprehensive handouts and useful documents included. Flexible financial support options available, including installment packages and funding through job center plus and DWP (Contact us for details). Money-back guarantee: Unsatisfied after your first session? We address your concerns and offer a refund if needed (Terms and conditions may apply). Assistance with computer optimization for improved software performance in Autocad, 3ds Max, and Photoshop on both MAC and PC platforms. Industry connections for portfolio promotion and job opportunities.
Level 3 Award in First Aid Trainer Course
By Canary Wharf Academy
Course Description: Gain essential first aid skills with our Level 3 Award in First Aid Course, recognized under the Regulated Qualifications Framework (RQF). Ideal for aspiring first aiders or first aid trainers, this course covers a broad range of subjects tailored for higher-risk workplaces or those with increased staff numbers. Course Overview: This comprehensive 3-day course equips learners with the knowledge and abilities to handle first aid situations in various sectors, including factories, construction, security, sports, and outdoor pursuits. Aligned with Health and Safety Regulations, the training covers the responsibilities of first aiders, incident assessment, and management of diverse medical emergencies. Course Content Highlights: Role and responsibilities of a First Aider Assessment and management of incidents First aid for unresponsive casualties, choking, and breathing difficulties Treatment for injuries to bones, muscles, joints, head, and spinal injuries First aid for burns, scalds, eye injuries, external bleeding, and shock Management of minor injuries, poisoning, anaphylaxis, and major illnesses Administering first aid for heart attacks, strokes, epilepsy, asthma, and diabetes Requirement: Participants must be aged 16 or above and bring a valid ID (Passport, Driving license, or ID card). Corporate or Group Booking: Benefit from special discounts on corporate or group bookings. Our experienced trainers can conduct on-site training tailored to your organization's needs. Course Assessment: The 3-day course consists of blended and face-to-face sessions with tutor support and practical demonstrations. Assessment includes a short exam and practical activities conducted during class. Course Fee: Enroll in the Level 3 Award in First Aid At Work (FAW) 3-day course for £199.99. How to Book: Book online via PayPal, debit/credit card, invoice, or bank transfer. Alternatively, visit our office or contact us by phone to secure your spot. Booking confirmation will be emailed instantly. Assistance Needed? For any inquiries or assistance, contact our dedicated team via phone or email. We're committed to supporting you throughout your learning journey. Contact us today for guidance and assistance.

Catheterisation Training
By Lead Academy
Do you wish to advance your professional development in healthcare by gaining the necessary skills and knowledge relevant to catheterisation? This comprehensive catheterisation training course is ideal for you! This course will help you learn about the entire process of catheterisation and the best practices for handling, inserting, and changing catheters securely. Whether you are a beginner or an experienced individual looking to advance your career in the healthcare sector, this course will set you up with the appropriate training required to excel in your role. This extensive catheter training online course covers the following credentials: Catheterisation process and methods Male and female catheterisation Various types of catheters Placement of the catheter after surgery Aseptic method Female and male urethral catheterisation Course Highlights Designed by healthcare professionals Accredited by the CPD Certification Recognised and Valuable Certification Self-Paced Online Theoretical Learning High-Quality E-Learning Study Materials Interactive practical training Remote Theoretical Learning Classroom-Based Catheterisation Training Course To ensure effective catheter training, our classroom-based learning is divided into two parts: Remote theoretical learning (online) We offer comprehensive theoretical instruction for the first portion of our catheterization training course, which you can finish at your own convenience. After successfully completing the courses and assessments, you can go on to the practical learning phase. Practical learning As part of the practical training, you will receive practical demonstrations and hands-on experience to justify your role. Who is this Catheterisation Training Course for? This catheterisation course is primarily aimed at: Health Visitors Healthcare professionals Nurses, midwives, pharmacists and doctors Freshers looking to begin their career in the healthcare sector Anyone looking to enhance their catheterisation skills Whether you are a fresher looking to kickstart your career in the field of healthcare and searching for catheterisation training for nurses or practising healthcare looking to enhance your catheterisation skills, this course will help you achieve your professional aspirations by all means. Aims and Learning Outcomes of this Catheterisation Training Course By the end of this catheterisation training course, you will: Grasp the entire process and methods of catheterisation Recognise the basic types of catheters Gain knowledge about the process of female and male urethral catheterisation Know where the post-procedure catheter should be placed Learn how to change and handle catheters properly Understand how to maintain catheter systems on a daily basis Know how to keep and maintain records Entry Requirements There are no academic entry requirements for this catheterisation training course, and it is open to students of all academic backgrounds. However, you are required to have a laptop/desktop/tablet or smartphone and a good internet connection. Assessment Method This Female and Male Catheterisation training course assesses learners through multiple-choice questions (MCQs). Upon successful completion of the modules, learners must answer MCQs to complete the assessment procedure. Through the MCQs, it is measured how much a learner could grasp from each section. In the assessment pass mark is 60%. Upon successful completion of the coursework and assessments, you will be directed to the practical learning part which will be conducted face-to-face. The practical training is taken during weekends to ensure maximum attendance. You will be required to attend the training from our London-based office which will be specified to you during enrolment. Upon successful demonstration of catheterisation, you will be awarded a certificate that is accepted by thousands of professional bodies and government regulators here in the UK and around the world. Course Curriculum 1. Introduction to Catheterisation 2. Anatomy and Physiology of Urinary System 3. Methods of Catheterisation 4. Size of Catheters 5. Reasons for Catheterisation 6. Causes and Types of Incontinence 7. Male Catheterisation Procedure 8. Female Catheterisation Procedure 9. Post Catheterisation Care 10. Removing an Indwelling Urethral Catheter 11. Risks Involved with an Indwelling Catheter 12. Infection Control and Prevention 13. Record Keeping 14. Conclusion Recognised Accreditation This course is accredited by continuing professional development (CPD). CPD UK is globally recognised by employers, professional organisations, and academic institutions, thus a certificate from CPD Certification Service creates value towards your professional goal and achievement. CPD certificates are accepted by thousands of professional bodies and government regulators here in the UK and around the world. Many organisations look for employees with CPD requirements, which means, that by doing this course, you would be a potential candidate in your respective field. Certificate of Achievement Competency Certificate and Certificate of Achievement from Lead Academy You will receive a competency certificate after successfully completing the Part 2 of the phlebotomy course, which serves as confirmation that you are qualified to function as a phlebotomist without the need for close supervision. Also, on successful completion of the phlebotomy course, you will be eligible to obtain a CPD accredited PDF and Hardcopy certificate of achievement as proof of your new skill. The certificate of achievement is an official credential that confirms that you successfully finished a course with Lead Academy.

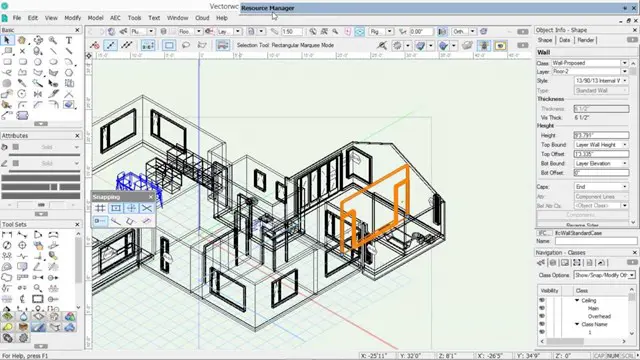
SketchUp Pro Training Course For Kitchen Designers
By ATL Autocad Training London
Who is this course for? SketchUp Pro Training Course For Kitchen Designers. This course is designed for kitchen designers aiming to elevate their skills in SketchUp Pro. Learn creating stunning kitchen worktops, cabinets, and designs tailored to perfection. Perfect your skills and bring 3d kitchen to life. Click here for more info: Website Duration: 6 hours. Method: 1-on-1, available in-person or Live Online sessions. Monday to Saturday between 9 am and 7 pm Alternatively, contact us at 02077202581 to book over the phone. Course Outline: SketchUp Pro Training Course For Kitchen Designers (6 hours) Module 1: Exploring 3D Warehouse for Appliance Selection Navigating 3D Warehouse for Appliance Models Selecting and Importing Appliances for Your Kitchen Design Module 2: Cabinetry Layout Introduction to Cabinetry Layout Planning and Arranging Cabinets for Functional Kitchens Module 3: Innovative Approaches to Cabinet Design Creative Strategies for Unique Cabinet Designs Incorporating Special Features and Functions Module 4: Creating Countertops and Sink Arrangements Designing Functional Countertops Integrating Sinks and Faucets Effectively Module 5: Enhancing Kitchen Spaces with Backsplashes Utilizing Backsplashes for Aesthetic and Practical Purposes Designing Custom Backsplash Solutions Module 6: Designing Efficient Range Hoods Range Hood Design Principles Ensuring Proper Ventilation and Aesthetics Module 7: Crafting Upper Cabinet Solutions Maximizing Storage and Style with Upper Cabinets Incorporating Upper Cabinet Design Variations Module 8: Perfecting Crown Moulding Applications Enhancing Cabinet and Wall Transitions Achieving a Polished Look with Crown Moulding Module 9: Optimizing Kitchen Islands Designing Functional and Stylish Kitchen Islands Utilizing Islands for Storage and Dining Module 10: Elevating the Ambiance with Wall Design Details Enhancing Walls with Creative Design Elements Adding Character and Texture to Kitchen Spaces Module 11: Ensuring Precise Dimensions Mastering Dimensioning Techniques Achieving Accuracy in Your Kitchen Design Module 12: Mastering Shadows and Style Customization Controlling Shadows for Realistic Renderings Customizing Styles to Enhance Visualization Upon completing the SketchUp Pro Training Course for Kitchen Designers, you will: Master SketchUp for comprehensive kitchen design. Efficiently select appliances from 3D Warehouse. Plan innovative cabinet layouts. Design functional countertops and sinks. Enhance kitchens with stylish backsplashes. Create efficient range hoods. Maximize storage with upper cabinets. Perfect crown moulding applications. Optimize kitchen islands. Elevate ambiance with wall design details. Ensure precision in dimensions. Customize realistic renderings. Job Opportunities: Kitchen designers can pursue roles such as Kitchen Designer, Interior Designer, Cabinet Designer, CAD Specialist, 3D Modeler, Home Renovation Consultant, and more. Freelance opportunities are also available. Skills Acquired: Advanced Kitchen Modeling: Master the art of creating detailed kitchen worktops, cabinets, and layouts using SketchUp Pro. Texture Mapping and Material Application: Learn to apply realistic textures and materials to enhance kitchen designs. Lighting and Rendering Techniques: Explore lighting setups and rendering tools for lifelike visualizations. Collaborative Design: Enhance skills in collaborative design, enabling seamless communication with clients and colleagues. Job Opportunities: Kitchen Designer: Design custom kitchen spaces, work closely with clients, and bring their visions to life. Interior Designer: Specialize in kitchen interior design, working with a focus on functionality and aesthetics. Furniture Designer: Create bespoke kitchen furniture pieces and optimize space for practical use. Freelance Kitchen Design Consultant: Offer specialized kitchen design services on a freelance basis, catering to various clients and projects. Personalized Learning! Why Choose Us? Tailored One-on-One Training: Exclusive coaching from skilled architects and designers, in-person or live online, Monday to Saturday. Customized Tutorials: Enhance your skills with tailored video tutorials to take home. Comprehensive Learning: Receive digital resources for thorough understanding and revision. Free Ongoing Support: Enjoy continuous assistance via phone or email, ensuring your success beyond the course. Flexible Syllabus: Adapted to your needs for focused learning. Official Certificate: Validate your expertise with our prestigious certification. Why Us? Supported Individual Learning: Personalized guidance, homework assignments, and post-course assistance for mastery. Personal Attention: Experience one-on-one learning for focused and confident progress. Financial Flexibility: Explore payment options tailored to your budget. Expert Instructors: Learn from industry experts dedicated to your success.

Coaching sessions
By Sinéad Robertson
Simply speaking, Life Coaching is about raising awareness of how we can move from A to B. Sometimes we don't know what place B is, and we can use Coaching to gain clarity on what B looks and feels like. Life Coaching is non-directive, which means as a Coach, I help you to unlock your potential rather than tell you what to do. The experience creates a space for accountability and motivation to take positive action. My role as your Holistic Coach is to provide you with a safe space for you to ground, explore & embrace your emotions, claim your personal power to design & live your dream life.

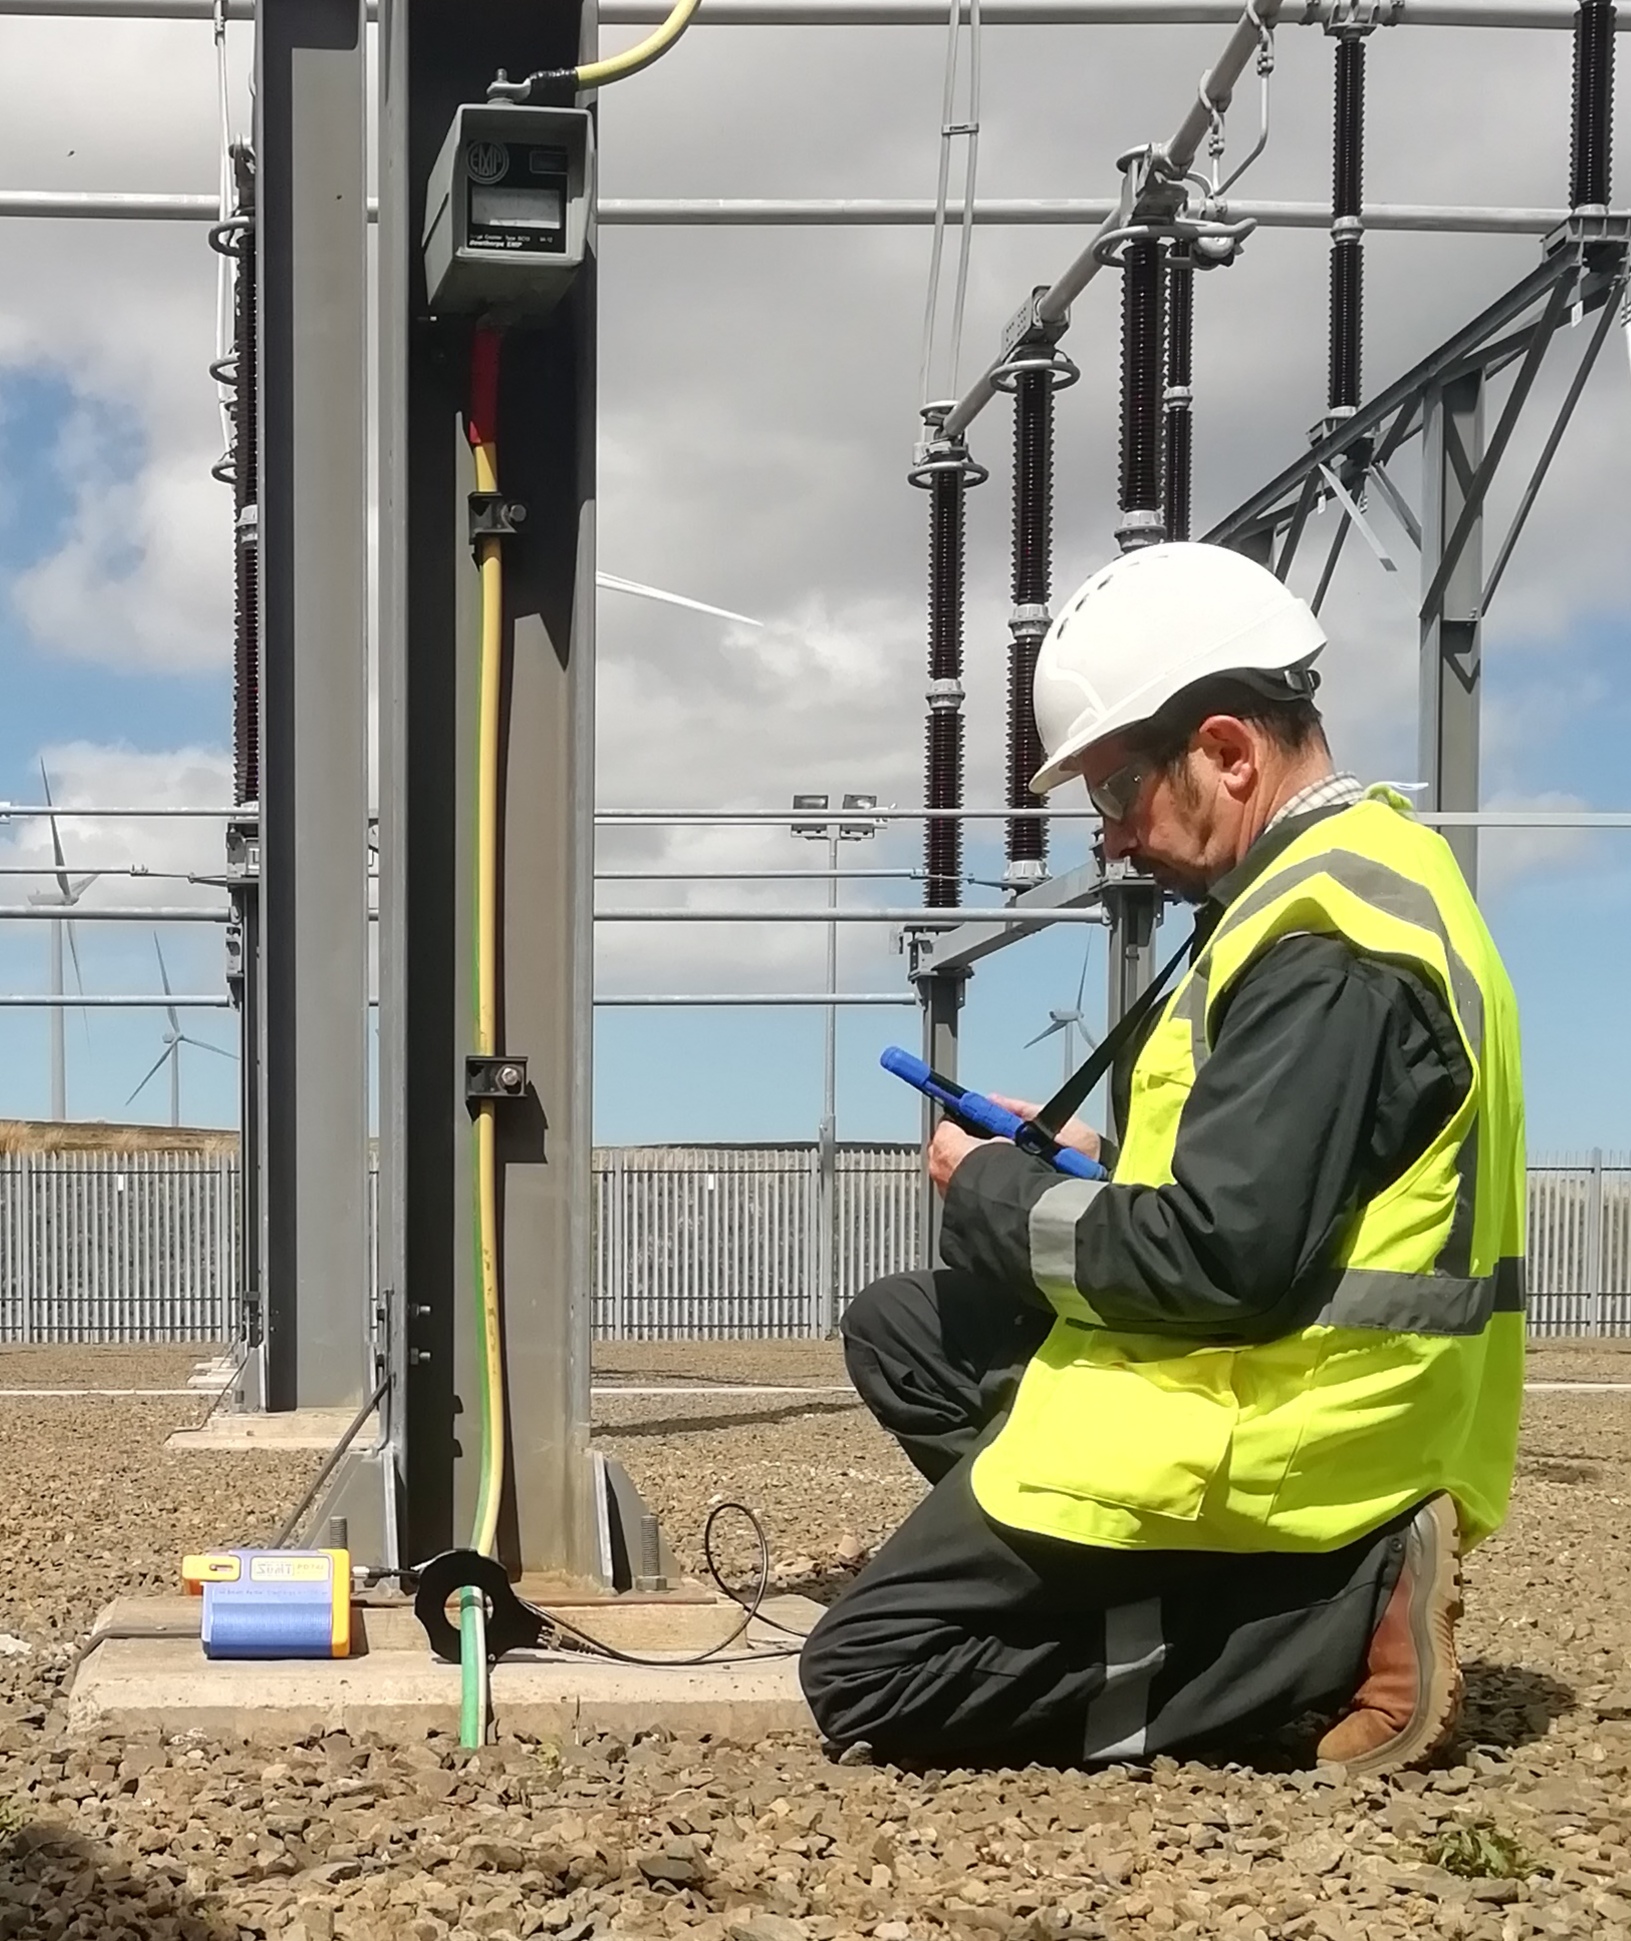
Partial Discharges - Fundamentals, Dectection, Diagnostics
By High Frequency Diagnostics and Engineering (HFDE) Ltd
Customised courses ranging from 1 hour online to a full day in person at your premises with hands-on experience and demonstrations. Please contact Martin Judd for details of our training options, delivery methods and pricing.
Adobe InDesign and Photoshop Training Courses 1-2-1
By Real Animation Works
Face to Face training customised and bespoke. One to One Online or Face to Face
Vray for Maya Essentials Course
By ATL Autocad Training London
Why Choose Vray for Maya Essentials Course? Learn V-Ray's power for stunning 3D visualizations. In design and architecture, it's essential for effective idea communication, offering an intuitive interface and efficient rendering, ensuring faster images and animations. Click here for more info: Website Duration: 10 hours Training Approach: 1-To-1 Sessions. Schedule: Customize your schedule by pre-booking a convenient hour of your choice, available Mon to Sat between 9 am and 7 pm. Module 1: Introduction to Vray for Maya (2 hours) Understand the significance of Vray and its integration with Maya. Installation and setup of Vray for Maya. Familiarize with the Vray interface, workflow, and materials overview. Module 2: Lighting with Vray (2 hours) Explore various lighting techniques in Vray. Understand different Vray lights and their settings. Master the creation and control of Vray sun, sky, dome lighting, and IES lights. Learn efficient lighting workflows with Vray. Module 3: Vray Camera (2 hours) Grasp Vray camera settings and exposure control. Work with Vray depth of field and create camera animations. Understand Vray frame buffer functionalities. Module 4: Vray Materials (2 hours) Explore Vray materials, realistic material creation, and custom material libraries. Utilize Vray material overrides for enhanced customization. Module 5: Vray Rendering and Post Production (2 hours) Dive into Vray rendering settings and techniques for both images and animations. Enhance post-production skills using Photoshop and Vray frame buffer. Learn the art of compositing Vray render elements and utilizing Vray denoiser. Additional Topics Covered: Global Illumination in VRay: Exploring techniques such as Irradiance Map, Light Cache, Quasi-Monte Carlo/Brute Force, and Environmental Lighting. Image Sampling: Understanding Fixed, Adaptive QMC, and Adaptive Subdivisions for optimal rendering quality. VRay Lights: Mastering Plane Light, Dome Light, Sphere Light, VRay Sun, VRay Shadow, Image-Based Lighting HDRI, and Object-Based Lighting. VRay Camera: Manipulating Focal Length, Film Speed, and Shutter Speed for precise camera control. VRay Materials: Customizing Diffuse Color, Reflection, Refraction, and Blurry Reflections for lifelike material creation. Rendering Test Scenes: Practical application by rendering interior and exterior scenes for a hands-on learning experience. V-Ray-Maya Trial https://www.chaos.com Master Vray for Maya to create high-quality renders. Apply various lighting techniques for realistic and visually appealing scenes. Control Vray camera settings and create dynamic shots. Create and customize realistic Vray materials for 3D scenes. Optimize rendering settings for high-quality output. Enhance renders with post-production techniques in Photoshop. Establish an efficient workflow with Vray in Maya. Gain hands-on experience and access valuable resources for further practice. Vray Proficiency: Master Vray tools, interface, and workflows in Maya for advanced 3D visualization. Advanced Lighting Skills: Expertise in diverse lighting techniques, including Vray sun, sky, and IES lights. Camera Control: Proficient manipulation of Vray camera settings, exposure, and animations. Material Customization: Create and customize realistic materials, utilizing custom libraries and overrides. Rendering Excellence: Skills in rendering images and animations, post-production, and compositing techniques. Global Illumination Mastery: Understand advanced global illumination methods for realistic scene lighting. Potential Jobs: 3D Lighting Artist: Specialize in illuminating scenes for films, games, or animations. 3D Visualization Specialist: Create realistic architectural or product visualizations. 3D Rendering Specialist: Focus on rendering high-quality images and animations. 3D Animator: Animate scenes within the context of realistic lighting. 3D Modeler: Develop detailed 3D models, ensuring realistic rendering. Visualization Consultant: Provide expert advice on visualization techniques. Freelance Vray Artist: Work independently on diverse projects, rendering scenes with exceptional realism. Expert Guidance: Receive guidance from certified tutors and industry professionals, benefitting from their deep expertise and practical insights. They will share valuable tips and techniques to enhance your rendering skills. Flexible Learning: Choose between in-person or live online sessions, tailored to your preference and location. Schedule training at your convenience, available Monday to Sunday, 9 am to 8 pm. Lifetime Assistance: Access lifetime email support, ensuring continuous guidance even after course completion. Our dedicated team is committed to addressing your queries and helping you overcome challenges. Unlock Your Potential: Enroll in our V-Ray for Maya Training Course to harness the power of this industry-leading rendering engine. Elevate your visual effects and animation skills, unleashing your creativity with stunning and lifelike renders.