- Professional Development
- Medicine & Nursing
- Arts & Crafts
- Health & Wellbeing
- Personal Development
Autodesk 3ds max Project based Training 1-2-1 Live online or Face to Face.
By Real Animation Works
3ds max face to face training customised and bespoke. Live online or Face to Face.

Lumion Training Course
By ATL Autocad Training London
Who is this coure for? Lumion Training Course. Whether you're an architect, designer, 3D artist, or simply someone passionate about crafting captivating architectural visualizations, this course equips you with the essential skills to harness Lumion as a potent tool within your creative process. Click here for more info: Website Duration: 10 Hours Customize your training. Choose any hour from Mon to Sat, 9 a.m. to 7 p.m. Call 02077202581 or WhatsApp at 07970325184 to book. Lumion 3D Course Outline Module 1: Introduction to Lumion 3D Explore Lumion 3D's Features and Navigate the Interface. Master Efficient Workflow with Shortcut Keys. Customize Settings for Optimal Performance. Module 2: 3D Models and Materials Import 3D Models in Various Formats. Apply and Fine-Tune Materials. Create Procedural Materials and Achieve Glass Effects. Troubleshoot Common Issues. Module 3: Building Projects in Lumion Craft Scenes and Sculpt Terrain. Enhance Realism with Alpha and Height Maps. Module 4: The 3D World Manage Multiple 3D Objects and Their Properties. Implement Grass and Scattering Elements. Module 5: Lighting in Lumion 3D Utilize Weather Settings for Dynamic Scenes. Master Lumion Lights, Interior and Exterior Illumination. Create 3D Reflections and Spotlight Effects. Module 6: Realistic Visualizations Integrate Special Effects like Fire, Smoke, and Fog. Achieve Realism with Camera Effects and Shadow Manipulation. Render Still Images and Dynamic Animations. Module 7: NPR Visualizations Create Non-Photorealistic Visualizations with Artistic Effects. Implement Unique Styles for Enhanced Visual Impact. Module 8: Artistic Effects in Lumion 3D Explore Conceptual Visualizations with Painting and Sketch Effects. Craft Cartoon Effects and Understand Perspective Concepts. Module 9: Animation in Lumion 3D Master Timing and Camera Techniques for Dynamic Shots. Compose Animation Clips and Incorporate Effects. Utilize Layers and Control Objects for Precise Animation. Module 10: Advanced Features Understand Import and Output Formats in Lumion. Expand Your Asset Library with the 3D Model Library. Integrate Animated Characters and Sound Effects. Maximize the Advanced Material Library's Potential. Control Environments and Weather for Dynamic Scenes. Efficient Scene Management and Movie Editing in Lumion 3D. For students, download Lumion at: Lumion for Students Download Lumion for Students https://lumion.com⺠Upon completing the Lumion 3D course, participants will: Master Lumion Tools: Navigate the interface, optimize settings, and use shortcuts efficiently. 3D Modeling and Materials: Import models, refine materials, troubleshoot, and enhance realism. Scene Crafting: Create detailed scenes, manage objects, and implement elements for lifelike environments. Lighting Mastery: Utilize weather settings, create reflections, and manage dynamic lighting. Visual Effects Integration: Add special effects, manipulate shadows, and create still images and animations. Artistic Visualization: Explore artistic effects, conceptual visualizations, and cartoon techniques. Advanced Animation: Master timing, camera techniques, and precise animation control. Advanced Features: Understand formats, expand asset libraries, and manage scenes efficiently. Effective Communication: Communicate design concepts effectively to clients and stakeholders. Independence in 3D Rendering: Gain expertise to create complex visualizations independently. Course Overview: What is Lumion? Lumion is specialized 3D rendering software designed for architects and designers. It enables the swift transformation of 3D design models, allowing application of materials, interior and exterior furnishing, and showcasing lighting and shadows without specialized training. Course Objectives: This course focuses on initiating Lumion projects, integrating environments, cameras, lighting, populating scenes, creating terrains, and producing animations. Expectations from the Course: By enrolling, you'll master high-quality render creation, enhance your portfolio, impress clients with top-tier visuals, and gain confidence to elevate your service rates. This course equips you with tools and skills to craft exquisite architectural renders, elevating your work significantly. Intended Audience: Architects, landscape architects, interior architects, civil engineers interested in 3D visualization, and students exploring the realm of 3D visualization. Course Benefits: Delve into Lumion's world-class rendering with speed and precision. This course emphasizes achieving superior quality and realism in the shortest rendering time. Whether you're an architect, interior designer, 3D visualization artist, or Lumion enthusiast, this course empowers you to create exceptional 3D render images. Essential assets, including 3D models and textures, are provided, allowing you to follow the step-by-step process at your own pace. Advantages of Personalized Training: Expertise in Real-Time Rendering: Gain in-depth mastery of Lumion, mastering its features for creating stunning real-time visualizations. Navigate the interface seamlessly and leverage powerful tools for immersive architectural experiences. Enhanced Design Presentations: Elevate design presentations with dynamic visualizations that effectively communicate concepts, lighting nuances, material details, and spatial relationships. Rich Asset Repository: Access a wide variety of high-quality assets, from vegetation to weather effects, enhancing realism and creating captivating scenes that engage viewers. Authentic Landscapes and Effects: Develop skills to create lifelike landscapes, atmospheric weather effects, and unique visual elements that add depth and intrigue to your projects. Flexible Learning Options: Choose between in-person or live online sessions, ensuring convenient and accessible learning tailored to your preferences. Additionally, access recorded lessons for self-paced review and revision. Continuous Support: Benefit from lifelong email support, allowing you to stay connected with instructors for ongoing learning and guidance, even after completing the course.


Power BI Introduction
By Underscore Group
Learn how to use this powerful tool to import and clean data and create some amazing visuals. Course overview Duration: 2 days (13 hours) Power BI Desktop is a powerful tool for working with your data. It enables you to import multiple data sources and create effective visualisations and reports. This course is an introduction to Power BI to get you started on creating a powerful reporting capability. You should have a good working knowledge of Excel and managing data before attending. Objectives By the end of the course you will be able to: Import data from multiple data sources Edit and transform data before importing Create reports Create different visualisations Create data models Build data relationships Use the drill down features Create measures Use the Power BI Service Build dashboards Use the mobile app Content Essentials Importing Data Power BI Overview Data sources Importing data Transforming Your Data Editing your data Setting data types Removing columns/rows Choosing columns to keep Setting header rows Splitting columns Creating Reports Creating and saving reports Adding pages Renaming pages Interactivity Refreshing your data Adding Columns Columns from example Custom columns Conditional columns Append Queries Importing folders Setting up and using append queries Creating Chart Visualisations Adding chart elements Choosing chart types Setting properties Setting values, axis and legends Using tooltips Visual filters Setting page and report filters Creating Tables, Cards, Gauges and Maps Adding table elements Adding maps Working with cards Working with matrices KPIs and Gauges Conditional Formatting Setting rules Removing conditional formatting Working with Data Models Merge Queries Setting up and using merge queries Merging in columns of data Creating a Data Model The data model Multiple data tables Connecting tables Building relationships Relationship types Building visuals from multiple tables Unpivoting Data Working with summary data Unpivoting data Using Hierarchies Using built in hierarchies Drill down Drill up See next level Expand a hierarchy Create a new hierarchy Grouping Grouping text fields Grouping date and number fields Creating Measures DAX functions DAX syntax Creating a new measure Using quick measures Using the PowerBI Service Shared workspaces My workspace Dashboards Reports Datasets Drill down in dashboards Focus mode Using Q&A Refreshing data Using Quick Insights Power BI Mobile App Using the Power BI Mobile App
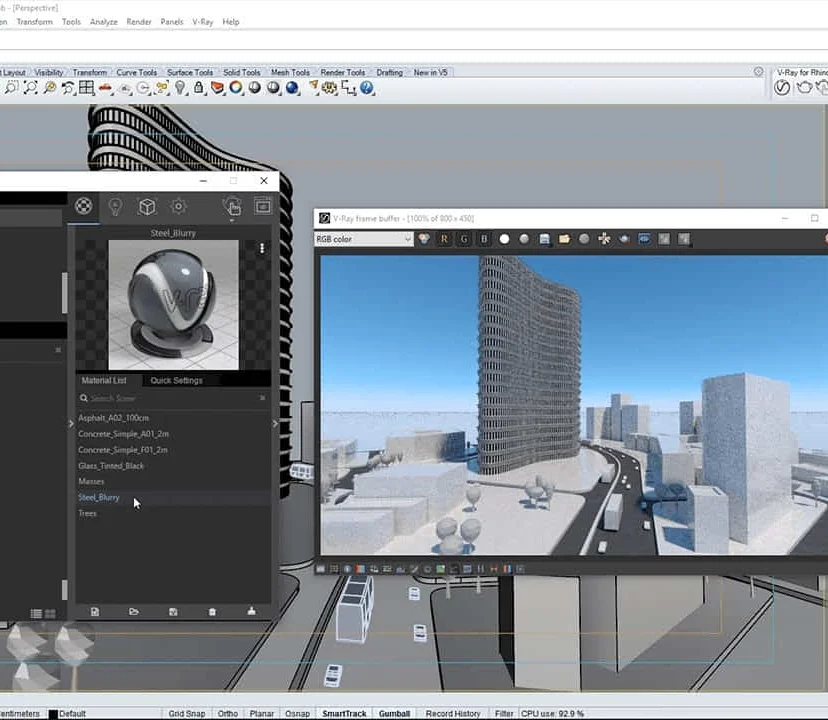
Complete Rhino 3D and V-Ray Training Program: Basic to Intermediate
By ATL Autocad Training London
Why Choose Complete Rhino 3D and V-Ray Training Program: Basic to Intermediate? Learn Rhino 3D and V-Ray for Rhino Basic to Intermediate Training Course. Suitable for beginners and experienced users alike, this program equips you with vital modeling and rendering skills. Opt for in-person or live online sessions. Click here for more info: Website Duration: 16 hours. Approach: 1-on-1 Sessions, Customized Content and Flexible Learning. Scheduling Flexibility: Tailor your sessions from Mon to Sat between 9 am and 7 pm. Course Title: Complete Rhino 3D and V-Ray Training Program: Basic to Intermediate - 16 Hours Session 1-2: Introduction to Rhino 3D Basics (2 hours) Understanding Rhino Interface: Navigating toolbars, command line, and properties panel. Basic Geometric Shapes: Creating lines, circles, and polygons with precision. Editing Tools: Mastering move, rotate, scale, and mirror commands. Session 3-4: Advanced Rhino 3D Modeling Techniques (2 hours) Curves and Surfaces: Delving into NURBS curves, creating complex surfaces, and blending techniques. Modeling Aids: Utilizing grids, snaps, and construction planes for accuracy. Organizing with Layers: Managing complex projects efficiently. Session 5-6: Introduction to V-Ray for Rhino (2 hours) V-Ray Interface: Understanding V-Ray toolbar and settings. Basic Lighting: Exploring different light types and their effects on scenes. Materials: Creating realistic materials, understanding diffuse, reflection, and transparency. Session 7-8: Intermediate V-Ray Concepts (2 hours) Advanced Lighting: Mastering HDRI lighting, creating natural outdoor lighting scenarios. Texture Mapping: Understanding UV mapping, applying textures seamlessly. Rendering Optimization: Reducing noise, optimizing settings for quicker, high-quality renders. Session 9-10: Rhino-V-Ray Integration (2 hours) Model Preparation: Optimizing Rhino models for V-Ray rendering. Advanced Material Manipulation: Creating complex materials, incorporating textures. Interactive Rendering: Real-time adjustments for immediate feedback. Session 11-12: Advanced Modeling Techniques in Rhino (2 hours) Advanced Surface Modeling: Creating organic shapes, advanced surfacing techniques. Precision Modeling: Advanced curve editing, filleting, and trimming. Working with 3D Text: Creating custom 3D text for design projects. Session 13-14: Scene Composition and Presentation (2 hours) Camera Settings: Understanding focal length, depth of field, and perspective. Scene Composition: Design principles, rule of thirds, focal points, and balance. Post-Processing: Enhancing renders in Photoshop, adding atmosphere and context. Session 15-16: Final Project and Portfolio Review (2 hours) Final Project Work: Participants apply learned skills to create a complex 3D scene. Instructor-led Critique: Feedback session for final projects. Portfolio Guidance: Tips for selecting the best works for a professional portfolio. By the end of this 16-hour course, participants will have a deep understanding of both Rhino 3D and V-Ray, allowing them to create intricate 3D models and produce high-quality, realistic renders for various applications. Upon completing the Rhino 3D and V-Ray Basic to Intermediate Training Course, participants can expect to achieve the following learning outcomes: Proficiency in Rhino 3D and V-Ray: Develop a comprehensive understanding of Rhino 3D and V-Ray interfaces, tools, and functionalities, enabling participants to navigate and utilize the software effectively. 3D Modeling Skills: Master the art of creating captivating 3D objects and shapes using Rhino 3D, including editing, transforming, and refining designs for diverse applications. Material Application: Acquire the ability to apply and customize materials and textures to enhance the visual appeal and realism of 3D models, elevating the quality of designs. Lighting Techniques: Gain expertise in utilizing V-Ray lighting tools, such as V-Ray lights and HDRI maps, to achieve striking lighting effects in rendered scenes. Rendering Excellence: Learn to optimize V-Ray render settings, control global illumination, and apply dynamic effects like depth of field and motion blur for high-quality and impressive renders. Advanced Modeling: Develop skills in advanced modeling techniques, including handling curves, surfaces, and solids, enabling participants to tackle complex design challenges. Lighting Mastery: Acquire the knowledge and expertise to create and adjust artificial lights, utilize the Sun and Sky system, and craft custom HDR images for realistic lighting setups. Seamless File Management: Understand various file formats for exporting and importing 3D models, facilitating efficient collaboration and preparation for 3D printing. Creative Problem-Solving: Enhance creative thinking and problem-solving abilities through hands-on practice and exploration of diverse design scenarios. Professional Presentation: Learn post-production techniques in Photoshop to enhance renders and create visually appealing design presentations for effective communication. Continuous Learning: Access valuable resources and tips to encourage continuous learning and professional growth in Rhino 3D and V-Ray. Skills You'll Gain: Master Rhino 3D basics: Curves, surfaces, modeling aids, and precision techniques. Explore intermediate V-Ray concepts: Advanced lighting, material manipulation, and texture mapping. Understand Rhino-V-Ray integration for seamless 3D modeling and rendering workflows. Optimize render settings for high-quality output and reduced rendering times. Career Opportunities: Upon completing this program, you'll be prepared for various roles in the design and visualization industry, such as: 3D Modeler: Create detailed 3D models for diverse industries, including architecture and product design. Architectural Visualizer: Produce realistic architectural visualizations for presentations and marketing materials. Product Designer: Develop visually appealing product prototypes and visualizations for marketing and manufacturing. Visualization Specialist: Work in design studios, advertising agencies, or game development companies, creating immersive visual content. Freelance Designer: Offer your skills on platforms like Upwork or Fiverr, providing 3D modeling and rendering services to clients worldwide. Solidify Rhino 3D Expertise: Master foundational modeling skills, including intricate geometries and surface manipulation, establishing a robust foundation for your 3D design journey. Unlock V-Ray for Rhino: Explore the potential of V-Ray for Rhino, learning to create mesmerizing visualizations and achieve lifelike rendering results that bring vitality to your designs. Enhance Visual Appeal: Grasp advanced lighting techniques, material application, and texture methods to elevate the visual allure of your 3D creations, making them more immersive and authentic. Explore Advanced Concepts: Delve into optimizing rendering settings, post-production tactics, and efficient workflows, advancing your design proficiency to higher levels. Hands-On Experience: Engage in practical exercises and real-world projects, applying your skills in practical contexts to enrich your portfolio and showcase your capabilities effectively. Certification of Achievement: Receive a valuable Certificate of Completion, confirming your expertise in Rhino 3D and V-Ray for Rhino, enhancing your professional credibility as a skilled designer. Flexible Learning Paths: In-Person or Live Online: Opt for in-person sessions, fostering collaborative learning, or choose live online classes for convenience and accessibility, tailoring your learning experience to your preferences. Personalized Guidance: Regardless of your chosen format, benefit from tailored instruction and guidance, ensuring optimal learning outcomes and continuous support throughout the course.
3ds Max Character Animation Training Course
By ATL Autocad Training London
Who is this course for? 3ds Max Character Animation Training Course. Master character animation in our 3ds Max course. All levels welcome. Learn from certified tutors in flexible in-person or online sessions. Create unique 3D characters from scratch, gaining personalized techniques to fuel your creativity. Click here for more info: Website Duration: 20 hours Method: 1-on-1 personalized attention Schedule: Flexible 1-on-1 sessions. Schedule your sessions at your convenience, choosing any hour between 9 am and 7 pm from Mon to Sat. Course Title: 3ds Max Character Animation Workshop Duration: 20 Hours Course Overview: This workshop is meticulously crafted to instill the foundational principles of character animation utilizing 3ds Max. Whether you're a novice or possess some background in 3D modeling and animation, this course caters to your learning needs. You'll delve into the art of character rigging, grasp animation essentials, and employ advanced methods to breathe life into your characters. Course Outline: Module 1: Introduction to Character Animation Grasping animation principles Exploring 3ds Max animation tools Mastering character rig creation Understanding the intricacies of the timeline Module 2: Basic Animation Principles Embracing keyframe dynamics Crafting fundamental animation cycles Applying the 12 principles of animation Navigating the graph editor Utilizing ease-in and ease-out techniques Module 3: Advanced Animation Techniques Harnessing the power of the reaction manager Crafting non-linear animations Implementing inverse kinematics for dynamic movements Designing custom controllers Exploring expressions and scripts Module 4: Character Creation Sculpting a character model from scratch Grasping the nuances of topology Perfecting UV maps and texturing techniques Preparing characters for seamless rigging Module 5: Facial Animation Mastering facial animation principles Creating expressive blend shapes Utilizing morph targets for nuanced expressions Achieving flawless lip syncing Module 6: Body Animation Crafting seamless walk cycles Animating characters in motion Creating authentic and believable poses Employing character physics for lifelike movements Module 7: Advanced Character Animation Implementing motion capture data for realistic animations Leveraging CAT and Biped for intricate movements Understanding motion blur nuances Adding special effects for enhanced realism Fine-tuning rendering and outputting animations Module 8: Character Animation Projects Synthesizing knowledge into practical applications Creating a fundamental character animation Crafting a nuanced walk cycle Executing complex character animations Course Requirements: Access to a computer with 3ds Max installed Basic proficiency in computer operations Enthusiasm for delving into the world of character animation Course Goals: Upon completion, you will possess a profound understanding of character animation in 3ds Max. You'll be equipped with the expertise to create intricate, lifelike character animations using advanced techniques. Moreover, you'll gain the skills necessary to continue honing your craft, ensuring a solid foundation for your future endeavors in the realm of character animation. Upon successful completion of the 3ds Max Character Animation Workshop, participants will: Master Fundamental Principles: Understand the core principles of character animation, including keyframe dynamics, timing, and the 12 principles of animation, laying a strong foundation for advanced techniques. Proficient Software Usage: Navigate 3ds Max confidently, utilizing animation tools, character rigging techniques, and specialized editors for precise control over character movements. Advanced Animation Techniques: Apply advanced techniques such as non-linear animations, inverse kinematics, and custom controller design to create dynamic and realistic character movements. Facial Animation Mastery: Demonstrate expertise in facial animation by creating expressive blend shapes, morph targets, and achieving seamless lip syncing for realistic character emotions. Body Language Proficiency: Create fluid and natural body movements, including walk cycles, dynamic poses, and character motions, capturing the essence of lifelike animations. Special Effects Integration: Integrate special effects seamlessly into character animations, enhancing visual appeal and realism in the final output. Project Implementation: Apply acquired knowledge and skills in practical projects, including basic character animations, walk cycles, and complex character animations, demonstrating proficiency in real-world scenarios. Problem-Solving Skills: Develop problem-solving abilities related to character animation challenges, employing creative solutions to achieve desired results. Collaborative Skills: Engage in collaborative projects, demonstrating effective communication and teamwork while integrating animations into broader creative contexts. Portfolio Enhancement: Build a robust portfolio showcasing diverse character animations, reflecting both technical prowess and creative expression, essential for career advancement in the animation industry. Continued Learning: Acquire the skills and confidence necessary to pursue further learning and self-improvement in the field of character animation, enabling a continuous growth trajectory in the industry. Course Title: 3ds Max Character Animation Workshop Duration: 20 Hours Key Details: Course Focus: Comprehensive training in character animation using 3ds Max, covering fundamental principles, advanced techniques, facial animation, body language, special effects integration, and project-based learning. Audience: Ideal for beginners and individuals with some background in 3D modeling and animation, aiming to enhance their skills in character animation for industries such as animation studios, gaming, and film production. Instruction Method: Interactive, instructor-led sessions combining theoretical knowledge with hands-on practical exercises, fostering a dynamic learning environment. Flexible Learning Options: Participants can choose between in-person and live online sessions, accommodating diverse schedules and geographical locations. Certified Instructors: Experienced tutors and industry professionals with certification in 3ds Max and character animation, ensuring high-quality instruction and personalized guidance. Project-Based Learning: Engage in real-world projects, applying learned skills to create character animations, walk cycles, and intricate character movements, fostering practical expertise. Software Proficiency: Gain proficiency in 3ds Max, including animation tools, character rigging, and specialized editors, enabling participants to confidently navigate the software. Collaborative Learning: Opportunities for teamwork and collaborative projects, encouraging effective communication and networking within the class. Career Development: Build a diverse and impressive portfolio, receive guidance on industry best practices, and develop problem-solving skills crucial for a successful career in character animation. Post-Course Support: Access to resources, tutorials, and community forums, allowing participants to continue learning and stay updated with industry trends even after the course completion. Certification: Participants receive a certificate of completion, recognizing their proficiency in 3ds Max character animation, enhancing their professional credibility in the job market. By enrolling in this course, you'll enjoy the following advantages: Comprehensive Learning: Master the art of character animation in 3ds Max, covering fundamental concepts and advanced techniques. Certified Tutors and Industry Experts: Learn from experienced professionals with extensive knowledge of character animation, providing valuable insights. Personalized Instruction: Receive one-to-one training tailored to your specific learning needs, ensuring individual attention and effective progress. Flexible Learning Options: Choose between in-person or live online training, offering convenience and accessibility to suit your schedule. Recorded Lessons: Access recorded sessions to review content and reinforce your learning at your own pace and convenience. Lifetime Email Support: Benefit from ongoing assistance and guidance through email, even after completing the course. Free Career Advice: Tap into our industry expertise and receive valuable career guidance to excel in the field of character animation.

Specification writing (introduction) (In-House)
By The In House Training Company
This intensive one-day training programme has been developed to help those involved in producing specifications create high quality documents in an organised and effective way. The programme explains the primary purpose of specifications and the importance of understanding the context in which they are used. It focuses particularly on how to develop and structure content and write requirements that are clear and concise. The methods and techniques presented will provide a practical foundation course for those new to the topic whilst offering new insights to those with more experience. The objectives of the workshop are to: Review and discuss the role and purpose of specifications Present a structured approach for organising and producing specifications Explain each of the key steps involved in creating effective specifications Review some methods for assisting in defining requirements Explain how to define the scope and develop the structure for a specification Present methods to assist the writing and editing of specifications Review how specifications should be issued and controlled 1 Introduction Course objectives Review of participants' needs and objectives 2 Specifications in perspective The role and purpose of specifications The impact of specifications on commercial performance The qualities of an effective specification The five key steps of 'POWER' writing: prepare-organise-write-edit-release 3 Step 1: Preparing to write Defining the purpose the specification; integrating the specification and contract Deciding how to specify: when to specify in functional and technical terms Getting the right people involved at the right time; engaging stakeholders Applying procedures for writing, issuing and controlling specifications 4 Step 2: Organising the specification content Scoping the document: scope maps, check lists, structured brainstorming Clarifying requirements; separating needs and desires Dealing with requirements that are difficult to quantify Useful techniques: cost benefit analysis, Pareto analysis Deciding what goes where; typical contents and layout for a specification Creating and using model forms: typical sections and sub sections 5 Step 3: Writing the specification Identifying and understanding the readers needs Choosing and using the right words; dealing with jargon Important words; will, shall, must; building a glossary Using sentence structure and punctuation to best effect Understanding the impact of style, format and appearance Avoiding common causes of ambiguity; being concise and ensuring clarity 6 Step 4: Editing the specification Why editing is difficult; how to develop a personal editing strategy Key areas to review: structure, content, accuracy, clarity, style and grammar Editing tools and techniques 7 Step 5: Releasing and controlling the specification Key requirements for document issue and control Final formatting and publication issues; document approval Requirements management: managing revisions and changes 8 Course review and action planning What actions should be implemented to improve specifications? Conclusion

Project management 'masterclasses' (In-House)
By The In House Training Company
Masterclasses? Refreshers? Introductions? It depends what you're looking for and where you want to pitch them, but here are six tried-and-tested highly focused sessions that organisations can take individually or as a series, to help develop their teams' project management capabilities one topic at a time. Objectives for each individual session are set out below, as part of the session outlines. Taken together, as a series, however, these modules are an ideal opportunity to develop your team's levels of project management capability maturity, whether that's by introducing them to the basic principles, refreshing them on best practice, or giving them the opportunity to really drill down into a specific area of challenge in your particular operating environment. Session outlines 1 Stakeholder management Session objectives This session will help participants: Understand why stakeholders matter to projects Be able to identify and engage stakeholders Be able to categorise stakeholders by their significance 1 Key principles What does 'stakeholder' mean - in theory? What does this mean in practice? Why stakeholders matter Consequences of missing stakeholders The stakeholder management process:IdentifyAssessPlanEngage 2 Identifying stakeholders Rapid listing CPIG analysis PESTLE analysis Drawing on the knowledge and experience of others Other ways to identify stakeholders 3 Assessing stakeholders Which stakeholders are significant? Stakeholder radar Power-interest maps Power-attitude maps 4 Planning The adoption curve Dealing with obstacles Who should engage which stakeholder? How should the project's organisation be structured? How will communication happen? 5 Engaging Seven principles of stakeholder engagement 2 Requirements and prioritisation Session objectives This session will help participants: Understand how clarity of requirements contributes to project success Use different techniques for prioritising requirements Agree requirements with stakeholders Manage changes to requirements 1 Understanding and managing stakeholder needs and expectations What are 'requirements'? What is 'requirements management'? Sources of requirements - and the role of stakeholders Are stakeholders sufficiently expert to specify their needs? Do they understand the detail of what they want, or do they need help to tease that out? What do stakeholders want to achieve? Working within constraints Prioritising requirements - three techniques 2 MoSCoW prioritisation 'Must have', should have', 'could have, 'won't have this time' When to use MoSCoW 3 The Kano Model Customer satisfaction - 'attractive' and 'must-be' qualities When to use Kano 4 Value-based prioritisation Understanding risk v value Using risk v value to prioritise features and schedules 5 Agreeing requirements Perfect v 'good enough' Establishing acceptance criteria Requirements traceability Agreeing project scope 6 Changing requirements Why requirements change Why change control matters Impact on projects A formal change control process Paying for change - managing change for different types of project 3 Estimating Session objectives This session will help participants: Understand the different purposes estimates satisfy Be able to use different estimating techniques Understand how to achieve different levels of accuracy 1 Key principles What's an estimate? Informed guesswork What needs to be estimated? Costs, resources, effort, duration Tolerances Precision v accuracy 2 Estimating through the lifecycle Start Plan Do 3 Early estimates Comparative ('analogous') estimating Parametric estimating Using multiple estimating techniques 4 Bottom-up estimating Bottom-up ('analytical') estimating Pros Cons 5 Three-point estimating Three-point ('PERT': Programme Evaluation and Review Technique) estimating Uncertainty and the range of estimates Calculating a weighted average Three-point with bottom-up 4 Scheduling Session objectives This session will help participants: Understand how to create a viable schedule Be able to use different forms of schedule Understand the concept of the critical path 1 Key principles The planning horizon Rolling wave planning Release planning 2 Viable scheduling Creating a viable schedule Define the scope Sequence the work Identify the risks and build in mitigations Identify the resources Estimate the effort and durations Check resource availability Refine until a workable schedule is produced 3 Critical path analysis The critical path Network diagrams Sequence logic Practical application:Network diagram with estimated durationsThe 'forward pass'The 'backward pass'Calculating total floatIdentifying the critical pathCalculating free float Gantt charts 5 Risk and issue management Session objectives This session will help participants: Understand the difference between risks and issues Be able to identify and assess risks Understand ways of mitigating risks Manage issues 1 Key principles Understanding risk Threats and opportunities The risk management processPreparation - proactive risk managementThe process - identify, assess, plan, implementStakeholder communication Roles and responsibilities Risk management strategy The risk register Risk appetite 2 Risk identification Brainstorming Interviews Assumption analysis Checklists 3 Risk assessment and prioritisation Probability, impact and proximity Triggers Qualitative risk assessment Qualitative impact assessment Qualitative probability assessment Probability / impact grid Bubble charts Risk tolerance 4 Planning countermeasures To mitigate or not to mitigate? Categories of risk response Avoid and exploit Reduce and enhance Transfer Share Accept Contingency Secondary risks 5 Issue management What is an issue? Tolerances Issues and tolerances The PRINCE2 view of issues Ownership of issues An issue management process Issue register 6 Budgeting and cost control Session objectives This session will help participants: Understand what to include in a budget - and why Choose - and use - the appropriate estimating technique Align the budget with the schedule Understand how to monitor spend and control costs Trouble-shoot effectively to get projects back within budget Session format Flexible. The session can be tailored to the participants' average level of project management maturity - a 60-minute session (delivered virtually) is an effective introduction. A 90-minute session allows for more in-depth treatment. A half-day session (face-to-face or virtual) gives time for a more challenging workshop, particularly to discuss specific cost control issues with any of the participants' current projects. 1 Where is the money coming from? Can we pay from revenue? Do we need to borrow? How long will the project take to pay back? The lifecycle of the budget Through-life costs Stakeholder involvement 2 Estimating costs Reminder: the relationship between estimates Reminder: possible estimating techniques What do we need to estimate?PeopleEquipmentMaterialsFacilities and operating costsWork package estimateEstimated project costs Estimating agile projects 3 Aligning budget and schedule Scheduling and financial periods Spreading the budget 4 Reserves and agreeing the budget Contingency reserve Management reserve Agreeing the budget 5 Cost control Planned spend over time Actual spend over time Work completed over time Evaluating different scenarios: delivery v spend 6 Trouble-shooting Why are we where we are? What has caused the project to spend at the rate it is? Why is it delivering at the rate it is? What are the root causes? What can we do about it?
Power BI - introduction to intermediate (2 days) (In-House)
By The In House Training Company
This course starts with the basics then moves seamlessly to an intermediate level. It includes a comprehensive yet balanced look at the four main components that make up Power BI Desktop: Report view, Data view, Model view, and the Power Query Editor. It also demonstrates how to use the online Power BI service. It looks at authoring tools that enables you to connect to and transform data from a variety of sources, allowing you to produce dynamic reports using a library of visualisations. Once you have those reports, the course looks at the seamless process of sharing those with your colleagues by publishing to the online Power BI service. The aim of this course is to provide a strong understanding of the Power BI analysis process, by working with real-world examples that will equip you with the necessary skills to start applying your knowledge straight away. 1 Getting started The Power BI process Launching Power BI Desktop The four views of Power BI Dashboard visuals 2 Connecting to files Connect to data sources Connect to an Excel file Connect to a CSV file Connect to a database Import vs. DirectQuery Connect to a web source Create a data table 3 Transforming data The process of cleaning data Column data types Remove rows with filters Add a custom column Append data to a table Fix error issues Basic maths operations 4 Build a data model Table relationships Manage table relationships 5 Merge queries Table join kinds Merging tables 6 Create report visualisations Creating map visuals Formatting maps Creating chart visuals Formatting chart Tables, matrixes, and cards Control formatting with themes Filter reports with slicers Reports for mobile devices Custom online visuals Export report data to Excel 7 The power query editor Fill data up and down Split columns by delimiter Add conditional columns Merging columns 8 The M formula Creating M functions Create an IF function Create a query group 9 Pivot and unpivot tables Pivot tables in the query editor Pivot and append tables Pivot but don't summarise Unpivot tables Append mismatched headers 10 Data modelling revisited Data model relationships Mark a calendar as a date table 11 Introduction to calculated columns New columns vs. measures Creating a new column calculation The SWITCH function 12 Introduction to DAX measures Common measure categories The SUM measure Adding measures to visuals COUNTROWS and DISINCTCOUNT functions DAX rules 13 The CALCULATE measure The syntax of CALCULATE Things of note about CALCULATE 14 The SUMX measure The SUMX measure X iterator functions Anatomy of SUMX 15 Introduction to time intelligence Importance of a calendar table A special lookup table The TOTALYTD measure Change year end in TOTALYTD 16 Hierarchy, groups and formatting Create a hierarchy to drill data Compare data in groups Add conditional formatting 17 Share reports on the web Publish to the BI online service Get quick insights Upload reports from BI service Exporting report data What is Q&A? Sharing your reports 18 Apply your learning Post training recap lesson