- Professional Development
- Medicine & Nursing
- Arts & Crafts
- Health & Wellbeing
- Personal Development
Adult Lessons at Willow Lodge Swimming Pool
By Baby Sharks
Every Adult Swimming teacher is highly qualified in teaching swimming, SE Level 2, a Lifeguard Qualification, First Aid, Certified in Safeguarding Adults and current DBS checked. We simply know and love our job and programme, We are proud to be one of the best swim schools in your area.
OneNote
By Underscore Group
Learn how to use OneNote to create, organize and populate electronic notebooks. Course overview Duration: 4 hours OneNote is a digital notebook and can be a great way to easily take notes. Whether for meetings, on training courses or to help with to do lists. It works very much like it’s paper copy equivalent but, of course, with lots of enhanced features. Its integration with Outlook and the other office applications means you can easily take notes and link them to documents meeting details and then email them out. You can even add audio and video notes as reminders. Objectives By the end of the course you will be able to: Create and manage notebooks Add contents Tag and prioritise content Create notes from other applications Create To Do Lists and integrate into Outlook Content Using OneNote Creating notebooks Creating sections and pages Formatting pages Using page templates Creating page templates Reordering sections and pages Deleting sections and pages Creating OneNote content Adding text Bullet lists Adding tables Adding images Adding drawings Adding links Adding audio and video notes Tagging Tagging Creating custom tags Creating to-do lists Searching and filtering for tags Notes Creating quick notes Filtering them in OneNote notebooks Linked notes Outlook integration Linking to tasks in Outlook Flagging notes for follow up Inserting Outlook meeting content Taking minutes Emailing OneNote pages Send emails to OneNote


Accounting Courses | Total Accounting | CPD Training
By Osborne Training
Total Accounting Courses It is a comprehensive practical accountancy training programme designed to build the bridge between knowledge and practical aspects of accounting and tax. With this programme various modules of tax and accounting are covered as well as Computerised based Accounting & Payroll. After completion of the modules you will have the chance to get hands on practical work experience which will open the door for lucrative Accounting, Tax & Payroll sector. Duration Accountancy Training: 10-12 Weeks (Weekdays/weekend/Evening) Accounting Work Experience 3 Months after the training You can start anytime of the year. The training takes place once each week. Once you finish your training modules then you can start job placement. What accounting jobs will I qualify for? Tax advisor Tax consultant Payroll Consultant Finance Officer Financial Accountant In these roles, you could earn up to £42,000 per annum (source: reed Salary Checker, UK Only). Benefits for Trainees Completion of this training will open new doors to exciting careers, as well as extending current skills if you are currently employed Free Job Placement(optional) Start your own accountancy Practice Work in a wide range of businesses Update your knowledge on tax and accountancy Improve your employability prospects A career path into tax and accountancy Ideal Continuing Professional Development course Gain a qualification to boost your CV Start your training soon without having to wait long for the new term to begin Free Tablet PC when paying in full upfront Gain Verifiable CPD Units Accounting Courses Contents Advanced Excel Bookkeeping VAT Training - Preparation and Submission Personal Tax Return Training Company Accounting and Tax Training Sage 50 Accounting Training Sage Payroll Training Accounting work experience (optional)
Control of contractors (In-House)
By The In House Training Company
If your organisation manages contractors then your staff need to understand the health and safety issues. This course is the answer. The expert trainer will set out clearly the legal responsibilities of all relevant parties and explore the practical application of these responsibilities with the course participants. The course will then examine the issues associated with the planning of work to be contracted out and the evaluation, selection, control and monitoring of contractors engaged to undertake the work. Although the main focus is on health and safety, the course will also explain how health and safety issues need to be integrated into your organisation's functional management processes to ensure effective control of contractors. The course will consider all types of contracted activities, including construction and maintenance, cleaning, security, plant installation, etc. This programme will give participants: A clear understanding of the organisation's legal responsibilities for managing contractors The information they need to assess the competence of contractors A practical understanding of risk assessment principles and the transfer of risk to contractors A step-by-step guide to the key aspects of managing contractors in practice, covering:Planning of the workSelecting contractorsHandover prior to work commencementDuring the workReviewing the work on completion Practical guidance on the integration of health and safety controls into organisational procedures for contractor management 1 Introduction Who are contractors? Why manage contractors? Different types of contractors Costs of poor contractor performance 2 Overview of health and safety law and liability Health and safety law and statutory duties Relevance of civil and criminal law Enforcement and prosecution 3 Relevant legislation for controlling contractors Health and Safety at Work Act 1974 Management of Health and Safety at Work Regulations 1999 Construction (Design and Management) Regulations 1994 (as amended, 2007) Other relevant legislation Contract law 4 Managing contractors in practice Exercise - how well is it happening? The objectives Five step approachPlanning of the workSelecting contractorsHandover prior to work commencementDuring the workReviewing the work on completion 5 Planning the work Scope and extent Risk assessment Interface and other activities Who controls what? Contract arrangements 6 Selecting the right contractor(s) Locating contractor organisations Selection the right contractors Assessing contractor competence Approved lists/frameworks Tender process 7 Pre-work commencement Co-ordination and co-operation Exchange of information Contractor risk assessments and method statements Permits to work Case study exercise 8 During contract work Communication and liaison Supervision and inspection of the work Inspection and reporting procedures Security issues Facilities and access 9 Reviewing work on completion Why, what and how? Achieving continuous improvement in contractor performance 10 Questions, discussion and review

Presentation skills for salespeople (In-House)
By The In House Training Company
We've all sat through far more bad presentations than good ones, but knowing what 'good' looks like is easier than successfully replicating it. Sales presentations are a performance and, as salespeople, fluffing our lines can cost us a lot more than hurt pride. Having discovered and understood the specific needs and burning issues our prospect has, then this course will help any salesperson avoid dropping the ball and instead wowing their prospects with a high-impact, tailored and compelling case for purchase. This course will help participants: Prepare mentally and physically for stand-up presentations Use voice modulation and bullet-pointing to demand attention Avoid boring their prospects Master the do's and don'ts of PowerPoint Deal more effectively with technical hitches and prospect's interruptions Use eye contact and engagement to avoid prospects 'tuning out' Deploy best practice essentials for presenting with colleagues Steer through the toughest Q&A 1 Preparing your presentation Mindset Knowing your objective(s) Vocal warm-up techniques Assembling pre-agreed benefits Time management Room set-up Technical preparation 2 How to open your presentation Vocal energy Summary and agreement of prospect's needs How to have posture and confidence Use of humour What to do with those dreaded hands Confident v non-confident body language 3 How to get and keep people's attention Bullet pointing Linking benefits to specific, stated needs Practical exercise - formulating and delivering tailored benefits Being selective with features Third party reinforcement and case studies 'Watering the garden' eye contact technique Practical exercise - participants practise 'sharing out' eye contact to audience How to handle a prospect's negative body language Handling interruptions 4 Presenting in groups Credentialing all participants Role delineation for group presentations Edifying other participants' messages - do's and don'ts How to maintain energy when not speaking Practical exercise - good and bad practice when not speaking Teamwork in Q&A sessions How to hand over professionally 5 PowerPoint do's and don'ts Use of visual aids Good and bad PowerPoint slides How to make PowerPoint work for you Classic PowerPoint errors Avoiding and handling technical problems Good and bad flipchart practice 6 Closing and / or achieving next action steps Power of summary Good Q&A practice Handling objections Practical exercise - handling objections on one's feet Creating consensus among prospect panel What to do when prospects disagree with each other When to trial close How to close on next action steps 7 Wrap-up Key learning points from each participant Action steps to be implemented on next presentations
Finance for the non-accountant (In-House)
By The In House Training Company
No-one in business will succeed if they are not financially literate - and no business will succeed without financially-literate people. This is the ideal programme for managers and others who don't have a financial qualification or background but who nonetheless need a greater understanding of the financial management disciplines essential to your organisation. This course will give the participants a sound understanding of financial reports, measures and techniques to make them even more effective in their roles. It will enable participants to: Overcome the barrier of the accountants' strange language Deal confidently with financial colleagues Improve their understanding of your organisation's finance function Radically improve their planning and budgeting skills Be much more aware of the impact of their decisions on the profitability of your organisation Enhance their role in the organisation Boost their confidence and career development 1 Review of the principal financial statements What each statement containsOutlineDetail Not just what the statements contain but what they mean Balance sheets and P&L accounts (income statements) Cash flow statements Detailed terminology and interpretation Types of fixed asset - tangible, etc. Working capital, equity, gearing 2 The 'rules' - Accounting Standards, concepts and conventions Fundamental or 'bedrock' accounting concepts Detailed accounting concepts and conventions What depreciation means The importance of stock, inventory and work in progress values Accounting policies that most affect reporting and results The importance of accounting standards and IFRS 3 Where the figures come from Accounting records Assets / liabilities, Income / expenditure General / nominal ledgers Need for internal controls 'Sarbox' and related issues 4 Managing the budget process Have clear objectives, remit, responsibilities and time schedule The business plan Links with corporate strategy The budget cycle Links with company culture Budgeting methods'New' budgetingZero-based budgets Reviewing budgets Responding to the figures The need for appropriate accounting and reporting systems 5 What are costs? How to account for them Cost definitions Full / absorption costing Overheads - overhead allocation or absorption Activity based costing Marginal costing / break-even - use in planning 6 Who does what? A review of what different types of accountant do Financial accounting Management accounting Treasury function Activities and terms 7 How the statements can be interpreted What published accounts contain Analytical review (ratio analysis) Return on capital employed, margins and profitability Making assets work - asset turnover Fixed assets, debtor, stock turnover Responding to figures EBIT, EBITEDIA, eps and other analysts' measure 8 Other key issues Creative accounting Accounting for groups Intangible assets - brand names Company valuations Fixed assets / leased assets / off-balance sheet finance
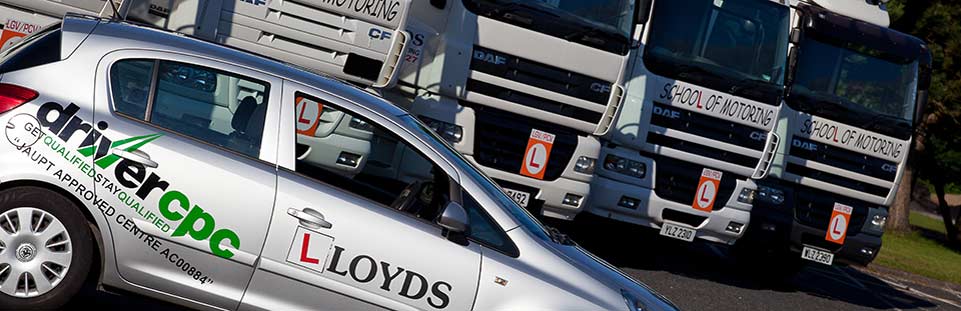
ADVANCED DRIVING COURSE
By Lloyds School Of Motoring
The Advanced Driving Course is designed to promote the principles of road safety and of enhanced driving methods. Training is delivered in cars or vans and encourages drivers to achieve high driving standards. This course is relevant to any driver wishing to hone their driving skills. There are many benefits; being a safer driver is just one aspect.
NVQ DIPLOMA IN DECORATIVE FINISHING – PAINTING AND DECORATING (CONSTRUCTION)
By Oscar Onsite
REFERENCE CODE 610/0054/0 COURSE LEVEL NVQ Level 3 THIS COURSE IS AVAILABLE IN Course Overview Who is this qualification for? This qualification is aimed at those who are involved in setting out and erecting masonry structures onsite working from drawings and specifications. The structures could be brick and blockwork or local materials. It is not expected that candidates working in this industry all do the same activities, so the qualification is structured to ensure that there is a high degree of flexibility within the units available and will allow employees from companies of all sizes and specialisms equal opportunity to complete. To provide this opportunity in addition to the mandatory units’ candidates will also be able to select optional units recognising specific skills What is required from candidates? Qualifications are now required to indicate the total qualification time (TQT), this is to show the typical time it will take someone to attain the required skills and knowledge to meet the qualification criteria, this qualification has a TQT of 610 hours. Qualifications are also required to indicate the number of hours of teaching someone would normally need to receive in order to achieve the qualification. These are referred to as Guided Learning Hours (GLH). The GLH for this qualification is 334. Group A MANDATORY UNITS Level Credit Confirming Work Activities and Resources for an Occupational Work Area in the Workplace Developing and Maintaining Good Occupational Working Relationships in the Workplace Confirming the Occupational Method of Work in the Workplace Conforming to General Health, Safety and Welfare in the Workplace Erecting and Dismantling Access/Working Platforms in the Workplace Preparing surfaces for painting and/or decorating in the workplace Applying surface coatings by brush and roller in the workplace Optional units Group A – Minimum of 1 unit must be achieved from this group Hang wallcoverings (standard and foundation papers) in the workplace Hanging non-standard width wallcoverings in the workplace 3 20 Optional units Group B-Minimum of 1 unit must be achieved from this group Applying coatings by the airless spray method in the workplace Summary of the: LEVEL 3 NVQ DIPLOMA IN DECORATIVE FINISHING-PAINTING AND DECORATING (CONSTRUCTION) Producing and applying complex stencils in the workplace 3 21 Hanging wallcoverings to complex surfaces in the workplace 3 32 Hanging wallcoverings (specialised paper) in the workplace 4 30 Assessment Guidance: Evidence should show that you can complete all of the learning outcomes for each unit being taken. Types of evidence: Evidence of performance and knowledge is required. Evidence of performance should be demonstrated by activities and outcomes, and should be generated in the workplace only, unless indicated under potential sources of evidence (see below). Evidence of knowledge can be demonstrated though performance or by responding to questions. Quantity of evidence: Evidence should show that you can meet the requirements of the units in a way that demonstrates that the standards can be achieved consistently over an appropriate period of time. Potential sources of evidence: The main source of evidence for each unit will be observation of the candidate’s performance and knowledge demonstrated during the completion of the unit. This can be supplemented by the following types of physical or documentary evidence: Accident book/reporting systems Photo/video evidence Safety records Work diaries Training records Timesheets Audio records Telephone Logs Job specifications and documentation Meeting records Delivery Records Records of toolbox talks Witness testimonies Equipment Correspondence with customers Prepared materials and sites Notes and memos Completed work Please Note that photocopied or downloaded documents such as manufacturers or industry guidance, H&S policies, Risk Assessments etc, are not normally acceptable evidence for these qualifications unless accompanied by a record of a professional discussion or Assessor statement confirming candidate knowledge of the subject. If you are in any doubt about the validity of evidence, please contact Oscar Onsite Academy

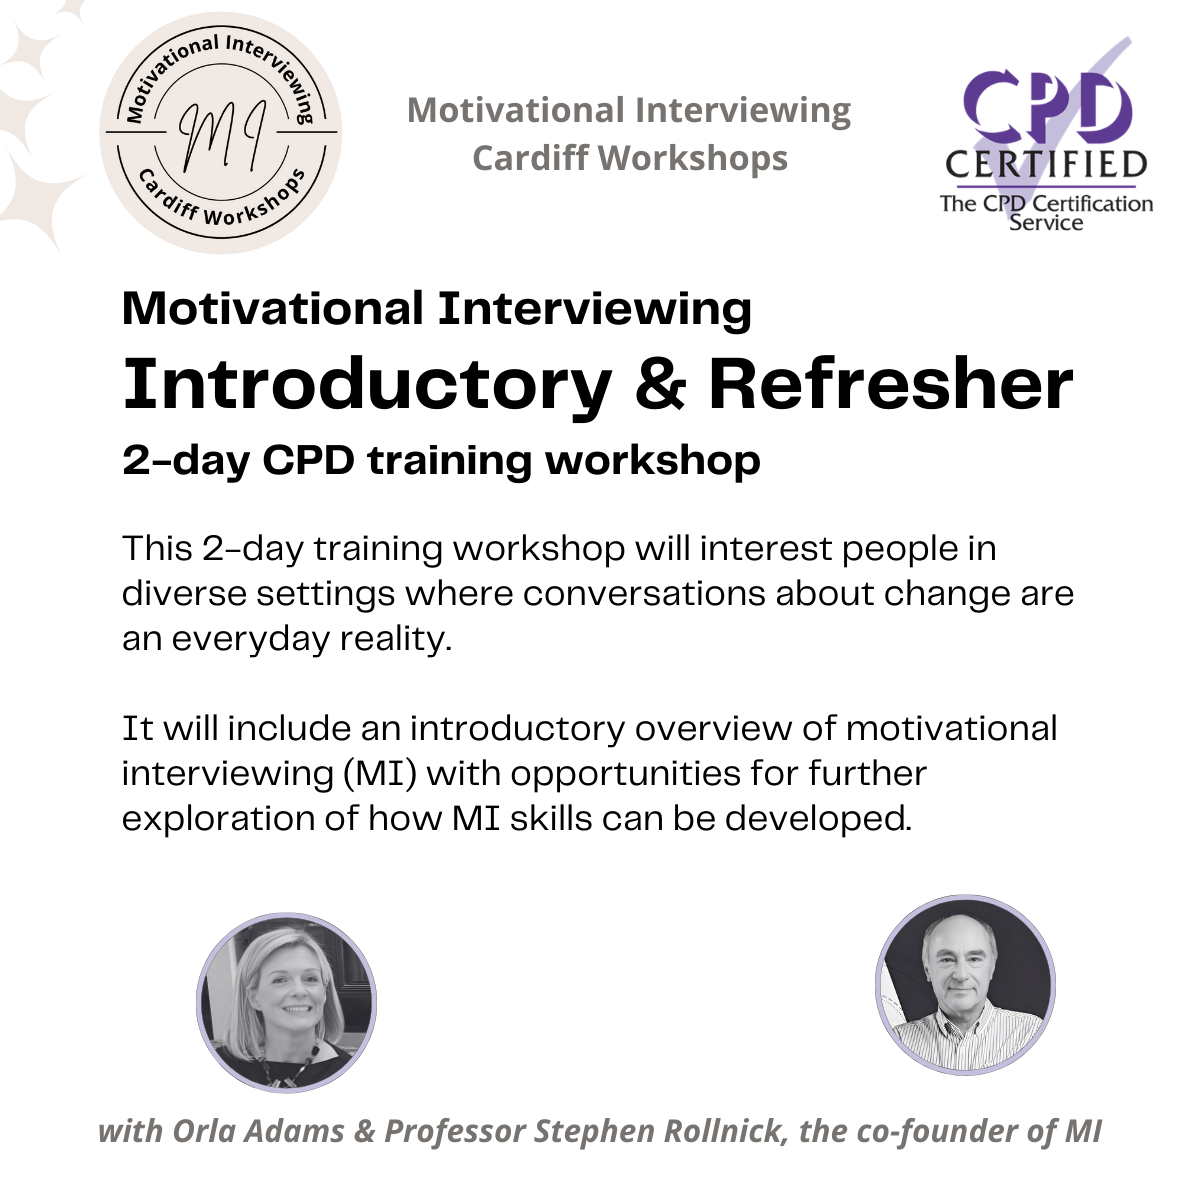
Motivational Interviewing: Introductory & Refresher 2-day In-person CPD training workshop
By MI Cardiff Workshops
Motivational Interviewing Introductory & Refresher 2-day In-person CPD training workshop Thursday 13th and Friday 14th February 2025 his 2-day workshop will be of interest to people in diverse settings and circumstances where conversations about change are an everyday reality. A wide range of learning methods are used to create an enjoyable atmosphere for learning and sharing ideas. These will include demonstration, video observation, brief content lectures, discussion, and focused practice. It is an introduction to Motivational Interviewing for some participants and a refresher for those people who have attended MI training previously.