- Professional Development
- Medicine & Nursing
- Arts & Crafts
- Health & Wellbeing
- Personal Development
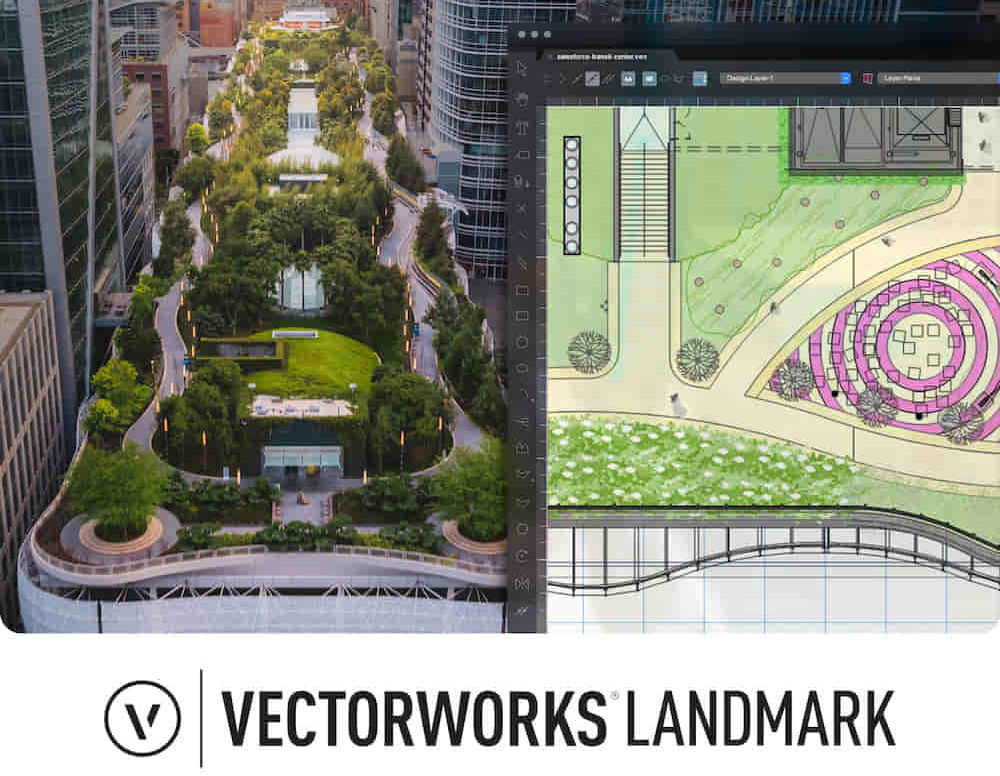
Landmark Training Course With Vectorworks
By ATL Autocad Training London
Who is this course for? Landmark Training Course With Vectorworks. Dive into terrain modeling, planting, irrigation, and site analysis guided by certified tutors. Master these tools for precise landscape designs and effective documentation. Check our Website Enrollment : 1-on-1 Landmark Training. Tailor your schedule. Mon to Sat between 9 am and 7 pm Call 02077202581 to book your slot. Duration: 16 hours. "Split these hours over multiple days as needed for your ideal schedule." Approach: In-person or live online. Landmark Training Course with Vectorworks: Basic to Intermediate Level Course Duration: 16 Hours Embark on a transformative journey with our Landmark Training Course tailored for landscape architects and designers. Over 16 intensive hours, dive deep into Vectorworks Landmark, mastering fundamental and intermediate techniques crucial for comprehensive 2D and 3D landscape design. Craft intricate site analyses, plans, irrigation systems, and elevate your designs with mesmerizing 3D visualizations. Explore custom plant symbols, detailed planting plans, and learn the art of efficient collaboration and customization. Course Highlights: I. Introduction to Vectorworks Landmark (1 hour) Explore Vectorworks Landmark for landscape design Master interface, tool usage, and project management II. Site Analysis and Site Plans (3 hours) Craft detailed site analyses and hardscape designs Work with contours, elevations, and terrain models III. Planting Plans (5 hours) Utilize the plant database for region-specific plant selection Create personalized plant symbols and comprehensive planting plans IV. Irrigation Design (2 hours) Design and edit efficient irrigation systems and zones Integrate irrigation components into site plans V. 3D Visualization (3 hours) Create captivating 3D models with realistic textures and materials Enhance designs with advanced lighting and special effects VI. Customization (1 hour) Tailor the interface for efficient landscape design Create custom object styles and resource libraries VII. Collaboration and Sharing (1 hour) Seamlessly import/export data from other platforms Share designs effectively with colleagues and collaborators VIII. Conclusion and Next Steps (1 hour) Review course content comprehensively Receive guidance on further learning resources Engage in a Q&A session and provide valuable feedback Enhance your landscape design expertise and unleash your creativity. Enroll now in our Vectorworks Landmark Basic to Intermediate Training and transform your designs. Download Vectorworks Landmark By the end of the Vectorworks Landmark Training Course, participants will: Understand the key features and functionalities of Vectorworks Landmark for landscape design. Demonstrate proficiency in using essential tools for site analysis, site plans, and hardscape design. Create detailed planting plans, selecting appropriate plants, and understanding their compatibility and growth patterns. Design efficient and effective irrigation systems, including generating irrigation reports. Create 3D visualizations of landscape designs, applying textures, materials, lighting, and special effects. Customize the interface and create personalized object styles and resources. Collaborate and share landscape design drawings with other software users. Have the foundation to pursue further learning and exploration in landscape design using Vectorworks Landmark. Mastering Foundations Begin your project by organizing your files and importing survey data. Learn to sketch existing buildings using Building Shell tools and model neighboring structures with Massing Model. Explore different methods for laying out survey points and marking existing features with precision. Objectives: Review File Organization Techniques Import Survey Data (DWG Import) Create Building Structures with Building Shell Tools Utilize Triangulation and Arc Tool for Precision Master Various Tape Measurement Techniques Elevating Your Design Enhance your survey with detailed ground, existing trees, and fences. Conduct shadow analysis to optimize planting locations. Dive into the Vectorworks Plant tool, your key design companion. Objectives: Develop Detailed Ground Surfaces Incorporate Existing Trees and Fences Design with Railing Fence Tool Conduct Shadow Analysis using Heliodon Tool Utilize Plant Tool Modes for Plant Placement Access Existing Plant Libraries and Customize Plants in 2D/3D Crafting Landscapes Create vibrant plant mixes using Landscape Area tool and apply them across your site models. Design intricate hardscapes, aligning them effortlessly even in complex paving scenarios. Learn to use components for detailed reporting, cut and fill calculations, and precise detailing. Explore custom object creation and site furniture placement. Objectives: Design Landscape Areas and Define Custom Plant Mixes Create Hardscapes and Define Custom Paving Constructions Generate Reports and Tags for Landscape Areas and Hardscapes Access and Manage Objects in Resource Manager Craft Custom Objects and Site Furniture Polished Presentation Present your designs professionally using Sheet layers and viewports. Create Section viewports to cut through your model and Detail viewports to focus on specific areas. Enhance visual appeal with mood boards and annotations, ensuring a refined, detailed presentation. Objectives: Craft Sheet Layers for Presentation Create Plan, Elevation, and Perspective Viewports Generate Section and Detail Viewports Annotate Viewports for Clear Communication Incorporate Images and Plant Reports for Comprehensive Presentations Master Vectorworks Landmark: Gain expertise in essential and advanced 2D/3D landscape design tools for precision and efficiency. Boost Efficiency: Learn time-saving techniques and workflows tailored to Vectorworks Landmark, enhancing productivity. Versatile Landscape Skills: Develop proficiency in site analysis, planting plans, hardscapes, and irrigation systems for diverse projects. Industry-Ready Expertise: Acquire sought-after skills in landscape architecture, paving the way for career growth. Flexible Learning: Access recorded lessons for convenient review and receive lifetime email support for ongoing guidance.
Enscape Rendering Training Course
By ATL Autocad Training London
Who is this course for? Enscape Rendering Training Course. The Enscape Rendering Training Course is tailored for architects, interior designers, and design students aiming to learn realistic visualizations using Enscape. Whether you prefer 1-on-1 in-person or online courses, this training is best for you. Click here for more info: Website Training duration: 5 hrs Method: 1-on-1 and Tailored content Schedule: Customize your training. Choose any hour from Mon to Sat, 9 am to 7 pm Call 02077202581 or WhatsApp at 07970325184 to book. Course Outline: Enscape Rendering Software Training (5 hours) Course 1: Enscape for Revit Hour 1: 1. Introduction to Enscape: Overview of Enscape rendering software, its features, and benefits. 2. Installing and Setting up Enscape: Step-by-step guidance on installing and configuring Enscape for Revit. 3. Enscape Interface: Familiarizing with the Enscape user interface and navigation controls within Revit. Hour 2: 4. Enscape Materials: Exploring material creation, application, and customization within Enscape for Revit. 5. Lighting in Enscape: Understanding different lighting options, adjusting light settings, and creating realistic lighting effects. Hour 3: 6. Enscape Camera Settings: Manipulating camera angles, perspectives, and settings for optimal visualization. 7. Enscape Rendering Settings: Exploring various rendering settings and techniques to enhance the quality of the final output. Hour 4: 8. Enscape Rendering Workflow: Demonstrating a step-by-step workflow for generating renderings and walkthroughs using Enscape in Revit. 9. Advanced Features: Introduction to advanced features such as creating panoramas, virtual reality (VR) walkthroughs, and creating animations in Enscape. Hour 5: 10. Tips and Tricks: Sharing tips and techniques for maximizing efficiency and achieving high-quality results in Enscape for Revit. 11. Q&A and Troubleshooting: Addressing participant questions, providing troubleshooting guidance, and discussing common challenges and solutions. OR Course Outline: Enscape Rendering Software Training (5 hours) Course 1: Enscape for Sketchup Hour 1: 1. Introduction to Enscape: Overview of Enscape rendering software, its features, and benefits for SketchUp users. 2. Installing and Setting up Enscape: Step-by-step guidance on installing and configuring Enscape for SketchUp. 3. Enscape Interface: Familiarizing with the Enscape user interface and navigation controls within SketchUp. Hour 2: 4. Enscape Materials: Exploring material creation, application, and customization within Enscape for SketchUp. 5. Lighting in Enscape: Understanding different lighting options, adjusting light settings, and creating realistic lighting effects. Hour 3: 6. Enscape Camera Settings: Manipulating camera angles, perspectives, and settings for optimal visualization in SketchUp. 7. Enscape Rendering Settings: Exploring various rendering settings and techniques to enhance the quality of the final output. Hour 4: 8. Enscape Rendering Workflow: Demonstrating a step-by-step workflow for generating renderings and walkthroughs using Enscape in SketchUp. 9. Advanced Features: Introduction to advanced features such as creating panoramas, virtual reality (VR) walkthroughs, and creating animations in Enscape. Hour 5: 10. Tips and Tricks: Sharing tips and techniques for maximizing efficiency and achieving high-quality results in Enscape for SketchUp. 11. Q&A and Troubleshooting: Addressing participant questions, providing troubleshooting guidance, and discussing common challenges and solutions. Learning Outcome: After completing the Enscape (VR) Training and Interactive Workshop, participants will master real-time walkthroughs, set up VR applications, efficiently migrate models, navigate designs dynamically, update objects in real-time, control visual styles, adjust day-time settings, export and share designs, utilize the asset library, and gain a comprehensive overview of Enscape. These skills will enable them to confidently visualize and display 3D designs without cloud uploads or external software, enhancing communication and collaboration in architectural projects. What does the Enscape Training & Interactive Workshop offer? The Enscape Training & Interactive Workshop is designed to help you get up and running with Virtual Reality (VR) in a cost-effective manner. It covers hardware and software setup, navigation techniques, real-time updates, material settings, and more. The workshop also allows participants to experience VR firsthand. What are the benefits of attending the Enscape (VR) Training and Interactive Workshop? By attending this workshop, you will gain the ability to perform real-time walkthroughs of your designs in 3D. You can view your projects in VR without the need for cloud uploads or exporting to other 3D software. The workshop offers extensive asset libraries, collaboration, and annotation sharing, enhancing your design visualization capabilities. What are the prerequisites for attending the Enscape (VR) Training and Interactive Workshop? No prior knowledge of Enscape is required. However, assistance from IT management may be necessary for hardware and software installation. Logistics, such as room suitability and technical requirements, will be discussed before the workshop. What will I learn in the Enscape (VR) Training and Interactive Workshop? The workshop covers hardware setup, software installation, and configuration. You will learn how to migrate models from Revit and SketchUp into VR, navigate through designs, update objects and materials in real-time, and utilize various visual styles and settings. The course also includes interactive workshops with support from our expert tutors. Enscape rendering courses offer valuable benefits: Real-time Visualization: Instantly visualize designs for quick iterations and informed decisions. Seamless Integration: Streamline rendering by integrating with popular design software. High-Quality Visuals: Create photorealistic presentations and walkthroughs. Efficient Design Communication: Enhance collaboration and communication during presentations. Enhanced Design Iteration: Explore options and make informed decisions in real-time. Time and Cost Savings: Reduce rendering time and deliver projects more efficiently. Portfolio Enhancement: Elevate your portfolio with visually striking renderings, opening new opportunities.

Access - intermediate (In-House)
By The In House Training Company
This one-day workshop will give you a better understanding of the components and operations of an Access database. It is designed to build on a user's existing skills and includes useful action queries to allow greater manipulation of a database. This workshop will help participants: Ensure the integrity of their databases Manage field properties Use the query functions effectively Save time with the query expression builder Create different types of query more quickly Design better forms Link expressions in forms Create better and more useful reports Import and export tables more easily 1 Table relationship integrity Identifying relationships Identifying criteria for data integrity Applying referential integrity Managing relationship join types 2 Table field properties Field properties overview Using input mask field Using default value fields Using field validation rules 3 Query functions Running aggregate function calculations Running sum, average, count, max and min functions Grouping calculated data 4 Query calculations Using query operators and expressions Adding calculated fields to a query Using the query expression builder 5 Action queries Creating make table queries Creating append queries Creating update queries Creating delete queries 6 Designing forms Adding form controls Aligning and arranging form controls Adding pictures and labels to forms Adding new fields to a form Controlling tab order Adding command buttons Adding a combo box control Formatting data using conditional formatting 7 Form expressions (calculations) Using the form expression builder Working with a property sheet within a form Linking expressions within a form 8 Working with reports Creating reports with the report wizard Inserting report fields Formatting fields Inserting report headers and footers Working with a property sheet within a report 9 Grouped reports Creating groups with the report wizard Sorting grouped data Grouping alphabetically Grouping on date intervals Creating sub reports Adding calculations to groups 10 Importing and exporting tables Importing tables into Access Exporting tables from Access Importing and linking data in Access

Photoshop Essentials Evening Training Sessions
By ATL Autocad Training London
Photoshop Essentials Evening Training Sessions, where you'll master the basics and elevate your photography and Photoshop rendering skills. Enhance your photos significantly, learning everything from color correction to retouching techniques. Expertly retouch and repair images during our comprehensive Photoshop training courses. Click here for more info: Website Duration: 10 hours Approach: 1-on1 guidance, Customized instruction and Tailored content. Choose your own time and day Monday to Saturday 9 am to 7 pm Becoming Proficient in Adobe Photoshop - 10-Hour Training Program Module 1: Introduction to Photoshop (1 hour) Familiarization with Photoshop interface and tools Understanding file formats and resolution concepts Navigation within the workspace and customization of preferences Mastering essential keyboard shortcuts for efficient workflow Module 2: Working with Layers (1 hour) Grasping the significance of layers and their efficient organization Application of layer styles to enhance creativity Utilization of blend modes for striking compositions Module 3: Selection Techniques (1 hour) Understanding diverse selection tools and their specific applications Precision in selections using Marquee, Lasso, Magic Wand, Quick Selection, and Refine Edge tools Creation of masks for non-destructive editing Module 4: Image Editing and Retouching (1 hour) Essential techniques for retouching portraits and landscapes Corrections in exposure, color, and tone using Adjustment Layers Seamless repairs with Healing Brush, Clone Stamp, and Content-Aware tools Module 5: Typography and Text Effects (1 hour) Working with text layers and formatting options Crafting captivating text effects using Layer Styles Manipulating text along paths and shapes for creative compositions Module 6: Advanced Image Manipulation (1 hour) Merging images with layer masks and blending modes Crafting composite images and surreal artwork Applying transformations and distortions creatively using Smart Objects Module 7: Filters and Special Effects (1 hour) Exploration of various filters for artistic and practical applications Application of blur, sharpening, distortion filters, and creative effects using the Filter Gallery Flexible editing with smart filters Module 8: Drawing and Vector Graphics (1 hour) Working with shape layers and vector tools Creation of custom shapes, icons, and logos Precision in illustrations using the Pen tool Module 9: Advanced Color Correction (1 hour) Expertise in color adjustments with Curves and Levels Selective color control using Adjustment Layers Understanding color spaces, profiles, and creating duotones and split-tones Module 10: Designing for Web and Print (1 hour) Image preparation for web and social media platforms Understanding resolution and color modes for print File exportation in various formats catering to diverse needs Final Project: Crafting a digital artwork or print-ready composition to showcase acquired skills. Upon completing this 10-hour Adobe Photoshop course, participants will: Master Photoshop Tools: Navigate the interface efficiently, apply advanced tools, and utilize essential shortcuts for streamlined work. Perfect Layer Techniques: Organize layers, use blend modes, and apply styles for visually appealing compositions. Refine Selection Skills: Make precise selections, create masks, and employ advanced selection tools for accuracy. Enhance Images Professionally: Learn advanced retouching, correction, and repair techniques for seamless photo editing. Create Captivating Text: Work with text layers, apply styles, and design typographic compositions creatively. Master Image Manipulation: Merge images seamlessly, apply transformations, and create surreal artwork with Smart Objects. Apply Filters and Effects: Utilize a range of artistic filters and effects for creative enhancements. Professional Vector Graphics: Craft custom shapes, logos, and icons with precision using vector tools. Advanced Color Correction: Master color adjustments, selective color control, and create captivating duotones and split-tones. Produce Print and Web Designs: Prepare images for various platforms, understand resolution, and export files in diverse formats. Hands-On Project Proficiency: Apply skills in real-world projects, demonstrating professional design expertise. Upon completion, participants will have the confidence and proficiency to excel in Photoshop, enabling high-quality, professional design work in both digital and print media. Adobe Photoshop Course: Adobe Photoshop course, hosted at the UK's top Adobe Training Centre. Develop expertise in Adobe's premier digital imaging software, crucial for crafting compelling visuals across a multitude of digital platforms. Our Photoshop training programs focus on interactive, real-life exercises, ensuring a hands-on and practical learning environment. Whether you are a novice aiming for a robust foundation or a proficient user striving for increased efficiency, our wide-ranging Photoshop courses are tailored to meet your specific requirements. Enroll today to master Photoshop and tap into a world of creative possibilities. Jobs You Can Pursue: Graphic Designer: Create visually appealing graphics for print and digital media. Digital Artist: Craft digital artwork for various applications, from illustrations to advertisements. Photo Retoucher: Enhance and manipulate photos to achieve desired visual effects. UI/UX Designer: Design user interfaces and experiences for websites and applications. Web Designer: Develop visually engaging websites by incorporating Photoshop skills into web design. Marketing Content Creator: Produce marketing materials like banners, brochures, and social media visuals. Freelance Designer: Work independently, offering design services to clients across different industries. Advertising Creative: Contribute to creative campaigns by designing impactful ad visuals. Print Production Specialist: Prepare print-ready materials, ensuring quality in printed products. Photography Post-Processing Specialist: Enhance and retouch photographs, optimizing them for professional use. Course Advantages: Master Vital Photoshop Skills: Gain expertise in essential image editing and manipulation techniques. Craft Striking Digital Artwork: Create visually appealing digital art and design graphics with finesse. Attain Professional-Quality Results: Achieve high-quality outcomes with accuracy and speed in your work. Unleash Creative Potential: Explore versatile design capabilities, tapping into your full creative spectrum. Flexible Learning: Access recorded lessons for convenient learning and revision. Continuous Assistance: Benefit from lifetime email support, ensuring ongoing guidance and support.

Power BI - advanced (1 day) (In-House)
By The In House Training Company
This course starts with data transformation strategies, exploring capabilities in the Power Query Editor, and data-cleansing practices. It looks at the Advanced Query Editor to view the M language code. This course focuses on advanced DAX measures that include filtering conditions, with a deep dive into time intelligence measures. Like the M query language, DAX is a rich functional language that supports variables and expression references. This course also looks at the creation of dynamic dashboards and incorporates a range of visualisations available in Power BI Desktop and online in the AppSource. The course finishes with a look at setting up end user level security in tables. 1 The query editor Split by row delimiter AddDays to determine deadlines Advanced query editor 2 Fuzzy matching joins Matching inconsistencies by percentage Matching with transformation table 3 Logical column functions Logical functions IF, AND, OR Using multiple conditions Including FIND in functions 4 Editing DAX measures Make DAX easier to read Add comments to a measure Using quick measures 5 The anatomy of CALCULATE Understanding CALCULATE context filters Adding context to CALCULATE with FILTER Using CALCULATE with a threshold 6 The ALL measure Anatomy of ALL Create an ALL measure Using ALL as a filter Use ALL for percentage 7 DAX iterators Anatomy of iterators A closer look at SUMX Using RELATED in SUMX Create a RANKX RANKX with ALL 8 Date and time functions Overview of functions Create a DATEDIFF function 9 Time intelligent measures Compare historical monthly data Create a DATEADD measure Creating cumulative totals Creating cumulative measures Visualising cumulative totals 10 Visualisations in-depth Utilising report themes Create a heatmap Comparing proportions View trends with sparklines Group numbers using bins Setting up a histogram 11 Comparing variables Visualising trendlines as KPI Forecasting with trendlines Creating a scatter plot Creating dynamic labels Customised visualisation tooltips Export reports to SharePoint 12 User level security Setting up row level security Testing user security
Power BI - intermediate (2 day) (In-House)
By The In House Training Company
This course is designed for those already using Power BI Desktop and are ready to work with more comprehensive elements of analysing and reporting in Power BI. The course maintains a balanced look at data analysis including the Power Query Editor, with a deep dive into writing DAX formulas, and enhanced dashboard visualisations. The aim of this course is to provide a more complete understanding of the whole Power BI analytics process, by working with business examples that will equip you with the necessary skills to output comprehensive reports and explore Power BI's analytical capabilities in more depth. 1 The Query Editor Grouping rows in a table Split row by delimiter Add days to determine deadlines The query editor 2 Fuzzy Matching Joins Matching inconsistencies by percentage Matching with transformation table 3 The Query Editor M Functions Adding custom columns Creating an IF function Nested AND logics in an IF function 4 DAX New Columns Functions Including TRUE with SWITCH Using multiple conditions The FIND DAX function The IF DAX function Logical functions IF, AND, OR 5 Editing DAX Measures Making DAX easier to read Add comments to a measure Using quick measures 6 The Anatomy of CALCULATE Understanding CALCULATE filters Add context to CALCULATE with FILTER Using CALCULATE with a threshold 7 The ALL Measure Anatomy of ALL Create an ALL measure Using ALL as a filter Use ALL for percentages 8 DAX Iterators Anatomy of iterators A closer look at SUMX Using RELATED with SUMX Create a RANKX RANKX with ALL 9 Date and Time Functions Overview of functions Create a DATEDIFF function 10 Time Intelligent Measures Compare historical monthly data Create a DATEADD measure Creating cumulative totals Creating cumulative measures Visualising cumulative totals 11 Visualisations In-Depth Utilising report themes Applying static filters Group data using lists Group numbers using bins Creating heatmaps Comparing proportions View trends with sparklines 12 Comparing Variables Visualising trendlines as KPI Forecasting with trendlines Creating a scatter plot Creating dynamic labels Customised visualisation tooltips Export reports to SharePoint
Introduction to Floating Production, Storage and Offloading Vessels (FPSO) – Design & Technology
By EnergyEdge - Training for a Sustainable Energy Future
Join Energy Edge's FPSO design and technology course to gain essential knowledge on floating production systems. Elevate your skills in the energy sector.

Microsoft Project Reporting
By Underscore Group
Use the features in project to report effectively on your plans. Course overview Duration: 4 hours Our Project – Reporting course is aimed at experienced users of Project who need to create reports in their project plans. It looks at using the different types of report in Project, exporting data to other packages, building new reports and sharing reports between projects. Experience of using Project to create and resource plans is required. Objectives By the end of the course you will be able to: Print and PDF data from your project Use timelines Setup filters and groups Import and export data Create and share dashboard reports Content Printing and reporting Setup and Printing Creating PDFs Visual reports Using the Timeline Filtering and grouping Applying filters Applying grouping Creating your own filters and groups Importing and exporting data Importing data into Project Exporting data Creating and saving data maps Dashboard reports Using dashboard reports Creating dashboard reports Adding widgets Customising data shown
Power BI - introduction to intermediate (2 days) (In-House)
By The In House Training Company
This course starts with the basics then moves seamlessly to an intermediate level. It includes a comprehensive yet balanced look at the four main components that make up Power BI Desktop: Report view, Data view, Model view, and the Power Query Editor. It also demonstrates how to use the online Power BI service. It looks at authoring tools that enables you to connect to and transform data from a variety of sources, allowing you to produce dynamic reports using a library of visualisations. Once you have those reports, the course looks at the seamless process of sharing those with your colleagues by publishing to the online Power BI service. The aim of this course is to provide a strong understanding of the Power BI analysis process, by working with real-world examples that will equip you with the necessary skills to start applying your knowledge straight away. 1 Getting started The Power BI process Launching Power BI Desktop The four views of Power BI Dashboard visuals 2 Connecting to files Connect to data sources Connect to an Excel file Connect to a CSV file Connect to a database Import vs. DirectQuery Connect to a web source Create a data table 3 Transforming data The process of cleaning data Column data types Remove rows with filters Add a custom column Append data to a table Fix error issues Basic maths operations 4 Build a data model Table relationships Manage table relationships 5 Merge queries Table join kinds Merging tables 6 Create report visualisations Creating map visuals Formatting maps Creating chart visuals Formatting chart Tables, matrixes, and cards Control formatting with themes Filter reports with slicers Reports for mobile devices Custom online visuals Export report data to Excel 7 The power query editor Fill data up and down Split columns by delimiter Add conditional columns Merging columns 8 The M formula Creating M functions Create an IF function Create a query group 9 Pivot and unpivot tables Pivot tables in the query editor Pivot and append tables Pivot but don't summarise Unpivot tables Append mismatched headers 10 Data modelling revisited Data model relationships Mark a calendar as a date table 11 Introduction to calculated columns New columns vs. measures Creating a new column calculation The SWITCH function 12 Introduction to DAX measures Common measure categories The SUM measure Adding measures to visuals COUNTROWS and DISINCTCOUNT functions DAX rules 13 The CALCULATE measure The syntax of CALCULATE Things of note about CALCULATE 14 The SUMX measure The SUMX measure X iterator functions Anatomy of SUMX 15 Introduction to time intelligence Importance of a calendar table A special lookup table The TOTALYTD measure Change year end in TOTALYTD 16 Hierarchy, groups and formatting Create a hierarchy to drill data Compare data in groups Add conditional formatting 17 Share reports on the web Publish to the BI online service Get quick insights Upload reports from BI service Exporting report data What is Q&A? Sharing your reports 18 Apply your learning Post training recap lesson
SUSTAINABILITY IN SUPPLY CHAIN
By Export Unlocked Limited
This module aims to develop knowledge and understanding of the impact of Import/Export freight movement on the environment and the opportunities available to organisations to use sustainable options. we will cover CBAM , Deforestation, GSPR and many challenges facing Exporters and Importers.