- Professional Development
- Medicine & Nursing
- Arts & Crafts
- Health & Wellbeing
- Personal Development
V-Ray for Rhino Essentials Training
By ATL Autocad Training London
Why Choose V-Ray for Rhino Essentials Training? Master photorealistic rendering in Rhino with our intensive V-Ray training. Led by certified experts, learn lighting, material manipulation, rendering configurations, textures, and global illumination. Check our Website Training Duration: 10 hours Approach: 1-on-1, in-Person and Live online and Customized Content. Flexibility: 1-on-1 sessions scheduled at your convenience, from Mon to Sat between 9 am and 7 pm. Vray for Rhino Essentials - 10 Hours Course Session 1: Introduction to Vray and Rhino Integration Overview of Vray: Understanding its importance in architectural and product visualization. Setting up Vray in Rhino: Installation, basic configurations, and interface exploration. Understanding the Rhino-Vray workflow: Navigating between Rhino and Vray seamlessly. Session 2: Basic Lighting Techniques Exploring different light sources: Domes, spotlights, and area lights. Adjusting light intensity and color temperature for realistic ambiance. Creating natural lighting scenarios: Daylight, twilight, and night scenes. Session 3: Mastering Material Creation Introduction to Vray materials: Diffuse, reflection, refraction, and bump maps. Crafting realistic materials: Wood, glass, metal, and fabrics. Utilizing the material editor efficiently for precise adjustments. Session 4: Advanced Rendering Configurations Global Illumination: Understanding photon mapping and irradiance mapping. Fine-tuning render settings: Quality vs. speed, resolution, and anti-aliasing. Exploring Vray frame buffer: Post-processing and image enhancement. Session 5: Texture Manipulation and Mapping Understanding UV mapping: Unwrapping complex geometries for accurate textures. Applying textures in Vray: Diffuse, bump, displacement, and normal maps. Realistic texture manipulation: Scaling, rotation, and blending textures seamlessly. Session 6: Camera Settings and Scene Composition Camera configurations: Focal length, depth of field, and exposure settings. Composing visually appealing scenes: Rule of thirds, focal points, and balance. Rendering interior and exterior scenes: Managing lighting challenges and reflections. Session 7: Real-Time Feedback and Interactive Rendering Introduction to Vray interactive rendering: Real-time feedback for quick adjustments. Utilizing Vray's denoiser for noise reduction in interactive mode. Enhancing productivity with interactive rendering: Modifying materials and lighting on the fly. Session 8: Optimizing Render Times Efficient render optimization techniques: Reducing noise and enhancing quality. Distributed rendering: Utilizing multiple machines for faster rendering. Troubleshooting common rendering issues: Flickering, artifacts, and texture problems. Session 9: Post-Processing and Presentation Post-production in Photoshop: Enhancing renders, adding depth, and adjusting colors. Creating compelling visual narratives: Adding people, context, and atmosphere. Designing professional presentation boards: Layout, annotations, and graphic elements. Session 10: Final Project and Portfolio Review Participants showcase their final Vray-rendered projects. Instructor-led critique and feedback session. Tips for building a strong portfolio: Choosing the best renderings and presenting your work effectively. By the end of this 10-hour course, participants will have a comprehensive understanding of Vray for Rhino, enabling them to create photorealistic renderings and significantly enhance their design visualization skills. Upon completing the Vray for Rhino Essentials course, participants will: Master Lighting Techniques: Expertly utilize various light sources. Create realistic lighting scenarios for diverse scenes. Advanced Material Proficiency: Manipulate complex materials and textures for lifelike renders. Understand reflective surfaces and material interaction. Optimize Rendering Settings: Fine-tune render configurations for optimal quality and speed. Implement noise reduction techniques for cleaner renders. Texture Mapping Mastery: Perfect UV mapping methods for accurate texture application. Seamlessly blend textures for realistic surface mapping. Effective Camera Use and Composition: Configure camera settings, depth of field, and exposure. Compose visually appealing scenes for impactful renders. Real-Time Rendering Skills: Utilize interactive rendering for immediate feedback and adjustments. Enhance scenes in real time for efficient workflow. Post-Processing Expertise: Enhance renders in post-production using software tools. Add depth, adjust colors, and create visually compelling final images. Professional Presentation Techniques: Design layouts, annotations, and context to create impactful visual narratives. Curate a strong portfolio with the best-rendered projects. By honing these skills, participants will produce photorealistic renders and significantly enhance their architectural and product visualization capabilities. Skills You'll Gain: Master lighting techniques for realistic visualization. Learn material manipulation and texture enhancement in Vray. Understand advanced rendering configurations for high-quality results. Explore global illumination concepts for lifelike scenes. Career Opportunities: Upon completing Vray for Rhino Essentials, you'll be well-equipped for various roles in the design and visualization industry, including: Architectural Visualizer: Create stunning architectural visualizations for presentations and client approvals. Product Designer: Enhance product design by creating photorealistic prototypes and visualizations. Interior Designer: Craft immersive interior spaces with realistic lighting and material textures. 3D Visualization Artist: Work in animation studios, gaming companies, or marketing agencies, producing high-quality 3D visualizations. Freelance Rendering Specialist: Offer your skills on platforms like Upwork or Fiverr, providing rendering services to clients worldwide. Course Highlights: Acquire fundamental skills in V-Ray for Rhino, covering lighting, materials, and rendering setups. Explore advanced techniques for lifelike textures, reflections, and global illumination effects. Master the workflow for crafting architectural renderings, both interior and exterior. Harness the power of V-Ray features like proxies, fur, and particle systems for dynamic visuals. Optimize render times and quality using efficient techniques and expert tips. Validate your expertise with a Certificate of Completion, showcasing your V-Ray proficiency. Access recorded lessons for future reference, enabling self-paced learning and continuous improvement. Professional Guidance: Learn from certified tutors and industry experts with extensive practical experience. Gain valuable insights and personalized feedback as you progress through the course, ensuring a comprehensive understanding of V-Ray for Rhino.

Vray for Architects and Interior Designers 3ds max or Sketchup Training
By London Design Training Courses
Why Choose Vray for Architects and Interior Designers 3ds max or Sketchup Training Course? Click here for info Achieve stunningly realistic renders with our tailored course in V-Ray. Designed for experienced SketchUp and 3ds max users, this advanced training covers model preparation and rendering techniques, customized to your skill level and preferences. Duration: 10 hrs. Method: 1-on-1, Personalized attention. Schedule: Tailor your own hours of your choice, available from Mon to Sat between 9 am and 7 pm. SketchUp is renowned for its user-friendly interface and widespread usage in 3D modeling. Now, with V-Ray for SketchUp, users can take advantage of a powerful rendering tool for unparalleled visualization quality and realism. V-Ray seamlessly integrates into the SketchUp environment, allowing for efficient rendering within your existing workflows. Our course is ideal for those seeking to enhance their SketchUp proficiency by incorporating V-Ray's potent rendering capabilities for 3D models. We adapt the training to your current skill levels in both SketchUp and V-Ray and tailor the content to your modeling requirements and desired rendering quality. V-Ray Rendering Training Course. Course Duration: 10 hours Course Description: This 10-hour course enhances rendering skills with V-Ray, a leading 3D visualization engine. Participants master photorealistic renders, focusing on lighting, materials, and post-production. Covering key concepts, workflow, lighting techniques, material creation, rendering settings, and post-processing, the course ensures stunning visual results. Course Outline: Module 1: Introduction to V-Ray Rendering (1 hour) Overview of V-Ray and its role in 3D rendering Understanding the rendering workflow Setting up V-Ray for your 3D software platform Module 2: Essential Rendering Concepts (1 hour) Understanding global illumination and its impact on renders Exploring image sampling and antialiasing techniques Introduction to render elements for post-processing Module 3: Lighting Techniques (2 hours) Mastering various lighting types in V-Ray Creating natural lighting with HDRI maps Implementing artificial lighting with V-Ray lights Achieving realistic daylight with V-Ray sun and sky Module 4: Material Creation (2 hours) Creating realistic materials using V-Ray material editor Applying textures and procedural maps for added realism Understanding material reflections and refractions Advanced techniques for materials like glass, metal, and fabric Module 5: Rendering Settings and Optimization (1.5 hours) Exploring V-Ray rendering settings for different scenarios Understanding render output options and resolution settings Efficiently using V-Ray distributed rendering for faster results Module 6: Post-Processing with Photoshop (1.5 hours) Enhancing renders through post-processing techniques Compositing render elements for added control Adjusting colors, contrast, and lighting in Photoshop Adding effects and final touches to achieve photorealism Module 7: Advanced Rendering Techniques (1 hour) Working with V-Ray proxies and instancing for complex scenes Utilizing V-Ray displacement for intricate detailing Understanding depth of field and motion blur effects Module 8: Real-World Project (1 hour) Applying the skills learned to complete a real-world rendering project Guidance and feedback from the instructor

Photoshop Essentials Evening Training Sessions
By ATL Autocad Training London
Photoshop Essentials Evening Training Sessions, where you'll master the basics and elevate your photography and Photoshop rendering skills. Enhance your photos significantly, learning everything from color correction to retouching techniques. Expertly retouch and repair images during our comprehensive Photoshop training courses. Click here for more info: Website Duration: 10 hours Approach: 1-on1 guidance, Customized instruction and Tailored content. Choose your own time and day Monday to Saturday 9 am to 7 pm Becoming Proficient in Adobe Photoshop - 10-Hour Training Program Module 1: Introduction to Photoshop (1 hour) Familiarization with Photoshop interface and tools Understanding file formats and resolution concepts Navigation within the workspace and customization of preferences Mastering essential keyboard shortcuts for efficient workflow Module 2: Working with Layers (1 hour) Grasping the significance of layers and their efficient organization Application of layer styles to enhance creativity Utilization of blend modes for striking compositions Module 3: Selection Techniques (1 hour) Understanding diverse selection tools and their specific applications Precision in selections using Marquee, Lasso, Magic Wand, Quick Selection, and Refine Edge tools Creation of masks for non-destructive editing Module 4: Image Editing and Retouching (1 hour) Essential techniques for retouching portraits and landscapes Corrections in exposure, color, and tone using Adjustment Layers Seamless repairs with Healing Brush, Clone Stamp, and Content-Aware tools Module 5: Typography and Text Effects (1 hour) Working with text layers and formatting options Crafting captivating text effects using Layer Styles Manipulating text along paths and shapes for creative compositions Module 6: Advanced Image Manipulation (1 hour) Merging images with layer masks and blending modes Crafting composite images and surreal artwork Applying transformations and distortions creatively using Smart Objects Module 7: Filters and Special Effects (1 hour) Exploration of various filters for artistic and practical applications Application of blur, sharpening, distortion filters, and creative effects using the Filter Gallery Flexible editing with smart filters Module 8: Drawing and Vector Graphics (1 hour) Working with shape layers and vector tools Creation of custom shapes, icons, and logos Precision in illustrations using the Pen tool Module 9: Advanced Color Correction (1 hour) Expertise in color adjustments with Curves and Levels Selective color control using Adjustment Layers Understanding color spaces, profiles, and creating duotones and split-tones Module 10: Designing for Web and Print (1 hour) Image preparation for web and social media platforms Understanding resolution and color modes for print File exportation in various formats catering to diverse needs Final Project: Crafting a digital artwork or print-ready composition to showcase acquired skills. Upon completing this 10-hour Adobe Photoshop course, participants will: Master Photoshop Tools: Navigate the interface efficiently, apply advanced tools, and utilize essential shortcuts for streamlined work. Perfect Layer Techniques: Organize layers, use blend modes, and apply styles for visually appealing compositions. Refine Selection Skills: Make precise selections, create masks, and employ advanced selection tools for accuracy. Enhance Images Professionally: Learn advanced retouching, correction, and repair techniques for seamless photo editing. Create Captivating Text: Work with text layers, apply styles, and design typographic compositions creatively. Master Image Manipulation: Merge images seamlessly, apply transformations, and create surreal artwork with Smart Objects. Apply Filters and Effects: Utilize a range of artistic filters and effects for creative enhancements. Professional Vector Graphics: Craft custom shapes, logos, and icons with precision using vector tools. Advanced Color Correction: Master color adjustments, selective color control, and create captivating duotones and split-tones. Produce Print and Web Designs: Prepare images for various platforms, understand resolution, and export files in diverse formats. Hands-On Project Proficiency: Apply skills in real-world projects, demonstrating professional design expertise. Upon completion, participants will have the confidence and proficiency to excel in Photoshop, enabling high-quality, professional design work in both digital and print media. Adobe Photoshop Course: Adobe Photoshop course, hosted at the UK's top Adobe Training Centre. Develop expertise in Adobe's premier digital imaging software, crucial for crafting compelling visuals across a multitude of digital platforms. Our Photoshop training programs focus on interactive, real-life exercises, ensuring a hands-on and practical learning environment. Whether you are a novice aiming for a robust foundation or a proficient user striving for increased efficiency, our wide-ranging Photoshop courses are tailored to meet your specific requirements. Enroll today to master Photoshop and tap into a world of creative possibilities. Jobs You Can Pursue: Graphic Designer: Create visually appealing graphics for print and digital media. Digital Artist: Craft digital artwork for various applications, from illustrations to advertisements. Photo Retoucher: Enhance and manipulate photos to achieve desired visual effects. UI/UX Designer: Design user interfaces and experiences for websites and applications. Web Designer: Develop visually engaging websites by incorporating Photoshop skills into web design. Marketing Content Creator: Produce marketing materials like banners, brochures, and social media visuals. Freelance Designer: Work independently, offering design services to clients across different industries. Advertising Creative: Contribute to creative campaigns by designing impactful ad visuals. Print Production Specialist: Prepare print-ready materials, ensuring quality in printed products. Photography Post-Processing Specialist: Enhance and retouch photographs, optimizing them for professional use. Course Advantages: Master Vital Photoshop Skills: Gain expertise in essential image editing and manipulation techniques. Craft Striking Digital Artwork: Create visually appealing digital art and design graphics with finesse. Attain Professional-Quality Results: Achieve high-quality outcomes with accuracy and speed in your work. Unleash Creative Potential: Explore versatile design capabilities, tapping into your full creative spectrum. Flexible Learning: Access recorded lessons for convenient learning and revision. Continuous Assistance: Benefit from lifetime email support, ensuring ongoing guidance and support.

The legendary Peter Keep from Jewellery Training Solutions is heading to Woking from Australia to teach his vast knowledge. Our focus within both courses on offer this weekend is to offer our students intricate technical knowledge which is quickly lost to new technology. Well skilled technical jewellers able to create multiple designs by hand are rare and in demand, Peter is dedicated to sharing his endless knowledge and tips, and while he can usually be found online, we are lucky enough to offer classes with Peter in person – a golden opportunity not to be missed. WHEN: FRIDAY 6th September 10-4 WHERE: Workshop 925 based at The Mayford Centre, just outside of Woking and very close to Guildford. Unit F9 The Mayford Centre, Mayford Green Woking, Surrey GU22 0PP TUTOR: Peter Keep –About WHAT DOES THE DAY INVOLVE? The legendary Peter Keep from Jewellery Training Solutions is heading to Woking from Australia to teach his vast knowledge. Our focus within both courses on offer this weekend is to offer our students intricate technical knowledge which is quickly lost to new technology. Well skilled technical jewellers able to create multiple designs by hand are rare and in demand, Peter is dedicated to sharing his endless knowledge and tips, and while he can usually be found online, we are lucky enough to offer classes with Peter in person – a golden opportunity not to be missed. In this class Peter will teach you how to make a catch with a hinged locking mechanism.This project is easier than it first looks, but you do need to have experience piercing out shapes and drilling. During the one-day workshop Peter will show you some other options and explain how they work. You will also be provided with information handouts and materials. These specialist skills can be applied across other aspects of jewellery making. You NEVER stop learning as far as the jewellery industry is concerned and it is Peter’s passion to maintain traditional skill. EXPERIENCE REQUIRED: Students should have some workshop experience and be confident using normal jewellery tools and equipment. If you are unsure, please email us at hello@workshop925.com to discuss any queries, we are always here to help. CLASS SIZE: 7 WHAT IS INCLUDED? All tools and consumables are supplied. WHAT TO BRING: For safety reasons, during each class, you are required to wear appropriate footwear, we request that no open toed shoes are worn within Workshop 925. Long hair should also be tied back when working with the equipment. You may also wish to bring a notebook. We have handouts for many demonstrations, but there are always many tips and tricks given verbally by the tutor, which some might like to keep note of. Please bring any lunch, snacks and drinks which you may want to your session. We have tea and coffee for you to help yourselves to. We supply all materials and tools. PAYMENT OPTIONS: You can pay via our website or in our workshop in person using our card machine. If you prefer to pay directly, you can email us on hello@workshop925.com and we can invoice you manually to arrange a bank transfer. For classes over £80, instalment options are also available. Please email us on hello@workshop925.com to arrange. Gift Voucher – if you have a voucher to redeem, please email us before booking on hello@workshop925.com Please check your dates carefully before booking a class as we are unable to offer refunds. See our Terms & Conditions for full details.
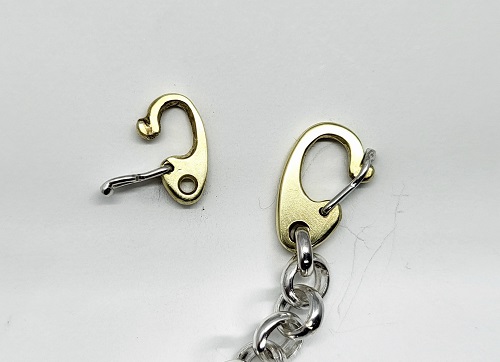
The legendary Peter Keep from Jewellery Training Solutions is heading to Woking from Australia to teach his vast knowledge. Our focus within both courses on offer this weekend is to offer our students intricate technical knowledge which is quickly lost to new technology. Well skilled technical jewellers able to create multiple designs by hand are rare and in demand, Peter is dedicated to sharing his endless knowledge and tips, and while he can usually be found online, we are lucky enough to offer classes with Peter in person – a golden opportunity not to be missed. If you’re ready to boost your skills and make jewellery findings with a locking mechanism, this course with Peter are a must. Clasp making demands precision, calculation and attention to detail. You will learn how to fabricate the elements required to create the working parts of a clasp and learn how to combine these elements. Peter will guide you through each step to create your clasp, sharing his wonderful hints and tips he has developed through years of training and experience in the industry across the world. WHEN: Saturday 7th September 10-4/5 WHERE: Workshop 925 based at The Mayford Centre, just outside of Woking and very close to Guildford. Unit F9 The Mayford Centre, Mayford Green Woking, Surrey GU22 0PP TUTOR: Peter Keep –About WHAT DOES THE DAY INVOLVE? The legendary Peter Keep from Jewellery Training Solutions is heading to Woking from Australia to teach his vast knowledge. Our focus within both courses on offer this weekend is to offer our students intricate technical knowledge which is quickly lost to new technology. Well skilled technical jewellers able to create multiple designs by hand are rare and in demand, Peter is dedicated to sharing his endless knowledge and tips, and while he can usually be found online, we are lucky enough to offer classes with Peter in person – a golden opportunity not to be missed. If you’re ready to boost your skills and make jewellery findings with a locking mechanism, this course with Peter are a must. Clasp making demands precision, calculation and attention to detail. You will learn how to fabricate the elements required to create the working parts of a clasp and learn how to combine these elements. Peter will guide you through each step to create your clasp, sharing his wonderful hints and tips he has developed through years of training and experience in the industry across the world. You will learn advanced soldering skills to create a tubular barrel and learn how to form a hardened snap catch.This technique will open your mind to other types of catches & clips. Peter will show you some other options and explain how they work.These specialist skills can be applied across other aspects of jewellery making. You NEVER stop learning as far as the jewellery industry is concerned and it is Peter’s passion to maintain traditional skill. EXPERIENCE REQUIRED: Students should have some workshop experience and be confident using normal jewellery tools and equipment. If you are unsure, please email us at hello@workshop925.com to discuss any queries, we are always here to help. CLASS SIZE: 7 WHAT IS INCLUDED? All tools and consumables are supplied. WHAT TO BRING: For safety reasons, during each class, you are required to wear appropriate footwear, we request that no open toed shoes are worn within Workshop 925. Long hair should also be tied back when working with the equipment. You may also wish to bring a notebook. We have handouts for many demonstrations, but there are always many tips and tricks given verbally by the tutor, which some might like to keep note of. Please bring any lunch, snacks and drinks which you may want to your session. We have tea and coffee for you to help yourselves to. We supply all materials and tools. PAYMENT OPTIONS: You can pay via our website or in our workshop in person using our card machine. If you prefer to pay directly, you can email us on hello@workshop925.com and we can invoice you manually to arrange a bank transfer. For classes over £80, instalment options are also available. Please email us on hello@workshop925.com to arrange. Gift Voucher – if you have a voucher to redeem, please email us before booking on hello@workshop925.com Please check your dates carefully before booking a class as we are unable to offer refunds. See our Terms & Conditions for full details.

Outspoken Cycles Park Tool School courses are aimed at home mechanics who wish to have an in-depth knowledge of their bikes as well as those individuals required to maintain bikes for friends, schools, clubs, businesses and other organisations. The 2 Day Intermediate course teaches you mechanical skills following the Park Tool Big Blue Book of Bicycle Repair syllabus to familiarise you with many bicycle systems and workshop practices. Completion of assessment leads to the award of a certificate. You are encouraged to work on your own bike. Please be aware for some elements of the course certain bikes may not be suitable, however, there are also a number of classroom bikes to work on where necessary. We can provide a classroom bike if you’re unable to bring your own. Course Detail Over two days you will cover: Chains (Assessing wear, chain care regimes, removal, sizing and installation) Pedals, Cranks and Drivetrain (Assessing wear, removal and installation of all components) Cassettes and Freewheels (Removal and installation, assessing wear) Gear Setup (Cabling and setup) Rim & Mechanical Disc Brakes (Assessing wear, strip down and re-installation) Bicycle Setup (Choosing the right bike, saddle height) Frame Assessment (new and damage frame assessment, tools used for frame prep) Price The course costs £275 inc VAT. This includes Park Tool Big Blue Book of Bicycle Repair and the use of all tools and equipment while on course. If you’re a Cambridge Cycling Campaign member, we offer a 15% discount to support the good work that they do. Please email us for access to your coupon code. Refunds for courses are only given under exceptional circumstances and never within 7 days of the advertised course. In the unlikely event we have to make the difficult decision to cancel a course, participants will be offered a refund or the option to reschedule. Please read our terms & conditions for full details. Pre-requisites Course participants must be 18 years old or above. We may be able to accommodate younger participants 16+, we accept these on a case by case basis based on prior experience. Please contact us to discuss. Participants should have a good knowledge of the key content outlined in the Basic: Ride With Confidence course before booking the Intermediate as this level of knowledge is assumed by the instructor on the day. There will be a brief refresher, but if you are unsure do get in touch to discuss. Course Timings, Assessment, Location & Travel Courses run 9am-4pm over two days, or 9:30am – 4:30pm for weekend courses. Courses take place in our dedicated training workshop at our offices in Cambridge. We have an abundance of bike racks, and we are close to Cambridge North Station. There is limited parking on site on a first-come-first-served basis and we are close to parking at Cambridge North Station. There is some limited on-road parking (at owners risk). You may also park for free at the Milton Park & Ride, which is only a short 15 minute cycle to our workshop. Further details If you have any further questions, please do please get in touch to discuss.

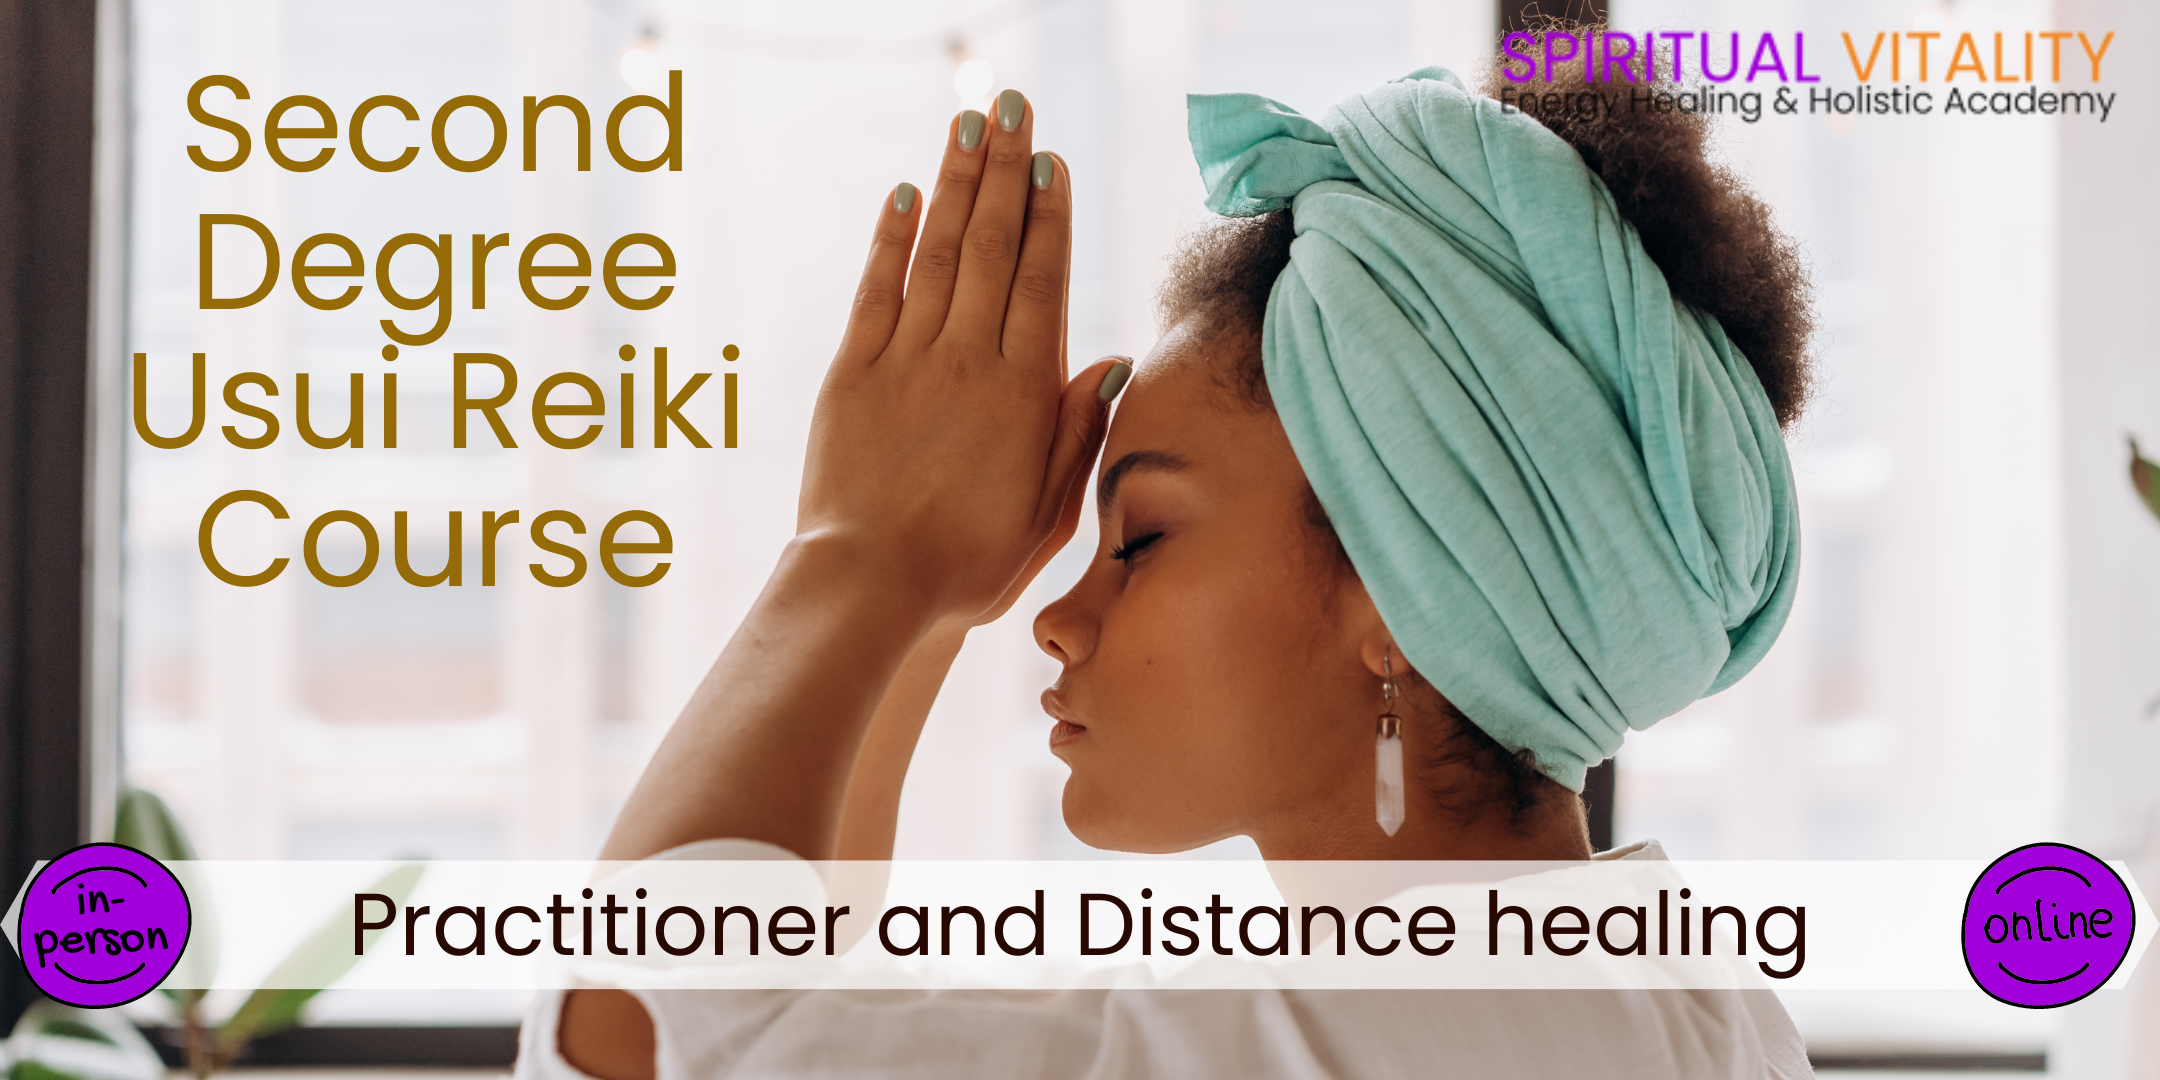
Second Degree Usui Reiki Course You will be taught how to conduct a healing session; protocols, etc and how to perform distance healings. This course is comprehensive and detailed. You will have all the tools you need to start using Reiki on others and their pets. Upon completion of this comprehensive and insightful Reiki course, you can go on to get insurance to set up as a Reiki Practitioner and start seeing clients.
Basic Photoshop Training Course
By ATL Autocad Training London
Learn the Basic PhotoshopTraining Course Learn retouching, layers, color, correction, shapes, and symbols. Delve into graphic design, photo editing, and digital art. From beginner to pro, gaining expertise in UX strategies, ensuring your websites are impactful and user-friendly. Click here for more info: Website Duration: 10 hours Approach: 1-on1 sessions and Personalized guidance. Schedule: Customize your schedule by booking a convenient hour, available from Monday to Saturday between 9 am and 7 pm. Module 1: Interface and Preferences Familiarize yourself with the Photoshop Interface Customize Panels and Toolbars to match your workflow Explore Photoshop Preferences to optimize settings Discover various Photoshop CC Workspaces tailored for different tasks Begin with essential Keyboard Shortcuts Module 2: Image File Formats Understand diverse image file formats such as PSD, JPEG, PNG, and PDF Delve into File Compression and its influence on image quality Module 3: Creating a New Document Set dimensions and size for new documents Grasp media units for accurate design specifications Explore Color Profiles and their significance Save presets for swift document setups Module 4: Placing Images Differentiate Embedded vs. Linked images Introduction to Smart Objects for non-destructive editing Master the Selection tool for precise image placement Module 5: Image Size and Resolution Save images using various formats and compression settings Understand Image Size and Resolution for diverse output needs Module 6: Layers Introduction Organize your work with Layer management Master layer tasks such as reordering, renaming, grouping, locking, and hiding Module 7: Selection Tools Explore Selection Tools like Marquee, Magic Wand, Quick Selection, and Lasso Grasp Inverse Selection and Deselect for efficient editing Module 8: Layer Effects Apply captivating Layer Effects such as Drop Shadow, Stroke, and Outer Glow Save and replicate Effects Styles for quick application Combine multiple effects for creative designs Module 9: Introduction to Shapes Utilize the Shapes tool for fundamental design elements Create Custom Shapes for unique designs Understand Color principles and use the Properties Panel for adjustments Master the Direct Selection tool for precise shape editing Create a basic poster using provided examples Module 10: Type and Typography Work with Type and explore the Character and Paragraph Panel Utilize Styles Panel for consistent text formatting Save favorite fonts for easy access Apply Effects and Layer Styles on Type for impactful typography Learn about Leading, Tracking, and Kerning for optimal text spacing Module 11: Colors Understand RGB vs. CMYK color modes Select colors using the Eyedropper tool Save colors as Swatches for reuse Create gradients using the Gradient Tool Module 12: Creating a Clipping Mask Master the concept of Clipping Masks and their application Apply Clipping Masks to Type, Images, and Shapes Combine Layer Effects with Clipping Masks for creative designs Module 13: Introduction to Masking Understand Masking and its importance in image editing Utilize the Brush tool for mask creation Learn Masking shortcuts and use Gradient Mask for smooth transitions Module 14: Adjustment Layers Explore Color and Gradient Adjustment Layers for image enhancements Master Curves, Levels, and Hue/Saturation Adjustment Layers for precise color control Convert images to Black and White using Adjustment Layers Combine Adjustment Layer Masks for targeted edits Module 15: Image Touch Up Master various touch-up techniques, including Red Eye Removal, Spot Healing Brush, and Patch Tool Utilize Content Aware Removal for seamless object removal Restore old photos using Clone Stamp and Dodge/Burn tools Enhance portraits by removing blemishes and whitening teeth Module 16: Filters Introduction Understand Smart Objects and Filter usage for non-destructive editing Explore the Filters Gallery and experiment with Blur and Vantage filters Module 17: Blending Modes Introduction Master the concept of Blending Modes and their effects on layer overlays Understand different Blending Modes like Darken, Lighten, and Overlay Layer Mastery: Develop expertise in working with layers, mastering advanced techniques for seamless editing and design organization in Adobe Photoshop. Precision Editing: Skillfully employ a variety of selection tools, ensuring precise and meticulous editing, manipulation, and composition of images and elements. Creative Layer Effects: Apply captivating Layer Effects with finesse, enhancing your designs and visuals to achieve professional-grade aesthetics. Advanced Editing Techniques: Understand the functionalities of Adjustment Layers, Masking, and Clipping Masks, enabling you to perform advanced editing and compositing tasks with confidence and precision. Effective Photo Restoration: Acquire techniques to touch up and restore photographs effectively, ensuring professional-quality results in photo editing and retouching. Typography Expertise: Explore advanced typography techniques, enabling you to create visually appealing text designs that complement your overall compositions. Filter Applications: Gain an introductory understanding of Filters and their creative applications, enhancing your ability to add artistic effects and refine visuals. Practical Color Theory: Grasp the fundamental principles of Color Theory and apply them practically in your designs, ensuring harmonious and visually pleasing color schemes in your work. Course Highlights: Advanced Photoshop Skills: Learn intricate techniques for professional image editing, retouching, and manipulation. Creative Design Projects: Engage in hands-on projects to enhance your practical skills in real-world scenarios. Mastering Special Effects: Dive into advanced topics like layer effects, filters, and blending modes to create stunning visual effects. Typography and Design Principles: Explore typography styles, layout design, and color theory for compelling compositions. Professional Portfolio Development: Receive guidance on creating a professional portfolio showcasing your Photoshop expertise. Potential Job Roles: Graphic Designer: Craft visually appealing graphics for print and digital media. Digital Artist: Create digital artwork for various applications, from illustrations to advertisements. Photo Retoucher: Enhance and manipulate photos for professional use, including portrait retouching. UI/UX Designer: Design user interfaces and experiences for websites and applications. Web Designer: Develop visually engaging websites with expertise in Photoshop for web design. Marketing Content Creator: Produce marketing materials such as banners, brochures, and social media visuals. Freelance Designer: Work independently, offering design services to clients across different industries. Advertising Creative: Contribute to creative campaigns by designing impactful ad visuals. Print Production Specialist: Prepare print-ready materials, ensuring quality in printed products. Photography Post-Processing Specialist: Enhance and retouch photographs, optimizing them for professional use. Comprehensive Photoshop Proficiency: Develop a solid foundation in Photoshop, mastering essential tools and techniques vital for image editing and manipulation. Creative Editing Expertise: Learn advanced retouching, image enhancement, digital artwork creation, and graphic design using Photoshop's powerful features. Professional-Grade Results: Acquire skills for achieving professional-level outcomes in image editing, ensuring precise color correction, seamless retouching, and visually appealing compositions. Optimized Workflow: Discover time-saving tips, shortcuts, and efficient techniques to enhance your Photoshop workflow. Learn layer management, non-destructive editing, and automation for streamlined processes. Versatile Design Skills: Unlock creative possibilities by mastering text effects, digital collages, filters, and graphic design for diverse mediums. Access to Recorded Lessons: Revisit course material and reinforce learning through recorded lessons. Review specific techniques at your own pace, deepening your understanding of Photoshop. Lifetime Email Assistance: Benefit from continuous support with lifetime email assistance. Seek guidance, get answers to questions, and seek clarification even after completing the course.
Rhinoceros 3D Night Training Course
By ATL Autocad Training London
Why Choose Rhinoceros 3D Night Training Course? Learning Rhino 3D opens doors to advanced 3D modeling, making it essential for architects, designers, and engineers. Its versatility, ease of use, and powerful features make it an industry favorite for creating intricate designs, from architecture to product design. Click here for more info: Website Personalized Learning: 1-on-1 sessions tailored to your needs Flexible Timing: Convenient evening classes (5 pm - 7 pm) Mon to Sat Duration: 10 hours. Choose your own day and time Rhino 3D Training Overview Our Rhino 3D Training offers in-person or live sessions suitable for beginners and those aiming to optimize their workflow in Rhinoceros 3D. Course Highlights: Master precise free-form 3D NURBS modeling. Explore advanced surfacing commands and the Rhino interface. Develop skills in curve, surface, and solid modeling. Learn effective modeling practices for various industries, from industrial design to jewelry and graphic design. Who Should Attend? This course is perfect for individuals starting their Rhino journey or aiming to refine their modeling skills. If jewelry modeling is your focus, check out our specialized Rhino Training for Jewelry Design Course. Why Choose Us? Hands-on, instructor-led sessions with flexible scheduling (weekdays, evenings, or weekends from 9 am to 7 pm). Expert instruction from Rhino professionals. Real-time practice with industry-aligned projects. Comprehensive electronic notes and course completion certificate. Ongoing support and career advice from experienced trainers. Benefits of Rhino Training Ideal for enthusiasts in animation, modeling, NURBS curves, surfaces, or solids, Rhino Training empowers you with industry-standard skills. No prerequisites are required, ensuring accessibility for all learners. Upon completing this course, you will: Master Rhino's Interface: Gain proficiency in Rhino's commands, toolbars, and menus, enabling efficient 3D modeling. Create Complex 3D Models: Develop the skills to create intricate 3D objects using curves, surfaces, and solids with various techniques like lofts, sweeps, and revolves. Refine Modeling Techniques: Learn advanced editing methods, such as filleting, chamfering, and curve Booleans, to refine and modify objects. Navigate the 3D Space: Understand 3D navigation, viewports, and construction planes, enabling precise modeling in a virtual space. Prepare Models for Production: Master techniques for analyzing and preparing 3D models for manufacturing, prototyping, and 3D printing. Enhance Rendering and Visualization: Learn rendering techniques to create realistic visuals of your models for presentations and proofs. Job Opportunities: After completing this course, you can pursue a variety of careers, including: 3D Modeler: Create detailed 3D models for industries like gaming, animation, or virtual reality. Product Designer: Design and visualize products for manufacturing using 3D modeling software. Architectural Visualization Specialist: Develop detailed architectural models for presentations and client approvals. Industrial Designer: Design consumer products, furniture, or appliances for manufacturing companies. Jewelry Designer: Craft intricate jewelry designs with precise detailing using 3D modeling techniques. Prototyping Specialist: Work in industries like aerospace or automotive, creating prototypes for testing and development. Freelance 3D Artist: Offer your skills on platforms like Upwork or Fiverr, creating custom 3D models for clients worldwide. Rhino 3D Training Overview Our Rhino 3D Training offers in-person or live sessions suitable for beginners and those aiming to optimize their workflow in Rhinoceros 3D. Course Highlights: Master precise free-form 3D NURBS modeling. Explore advanced surfacing commands and the Rhino interface. Develop skills in curve, surface, and solid modeling. Learn effective modeling practices for various industries, from industrial design to jewelry and graphic design. Who Should Attend? This course is perfect for individuals starting their Rhino journey or aiming to refine their modeling skills. If jewelry modeling is your focus, check out our specialized Rhino Training for Jewelry Design Course. Why Choose Us? Hands-on, instructor-led sessions with flexible scheduling (weekdays, evenings, or weekends from 9 am to 7 pm). Expert instruction from Rhino professionals. Real-time practice with industry-aligned projects. Comprehensive electronic notes and course completion certificate. Ongoing support and career advice from experienced trainers. Benefits of Rhino Training Ideal for enthusiasts in animation, modeling, NURBS curves, surfaces, or solids, Rhino Training empowers you with industry-standard skills. No prerequisites are required, ensuring accessibility for all learners. Advantages: Personalized Rhino 3D Evening Training with individual attention. Flexibility to select your preferred time and day for the training. Access to free online support even after completing the course. Comprehensive PDF notes and handouts provided for effective learning. Receive a certificate upon completing the Rhino 3D Evening Training Course. Affordable pricing options tailored to your budget. Assistance in computer configuration for seamless software installation. Referral benefits: Recommend a friend and enjoy exclusive discounts. Special discounts available for group training sessions. Operating hours from Monday to Saturday, extending into the evening for convenience. Tailored training programs designed to meet your specific needs and requirements.
The Full Hypnobirthing Programme | In-person or online | Groups or Private Classes.
(10)By Poppy & Jack - Hypnobirthing And Mama Wellbeing
The Poppy and Jack Hypnobirthing course is a complete birth preparation programme that helps expectant parents to release anxiety and enjoy a positive mindset for a better birth experience. Antenatal education, breathing, visualisation and guided relaxation techniques for pregnancy, birth and beyond.