- Professional Development
- Medicine & Nursing
- Arts & Crafts
- Health & Wellbeing
- Personal Development
Enscape Rendering Training Course
By ATL Autocad Training London
Who is this course for? Enscape Rendering Training Course. The Enscape Rendering Training Course is tailored for architects, interior designers, and design students aiming to learn realistic visualizations using Enscape. Whether you prefer 1-on-1 in-person or online courses, this training is best for you. Click here for more info: Website Training duration: 5 hrs Method: 1-on-1 and Tailored content Schedule: Customize your training. Choose any hour from Mon to Sat, 9 am to 7 pm Call 02077202581 or WhatsApp at 07970325184 to book. Course Outline: Enscape Rendering Software Training (5 hours) Course 1: Enscape for Revit Hour 1: 1. Introduction to Enscape: Overview of Enscape rendering software, its features, and benefits. 2. Installing and Setting up Enscape: Step-by-step guidance on installing and configuring Enscape for Revit. 3. Enscape Interface: Familiarizing with the Enscape user interface and navigation controls within Revit. Hour 2: 4. Enscape Materials: Exploring material creation, application, and customization within Enscape for Revit. 5. Lighting in Enscape: Understanding different lighting options, adjusting light settings, and creating realistic lighting effects. Hour 3: 6. Enscape Camera Settings: Manipulating camera angles, perspectives, and settings for optimal visualization. 7. Enscape Rendering Settings: Exploring various rendering settings and techniques to enhance the quality of the final output. Hour 4: 8. Enscape Rendering Workflow: Demonstrating a step-by-step workflow for generating renderings and walkthroughs using Enscape in Revit. 9. Advanced Features: Introduction to advanced features such as creating panoramas, virtual reality (VR) walkthroughs, and creating animations in Enscape. Hour 5: 10. Tips and Tricks: Sharing tips and techniques for maximizing efficiency and achieving high-quality results in Enscape for Revit. 11. Q&A and Troubleshooting: Addressing participant questions, providing troubleshooting guidance, and discussing common challenges and solutions. OR Course Outline: Enscape Rendering Software Training (5 hours) Course 1: Enscape for Sketchup Hour 1: 1. Introduction to Enscape: Overview of Enscape rendering software, its features, and benefits for SketchUp users. 2. Installing and Setting up Enscape: Step-by-step guidance on installing and configuring Enscape for SketchUp. 3. Enscape Interface: Familiarizing with the Enscape user interface and navigation controls within SketchUp. Hour 2: 4. Enscape Materials: Exploring material creation, application, and customization within Enscape for SketchUp. 5. Lighting in Enscape: Understanding different lighting options, adjusting light settings, and creating realistic lighting effects. Hour 3: 6. Enscape Camera Settings: Manipulating camera angles, perspectives, and settings for optimal visualization in SketchUp. 7. Enscape Rendering Settings: Exploring various rendering settings and techniques to enhance the quality of the final output. Hour 4: 8. Enscape Rendering Workflow: Demonstrating a step-by-step workflow for generating renderings and walkthroughs using Enscape in SketchUp. 9. Advanced Features: Introduction to advanced features such as creating panoramas, virtual reality (VR) walkthroughs, and creating animations in Enscape. Hour 5: 10. Tips and Tricks: Sharing tips and techniques for maximizing efficiency and achieving high-quality results in Enscape for SketchUp. 11. Q&A and Troubleshooting: Addressing participant questions, providing troubleshooting guidance, and discussing common challenges and solutions. Learning Outcome: After completing the Enscape (VR) Training and Interactive Workshop, participants will master real-time walkthroughs, set up VR applications, efficiently migrate models, navigate designs dynamically, update objects in real-time, control visual styles, adjust day-time settings, export and share designs, utilize the asset library, and gain a comprehensive overview of Enscape. These skills will enable them to confidently visualize and display 3D designs without cloud uploads or external software, enhancing communication and collaboration in architectural projects. What does the Enscape Training & Interactive Workshop offer? The Enscape Training & Interactive Workshop is designed to help you get up and running with Virtual Reality (VR) in a cost-effective manner. It covers hardware and software setup, navigation techniques, real-time updates, material settings, and more. The workshop also allows participants to experience VR firsthand. What are the benefits of attending the Enscape (VR) Training and Interactive Workshop? By attending this workshop, you will gain the ability to perform real-time walkthroughs of your designs in 3D. You can view your projects in VR without the need for cloud uploads or exporting to other 3D software. The workshop offers extensive asset libraries, collaboration, and annotation sharing, enhancing your design visualization capabilities. What are the prerequisites for attending the Enscape (VR) Training and Interactive Workshop? No prior knowledge of Enscape is required. However, assistance from IT management may be necessary for hardware and software installation. Logistics, such as room suitability and technical requirements, will be discussed before the workshop. What will I learn in the Enscape (VR) Training and Interactive Workshop? The workshop covers hardware setup, software installation, and configuration. You will learn how to migrate models from Revit and SketchUp into VR, navigate through designs, update objects and materials in real-time, and utilize various visual styles and settings. The course also includes interactive workshops with support from our expert tutors. Enscape rendering courses offer valuable benefits: Real-time Visualization: Instantly visualize designs for quick iterations and informed decisions. Seamless Integration: Streamline rendering by integrating with popular design software. High-Quality Visuals: Create photorealistic presentations and walkthroughs. Efficient Design Communication: Enhance collaboration and communication during presentations. Enhanced Design Iteration: Explore options and make informed decisions in real-time. Time and Cost Savings: Reduce rendering time and deliver projects more efficiently. Portfolio Enhancement: Elevate your portfolio with visually striking renderings, opening new opportunities.


Who Should Attend Those working towards their President's Badge (14 to 16 years old). Course Description A practical course focusing on developing new and existing skills for those working on their President's Badge. The cost is £10 per participant, we will invoice on receipt of entries. Venues The venue for Course 1 (25 Oct) is Battalion HQ, the venue for Course 2 (18 Jan) is St John's Renfield Church, the venue for Course 3 (21 Feb) is still to be confirmed.
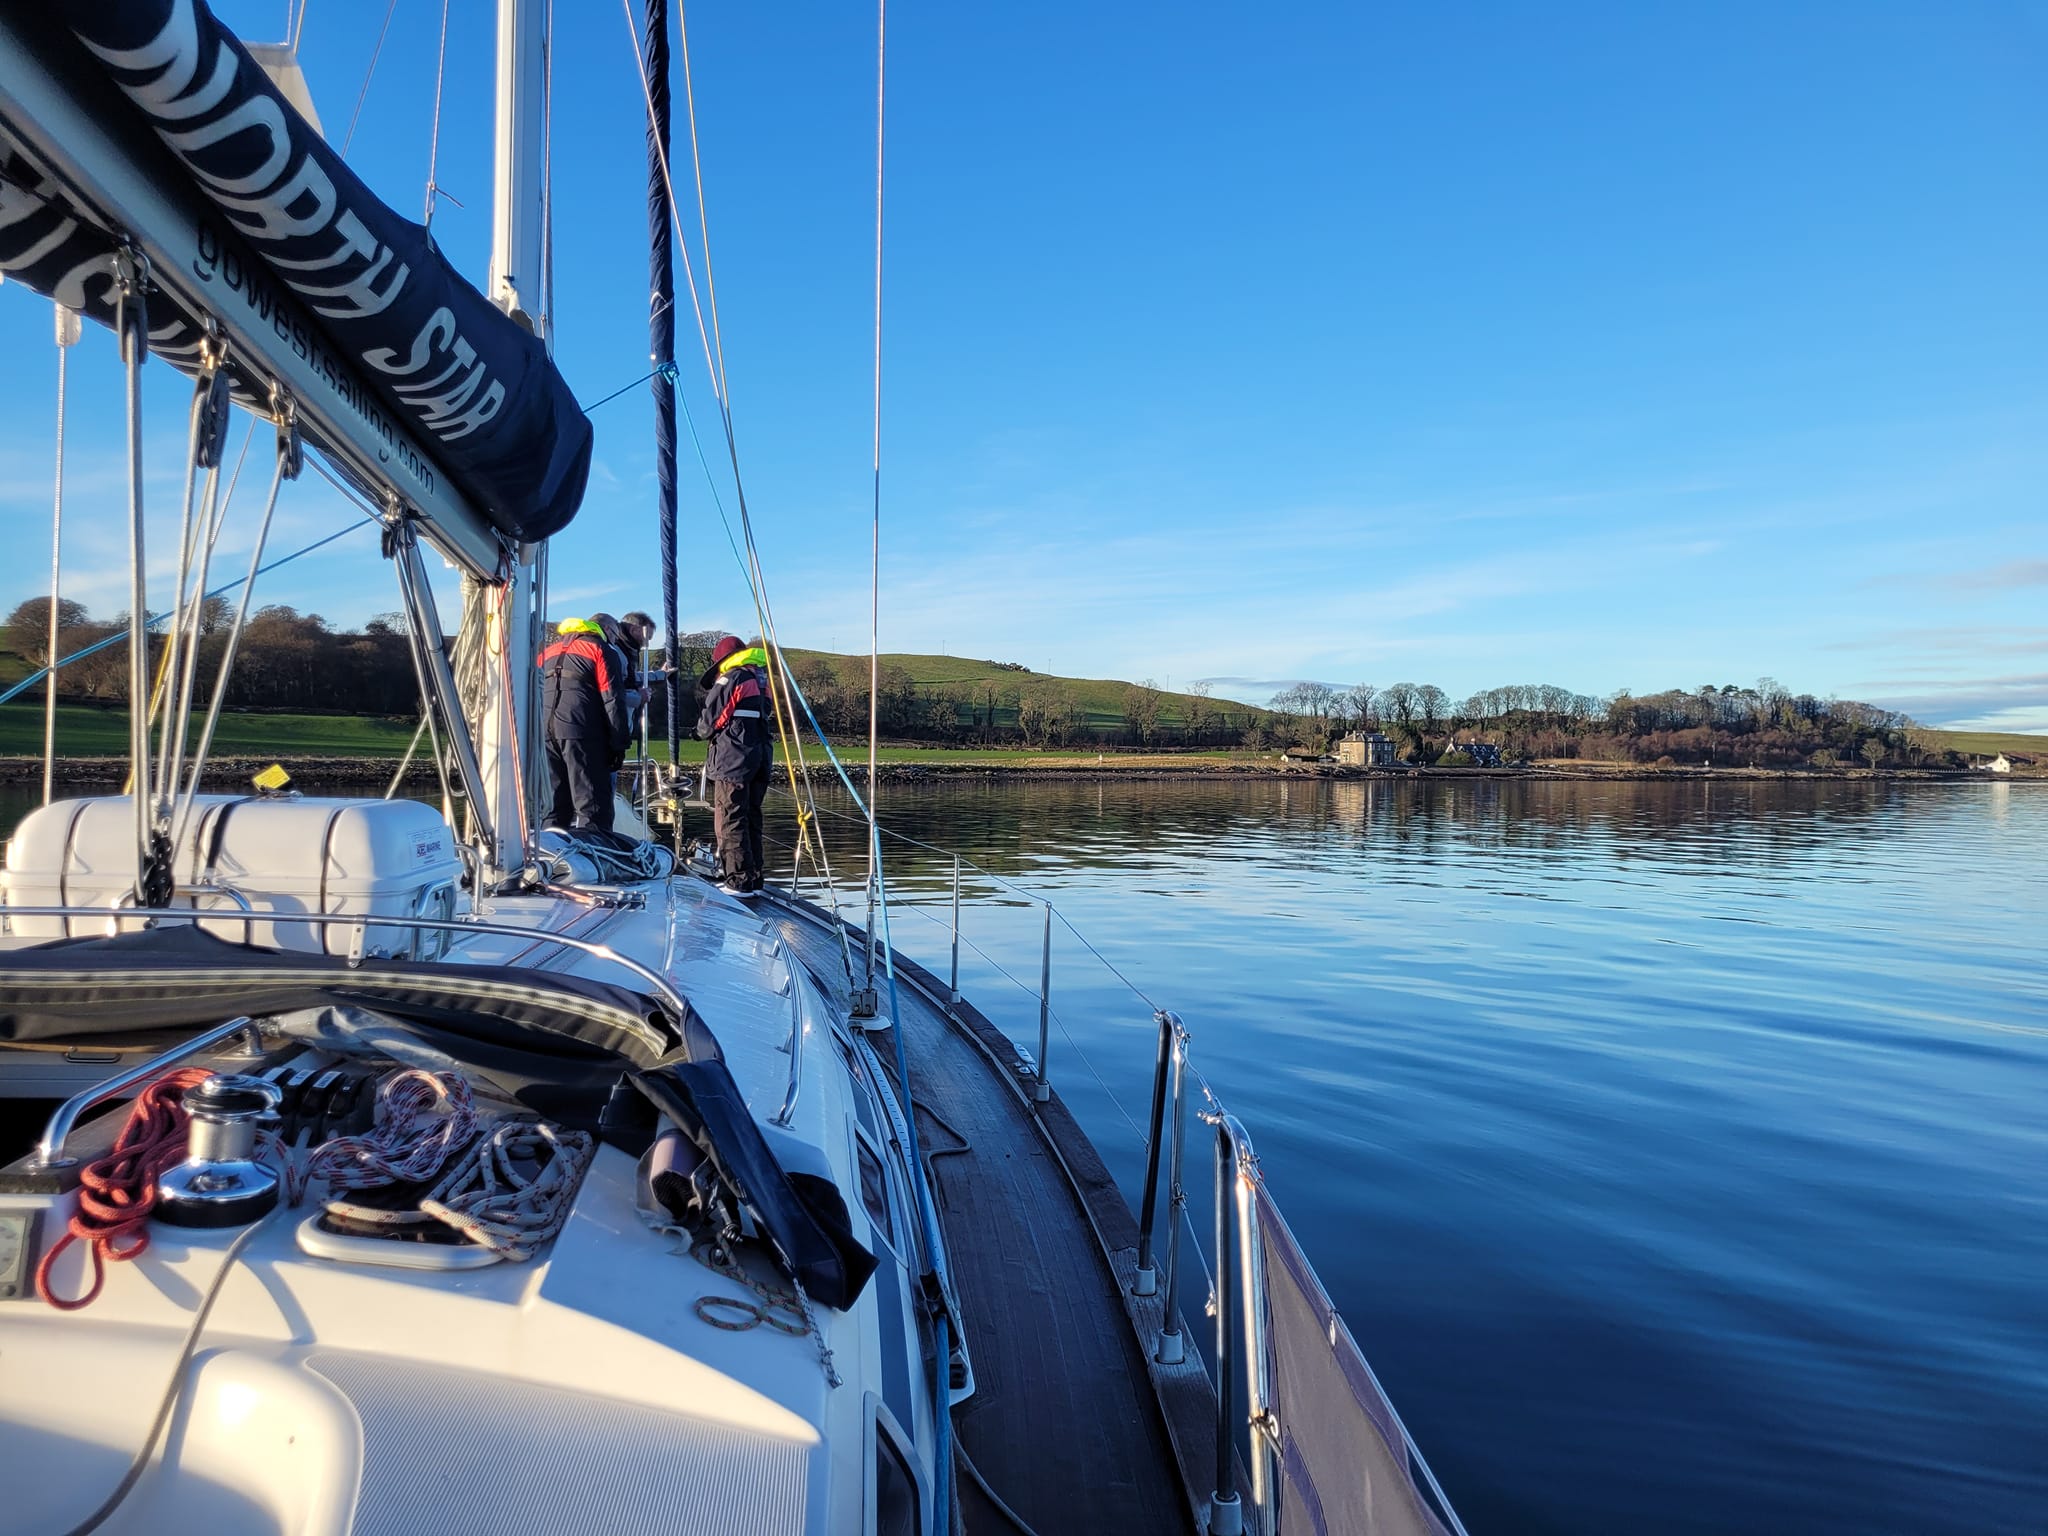
Join us to gain experience and log miles. Perhaps you have the skill to complete the next level in RYA qualification but need more miles, or maybe you wish to refresh your capabilities as a qualified skipper or a crew member. This is the perfect opportunity to join like-minded people, practice your skills and log those required miles. You will be part of a crew of five, along with one of our experienced instructors who can help you with the skills and drills required for all levels of RYA courses. During a 5-day course you will visit some of the most beautiful harbours and anchorages on the west coast of Scotland. You will be living on one of our fully coded, well equipped, yachts. Food, fuel and marina fees are included. A weekend course will not venture so far, and the emphasis will be on short passages to local harbours or marinas, with lots of activities en route. What is included in the price: 5 nights on board (2 nights on a weekend course), all on board meals and snacks, all marina fees, fuel and gas. Optional extras: oil skins hire - £3.50 per item/day; cleaning fee £12.50/per person or the crew can clean the boat; sleeping bag can be hired at just £15 per period.
During this two-day workshop, you will learn how to tell a compelling story via photographs. Participants will gain the tools for conceiving of and crafting their own projects, with pointers on how to find ideas, develop your vision, and self-edit. We will cover a broad range of themes, including subject interaction, ethical dimensions, natural light usage and composition. There will also be practical guidance on financing projects, and where to place finished work.Between the two sessions there will be an assignment, intended to provide a practical application of newly acquired skills – this will be reviewed in our second meeting.This workshop is perfect for those with a good understanding of digital photography, seeking to hone their storytelling abilities and push the boundaries of documentary photography.Day 1:– Introduction to photographic storytelling.– Case study of Michael’s work in relation to the practicalities involved with funding, organising and producing a documentary project.– Discussion on the work of inspirational photographers, film makers, and artists.– Consideration of the ethical challenges encountered when producing documentary photography.– Introduction of practical task, and review of images.There will be a practical assignment to be carried out before the 2nd session.Day 2:– Photo story workshop and discussion on style.– Editing: how to select the right pictures to suit narrative objectives.– How to work within time constraints.– Practical task– Portfolio review of work produced during the workshop.– Presentation on opportunities, competitions, and publishing documentary photography projects. Courses are subject to minimum enrolment. Please register early, within five days of the start date, to reduce the likelihood of course cancellation. Please read our cancellation policy before booking. Students, anyone over the age of 65, and those in receipt of any form of benefits can claim the concessionary price, offering a 10% discount on the full course price. Valid proof of eligibility must be produced on the first day of the course. Please use the code CONCESSION when prompted at checkout.

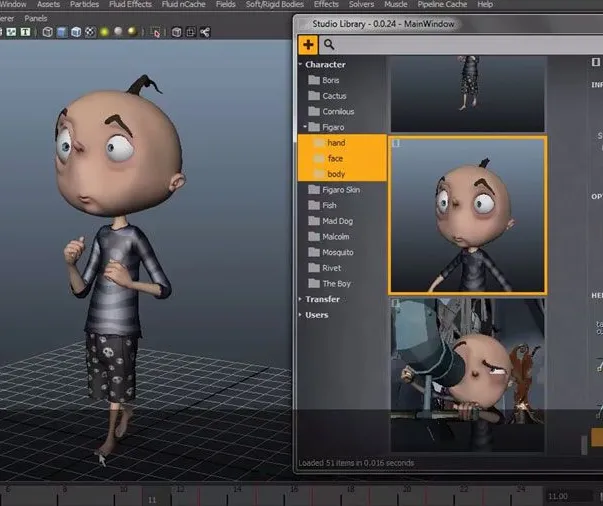
Mastering Maya Basics to Intermediate Course
By ATL Autocad Training London
Why Choose Mastering Maya Basics to Intermediate Course? Click here for more info: Website Our courses cater to graphic designers, animators, and beginners, providing industry-standard animation skills. Dive into 3D animation, modeling, simulation, and rendering for film, TV, games, and ads. Duration: 20 hours Approach: 1-on-1 Sessions. Schedule: Design your own schedule by pre-booking a convenient hour of your choice, available Mon to Sat between 9 am and 7 pm. I. Introduction to Maya (1.5 hours) Understanding Maya and its Applications Navigating the Maya Interface and Basic Tools Creating and Managing Projects II. 3D Modeling (3 hours) Basics of Polygon Modeling Creating Simple and Complex 3D Shapes Organic Shape Creation using NURBS Advanced Techniques: Extrusions, Bevels, and Editable Objects III. Texturing and Materials (1.5 hours) Introduction to Texturing and Material Creation UV Unwrapping and Texture Mapping Importing and Applying Textures and Images IV. Lighting and Rendering (2 hours) Fundamental Lighting Techniques Camera Setup and Composition Rendering Images and Animations Output Options and File Formats V. Animation (4 hours) Keyframe Animation and Animation Curves Rigging and Animating Characters Motion Paths and Animation Layers Editing Animation Clips VI. Rigging (2 hours) Introduction to Rigging and Skeletons Binding Skin and Weight Maps Creating Rigging Systems for Characters VII. Special Effects (1.5 hours) Particle Systems and Dynamics Creating Fluids, Fire, and Other Effects Special Effects Editing: Explosions, Smoke, and more VIII. Advanced Modeling Techniques (1.5 hours) Complex Objects using Booleans and Deformers Modifying Curves and Surfaces Organic Shape Creation with Sculpting Tools IX. Conclusion and Next Steps (0.5 hours) Course Review Further Learning Tips and Resources Q&A and Feedback Please note: The course content and duration are flexible, tailored to match learners' needs and skill levels. Throughout the course, lifetime email support ensures you receive guidance with any challenges you face. Embark on your Autodesk Maya journey, exploring 3D modeling and animation with confidence. Additional Topics Covered: Modeling: Surfaces, Control Vertex, Polygons, Extrusion, Vertices, Edges, Bridge Tool, Combining, Smooth, Mirror Geometry, Merging Vertices, Subdivision Modeling. Deformations: Twist, Lattice, Flare, Bend. Shapes: Lines, Pen Tools. Animations: Basic Keyframes, Vertex Animation, Clusters, Path Animations, Skeletons, Bones, IK Handle Tool, Skinning. Dynamics: Fire, Lighting, Soft and Rigid Bodies, Particles, Collisions, Gravity. Fur and Paint Effects: Fur Basics, Fur Color Corrections, Paint Effects, Paint Modifier, Brush Animations. Texturing: Diffuse and Bump Maps, Reflections, Transparency, Shaders, Toon Shaders, Glow Textures. Lighting: Basic and Advanced Lights, Shadows, Special Light Effects. Camera: Free and Aim Cameras, Camera Effects, Path Animations. Fluid Effects and Ncloth: 2D and 3D Containers, Collision Effects, Gravity, Wind Effects. Rendering: Images and Animations, Render Techniques, Resolution Settings, Batch Rendering. Download Maya Maya Proficiency: Master Maya's interface, tools, and functions, advancing from basic to intermediate levels. 3D Modeling Expertise: Create diverse 3D models using polygonal and NURBS techniques, from simple shapes to intricate designs. Texturing and Rendering Skills: Apply textures, create materials, and utilize advanced rendering techniques for high-quality visuals. Animation Techniques: Understand keyframe animation, rigging, and character animation, producing engaging animations and special effects. Special Effects and Dynamics: Explore particle systems, fluid dynamics, and advanced visual effects, enhancing realism in animations. Advanced Modeling and Sculpting: Master complex modeling techniques, including Booleans, deformers, and organic shape creation through sculpting tools. Professional Portfolio: Develop a diverse portfolio showcasing 3D modeling and animation skills, ready for presentation to employers or clients. Problem-Solving Skills: Learn creative approaches to solve complex 3D challenges effectively. Collaborative Abilities: Understand team dynamics and collaboration within the 3D production pipeline. Recommended Books: "Introducing Autodesk Maya 202X" by Dariush Derakhshani and Randi L. Derakhshani: Comprehensive beginner's guide to Maya's essential tools and techniques. "Mastering Autodesk Maya 20XX" by Todd Palamar: In-depth intermediate guide covering advanced features, modeling, animation, and rendering. "Maya Character Creation: Modeling and Animation Controls" by Chris Maraffi: Focuses on character creation, covering modeling, rigging, and animation. "Maya Secrets of the Pros" by Todd Palamar: Expert tips and techniques from professional Maya artists, detailing advanced workflows and best practices. "Stop Staring: Facial Modeling and Animation Done Right" by Jason Osipa: Specialized book on facial modeling and animation, perfect for character expression enthusiasts. "The Art of 3D Computer Animation and Effects" by Isaac Kerlow: Offers foundational knowledge in 3D computer animation principles, applicable to various software, including Maya. Mastering Maya Basics to Intermediate Course Benefits: Comprehensive Skill Development: Master essential tools and techniques, from basics to intermediate, with hands-on projects mirroring real industry scenarios. Industry-Grade Proficiency: Acquire expertise in Autodesk Maya, enhancing credibility in animation, visual effects, and gaming industries. Creative Exploration: Unlock creative potential through advanced shading, lighting, dynamics, and simulations, enabling imaginative project realization. Portfolio Enhancement: Build a strong portfolio showcasing skills in 3D modeling, animation, and rendering for career advancement. Individualized Support: Receive personalized guidance and feedback, ensuring tailored learning experiences and skill refinement. Potential Jobs After Course: 3D Animator: Create lifelike character animations for films, games, and advertisements. 3D Modeler: Design detailed 3D characters, environments, and objects for various applications. Visual Effects Artist: Produce stunning visual effects for movies, TV shows, and commercials. Texture/Lighting Artist: Develop intricate textures and set the mood with expert lighting. Rigging Specialist: Rig characters and objects for realistic movement in animations. Rendering Specialist: Optimize rendering capabilities for high-quality images and animations. Game Developer: Contribute to interactive game development using Maya's features. Freelance Artist/Animator: Work independently on diverse projects, collaborating with studios and agencies. Skill Advancement: Progressive Mastery: Develop from basics to intermediate levels in Autodesk Maya, honing essential tools for stunning 3D visuals and animations. Hands-On Learning: Interactive Practice: Engage in practical projects, refining your skills in 3D modeling, advanced materials, character animation, and high-quality renders. Industry-Ready Proficiency: In-Demand Skills: Acquire proficiency in Autodesk Maya, a key software in animation and gaming, enhancing your employability. Creative Exploration: Unlock Creativity: Experiment with advanced shading, lighting, and dynamic animations, unleashing your creative potential in Maya. Flexible Support: Tailored Learning: Access recorded lessons for review, deepening your understanding, with lifetime email support for continuous guidance.
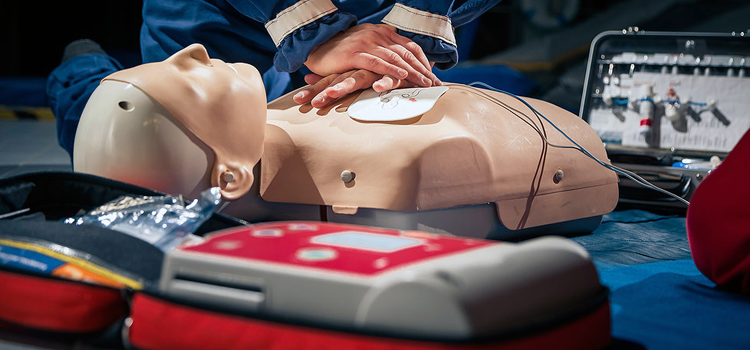
Emergency First Aid at Work Training Liverpool - Open Courses
By Training Course Solutions
This Emergency First Aid at Work (RQF) Level 3 Award qualification is designed for individuals who wish to act as an emergency first aider in their workplace. This Level 3 Award (EFAW) course is fully accredited and is statutory qualification specifically designed for individuals who wish to act as an emergency first aider in their workplace. This Emergency First Aid at Work Qualification is regulated by Ofqual. Course venue: Partnership for Learning Training and Conference Centre South Road Speke Liverpool L24 9PZ Emergency First Aid at Work Training Liverpool – Course Dates for 2023 Friday 21 April 2023 Thursday 25 May 2023 Thursday 29 June 2023 Thursday 27 July 2023 Thursday 31 August 2023 Thursday 28 September 2023 The Cost for the Emergency First Aid at Work ‘Open Course’ per delegate is only £98.00 +Vat. First Aid Courses in Liverpool – Call Dan or Mark on 0151 515 0416 for further details or to secure your first aid course. First aid courses Liverpool and surrounding areas – You can be assured that you are meeting your First Aid Training requirements by attending this course which is Ofqual regulated. To see our 3 Day First Aid Courses in Liverpool please click the link below: 3 Day First Aid at Work Training in Liverpool
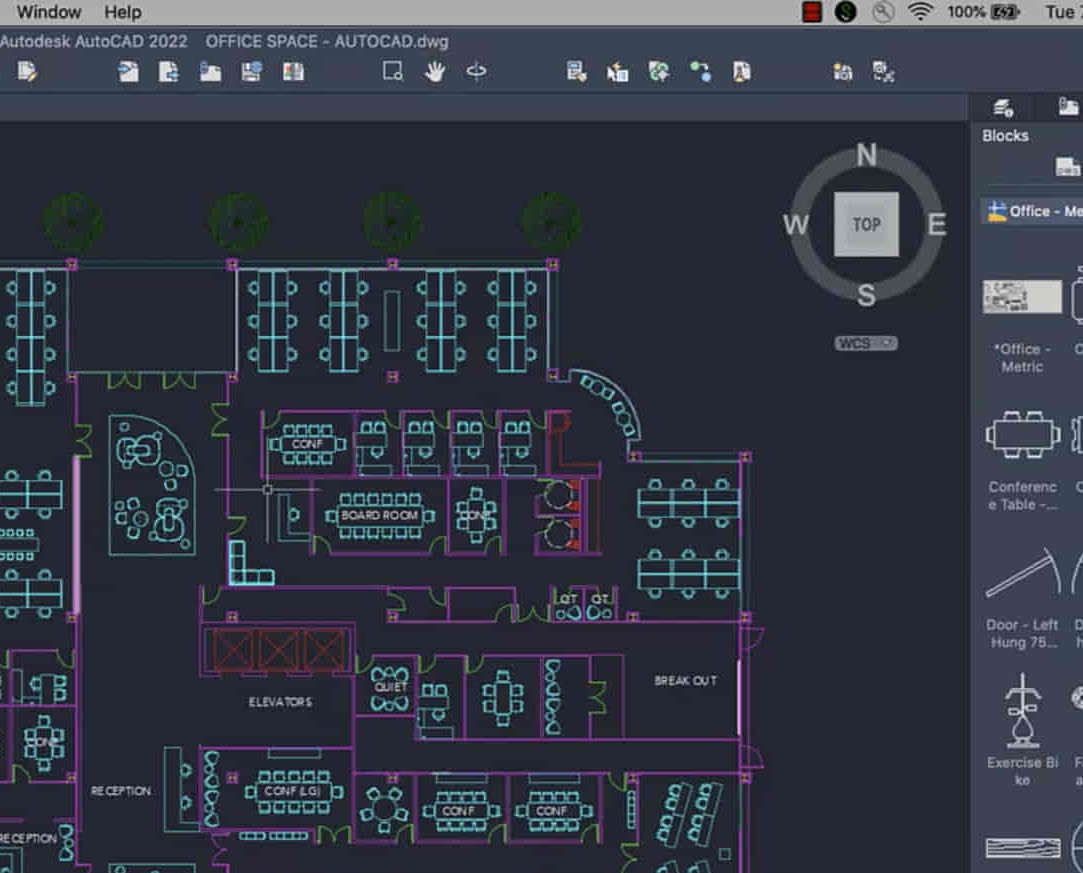
AutoCAD-Mac Introduction to Advanced Training Course
By ATL Autocad Training London
AutoCAD-Mac Introduction to Advanced Training Course This project-based course is tailored for AutoCAD Mac users, architecture and interior design students and professionals. Click here for more info: Website When Can I Book This Training Course? Personalized experience with 1-on-1 sessions designed to fit your unique needs. Available from Monday to Saturday, 9 am to 7 am Or Call to Book 02077202581. Duration of Training: 16 hours. Training Method: 1-on-1, providing the option for in-person sessions or live online training. Course Content Section 1: Introduction Course Overview Section 2: Basic Concepts Status Bar and The Units Drawing Commands Control Points - Vertex or Verteces Modifying Commands Snap Settings Drawing An Outline Section 3: Dimensions and Customization Adding Dimensions and Dimension Style Manager Importing Dimension Styles Customizing Shortcuts Section 4: Advanced Techniques Adding Walls Thickness with Offset Command Adding interior layout Cleaning Layout lines with Trim Section 5: Text and Styling Text Editing and Importing Text Styles Main File Formats in AutoCAD Section 6: Design Elements Creating Openings in the Floor Plan Adding Openings - Part 2 Adding Openings - Part 3 Drawing Doors & Windows Using Line Types & Linetype Scale Group and Ungroup Commands Using Blocks Using Blocks Library & Dynamic Blocks Section 7: Layers and Furnishing Layers - Part 2 Layers - Part 3 Furnishing Bedrooms & Bathrooms - Part 1 Adding Furniture, Fixtures, and Equipments | part 2 Adding Furniture, Fixtures, and Equipments | part 3 Drawing the Kitchen Drawing the Living Room Drawing Dining Room & Adding Casework Adding Steps and Railings Using Stretch Command Finishing Steps and patio areas Hatch command Hatch Customization Adding Plants & Finishing Floor Plan Section 8: Layout and Printing Paper Space & Page Setup Manager Working with Viewport & Using Print Command Scale & Using Multiple Viewports Locking Viewport Scale Drawing A Titleblock - Part 1 Drawing A Titleblock - Part 2 Copying the Titleblock Using Titleblock with Attributes Section 9: Roof Plan and Organization Drawing The Roof Plan Placing Roof Plan on Sheet Organizing Project Drawings & Using Layer Freeze AutoCAD Crashing And What To Do Section 10: Elevations Exterior elevations - Drawing the Outline Exterior elevations - Drawing the Openings Elevations - Detailing - Part 1 Elevations - Detailing - Part 2 Elevations - Repeating the workflow Elevations - Finishing 3rd Elevation Elevations - Drawing the final elevation Section 11: Sections Sections: Drawing Cut Lines & the Outline Sections: Placing 1st Section on Sheet Sections: Drawing Section #2 - Different Technique Sections: Adding Final Detail Section 12: Interior Elevations Interior Elevations: Drawing the Outline Interior Elevations: Placing on Sheet Interior Elevations: Using Block Clip Interior Elevations: Final Drawing Section 13: Conclusion Putting the Final Set Together Proficient AutoCAD Skills: Master essential tools for efficient drawing creation and manipulation. Accurate 2D Designs: Create precise and high-quality layouts with attention to detail. Effective Object Handling: Excel in selecting, moving, copying, and scaling objects. File Management: Organize drawings efficiently and understand different file formats. Precise Measurements: Utilize inquiry commands for accurate design analysis. Annotations and Hatching: Apply text, dimensions, and hatching to enhance drawings. Object Organization: Manage layers and object properties for organized designs. Reusable Content: Efficiently use blocks, tool palettes, and groups for productivity. Layout Optimization: Create layouts with viewports for optimal design presentation. Professional Output: Generate professional plots and PDF output for polished results. Enhanced Productivity: Explore AutoCAD toolsets and web/mobile apps for streamlined workflow. Course Overview: Learn versatile AutoCAD for Mac drawing techniques, applicable across all industries, enabling you to excel in the application. Our trainers incorporate exercises from various disciplines. Who Should Attend: Ideal for newcomers to AutoCAD for Mac, self-taught users seeking correct techniques, and those transitioning from other CAD tools. Requirements: A solid Mac OS understanding is essential, while prior CAD knowledge is not required. Pre-course preparation guidance is provided for new AutoCAD users. Highlights: Perfect for AutoCAD for Mac beginners. Gain skills for precise 2D layouts and designs. Versatile drawing techniques for all industries. Choose between in-class or live online training. Autodesk Certified Tutors: AutoCAD 1-2-1 courses. Hands-on learning with expert trainers. Lifetime post-course email support. Tailored on-request training available. Certificate: Digital certificate included. Tailored Mac Training: Excel in AutoCAD with specialized Mac training, leveraging its distinct features and interface for heightened efficiency. Comprehensive Skill Enhancement: Advance from fundamental to intermediate AutoCAD Mac proficiency, creating precise and professional 2D drawings. Industry-Relevant Expertise: Attain in-demand skills valued by employers in architecture, engineering, and design sectors. Hands-On Project Exposure: Immerse yourself in practical exercises mirroring real-world design scenarios, fostering practical competence. Lesson Recordings for Review: Access recorded lessons for reinforcement and deeper AutoCAD Mac comprehension. Ongoing Email Support: Benefit from lifetime email support, ensuring assistance beyond course completion."
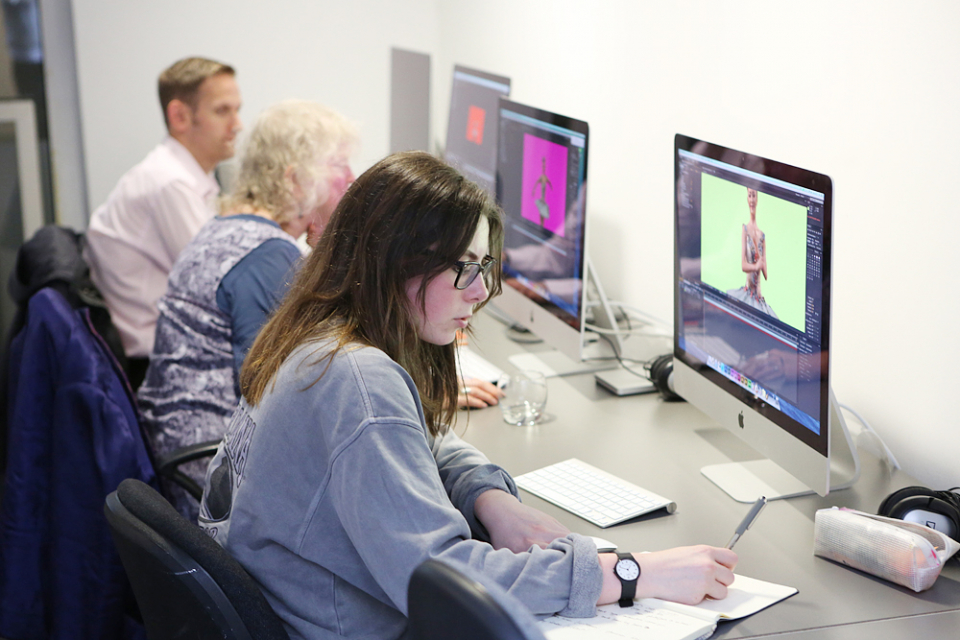
Adobe After Effects CC is the industry leader in video compositing software, offering an exciting and versatile array of applications for the creation of professional moving image work. On this course you will learn a range of visual effects and animation techniques, working between Photoshop and After Effects to create videos which explore text based motion graphics, character animation, green-screen compositing, 3D landscapes, motion tracking and lots more in-between. Alongside technical exercises the tutor will screen and discuss relevant artists, designers and filmmakers, providing both the technical skills and inspiration to create your own professional motion graphics work, filmic special effects or experimental artists video. Computer experience is required. Week 1 This week we will create a short video that combines text, still image and video layers. Through this exercise you will learn how to: Navigate the workspace on After Effects Set up a project and select a video format Introduce video to the timeline and split layers Change the position and scale of layers Introduce basic text Use selections in Photoshop to create a still image composition Import this composition into After Effects to create a composite video. Week 2 This week we will look at basic animation techniques. Through a series of exercises, you will learn how to: Use Photoshop to great multi-layered elements for animation Import these Photoshop elements into After Effects Work with key-frames and interpolation Add motion blur Duplicate and pre-compose animated elements Create a parallax effect to give the illusion of depth Apply blending modes Work with the puppet tool to create moving joints for an animated character Week 3 This week we will look at converting 2D photographs into a 3D virtual space to provide depth and movement. Through a series of exercises, you will learn how to: Convert a 2D image into a 3D space Set up a multi-layered diorama in Photoshop Import this into After Effects and position the layers within 3D space Create an animated camera move through 3D space Apply depth of field Week 4 This week we will look at working with green-screen compositing to place a live action figure within an animated backdrop. Through a series of exercises, you will learn how to: Work with the Keylight filter Adjust colour balance and tone Composite the figure against an animated background Introduce shadows and highlights Use the green-screen figure to create a silhouette Week 5 This week we will look at applying masks to footage to create cutouts, as well as exploring different applications for effects. Through a series of exercises, you will learn how to: Work with masks Use the Roto-mask tool Apply time re-mapping Work with ‘Particle Playground’ and similar effects Week 6 This week we will look at working with the paint panel to create animated drawings, as well as using motion tracking to attach a text element to a moving point within a video clip. Finally, we will cover how to output your final project, adding sound effects and applying a basic edit. Through a series of exercises, you will learn how to: Create text based motion graphics (kinetic typography) Apply motion tracking to live action footage Render your project Add sound to your video Courses are subject to minimum enrolment. Please register early, within five days of the start date, to reduce the likelihood of course cancellation. Please read our cancellation policy before booking. Students, anyone over the age of 65, and those in receipt of any form of benefits can claim the concessionary price, offering a 10% discount on the full course price. Valid proof of eligibility must be produced on the first day of the course. Please use the code CONCESSION when prompted at checkout.
Unity 3d one day course 1-2-1
By Real Animation Works
Unity 3d face to face training customised and bespoke.