- Professional Development
- Medicine & Nursing
- Arts & Crafts
- Health & Wellbeing
- Personal Development
562 Courses in London
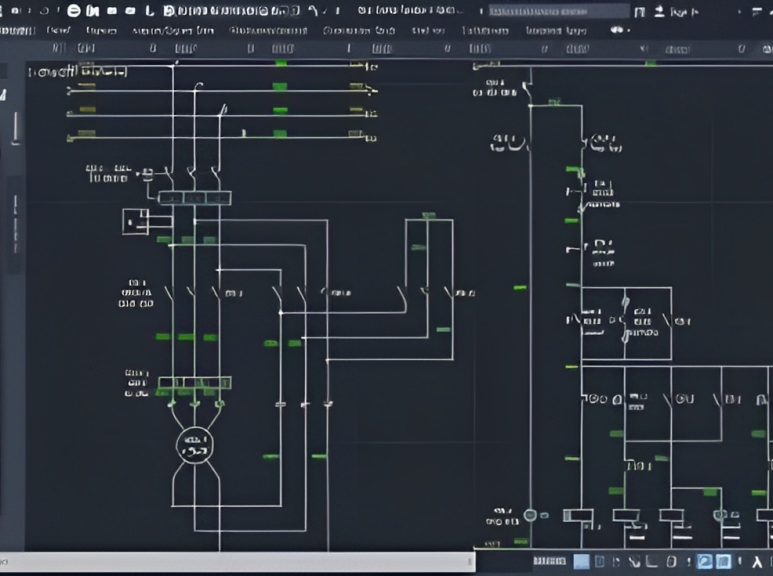
AutoCAD Training Course for Electrical
By ATL Autocad Training London
Exclusive to AutoCAD subscribers, the AutoCAD Electrical toolset simplifies electrical system creation. Click here for more info: Website Our course provides a strong foundation in 2D electrical design, covering essential tools. Flexible one-on-one sessions from 9 a.m. to 7 p.m., Monday to Saturday. Call 02077202581 or book online. The 16-hour course offers flexibility, divide hours across days. Benefit from individualized attention and tailored content. Enroll for in-person or Zoom sessions to excel in AutoCAD Electrical. AutoCAD Electrical Course Content: Introduction to AutoCAD Electrical Software: Overview and features of AutoCAD Electrical Understanding the software interface and tools Project file structure and management Layout and Navigation: Navigating the AutoCAD Electrical workspace Creating new project files and using attribute editors Understanding WDD, WDX, and WDF project files Exploring the Project Manager interface and attribute editors Electrical Diagram Drawing: Numbering and titling wires in diagrams Labelling components Utilizing diagram symbol libraries Creating and editing Electrical Control Circuits (ECC) Component dialog box and Circuit Scale dialog box Introduction to Programmable Logic Controllers (PLCs) and Integrated Systems: PLC Symbols and Concepts Inserting Programmable Logic Controllers (PLCs) into diagrams Adding PLC Units to diagrams Working with PLC Input and Output points and circuits Understanding PLC-based classification Using the Spreadsheet to PLC Input and Output Points utility Custom and Bespoke Symbols: Creating custom symbols for Switches, Wires, Contactors, Motors, Transformers, etc. Specifying symbol conventions and standards Offline and online usage of AutoCAD Electrical databases Drawing for Terminals and Plans: Implementing Terminal symbols in diagrams Handling terminal plans and locations Working with compound level terminals and locations Utilizing the Component command for single and multiple components Managing Jumpers and wiring Modifying Terminal Strips and Dual In-Line Packages (DIP) Understanding DIN Rail, Electrical Enclosure, Circuit Breakers, and Electrical Equipment Generating PDFs and Reports: Exporting drawings to PDF format Organizing report templates Automating the generation of reports Creating Electrical Audit Reports This AutoCAD Electrical course provides comprehensive knowledge of the software, focusing on electrical diagram drawing, symbol creation, PLC integration, terminal planning, and report generation. Participants will gain the skills needed to efficiently design electrical systems using AutoCAD Electrical software. Upon completion, participants will proficiently use AutoCAD Electrical to create precise electrical diagrams, integrate PLCs, design custom symbols, plan terminals, and generate reports efficiently. They will possess the skills needed to confidently design electrical systems and enhance their expertise in electrical design and drawing. AutoCAD Electrical Training Course: Master precision in specialized electrical design skills. Optimize your design process with streamlined workflows. Ensure compliance with industry standards consistently. Boost productivity in electrical design tasks. Facilitate seamless collaboration with fellow professionals. Benefit from recorded lessons for convenient review. Enjoy continuous support with lifetime email assistance. Unleash the complete power of AutoCAD for your electrical design needs. Enroll today and craft precise, professional electrical drawings confidently. Select between in-person and live online sessions to suit your preference. Flexible Evening Sessions: Learn AutoCAD at your own pace with evening sessions designed for busy individuals. Boost your career opportunities in computer-aided design. Comprehensive Skill Development: Gain a strong foundation in AutoCAD's core features and advance to 3D modeling and rendering techniques, enhancing your design capabilities. Industry-Standard Knowledge: Become proficient in AutoCAD, a widely used CAD software in architecture, engineering, and construction fields, making you highly sought after by employers. Practical Application: Apply AutoCAD skills to real-world design scenarios, creating detailed plans for professional projects in architecture, engineering, and mechanical fields. Recorded Lessons for Review: Access lesson recordings to reinforce learning and review specific topics or techniques whenever needed. Lifetime Email Support: Enjoy ongoing support with lifetime email assistance, even after completing the course, for guidance and clarification.
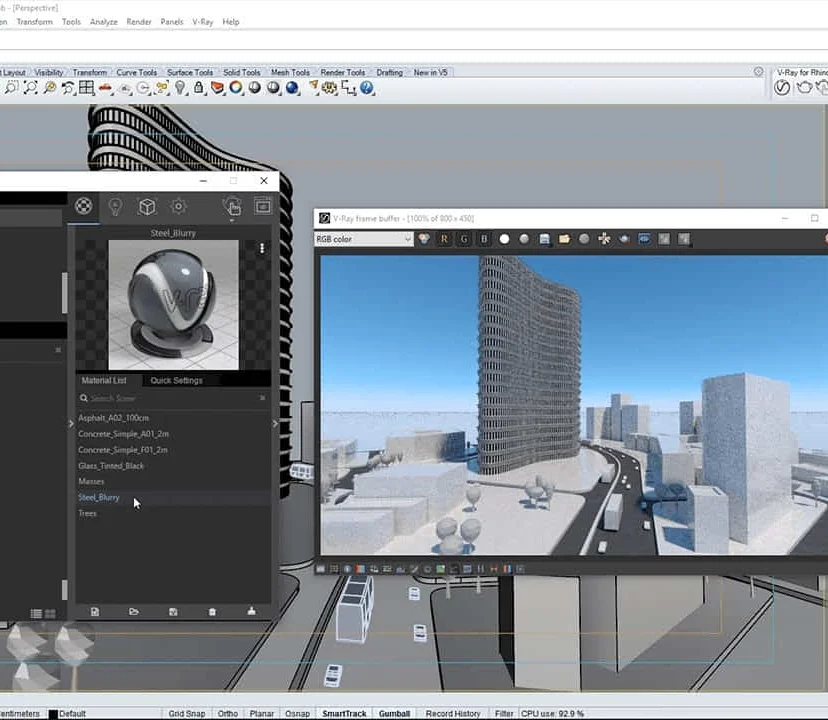
Complete Rhino 3D and V-Ray Training Program: Basic to Intermediate
By ATL Autocad Training London
Why Choose Complete Rhino 3D and V-Ray Training Program: Basic to Intermediate? Learn Rhino 3D and V-Ray for Rhino Basic to Intermediate Training Course. Suitable for beginners and experienced users alike, this program equips you with vital modeling and rendering skills. Opt for in-person or live online sessions. Click here for more info: Website Duration: 16 hours. Approach: 1-on-1 Sessions, Customized Content and Flexible Learning. Scheduling Flexibility: Tailor your sessions from Mon to Sat between 9 am and 7 pm. Course Title: Complete Rhino 3D and V-Ray Training Program: Basic to Intermediate - 16 Hours Session 1-2: Introduction to Rhino 3D Basics (2 hours) Understanding Rhino Interface: Navigating toolbars, command line, and properties panel. Basic Geometric Shapes: Creating lines, circles, and polygons with precision. Editing Tools: Mastering move, rotate, scale, and mirror commands. Session 3-4: Advanced Rhino 3D Modeling Techniques (2 hours) Curves and Surfaces: Delving into NURBS curves, creating complex surfaces, and blending techniques. Modeling Aids: Utilizing grids, snaps, and construction planes for accuracy. Organizing with Layers: Managing complex projects efficiently. Session 5-6: Introduction to V-Ray for Rhino (2 hours) V-Ray Interface: Understanding V-Ray toolbar and settings. Basic Lighting: Exploring different light types and their effects on scenes. Materials: Creating realistic materials, understanding diffuse, reflection, and transparency. Session 7-8: Intermediate V-Ray Concepts (2 hours) Advanced Lighting: Mastering HDRI lighting, creating natural outdoor lighting scenarios. Texture Mapping: Understanding UV mapping, applying textures seamlessly. Rendering Optimization: Reducing noise, optimizing settings for quicker, high-quality renders. Session 9-10: Rhino-V-Ray Integration (2 hours) Model Preparation: Optimizing Rhino models for V-Ray rendering. Advanced Material Manipulation: Creating complex materials, incorporating textures. Interactive Rendering: Real-time adjustments for immediate feedback. Session 11-12: Advanced Modeling Techniques in Rhino (2 hours) Advanced Surface Modeling: Creating organic shapes, advanced surfacing techniques. Precision Modeling: Advanced curve editing, filleting, and trimming. Working with 3D Text: Creating custom 3D text for design projects. Session 13-14: Scene Composition and Presentation (2 hours) Camera Settings: Understanding focal length, depth of field, and perspective. Scene Composition: Design principles, rule of thirds, focal points, and balance. Post-Processing: Enhancing renders in Photoshop, adding atmosphere and context. Session 15-16: Final Project and Portfolio Review (2 hours) Final Project Work: Participants apply learned skills to create a complex 3D scene. Instructor-led Critique: Feedback session for final projects. Portfolio Guidance: Tips for selecting the best works for a professional portfolio. By the end of this 16-hour course, participants will have a deep understanding of both Rhino 3D and V-Ray, allowing them to create intricate 3D models and produce high-quality, realistic renders for various applications. Upon completing the Rhino 3D and V-Ray Basic to Intermediate Training Course, participants can expect to achieve the following learning outcomes: Proficiency in Rhino 3D and V-Ray: Develop a comprehensive understanding of Rhino 3D and V-Ray interfaces, tools, and functionalities, enabling participants to navigate and utilize the software effectively. 3D Modeling Skills: Master the art of creating captivating 3D objects and shapes using Rhino 3D, including editing, transforming, and refining designs for diverse applications. Material Application: Acquire the ability to apply and customize materials and textures to enhance the visual appeal and realism of 3D models, elevating the quality of designs. Lighting Techniques: Gain expertise in utilizing V-Ray lighting tools, such as V-Ray lights and HDRI maps, to achieve striking lighting effects in rendered scenes. Rendering Excellence: Learn to optimize V-Ray render settings, control global illumination, and apply dynamic effects like depth of field and motion blur for high-quality and impressive renders. Advanced Modeling: Develop skills in advanced modeling techniques, including handling curves, surfaces, and solids, enabling participants to tackle complex design challenges. Lighting Mastery: Acquire the knowledge and expertise to create and adjust artificial lights, utilize the Sun and Sky system, and craft custom HDR images for realistic lighting setups. Seamless File Management: Understand various file formats for exporting and importing 3D models, facilitating efficient collaboration and preparation for 3D printing. Creative Problem-Solving: Enhance creative thinking and problem-solving abilities through hands-on practice and exploration of diverse design scenarios. Professional Presentation: Learn post-production techniques in Photoshop to enhance renders and create visually appealing design presentations for effective communication. Continuous Learning: Access valuable resources and tips to encourage continuous learning and professional growth in Rhino 3D and V-Ray. Skills You'll Gain: Master Rhino 3D basics: Curves, surfaces, modeling aids, and precision techniques. Explore intermediate V-Ray concepts: Advanced lighting, material manipulation, and texture mapping. Understand Rhino-V-Ray integration for seamless 3D modeling and rendering workflows. Optimize render settings for high-quality output and reduced rendering times. Career Opportunities: Upon completing this program, you'll be prepared for various roles in the design and visualization industry, such as: 3D Modeler: Create detailed 3D models for diverse industries, including architecture and product design. Architectural Visualizer: Produce realistic architectural visualizations for presentations and marketing materials. Product Designer: Develop visually appealing product prototypes and visualizations for marketing and manufacturing. Visualization Specialist: Work in design studios, advertising agencies, or game development companies, creating immersive visual content. Freelance Designer: Offer your skills on platforms like Upwork or Fiverr, providing 3D modeling and rendering services to clients worldwide. Solidify Rhino 3D Expertise: Master foundational modeling skills, including intricate geometries and surface manipulation, establishing a robust foundation for your 3D design journey. Unlock V-Ray for Rhino: Explore the potential of V-Ray for Rhino, learning to create mesmerizing visualizations and achieve lifelike rendering results that bring vitality to your designs. Enhance Visual Appeal: Grasp advanced lighting techniques, material application, and texture methods to elevate the visual allure of your 3D creations, making them more immersive and authentic. Explore Advanced Concepts: Delve into optimizing rendering settings, post-production tactics, and efficient workflows, advancing your design proficiency to higher levels. Hands-On Experience: Engage in practical exercises and real-world projects, applying your skills in practical contexts to enrich your portfolio and showcase your capabilities effectively. Certification of Achievement: Receive a valuable Certificate of Completion, confirming your expertise in Rhino 3D and V-Ray for Rhino, enhancing your professional credibility as a skilled designer. Flexible Learning Paths: In-Person or Live Online: Opt for in-person sessions, fostering collaborative learning, or choose live online classes for convenience and accessibility, tailoring your learning experience to your preferences. Personalized Guidance: Regardless of your chosen format, benefit from tailored instruction and guidance, ensuring optimal learning outcomes and continuous support throughout the course.
Microneedling Training
By Cosmetic College
We have completed a training course to teach you everything you need to know about Microneedling. Microneedling, also known as skin needling or collagen induction therapy, leads the way in skin rejuvenation. Safely delivered, this treatment carries no risk or downtime to the client. It is a procedure whereby a device, such as a derma roller or an automated pen device, is passed across the skin's surface, creating superficial punctures that stimulate a healing response. We work with Dr Pen and Beautier needling pen and the Clinicare range as part of this course and cover appropriate products from this range. Skills and knowledge from this course will be transferable to other brands. Our Microneedling Training Course will provide you with everything you need to know about the history and the use of microneedling, as well as all the technical aspects of it: safety, indications, technique and post-treatment tips for a successful outcome. This course will primarily focus on the face, although we touch on the scalp & body benefits of this treatment. Learn how to safely, confidently and expertly deliver this treatment with our fully accredited microneedling training course Course prerequisites Minimum 18 years of age Good command of English Be able to learn independently A strong desire to build a career in aesthetics Previous skin and facial training are desirable; we suggest that learners new to the industry enrol on our facial and skincare course before enrolling on our ClinicCare skin peel course. Course structure The online study, virtual lecture and in-person practical training All courses are intimate with four learners in class 2-1 ratio. One day of on-site training Online learning includes: Anatomy and physiology of the skin and tissues Infection control Sharps and hazardous waste training History of skin needling Treatable skin conditions Contraindications Consultation Aftercare Introduction to automated Pen Device and Dermaroller Pre-study microneedling (health and safety) Onsite training day includes: Face-to-face practical training with 1 model per treatment area Clinical set up Live treatment demonstrations Frequently Asked Questions Where is the Cosmetic College The Cosmetic College is located at: 3 Locks Court, 429 Crofton Road, Orpington, BR6 8NL How can I book? We have a few options for you to book. You can book by selecting an available training date above here on our website, by contacting us through email at hello@cosmetic.college or by contacting us on 0333 015 5117. Is a deposit required to book? All enrolments are charged an administration fee which is non-refundable. When you enrol you can elect to pay a deposit of 10% plus the administration fee or pay the total training course in full. We have full details of the terms and conditions of training course enrolments here What is the course duration? 1 day + pre-study via our online learning platform.

Microsoft Excel Macros & VBA - classroom
By Microsoft Office Training
Course Objectives At the end of this course you will be able to: Record and edit a Macro Assign macros to keyboard shortcuts, Quick Access Toolbar, Buttons and Shape objects. Use the Visual Basic Editor; change the properties of an object; add a module to a project; write the code for a procedure and then run it; and use the Object Browser to search procedures Manipulate data by declaring variables of different data types; combine data by using expressions; use functions to accept input and display output; and declare variables and procedures with the appropriate scope Use decision structures to create procedures that make decisions; and use loop structures to perform repetitive tasks Create an error handling routine in case things go wrong with VBA code ' 1 year email support service Take a closer look at the consistent excellent feedback from our growing corporate clients visiting our site ms-officetraining co uk Customer Feedback Best Training Ever! Just finished a bespoke 1-1 training course in Excel Advanced, Macros & VBA. Pedro is an excellent trainer, imparting his skills and knowledge in the best way - appropriately to audience skills, knowledge and ability. Pedro is always approachable, encouraging and supportive, giving delegates the optimum learning environment. I would not hesitate to recommend Pedro as a trainer, whatever your level of ability. Amanda Morris - Treasury & Systems Accountant at Reall - Real Equity for All The trainer was very knowledgeable, kept everyone involved and was enthusiastic. A great experience.. Simon Harper - Lloyd's of London My learning experience was awesome. Perdinand Reagan - Subsea7 Very nice and relaxed approach to teaching. Was definitely a good learning experience. Jerome Pupe - S5 Agency World The Trainer – Very positive + patient + helpful + thorough Agnes Souza - Direct Wines ' With more than 20 years experience, we deliver courses on all levels of the Desktop version of Microsoft Office and Office 365; ranging from Beginner, Intermediate, Advanced to the VBA level. Our trainers are Microsoft certified professionals with a proven track record with several years experience in delivering classroom, one to one, tailored and bespoke courses. Tailored In Company training: You can choose to run the course exactly as they are outlined by us or we can customise it so that it meets your specific needs. A tailored or bespoke course will follow the standard outline but may be adapted to your specific organisational needs. Introduction to Macros and VBA Introducing Visual Basic for Applications Recording a Macro Naming conventions for Macro Procedures Running a Macro Absolute or Relative Cell Referencing Saving and Opening Files with Macros Making macros always available Adding Macros to Keyboard Shortcuts, Quick Access Toolbar, Buttons and Shapes Editing a Macro in the Visual Basic Editor Understanding the Development Environment Customising the Editor Tips for General Typing in VBA Using Visual Basic Help Working with Procedures Program Design Understanding Modules Naming Rules Creating a Module Understanding Procedures Programming Macro Concepts Creating a Subroutine Creating a Function Understanding Arguments Exiting Procedures Calling Procedures Objects, Properties, Methods and Events Understanding Objects Properties, Methods, and Events Navigating the Object Hierarchy Understanding Collections Accessing a Member of a Collection Understanding Hierarchy Using the Object Browser Using the With Statement Working with Properties Working with Methods Creating an Event Procedure Reserved Macro Names Using Expressions, Variables and Intrinsic Functions Understanding Expressions and Statements Declaring Variables Understanding Data Types Determining the Value of Variables Working with Variable Scope Using Built-in VBA Functions Understanding Constants Using Message Boxes Controlling the Answer to a Message Box Using Input Boxes Declaring and Using Object Variables Controlling Program Execution Understanding Control-of-Flow Structures Using the If...End If Decision Structures Nested If Statements Using the Select Case ... End Select Structure Using the Do ... Loop Structure Using the For ... Next Structure Using the For Each ... Next Structure Guidelines for Use of Control-of-Flow Structures Debugging and Handling Errors Understanding Errors Using Debugging Tools Setting Breakpoints and Using Break Mode Stepping Through Code Trapping Errors with the On Error Statement Understanding the Err Object Working with Inline Error Handling Writing an Error-Handling Routine Working with Forms and Controls Understanding UserForms Creating a Form Displaying and Removing a Form Aligning and Sizing Controls Using the Toolbox Working with a Form's Properties, Methods, and Events Working with Form and Control Properties, Methods and Event Setting the Tab Order Populating a Control Who is this course for? Who is this course for? This course is designed to give proficiency in the Visual Basic Editor (VBE), predominantly making use of Excel objects, understanding Object's Properties, Events and Methods, basic VBA Object oriented programming, event handling, control structures, and debugging tools. Requirements Requirements Preferably, delegates should have attended the Excel Advanced course. Career path Career path Excel know-how can instantly increase your job prospects as well as your salary. 80 percent of job openings require spreadsheet and word-processing software skills

Achieving Sales on the Telephone
By Inovra Group
Overview This one day course is designed for anyone that deals with telephone sales in either an inbound or outbound call environment. Description The telephone has become a critical tool in obtaining sales in today’s competitive market, and yet it is often an area we pay little attention to, and consequently it becomes a negative aspect of our business rather than the highly positive one it can be. This course sets out to enable the attendees to sell effectively over the phone. The tools that are covered will help generate sales and whether they take inbound or receive outbound calls they will find that if they apply the techniques in this session, their success rate will increase immensely. Topics covered: Advantages and Disadvantages – A look at how the phone can work for and against us in a sales environment. An Introduction to Selling on the Telephone – Understanding the key points that encourage a customer to purchase from us. Structuring and the Sales Process – Defining a set process for structuring a sales call with a chance to demonstrate understanding. Why People Buy – A look at the reasoning behind people’s purchasing decisions. How People Buy – An insight into the emotional factors behind how people arrive at purchasing decisions. Turning Inbound Calls into Sales – Gauging the level of interest of a caller in order to establish the likelihood of a sale. Making Effective Outbound Calls – A set process of ensuring you gain the best advantage with this type of call. Getting Past the Gatekeeper – Understanding the role of the gatekeeper and developing methods of dealing with them in order to speak to the decision maker. Using scripts and techniques that are proven and effective. Sounds Interesting? – Studying three key communication factors when projecting the voice over the phone. Including a chance to review how the participant’s voice comes across over the phone. Methods of Improving the Way You Sound – 10 key tips on vocal improvement. Telephone Questioning Techniques – Giving the delegates the chance to fully understand the different questioning techniques that can be used during a sales call. Features and Benefits – How to practically apply them in a sales scenario. Logical and Emotional Purchasing – A further look at the reasons we buy. Overcoming Objections – Practical use of a set process and ways to apply it in the workplace. Closing the Sale – Clear methodology with a chance to practice the skills in a fun way. Post-course Assignment – A method of carrying the learning into the workplace and ensure continual review. Who should attend the course? Anyone who handles inbound or outbound sales calls over the telephone. Requirements for Attendance No prerequisites required.

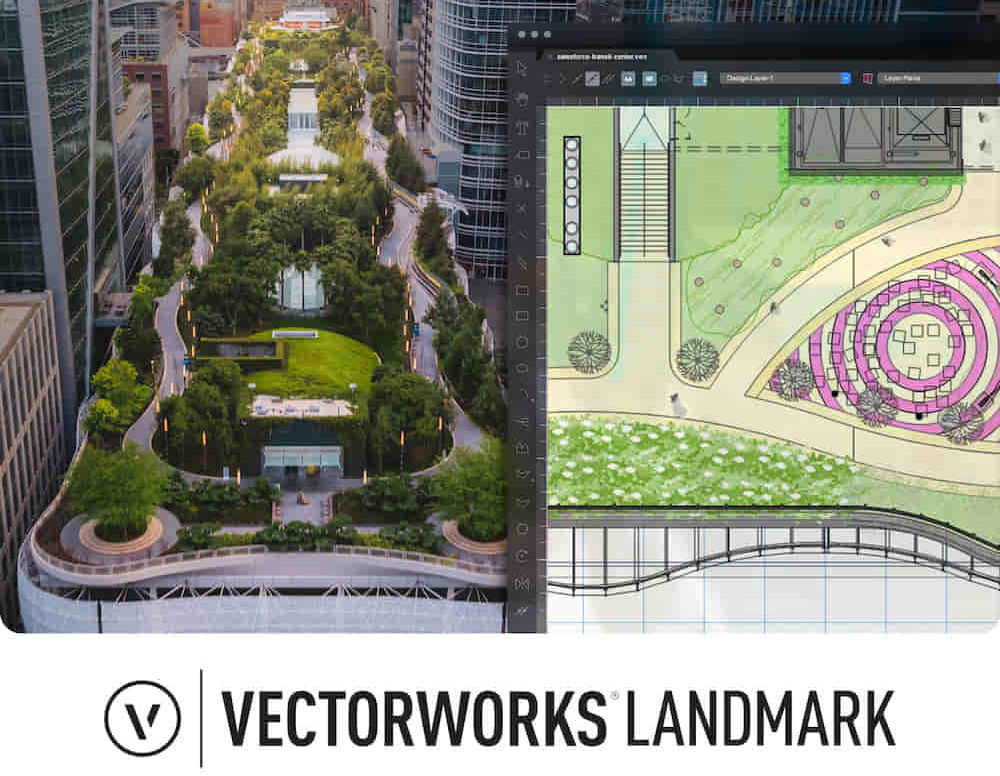
Landmark Training Course With Vectorworks
By ATL Autocad Training London
Who is this course for? Landmark Training Course With Vectorworks. Dive into terrain modeling, planting, irrigation, and site analysis guided by certified tutors. Master these tools for precise landscape designs and effective documentation. Check our Website Enrollment : 1-on-1 Landmark Training. Tailor your schedule. Mon to Sat between 9 am and 7 pm Call 02077202581 to book your slot. Duration: 16 hours. "Split these hours over multiple days as needed for your ideal schedule." Approach: In-person or live online. Landmark Training Course with Vectorworks: Basic to Intermediate Level Course Duration: 16 Hours Embark on a transformative journey with our Landmark Training Course tailored for landscape architects and designers. Over 16 intensive hours, dive deep into Vectorworks Landmark, mastering fundamental and intermediate techniques crucial for comprehensive 2D and 3D landscape design. Craft intricate site analyses, plans, irrigation systems, and elevate your designs with mesmerizing 3D visualizations. Explore custom plant symbols, detailed planting plans, and learn the art of efficient collaboration and customization. Course Highlights: I. Introduction to Vectorworks Landmark (1 hour) Explore Vectorworks Landmark for landscape design Master interface, tool usage, and project management II. Site Analysis and Site Plans (3 hours) Craft detailed site analyses and hardscape designs Work with contours, elevations, and terrain models III. Planting Plans (5 hours) Utilize the plant database for region-specific plant selection Create personalized plant symbols and comprehensive planting plans IV. Irrigation Design (2 hours) Design and edit efficient irrigation systems and zones Integrate irrigation components into site plans V. 3D Visualization (3 hours) Create captivating 3D models with realistic textures and materials Enhance designs with advanced lighting and special effects VI. Customization (1 hour) Tailor the interface for efficient landscape design Create custom object styles and resource libraries VII. Collaboration and Sharing (1 hour) Seamlessly import/export data from other platforms Share designs effectively with colleagues and collaborators VIII. Conclusion and Next Steps (1 hour) Review course content comprehensively Receive guidance on further learning resources Engage in a Q&A session and provide valuable feedback Enhance your landscape design expertise and unleash your creativity. Enroll now in our Vectorworks Landmark Basic to Intermediate Training and transform your designs. Download Vectorworks Landmark By the end of the Vectorworks Landmark Training Course, participants will: Understand the key features and functionalities of Vectorworks Landmark for landscape design. Demonstrate proficiency in using essential tools for site analysis, site plans, and hardscape design. Create detailed planting plans, selecting appropriate plants, and understanding their compatibility and growth patterns. Design efficient and effective irrigation systems, including generating irrigation reports. Create 3D visualizations of landscape designs, applying textures, materials, lighting, and special effects. Customize the interface and create personalized object styles and resources. Collaborate and share landscape design drawings with other software users. Have the foundation to pursue further learning and exploration in landscape design using Vectorworks Landmark. Mastering Foundations Begin your project by organizing your files and importing survey data. Learn to sketch existing buildings using Building Shell tools and model neighboring structures with Massing Model. Explore different methods for laying out survey points and marking existing features with precision. Objectives: Review File Organization Techniques Import Survey Data (DWG Import) Create Building Structures with Building Shell Tools Utilize Triangulation and Arc Tool for Precision Master Various Tape Measurement Techniques Elevating Your Design Enhance your survey with detailed ground, existing trees, and fences. Conduct shadow analysis to optimize planting locations. Dive into the Vectorworks Plant tool, your key design companion. Objectives: Develop Detailed Ground Surfaces Incorporate Existing Trees and Fences Design with Railing Fence Tool Conduct Shadow Analysis using Heliodon Tool Utilize Plant Tool Modes for Plant Placement Access Existing Plant Libraries and Customize Plants in 2D/3D Crafting Landscapes Create vibrant plant mixes using Landscape Area tool and apply them across your site models. Design intricate hardscapes, aligning them effortlessly even in complex paving scenarios. Learn to use components for detailed reporting, cut and fill calculations, and precise detailing. Explore custom object creation and site furniture placement. Objectives: Design Landscape Areas and Define Custom Plant Mixes Create Hardscapes and Define Custom Paving Constructions Generate Reports and Tags for Landscape Areas and Hardscapes Access and Manage Objects in Resource Manager Craft Custom Objects and Site Furniture Polished Presentation Present your designs professionally using Sheet layers and viewports. Create Section viewports to cut through your model and Detail viewports to focus on specific areas. Enhance visual appeal with mood boards and annotations, ensuring a refined, detailed presentation. Objectives: Craft Sheet Layers for Presentation Create Plan, Elevation, and Perspective Viewports Generate Section and Detail Viewports Annotate Viewports for Clear Communication Incorporate Images and Plant Reports for Comprehensive Presentations Master Vectorworks Landmark: Gain expertise in essential and advanced 2D/3D landscape design tools for precision and efficiency. Boost Efficiency: Learn time-saving techniques and workflows tailored to Vectorworks Landmark, enhancing productivity. Versatile Landscape Skills: Develop proficiency in site analysis, planting plans, hardscapes, and irrigation systems for diverse projects. Industry-Ready Expertise: Acquire sought-after skills in landscape architecture, paving the way for career growth. Flexible Learning: Access recorded lessons for convenient review and receive lifetime email support for ongoing guidance.
Building Relationships
By Inovra Group
Overview This one day Building Better Work Habits training course has been developed for everyone in your organisation who may struggle with their own personal effectiveness. They may not have control of their own workload or blame others as to why they’re not achieving certain tasks and projects. Alternatively, it might be that high performers want to understand how they can organise themselves in a new way to give themselves more stretch in their roles. The training course will help the learners build self-awareness and will highlight the important parts of working smarter to achieve end goals. Description We are all busy, and sometimes it seems we do not have enough hours in the day to complete deadlines and projects. It can then eat into our home life, meaning we often end up stressed, or in worst-case scenarios, unwell (both physically and mentally). The reason behind this is often how we work day to day, as opposed to others giving us work at the last minute. These training course materials have been designed to help your participants work more effectively for the long term. This isn’t about how to manage a diary or emails, but rather look closely to see what are the blockers which get in the way of success. These small changes in day to day work will have a dramatic impact in both productivity and personal effectiveness. Topics covered: Productivity: the science bit – A chance to explore what we mean by being productive and how that helps us build better work habits, as well as the opportunity to look at some of the science behind myths and bad habits we’ve probably already formed. Includes a link to a YouTube video. Procrastination, why put off to tomorrow what we can do today! – Participants will explore what we procrastinate about, how we procrastinate in our own lives, and what we can do about it! Eat That Frog – An introduction to Brian Tracy’s book “Eat that frog” and how it can help us improve our working habits. Includes a link to a YouTube video. Eat That Frog: Thinking on Paper – A chance to put into practice some of Brian Tracy’s methods and how to use them in our real lives Eat That Frog: Rocks, Pebbles and Sand – Taking our goal setting further, we explore Covey’s methodology around prioritising our tasks. Eat That Frog: The Pareto Principle – The final part of the “Eat that Frog” section looks at how effective we in terms of how we spend our day Prioritising: how do we spend our day? – Participants explore how proactive they are, and what the danger might be in letting a situation rule their time Prioritising: The Priority Matrix – Taking the Rock, Pebbles and Sand methodology further, participants explore what truly is urgent and what is important in our day to day Prioritising: Company Performance Tensions – We may know what our own personal objectives are, however, our business objectives have certain tensions that could impact these. How can we balance these two different objectives to ensure we’re successful day to day? What’s my mindset? – Sometimes we can get in the way of our own successes and plans due to our mindset; utilising Carol Dweck’s work, it is a chance to reflect on our own mindsets when we’re building new work habits. Includes a link to a YouTube video. What’s my mindset? Energy Cycles – Our energy can impact our mindset and how productive we are. A chance to look at what gives us energy, and how we can work more effectively depending on where our energy levels might be Who should attend Anyone interested in understanding in being more effective at work. Requirements for Attendees None.

Building Better Work Habits
By Inovra Group
Overview This one day Building Better Work Habits training course has been developed for everyone in your organisation who may struggle with their own personal effectiveness. They may not have control of their own workload or blame others as to why they’re not achieving certain tasks and projects. Alternatively, it might be that high performers want to understand how they can organise themselves in a new way to give themselves more stretch in their roles. The training course will help the learners build self-awareness and will highlight the important parts of working smarter to achieve end goals. Description We are all busy, and sometimes it seems we do not have enough hours in the day to complete deadlines and projects. It can then eat into our home life, meaning we often end up stressed, or in worst-case scenarios, unwell (both physically and mentally). The reason behind this is often how we work day to day, as opposed to others giving us work at the last minute. These training course materials have been designed to help your participants work more effectively for the long term. This isn’t about how to manage a diary or emails, but rather look closely to see what are the blockers which get in the way of success. These small changes in day to day work will have a dramatic impact in both productivity and personal effectiveness. Topics covered: Productivity: the science bit – A chance to explore what we mean by being productive and how that helps us build better work habits, as well as the opportunity to look at some of the science behind myths and bad habits we’ve probably already formed. Includes a link to a YouTube video. Procrastination, why put off to tomorrow what we can do today! – Participants will explore what we procrastinate about, how we procrastinate in our own lives, and what we can do about it! Eat That Frog – An introduction to Brian Tracy’s book “Eat that frog” and how it can help us improve our working habits. Includes a link to a YouTube video. Eat That Frog: Thinking on Paper – A chance to put into practice some of Brian Tracy’s methods and how to use them in our real lives Eat That Frog: Rocks, Pebbles and Sand – Taking our goal setting further, we explore Covey’s methodology around prioritising our tasks. Eat That Frog: The Pareto Principle – The final part of the “Eat that Frog” section looks at how effective we in terms of how we spend our day Prioritising: how do we spend our day? – Participants explore how proactive they are, and what the danger might be in letting a situation rule their time Prioritising: The Priority Matrix – Taking the Rock, Pebbles and Sand methodology further, participants explore what truly is urgent and what is important in our day to day Prioritising: Company Performance Tensions – We may know what our own personal objectives are, however, our business objectives have certain tensions that could impact these. How can we balance these two different objectives to ensure we’re successful day to day? What’s my mindset? – Sometimes we can get in the way of our own successes and plans due to our mindset; utilising Carol Dweck’s work, it is a chance to reflect on our own mindsets when we’re building new work habits. Includes a link to a YouTube video. What’s my mindset? Energy Cycles – Our energy can impact our mindset and how productive we are. A chance to look at what gives us energy, and how we can work more effectively depending on where our energy levels might be Who should attend Anyone interested in understanding in being more effective at work. Requirements for Attendees None.

Unity 3d one day course 1-2-1
By Real Animation Works
Unity 3d face to face training customised and bespoke.

REVIT ADVANCED ONE-TO-ONE COURSE
By Real Animation Works
Vray face to face training customised and bespoke.